If you’re managing a Facebook Page for your business, keeping it active is key. Sharing updates, photos, and news helps you connect with your audience.
Like many digital marketers online, I’m always looking for ways to maximize the reach of my Facebook content and make sure it’s seen.
Getting your Facebook posts onto your website can really boost engagement. It keeps your site dynamic and shows visitors what you’re sharing on social media.
I remember when I first wanted to integrate Facebook posts onto my website. The old way of doing it felt clunky and time-consuming. Dealing with embed codes and manual updates wasn’t ideal.
I knew there had to be a more efficient and streamlined method for busy marketers like myself, don’t you think?
That’s why I started exploring different WordPress solutions for automating my Facebook embeds.
After trying out a few plugins focused on social media integration, one in particular proved to be exceptionally user-friendly and reliable for embedding Facebook feeds. For automatically displaying Facebook posts, it really simplified the process.
In this article, I’ll share with you the easiest way to embed Facebook page posts on your website automatically.
We’ll also talk about how to embed Facebook page feeds and keep your visitors engaged.
Here’s a table of contents to help you navigate this post:
- 2 Ways to Embed Facebook Page Posts on WordPress
- How to Embed Facebook Posts on WordPress Automatically
- Step-by-Step Guide on Automatically Embedding Facebook Posts
- How to Automatically Embed Facebook Feeds on WordPress
- How to Embed Facebook Posts on Your Website (Manually)
- Top Posts on Social Feeds for WordPress
2 Ways to Embed Facebook Page Posts on WordPress
There are 2 different ways to add Facebook posts to your website:
1. Automatically: Using the Facebook Feed Pro plugin, you can easily embed Facebook posts on your website in just a few clicks. Plus, it’s all automatic, so this way will save you a lot of time and effort.
The best part? You don’t even need to be tech-savvy in WordPress to start embedding Facebook posts automatically.
You can go ahead and skip to this quick step-by-step guide on how to easily embed Facebook posts automatically.
2. Manually: You could click on “share” and copy the post’s link on the drop-down menu. Then, paste your Facebook link to WordPress, and your Facebook post would automatically get embedded.
The manual method of embedding Facebook posts takes a lot of time and effort, especially if you need to add multiple Facebook posts.
Plus, this manual method has already been discontinued by WordPress — you can’t do it unless you use a Facebook WordPress plugin like Facebook Feed Pro.
How to Embed Facebook Posts on WordPress Automatically
Now that you know how complicated it is to embed Facebook posts manually, let’s talk about how to embed Facebook posts on your website automatically.
Here’s a step-by-step video tutorial on how you can get your Facebook posts embedded on your WordPress site in a few minutes:
Or, if you prefer to follow written instructions on displaying Facebook posts automatically, continue reading below.
The best way to automatically embed Facebook page posts on your WordPress website is by using the Smash Balloon Facebook Feed Pro plugin.
As the best Facebook feed plugin for WordPress, this plugin allows your WordPress site to use oEmbeds once again.
This way, you can just paste your URL and embed Facebook posts on your website’s homepage, sidebar, footer or any other webpage in your site.
Your visitors can then see your Facebook posts and even interact with them by using the like, comment, and share buttons.
In addition to showing single Facebook posts, you can also use the plugin to create a Facebook feed widget and show multiple Facebook posts on your site — automatically, at once!
Over 1.75 million users trust Smash Balloon plugins such as Facebook Feed Pro because of its following features:
- Easy Customization: With this plugin, you get a visual feed customizer with live preview so you can easily customize your Facebook feed’s design and make it fit perfectly with your brand.
- Optimized for Speed: It doesn’t matter how many Facebook posts you have. This plugin will make sure that everything loads super fast. And a faster page can boost your SEO.
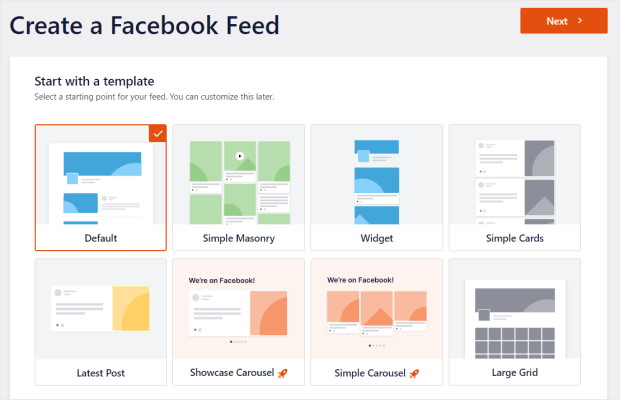
- Feed Templates: You can instantly have unique Facebook feeds ready to go by choosing from a collection of pre-built templates.
- Lots of Feed Types: Instead of simple posts, you can also embed Facebook albums, events calendars, Facebook reviews, videos, Facebook carousels, and more.
- Customer Support: If you run into any issues with embedding your Facebook posts, you can easily turn to the dedicated support team for help.
- 100% Compatible: The plugin is perfectly compatible with the fastest-growing website platform, WordPress. Even though it’s not designed for Wix, Shopify or Squarespace websites, you can also use the plugin to show your Facebook feeds on your Elementor, Divi, Beaver Builder Facebook page feeds and Thrive Architect website.
All these have made Facebook Feed Pro the best Facebook feed plugin for WordPress. With 250,000 active users and a rating of 4.9/5 stars, it’s easy to see that lots of people love it.
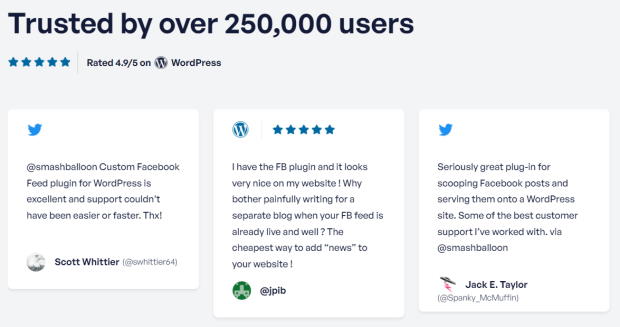
In fact, some of the biggest brands in the world use Smash Balloon social media feed plugins like Facebook Feed Pro to add social media feeds to their websites, so, you’ll be in good company there.

Ready to start automatically embedding Facebook content in WordPress? Get started with Facebook Feed Pro now!
Step-by-Step Guide on Automatically Embedding Facebook Posts
With that, let us show you a step-by-step guide on how to embed Facebook posts on your website. To automatically display your Facebook posts on your WordPress website, simply follow the steps below.
Step 1: Install Facebook Feed Pro Plugin
You can go ahead and download a copy of the Facebook Feed Pro plugin to get started. The next step is to install and activate the plugin.
Not sure how to do that? Don’t worry. Follow this helpful guide on how to install WordPress plugins.
Step 2: Enable the oEmbeds Feature
With the plugin installed, you can now go ahead and enable the oEmbeds feature from the plugin’s settings. To get started, go to Facebook Feed » oEmbeds from your WordPress dashboard.
On this page, you can enable or disable the oEmbeds for your website. We’ll enable oEmbeds so that WordPress can automatically embed our Facebook posts just by pasting the post’s link in the editor.
Click on the Enable button to the right of the Facebook oEmbeds section.
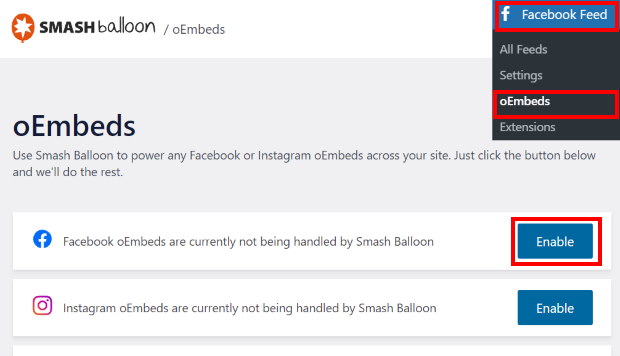
After clicking on that, the plugin will open your Facebook and ask for read-only permissions.
Don’t worry, the plugin can’t make any changes so Smash Balloon is completely safe to use.
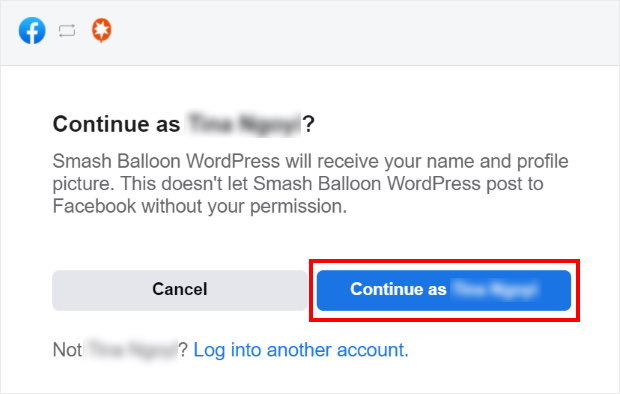
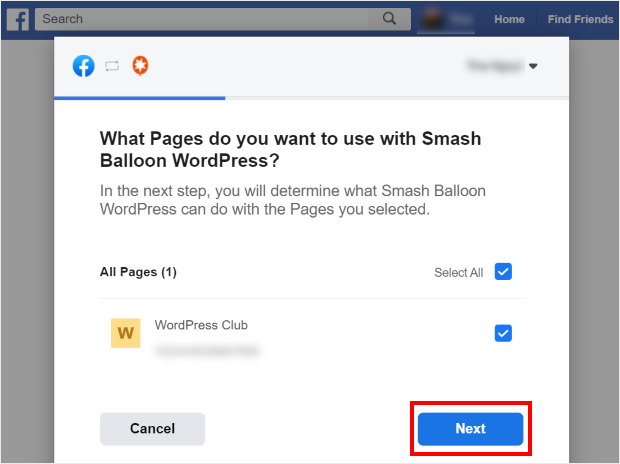
After that, the popup will ask you to pick a Facebook page that you want to use with this plugin. Select a page here and then click on Next.
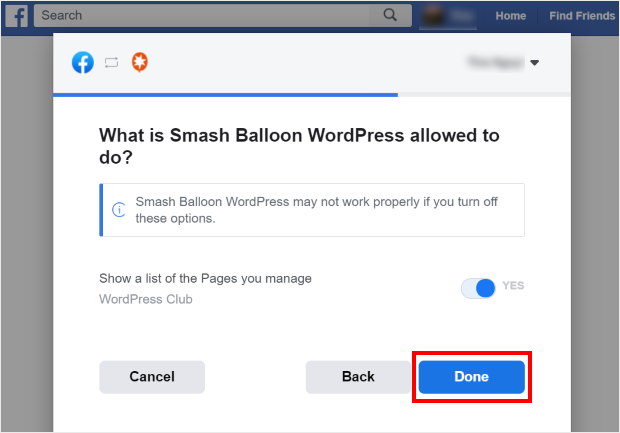
Now you can confirm the read-only access for the plugin by clicking on Done.
And that’s it! You’ve now enabled oEmbeds for your WordPress website. With that, it’s time to go to step 3 and check out how you can embed Facebook posts automatically.
Step 3: Embed Facebook Posts on Your Website
Now, you can go ahead and display Facebook posts on your website with ease.
As an example, we’ll create a new WordPress page to show the Facebook post. For that, go to Pages » Add New from your dashboard.
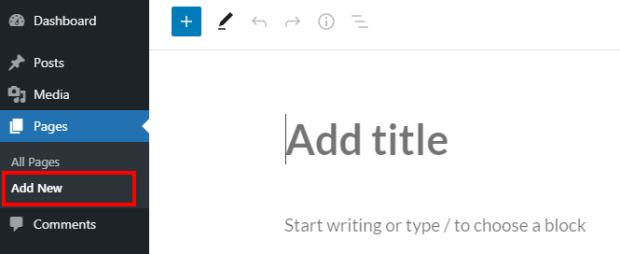
In the editor, paste the URL of the Facebook post.
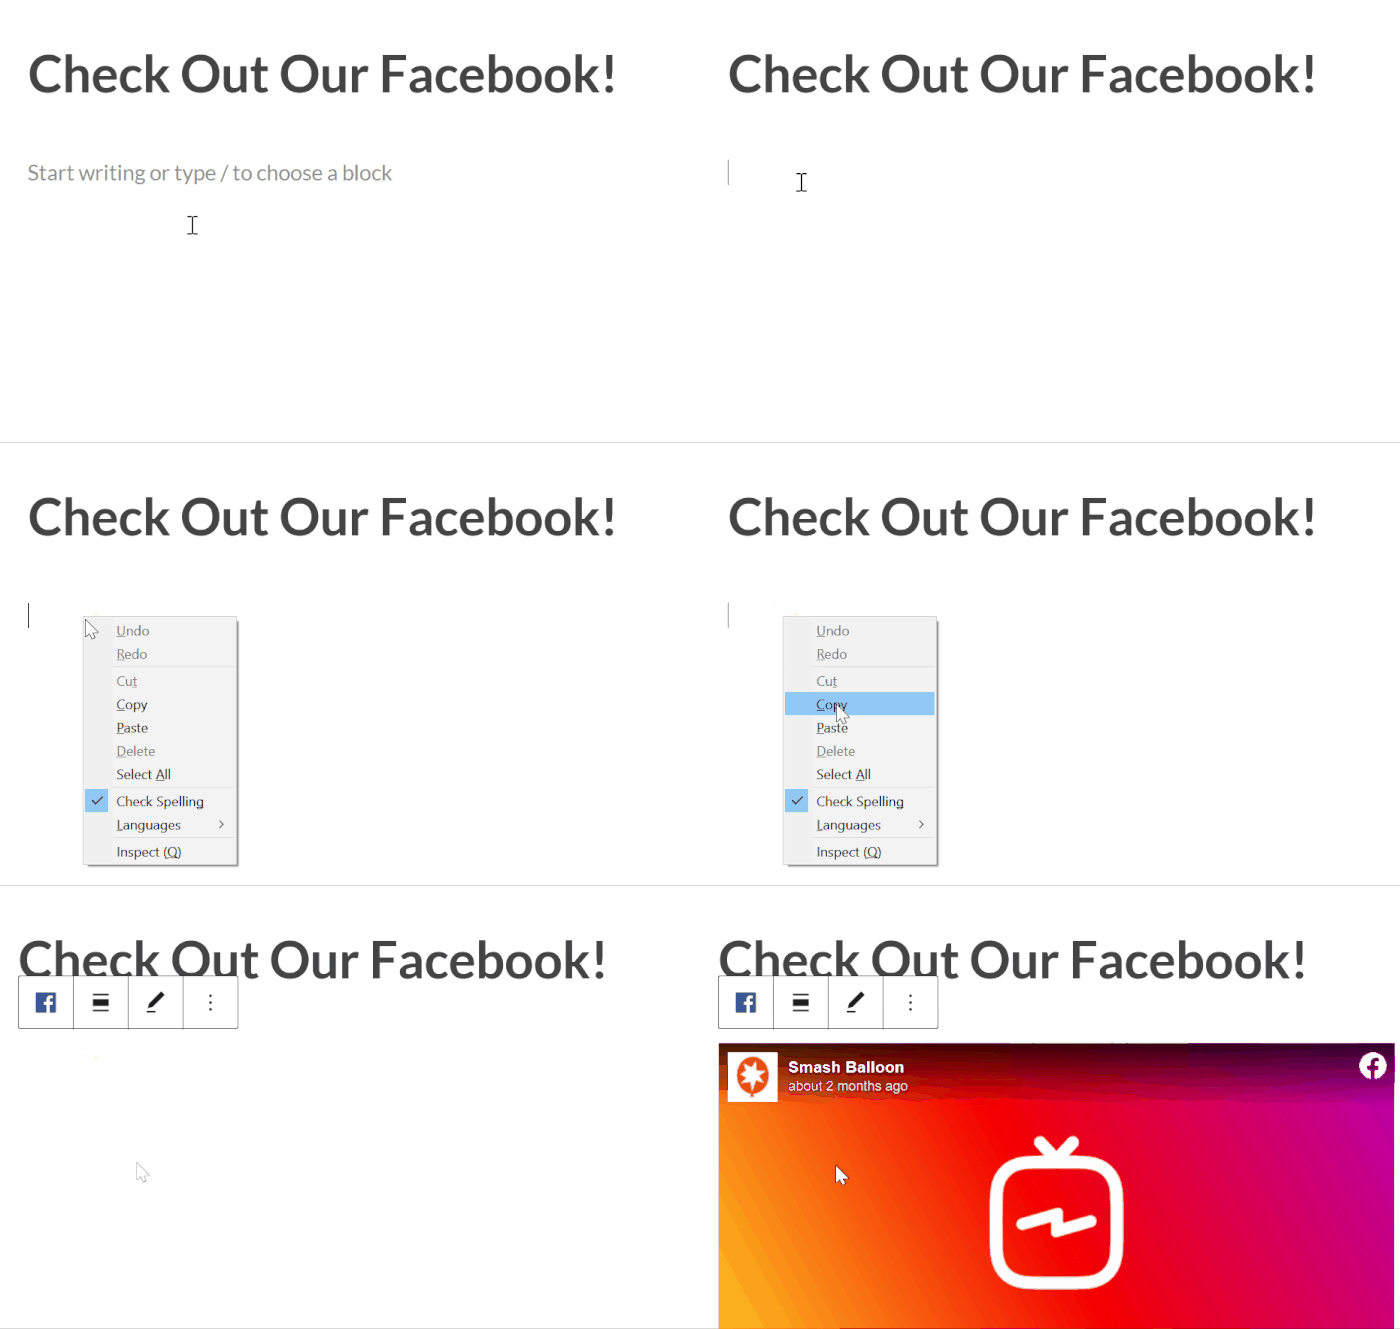
And there you go! You can now easily get your Facebook posts to show up on your WordPress website.
Using Facebook Feed Pro plugin, you can also embed Facebook posts on a website sidebar or footer areas with a few easy clicks.
First, go to Appearance » Widgets from your dashboard to start managing the widgets on your website.
Once you do that, click on the Sidebar panel.
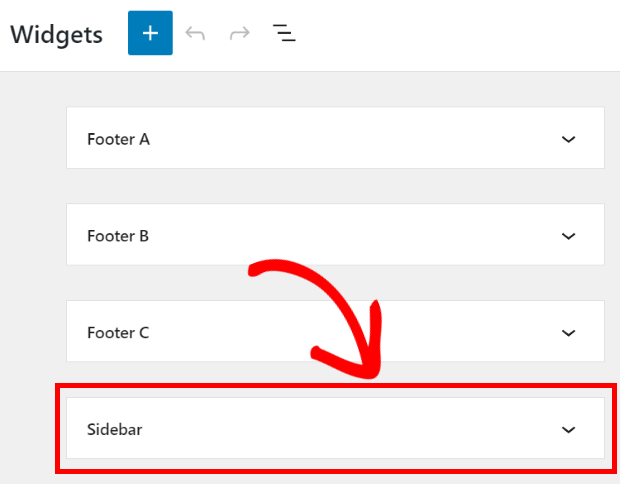
You can also add your Facebook post on the footer here. For that, click on a Footer panel instead.
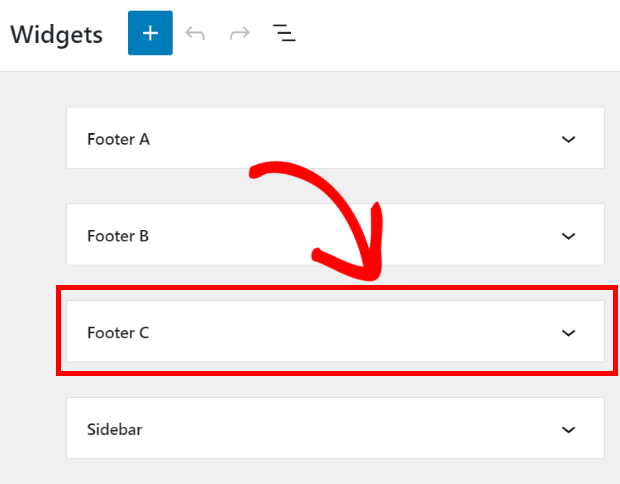
In this tutorial, we’ll add a Facebook post on the sidebar.
To proceed, click on the plus icon (+) and select the Paragraph widget.
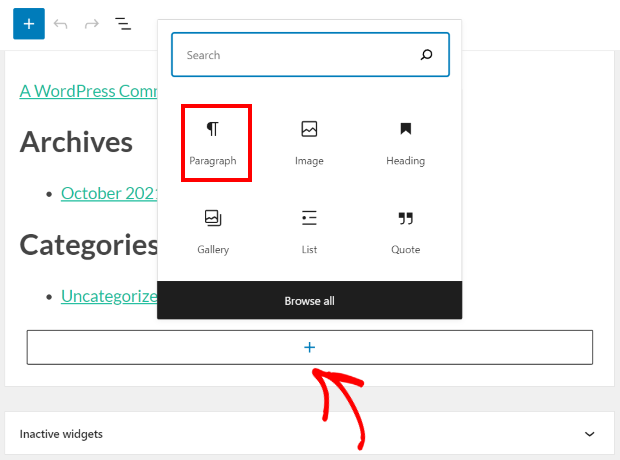
Finally, you can easily paste the URL of the Facebook post on the new paragraph block.
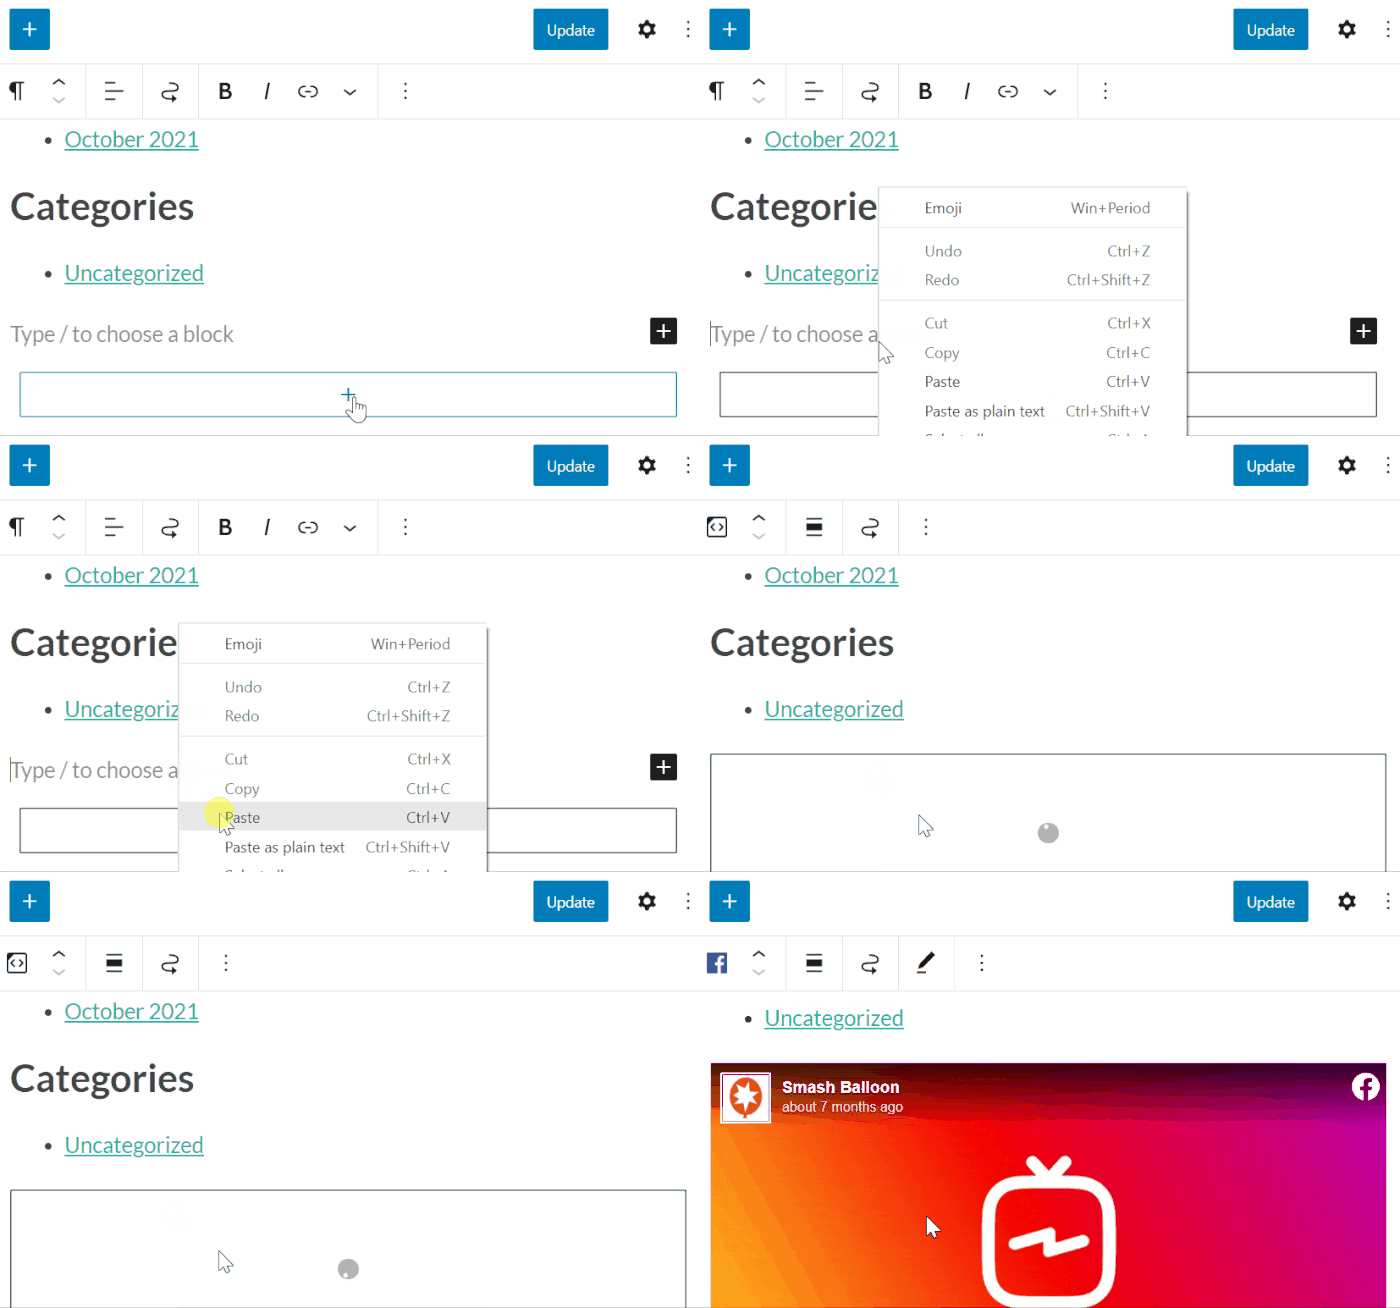
Remember to click on Update to save your changes here. Now, check out your website and you should be able to see your Facebook post on the sidebar.
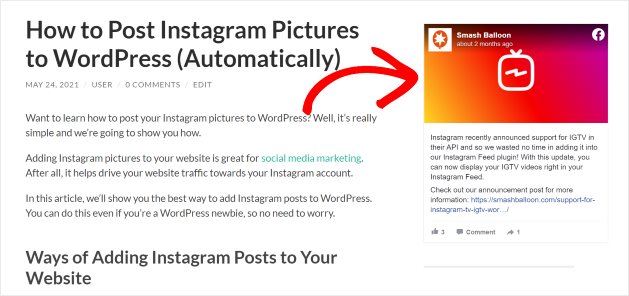
As you can see, it’s super easy to display Facebook posts on the website sidebar and footer areas since Facebook Feed Pro enabled the oEmbeds feature in WordPress again.
And there’s a lot more you can do using Facebook Feed Pro.
Instead of just adding single Facebook posts, you can embed lots of posts at once in the form of a Facebook feed.
How to Automatically Embed Facebook Feeds on WordPress
What is a Facebook feed?
A Facebook feed is a live feed of your Facebook page content, automatically displaying your posts, pictures, videos, Facebook livestreams or more right on your WordPress site.
By embedding a Facebook feed on your site, your website visitors get a taste of your Facebook activity without ever leaving your site — keeping them engaged and encouraging them to follow you on Facebook for more.
Can I embed a Facebook feed on my website?
Yes, it’s really easy to add a live Facebook feed to your site as long as you have the Facebook Feed Pro plugin.
No need for you to get code snippets or deal with complicated page URLs as the plugin takes care of those already.
Let’s get started and show you how to put a Facebook feed on your website the easy way.
Step 1: Create a Facebook Feed
First, you’ll have to create your Facebook feed, which is super easy. Go to the Facebook Feed » All Feeds menu from your WordPress dashboard.
Now click on the Add New button at the top of the page.
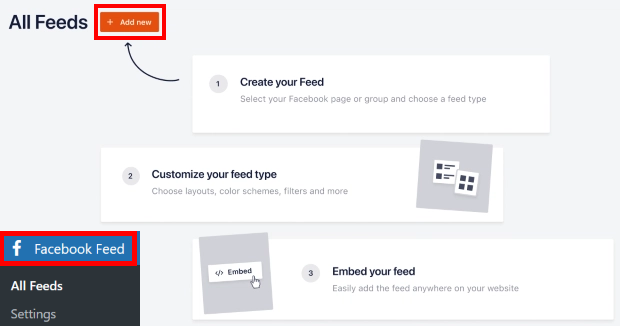
After that, you can pick the type of Facebook feed that you’d like on your website.
With this plugin, you’ll get 9 different options here, such as timeline feed, photos feed, reviews feed, videos feed, events feed, albums feed, and much more.
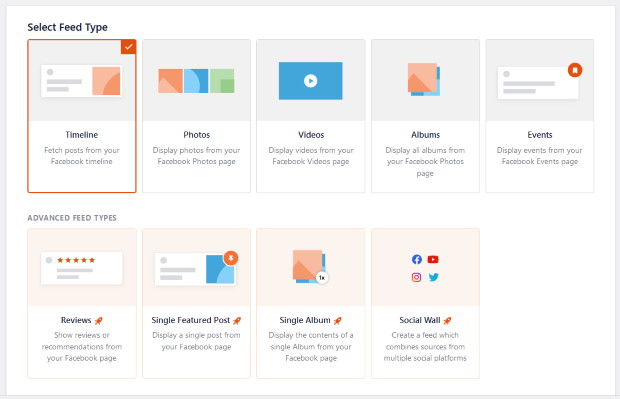
You can select any of the feed types and then click on Next to proceed.
For this tutorial, we’ll be using a timeline feed.
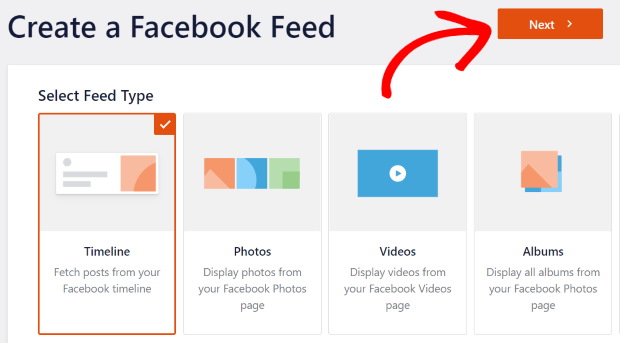
And you’ve now created a new Facebook feed. For the next step, you’ll have to connect it to Facebook so that it can show your posts.
Step 2: Connect Your Feed to Facebook
Now that you’ve created a new Facebook feed, you can connect it to a source. This source can be a Facebook page.
To get started, click on the Add New button on the popup.
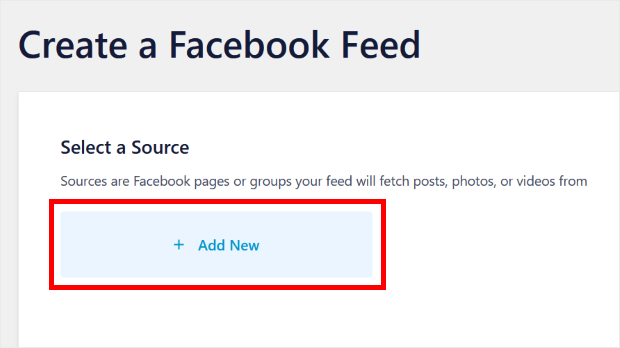
After that, the plugin asks you to connect your Facebook feed to a page. You can pick the option you prefer and then click on Connect to proceed.
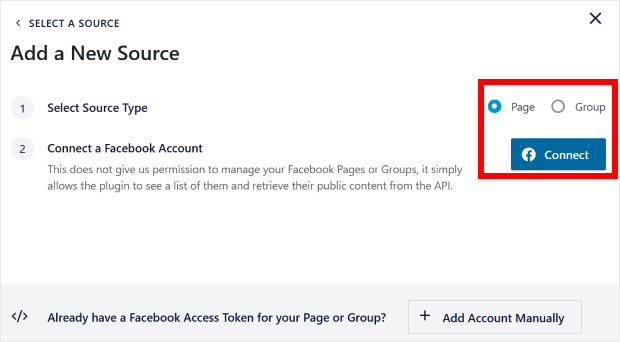
After that, the plugin will send you to Facebook and ask for read-only access to your Facebook account.
Using that access, it can only read your Facebook posts and can’t actually make any changes. Because of that, using Smash Balloon is absolutely safe.
To continue, select a Facebook page from the list here. Then click on the Next button.
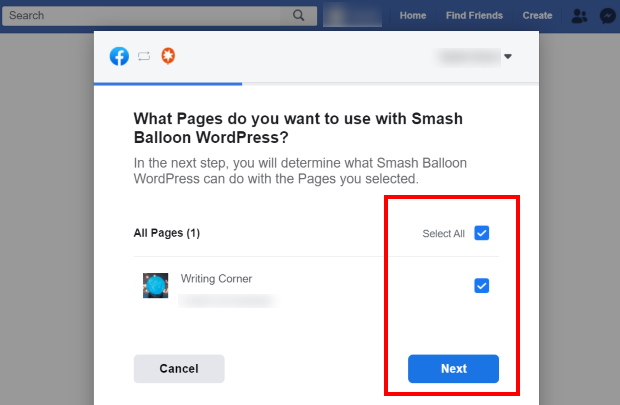
On the next popup, click on Done to confirm this page as a source for your Facebook feed.
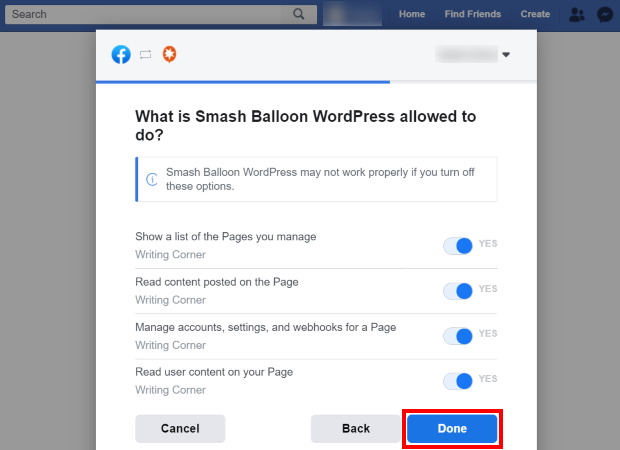
Doing that will bring you back to your website. To continue, click on the Add button on this popup.
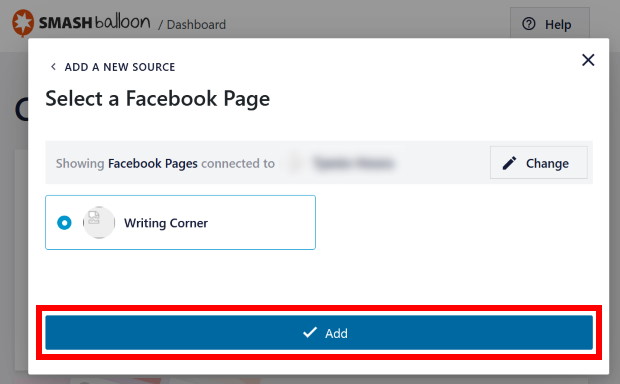
To finish connecting this feed to Facebook, click on the Next button.
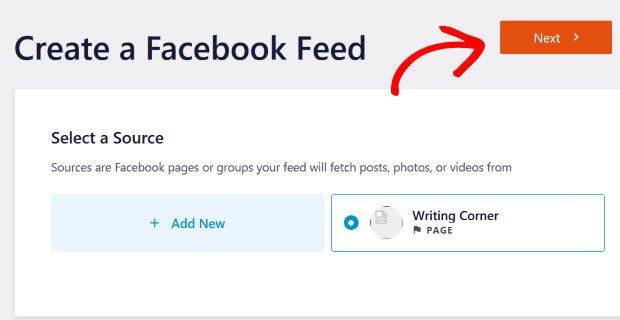
With that done, you can now go to step 3 and change the design of your new Facebook feed.
Step 3: Customize Your Facebook Feed
After you connect your new feed to Facebook, the plugin will open it in the visual feed editor with live preview.
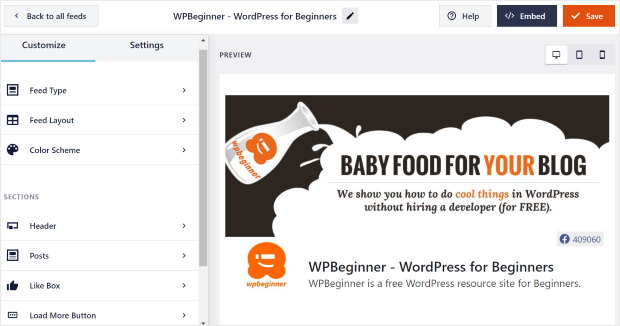
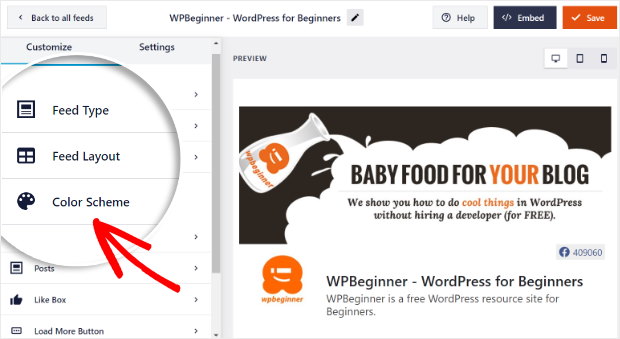
Here, you can customize your feed using the options on the left. The plugin allows you to set your post layout, feed layout, feed themes, color scheme, cover photo, header style, like box style, and much more.
And on the right, you can find the live preview of your Facebook feed. This lets you see how your Facebook feed looks whenever you make any changes.
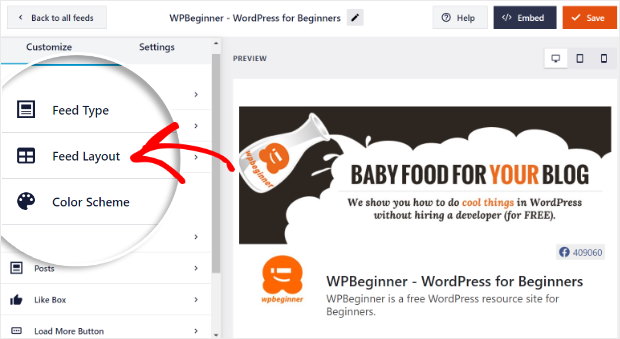
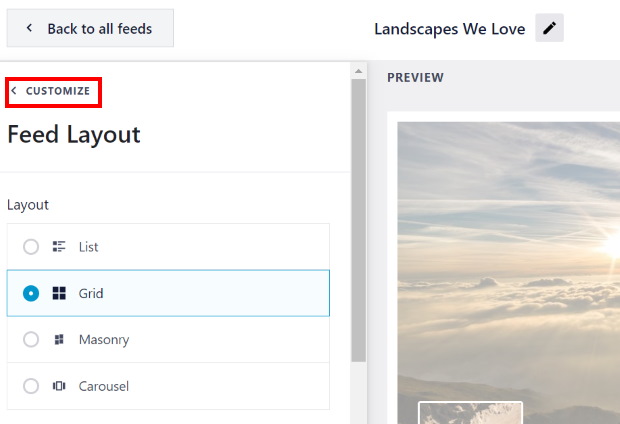
To start customizing your Facebook feed, select the Feed Layout option.
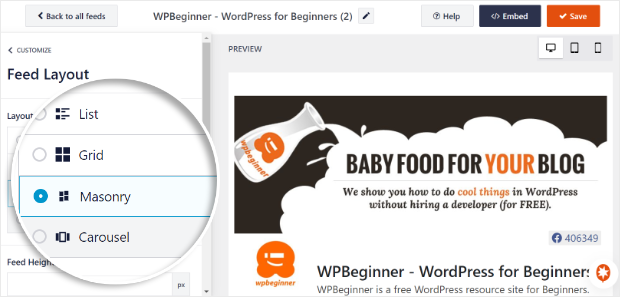
You can then see the 4 layout templates for your Facebook feed: List, Grid, Masonry, and Carousel.
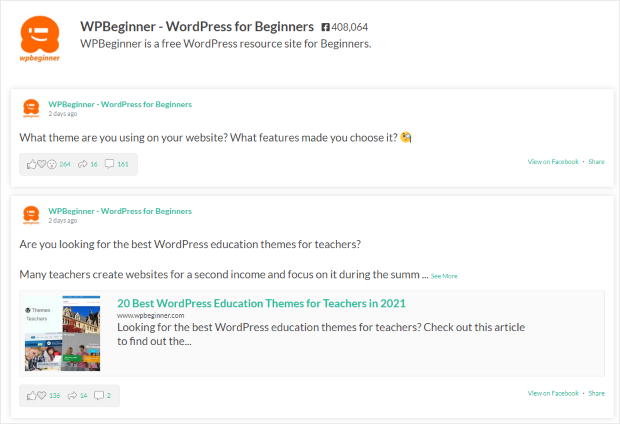
Using the list layout, you can show your Facebook posts one after the other in a single column, so each of your Facebook posts will get more space on your web page.
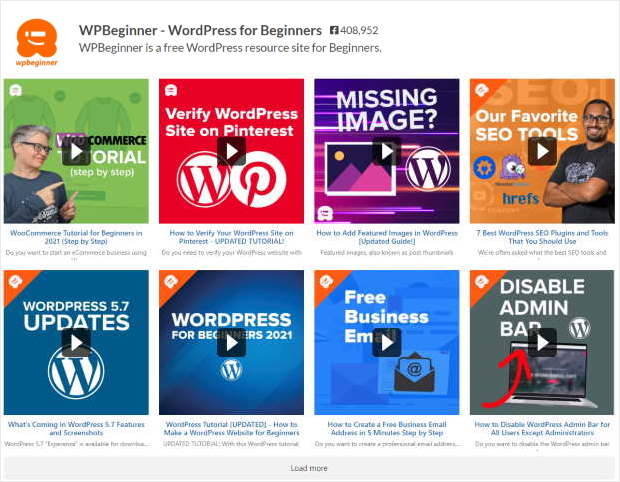
After that, you have the grid layout that can show your Facebook posts in a grid with rows and columns.
Using this layout, you can embed many Facebook photos or videos at the same time. This means more content to engage your website visitors.
You can show your Facebook content in multiple columns using the masonry layout. Plus, this layout keeps the original proportions of your Facebook posts.
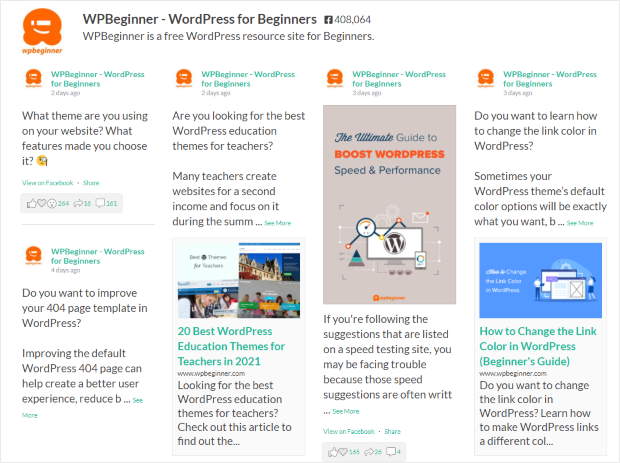
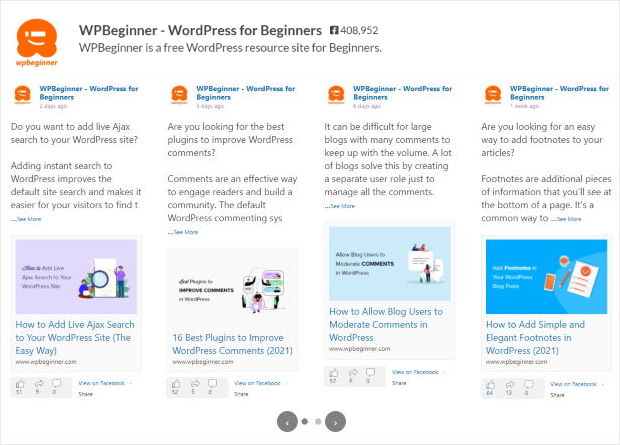
Finally, there’s the carousel layout which shows your posts in a Facebook carousel slider.
This gives your visitors another way to interact with your site and also makes your page look more dynamic.
Select the feed layout that you prefer and then click on Save. Next, you can use the small Customize button and see the main customization options once again.
After that, click on the Color Scheme option to go ahead and set the colors for this Facebook feed.
Here, you can find 4 color schemes that you can pick from:
- Inherit from Theme: Copy the colors of your website for your feed
- Light: Go with a light background along with a darker text color
- Dark: Select a darker background and a lighter color for the text
- Custom: Manually pick all of the colors yourself
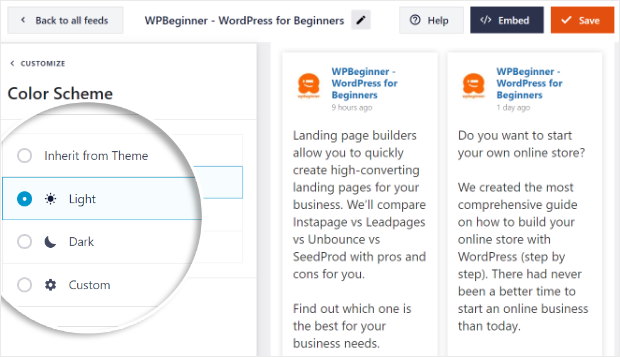
To continue, pick the color scheme that you prefer and then click on the Save button.
Next, you can go ahead and use the rest of the options here to customize your new Facebook feed. In just a few clicks, you can pick your header style, post style, like box design, feed margins, background, and much more.
And after you’re done customizing the feed, click on Save to confirm the changes.
That’s it!
See how easy and quick it was to create and customize your new Facebook feed? Now it’s time to add the Facebook feed to your website.
Step 4: Embed the Facebook Feed on Your WordPress Site
Want to add your Facebook feed to your site without any shortcode?
In this final step, you can easily use the Facebook Feed Pro plugin to embed a Facebook feed on your site with just a few clicks.
You have 2 ways to do that:
- Embed the Facebook feed on your WordPress page
- Embed the Facebook feed on your WordPress sidebar or footer
Embed the Facebook Feed on Your WordPress Page
You can embed your Facebook feed on your website in just a few clicks from the live feed editor.
To start, click on the Embed button at the top.
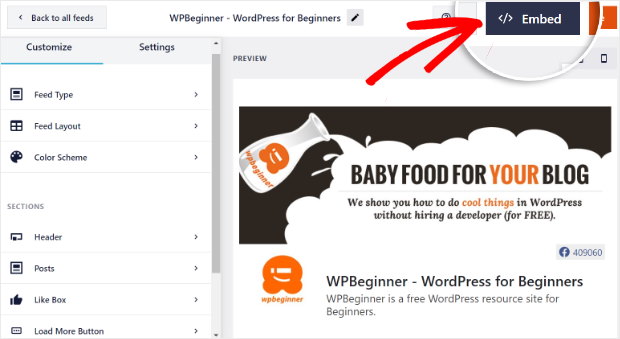
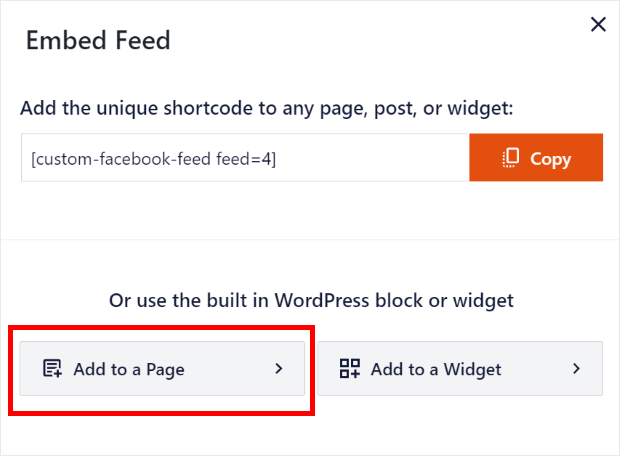
Doing that will show a new popup where you can confirm the location of your Facebook feed.
To proceed, select the Add to a Page option on the popup.
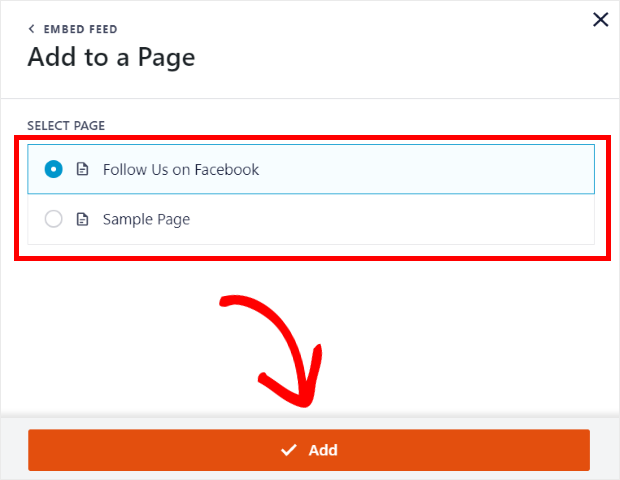
Once you do that, the plugin will show you a list of the pages on your site. Select the page where you want to embed your new Facebook feed.
After that, click on the Add button to continue.
Now, the plugin will send you to that page so you can embed your Facebook feed.
To do that, click on the plus icon (+) and then pick the Custom Facebook Feed widget from the options.
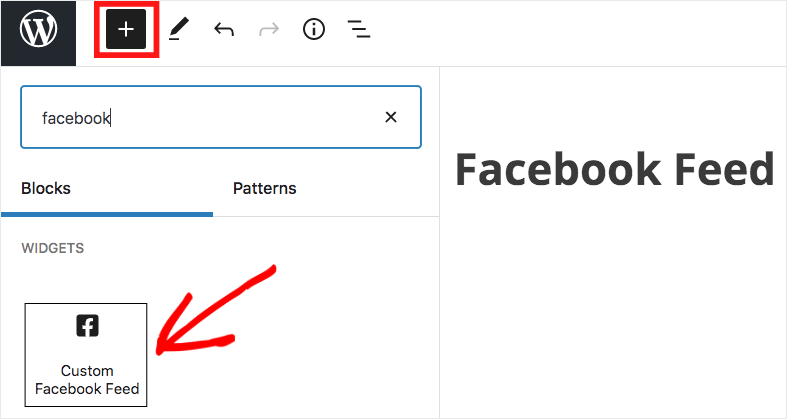
Now click on the Publish button to save your changes and you’ve officially added your Facebook feed to your website.
To see how the Facebook feed looks, you can open your site and take a look.
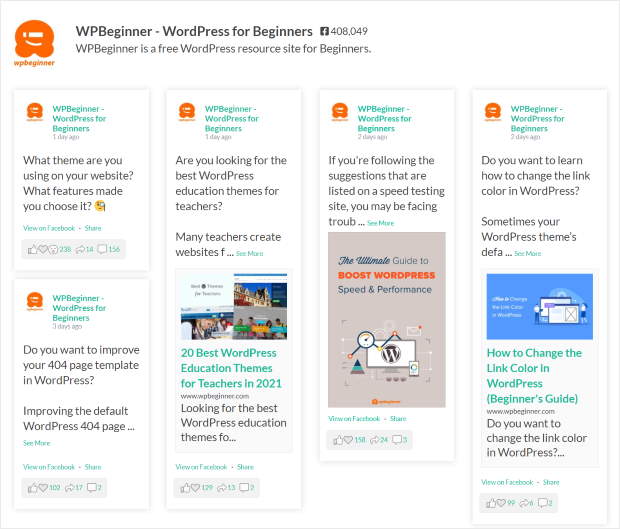
And if you update your Facebook page, the plugin will automatically add the new post to your feed as well.
Embed the Facebook Feed on Your WordPress Sidebar or Footer
The next option is to embed your feed on the sidebar or footer as a Facebook widget.
To do that, you’ll need to have the Facebook feed open in the live feed editor.
First, navigate to the Facebook Feed » All Feeds menu from your WordPress dashboard. On that page, you’ll find all of your Facebook feeds listed.
To continue, click on your Facebook feed here.
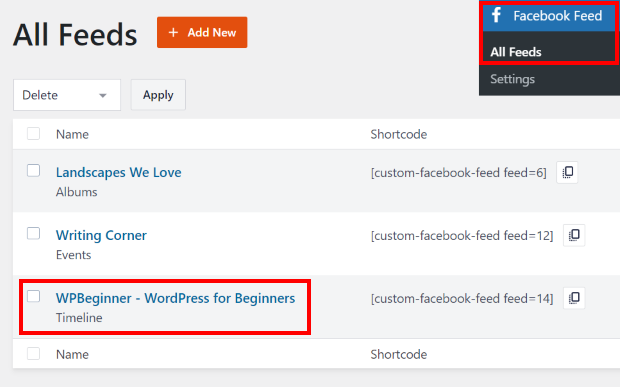
This will open your Facebook feed in the live feed editor. Now you can click on the Embed button in the top right corner.

After that, the plugin will show you a popup and ask you to choose the location for your Facebook feed.
To continue, click on the Add to a Widget option here.
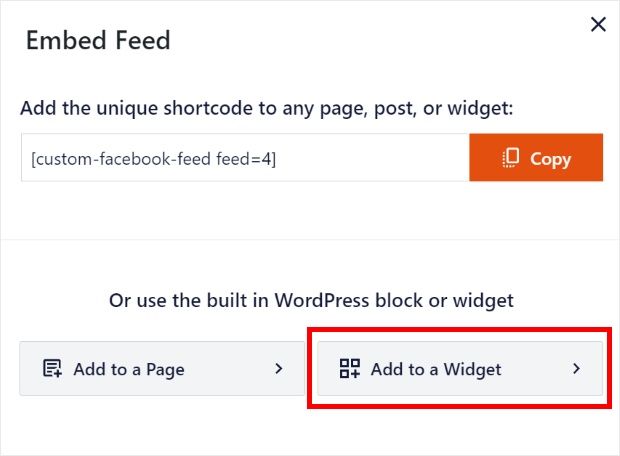
Once you do that, the plugin will send you to the Widgets page of your website. You can use this page to add your new feed to the sidebar or footer as a Facebook widget.
To proceed, click on the Sidebar panel here.

If you want to add your Facebook feed to the footer, you can click on a Footer panel instead.
We’ll embed the Facebook feed on the sidebar for this tutorial.

To add your Facebook feed to the sidebar, click on the plus icon (+) and then pick the Custom Facebook Feed widget.
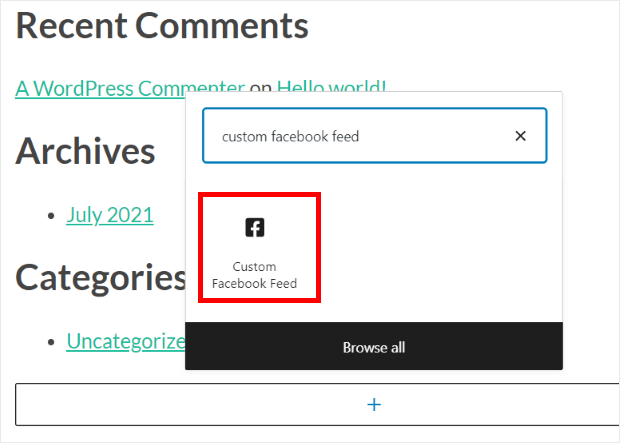
Now click on the Update button and you’ve officially embedded your Facebook feed on your sidebar — no need to touch any HTML code, CSS, embed code, or JavaScript SDK.
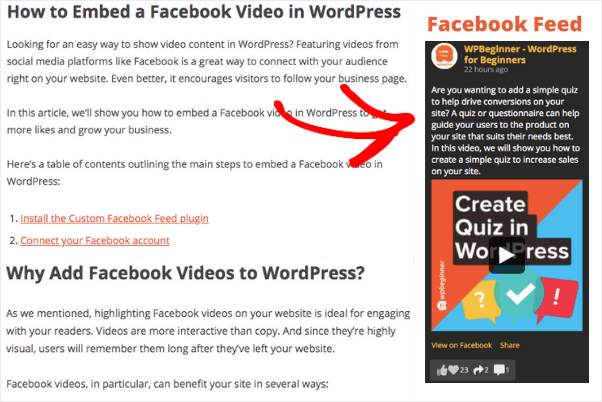
To check out how the embedded post looks, you can go ahead and open your website. As you can see in the screenshot below, your Facebook feed is now in your sidebar area.
How to Embed Facebook Posts on Your Website (Manually)
Can you still manually embed Facebook page posts on WordPress?
In the past, you could integrate Facebook posts into your website without any Facebook page plugins.
With the oEmbeds feature, WordPress would automatically embed the Facebook posts. All you had to do was paste the link from your Facebook profile.
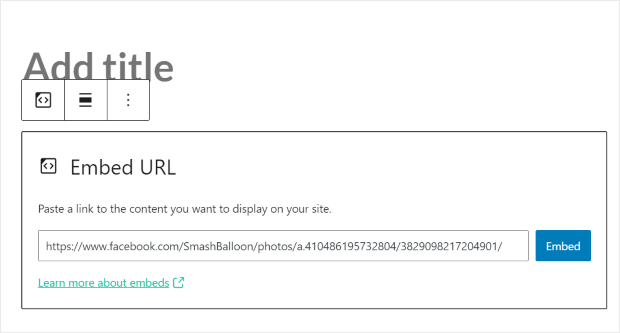
Sadly, it doesn’t work anymore since WordPress dropped support for oEmbeds on October 24, 2020. Now, it’s more difficult to add Facebook posts to your website if you do it manually.
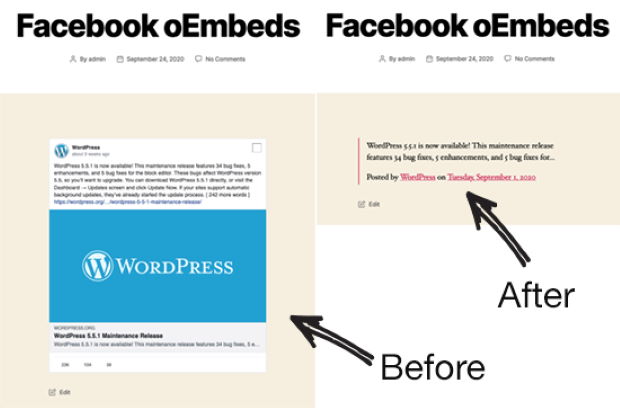
You now have 2 options if you want to embed Facebook posts on your website:
- You can register as a Facebook developer, which is much more time-consuming and complicated since you need to be familiar with coding, iFrame, Facebook API, and more.
- Or, you can simply use a WordPress plugin like Facebook Feed Pro that can automatically display Facebook posts on your website.
That’s it!
We hope this showed you how you can get Facebook posts on your website and embed Facebook feeds in just minutes — all without any coding.
You can now post engaging content that converts your visitors and boosts your Facebook following at the same time!
Ready to show Facebook posts on your website? Get started with Facebook Feed Pro today!
Top Posts on Social Feeds for WordPress
- Looking to display Facebook videos instead? Here’s how you can embed Facebook videos on WordPress.
- Do you want to use Facebook to boost your business further with social proof? Check out this post on the best Facebook plugins to grow your business.
- You can also read this post on how to add an Instagram hashtags feed to your WordPress site.
- Does your business have a TikTok account? Here’s how to embed TikTok feeds to your website for more views, conversions, and followers.
