Looking for a way to embed Facebook posts from a specific date range?
Adding Facebook posts on your site can be a great way to promote your business page, grow a Facebook community, and engage your visitors.
And today, we’ll show you the simplest way to embed Facebook posts while filtering them by date.
Let’s get started!
Why Embed Facebook Posts on Your WordPress Site?
By embedding your own Facebook posts, you can get tons of new likes, comments, and followers from all the people visiting your site.
Plus, you can filter Facebook posts by date range and only show specific posts from Facebook, hide outdated content, and remove old posts.
That way, you can keep showing fresh content on your site, which can help boost your SEO.
But to manually do that, you’ll have to deal with Facebook’s API. Since this method requires coding, filtering Facebook posts can take a lot of time and effort.
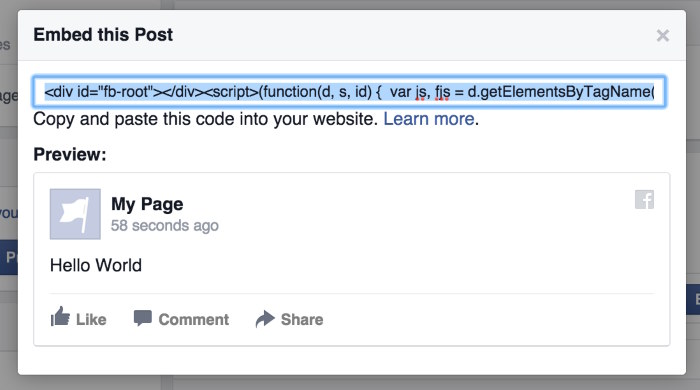
In this post, we’ll help you out and show you the easiest way to embed Facebook posts from a selected date range — no need for HTML, Javascript, or any kind of code snippets.
How to Embed Facebook Posts from a Specific Date Range
Just follow the step-by-step tutorial below, and you can show Facebook posts from your selected date range in just minutes!
Step 1: Install the Facebook Feed Pro Plugin
For the easiest way to embed Facebook posts, you can start by grabbing your copy of Facebook Feed Pro here.
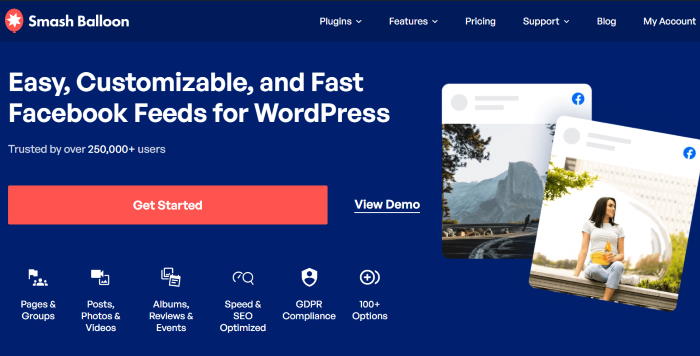
As the best Facebook feed plugin in the market, you can use it to create, customize, and embed feeds of Facebook posts in just minutes — absolutely no coding needed.
You can then get the plugin’s Date Range extension here.
After that, simply install and activate both on your WordPress website.
If you want a quick refresher on how to do that, we’ve got a helpful guide on how to install a WordPress plugin.
Once you’ve installed and activated the Facebook Feed Pro plugin and its extension, you can move on to step 2.
Step 2: Enable the Date Range Extension
You can now enable the plugin’s Date Range extension from your WordPress dashboard to finish setting up the plugin.
First, open the Facebook Feed » Extensions menu from your dashboard and look for the Date Range section.
There, click on the Activate button to continue.
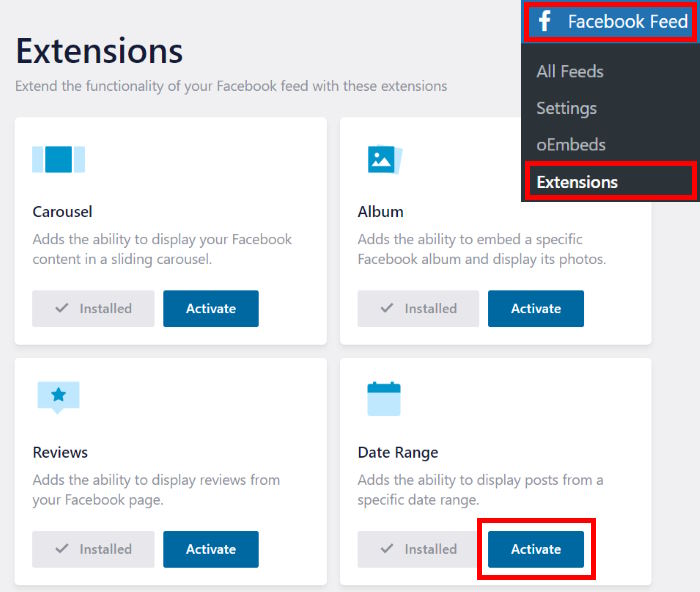
You can now move on to step 3 and create a new feed of Facebook posts using this plugin.
Step 3: Create a New Facebook Feed
Using the plugin’s 3-step guided flow, you can easily create a new Facebook feed on your website.
To do that, first, open the Facebook Feed » All Feeds menu from your dashboard area and click on Add New.
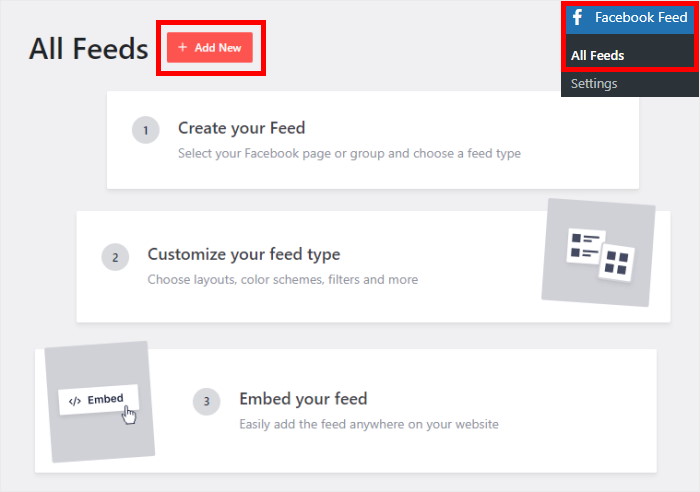
Next, you can choose the type of Facebook posts you’d like to embed on your site. With Facebook Feed Pro, you have 9 options to choose from:
- Timeline: Show public posts from a Facebook timeline
- Photos: Embed photos from Facebook on your website
- Videos: Display a feed of Facebook videos
- Albums: Choose photo albums and display all of their images
- Events: Add a Facebook events calendar to your website
- Reviews: Boost your conversions with positive reviews and testimonials
- Single featured post: Highlight a specific Facebook posts
- Single album: Show content from a selected Facebook album
Once you select your feed type, click on the Next button to continue.
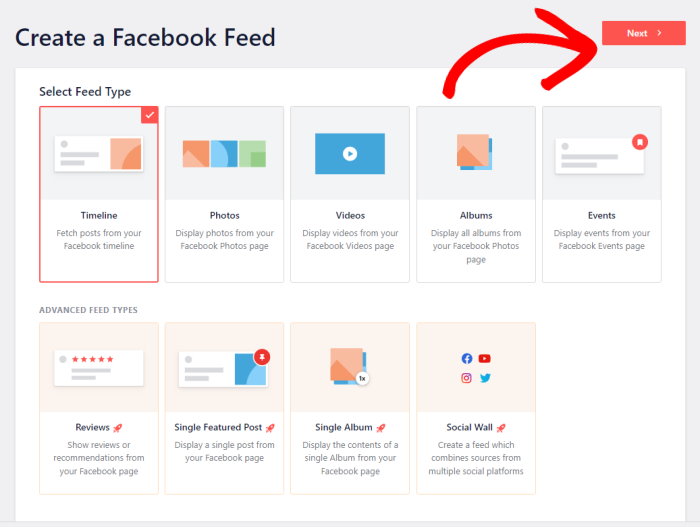
For this example, we’ll embed Facebook posts from a timeline.
Now that you’ve created your Facebook feed, it’s time to move on to the next step, where you connect it to your account.
Step 4: Connect Your Feed to Facebook
By connecting your feed to Facebook, it can fetch Facebook posts and then display them on your WordPress website.
Ready to get started?
First, click on the Add New button here.
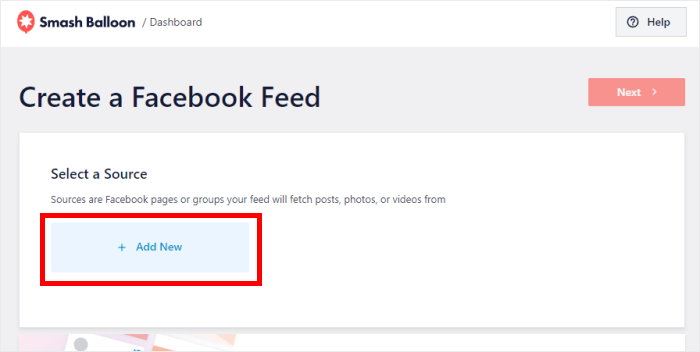
Now, the plugin will ask you to choose between connecting a Facebook page or a Facebook group.
Just pick the option you prefer and then click on the Connect to Facebook button below.
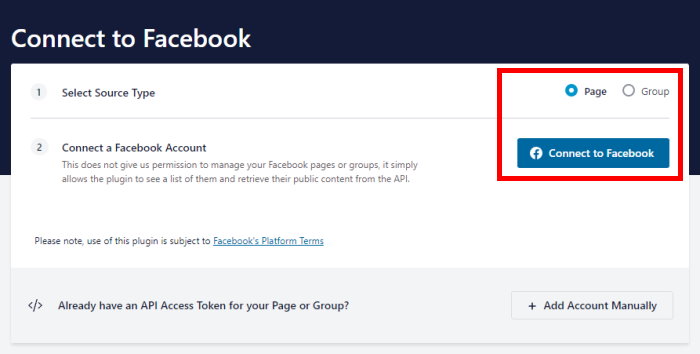
After you do that, the plugin will open https://www.facebook.com on your web browser. You can then start connecting your feed to your Facebook profile.
Here, select the page or group on the popup and then click on the Next button.
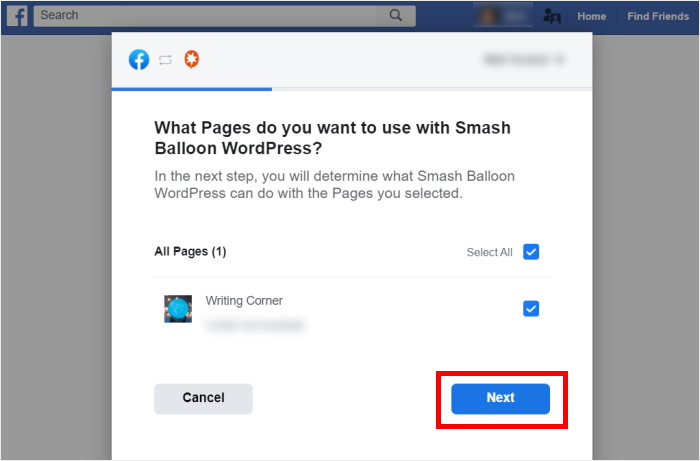
To finish connecting your feed to Facebook, the plugin will now ask for read-only access to your account.
Facebook Feed Pro will use this access to view Facebook content, and it can’t make any changes to your account at all.
Like all the other Smash Balloon plugins, Facebook Feed Pro is completely safe to use.
Click on the Done button to give the plugin read-only access to your account.
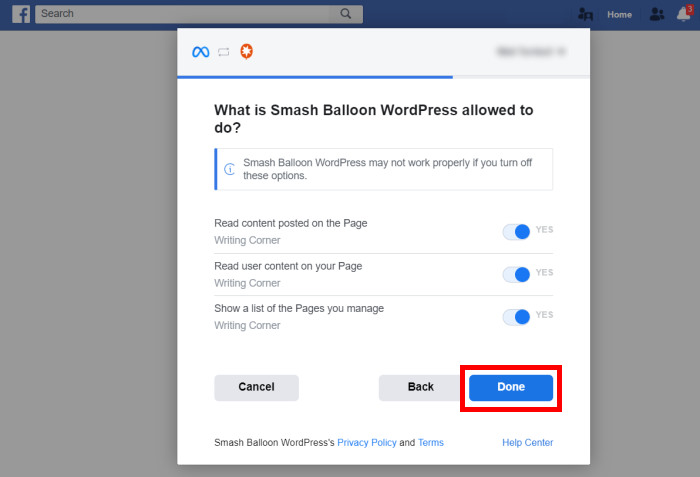
Now that you’ve connected your Facebook account, the plugin will return you to your WordPress website.
To confirm this page or group as your Facebook feed’s source, click on the Add button.
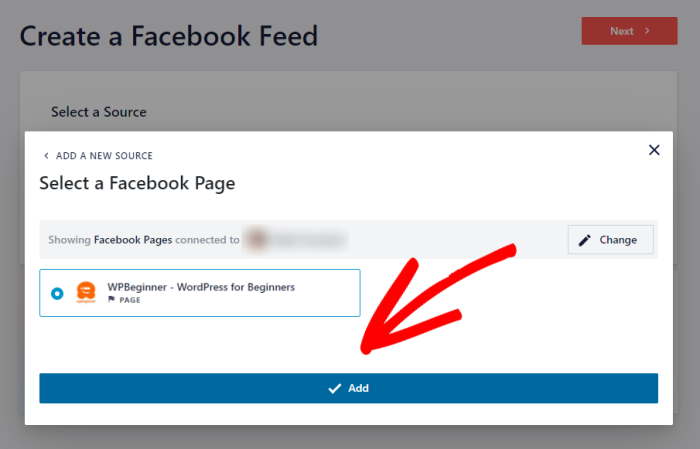
When creating new Facebook feeds, you can reuse this source without leaving your website.
You can now click on the Next button here to proceed.
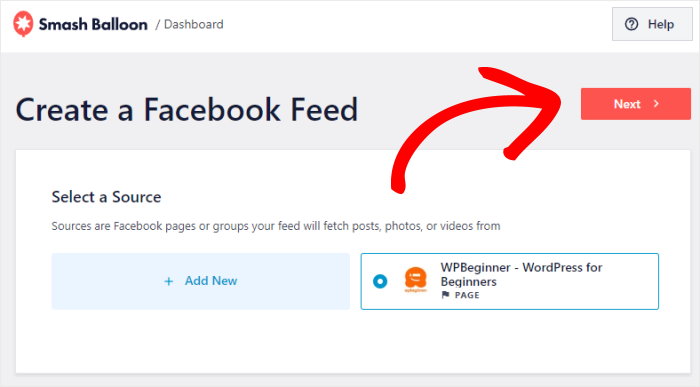
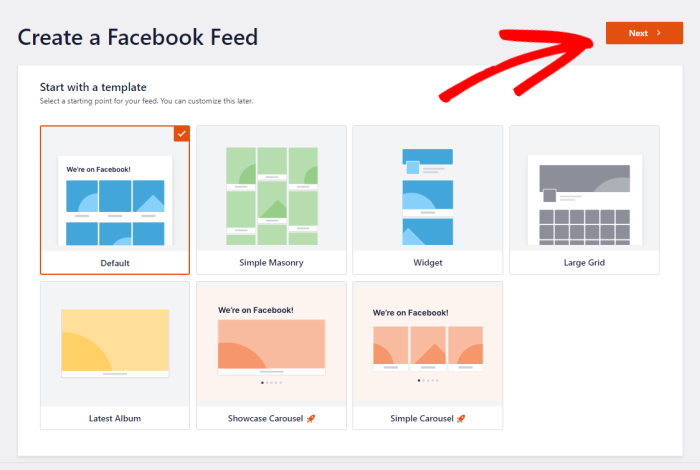
Before you move on to the next step, you can choose to import the design of a feed template. That way, you can instantly have a great look ready for your Facebook feed.
You have 7 feed templates that you can choose from:
- Default
- Simple masonry
- Widget
- Large grid
- Latest album
- Showcase carousel
- Simple carousel
To continue, select a feed template and then click on Next.
Now that you’ve created your Facebook feed and connected it to a source, you can start filtering the posts using a chosen date range.
Step 5: Select Your Date Range
Facebook Feed Pro comes with a live feed editor that makes it simpler than ever to customize your Facebook feeds.
On the left, you can find the options to change your feed layout, color scheme, profile picture, header design, post style, and much more just by selecting and unselecting options — no codes or confusing dropdown menus.
From here, you can access the feed settings, where you can filter your Facebook posts as well.
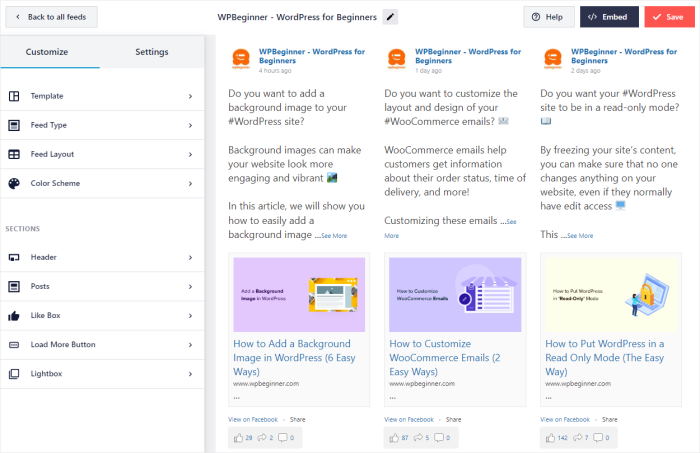
Whenever you make changes to your Facebook feed, the live preview on the right will show you how your Facebook posts will look.
Ready to filter your Facebook posts by date? Click on the Settings tab at the top.
Now, select the Filters option on the left to continue.
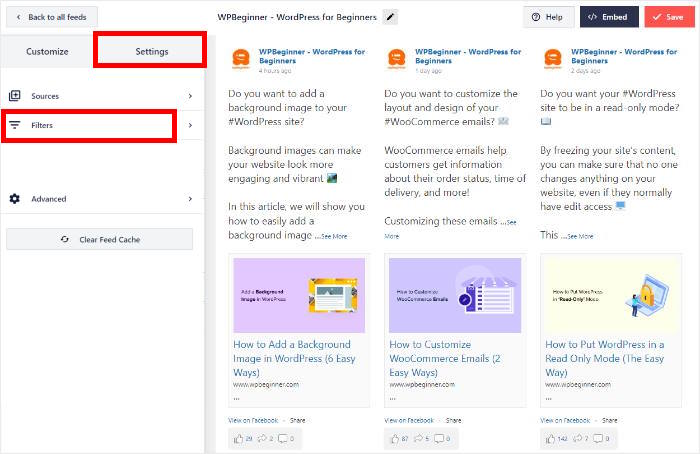
On the left, scroll down until you find the option labeled Show posts within the date range.
Once you toggle it on, you can enter your date range using the options below. There are 2 types of date range that you can use:
- Specific: Display posts made between two specific dates (Eg. show posts after September 23, 2022, and before December 23, 2022)
- Relative: Only show posts made within a certain number of days from today (Eg. show posts from the past 30 days)
Select the type you prefer and then enter your date in the From and To fields below.
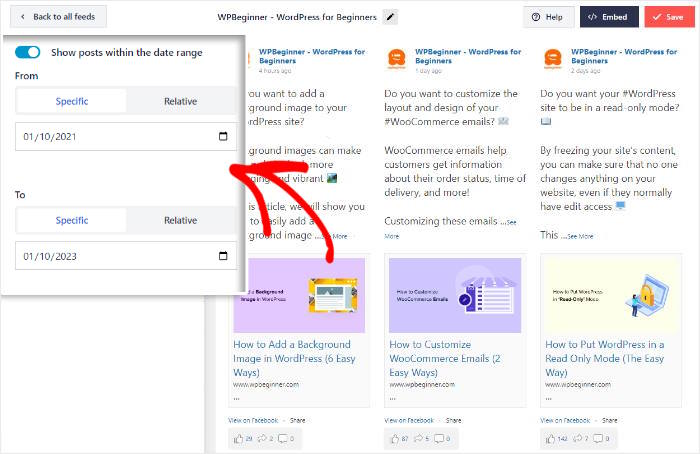
For our example, we’re showing Facebook posts from 01/10/2021 to 01/10/2023.
Finally, click on the Save button to confirm your changes.
Just like that, your Facebook feed will show posts from your selected date range. Once you’re done filtering your Facebook feeds by the date range, you can move to the next step.
Step 6: Customize Your Facebook Posts
Since the plugin automatically copies your website’s design, your feeds will look beautiful right out of the box. Plus, they’re all completely responsive, so you can engage visitors from mobile devices as well.
You can now use the live feed customizer to change the design of your Facebook feed even further.
First, click on the Customize tab at the top to open the main customization options again.
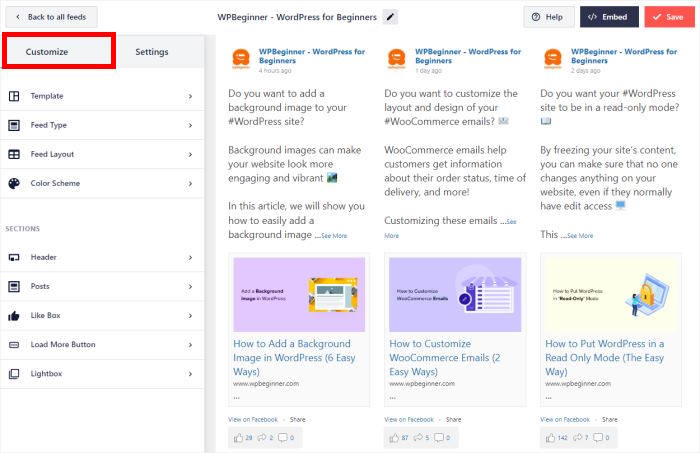
Next, you can use the plugin to set the layout of the Facebook posts on your website.
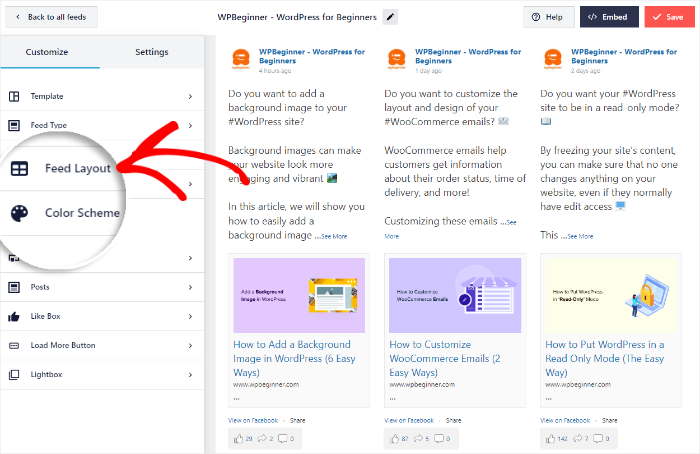
First, click on the Feed Layout option on the left.
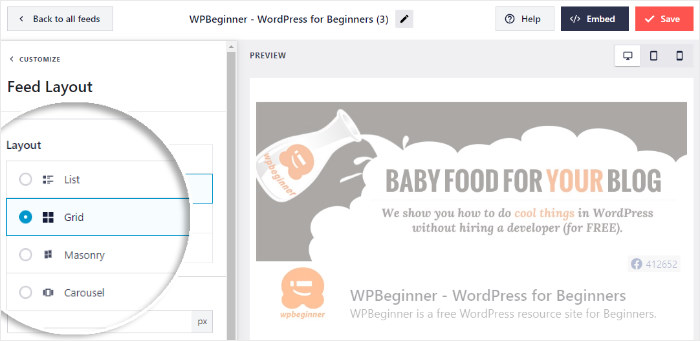
You can now choose between 4 different layouts for your Facebook feed: List, Grid, Masonry, and Carousel.
We’ll look at each of these layouts below:
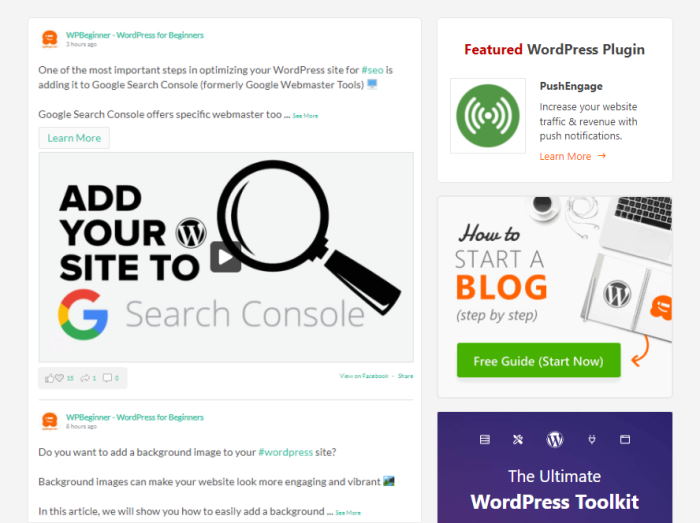
Want to make your Facebook posts more clearly visible?
You can choose the list layout and show your Facebook feed in a single column.
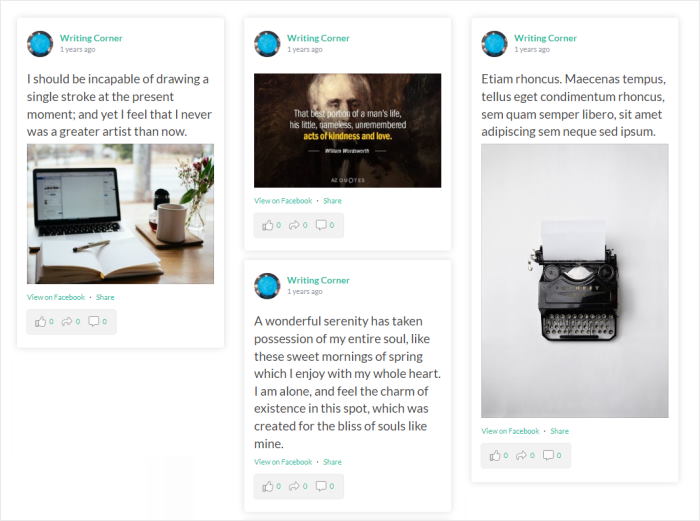
If you want to show lots of Facebook posts from your chosen date range, you can pick the masonry layout.
This layout will show your Facebook feed in multiple columns.
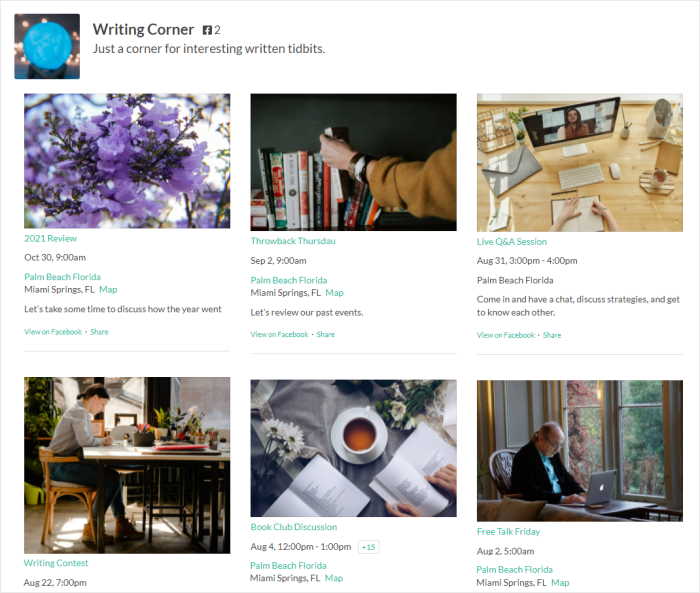
To embed lots of photos and videos from Facebook, you can use the Grid layout.
That way, you can show engaging visual content in simple rows and columns.
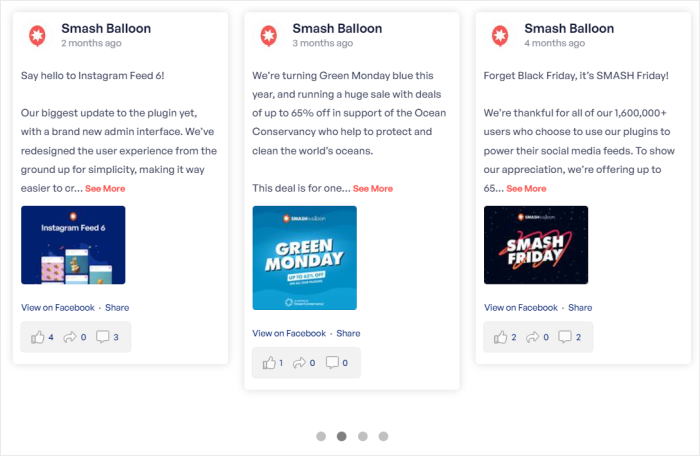
Next, you have the carousel layout, which will show your posts in a beautiful Facebook carousel.
As a result, you can engage your visitors with a more interactive site.
Once you pick a feed layout, click on the Save button to confirm your changes.
You can then use the small Customize button to return to the main customization options once more.
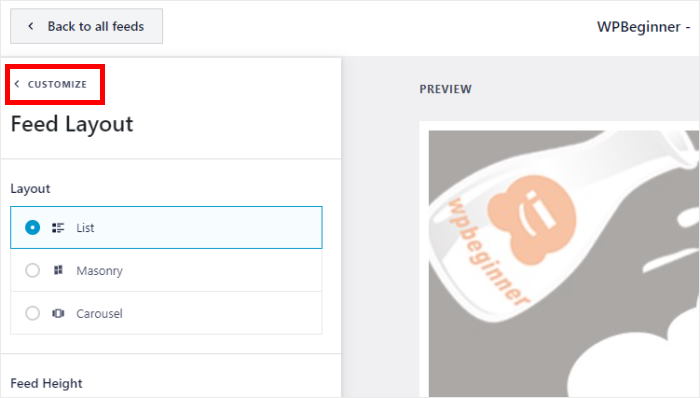
Just like that, the live feed editor makes it easy to customize your header design, post style, color scheme, number of posts, and much more.
When you’re happy with how your Facebook feed looks, click on the Save button.
In the next step, you can finally embed Facebook posts on your WordPress website with the help of Facebook Feed Pro.
Step 7: Embed Your Facebook Posts in WordPress
Facebook Feed Pro has 2 different ways you can embed your Facebook content:
- Embed Facebook posts on a WordPress page
- Embed Facebook posts on the WordPress sidebar or footer
Let’s get started and go through both of these methods below.
Embed Facebook Posts on a WordPress Page
Using the live feed editor, you can embed your Facebook posts in just a few simple clicks — no need to bother with embed codes.
To get started, first, click on the Embed button in the top right corner.
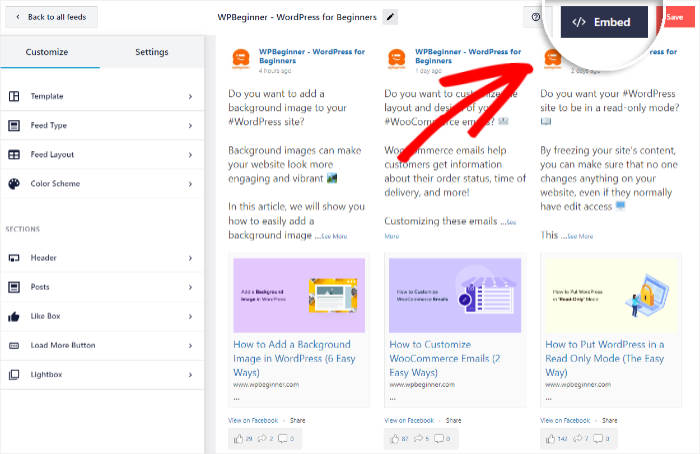
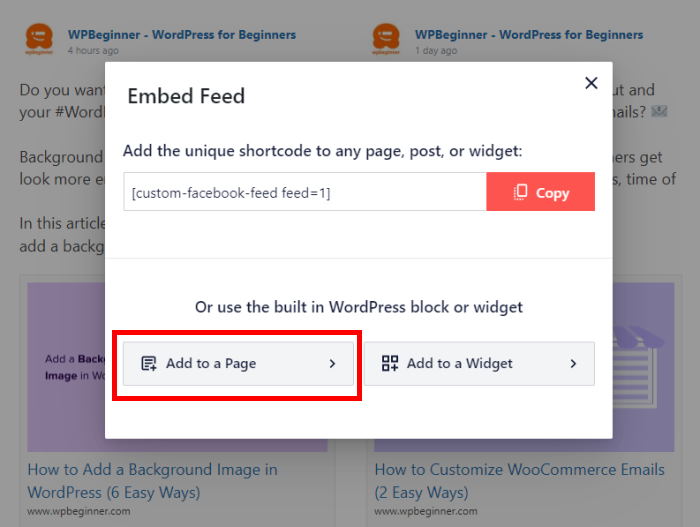
Next, Facebook Feed Pro will show you all the ways you can embed your Facebook feed. You can even copy your shortcode here if you want to embed it manually.
To continue, click on the Add to a Page button.
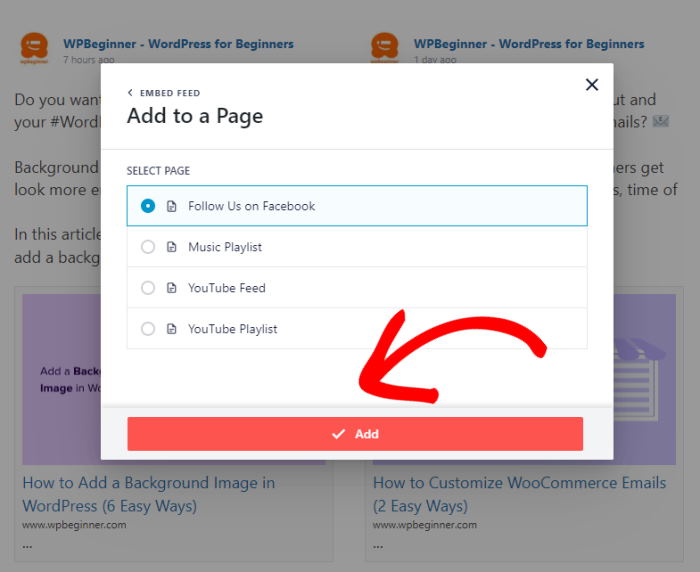
You can then select the WordPress page where you want to embed your feed.
Once you do that, click on the Add button below.
Clicking on that will open the page in WordPress, where you can embed your Facebook feed with a content block.
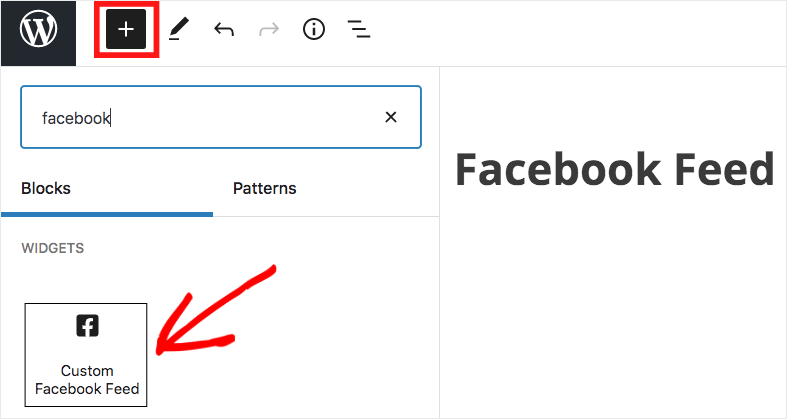
First, click on the plus icon (+) to add a block and then select the Custom Facebook Feed block.
You can now click on Update, and your new Facebook feed will be online. You can follow these simple steps to embed Facebook posts from a specific date range in just minutes.
If you open your website now, you can find the Facebook posts on your webpage, like in this screenshot:
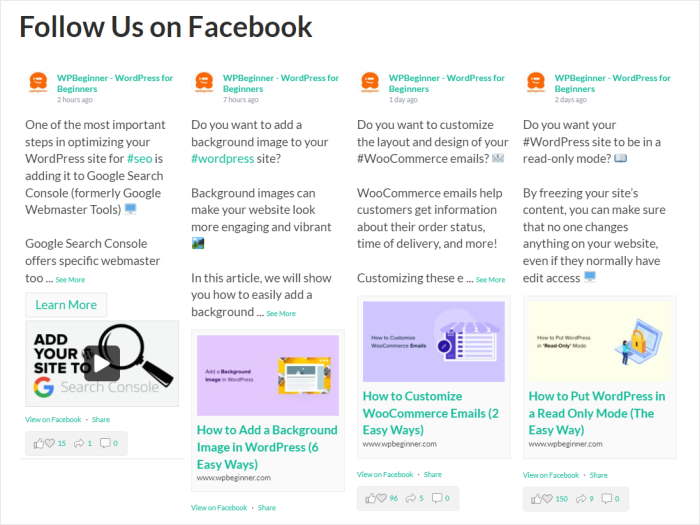
Now you know how to embed Facebook content on your pages with this plugin. Let’s go ahead and see how you can embed your posts using Facebook widgets.
Embed Facebook Posts on the WordPress Sidebar or Footer
Facebook Feed Pro also makes it easy to embed posts on your site’s widget-ready areas like the footer or sidebar.
Like before, you can do this directly from the plugin’s live feed editor.
If your live feed editor isn’t open yet, navigate to the Facebook Feed » All Feeds menu from your dashboard and then click on your Facebook feed.
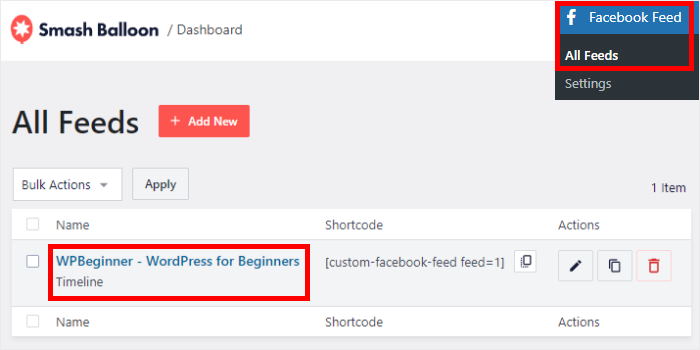
Your Facebook feed will now be open in the live feed editor once more.
On the editor, click on the Embed button at the top.

Using the popup, you can choose to embed your Facebook feed on the WordPress sidebar or footer.
For that, select the Add to a Widget option.
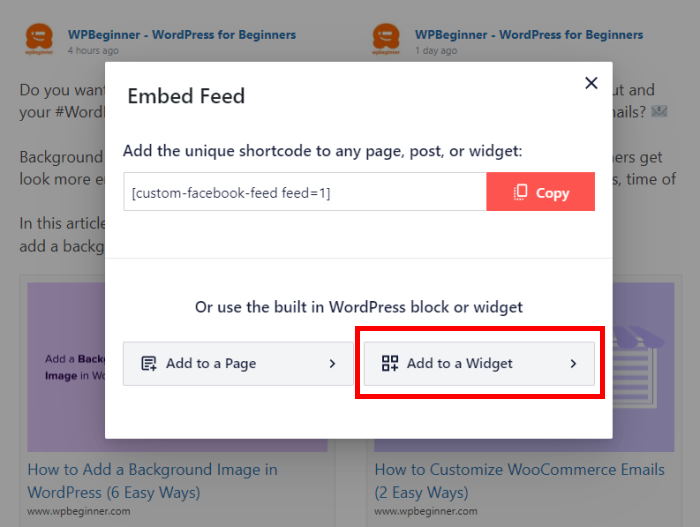
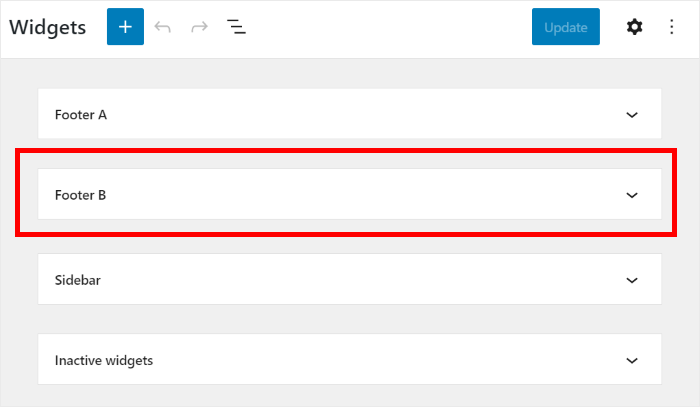
Facebook Feed Pro will then redirect to your site’s Widgets page so you can add, remove, or manage WordPress widgets.
Next, click on the Sidebar panel to embed your Facebook posts on your sidebar.
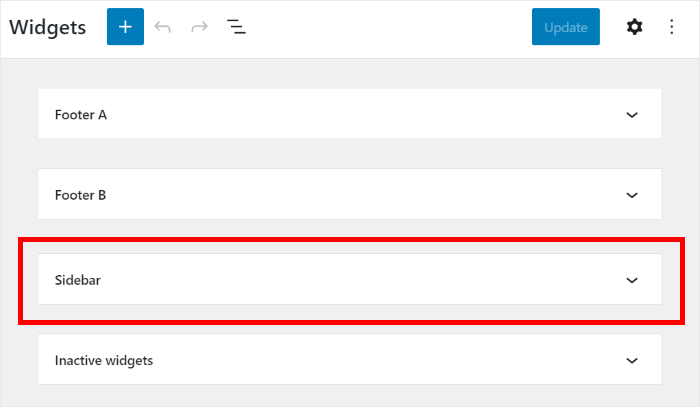
We’ll also use the sidebar for our example here.
If you want to embed Facebook posts below your site’s content, click on a Footer panel instead.
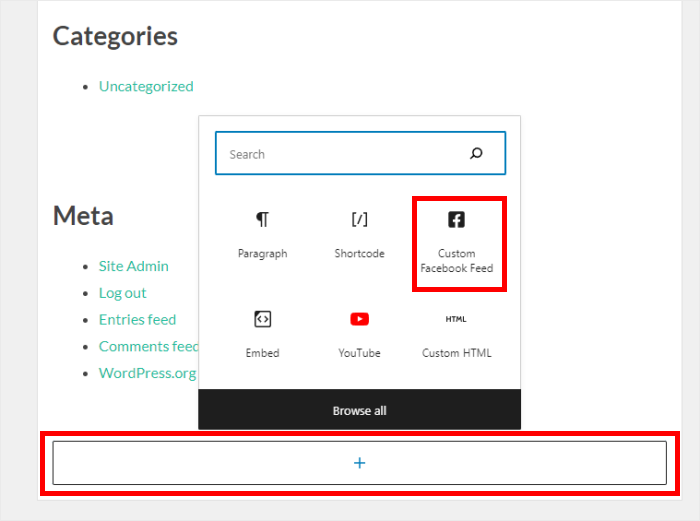
To add a new Facebook widget, first, click on the plus (+) icon at the bottom.
And from the options, select the Custom Facebook Feed widget.
Finally, click on Update, and you’ll have a Facebook widget on your site’s sidebar or footer.
You can now open your website to see Facebook posts from your specified date range.
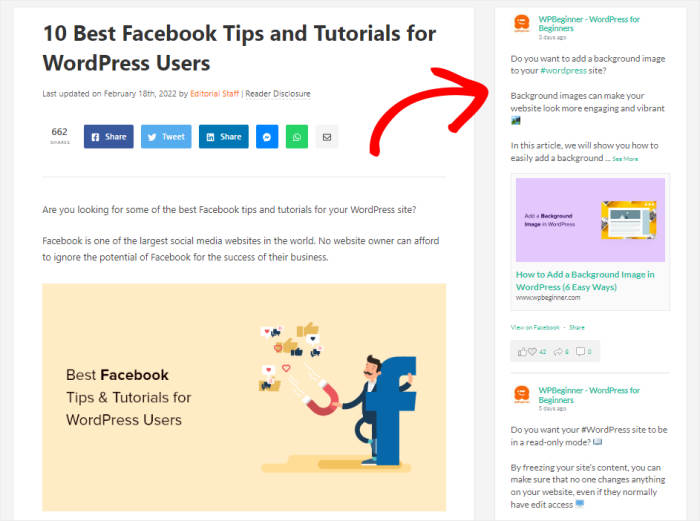
And there you go!
Now you know how you can embed Facebook posts from a specific date range and engage your visitors with fresh content.
As you can see, Facebook Feed Pro makes it super easy to create, customize, and embed feeds of Facebook posts on your WordPress site.
Ready to embed Facebook posts easily? Get Facebook Feed Pro from here!
Want to add more kinds of social media integrations to your site? Check out our list of the best social media feed plugins.
If you found this helpful, don’t forget to follow us on Facebook and Twitter for more useful tips and tricks.
