Looking to share your latest Instagram posts right on your WordPress website?
Adding an Instagram widget can instantly boost your site’s visual appeal, keep your content fresh, and encourage more visitors to follow you on Instagram.
But using Instagram’s standard embedding options can be limiting, especially if you want your feed to match your site’s style or update automatically.
From my work helping website owners improve their social presence, I know how tricky it can be to get your Instagram content to display seamlessly.
Drawing on the experience of our team at Smash Balloon, who have supported millions of WordPress users with social media integration, I’ve put together a straightforward guide just for you.
In this article, I’ll show you the easiest way to add an Instagram widget to your WordPress site.
What’s more, you’ll be able to do it in just a few clicks — no tech expertise needed, so anyone can get their Instagram feed up and running right away.
In This Article
- Ways to Add an Instagram Widget to WordPress
- How to Add an Instagram Widget to WordPress
- Why Add an Instagram Feed Widget to WordPress?
- Start Embedding Your Instagram Widget Now
- More Social Media Marketing Guides & Tips
Ways to Add an Instagram Widget to WordPress
In the past, you could add Instagram links to your website, and the WordPress oEmbed feature would automatically embed it.
Sadly, the feature has been discontinued, so it’s much harder to manually embed Instagram content.
Can you add Instagram as a widget?
Yes, you can add an Instagram widget to your website with the help of an Instagram plugin for WordPress.

The best Instagram WordPress plugins enhance the functionality of your website and let you add new features even if you’re a beginner.
Easiest Way of Adding Instagram Widgets to WordPress
A plugin that makes it super easy to embed Instagram widgets is the Instagram Feed Pro plugin.
With it, you can easily create, customize, and embed Instagram WordPress widgets and embed them on your website — in just a few clicks!

The plugin also doesn’t require any coding background or knowledge in CSS, JavaScript, or HTML. You get a visual builder that allows you to create beautiful Instagram feed widgets with ease.
With a few clicks, you can use the plugin to access its powerful Instagram features:
- Customizable layout: Choose between a classical grid layout mimicking the look of Instagram, Instagram slideshow widget, or highlight specific photos.
- Responsive design: Your feeds are mobile-friendly and responsive, so your Instagram widgets look great on both desktop and mobile.
- Follow buttons: Make it easy for Instagram users to follow you with a simple click.
- Instagram shopping: Using the plugin, you can add shoppable Instagram posts and display its feed as an Instagram widget on your WordPress website’s sidebar.

- Social engagement: Display Instagram stories and Instagram photo thumbnails right on your website in a pop-up lightbox.
- Reduced load time: Thanks to reliable data caching, you don’t have to worry about the plugin slowing down your website. With a faster website, you get better site SEO as well.
- Multi-display: Add multiple Instagram feeds to different areas of your site, showing specific types of Instagram posts.
And with an average rating of 4.9/5 stars, the plugin is helping over 1 million users all over the world embed Instagram content.
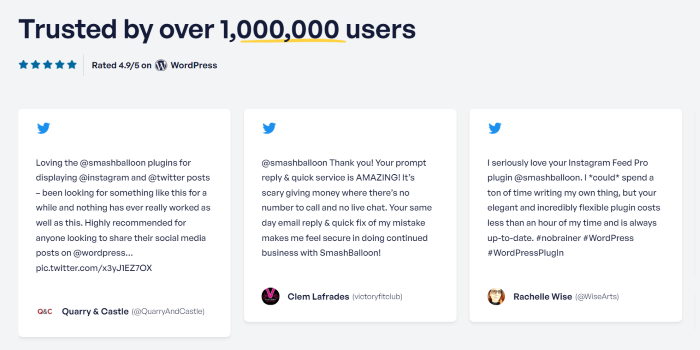
For all these reasons and more, Smash Balloon’s Instagram Feed Pro is the best Instagram widget plugin for WordPress.
Ready to add Instagram widgets to your WordPress site? Get started with Instagram Feed Pro today!
How to Add an Instagram Widget to WordPress
Ready to add an Instagram widget to your WordPress site? Dive in by following the steps below.
Step 1: Install the Instagram Feed Plugin
To begin, click here to get started with Instagram Feed Pro. Then download the plugin to your computer.
After that, you need to upload it to your WordPress website and activate it. If you need a refresher on how to install a WordPress plugin, check out this step-by-step guide.
Step 2: Create Your Instagram Feed Widget
After you install and activate the plugin, it’s time to create your Instagram feed widget in this step.
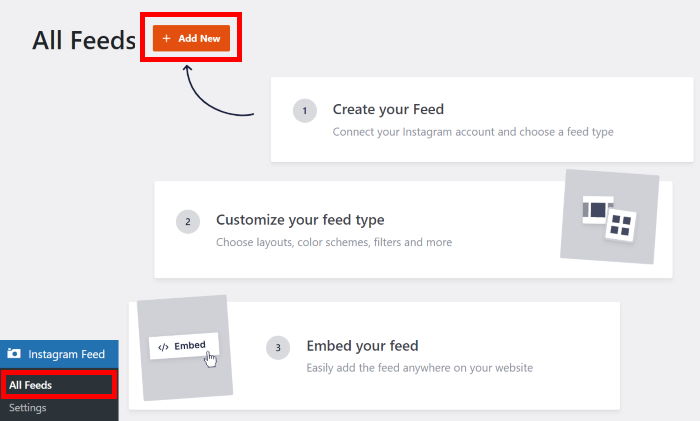
First, navigate to the Instagram Feed » All Feeds menu from your WordPress dashboard and click on the Add New button.
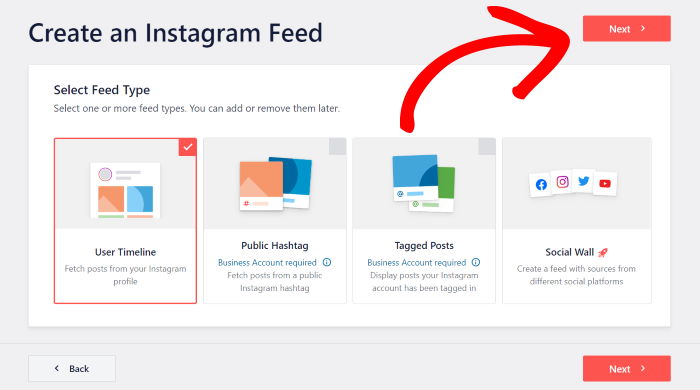
You can then choose the type of Instagram feed that you want for your widget. While Instagram Feed Pro has a free version with limited features, the plugin’s pro version gives you 3 different options to choose from:
- User Timeline: Display your latest Instagram posts from your own account
- Public Hashtag: Show Instagram posts that have your chosen hashtags
- Tagged Posts: Embed Instagram widgets that have tagged your account
On top of that, you can also select multiple options at the same time. So, you can combine different feed types into a single feed.
To proceed, just pick your Instagram feed type and then click on Next.
For our tutorial, we’ll pick the user timeline feed type here.
Step 3: Connect Your Instagram Account
In this step, we’ll show you how to link a business or creator Instagram account to WordPress.
Don’t have a business or creator account yet? Just take a look at our handy guide that shows you how to change a personal Instagram account into a business profile.
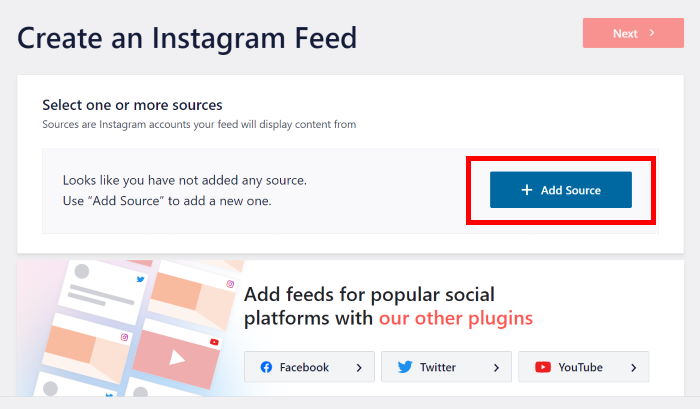
Once your account is ready, click on the Add Source button on this page.
The plugin will then ask if you want a Basic or Advanced Instagram connection.
Using a Basic connection, you can show your Instagram posts in your feed.
For the other types of feeds, such as hashtag feeds, mentions feeds, and more, you need an Advanced connection.
Pick the type of Instagram connection you want, then click on Connect.
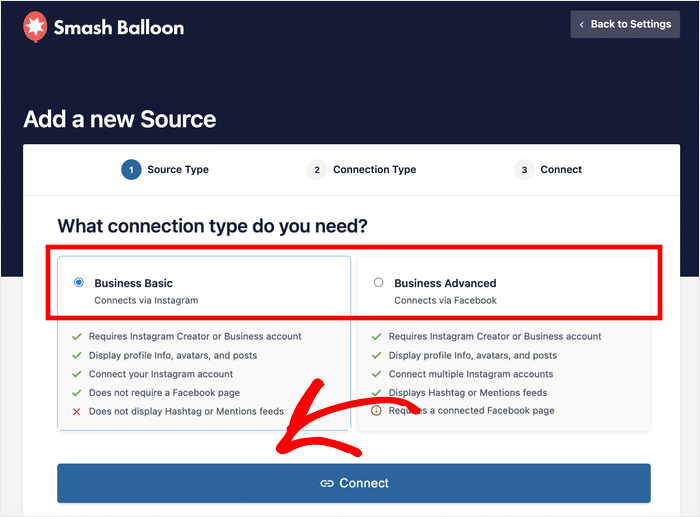
Next, we’ll open either Facebook or Instagram to finish connecting your account. For a basic connection, we can use Instagram, but the process is the same either way.
First, click on Connect with Instagram.
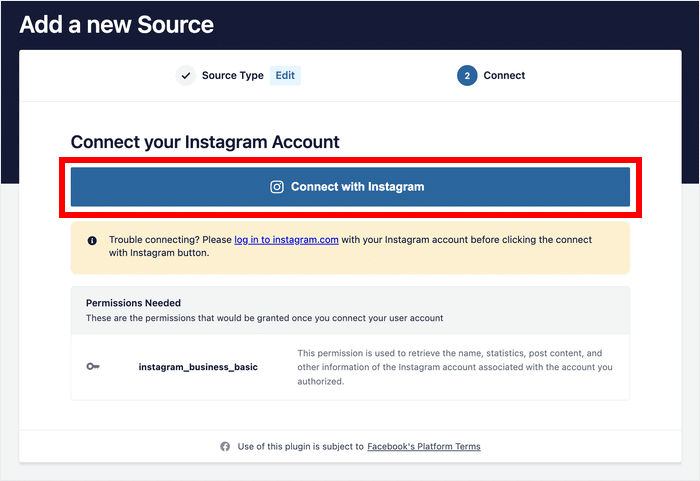
You can now give the Instagram Feed Pro plugin a read-only access to your Instagram account. The plugin will use that access to view Instagram info, but it can’t actually make any changes.
That way, Instagram Feed Pro is completely safe to use.
To give the plugin read-only access, click on the Allow button here.
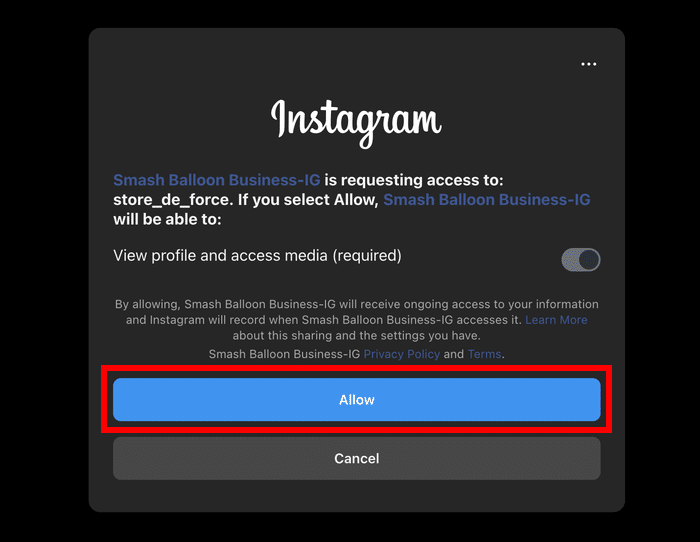
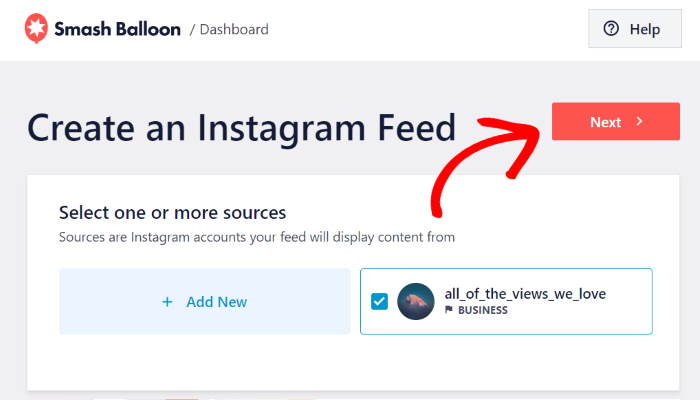
After doing that, the plugin will send you back to your WordPress site.
To finish connecting your Instagram account, click on Next.
Step 4: Customize Your Instagram Widget Feed
The plugin will now open your Instagram feed in the live feed editor. On the left panel here, you can find your customization options.
You can change your feed layout template, color scheme, header design, post layout, and more using these options.
Towards the right, you can find a live preview where you can see any changes to your Instagram feed in real-time.
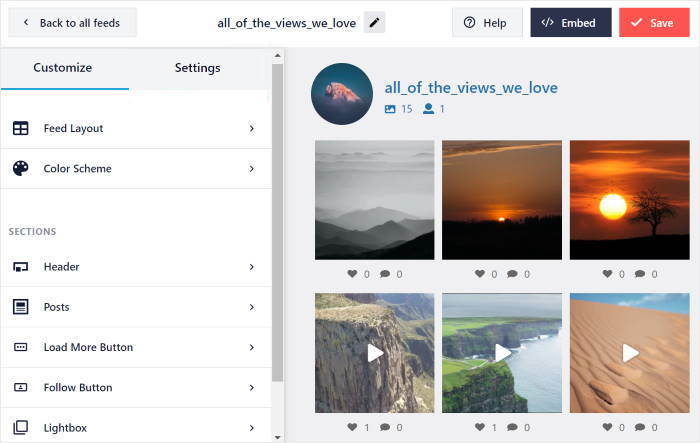
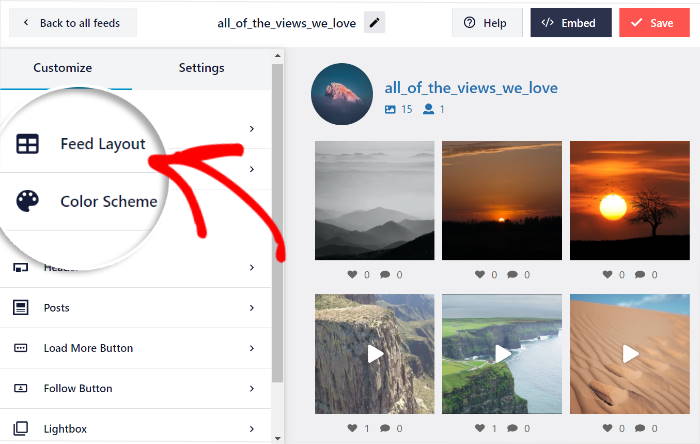
Now select the Feed Layout option from the left section to start the customization.
For your new Instagram feed, you can choose from 4 different layouts: Grid, Carousel, Masonry, and Highlight.
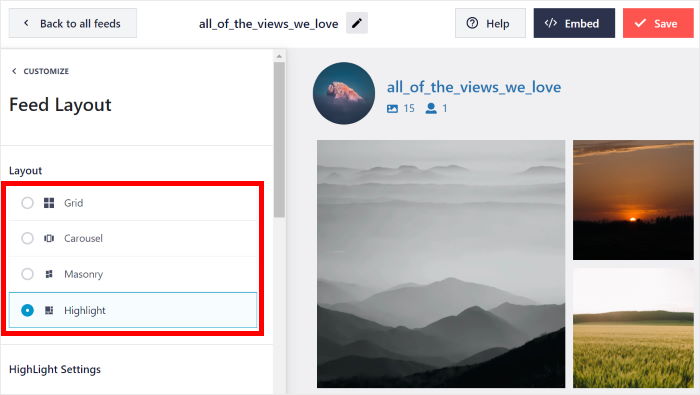
Want to show your Instagram posts in a clean way? Select the grid layout which crops your Instagram thumbnails into neat squares and shows them in rows and columns.
Personally, I like using Instagram Feed Pro’s grid layout for my Instagram widget. I prefer to embed my personal Instagram feed in my sidebar area using the grid layout so my posts look organized and neat.
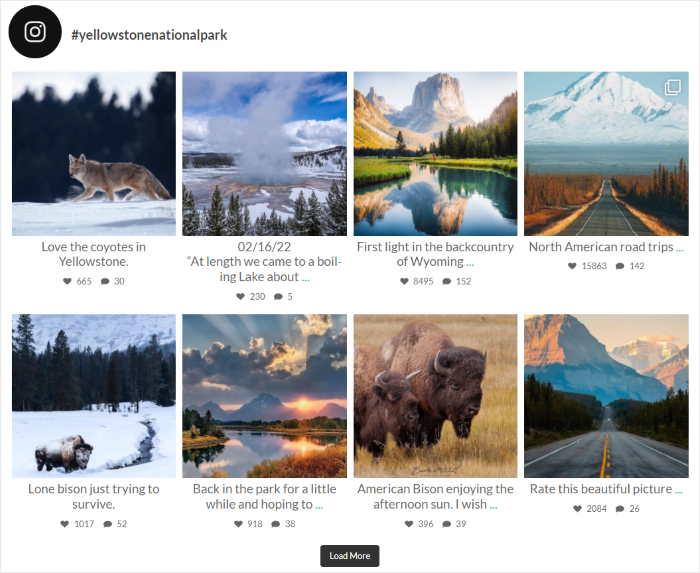
If you want to show lots of Instagram posts without taking up much space on your page, go for the carousel layout.
This option will display photos and videos in a beautiful Instagram carousel.
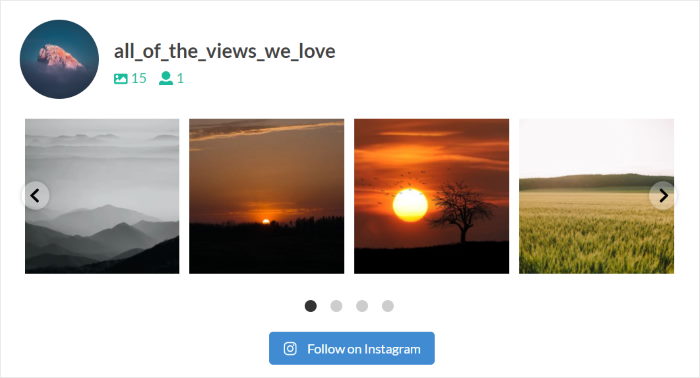
To show your Instagram content in different columns, you can pick the masonry layout instead. This layout will also keep the original proportions of your Instagram posts.

Finally, there’s the highlight layout that removes the captions and likes to put the focus on your Instagram posts. You can also increase the size of specific posts here to make them clearly visible.

To save your Instagram feed layout, click on the Save button at the top.
Now you can go ahead and customize the rest of your Instagram feed by clicking on the small Customize button.
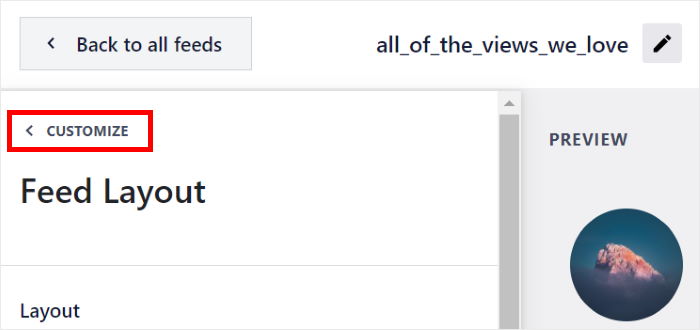
Here, click on Color Scheme to start editing the colors of your Instagram feed.
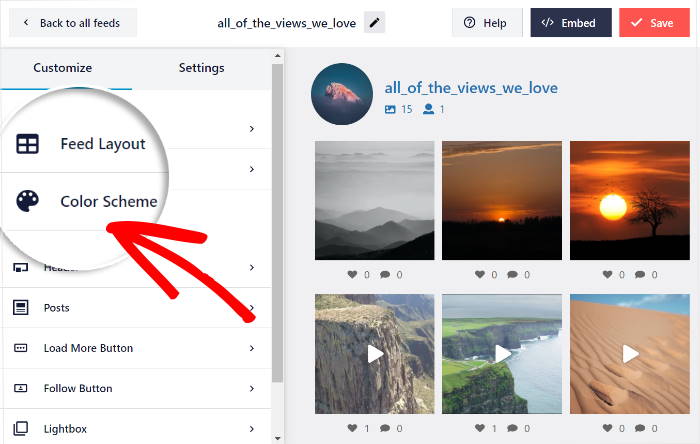
To easily set your feed colors, you can just pick from 4 color schemes:
- Inherit from Theme: Use your WordPress theme’s colors for your Instagram feed.
- Light: Show a light background and dark font for your feed.
- Dark: Switch to a dark color for your background and a light color for your fonts.
- Custom: Manually pick all the colors for your Instagram feed yourself.
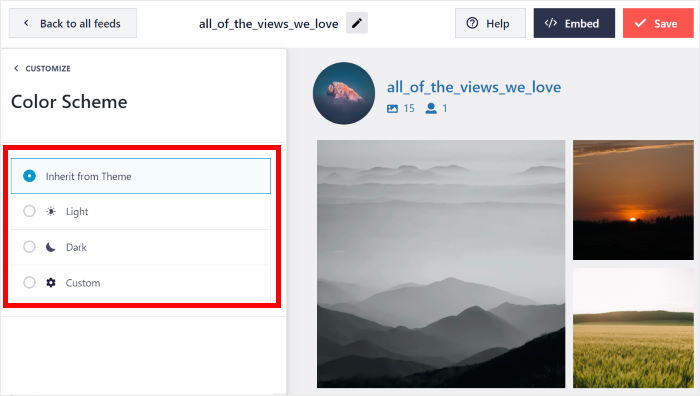
Just select the color scheme that you prefer and then click on the Save button.
Now you can use the remaining customization options to change your post layout, number of columns, header style, feed size, button style, and much more.
After you’re done customizing your Instagram feed, remember to click on Save again.
Step 5: Embed Instagram Widget on Your WordPress Site
From your visual feed customizer with live preview, you can go ahead and embed your Instagram feed in a few clicks.
First of all, click on the Embed button in the top right corner.
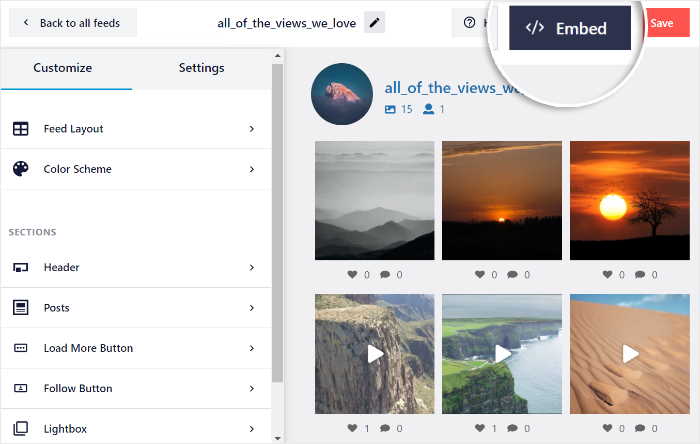
You’ll then see a popup that asks you to pick the location for your new Instagram feed.
To continue, you can copy the shortcode and click on the Add to a Widget button.
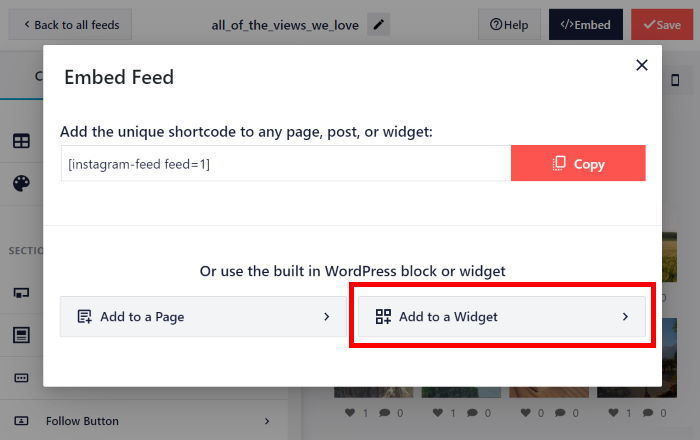
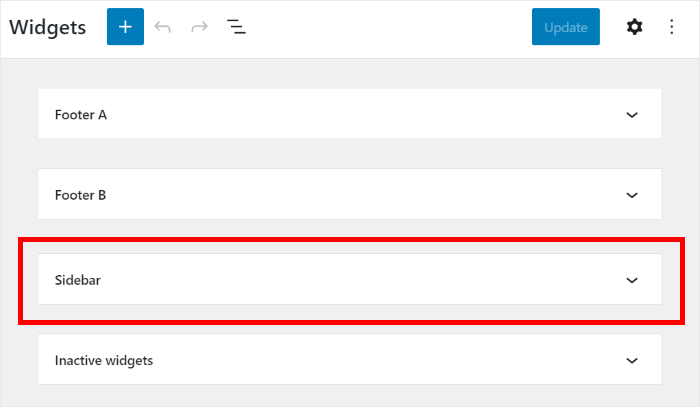
Once you do that, Instagram Feed Pro will open the Widgets page of your WordPress website. You can manage all of your sidebar and footer widgets here.
To start embedding your Instagram feed widget, click on the Sidebar panel.
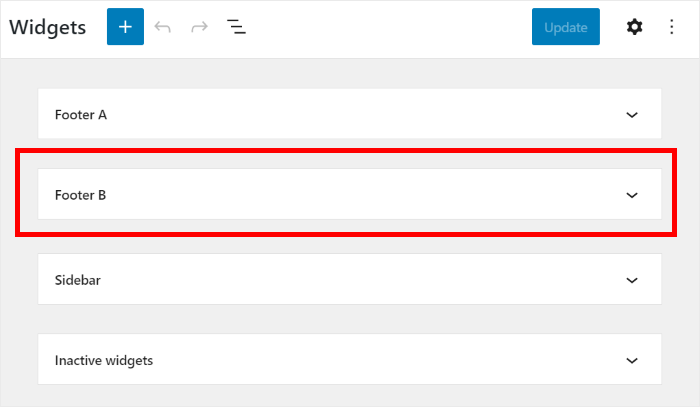
You can also click on a Footer panel here if you want to embed your Instagram feed on your footer widget area.
We’ll use our WordPress sidebar for this tutorial.
Now click on the plus icon (+) to add a new widget to your footer or sidebar. From the options, just select the Instagram Feed widget to embed your feed.
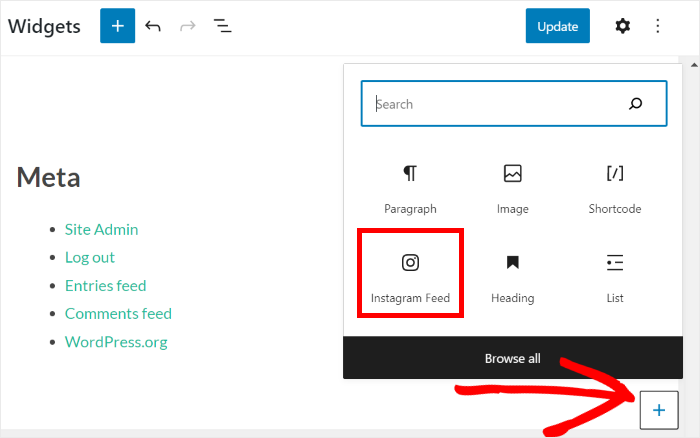
Once you click on Update, you can now see your Instagram widget added to your WordPress page, like this:

There you have it!
You’ve just added an Instagram widget to your WordPress site. With Instagram Feed Pro, all it takes is a few simple steps — no coding needed at all!
After that, you can engage your visitors with relevant visual content, transforming them into loyal Instagram followers.
Ready to embed Instagram widgets with ease? Get started with Instagram Feed Pro today.
Why Add an Instagram Feed Widget to WordPress?
As one of the biggest social media platforms in the world, Instagram is a great place if you want to reach tons of people.
For your business, that means more customers, sales, and conversions.
And to help you make the most of Instagram, you can just embed Instagram feeds on your website.
That way, your website visitors can check out your Instagram content, and you get more likes, comments, and Instagram followers.
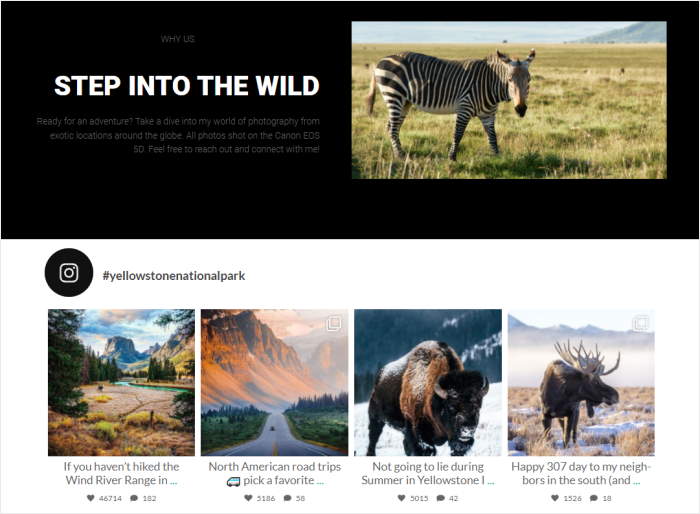
At the same time, you can also make your website more engaging when you show relevant Instagram posts.
In fact, embedding Instagram widgets in WordPress can help you in tons of more ways:
- Building trust: Your social photo feed makes your site look fresh and up to date. So, your customers can see that your business is active and thriving.
- Better engagement: It’s a great way to increase social engagement and get new followers so you can promote your business on Instagram better.
- Consistent branding: Your Instagram photos and videos can act as a branding element reinforcing your company’s image — and if you display user-generated Instagram images on your website, it’s a great way to use social proof to boost brand awareness.
- More sales: If you display shoppable Instagram posts or reviews widgets on your eCommerce website, you make it easier for your site visitors to discover your products and buy from you.
- Better SEO: When visitors enjoy your Instagram widget feed, they’ll spend more time on your site, especially if they click on the “load more” button on your Instagram feed. As a result, you can get much better SEO and reach tons of people.
- Save time and effort: Embedding an Instagram feed on your site means it’ll be automatically updated and show new posts every time you upload on Instagram. No need to upload separately on your website.
As you can see, there are many ways to give your business a boost when you display posts from Instagram on your site.
Pro-tip: Looking to display Instagram Reels on your website? Here’s a step-by-step tutorial on how to embed Instagram reels on WordPress.
Start Embedding Your Instagram Widget Now
Adding a live Instagram widget to your WordPress sidebar or footer keeps your site visually engaging.
From my experience helping users, what can seem like a technical task is made simple with Smash Balloon Instagram Feed Pro.
You can have a professional-looking Instagram widget displaying your latest posts in just a few minutes. No coding needed.
Here is what I recommend you do next:
- Get your copy of Instagram Feed Pro. (It includes our 14-day money-back guarantee!)
- Follow the easy steps in this guide to create and customize your Instagram widget
- Place the Instagram feed widget in your website’s sidebar or footer area
Do you have any questions about using Instagram Feed Pro to add an Instagram widget to your website? Please ask me in the comments below.
More Social Media Marketing Guides & Tips
- Want to display other social media feeds on your website? Check out this next article on how to add social media feeds to your WordPress.
- Interested in growing your business with Instagram? Here are the best Instagram WordPress plugins your website needs today.
- For easy Facebook growth, you can also read this next post on how to embed a Facebook feed on your website.
And if you enjoyed this article, feel free to follow us on Twitter and Facebook for more helpful tutorials.



good information to know, very helpful !!!!