Wondering how you can quickly display your Instagram feed on your Elementor website?
Adding your Instagram feed is a fantastic way to keep your site fresh, drive more engagement, and encourage visitors to follow you on Instagram.
With organic reach on Instagram getting harder to maintain, sharing your posts on your website helps you connect with a wider audience.
But getting your Instagram feed to appear perfectly in Elementor using the usual methods can be confusing and time-consuming. Especially if you’re not familiar with code or widgets.
I remember the first time I tried integrating my Instagram feed with Elementor. Since I was a WordPress newbie, it was hard for me.
With years of experience at Smash Balloon as a digital marketer helping users beautifully display Instagram feeds on their sites, I’ve found what truly works.
In this article, I’ll walk you through the exact steps I use to add my Instagram feed to Elementor in under five minutes. Yep, even if you’re new to the process or not tech-savvy!
In This Article
- What's the Easiest Way to Add Instagram Feeds to Elementor?
- How to Add an Instagram Feed to Elementor (Step by Step)
- Start Adding Your Instagram Feed to Elementor Now
- Popular Articles on Adding Social Feeds to Elementor
What’s the Easiest Way to Add Instagram Feeds to Elementor?
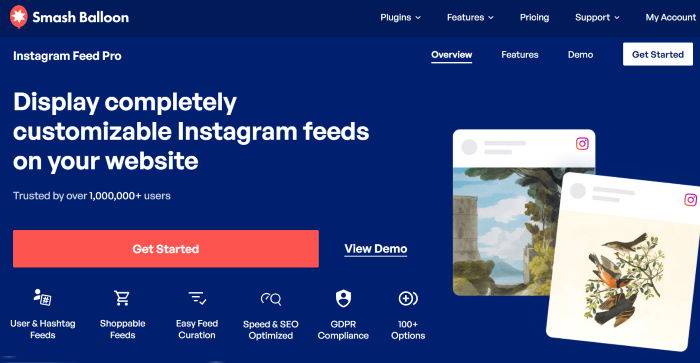
Out of all the options, I went with Instagram Feed Pro for this guide since it’s just that easy to use.
You don’t have to deal with complex embed codes or a long setup. In just minutes, you can create a beautiful Instagram feed and add it to your Elementor site.
In fact, there are a few great features that make this tool stand out from the competition.
- Easy & Fast Setup: Setting up Instagram Feed Pro only takes a few minutes with no coding needed.
- Lots of Feed Types: Instagram Feed Pro gives you different types of feeds to choose from. You can display hashtag feeds, Instagram reels, shoppable Instagram feeds and more.
- Shoppable Feeds: Instead of a simple link-in-bio, you can create shoppable Instagram feeds and link your products to Instagram posts and give your visitors a smooth shopping experience.
- Matches Your Branding: Plus, all the feeds you make with this plugin will automatically copy the looks of your website. You’ll get Instagram feeds that perfectly match your branding and WordPress theme — no extra effort needed.
- Responsive Instagram Feeds: This Instagram WordPress plugin automatically creates responsive Instagram feeds. This means your feeds look great and work well on any screen size and device.
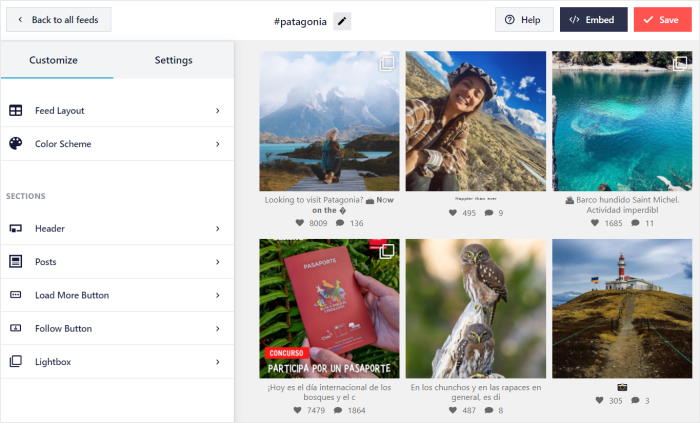
What I particularly appreciate about this best WordPress plugin for Instagram feeds is its visual feed customizer, which allows you to control both the design and the content of your Instagram feed with just a few simple clicks.
Plus, the tool is pretty lightweight, so I was able to add a ton of photos and videos to Elementor and the site was as fast as ever.
As a bonus, the other users seem to be happy with the plugin as well. Instagram Feed Pro has a rating of 4.9/5 stars from over 1 million users.
Pro-tip: Want to display Instagram content on Divi instead? Here’s how you can embed Instagram feeds on your Divi website.
Ready to give it a shot? You can get started with Instagram Feed Pro here!
How to Add an Instagram Feed to Elementor (Step by Step)
Adding an Elementor Instagram feed is actually pretty easy. Let’s go through the 5 simple steps to do that below.
Step 1: Install and Activate the Instagram Feed Pro Plugin
To get started, you can grab your copy of Instagram Feed Pro here. Next, you can just install and activate the plugin on your website.
If you want to see how that’s done, you can look at our guide on how to install WordPress plugins.
Step 2: Create a New Elementor Instagram Feed
After installing and activating the plugin, you can now use Instagram Feed Pro to create your new feed.
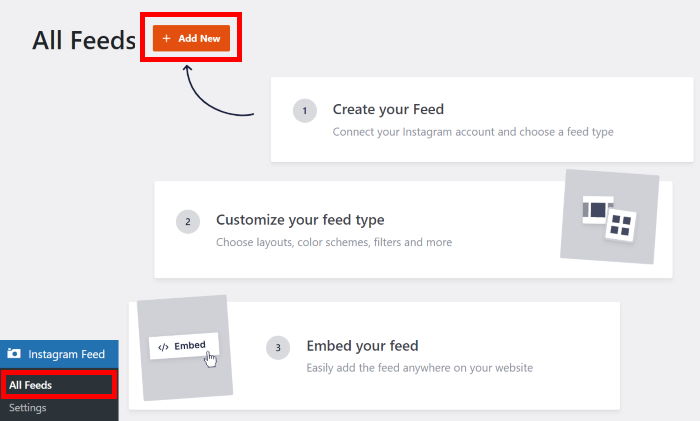
First, go to the Instagram Feed » All Feeds menu from your WordPress dashboard area.
Now click on the Add New button to get started.
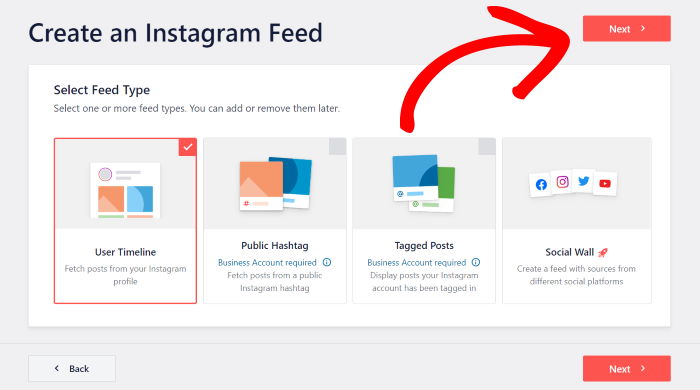
On the next page, you can select the type of Instagram feed that you want from these 3 options:
- User Timeline: Show your own Instagram posts
- Public Hashtag: Display Instagram photos and videos that have specific hashtags
- Tagged Posts: Embed posts that have tagged your Instagram account
Want to combine different Instagram feed types into a single feed? Just select multiple options here.
Finally, click on the Next button once you’ve chosen your Instagram feed type,
In this Elementor Instagram feed tutorial, I’ll use a user timeline feed. Selecting this feed type means Instagram Feed Pro will show posts from your own Instagram profile.
Step 3: Connect Your Elementor Instagram Feed to Instagram
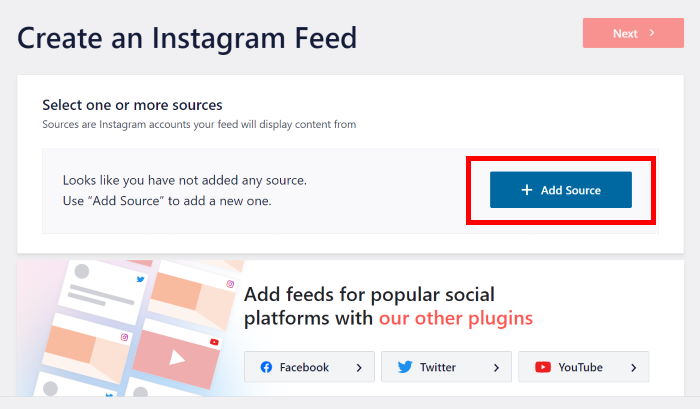
In this step, you can connect the new feed to your Instagram account so it can show photos and videos from Instagram on your website.
To get started, click on the Add Source button here.
Now, you can connect your business or creator Instagram account to your website.
In case you don’t have one already, check out this guide on converting to a business Instagram account.
Once your account is ready, you can choose between 2 types of connections:
- Business Basic: You can display content from your Instagram profile to get engagement and followers.
- Business Advanced: On top of your posts, you can show hashtag feeds, Instagram Reels, shoppable feeds, and much more.
Once you pick the option you prefer, click on Connect.
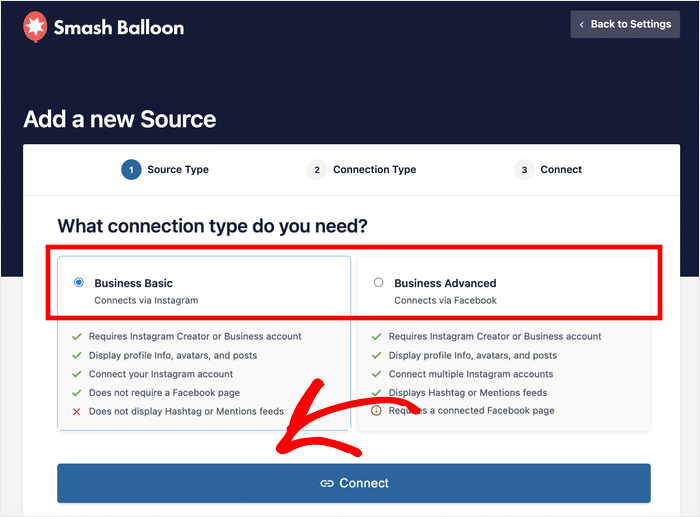
For this guide, I’ll go ahead and select the Business Basic type.
Next, click on the Connect with Instagram account.
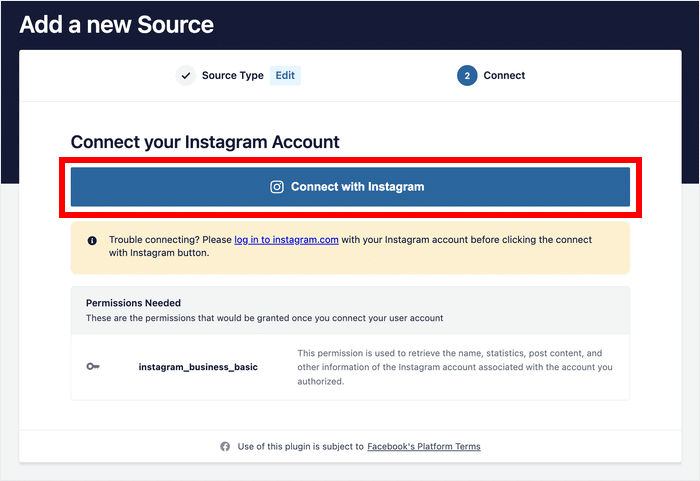
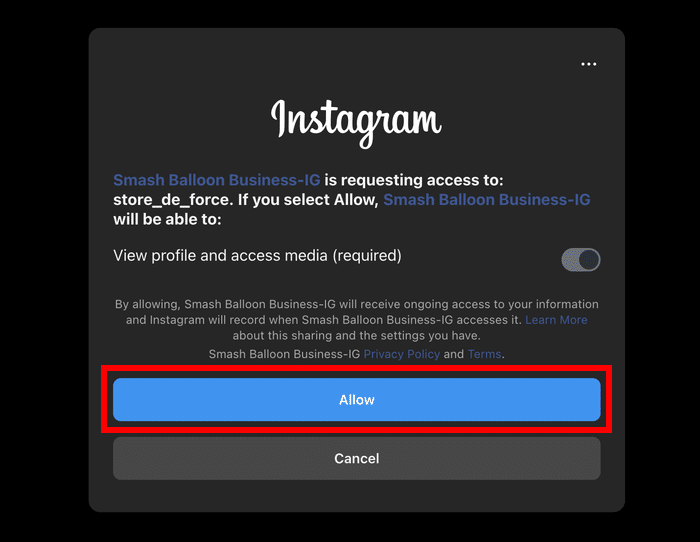
Next, you can give the plugin read-only access to your Instagram account.
This means Instagram Feed Pro can only see your content and can’t change anything, so this Smash Balloon plugin is completely safe. So click on Allow to give the read-only access.
And once you’ve done that, you can finally click on Next to finish connecting your feed to Instagram.
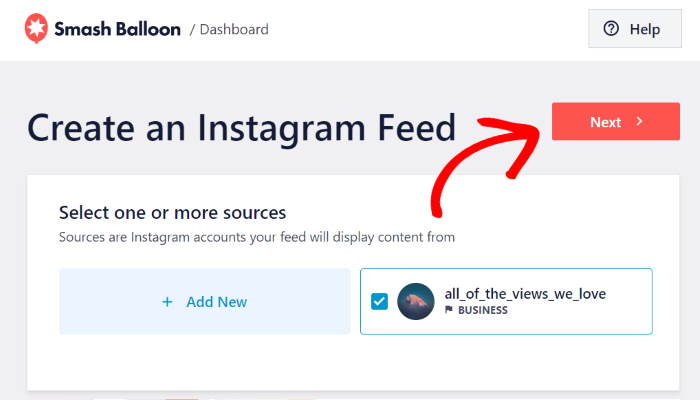
See how easy that was? You didn’t even have to manually create an Instagram access token. It only took a few clicks and your Instagram account is now connected to your feed.
Step 4: Customize Your Elementor Instagram Feed
Once you’ve connected your account, you can now move on and start customizing your feed.
The plugin will now open the live feed editor, where you can set your feed layout, color scheme, post layout, header style, buttons, spacing and more styling options on the left side.
You can then see a live preview of how your Instagram feed looks on the right.
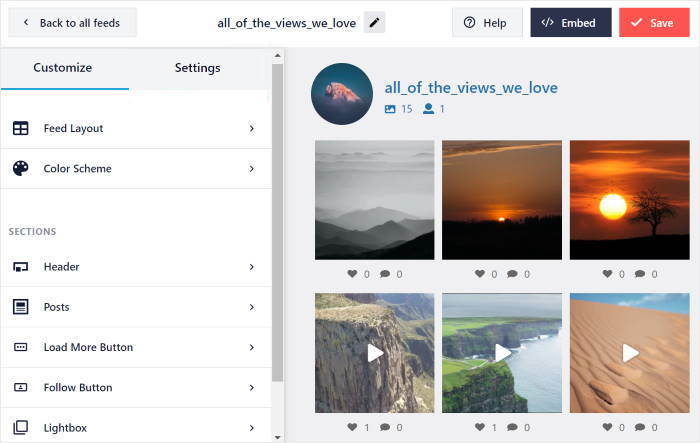
First, select the Feed Layout option on the left to start changing the layout of your Instagram feed.
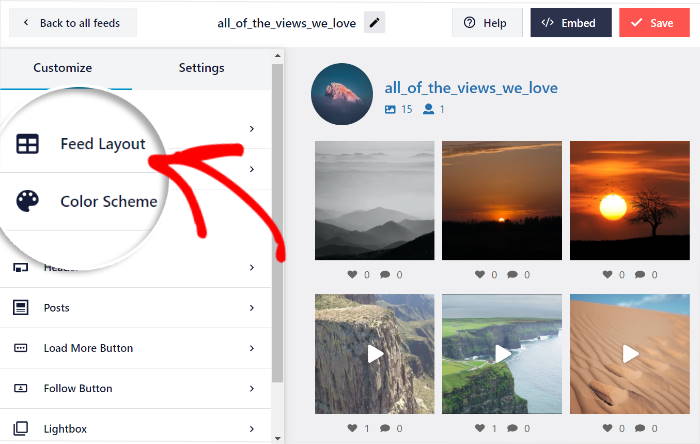
With Instagram Feed Pro, you have 4 different layout options here: Grid, Carousel, Masonry, and Highlight.
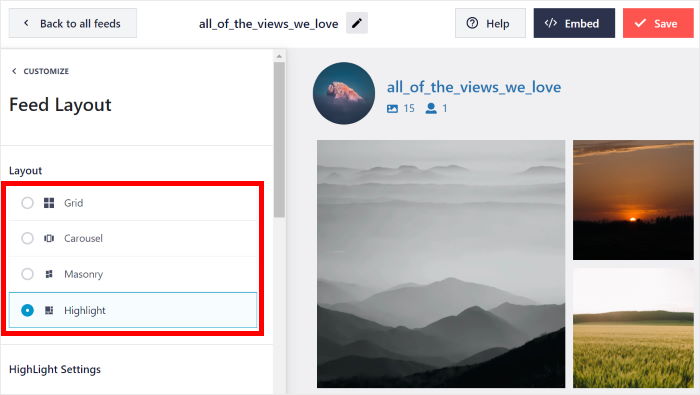
If you want to show lots of Instagram images at the same time in rows and columns, try the grid option.
I usually use the grid layout for my Instagram feed since I find that this gives my Instagram content a clean and uniform look.

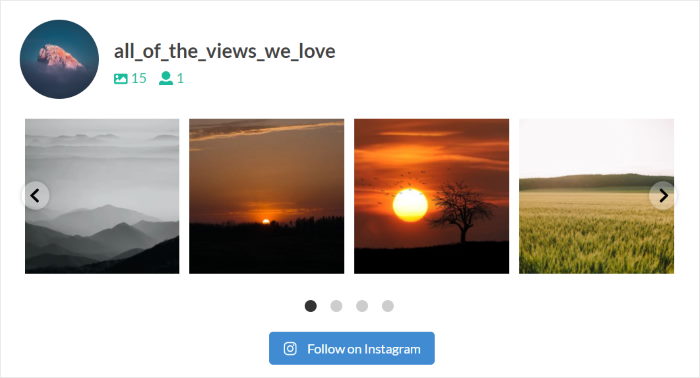
Do you want a dynamic way to show your Instagram posts? You can try using an Instagram carousel layout to show photos and videos then.
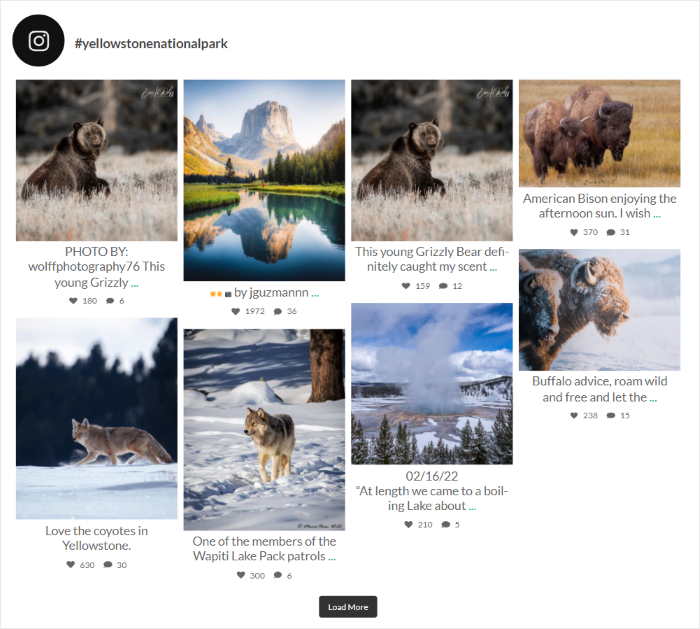
You also have the masonry layout, which can show photos and videos from your Instagram gallery in different columns while keeping their original proportions.
Finally, there’s the highlight option that will put more focus on your posts by removing the likes, comments, and captions.
In fact, this layout increases the size of specific photos and videos by 4 times.
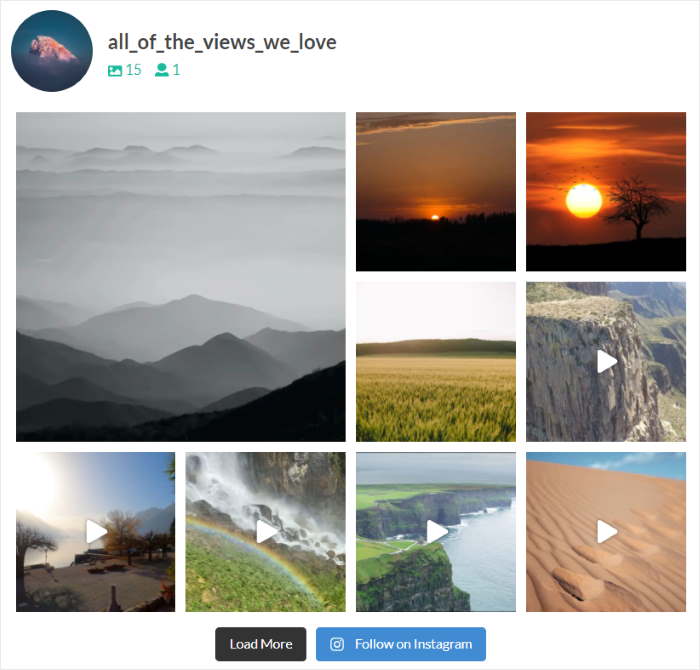
After selecting the Instagram feed layout you like, click on Save Changes.
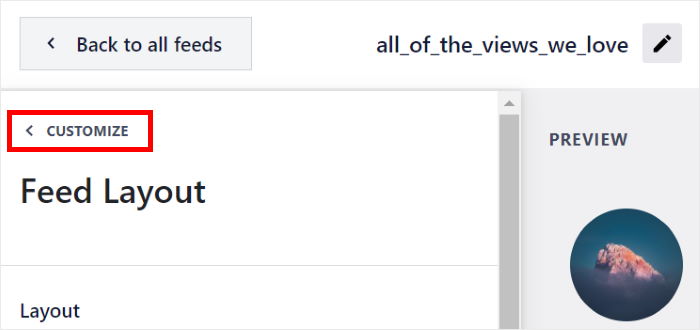
Now look for the small Customize button at the top and click on it to return to the main customization options.
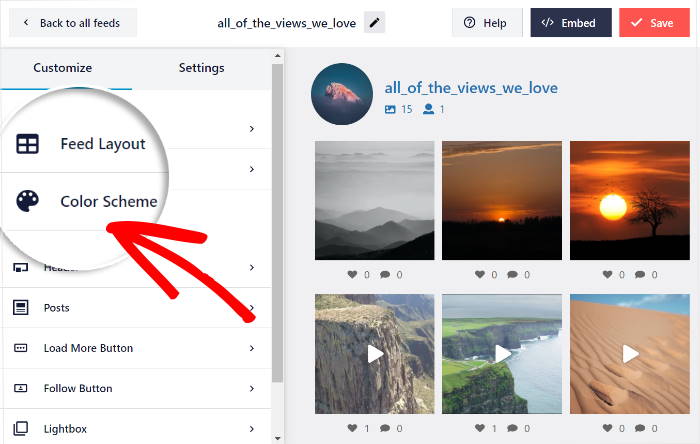
Now click on the Color Scheme option on the left to change the colors of your Instagram feed.
You can now pick from 4 different color schemes for your new Instagram feed here:
- Inherit from Theme: Easily the colors of your website’s theme
- Light: Showcase a light background along with a dark font
- Dark: Pick a dark color for the background and a light-colored font
- Custom: Choose all the colors of your Instagram feed
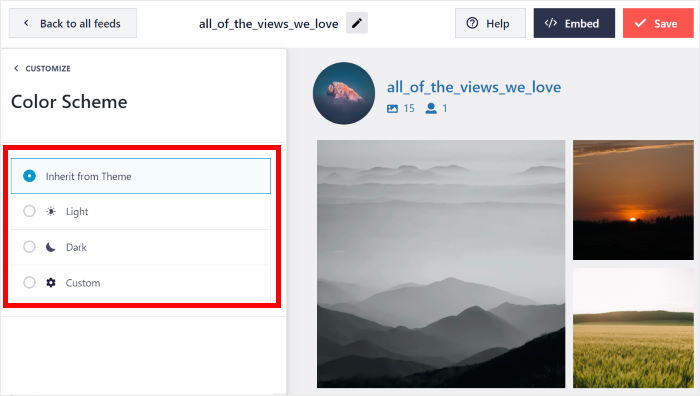
Just pick your color scheme from the options and click on Save to keep your changes.
After that, you can customize your header layout, post style, load more button, lightbox design, and much more using Instagram Feed Pro’s live feed editor.
Finally, click on Save to confirm your changes after customizing the rest of your Instagram feed.
As you can see, the customization is pretty easy with Instagram Feed Pro. So, you can have feeds that look just the way you want without any complex coding needed.
Step 5: Add Your Instagram Feed to Elementor
Once you’re done customizing, it’s time to add your Instagram feed to Elementor.
With Instagram Feed Pro, it’s easy to display your Instagram feed on any Elementor page such as coming soon page, optin page, sales page and more.
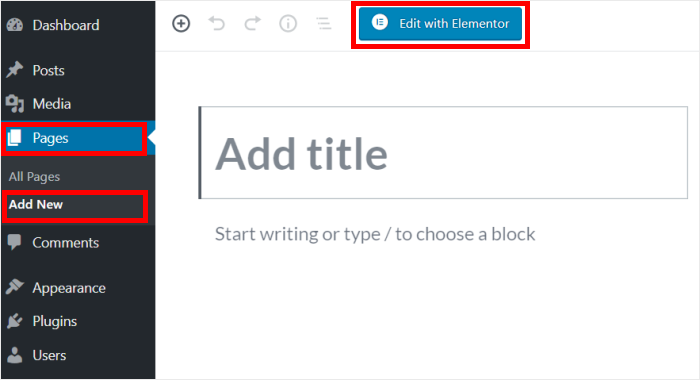
To get started, go to the Pages » Add New menu from your dashboard to create a new WordPress page.
After that, just click on the Edit with Elementor button at the top.
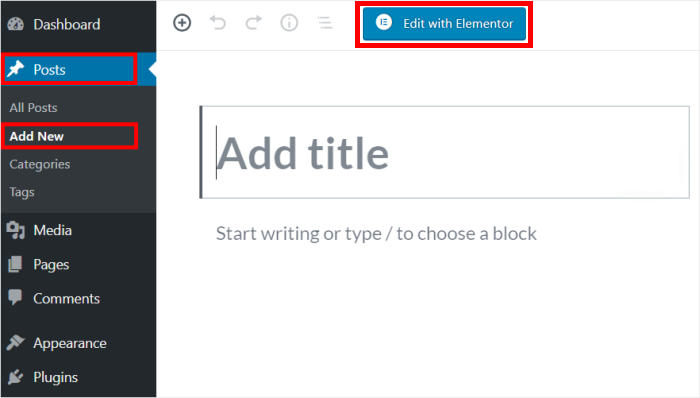
You can also use a WordPress post here instead. To do that, go to Posts » Add New from your dashboard and select Edit with Elementor.
For this example, we’ll use a WordPress page.
Towards the right of the Elementor editor, you can see a live preview of your web page. And on the left, you can find all the Elementor widgets that you can add to your page.
For the next step, just go to the search field on the left and type in “instagram.”
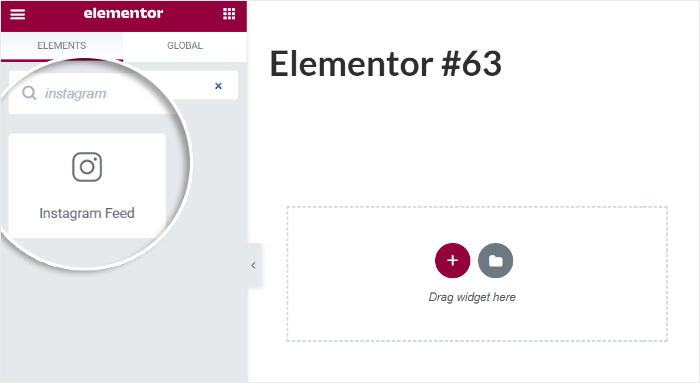
And below that, you should see the Instagram Feed widget in the search results.
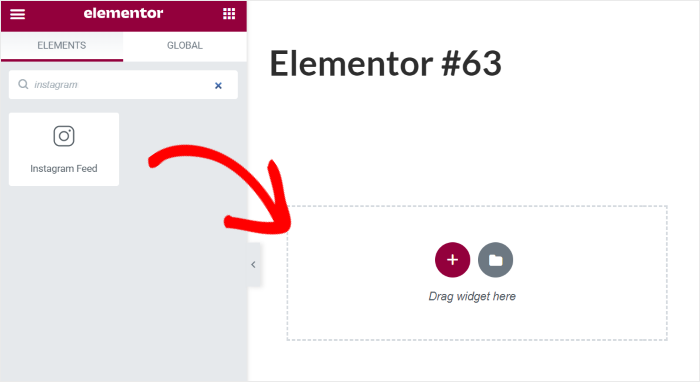
Now all you have to do is drag the widget and drop it on the right.
You can now see the settings for the Instagram feed widget on the editor.
Here, use the dropdown menu to select the Instagram feed you created earlier.
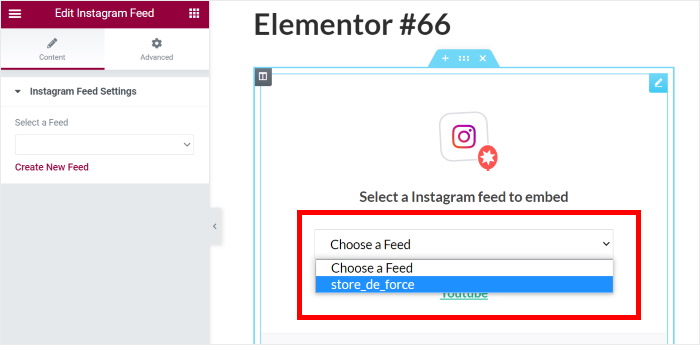
Finally, click on the Publish button to finish it up.
You’ve now added your Instagram feed to Elementor! Just check your website and see how it looks.

And that’s it!
As you can see, it’s pretty easy to add your Instagram feed widget to Elementor. Using the Instagram Feed Pro plugin, all it takes is a few simple clicks — no need to touch a single line of code.
And now, you can do it for your site and create engaging pages to boost conversion and get more sales.
Why Add Your Instagram Feed to Elementor?

Elementor is a popular landing page builder plugin for WordPress.
With its simple editor, you can create web pages such as 404 pages, maintenance mode pages, sales pages and other landing pages, so you can engage your audience even if you’re a new WordPress site owner.
And you can also add Instagram feeds to your Elementor pages to improve them. You can get more Instagram followers, conversions, and sales for your business that way.
Here are a few reasons you should add an Instagram feed to your Elementor page:
- You can show reviews and testimonial Instagram posts on your ecommerce site. When people see others enjoying your products, it works as social proof and makes them more likely to buy from you.
- By adding a feed of your Instagram profile to WooCommerce, you can show relevant images and full videos on your website. So, you can make your pages more engaging even without uploading these images and videos to your site.
- Embedding your own Instagram posts on your site means more people can see them. And that can get you more Instagram followers.
- Instagram feeds can also give your visitors an amazing online shopping experience. You can add shoppable Instagram feeds to your site and directly sell your products.
As you can see, Elementor Instagram feeds can help you promote your business and get more sales in lots of ways.
Want to embed Instagram feeds on your Elementor site? Get Instagram Feed Pro today!
Do you have reels? Here’s a helpful post on how you can get more views on your Instagram reels.
Start Adding Your Instagram Feed to Elementor Now
Adding an Instagram feed to your Elementor site is a fantastic way to keep your content fresh and engaging.
From my experience, trying to do this with manual embeds or complex widgets can be frustrating.
That’s why I recommend Smash Balloon Instagram Feed Pro. It simplifies the entire process, letting you create a beautiful, customized feed in just a few minutes, no coding required.
Here’s how you can get started:
- Get Instagram Feed Pro here and try it risk-free for 14 days to start adding your Instagram feed to Elementor the easy way
- Create a stunning feed using the visual editor to perfectly match your website’s style and branding
- Seamlessly add your feed to any Elementor page with the simple drag-and-drop widget
Do you have any questions about using Instagram Feed Pro with Elementor? Please let me know in the comments below.
Popular Articles on Adding Social Feeds to Elementor
- How to Embed YouTube Playlist on Elementor (Best Way)
- How to Add Your Twitter Feed to Elementor
- How to Add a YouTube Video Gallery for Elementor
- How to Add Tripadvisor Reviews to Elementor
- How to Add Social Media Feeds to Elementor [For Newbies]
