Social Wall
  Feed Analytics

Looking for an easy and hassle-free way to embed your Instagram on your website?
Instagram is where a lot of your audience already spends time, but most of that never makes it back to your site. Meanwhile, most of your website visitors never even see your Instagram.
You’re basically running two separate audiences that never meet.
Embedding your feed closes that gap. It keeps your pages fresh and gives both audiences a reason to cross over.
I’ll walk through both options below: the manual way, in case you just need to embed a single post, and the plugin method, which is what I’d recommend if you want a full feed that keeps itself updated.
Why Display Your Instagram Posts on Your Website?
Adding Instagram content to your site connects two audiences that usually never meet: the people browsing your website and the people following you on Instagram. Once your feed is live, each side gets pulled toward the other.
Here’s what that looks like in practice:
- Longer visits: Photos and videos give people a reason to stick around instead of bouncing
- More followers: Visitors browsing your site can hit follow without ever leaving it
- Better search rankings: Fresh, regularly updating content gives search engines more to index
- Stronger trust: Real posts and mentions from your audience act as social proof for new visitors
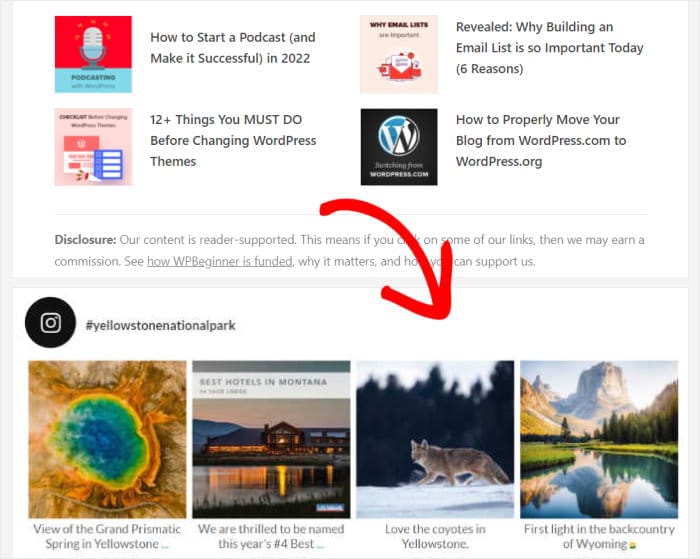
Method 1: Manually Add Instagram Posts to WordPress
To add Instagram posts to your WordPress website using the manual method, you can go through these steps:
- Step 1: Open the Instagram post that you want to embed
- Step 2: Click on the 3 dots icon in the top-right corner
- Step 3: Select the Embed option from the menu
- Step 4: Click on the Copy Embed Code button
- Step 5: Return to your website and open a page or post
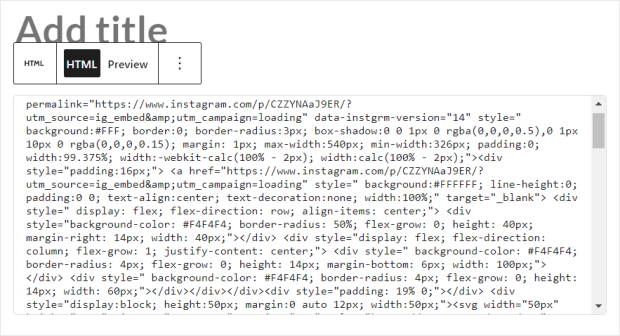
- Step 6: Insert the Custom HTML block
- Step 7: Paste the copied Instagram embed code
While you can do all this without a plugin, this method also comes with some downsides:
- No dedicated support team to help if the embed code breaks or stops working
- Stuck with Instagram’s default branding and styling, which can clash with your site’s design
- No SEO benefits, since search engines can’t read content inside an iframe
Method 2: Embed Instagram Feed with a Plugin (Recommended)
A plugin is the simplest way to get this done. For Instagram specifically, Instagram Feed Pro handles the heavy lifting: no code, no guesswork, and no need to be technical.
Most people have their feed live in under 5 minutes.
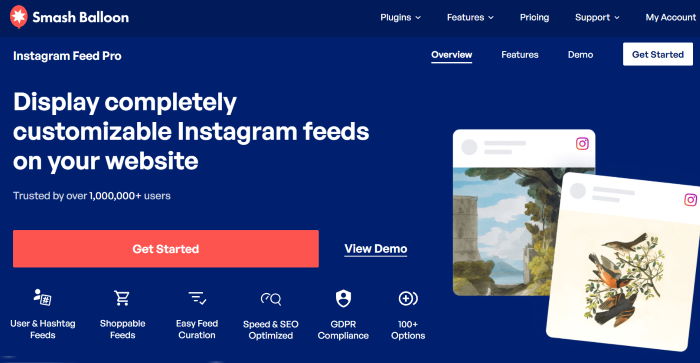
In fact, it comes with a collection of useful features to help you embed feeds with ease:
- To create Instagram feeds in record time, you can simply follow the 3-step guide. You can then invest the saved time back into your business.
- You get tons of different types of Instagram content to choose from: Instagram timeline feed, hashtag feeds, tagged posts, Reels, and more.
- To help you boost conversions and get more sales, you can embed a shoppable Instagram feed on your site.
- Instagram Feed Pro is lightning fast since it efficiently retrieves data from Instagram’s API to minimize its loading time. So, it won’t slow down your website’s performance at all.
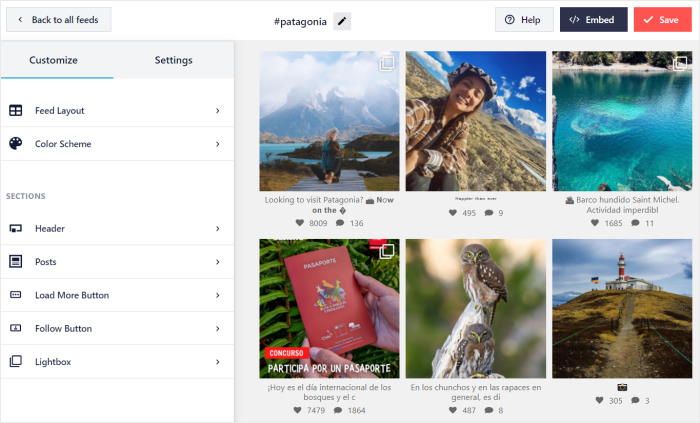
- Instagram Feed Pro is so user-friendly that you can customize your Instagram feed in a few clicks using the live feed editor.
The plugin helps over 1 million active users embed Instagram content on websites worldwide.
And with its 4.9/5 solid star rating, you know you’re in great hands because Smash Balloon’s fast and friendly support team is always ready to help you out.
Ready to embed Instagram feeds in WordPress? Get your copy of Instagram Feed Pro today!
Step 1: Install the Instagram Feed Pro Plugin
The first step is to get your own copy of Instagram Feed Pro here. Next, download the plugin to your computer.
After downloading the plugin, you just need to upload it to your WordPress website and install it.
Don’t worry if you’re not sure how to do this. You can always check out this post on how to install a WordPress plugin for your guide.
Step 2: Create an Instagram Feed
With the Instagram Feed Pro plugin, you can create a new feed in just a few simple steps.
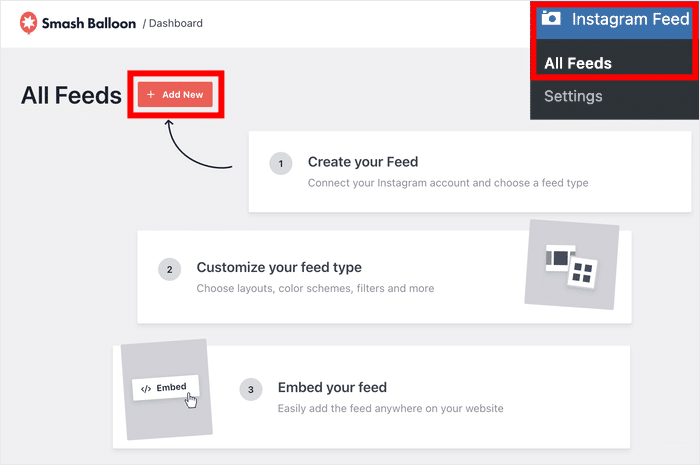
First, visit your WordPress dashboard and go to the Instagram Feed » All Feeds menu.
On this page, click on the Add New button at the top.
To continue embedding Instagram content into your website, you can now choose the Instagram feed type.
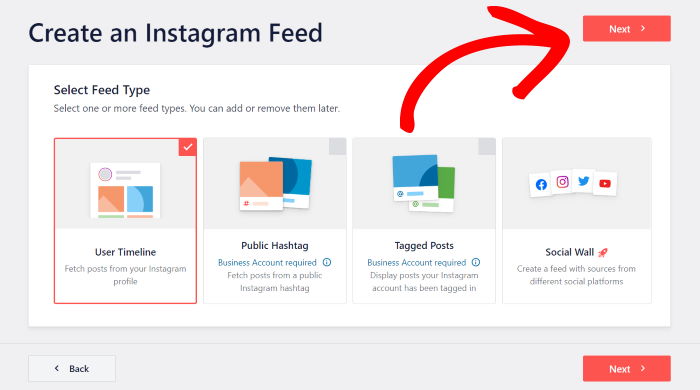
Instagram Feed Pro allows you to choose from 3 feed types:
- User Timeline: Embed an Instagram feed from your account, so only the photos on your profile will be shown.
- Public Hashtag: Embed an Instagram feed from a public hashtag of your choice. This can be a branded hashtag so you can display Instagram testimonials on your site.
- Tagged Posts: Embed an Instagram feed of photos where your Instagram account is tagged in by other active users.
You can also combine multiple Instagram feeds and display them as a single embedded Instagram feed by selecting multiple options here.
Once you’ve selected the Instagram feed type, click on Next.
For this specific tutorial, I’ll go ahead and pick the user timeline option.
Step 3: Connect Your Instagram Account
Before you connect your Instagram account, you’ll have to make sure it’s a business or creator account.
In case you don’t have one already, you can check out this post on how to convert your Instagram account to a business profile.
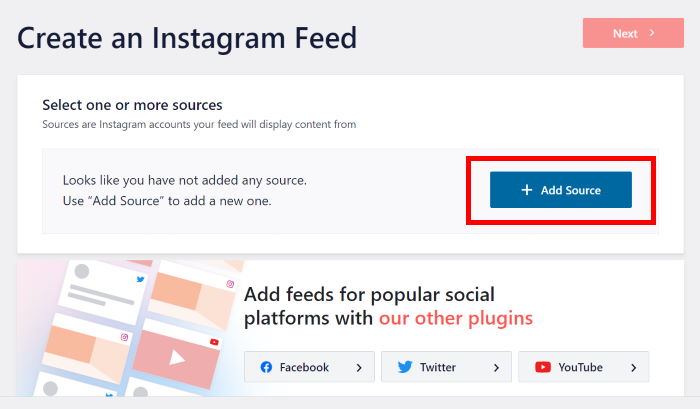
On this page, click the blue Add Source button to get started.
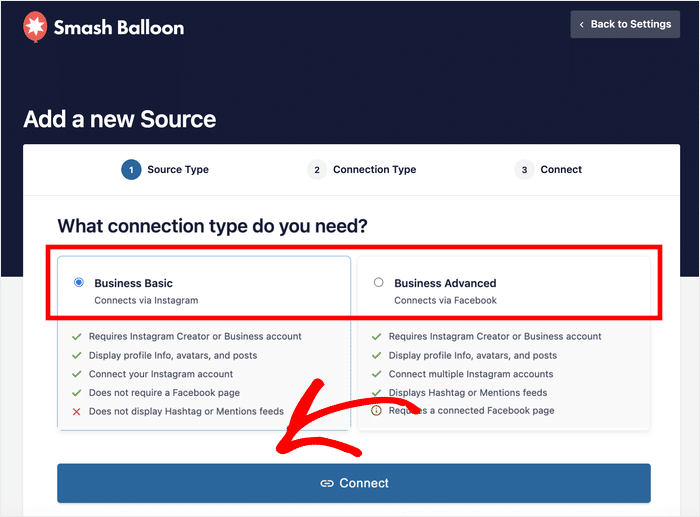
Then, you’ll be asked to choose between a basic or advanced connection type.
- Business Basic: Show photos from your own Instagram account on your website
- Business Advanced: Display more types of content, such as hashtag feed, and shoppable Instagram feed
Once you select your Instagram account type, click on Connect.
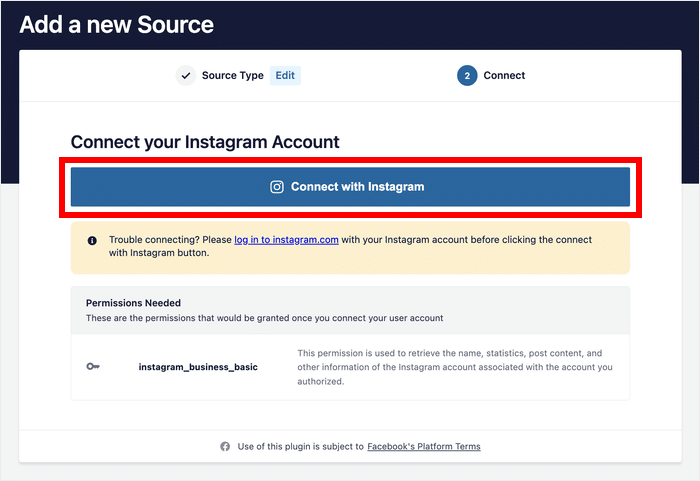
After that, you can open either Instagram or Facebook to finish connecting your account.
For now, I’ll click on the Connect with Instagram button.
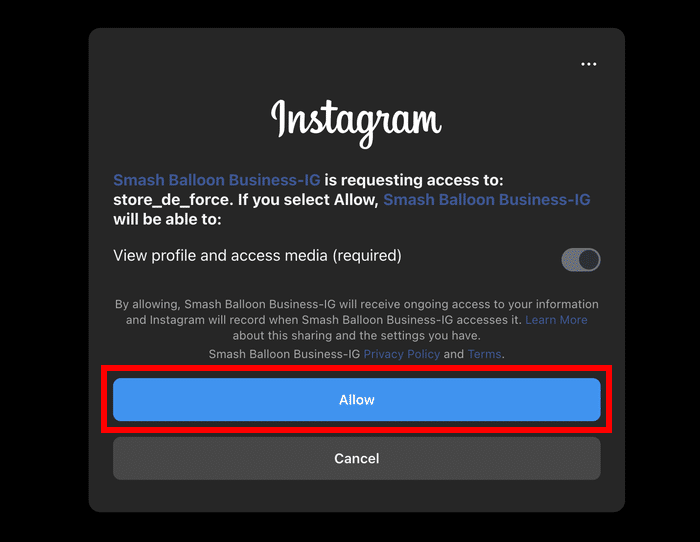
The plugin will now send you to Instagram, where you can give read-only access to your account.
Instagram Feed Pro is completely safe since it can use this access to view your info and doesn’t have permission to make changes.
To continue, just click on the Allow button on the popup.
With that, Instagram Feed Pro will bring you back to your website once again.
Here, click on Next to confirm this Instagram account as the source for your new Instagram feed.
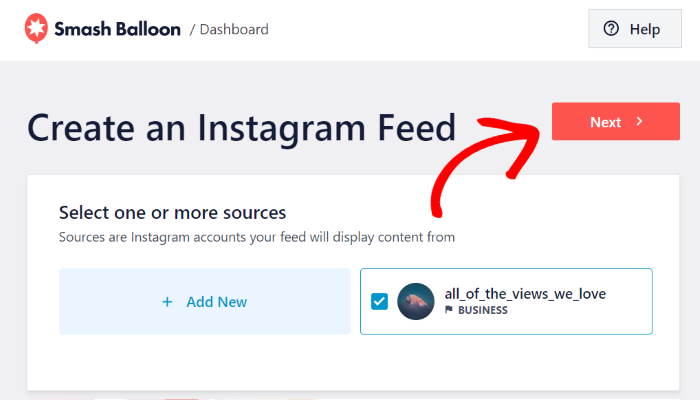
Step 4: Customize Your Instagram Feed’s Design
You already did the hard part. Keeping it updated is easy.
Smash Balloon Instagram Feed Pro refreshes your feed automatically as you post, so new photos show up without you editing anything. Try it risk free with our 14 day money back guarantee.
Automate My Instagram FeedTo help you create beautiful Instagram feeds with ease, Instagram Feed Pro comes with professionally designed themes that you can import.
In fact, you have 5 different themes with unique designs that you can use for your feed:
- Default: Clean and minimal, lets the photos do the talking
- Modern: The full package, profile info up top and post details on every card
- Social Wall: Feels like scrolling a live feed, dates and colored icons included
- Outline: Social Wall’s look, with a direct link back to Instagram on every post
- Overlap: Same rich post details as Modern, with a bigger, more prominent header
All you have to do is select the theme that you prefer and click on the Next button.
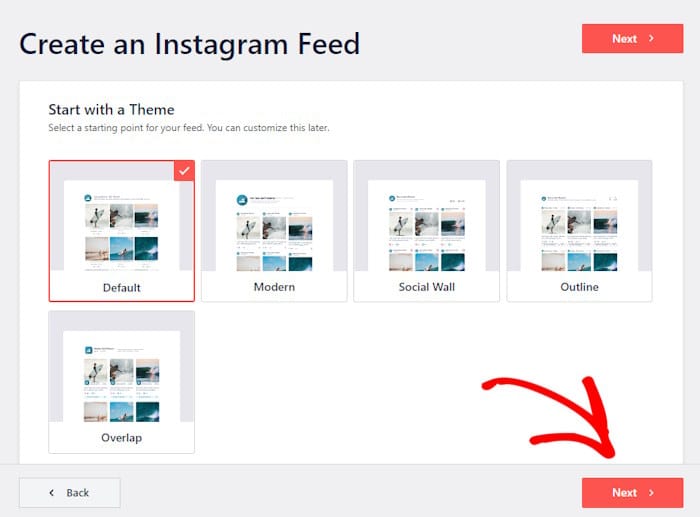
Just like that, the plugin will automatically import the theme’s design for your feed. On top of that, you can import a template to change the layout of the Instagram posts on your feed.
Like before, select the template that you prefer and then click on Next.
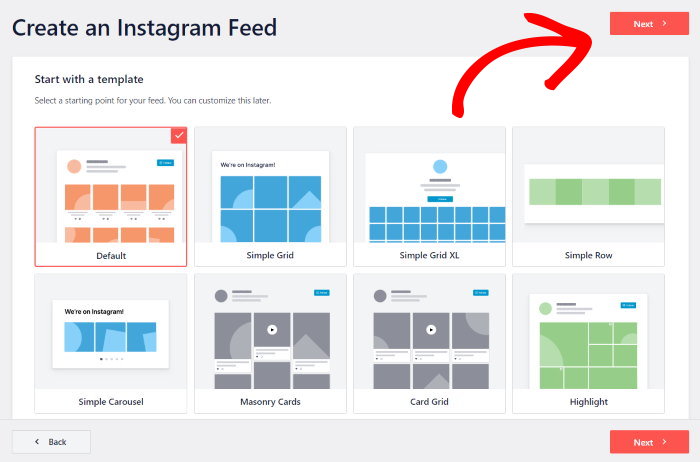
The plugin will now open the live feed editor so you can personalize your Instagram feed’s design with ease.
First, check out the customization options on the left panel. From here, you can control your Instagram feed’s size, layout, color, header style, design, and much more.
Whenever you make any changes, you can see how it looks using the real-time preview on the right.
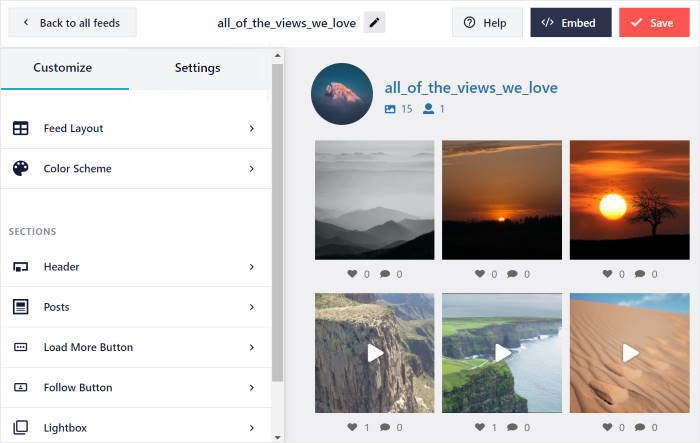
To get started with the customization, I usually change the layout of the Instagram feeds.
For that, click on the Feed Layout option on the left.
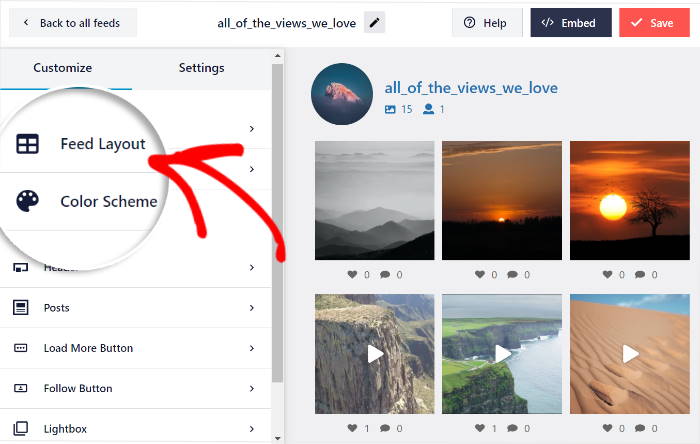
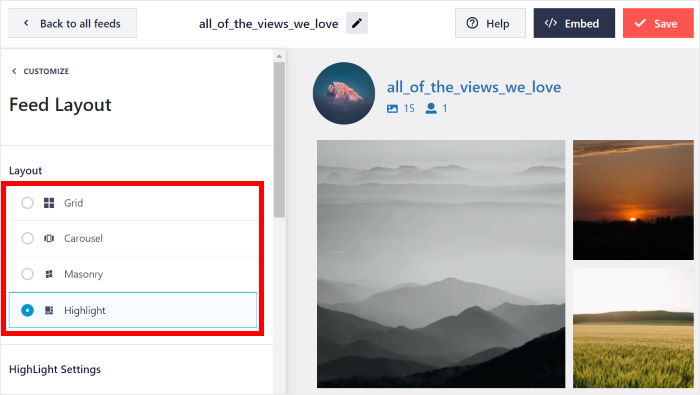
Now, you can choose from 4 different layouts for your Instagram feed: Grid, Carousel, Masonry, and Highlights.
Let’s take a look at each layout in detail.
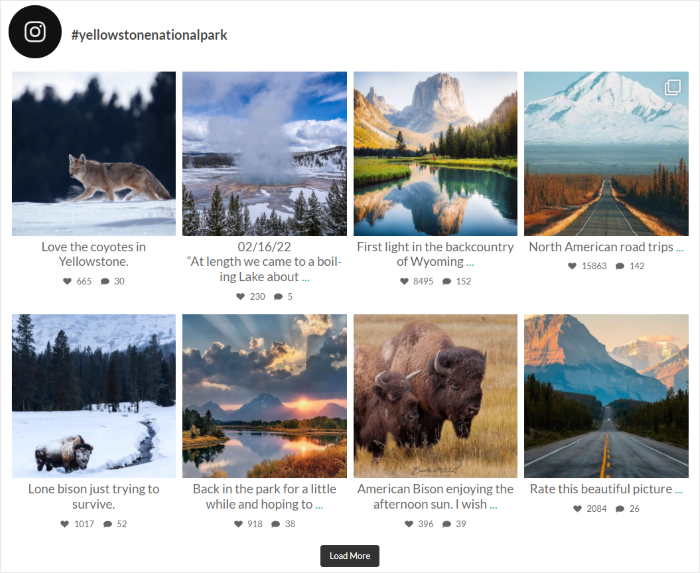
Choose the grid layout to showcase your Instagram feed as an organized collection of square-sized images, like this:
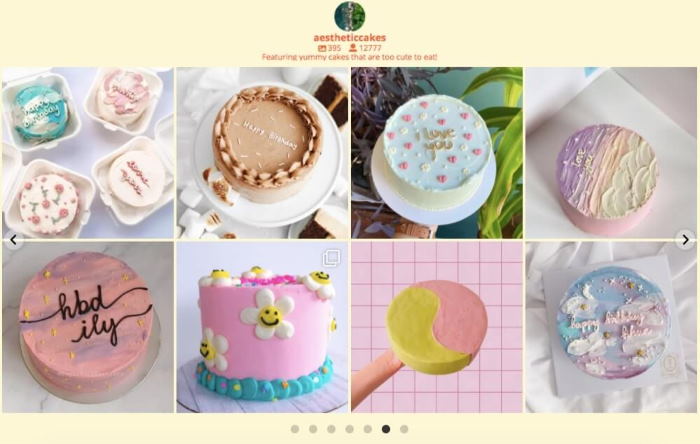
Want to display an Instagram carousel feed? You can choose the carousel layout to showcase your Instagram photos in a scrolling horizontal feed.
For Instagram users interested in displaying an Instagram gallery, the masonry layout is the best choice for you.
This way, your Instagram photos are showcased in their original proportions.
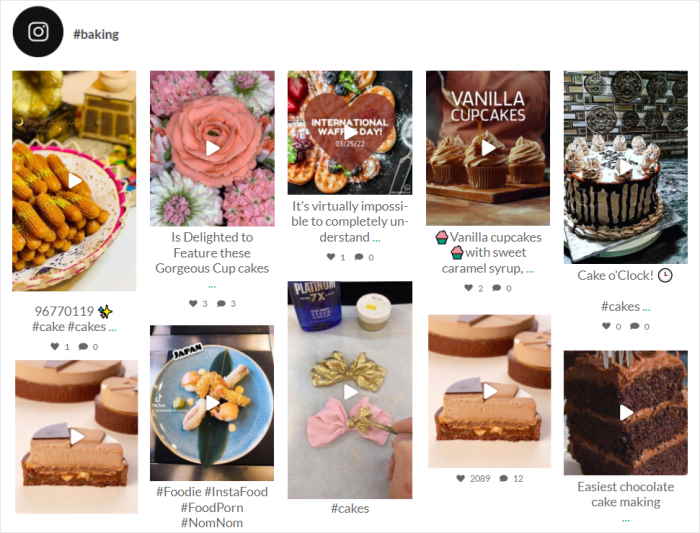
Finally, if you want to emphasize specific Instagram photos in your feed, you can choose the highlight option.
Since highlighted photos are shown twice as large in your feed, this layout is helpful if you want to capture your audience’s attention.

Select the layout type that you prefer, and then click on the Save button at the top.
Next, click on the small Customize button to return to the main options.
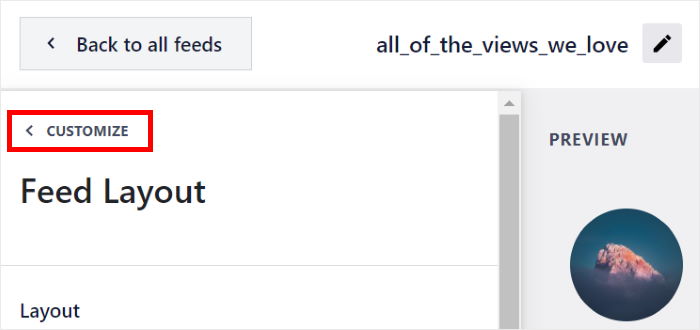
Now, let’s go ahead and change the colors of your new Instagram feed.
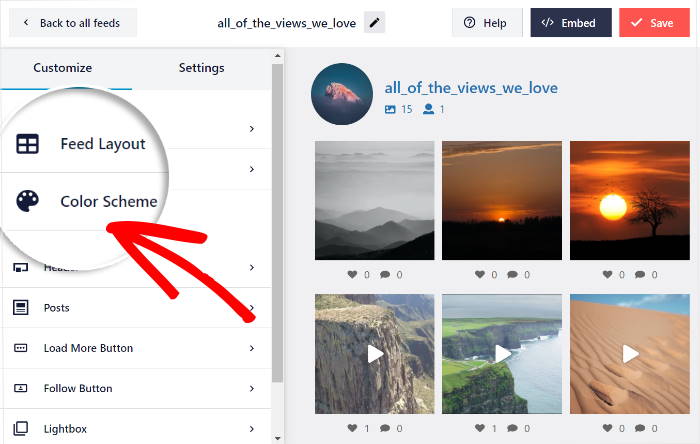
First, click on the Color Scheme option on the left.
Inherit from Theme pulls your site’s existing palette automatically, which is the fastest option if you don’t want to think about it.
Light and Dark will flip your background/font contrast.
Custom is the one to use if your brand has a specific hex code you need to match exactly.
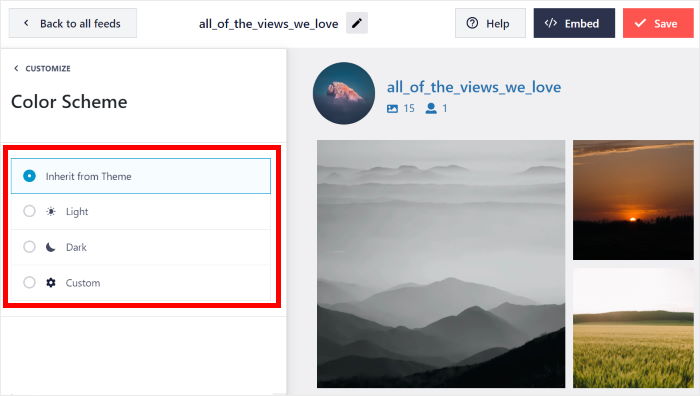
Just select the option that you prefer from here and then click on the Save button to confirm your changes.
With the live feed editor, it’s super easy to customize the rest of your Instagram feed. In just a few clicks, you can set your header style, follow button, lightbox options, feed size, and much more.
After customizing your Instagram feed, remember to click on the Save button once again.
Step 5: Embed Your Instagram Feed on Your Website
Smash Balloon works seamlessly with both Instagram and WordPress, so it’s pretty easy to add your Instagram content to your website.
You can choose between adding your Instagram feed to a WordPress page or to your website’s sidebar area.
Display Instagram Feed on WordPress Page
Using the live feed editor, you can easily add your Instagram feed to a WordPress page.
Click Embed at the top of the editor.
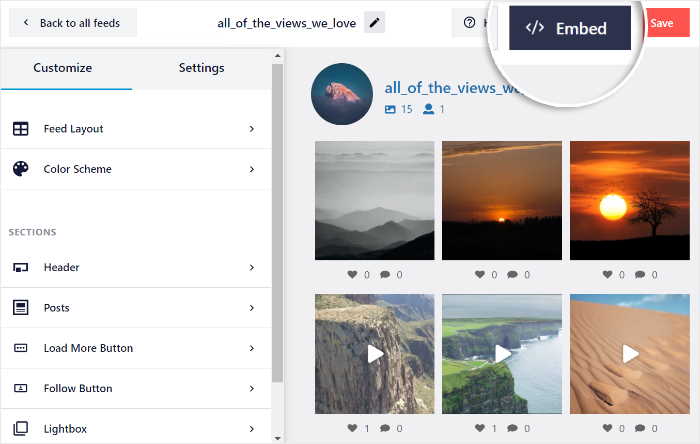
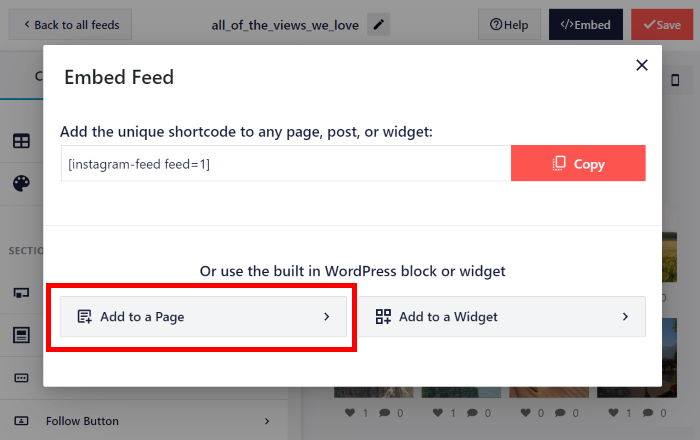
You can now see a popup where you can set the location of your Instagram feed.
Just click on the Add to a Page option for now.
Pick the page you want from the list and hit Add.
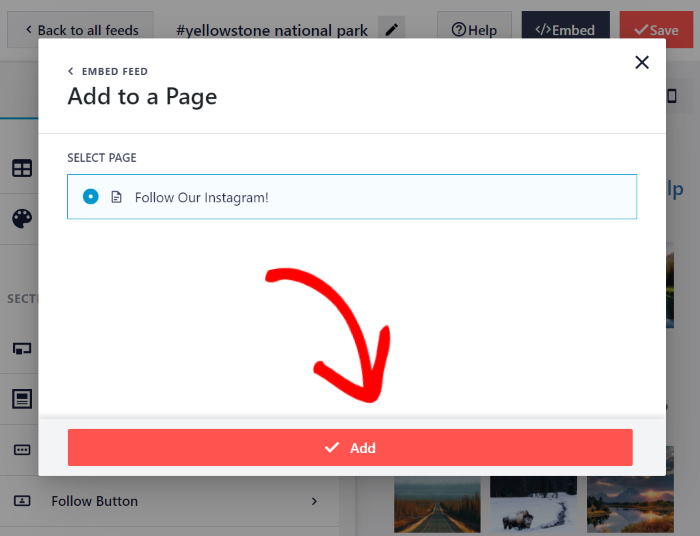
That drops you into the WordPress editor, ready for the next step.
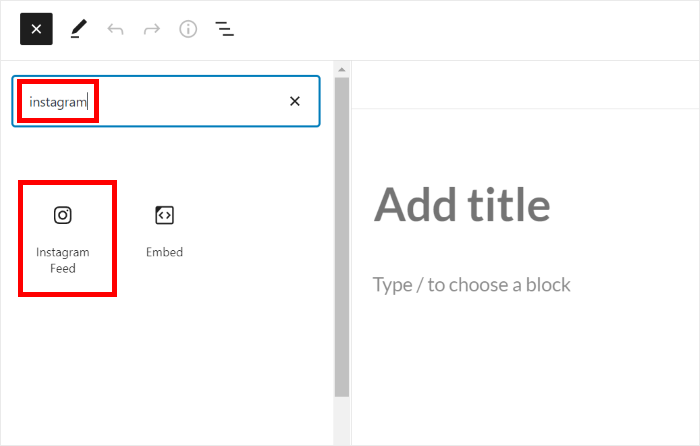
Click the Plus (+) icon on the editor so you can add a new WordPress content block.
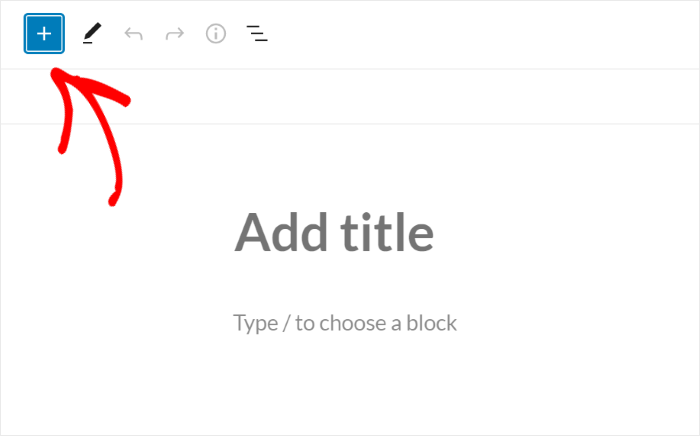
Then, search for “instagram” and click the Instagram Feed block to add it to your page.
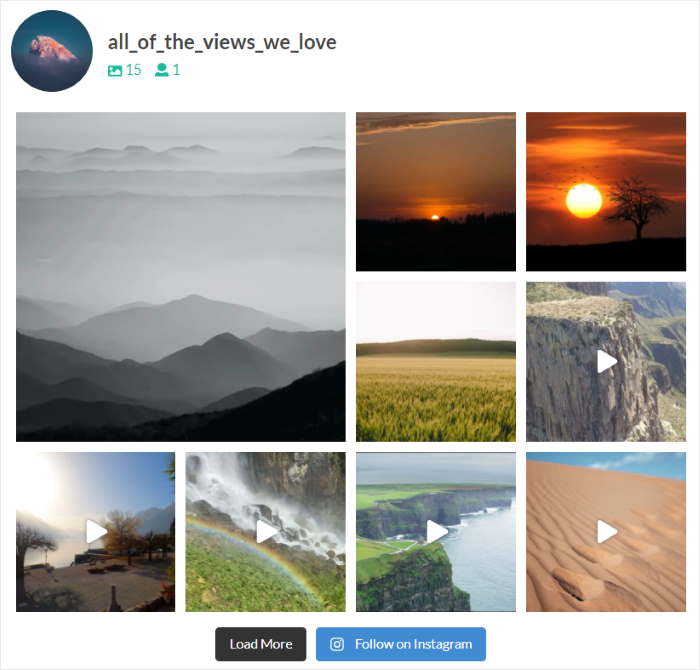
You’ll see a preview of your Instagram feed on your page editor. Finally, click on Publish to make your new Instagram feed live on your website.
With that, let’s move on and take a look at the second method of embedding your Instagram feed.
Display Instagram Feed on WordPress Sidebar or Footer
To embed your feed on your website’s sidebar or footer, first, open your feed in the live feed editor.
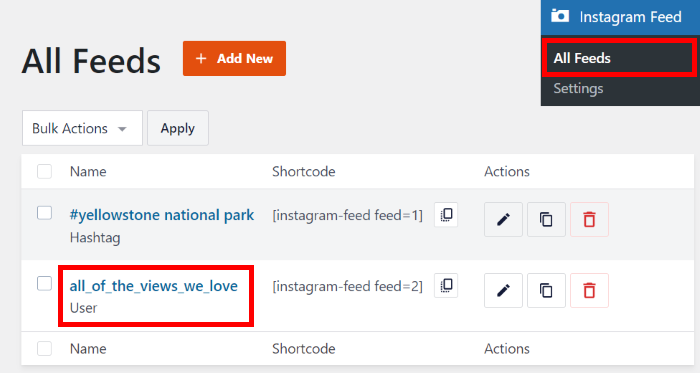
For that, you can navigate to Instagram Feed » All Feeds from your WordPress dashboard.
On this page, you can click on the Instagram feed that you created earlier.
This will open the feed in the plugin’s live feed editor once again.
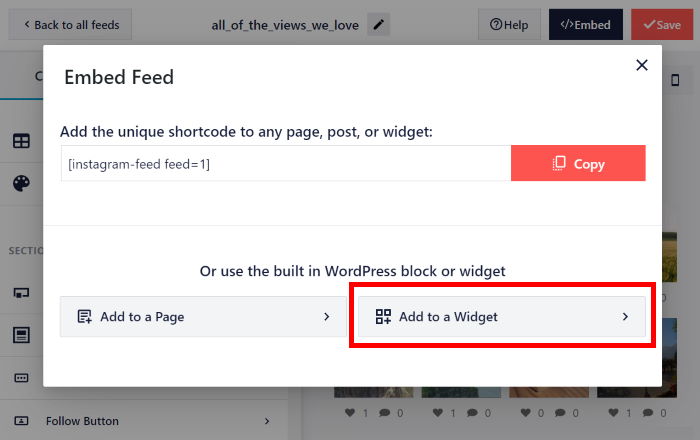
From here, click on the Embed button to continue.
Next, click on the Add to a Widget button on the popup.
This will open the widget page of your WordPress site.
From here, you can add your new feed to your sidebar or footer as an Instagram widget.
You can now click on the Sidebar panel to manage the widgets on your sidebar.
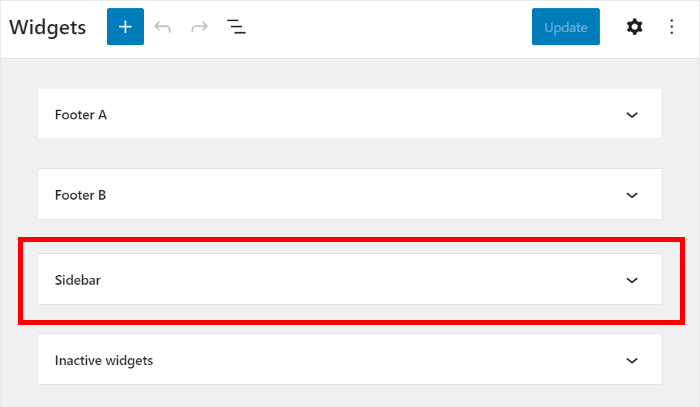
Alternatively, click on the Footer panel if you want to start managing your footer widgets.
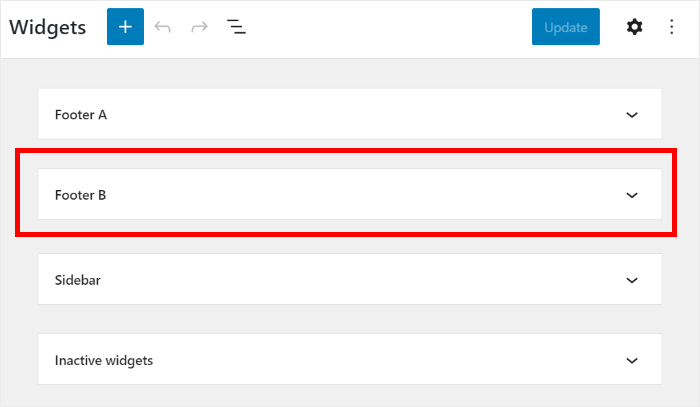
For our tutorial, we’re going to use the WordPress sidebar.
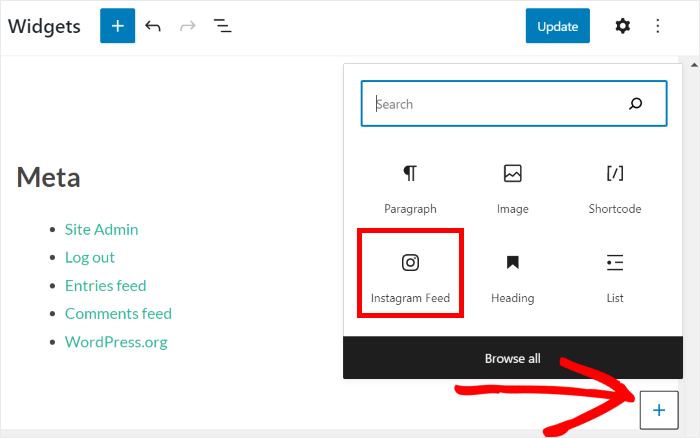
Finally, click on the plus (+) icon to add a widget, and then click on the Instagram Feed widget to embed your feed.
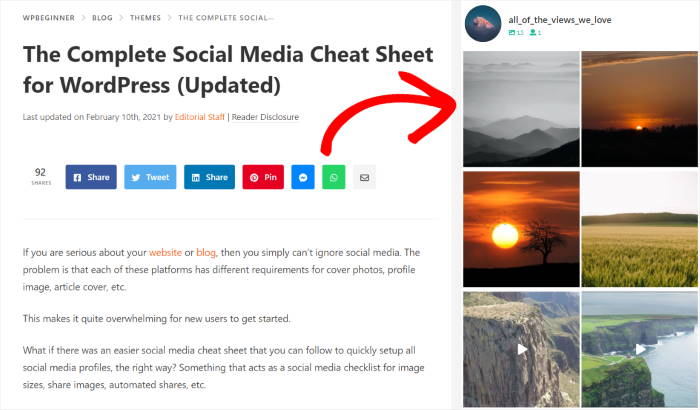
Doing this makes your Instagram feed live on your website’s sidebar. As a result, you’ll see this example when you visit your website:
So, there you have it!
Your Instagram feed is now live, and every new post you make will show up automatically without you touching the plugin again.
As a result, you can enjoy more followers and more sales for your business in no time at all. Better yet, you can do all that and more with absolutely zero coding.
Ready to embed Instagram feeds? Get started with Instagram Feed Pro today.
While you’re here, you can also take a look at our guide on how to get more views on Instagram reels.
The manual method works, until you have to do it again for every post
Backed by a 14 day money back guarantee, Smash Balloon Instagram Feed Pro handles the reconnecting and updating that the manual method leaves entirely on you.
See the Easier MethodMore Instagram Marketing Tips and Tricks
- How to Embed Instagram Feed in WordPress for FREE (NO Code)
- How to Add Social Media Feeds to Elementor
- How to Embed Instagram Posts on WordPress Sites
- Clever Types of Social Media Posts to Engage Your Followers
- Hacks to Get More REAL Followers on Instagram [Fast]
And if you found this post useful, feel free to connect with us on X (Twitter) and Facebook for more helpful tutorials.