Looking for a way to add Smash Balloon Instagram feeds to Elementor?
As the most popular page builder, Elementor is the go-to choice for many people who want to build beautiful pages for their site.
And adding an Instagram feed is an easy way to make those pages even more engaging for your visitors.
Today, I’m going to show you the easiest way to add Instagram feeds to Elementor.
- Why Use Instagram Feeds With Elementor?
- Easiest Way to Add Instagram Feeds to Elementor
- How to Add Your Smash Balloon Instagram Feeds to Elementor
- Popular Posts on Embedding Social Feeds on Elementor
Why Use Instagram Feeds With Elementor?
Elementor is a page builder plugin that allows you to create pages for your WordPress site. Since it’s all done through a drag and drop editor, you don’t even need to touch a single line of code to build your pages.
But if you want to make all the Elementor pages even better, there’s an easy way to do it.
Just like embedding TikTok videos, you can also add relevant Instagram posts to your site to make it more engaging, boost conversion, and get more social media followers at the same time.
Here’s what you can get by adding Instagram feeds to your site:
- You can show Instagram posts of real people enjoying and promoting your products. With this social proof, you can convince visitors on your site to make a purchase.
- Adding Instagram feeds allows you to show relevant images and Instagram reel videos without the hassle of uploading them to your site.
- With Instagram feeds on your site, you can get more followers from your visitors. So, social media marketing will be easier for you.
- By embedding shoppable Instagram feeds, you can even link your Instagram posts to your sales page and allow people to purchase directly from your Instagram feeds.
Easiest Way to Add Instagram Feeds to Elementor
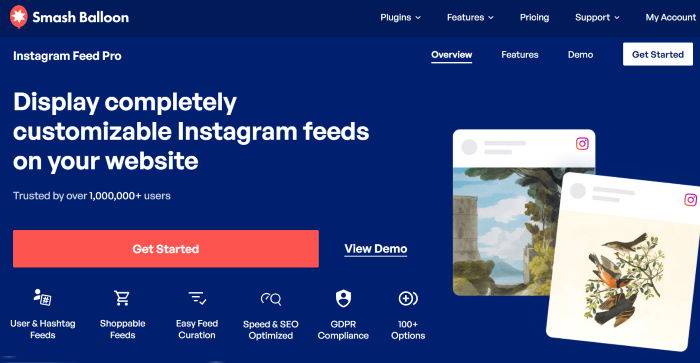
With Smash Balloon’s Instagram Feed Pro, you can embed Instagram feeds on your Elementor site, free of any hassle.
Designed to be user-friendly, you’ll be able to add all the feeds you want with it even if you’re a WordPress newbie.
If you’re wondering “Does Smash Balloon work with Elementor?”, then you’re in luck.
I personally love the fact that Instagram Feed Pro is perfectly compatible with Elementor, so you can add beautiful Instagram feeds using Elementor’s drag-and-drop editor.
In addition to its ease of use, Instagram Feed Pro comes with lots of other features. In fact, here are a few highlights:
- Super Easy & Quick Setup: You can start embedding Instagram feeds in just a few minutes — no complicated coding needed.
- Different Instagram Feed Types: With Instagram Feed Pro, you can add lots of different types of feed, from shoppable Instagram posts to hashtag feeds and even embedding Instagram reels.
- Match Your Branding: All the feeds from Instagram Feed Pro will automatically match the existing design of your website. So your Instagram feeds will fit perfectly with your branding.
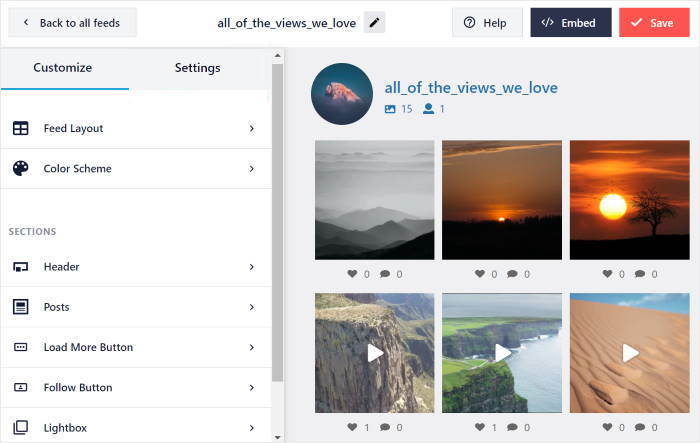
- Easy Customization: You can also customize your feed, including the size, margins, color, font, layout, and a lot more in just a few clicks using the amazing live feed editor.
- Lightning Fast: Despite all the Instagram photos and videos on your website, the plugin is lightweight so your feeds will load super fast. And a fast website is much better for SEO.
- Customer support: Smash Balloon’s Instagram Feed Pro comes with a team of WordPress experts to make your experience of building feeds much more smooth.
As the best Instagram feed plugin for WordPress, Instagram Feed Pro is compatible with Elementor and other popular page builders such as Divi, Thrive Architect, Beaver Builder, and more.
Pro-Tip: Are you also interested in embedding Instagram content on other website builders? Here’s how you can embed Instagram feeds on Divi.
With over 1,000,000 active users and a rating of 4.9/5 stars, it’s a hit among the users.
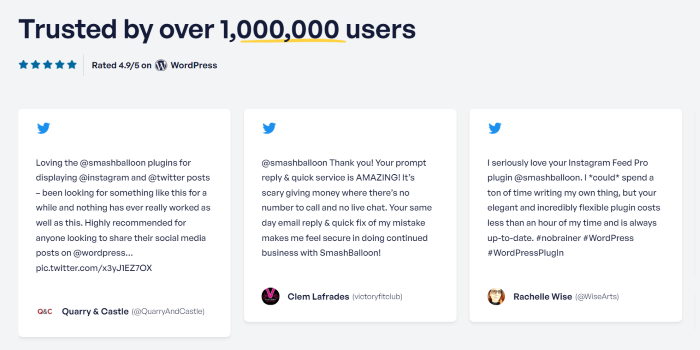
Plus, Instagram Feed Pro is trusted by some of the biggest brands in the world. All in all, it’s really the best option if you want to add Instagram feeds to your site.
Today, we’re going to show you how to Install Smash Balloon’s Instagram Feed Pro plugin and add your feeds to Elementor.
How to Add Your Smash Balloon Instagram Feeds to Elementor
Just follow the steps below, and you can have a beautiful Instagram feed on your Elementor WordPress site in no time.
Let’s get started!
Step 1: Install and Activate Instagram Feed Pro
First, you can go and grab your copy of Instagram Feed Pro here. Then, just install and activate it on your site.
Not sure how that’s done? We have a handy article on how to install WordPress plugins.
Step 2: Create a New Instagram Feed
Once the plugin is installed and activated, go to Instagram Feed » All Feeds from your WordPress dashboard.
On this page, click on the Add New button.
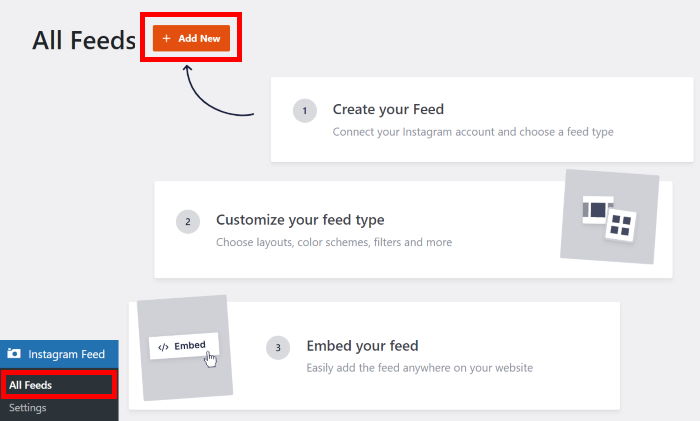
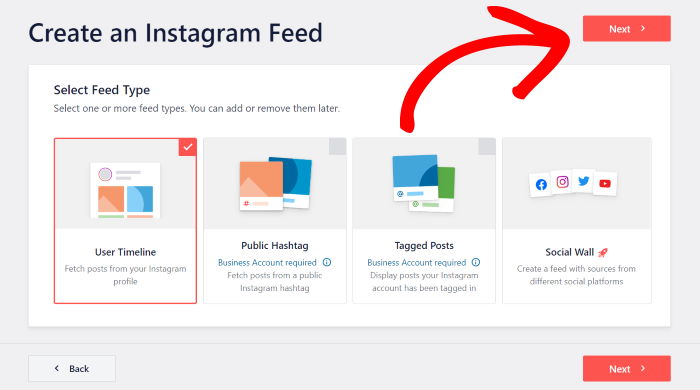
You can now choose the type of Instagram feed that you want to create for your site. There are 3 options for you to pick from here:
- User Timeline: Create a live Instagram feed that shows posts from your own account
- Public Hashtag: Use your Instagram feed to show posts that have specific hashtags
- Tagged Posts: Embed all the posts that your Instagram account is tagged in
As a bonus, you can even display multiple Instagram feeds at once. That way, you can create a single feed with different types of content.
To proceed, just select your Instagram feed type and then click on Next.
For this tutorial, we’ll pick a user timeline here.
Step 3: Connect Your New Feed to Instagram
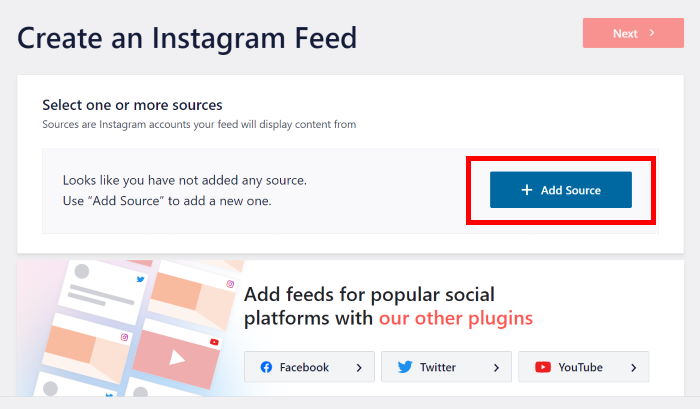
After creating your Instagram feed, the plugin will ask you to connect to a source so that it can show Instagram content.
For that, you can just connect your own Instagram account as a source.
Click on Add Source on this page to start connecting your Instagram account.
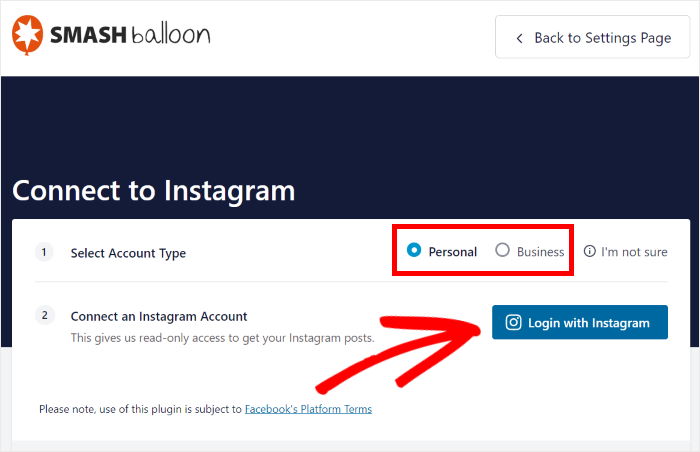
This will bring up a popup where you can choose between a business profile or a personal profile.
With a personal Instagram profile, you can use all the features you normally use on Instagram. On Instagram Feed Pro, this means you can add feeds from your own Instagram account.
If you have a business Instagram profile, you get access to analytics and a contact button that can help your business.
You can also add all kinds of Instagram feeds using this plugin, such as hashtag feeds, Instagram TV (IGTV) videos, shoppable feeds, and much more.
Pick the option you prefer and click on Login with Instagram.
We’ll go with a personal profile for this tutorial.
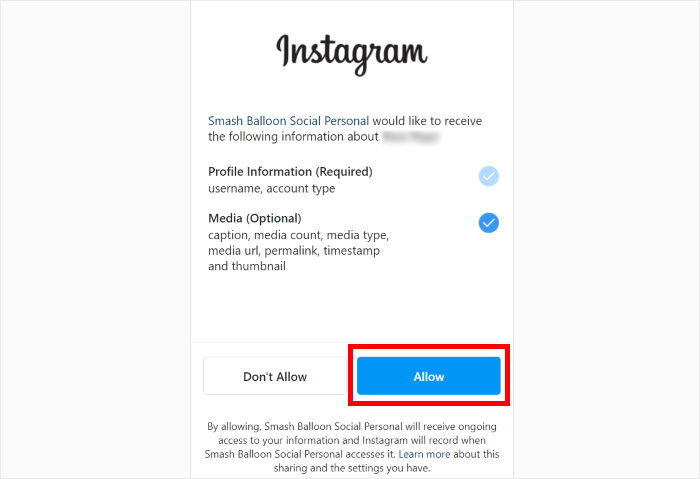
Now Instagram Feed Pro will ask for read-only access to your account. The plugin will use that access to view Instagram info and it can’t make any changes at all.
This means it’s perfectly safe to use Smash Balloon for your website.
To give that read-only access, just click on Allow.
Finally, click on the Next button to confirm the Instagram account as a source for your feed.
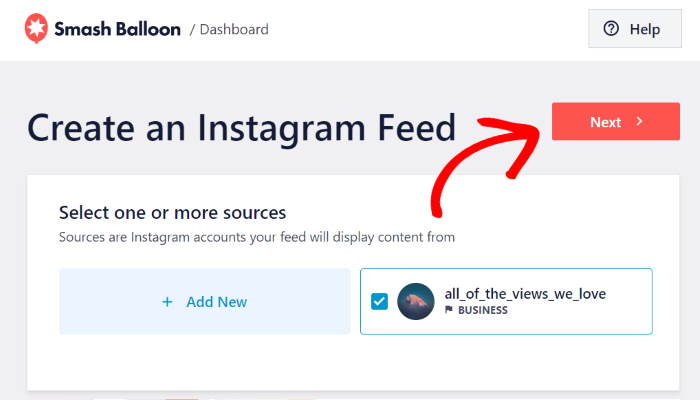
It’s now time to go to step 4 and customize the design of your Instagram feed.
Step 4: Customize Your Instagram Feed
You can now see Instagram Feed Pro’s live feed editor, where you can customize your feed’s design.
On the left side of the editor, you can see all the customization options that you can use. You can edit your feed layout, color scheme, post layout, header design, and much more.
Whenever you make any changes, you can see how it looks using the live preview on the right.
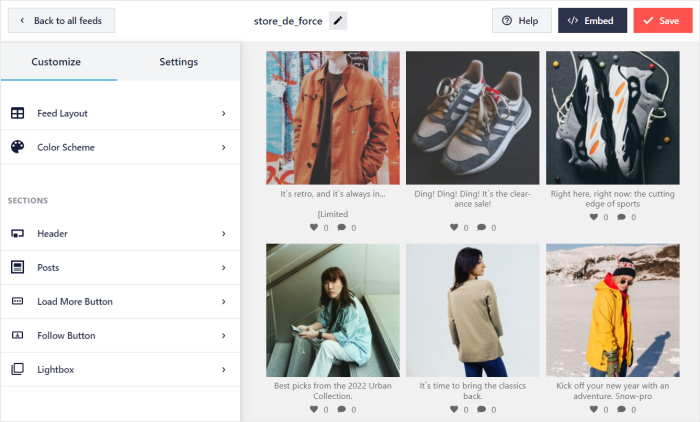
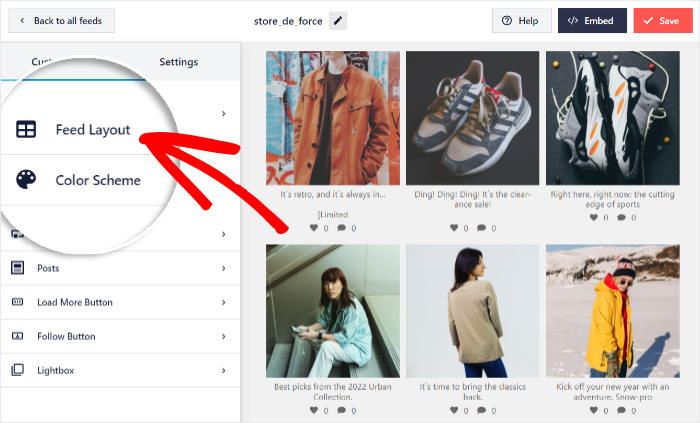
To start customizing your Instagram feed, click on the Feed Layout section on the left.
From here, you can choose between 4 different layouts for your Instagram feed: Grid, Carousel, Masonry, and Highlight.
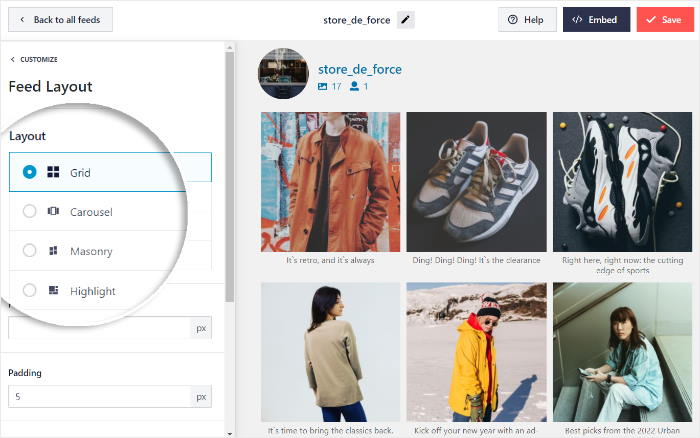
The grid option will give you simple rows and columns to neatly show your Instagram posts. With this clean layout, you can show tons of posts at once.
Personally, I like using this layout for my Elementor Instagram feed because it’s neat and organized, so it encourages my site visitors to engage with my feed.

With an Instagram carousel, you can place your Instagram posts on a slider for a dynamic look. Plus, it makes your page more interactive.
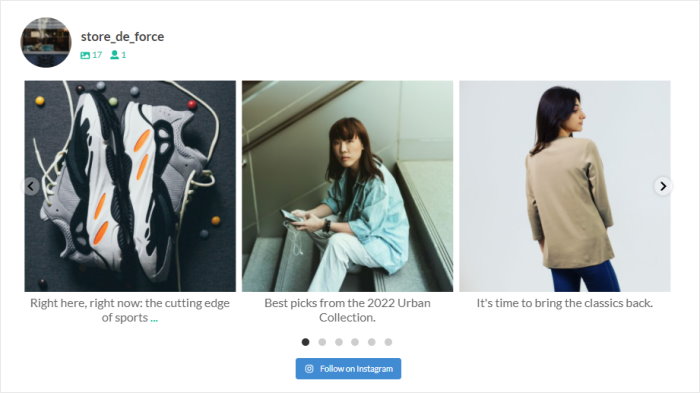
Want your Instagram images to keep their original dimensions? In that case, the masonry layout can do that for you.
You can then show your Instagram content without cropping anything out.

And if you want your Instagram posts to be more visible, you have the highlight option that increases their size by 4 times.
This layout can be helpful if you want to highlight certain Instagram posts from your feed.

Once you pick your feed layout, just click on Save.
To continue editing the design of your Instagram feed, click on the small Customize button at the top.
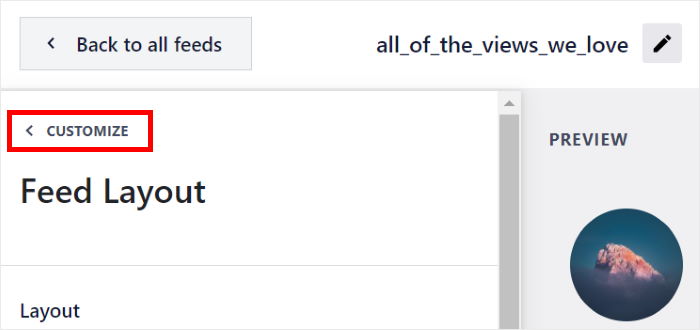
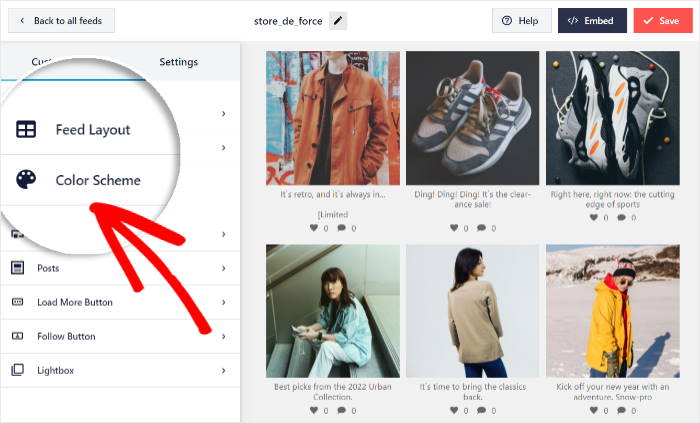
Now click on the Color Scheme option on the left to change the colors of your Instagram feed.
You can now pick from 4 different color schemes for your new Instagram feed here:
- Inherit from Theme: Quickly copy your website’s theme colors
- Light: Display a light background along with a dark-colored font
- Dark: Pick a dark color for the background and a lighter font
- Custom: Manually pick all the colors of your Instagram feed
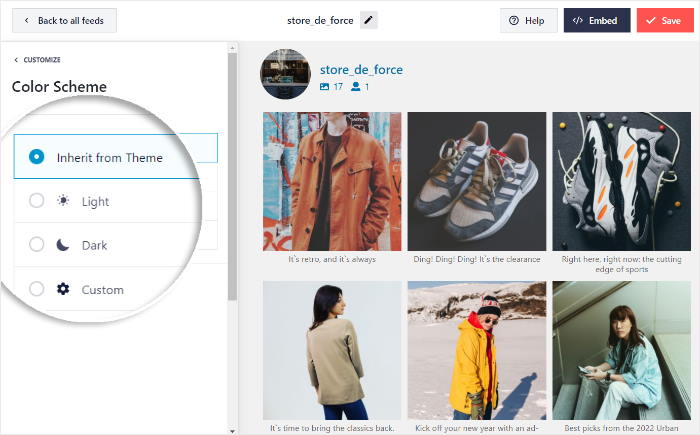
Once you’re happy with your color scheme, click on the Save button.
And that’s not all. Using this live feed editor, you can also set the other customization options like feed size, header style, button design, lightbox style, and much more.
Because of the plugin’s easy customization options, you can have more control over how your Instagram feeds look.
Finally, click on Save to confirm your changes, and you can move to the final step below.
Step 5: Add Instagram Feed to Elementor
Finally, you can now add your Smash Balloon Instagram Feed to Elementor.
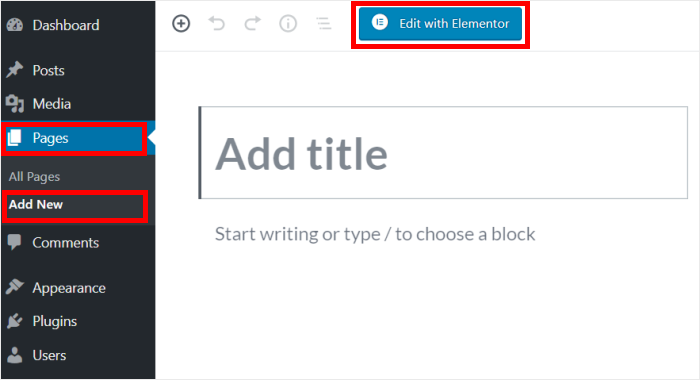
To get started, go to Pages » Add New to open a new page in the WordPress editor.
Here, click on the Edit with Elementor button on the top.
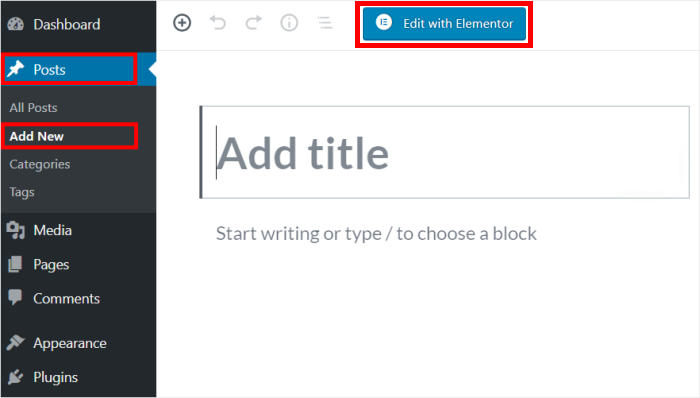
If you want to use a WordPress post instead, you can go to Posts » Add New and click on Edit with Elementor.
We’ll use a WordPress page for this example.
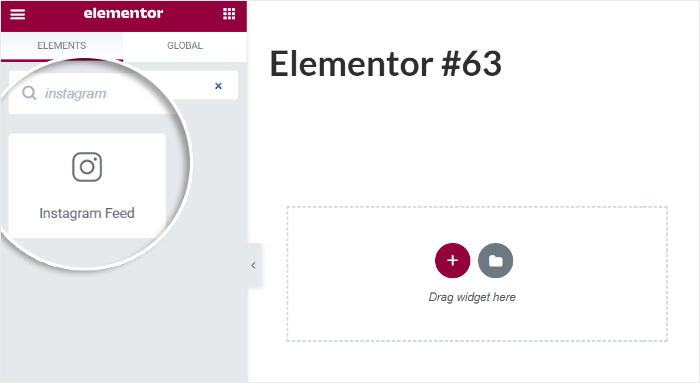
This will open up the Elementor editor. Here, you can find the panel towards the left where all the Elementor widgets are located.
In the search field, just type in “instagram,” and you should see the Instagram Feed widget in the search results.
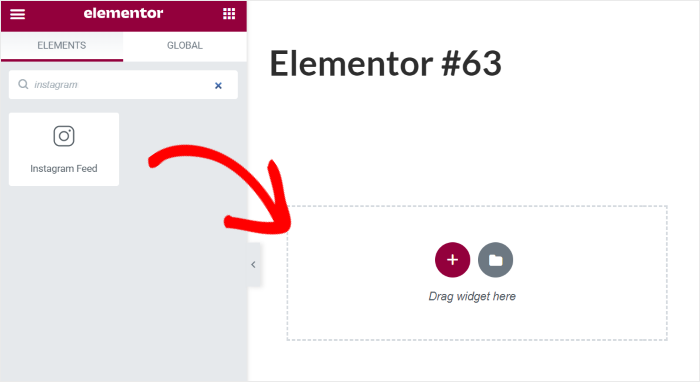
Just drag the Instagram widget and drop it on the page to the right.
After adding the Instagram feed widget to the page, you can choose which feed you want to display.
Using the dropdown menu, select the Instagram feed that you created earlier.
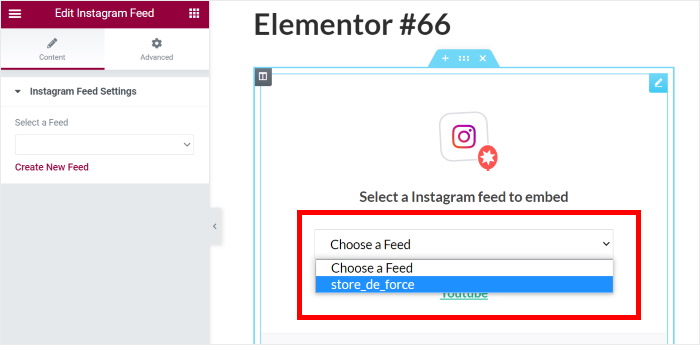
Finally, click on the Publish button to save your changes.
You’ve now successfully added your Smash Balloon Instagram feed to Elementor.
Just check out your website and see how it looks on the front end.

And that’s it!
Now, you should know how to embed your Smash Balloon Instagram Feeds on your Elementor pages. As you can see, you can create, customize, and embed Instagram feeds in a few easy steps with this plugin.
With beautiful Instagram feeds on your website, you can engage your visitors and grow your following easily.
Want to add Instagram content to your Elementor site? Grab your copy of Instagram Feed Pro today!
Popular Posts on Embedding Social Feeds on Elementor
- How to Embed YouTube Playlist on Elementor (Best Way)
- How to Add TikTok Feed to Your Elementor Website
- How to Add Tripadvisor Reviews to Elementor
- Embed Your Trustpilot Reviews to Elementor in 5 Steps
- How to Add a YouTube Video Gallery for Elementor
Looking for ways to boost your Instagram presence? Why not check out our post on how to increase Instagram followers?
Or, if you have another social media feed you want to display on Elementor, see this tutorial on how to add Google reviews on your Elementor website.
If this article helped you out, give us a follow on Twitter and Facebook, and stay tuned for more social media marketing tips and tricks.





Hi Sara,
Thank you for contacting us! In this case, I’d suggest checking that you have the latest version of the plugin and that you are using a Hex format in the background color. If you want a transparent background, you can use #FFFFFF00, like in this example.
If the problem continues, kindly send us a support request using the form on our website here, including the System Info.
To obtain this information, follow the steps on this page.
I hope this helps! Please let me know if you have any questions.
Thanks! 🙂
Hello,
I can’n find the Instagram Feed widget. I am using the astra theme with elementor. Also I am using the new flex box.
Can you help me? Greets Tessa
Hi Tessa,
Thank you for contacting us! I’d suggest checking that you have the latest version of the plugin installed; then, you should be able to see the Instagram widget on Elementor, like in this example here. If you don’t see this widget, you can use a simple text widget to embed the Instagram Shortcode that you can get by navigating to Instagram Feed > All Feeds; it should look like this [instagram-feed feed="1"]. The feed number could differ depending on the number of feeds you have created.
If that doesn’t work, kindly send us a support request using the form on our website here, including the System Info.
To obtain this information, follow the steps on this page.
We ask you to use our form, as the System Info contains other website information and the Access Token for your connection, which we do not suggest posting here.
Thanks! 🙂
Hey ken,
Kindly send us a support request using the form on our website here, including the System Info.
To obtain this information, follow the steps on this page.
We ask you to use our form, as the System Info contains other website information and the Access Token for your connection, which we do not suggest posting here.
Thanks! 🙂