Looking for a way to create custom WordPress themes?
If you create your own theme for WordPress, you can have an engaging website that perfectly fits your brand. That way, you can make a great impression on your visitors.
But creating a WordPress theme means working with complicated code or spending lots of money on hiring developers.
To save you time and money, we’re here to show you the easiest way to create custom WordPress themes -– no coding needed!
Easiest Way to Create Custom WordPress Themes
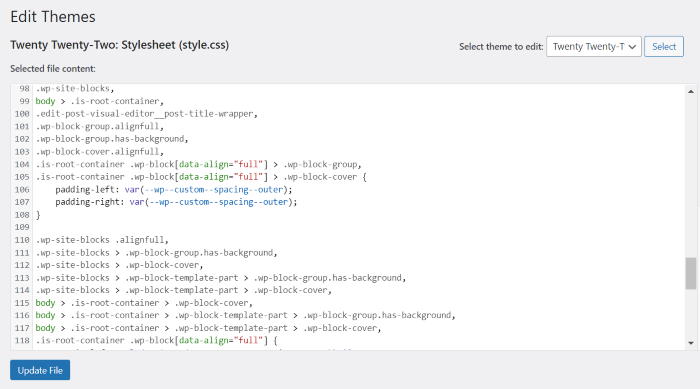
A WordPress theme is simply a template written using PHP, HTML, CSS, and JavaScript. To create or edit WordPress themes yourself, you’d usually need to be familiar with those coding languages.
Not only does it take a lot of time and effort, but a simple mistake can even break your website. And when that happens, you’re on your own since there’s no support team to help you out.
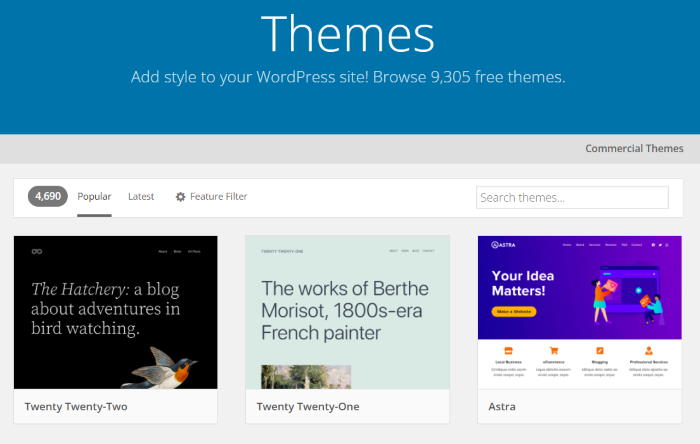
You can also use WordPress theme frameworks that come with in-built features and designs. But if you’re not a theme developer, this method can also get confusing.
Another option is to hire a developer to create a custom WordPress theme for you. But creating and maintaining your website can end up costing thousands of dollars.
Since it’s so expensive, small businesses often stick to the default WordPress themes instead. As a result, the design of their website might not even match their branding.
While you can use a page builder to create landing pages without any coding, you can’t create custom layouts. As a result, they can only build single pages.
The good news?
There’s a page builder in the market that comes with an easy-to-use custom theme builder as well.
With SeedProd, you can easily create your custom WordPress themes and build an engaging website in no time.
Why Use SeedProd?
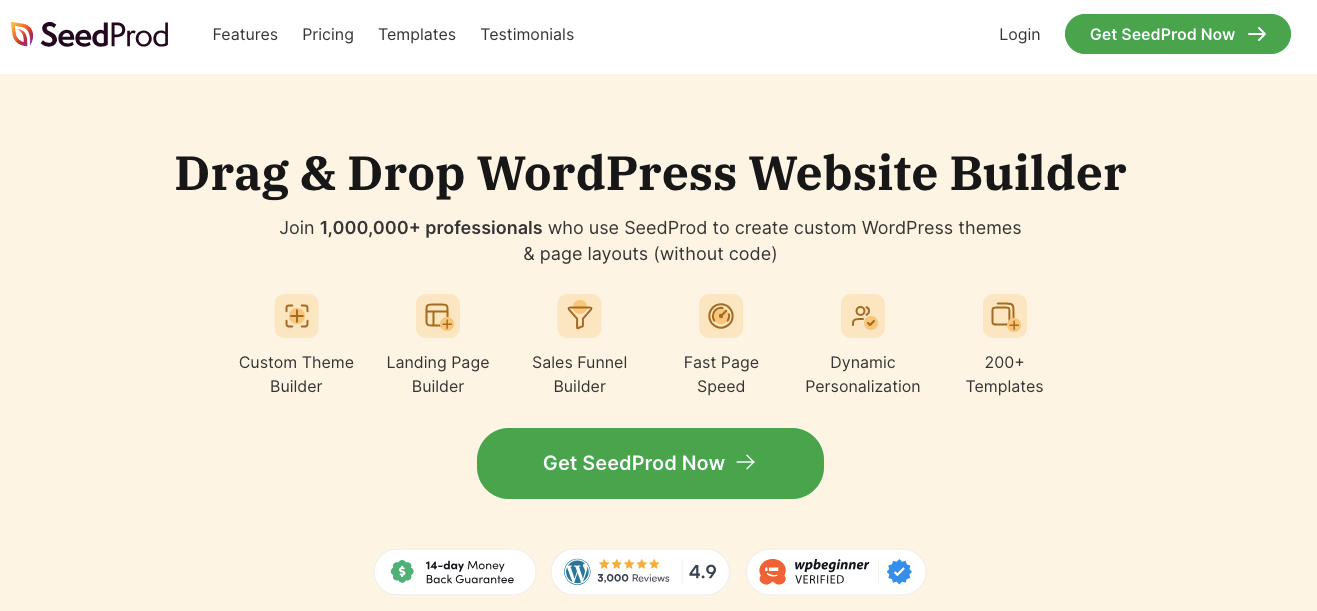
SeedProd is the best website builder plugin that comes with a user-friendly WordPress theme builder feature.
With its powerful drag and drop builder, you can easily create engaging landing pages and WordPress themes – no coding needed.
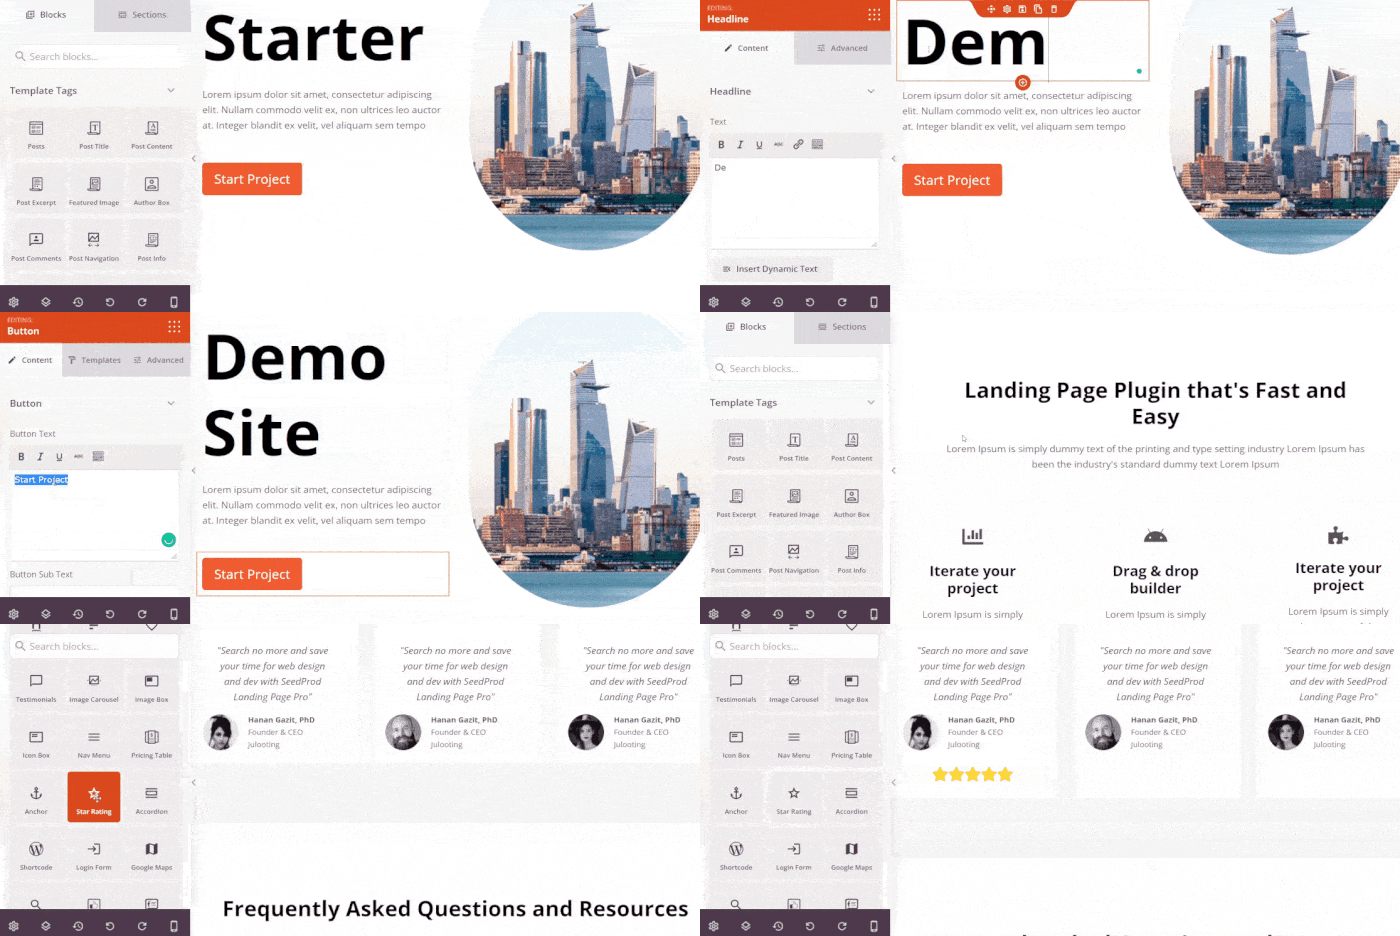
In fact, here are a few more amazing features that you can get from SeedProd:
- As the best landing page plugin in WordPress, SeedProd lets you choose from 150+ page templates including coming soon page, sales page, 404 error page, maintenance mode page, and much more.
- For a faster way to create custom themes, you also have pre-designed themes that you can edit to your liking.
- Since the plugin is lightweight, your website will also load super fast. And that means much better SEO as well.
- Like other website building plugins, SeedProd supports popular email marketing services like Constant Contact and ConvertKit.
- SeedProd also comes with an amazing support team of experts who’re always ready to lend you a hand.
Over 1 million websites are already using SeedProd to engage their visitors. Since it has a rating of 4.9/5 stars, you can clearly see how happy its users are.

If you want to learn more, you can check out our full review of SeedProd.
With that, let’s see show you how you can easily create custom WordPress themes using SeedProd.
How to Create a Custom WordPress Theme (Step by Step)
In this post, we’ll show you how to create custom themes in WordPress with a step-by-step guide.
Let’s get started:
Step 1: Install and Activate SeedProd
To get started, go and grab your copy of SeedProd from here. Once you have the plugin, install and activate it on your website.
Not sure how? You can follow this step-by-step guide on how to Install WordPress plugins.
Once you’ve installed and activated SeedProd on your WordPress website, you can move on to step 2.
Step 2: Create Your Theme Template
You can now start building your custom WordPress theme using SeedProd.
First, go to SeedProd » Theme Builder from your dashboard area to open the Theme Templates page.
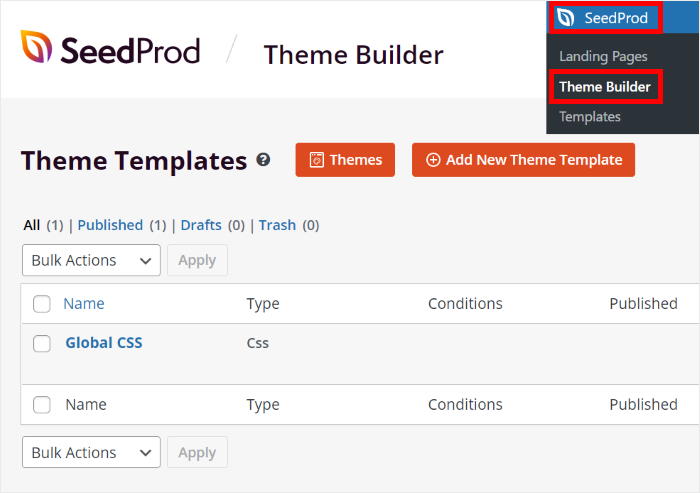
From here, you’ve got 2 ways to create your WordPress theme:
- Choose a pre-built WordPress theme and customize it
- Manually create a custom WordPress theme
Let’s look at how you can use these options to create your theme.
Choose a Pre-Built WordPress Theme
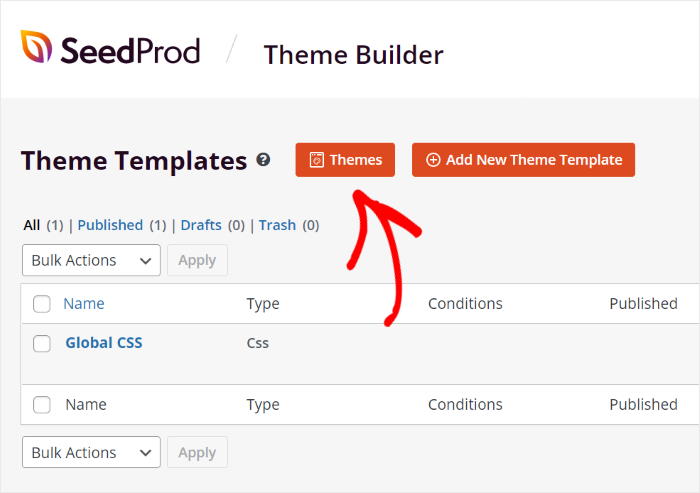
To import and customize a pre-built theme, click on the Themes button at the top.
You can now see a popup showing you all the pre-built themes you get with SeedProd.
There are tons of options here so that you can create different types of WordPress themes. You’ve got themes for cafes, WooCommerce stores, events, travel sites, marketing agencies, and much more.
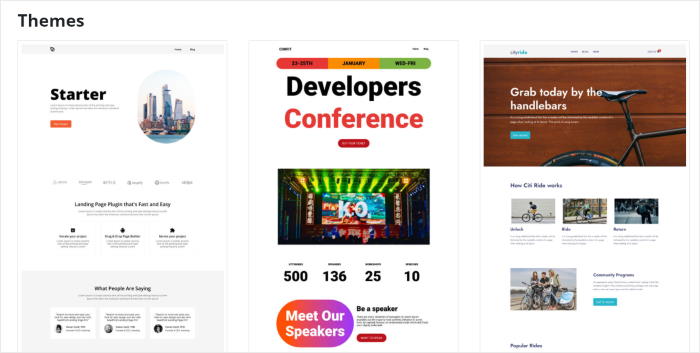
To use a pre-built theme, hover your mouse over it and click on the checkmark icon.
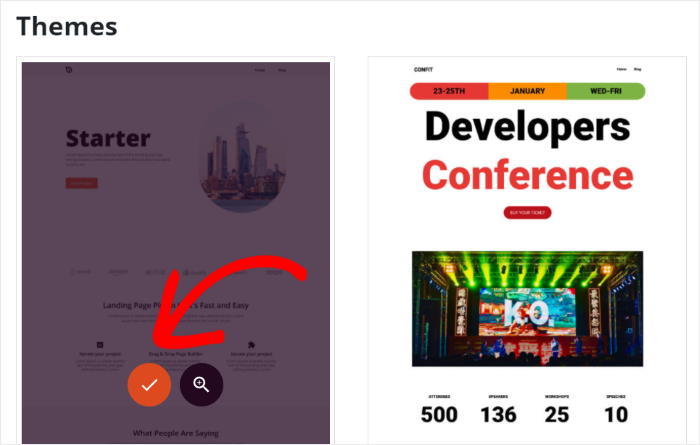
Once you do that, SeedProd will import the theme to your website and show you all the templates that you can access;
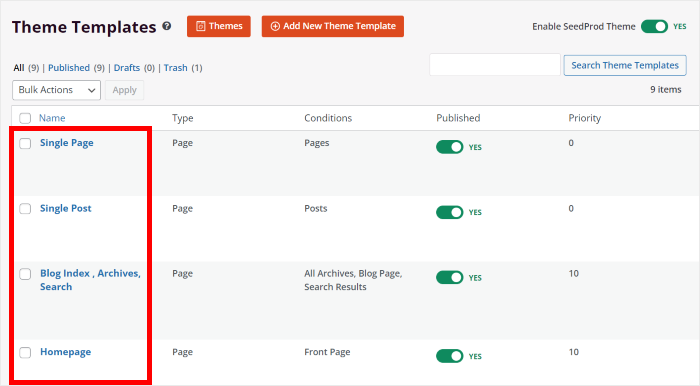
Each theme template contains the design for a specific part of your theme, like the header, footer, single page, blog page, and more.
For example, to change the header design of your theme, you can customize the header theme template from here.
Just like that, you can design the rest of your theme by customizing the remaining theme templates.
Before showing you how to customize these templates, let’s check out another way to get theme templates on your website.
Manually Create a Custom WordPress Theme
Want to create your WordPress theme from scratch?
Then you can manually create all the theme templates yourself instead of importing a single pre-built theme.
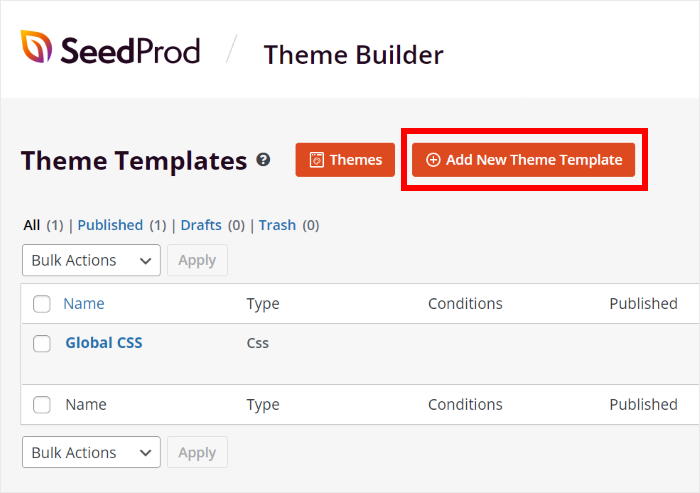
For that, click on the Add New Theme Template button here.
SeedProd will then show you a popup where you can set the Name of your new theme template.
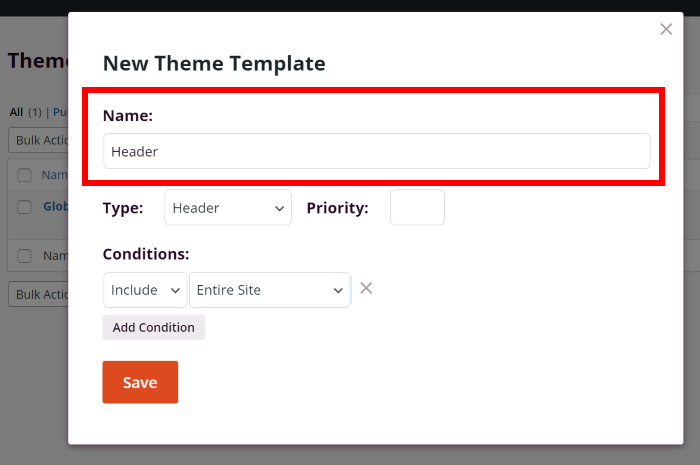
Below that, you’ve got the Type option to pick the type of theme template you want to create.
You can select a header, footer, single post, archive page, search results, and much more.
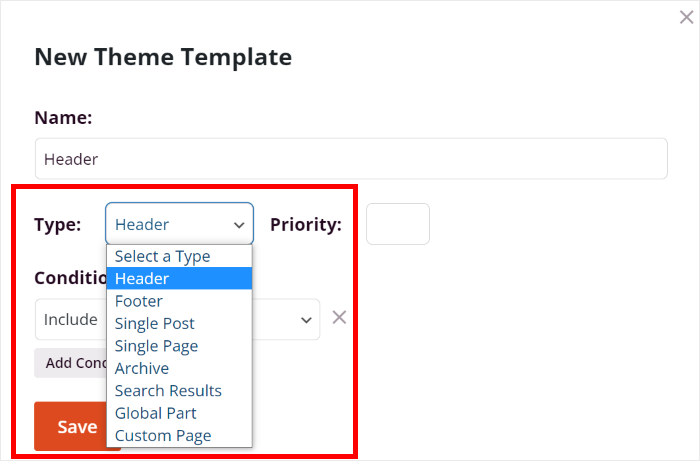
Finally, you can use the Conditions option to choose where this template will appear.
You can include it on specific parts of your site, exclude it from specific parts, show it everywhere, show it only in a single place, and much more.
Now click on the Save button to finish creating your theme template.
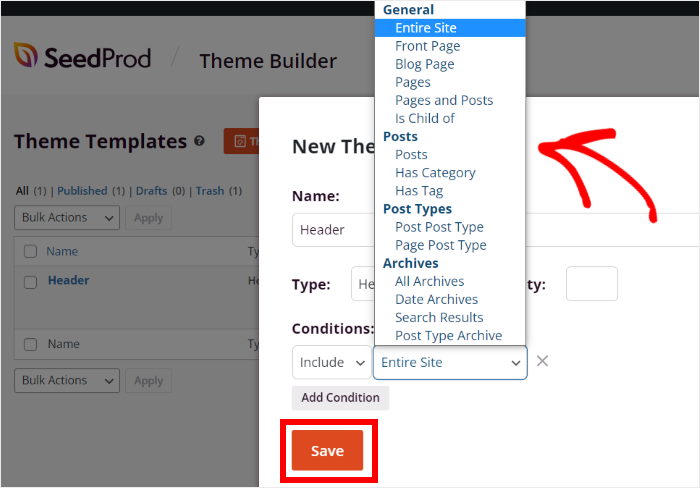
After this, you can go to step 3 and use the drag and drop customizer to design your theme.
Step 3: Customize Your WordPress Theme
If you manually created your theme template earlier, SeedProd will automatically send you to the drag and drop editor.
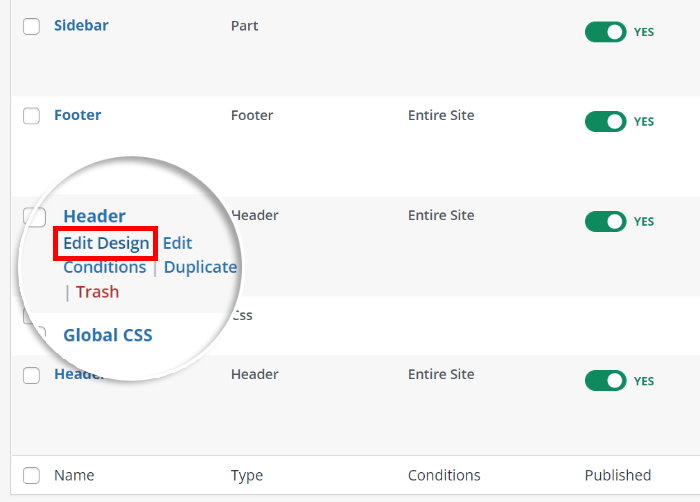
But if you imported a pre-built theme, you can hover over a theme template and then select the Edit Design option.
In the SeedProd editor, you can see all the content blocks on the left section of the screen. When you make any changes, you can see a live preview of your custom theme on the right.
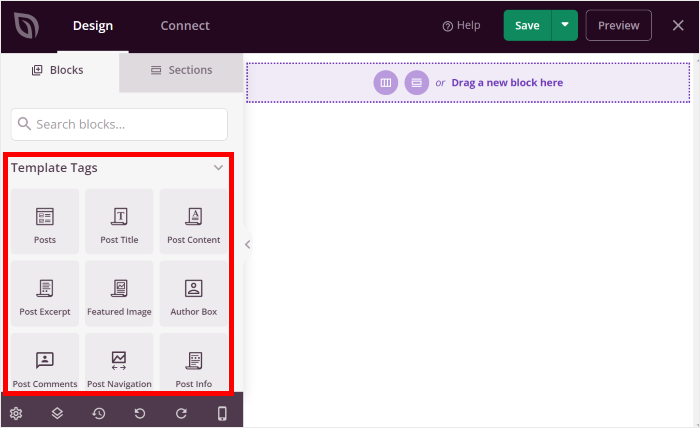
When it comes to adding content to your theme, you’ve got 4 types of content blocks to choose from:
- Template Tag Blocks: Add parts of your content like your post title, comment section, featured image, and much more.
- Standard Blocks: Show content like images, videos, text box, buttons, and more on your theme template.
- WooCommerce Blocks: For a WooCommerce store, you can add product pages, add to cart buttons, product ratings, and more.
- Advanced Blocks: Integrate contact forms, giveaway widgets, countdown timers, and more to engage your visitors and generate leads.
To add a content block to your theme template, drag the block from the left and drop it on the right.
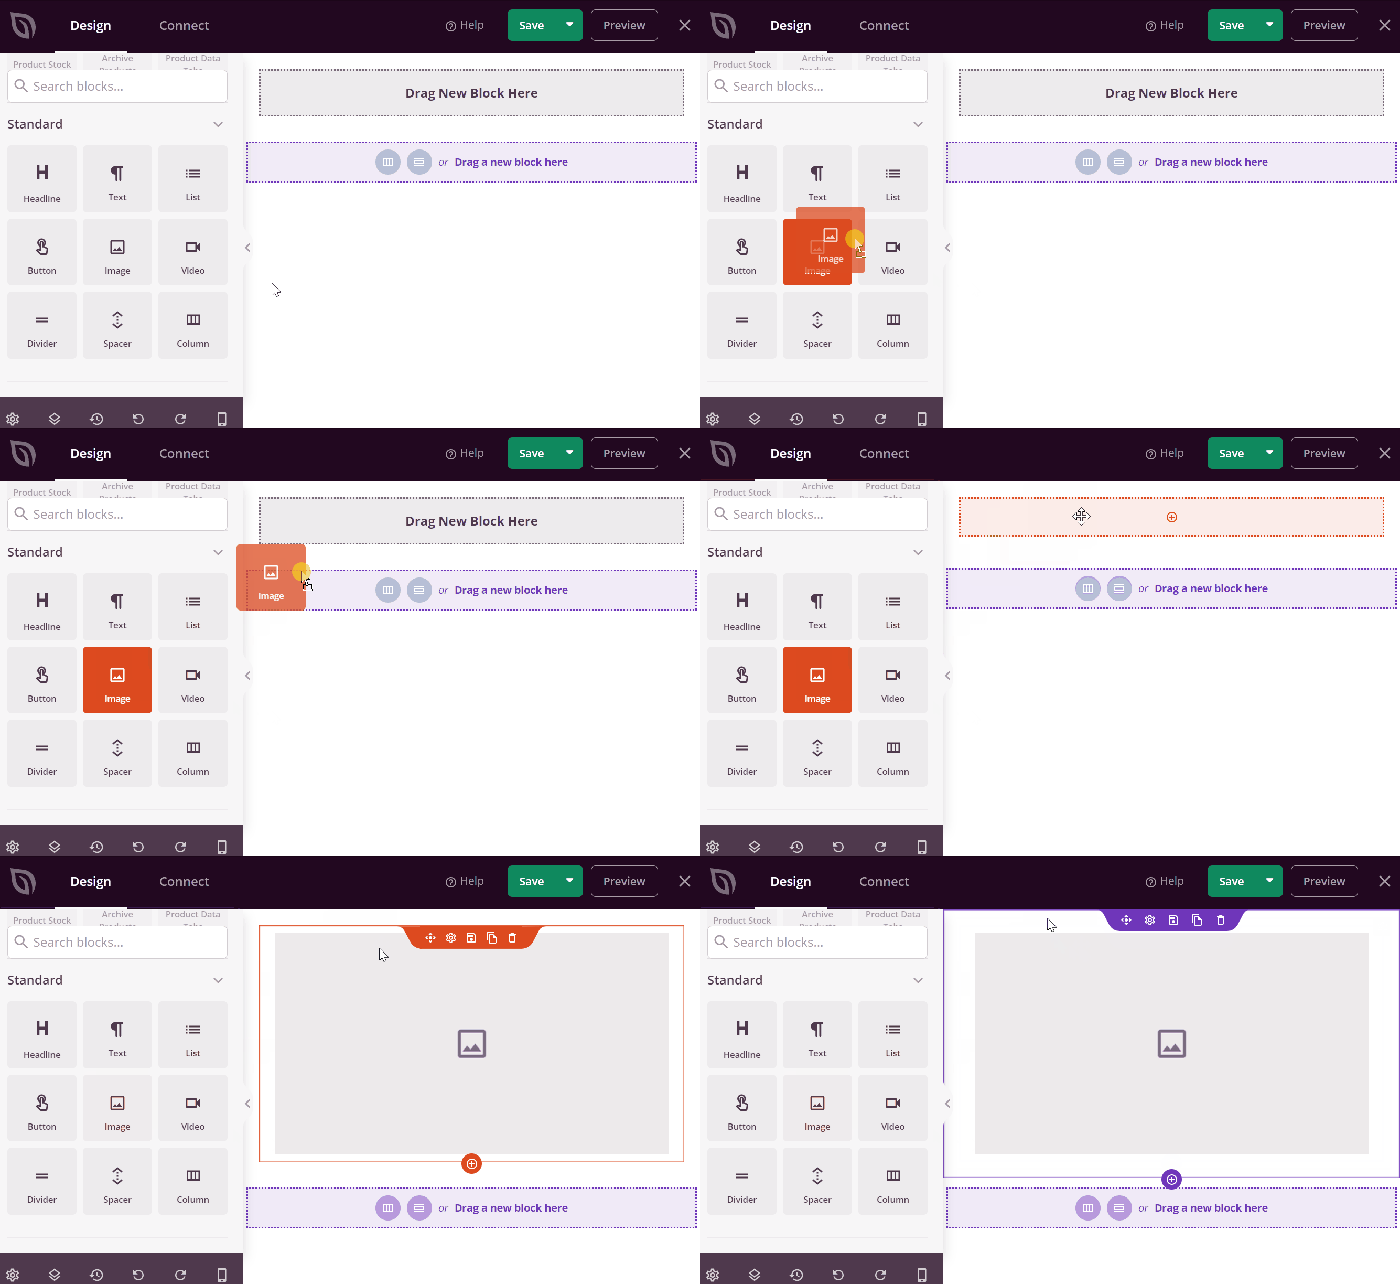
After that, you can click on the content block, and you’ll see its settings on the left.
Here, you can choose what type of content this block should show and change its design.
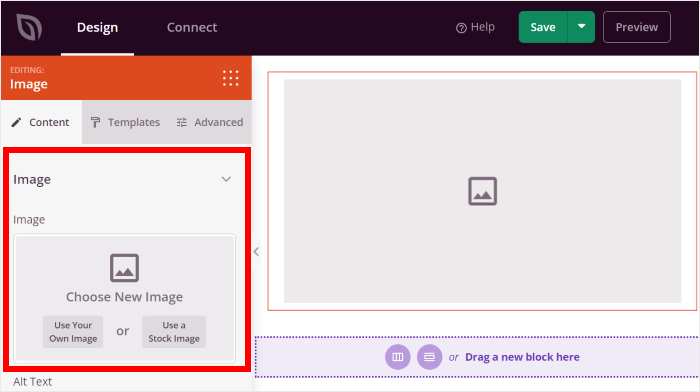
For example, after adding an image block, you can choose the image and change its size, shape, border, and more.
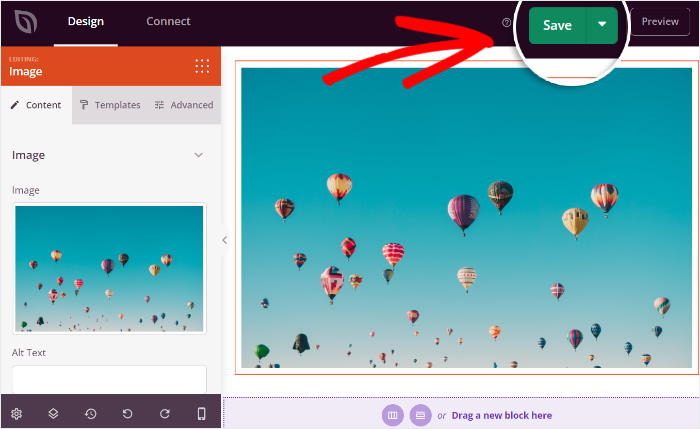
After you’re done customizing your content block, click on the Save button at the top to keep your changes.
To return to the previous options and continue adding blocks, click on the small grid icon on the left.
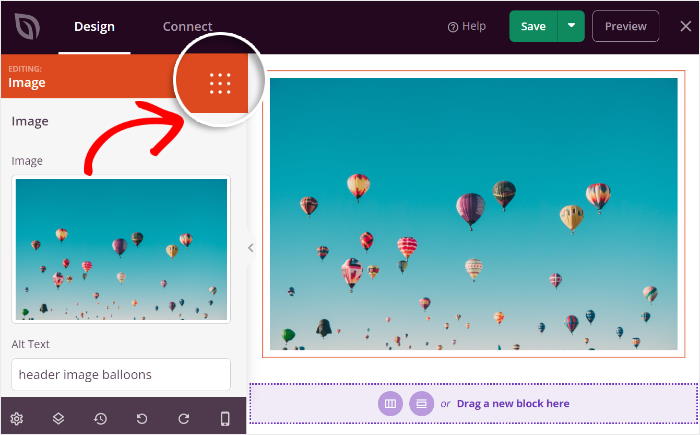
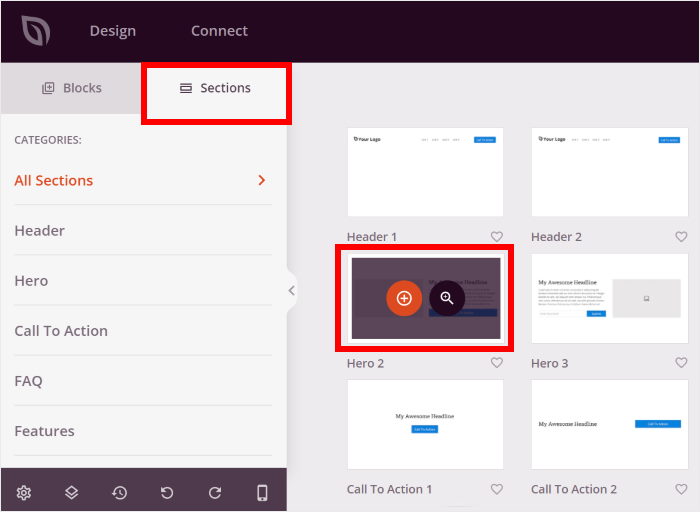
Now click on Sections to continue adding content to your custom WordPress theme.
From here, you can add pre-made sections like FAQs, pricing charts, customer testimonials, call-to-action, and more.
To add a section to your theme template, hover your mouse over a section and then click on the plus (+) icon.
Like before, you can click on a section after adding it and see its customization options on the left.
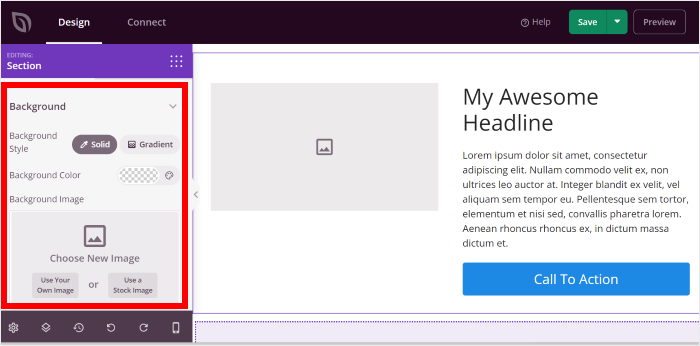
This way, you can use the SeedProd editor to add and customize the design of your theme templates.
Once you’re happy with the design, click on the Save button in the top right corner again.

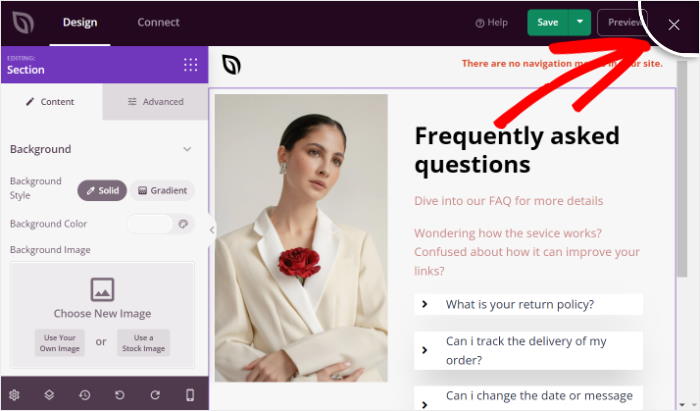
After adding content blocks and sections, you can close the SeedProd editor by clicking on the cross (x) icon at the top.
This will bring you back to your theme templates menu.
From here, you can toggle the Published option and choose if you want to show this theme template on your site or not.
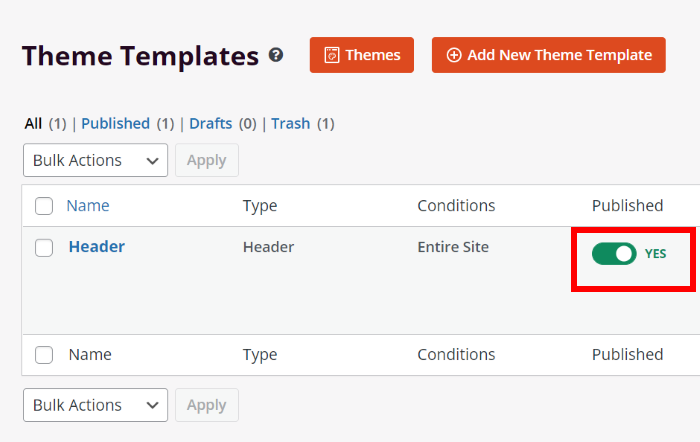
Just like this, you can customize the remaining parts of your new WordPress theme, including the sidebar, footer, single post, archives page, search results, and more.

Now go to the next step to change the global settings for your new WordPress theme.
Step 4: Customize the Global CSS
By customizing your global CSS options, you can change the looks of your entire WordPress theme at once.
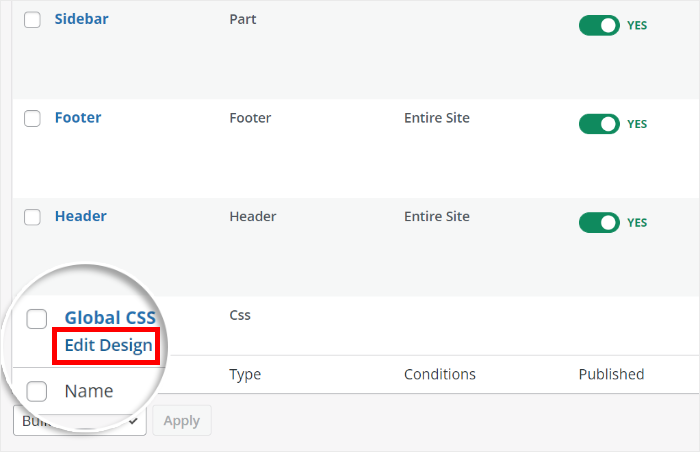
To get started, find the Global CSS theme template, and then click on the Edit Design button.
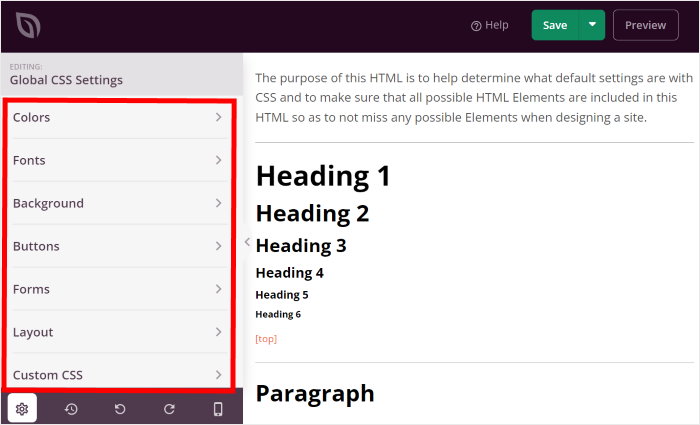
On the left section, you can now see the options to change your colors, font, background, buttons, layout, and much more.
For example, if you select the Colors section, you can start editing the colors for your theme. These colors will be applied to all the other theme templates now.
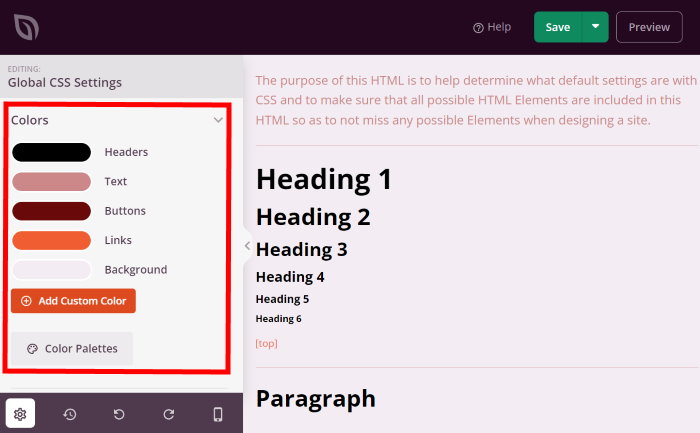
After customizing the colors, click on Save to keep the changes.
Just like that, you can use the remaining options to set your background, button design, layout, fonts, and more. And remember to click on Save at the end.
As you can see, SeedProd makes it super easy to customize your WordPress theme design.
Next, you can move to step 5 and connect your custom theme to an email marketing service.
Step 5: Connect to Your Email Newsletter
An amazing feature of SeedProd is that you can connect your site to popular email marketing services like Constant Contact and Drip.
For that, pick a theme template to connect to email marketing and open it in the SeedProd editor.
Like before, hover over the template and then click on Edit Design.

To continue, click on the Connect button at the top of the editor.
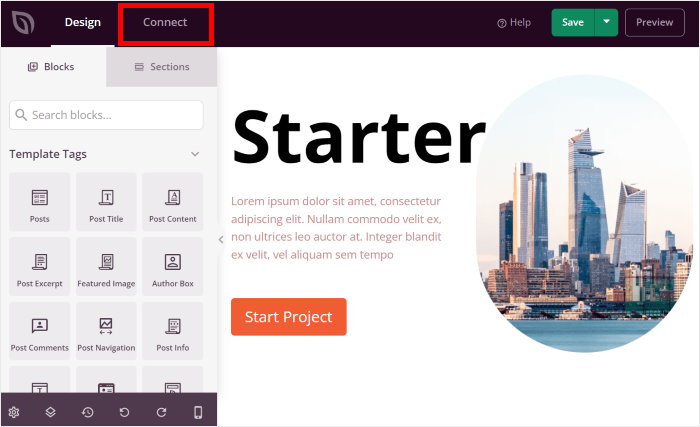
You can now see the 13 different email marketing services that SeedProd supports.
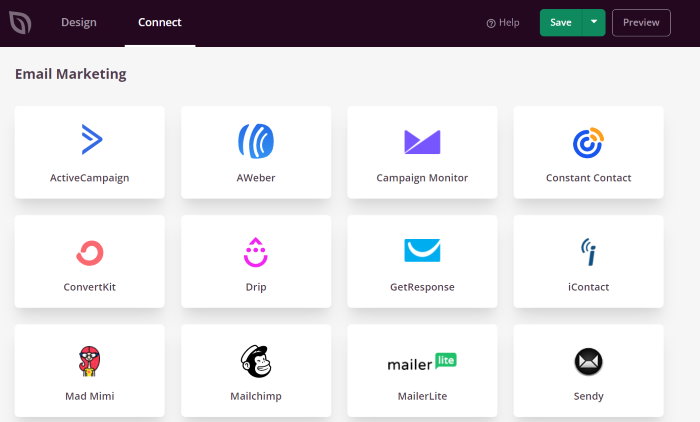
When you scroll down, you can also find the options to connect your site to Google Analytics, Recaptcha, and Zapier.
To continue, select the mailing service that you use and then click on Connect New Account.
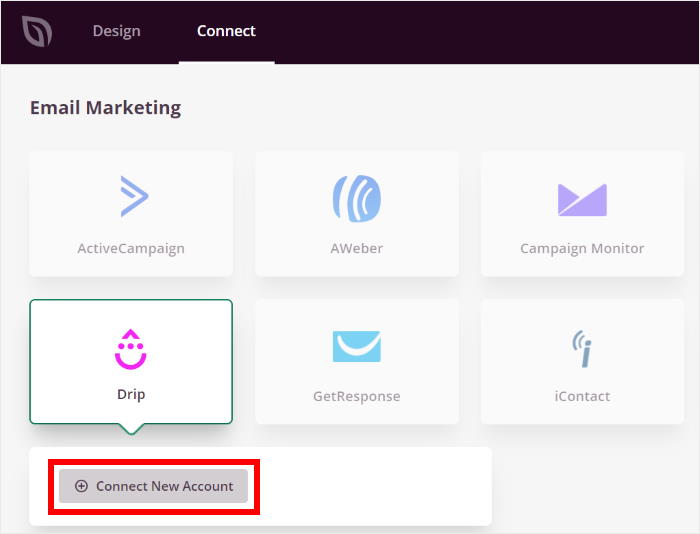
Then you can follow the onscreen instructions to verify your account, and SeedProd will connect your mailing service to this theme.
Finally, click on Save to confirm your changes.
With that, you’ve created your WordPress theme and connected it to an email marketing service.
In the next step, you can finally publish your new custom theme so your visitors can check it out as well.
Step 6: Publish Your Custom WordPress Theme
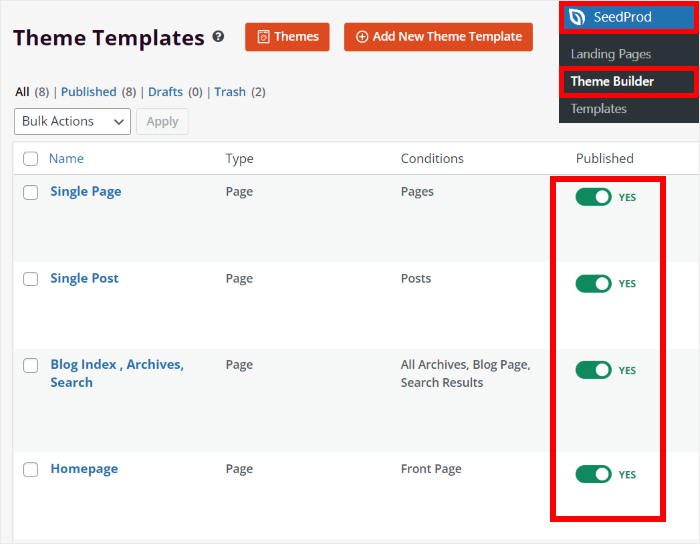
To publish your new custom theme, first, go to SeedProd » Theme Builder from your WordPress dashboard.
From this page, you can toggle the Published option and choose if you want to show each theme template on your website.
Finally, turn on the Enable SeedProd Theme option in the top right.
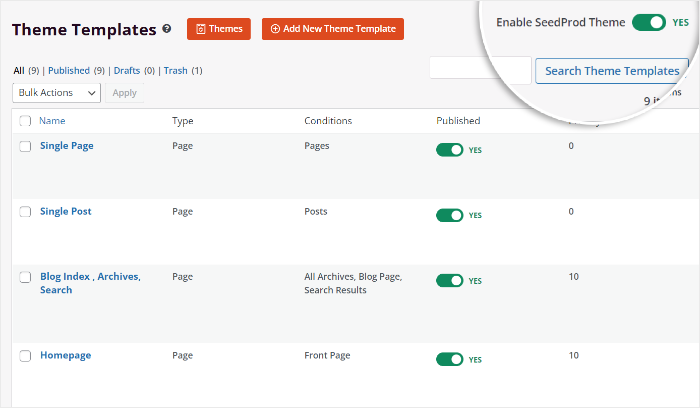
With that, your new custom WordPress theme is online. Just open your website, and you can see how it looks.

And there you go!
This was our guide on how to create custom WordPress themes for your website.
As you can see, SeedProd is an amazing tool if you want to create an engaging website to promote your brand.
With it, you can create engaging landing pages to promote your products, services, events, announcements, and more.
Ready to create a better website and grow your business? Grab your copy of SeedProd here.
Want to check out more helpful tools like SeedProd for your online brand? Then take a look at our list of the best WordPress plugins.
Found this tutorial helpful? Then give us a follow on Facebook and Twitter for more tips and tutorials.
