Visuals are a key part of making a website interesting. As a digital marketing professional for a few years now, I’ve consistently seen how important pictures are for keeping people engaged online.
Facebook is a place where many businesses and individuals share photos. If you use Facebook to showcase your products, events, or team, you might want to also show these photos on your website.
Displaying your Facebook photos on your website can make it more lively and visually appealing. It lets visitors see your photos directly on your site, without having to go to Facebook.
In this article, I’ll provide a clear, step-by-step process to help you easily show your Facebook photos on your site.
Using my knowledge of website content and social media integration, I’ll share simple instructions, so you can enhance your website with your Facebook photos and make it more visually engaging for your audience.
In This Article
- Why Show Facebook Photos on Your Website?
- Easy Way to Display Facebook Photos on Your Website
- Display Facebook Photos on Your Website Manually
- Best Way To Display Facebook Photos in WordPress
Why Show Facebook Photos on Your Website?
People usually upload photos to Facebook to share them with their friends and family.
But as a brand, it’s important to remember that not everyone has a Facebook account. This means your ideal audience won’t see your photos if you publish them exclusively on your Facebook page.
Cross-publishing Facebook photos onto your website makes them accessible to everyone so you can promote your business using Facebook. This means your site visitors can see your Facebook content — even if they have a Facebook account or not.
As a result, you’ll have more people engaging with your Facebook content and exploring your website. After all, our detailed research on social media marketing statistics shows that:
While engagement rates on Facebook can vary, photos tend to capture the most attention, boasting an average engagement rate of 0.12%.
Showing Facebook photos in WordPress is also an ideal way to get more Facebook followers. The methods we explore later in this article lets your visitors like and interact with your Facebook page without leaving your website.
Now that you know some of the benefits of showing Facebook photos on your site, let’s look at the methods for embedding them in WordPress.
Easy Way to Display Facebook Photos on Your Website
The easiest way to display Facebook photos on your website is by using a WordPress plugin.
The best WordPress plugins enhance your site’s functionality, giving you extra features without needing to know how to code.
The Smash Balloon Facebook Feed Pro plugin lets you seamlessly integrate Facebook content into your WordPress site, including photos and other media like Facebook videos.

Then, all you need is to post an update on your Facebook page, and it’s automatically shown on your website.
What’s more, the plugin looks great on your site right out of the box, so it won’t take any work to get your content looking the way you want.
With that in mind, let’s look at the steps to show Facebook photos using the Facebook Feed Pro plugin.
Step 1: Download Smash Balloon Facebook Feed Pro
To begin, you can get your copy of Facebook Feed Pro from here. Then, proceed to installing and activating the plugin on your website.
For help, you can check out this step-by-step guide on how to install a WordPress plugin.
Step 2: Create Your Facebook Photo Feed
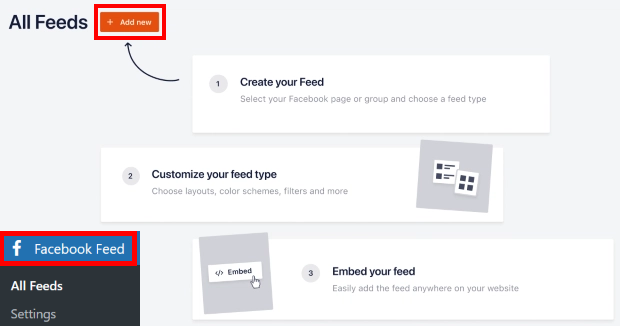
After installing and activating the plugin on your website, navigate to the Facebook Feed » All Feeds menu from your WordPress dashboard.
Then, to create a new Facebook feed, click on Add New.
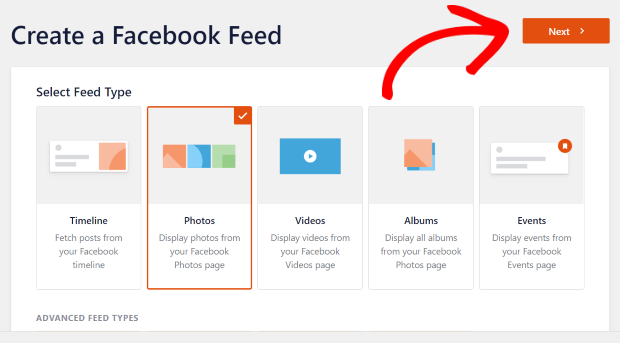
Next, you need to pick the feed type. With Custom Facebook Feed Pro, you have 9 different options to pick from: photos feed, events feed, albums feed, videos feed, reviews feed, and much more.
Here, select Photos and then click on the Next button.
With that, you’ve created your new Facebook photo feed so it’s time to connect it to Facebook.
Step 3: Connect to Your Facebook Page
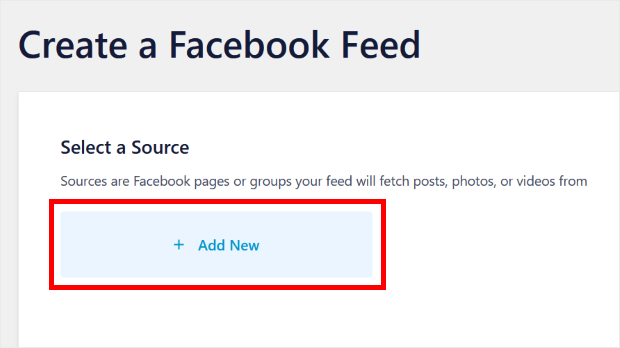
Now, you can choose to connect your new feed to a Facebook page. To do that, click on the Add New button.
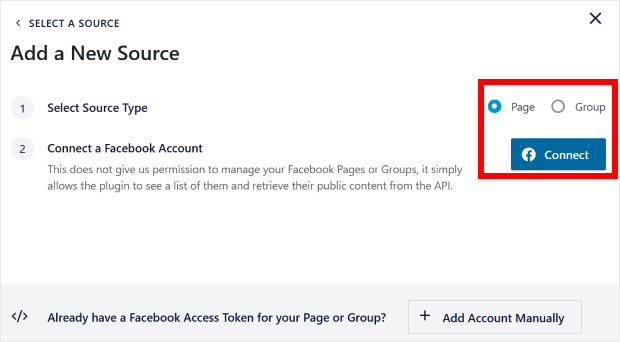
This will bring up a new popup where you can choose to connect a Page. Select the one you want here, and then click on the Connect button.
Now the plugin will redirect you to Facebook and ask for read-only access to your account. Since it’s read-only, the plugin can’t actually change anything and only reads your data, so it’s completely secure.
You can pick the page that you want on your site and then click on Next.

Finally, click on Done and your Facebook photo feed will have read-only access to your Facebook page.

After that, you can select Add to finish adding your source.
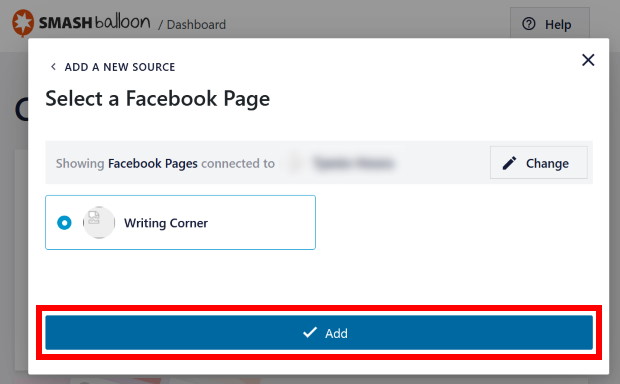
You can now select the newly added source for your Facebook photo feed. Then, click on Next to proceed.
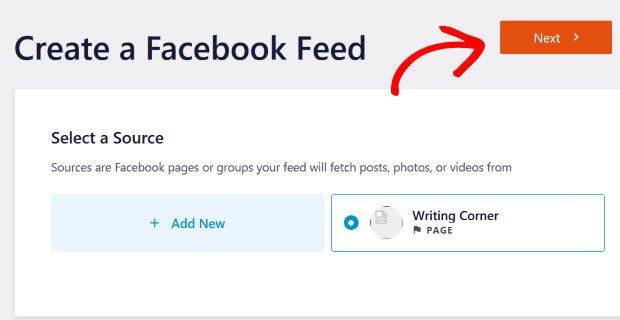
It’s now time for step 4, where you get to choose the looks of your Facebook photo feed.
Step 4: Customize Your Facebook Photo Feed
After that, you can start customizing your Facebook photo feed using the live feed editor.
On the left, you have the customization options for your Facebook feed. You can also check the live preview on the right and see how your feed looks.
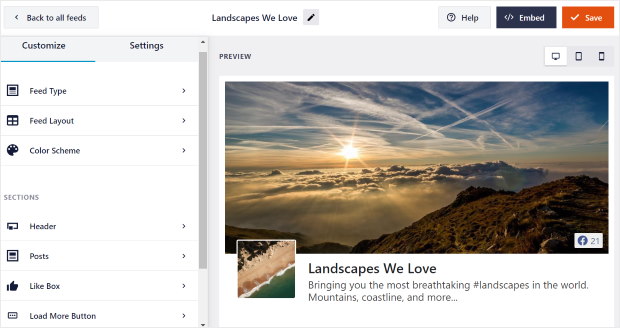
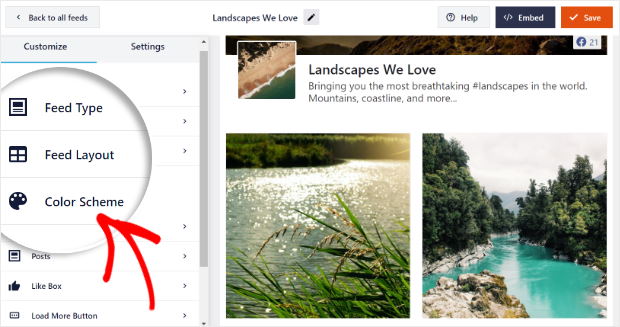
You can now change the feed type, layout, color scheme, header design, post design, and a lot more here.
To get started, select the Feed Layout option.
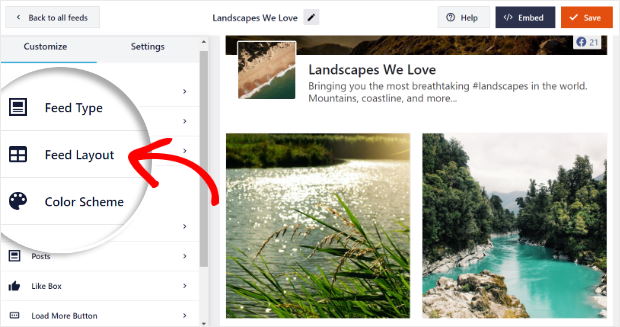
You have 4 different options for your Facebook photos here: List, Grid, Masonry, and Carousel.
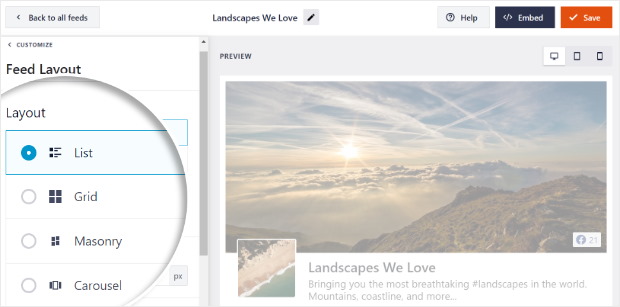
With a list layout, your Facebook photos will be posted one after another.

You can pick the grid option if you want to show lots of photos in neat rows and columns, like in a Facebook gallery.

If you want your Facebook photos to keep their original proportion, you have the masonry layout.

You can also give your photos a more dynamic look with a Facebook carousel instead.

Select the layout that you like and then click on the Save button at the top.
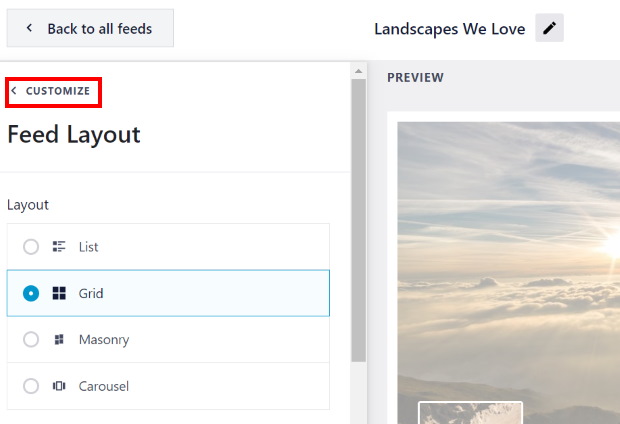
Next, you can click on the small Customize button to go back to the previous options.
You can now move on and set the colors of your Facebook photo feed.
To do that, just click on the Color Scheme option on the left.
On this page, you can pick the colors for your Facebook photo feed. You can choose from:
- Inherit from Theme: Copy your website’s color scheme
- Light: Choose a bright look for your Facebook photo feed
- Dark: Have a darker look for your feed with light-colored font
- Custom: Manually pick all the colors of your feed
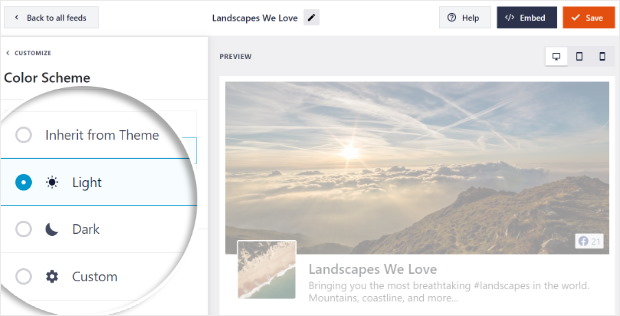
Select the color scheme you like and then click on Save.
After that, you can start editing the feed to your liking. With this simple editor, you can set the header type, post style, feed size, margins, and much more with a live preview to help you out.
When you’re done, you can just click on the Save button on the top right and move on to the next step where you embed the feed.
Step 5: Display Your Facebook Photos on WordPress
Now it’s time to show your Facebook photos on your website. This part’s actually pretty simple, and you can do it in 2 different ways.
Display Facebook Photos on Your Page
You can show your Facebook photo feed on your webpage with ease using the live feed editor.
First, click on the Embed button at the top right of your live feed editor.
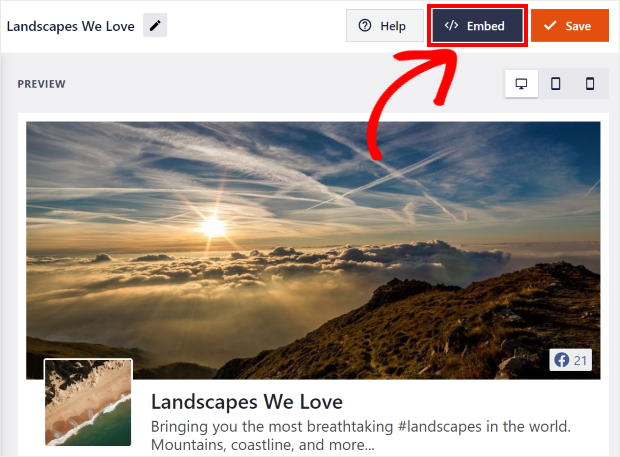
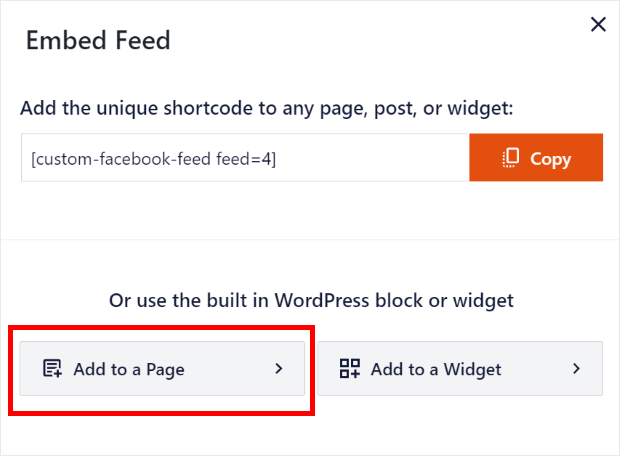
This will bring up a new popup. From here, you can choose where to show your Facebook photos.
To proceed, just click on the Add to a Page button here.
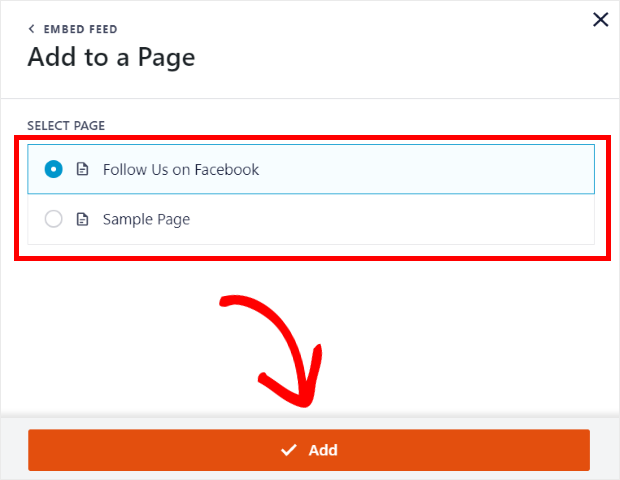
Now, you can see a list of all your available pages. Just pick the page where you want to show your Facebook photos and click on the Add button.
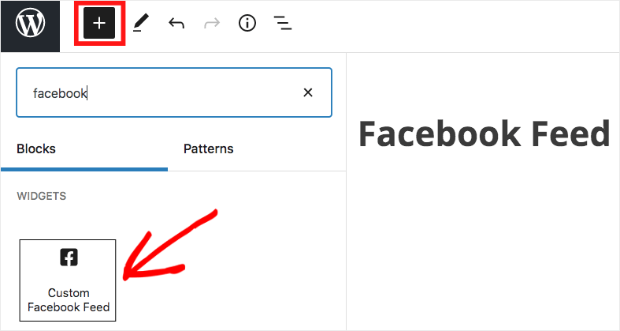
Once you’ve done that, the plugin will redirect you to the page.
Here, click on the small plus icon (+) and pick the Custom Facebook Feed widget.
Finally, click on the Publish button and you’re done.
You’ve now successfully added your Facebook photos to your website. Check out your website and see how they look to your visitors.

If you want to show your Facebook photo feed on your sidebar instead, the plugin has you covered as well.
Display Facebook Photos on Your Sidebar
You can also show your Facebook photos on your sidebar as a Facebook widget.
To do that, first go to the Facebook Feed menu from your WordPress dashboard. There, you’ll see a list of all your available feeds.
Simply click on your Facebook photo feed to proceed.
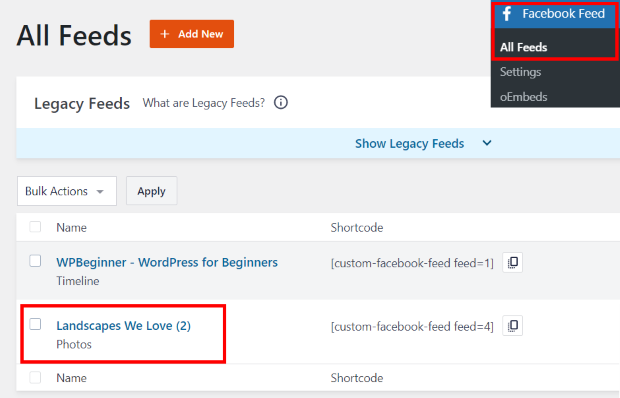
You’ll now see the live feed editor once again. Here, you can click on the Embed button in the top right corner.

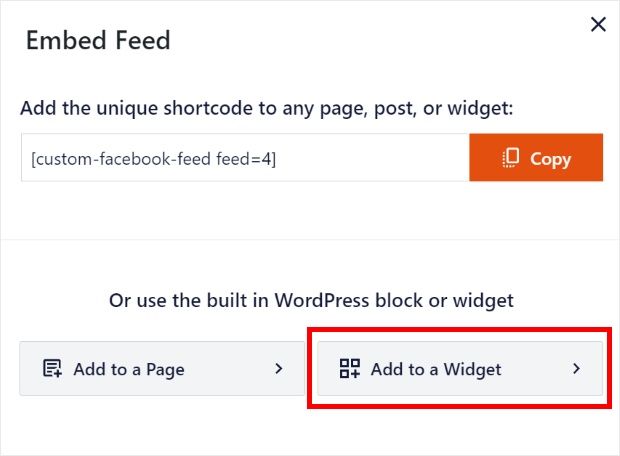
You’ll see a popup where you can pick the location for your Facebook photo feed. To continue, click on the Add to a Widget button.
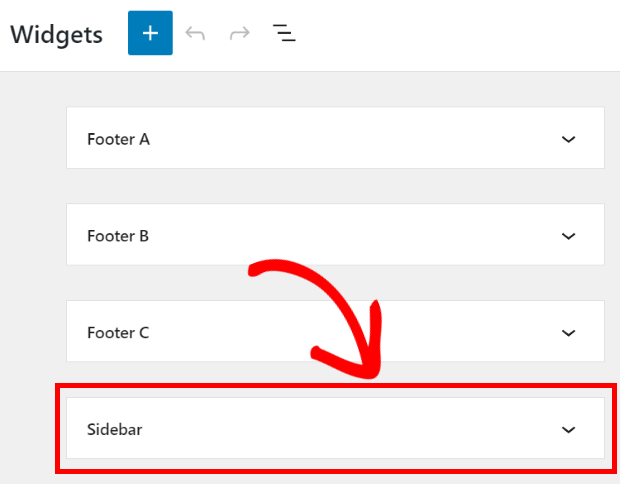
The plugin will redirect you to the widgets page now. Now, you can choose between all the available locations for your Facebook photo feed widget.
You can click on Sidebar from the options to continue.
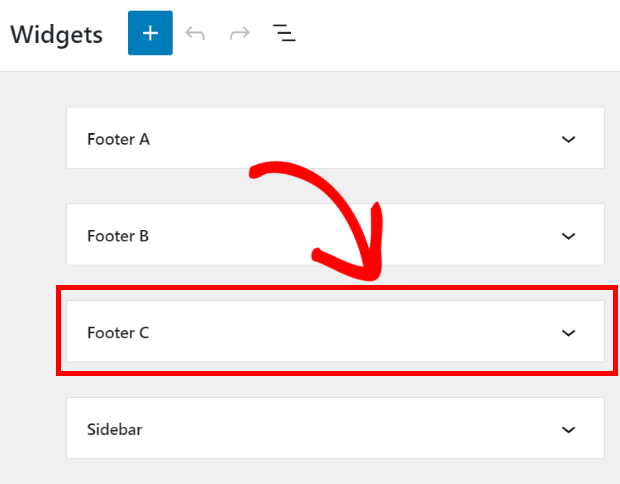
If you want to display Facebook photos on your footer instead, click on the other options here.
In this tutorial, we’ll display Facebook photos on the sidebar. Now, you can get started by clicking on the button with the plus icon (+) to add a new widget.
Here, select the Custom Facebook Feed block, and you’re done!
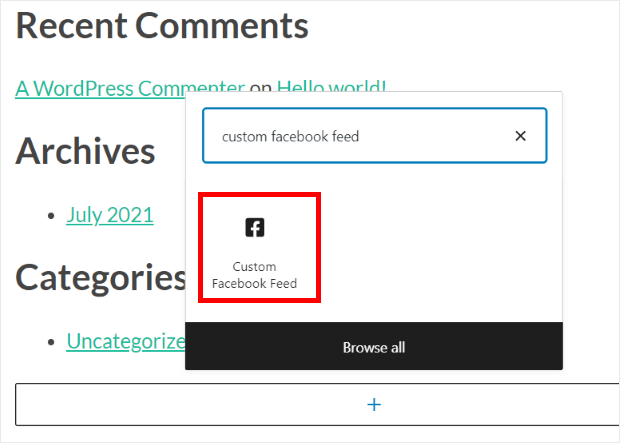
Your website now has your Facebook photo on the sidebar! Open it up and you can check how it looks.
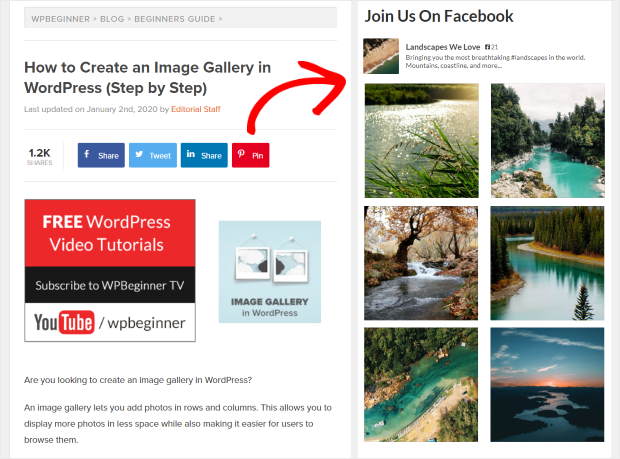
It’s not just simple photos you can show in WordPress, either. Smash Balloon’s Facebook Album’s extension lets you embed a Facebook album on your website too.
Display Facebook Photos on Your Website Manually
As an alternative to using a WordPress plugin to show Facebook photos on your website, you can embed your photos manually.
This is a useful choice if you’re not interested in using a WordPress plugin and have experience editing JavaScript and other coding languages.
Yet if you’re not comfortable with this approach, we suggest using the easier method above.
One of the drawbacks of adding Facebook photos to WordPress manually is it isn’t as user-friendly.
Facebook Feed Pro automatically imports Facebook photos, displaying them in a user-friendly grid. Then when users click each image, you can see the captions and further details.
But if you don’t use a WordPress plugin, the manual method requires you to find the individual Facebook posts with the photos you want to display. Then instead of a beautiful gallery, you’ll end up embedding a single Facebook post.
Let’s look at how it works.
First, head to the Facebook Developers website and choose the Embedded Posts option.
Next, enter the URL of the Facebook post containing the photo you want to add to your site. You can include the full post or the post’s image by clicking the checkbox.
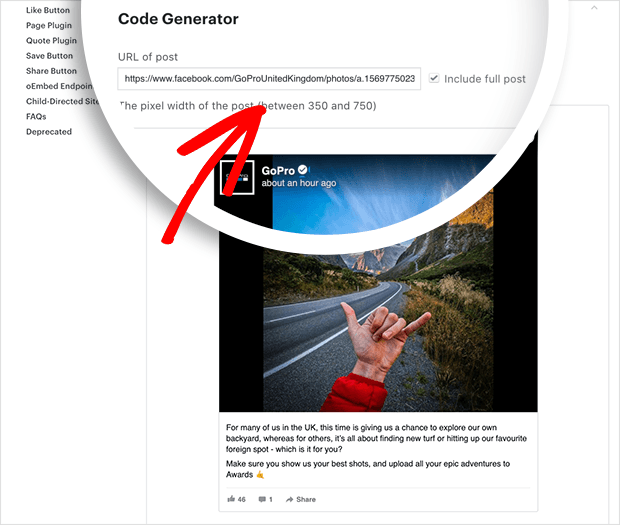
Now click the Get Code button to open a lightbox popup containing the embed codes for your website.
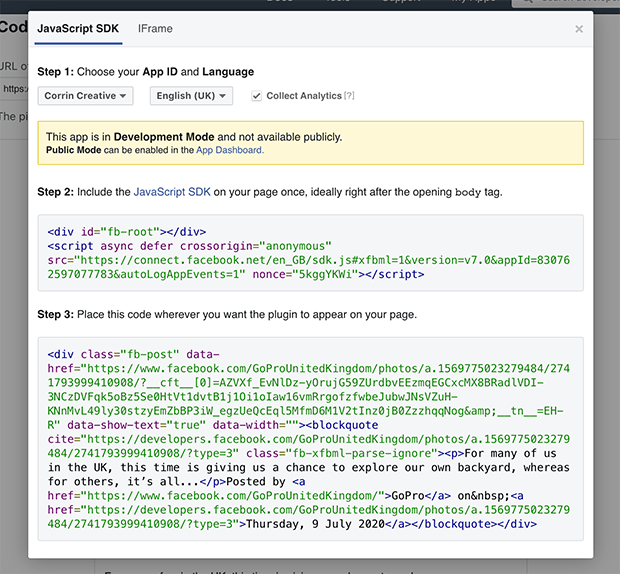
To embed your post in WordPress, copy the first section of code, and paste it into your site’s header.php file after the opening <body> tag.
If you’re using a modern WordPress theme, you may be able to do this using the WordPress customize panel, as shown below. If that’s the case, paste the code into the Header box and save your changes.
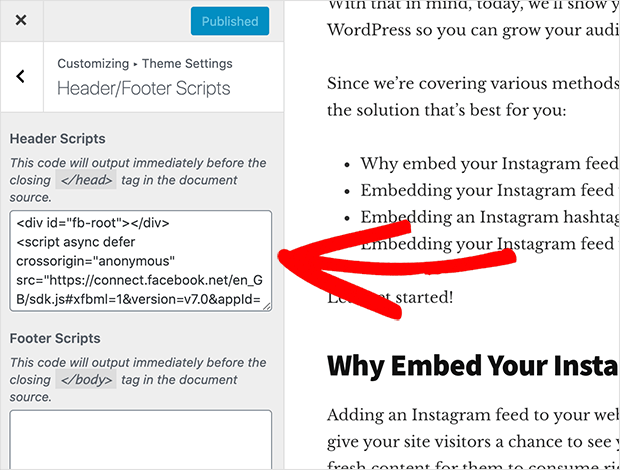
Now copy the second section of code, and create a new page in WordPress.
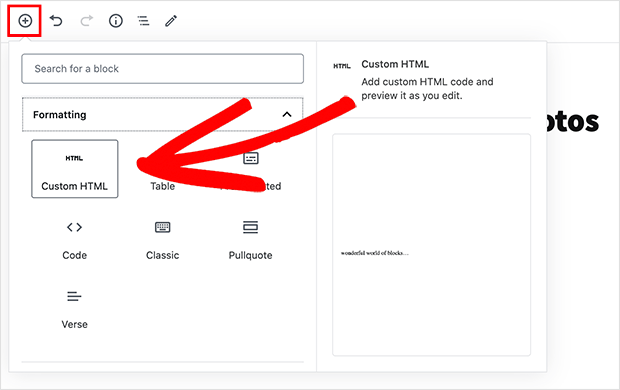
If you’re using the block editor, add a new block by clicking the Plus (+) icon. Then under the Formatting section, choose the Custom HTML WordPress block.
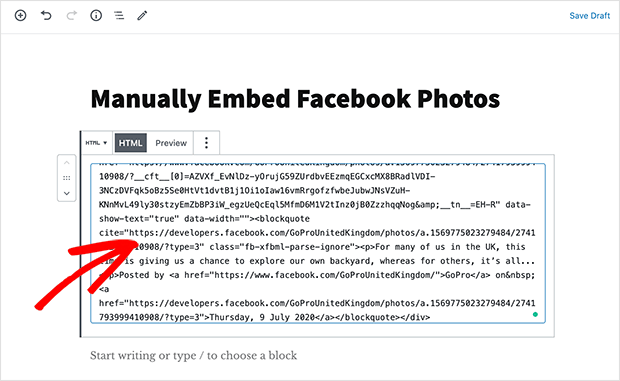
Paste your Facebook photo embed code directly into the Custom HTML block, and publish your page.
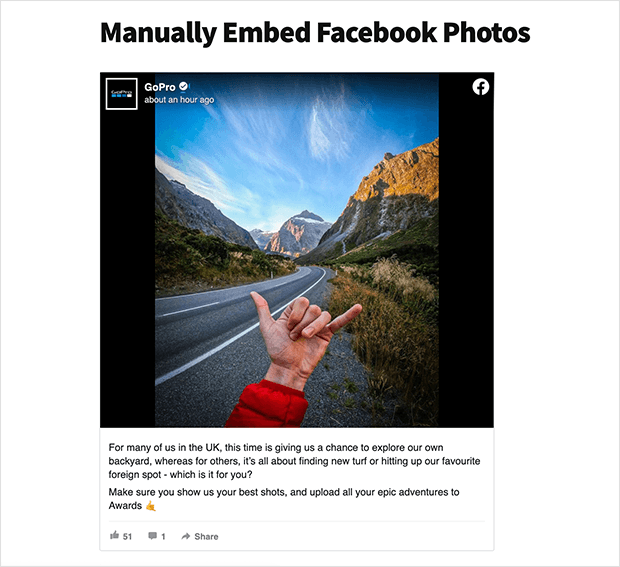
When you visit your live page, it’ll look similar to the example below.
Best Way To Display Facebook Photos in WordPress
As you can see, manually embedding Facebook photos on your site won’t give you the polished, user-friendly design you can achieve when using a WordPress plugin.
It also limits how many photos you can show to the number included in the initial post.
Whereas with Smash Balloon’s Facebook plugin, you can display as many photos as you like, in multiple Facebook feeds across your website.
This helps you increase engagement between you and your site visitors and helps you get more likes by displaying dynamic Facebook content directly on your website.
So what are you waiting for?
Click here to get started with Facebook Feeds Pro by Smash Balloon today!
Plus, the plugin can do a lot more than embed Facebook photos.
In fact, you can also check out our guide on how to embed Facebook videos to WordPress and make your site even more engaging.
Want to know how to add social media content to your site? Here’s how to embed social media feed widgets on WordPress.
Finally, if you enjoyed this article, feel free to follow us on Twitter and Facebook for more helpful tutorials.


