Social Wall
  Feed Analytics


Are you looking for an easy way to add an X (Twitter) feed to WordPress without a plugin?
Embedding X (Twitter) content on your site is a great way to show valuable social proof and keep your audience engaged.
As I’ve been a digital marketer working with embedding social feeds for several years now, I know that adding an X (Twitter) feed manually is challenging, especially if you’re not tech-savvy.
Plus, most WordPress tutorials on how to embed X (Twitter) feeds can be too technical for new users to get started.
In this article, I’ll show you how to add an X (Twitter) feed to WordPress without a plugin. Plus, I’ll show you a bonus method that takes even less time, effort, and coding.
In this Article:
Should You Add an X (Twitter) Feed With or Without a Plugin?
Maybe you’ve heard that fewer WordPress plugins are better for your site.
While poorly coded plugins can slow your site down, professional plugins can actually save time while still keeping your website fast.
The truth is that the number of plugins on your WordPress site has almost no direct impact on its speed and performance. It’s the quality of the plugin that matters most of all.
The best WordPress plugins are tested and optimized for speed. This means adding an X (Twitter) feed to your site using the X (Twitter) Feed Pro plugin from Smash Balloon won’t negatively impact your site.

Here’s what you’re up against going without a plugin:
- The timeline embed is unreliable. X (Twitter) still offers it, but it often fails to render, and plenty of people find it doesn’t work at all.
- One post per embed. Individual post embeds are the dependable option, so you can show a specific post. Every extra post means another block of code.
- Nothing updates by itself. Post something new and it won’t appear on your site until you embed it by hand.
- Barely any customization. You get what X (Twitter) gives you, and changing much beyond that means a developer.
- The code is easy to lose. Switch WordPress themes and your widget-area embeds can disappear with the old theme.
Easiest Way to Add X (Twitter) Feeds to WordPress Websites
Looking for an easier way? Smash Balloon X (Twitter) Feed Pro builds the feed for you and keeps it updated, so you’re not embedding posts by hand.

With the X (Twitter) Feed Pro plugin, you can easily embed X (Twitter) content in your site and completely tailor your feed using the following features:
- Unlimited X (Twitter) feeds: Show as many feeds as you like on the same page or throughout your website without any limitations using this custom X (Twitter) feeds plugin.
- User-friendly: Since the plugin is so easy to use, you can create X (Twitter) feeds in minutes — even if you’re a WordPress beginner.
- Lots of feed types: Display the latest X posts and reposts from user timelines, hashtag feeds, lists, and even advanced search terms in stunning X (Twitter) feeds.
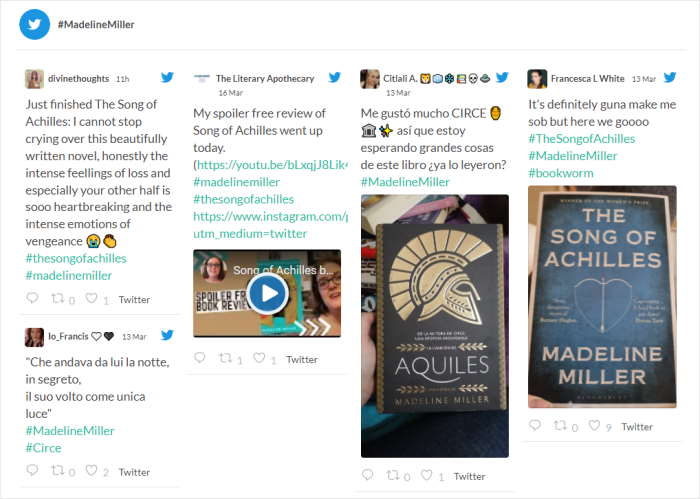
- Multiple feed layouts: Show your feed in a multi-column masonry layout, scrolling carousel, or a single-column list.
- SEO Ready: By showing custom X (Twitter) feeds with relevant keywords, you can rank high in search engine results and reach more people
- Code-free customization: Use this X (Twitter) plugin’s visual customizer to control your feeds’ colors, fonts, buttons, X post styles, padding, and more without writing a single line of code.
There’s a lot more, too — see the full list of X (Twitter) Feed features here.
In fact, some of the biggest companies in the world are also using Smash Balloon social media feed plugins to showcase social media content on their website:

Ready to embed an X (Twitter) feed on your WordPress — no coding needed? Get started with X (Twitter) Feed Pro.
With that, let’s go ahead and see the easiest way to add X (Twitter) feeds to your WordPress website.
Best Way to Embed X (Twitter): Use an X (Twitter) WordPress Plugin
If you’d rather take the easier route, here’s the plugin method step by step. It only takes a few minutes and you’ll have an auto updating feed on your website.
Step 1: Download and Activate Smash Balloon X (Twitter) Feed Pro
To begin, click here to get started with X (Twitter) Feed Pro from Smash Balloon and download the plugin to your computer.
After that, you’ll need to upload the plugin to your WordPress website. If you want help with that, see this guide on installing a WordPress plugin.
Step 2: Create an X (Twitter) Feed
With this plugin, you can simply follow the guided flow to create a new X (Twitter) feed for your website.
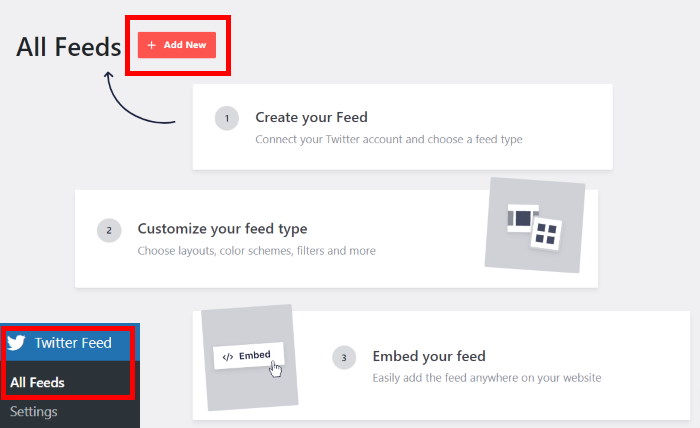
To get started, first, go to the X (Twitter) Feed » All Feeds menu from your WordPress dashboard area.
On the new page, click on the Add New button.
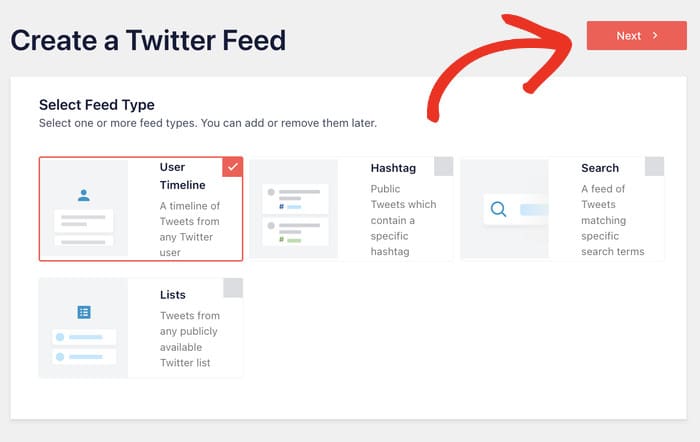
After you do that, you can choose the type of X (Twitter) feed that you want to show on your website:
- User Timeline: Recent X posts made by specific X (Twitter) accounts
- Hashtag: A feed of public hashtags from X (Twitter)
- Search: A feed based on an advanced X (Twitter) search
- Lists: Display content from a public X (Twitter) list
Click the feed type you’d like to create, then click the Next button.
For our tutorial, we’ll create a user timeline feed.
Just like that, you now have an X (Twitter) feed on your website.
Step 3: Link Your X (Twitter) Account
For the next step, you can connect your X (Twitter) account to this plugin.
That way, X (Twitter) Feed Pro can show content from X (Twitter) on your website.
To get started, click on the Connect button.
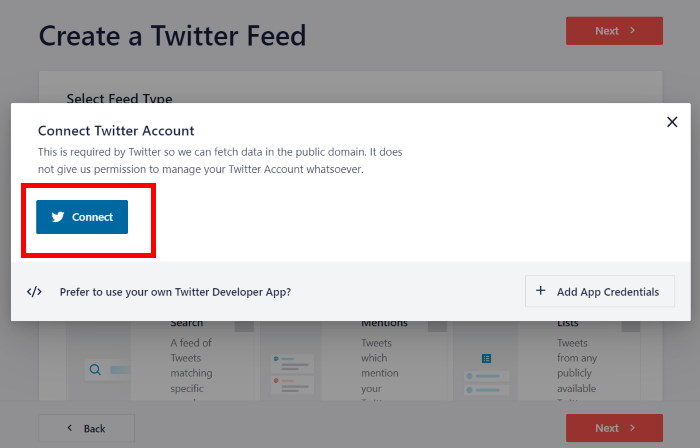
Now, the plugin will open X (Twitter) and ask for read-only access to your X (Twitter) account.
Using this access, X (Twitter) Feed Pro will only view information on X (Twitter) and won’t be able to make changes to your account at all.
To allow read-only access, click on the Authorize app button on the popup.
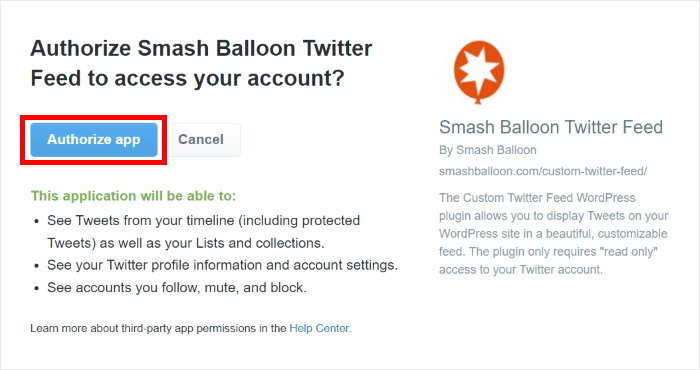
Doing that will bring you back to your website where you can choose which X (Twitter) content to show on your website.
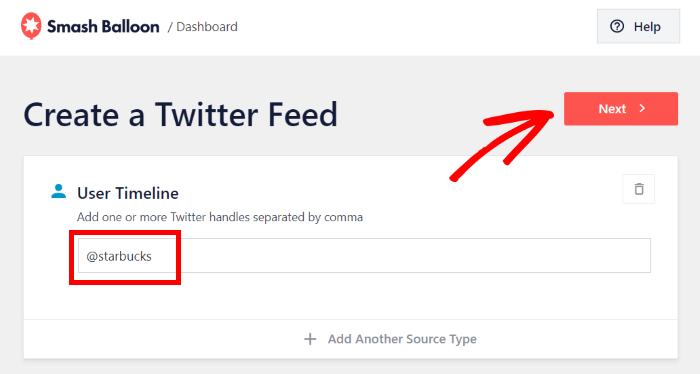
On the popup, enter the X (Twitter) handles, hashtags, or search terms that you want to embed.
For our example, we’ll enter the “@starbucks” X (Twitter) handle here.
After you do that, click on Next to proceed.
Step 4: Choose Your Customizations
If you were to go ahead and publish your X (Twitter) feed now, it would look fantastic right out of the box. This is because X (Twitter) Feed Pro adapts to your current website’s design.
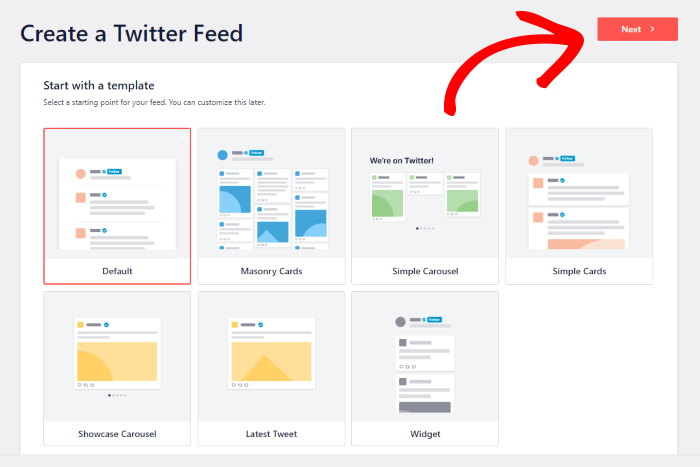
What’s more, it also has pre-designed X (Twitter) feed templates that you can import in a single click.
To help you create beautiful X (Twitter) feeds with ease, you get to pick from 7 templates:
- Default
- Masonry
- Simple Carousel
- Simple Cards
- Showcase Carousel
- Latest X posts
- Widget
Select a feed template that you prefer and click on the Next button.
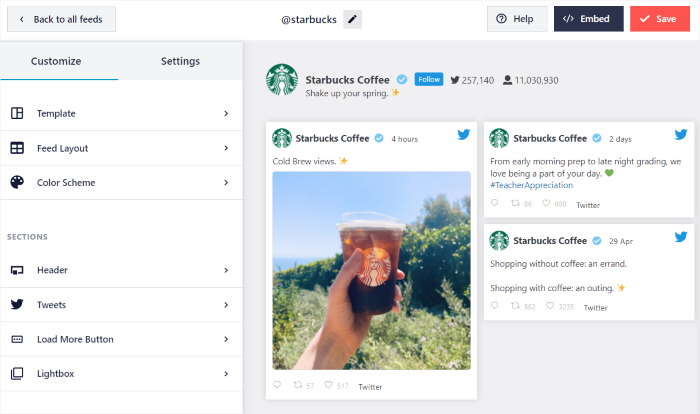
After you do that, you can use the live feed editor to configure your X (Twitter) feed even more.
Immediately, you can see options to change your feed’s color scheme, layout, header style, load more buttons, and more – no need for HTML, CSS, or any kind of code.
Towards the right, you can see a live preview of your new X (Twitter) feed.
Ready to start customizing your feed?
First, click on the Feed Layout option on the left panel.
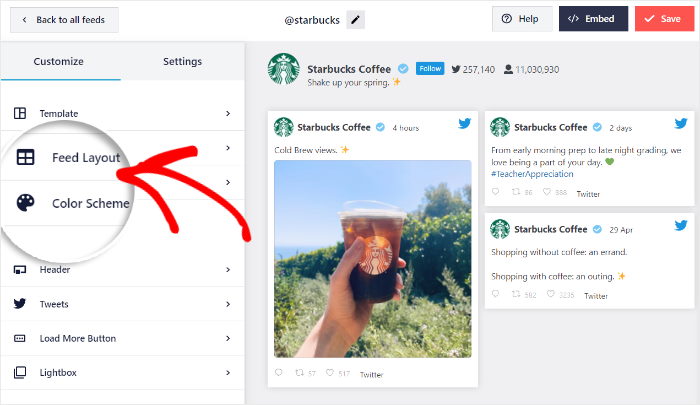
From here, you can choose your feed’s layout and decide how you want to show X posts on your website.
With X (Twitter) Feed Pro, you can pick from 3 options: List, Masonry, and Carousel.
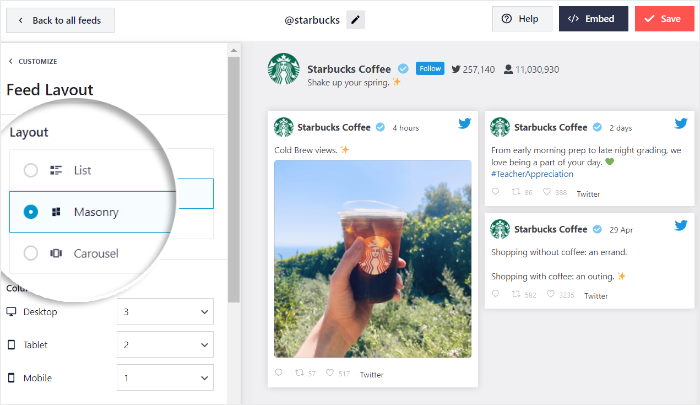
With the list layout, you can embed a list of X posts in a single column. That way, your X posts get more space on your website.

The second option is the masonry layout that can embed your X (Twitter) content in multiple columns. Plus, you can show tons of X posts at once.

You can also choose the carousel layout and show a sliding carousel for your X (Twitter) content. As a result, you can make your site more engaging.

Simply select the layout that you want to use and click on Save.
You can also change the number of posts, rows, columns, and more from here. Feel free to change them as you like before saving your changes.
Then, click on the Customize button at the top to return to the main customization options once more.
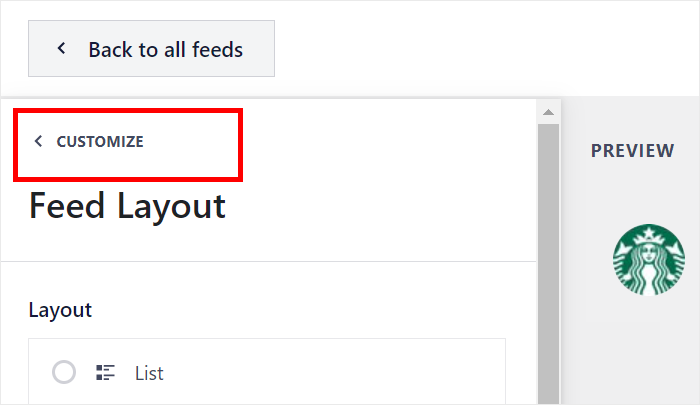
Next, you can use the live feed customizer to set the colors for your X (Twitter) feed.
You can click on the Color Scheme option on the left to get started.
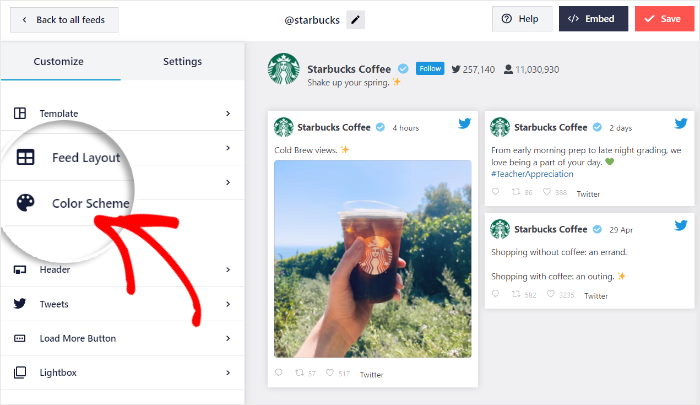
Now, you get 4 color schemes that you can use to quickly change the colors of your X (Twitter) feed:
- Inherit from Theme: Copy the colors of your website’s theme
- Light: Use light colors for the background and dark colors for the font
- Dark: Show a dark background and a light font for your feed
- Custom: Manually choose all the colors by yourself

Check out the options here and select the color scheme that you prefer. Personally, I like the Inherit from Theme color scheme so my X (Twitter) feed matches my site instantly. And like before, click on the Save button to confirm your changes.
After that, you can customize your header, lightbox, buttons, X post boxes, feed size, and much more using the live feed editor. Once you’re happy with your X (Twitter) feed, click on Save again to confirm this design.
Step 5: Publish Your X (Twitter) Feed
There are 2 ways you can add your X (Twitter) feed to WordPress with this plugin, including:
- X (Twitter) Feed WordPress Block: This lets you add your feed to a page using the WordPress block editor.
- X (Twitter) Feed Widget: The built-in widget lets you add your feed to your WordPress sidebar or footer areas.
To embed your X (Twitter) feed using both of these methods, you can use the live feed editor.
Click on the Embed button at the top to get started.
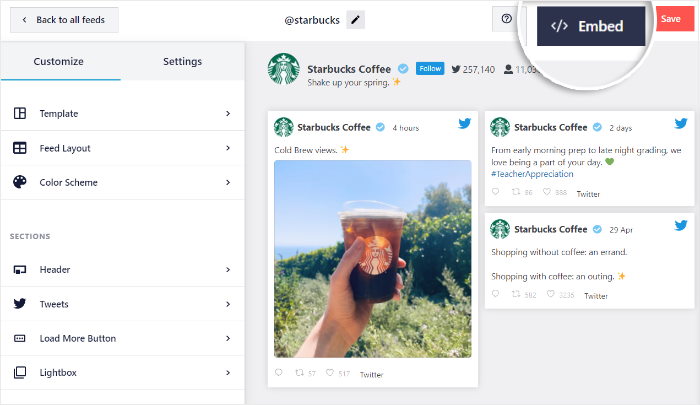
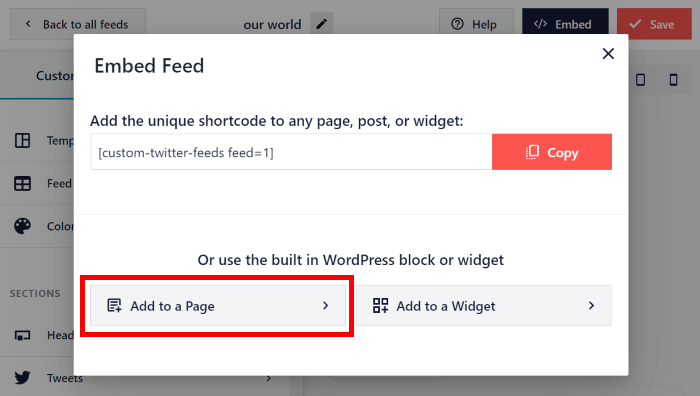
Now, X (Twitter) Feed Pro will show you a popup where you can choose how you want to embed the X (Twitter) feed. You can even copy your shortcode from here.
To embed it on a WordPress page, click on the Add to a Page button here.
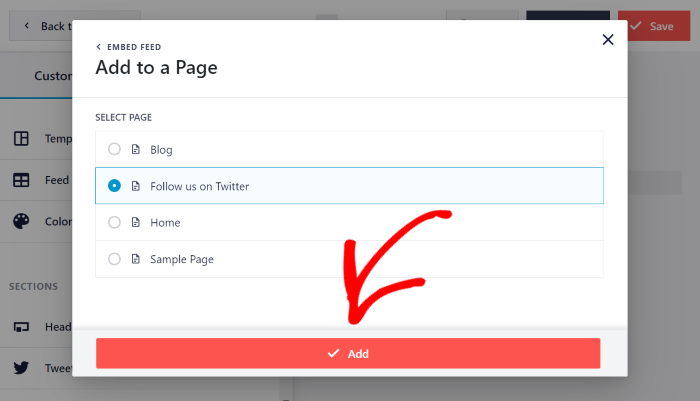
Next, you’ll see a list of WordPress pages on your site.
Select the page where you want to embed the feed and click on the Add button below.
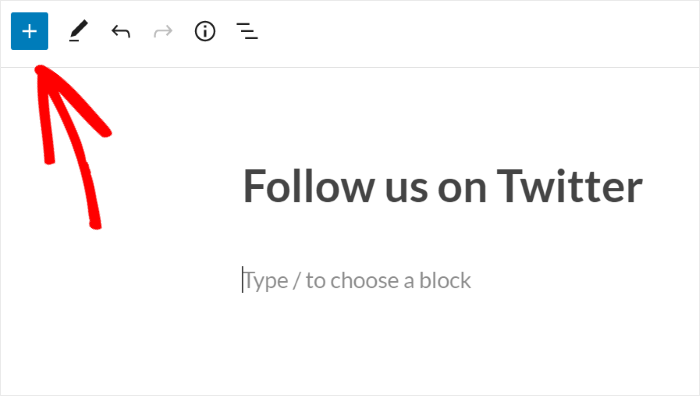
Doing that will open the WordPress page in the block editor.
Click the plus (+) icon to add a new WordPress block.
Now, look for the “twitter feed” block using the search bar at the top.
From the search results, click the X (Twitter) Feed WordPress block to add it to your page.
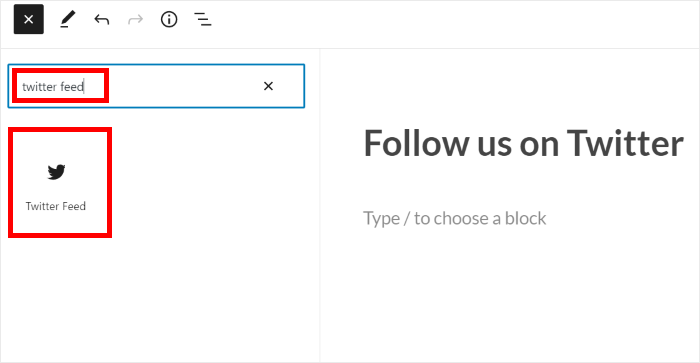
Finally, click on the Publish or Update button, and your X (Twitter) feed will be online.
Now, when you open your WordPress page, you’ll see your published X (Twitter) feed like this:

To add an X (Twitter) feed to your WordPress sidebar, open your X (Twitter) feed in the live feed editor.
You can do that by navigating to the X (Twitter) Feed » All Feeds menu from your WordPress dashboard to view all available X (Twitter) feeds.
Then, go ahead and click on the feed you created earlier.
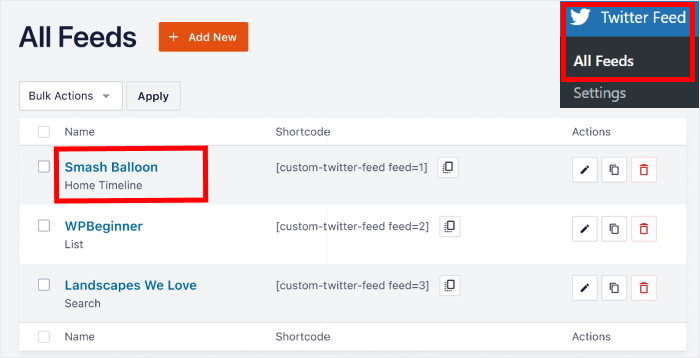
This way, you can open any of your X (Twitter) feeds in the live feed editor again.
From here, click on the Embed button at the top to get started.
Like before, you’ll see a popup where you can choose the location of your X (Twitter) feed.
To embed your X (Twitter) feed as a widget, you can click on the Add to a Widget option here.
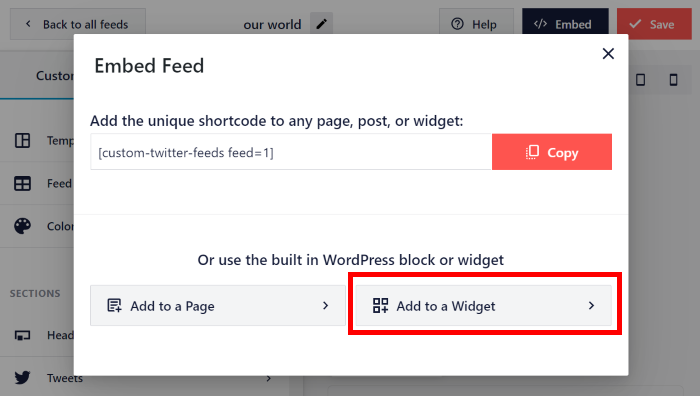
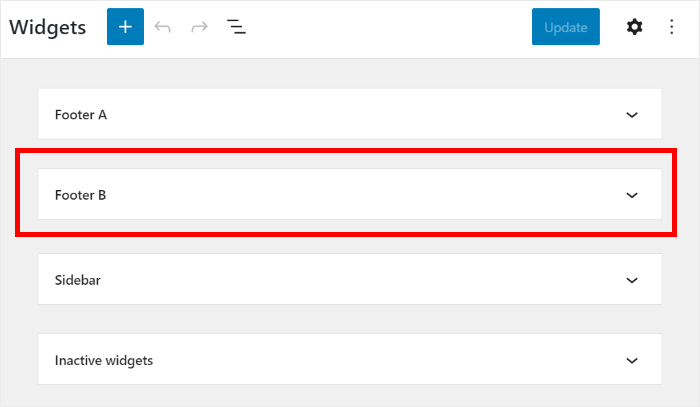
Doing that will open your Widget page, where you can add, remove, or edit WordPress widgets for your site.
Want to show an X (Twitter) feed widget on your sidebar? Simply click on the Sidebar panel.
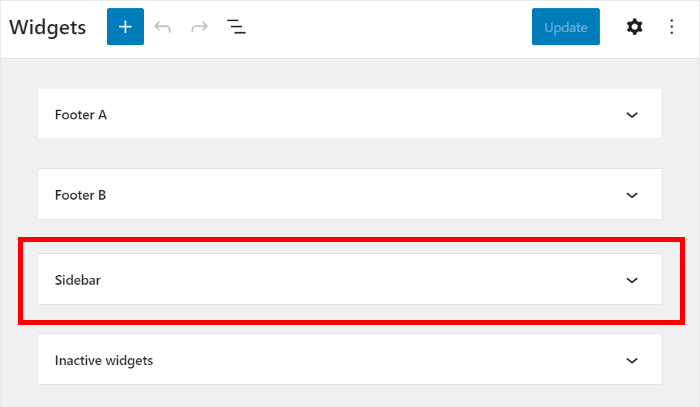
You can also click on a Footer panel instead and embed your X (Twitter) feed there.
To add a new widget, click on the plus (+) icon at the bottom.
From there, find the X (Twitter) Feed widget and click on it.
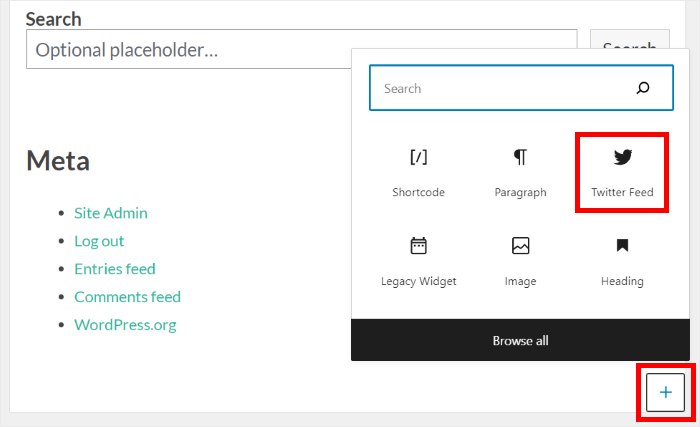
Remember to click Update to preserve your settings.
Finally, you can open your website to see how your new X (Twitter) feed widget looks.
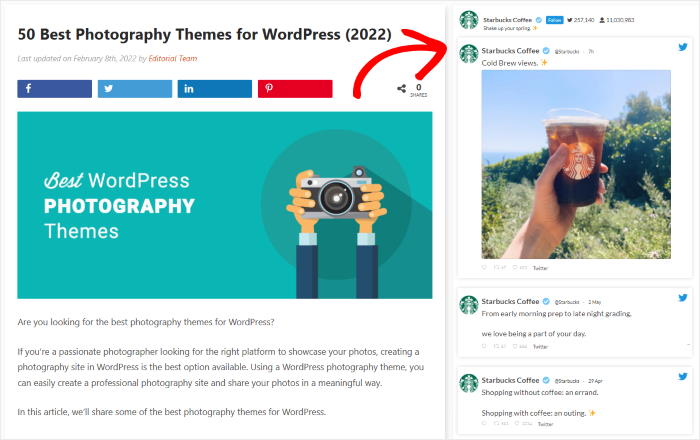
And that’s your feed live on your site, updating itself every time you post.
Want a feed, not one post at a time?
Connect your account once and your latest posts appear automatically, in a feed that matches your theme.
Get Smash Balloon X (Twitter) Feed ProBefore You Try the Manual Method
One thing that’s worth knowing first, because it affects which option you should pick.
X (Twitter)’s embed tool gives you three choices, and they’re not equally dependable:
| Option | How reliable is it? | What you get |
|---|---|---|
| Embedded X post | ✅ Usually fine | One post, embedded individually |
| X (Twitter) Buttons | ✅ Usually fine | A follow button |
| Embedded Timeline | ⚠️ Inconsistent | A feed, when it renders |
Embedded Timeline is the one that gives you an actual feed, and it’s the one causing problems. Often the code generates normally but nothing appears on the page, just a blue link where the feed should be.
That blue text is the fallback built into the embed code, so seeing it means the timeline didn’t load.
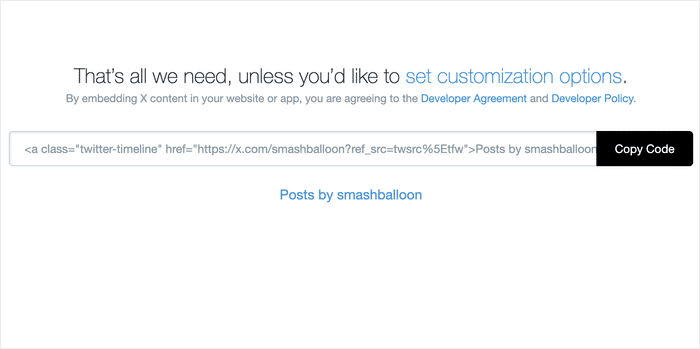
This is one of the most common complaints about embedding X (Twitter) content. Developers have been raising it on X (Twitter)’s own forums since 2023 and reports are still coming in this year.
It might work fine for you. X (Twitter) hasn’t removed the feature and could fix it at some point. But an embed that renders today and quietly empties next month is a bad thing to build a page around, so it’s worth knowing before you start.
If an embed of yours has stopped showing anything, here’s why X (Twitter) embeds break and how to fix them.
The steps below work for either option. I’d start with a single post, since that’s the more dependable one.
Add an X (Twitter) Feed to WordPress Without a Plugin
As you can see, using a WordPress plugin to set up your X (Twitter) feed is a smart idea. But if you’d rather add a feed without a WordPress X (Twitter) plugin, follow the simple steps below.
Step 1: Visit the Twitter Publish Website

The first step is to go to the official Twitter Publish website.
From here, you can generate X (Twitter) embed codes that you can add to your website.
Step 2: Select Your Embed Options
Next, scroll down the page to view the different embed options, which include:
- Embedded X post: A single X post or X (Twitter) thread
- Embedded Timeline: A full user timeline from an X (Twitter) profile
- X (Twitter) Buttons: X (Twitter) follow buttons
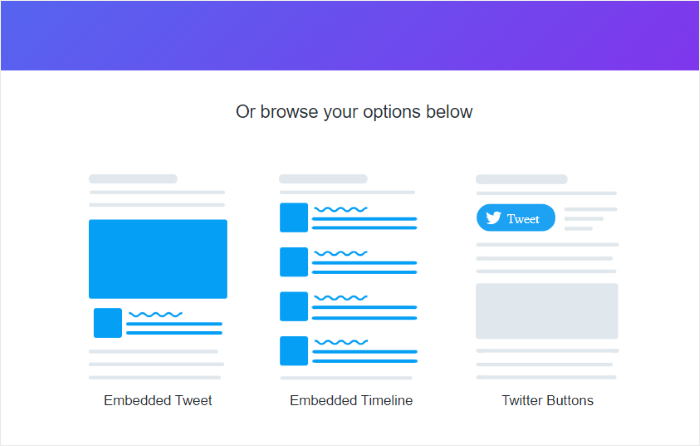
Click whichever option you want. You can still try Embedded Timeline if you want the feed version, just keep the reliability issue above in mind.
Step 3: Enter Your X (Twitter) URL
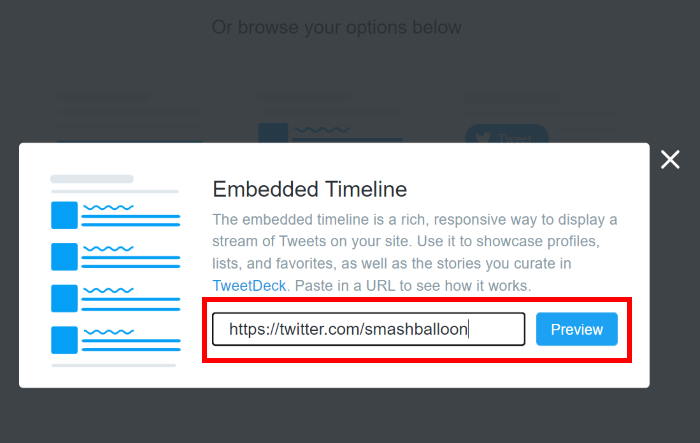
After clicking your preferred embed option, a lightbox popup appears, asking you to paste a URL.
In this box, enter the URL of the X (Twitter) feed you’d like to show on your website and click the Preview button.
Step 4: Copy the X (Twitter) Embed Code
If nothing renders in the preview, that’s the problem showing up.
Try a different post, or switch to a single post embed if you were attempting a timeline. There’s no way to tell in advance which ones will work.
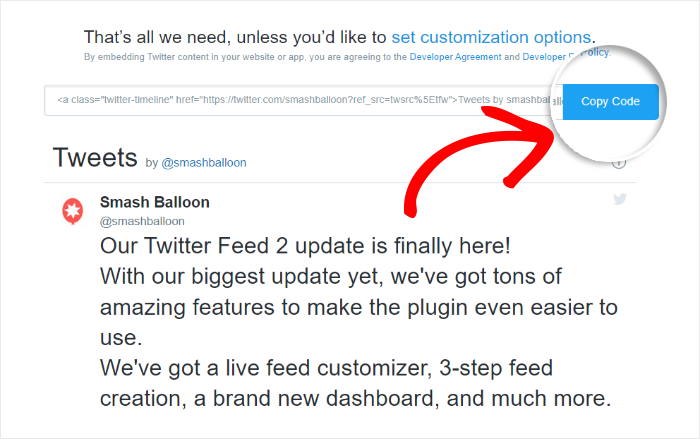
In case the preview works for you, click on the Copy Code button.
Step 5: Add the X (Twitter) Embed Code to WordPress
The final step is to paste your X (Twitter) embed code on your WordPress website. You can do this by adding the code to a new post, page, or widget.
To add your X (Twitter) feed to a new page, navigate to Pages » Add New from your WordPress dashboard.
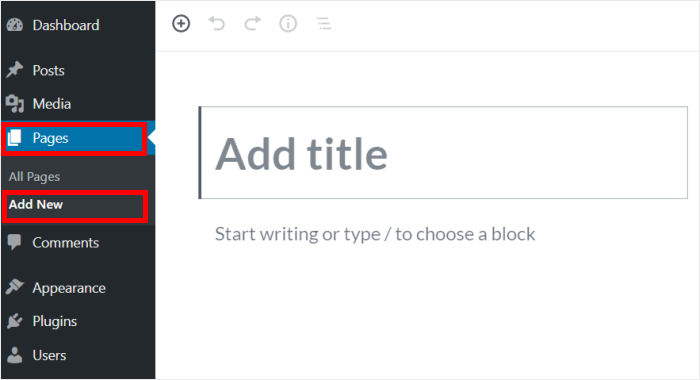
To use a WordPress post instead, go to the Posts » Add New menu from your dashboard instead.
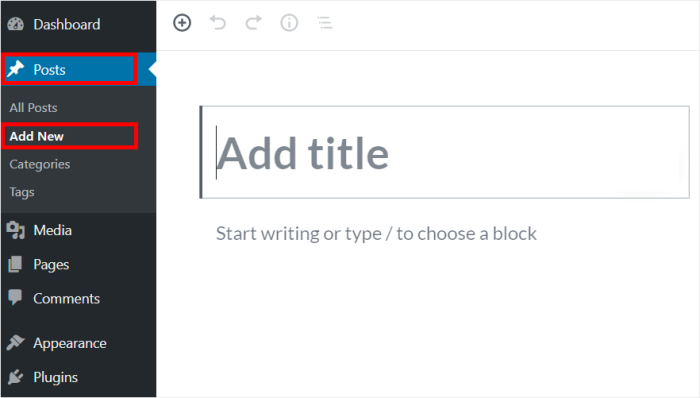
This will open a new page or post in your WordPress block editor.
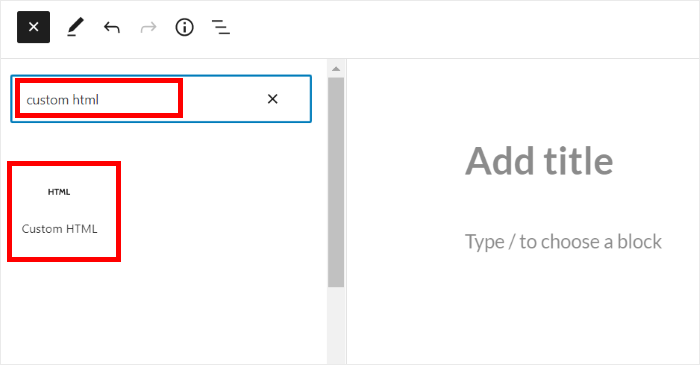
From here, you can now start embedding your X (Twitter) feed. First, click the plus (+) icon to add a new WordPress block.
Then, use the search box to look for “custom html” before clicking on the Custom HTML block in the search results.
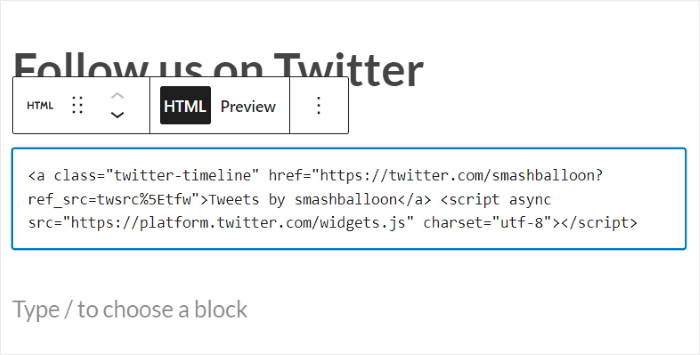
Inside your new block, simply paste the X (Twitter) embed code that you just copied earlier.
Finally, click on the Publish button to save this page.
Now, you can open this page and check if your X (Twitter) widget is working or not.
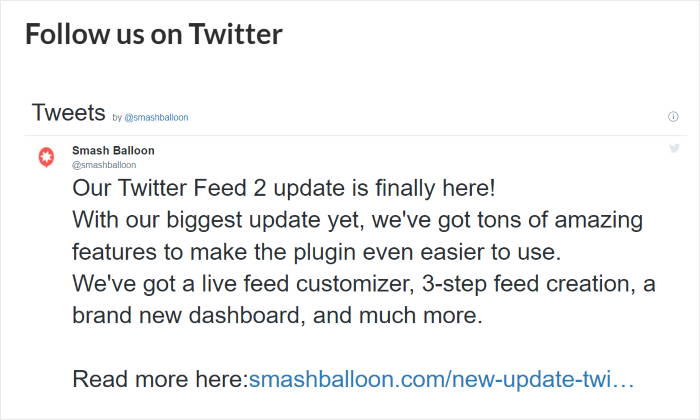
You can also embed your X (Twitter) feed manually on your WordPress sidebar or footer by using an X (Twitter) widget.
To do that, navigate to the Appearance » Widgets menu from your dashboard.
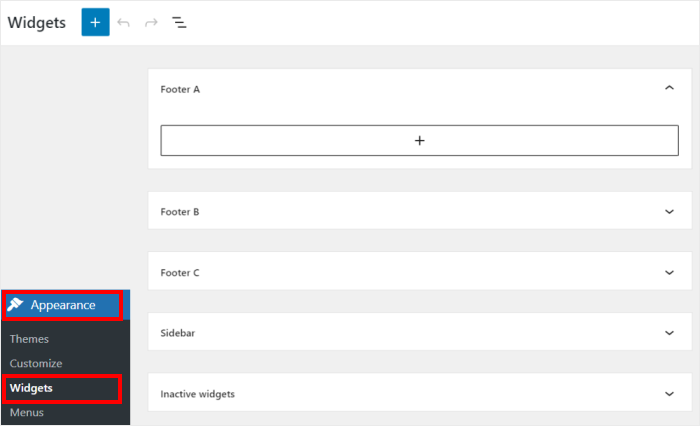
From this page, you can start managing your WordPress widgets easily.
Now, click on the Sidebar panel to embed your X (Twitter) widget there.
You can also click on the Footer panel instead if you prefer to show X (Twitter) content on your footer area.
Finally, click on the plus (+) icon to add a new widget, and then click on the Custom HTML widget from the options.
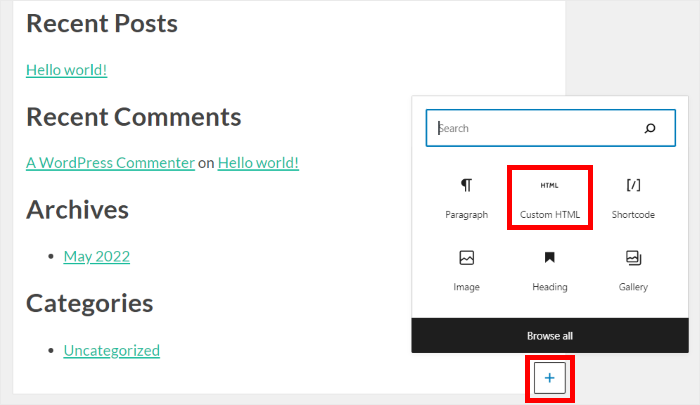
Like before, paste the X (Twitter) embed code that you copied earlier, and WordPress will embed your X (Twitter) feed as a widget.
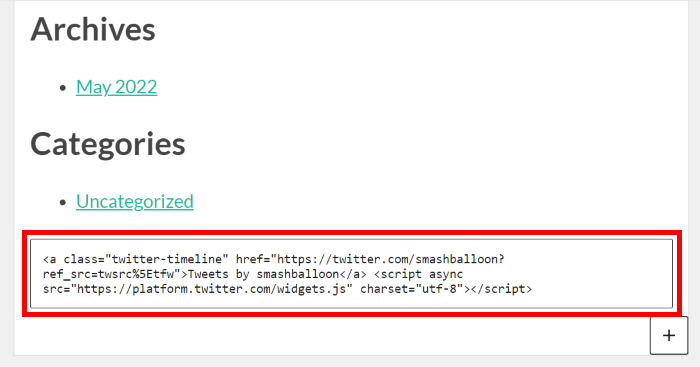
Remember to click on Update to preserve your settings. Then, when you preview your published widget, it’ll look something like this:

As you can see, this method is pretty limited and doesn’t offer a lot of customization options. Plus, you’ll have to manage lots of embed codes if you want to show different X posts on your site.
There you have it!
You’ve learned how to add an X (Twitter) feed to WordPress without a plugin. Now, you can engage your website visitors with relevant content from X (Twitter).
But if you want to easily embed X posts in a WordPress site, using a plugin will make things much easier. That way, it only takes a few simple clicks with no coding needed.
Ready to embed your X (Twitter) feed in WordPress websites with ease? Get started with X (Twitter) Feed Pro today.
On a limited budget? You can also use Smash Balloon Custom X (Twitter) Feeds, the free version of X (Twitter) Feed Pro, without spending anything.
Want to try X (Twitter) Feeds Lite for FREE?
Enter the URL of Your WordPress website to install Custom X (Twitter) Feeds for FREE
Take note this free plugin lets you create an X (Twitter) feed from 1 public X (Twitter) account only though. If you want to embed X posts from multiple users, get started with X (Twitter) Feed Pro today.
Want to easily get more X (Twitter) followers in no time at all? Check out our simple guide on how to boost your X (Twitter) followers.
If you’re looking for social media tips on growing your X (Twitter) account, here’s how you can increase your X (Twitter) engagement today.