Looking for an easy way to show Twitter content on your website?
Adding a Twitter widget is one of the most effective ways to serve your visitors fresh, engaging Twitter content. With so many methods for adding widgets to WordPress, it’s hard to know where to start.
In this article, we’re going to show you how to add a Twitter widget in WordPress using 2 different methods:
- Adding Twitter widgets to WordPress with a plugin
- Embedding Twitter widgets in WordPress with Twitter Publish
Before we dive in, let’s clarify what we mean when we say “Twitter widget.”
What is a WordPress Twitter Widget?
A “widget” is simply a block of content that you can add to your site’s sidebar, footers, and other areas.
Have you ever visited a blog and seen a sign-up form or social buttons in the sidebar? Both of those are widgets. Each widget adds a feature or function to your site without the need to write any code.

So, a Twitter widget is a block of Twitter content you can add to your sidebar areas.
Using a Twitter widget, you can show Twitter content on your website and engage your visitors. To manually add a Twitter widget, you’ll need to deal with embed codes which can get confusing.

To make it easier, you can use WordPress plugins, which removes the need to mess around with code.
Should You Use a Twitter Plugin for WordPress?
If you’re not comfortable working with embed codes and would like an easy way to customize your widget, using a Twitter plugin is a smart decision.
That way, you can easily show tons of Twitter content on your website without touching a single line of code or hiring a designer.

Using a plugin, you can even tweak your Twitter widget’s design. For example, you can click a few settings to match the widget to your site’s theme and branding.
They also help you display specific Twitter widget examples like hashtag feeds, custom searches, and user timelines.
As you can see, a Twitter plugin for WordPress will make it much easier to create Twitter widgets that look how you want.
Methods to Add a Twitter Widget in WordPress
Now it’s time to look at the different methods for adding a Twitter widget in WordPress.
There are 2 ways to add a Twitter widget to your WordPress site:
- Add your Twitter widget using a WordPress plugin
- Add your Twitter widget manually
Let’s take a look at both of these methods below:
How to Add Twitter Widgets to WordPress With a Plugin
To add a Twitter widget to WordPress posts and pages, you’ll need to download the Twitter Feed Pro plugin from Smash Balloon.

As the highest-rated Twitter feed plugin for WordPress, it lets you seamlessly integrate your Twitter content into your website.
To help you create beautiful Twitter feeds, it even has a live feed editor to help you customize everything with ease. You can set your header, feed layout, color scheme, and much more.
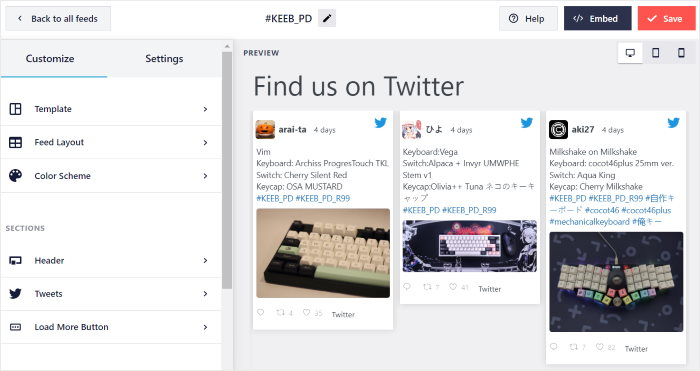
Plus, the plugin is lightweight, so you can embed as many tweets as you want, and your site will still load as fast as ever. With a faster site, you can get better SEO and rank high in search engine results as well.
You’ll have beautifully clean, customizable, and responsive feeds that increase engagement on your site and add valuable social proof.
As a result, Twitter Feed Pro has a rating of 4.9/5 stars and over 150,000 active users from all over the world.

Click here to get started with Twitter Feed Pro.
Now, let’s go ahead and see how you can add Twitter widgets to your site using this plugin.
Step 1: Install the Twitter Feed Pro Plugin
First, grab your copy of Twitter Feed Pro here and install it on your website.
Not sure how? You can just follow these instructions to install a WordPress plugin on your website.
After you install and activate the plugin, it’s time to create your Twitter widget.
Step 2: Create a New Twitter Widget
It’s time to create your Twitter widget using the plugin.
From your WordPress dashboard area, navigate to the Twitter Feed » All Feeds menu and then click on the Add New button.
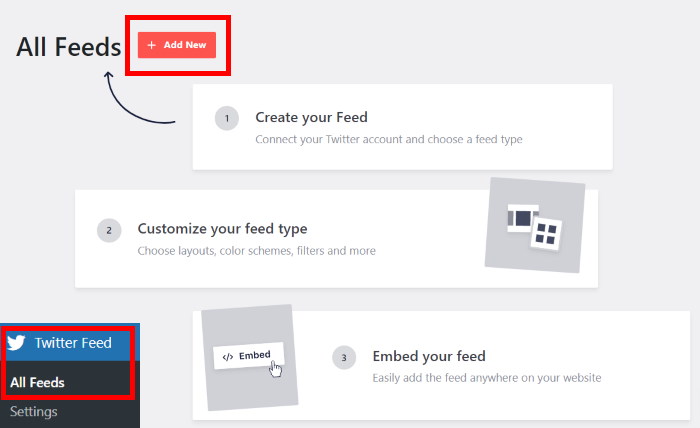
Now, Twitter Feed Pro will ask you to select the type of Twitter widget that you want on your website.
You can pick from these options:
- User Timeline: Pick a specific Twitter profile and show its tweets
- Hashtag: Feeds of content filtered to specific public hashtags
- Search: The results from an advanced Twitter search are displayed in a Twitter widget
You can also select multiple options here to combine different Twitter feed types in a single widget.
To continue, select your Twitter feed type and click on Next.
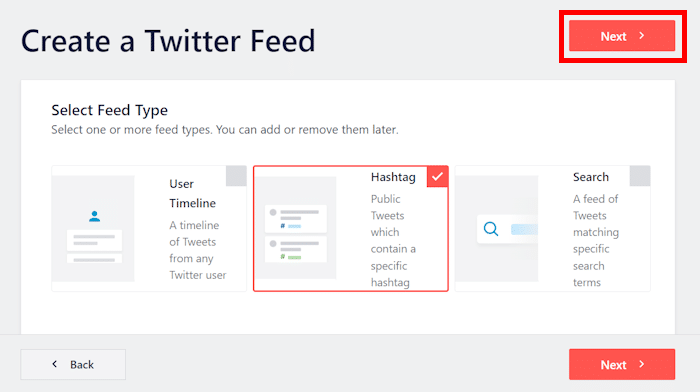
For this tutorial, we’ll show a hashtag Twitter widget.
As you can see, it’s super easy to create a new Twitter widget using the Twitter Feed Pro plugin.
In the next step, you can connect this widget to your own Twitter account so that it can display tweets on your site.
Step 3: Connect Your Twitter Account
Twitter Feed Pro makes it super easy to connect your Twitter account to WordPress
To get started, click on the Connect button on the popup.
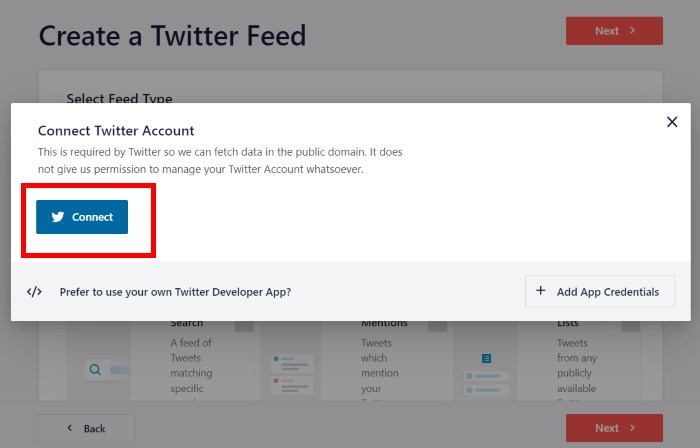
Once you do that, the plugin will open Twitter, where it asks for read-only access to your account.
Using this access, Twitter Feed Pro will only view your information and won’t be able to make any changes at all.
This means it’s totally safe to use this plugin.
Just click on the Authorize app button here, and you can confirm the read-only access.
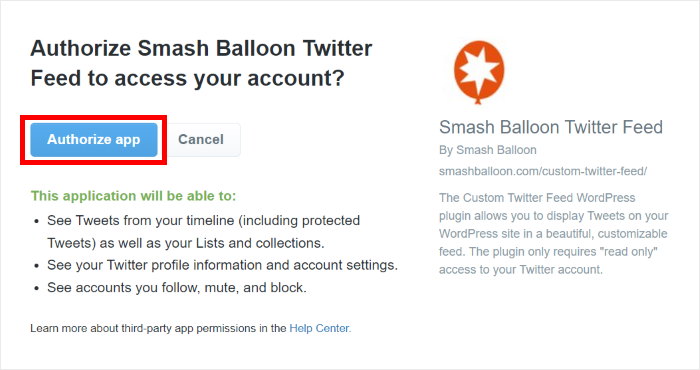
Once you do that, Twitter Feed Pro will send you back to your website once again.
You can now select what to show on your Twitter widget by adding the hashtag, user account, Twitter list, search term, and more.
For this guide, we’ll add our hashtag to the popup.
Once you add your source, just click on Next.
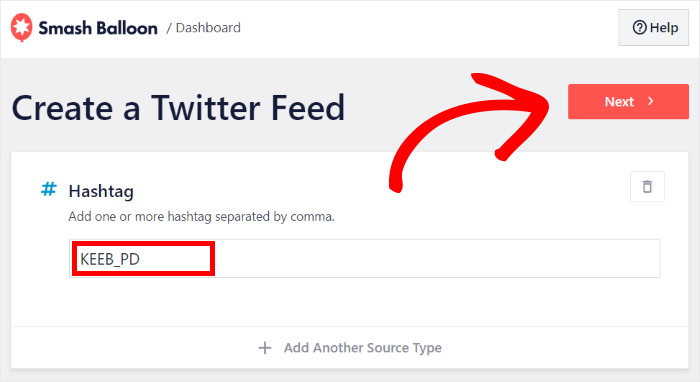
Just like that, you’ve created a new Twitter widget and connected it to your account.
Step 4: Customize Your New Twitter Widget
To make customization super easy, you can just select a template for your new Twitter widget.
There are 7 feed templates that you can choose from, and each has a unique design:
- Default
- Masonry
- Simple Carousel
- Simple Cards
- Showcase Carousel
- Latest Tweets
- Widget
Once you pick an option that suits your Twitter widget, click on Next to continue.
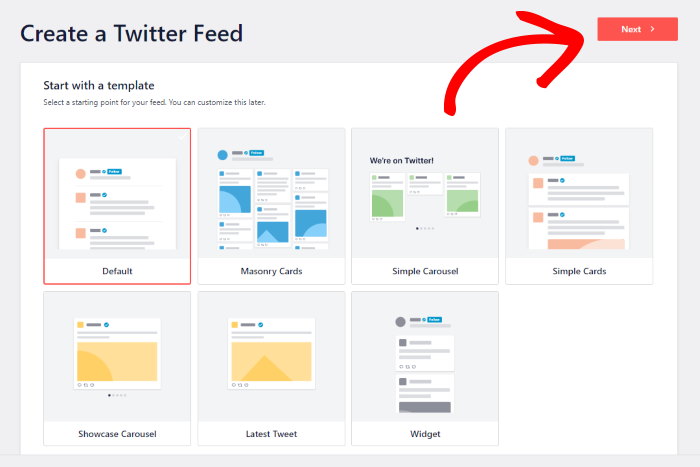
Now, you can use the live feed editor to customize the design of your new Twitter feed widget.
Towards the left, you can find the customization options to set your feed layout, colors, header design, tweet box style, lightbox options, and more.
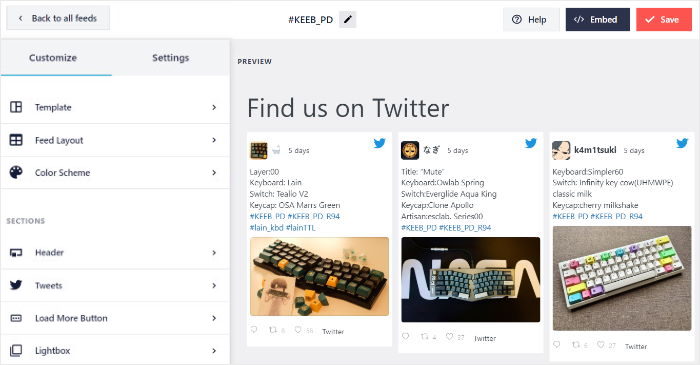
To help you track your changes, there’s a live preview of your Twitter feed on the right.
Let’s get started with the customization and set the layout of your Twitter widget.
To do that, just select the Feed Layout option from the left.
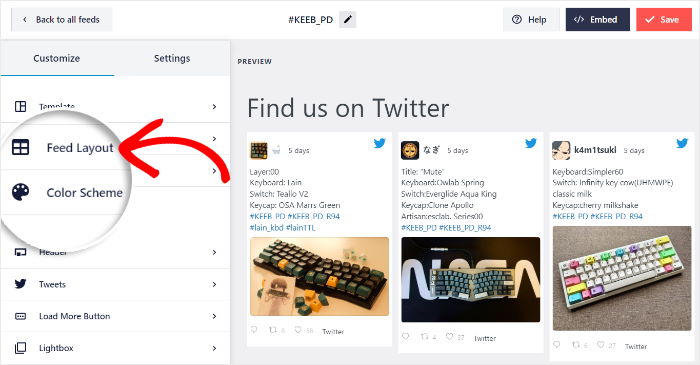
With Twitter Feed Pro, you can pick from 3 feed layout options:
- List
- Masonry
- and Carousel
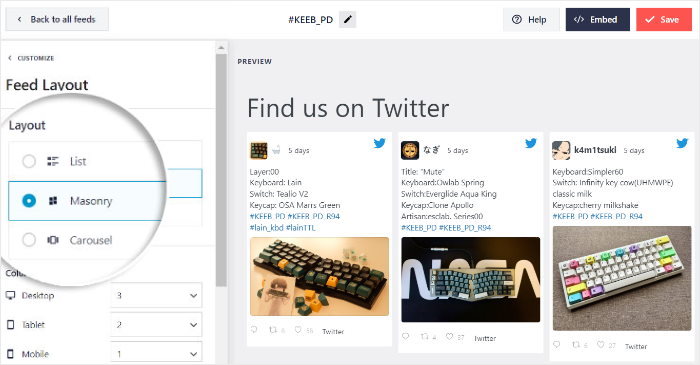
First, you have the List option that shows your tweets in a single column. That way, your tweets will get a lot more room.

Want to show tons of tweets at once on your Twitter widget?
You can go for the Masonry layout, which shows the tweets in multiple columns.

You can also pick the Carousel layout and show your tweets in a beautiful slideshow carousel.
That way, your visitors can interact with your Twitter widget to check out more content.

Once you select the feed layout that fits your Twitter widget, just click on the Save button.
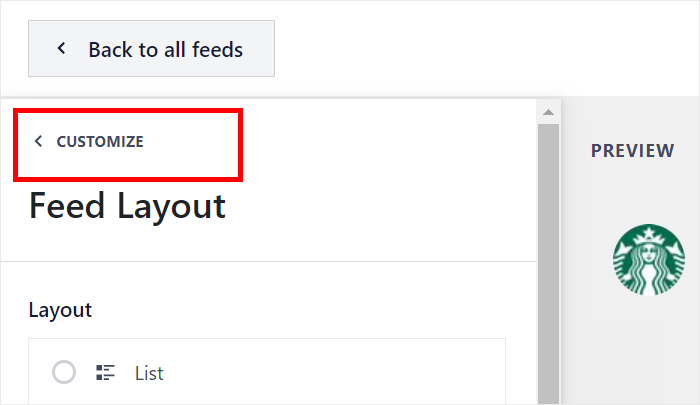
From here, you can return to the main options by clicking on the small Customize button at the top.
Want to choose the colors for your new Twitter widget?
Then click on the Color Scheme option on the left.
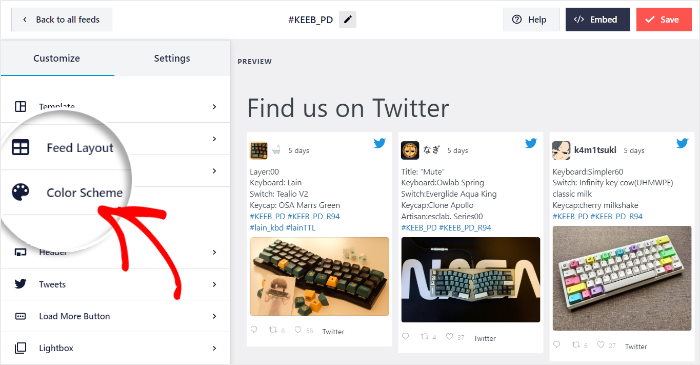
To select the colors for your widget, you can just pick a color scheme.
With Twitter Feed Pro, there are 4 options for your color scheme:
- Inherit from Theme: Automatically copy your theme’s colors
- Light: Pick a bright look for your Twitter widget
- Dark: Use dark colors and light font instead
- Custom: Select all the colors manually
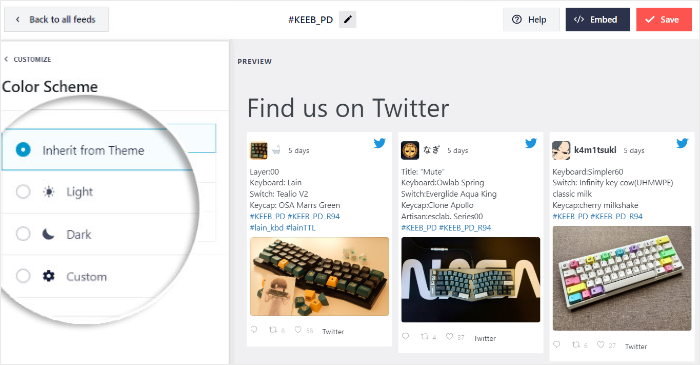
Select the color scheme that you prefer and then click on the Save button again to confirm your changes.
Using the live feed editor, you can now go ahead and customize your tweet box style, Twitter header, load more button, feed size, and much more.
Once you’re happy with how your Twitter widget looks, remember to click on Save once again.
Step 5: Add Twitter Widget to WordPress
It’s super easy to embed the Twitter widget using the live feed editor. What’s more, there are two ways you can embed your widget:
- Add the Twitter widget to a WordPress page
- Add the Twitter widget to the sidebar or footer
We’ll take a look at both of these methods below.
From the live feed editor, click on the Embed button at the top to get started.
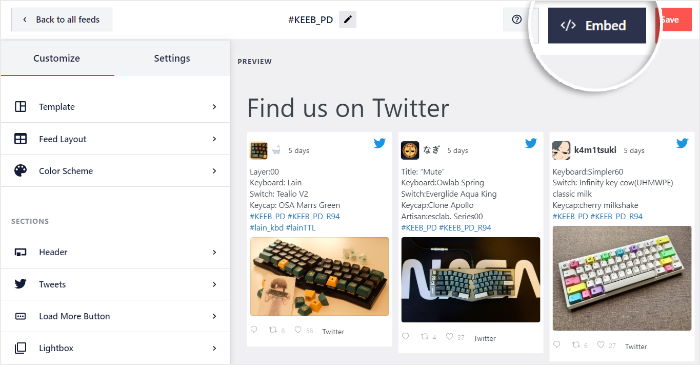
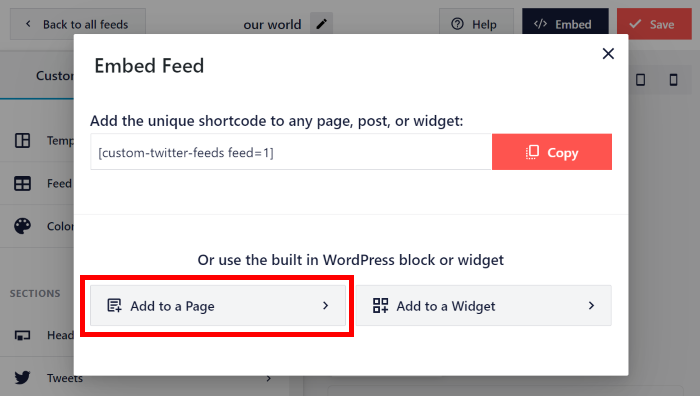
This will open a popup that asks where you want to embed your Twitter widget.
Just click on the Add to a Page option to embed it on a WordPress page.
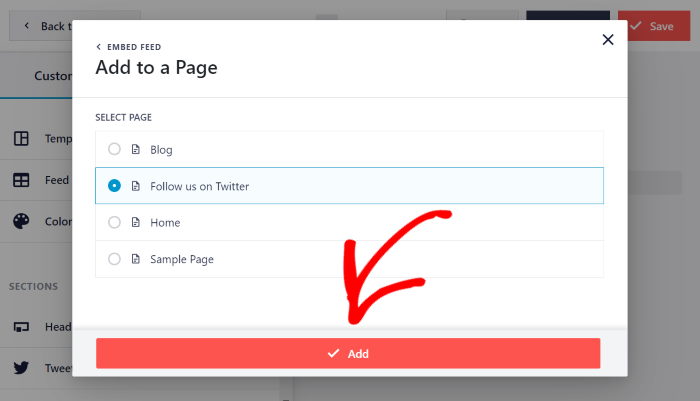
On the popup, just select the page where you want to show the widget.
Then, click on the Add button below.
You can now see that page open in the WordPress block editor, where you can embed the Twitter widget.
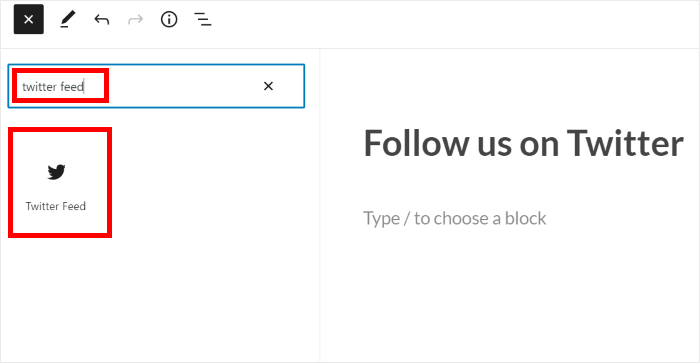
To do that, first, click on the plus (+) icon on the editor to add a content block.

Using the search bar, look for “twitter feed” and then click on the Twitter Feed widget below.
With that, you’ve added the Twitter widget to your page.
Finally, click on the Publish or Update button and your Twitter widget will now be live for everyone.
In fact, you can open your website to check out how it looks.

Want to add your widget to the sidebar or footer?
You can do that with ease from the live feed editor.
From your admin dashboard area, navigate to the Twitter Feed » All Feeds menu and then click on your Twitter feed widget.
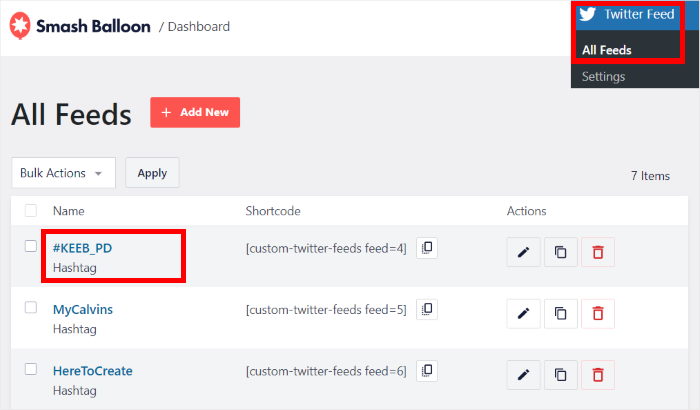
This will show you the Twitter widget in the live feed editor.
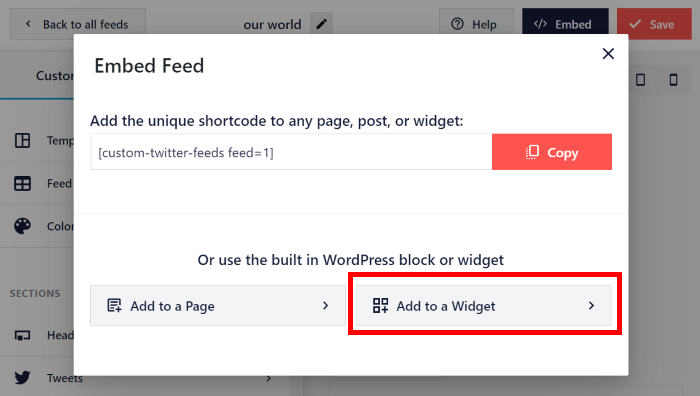
To start embedding your widget, click on the Embed button in the top right corner.

On the popup, you can click on the Add to a Widget button this time.
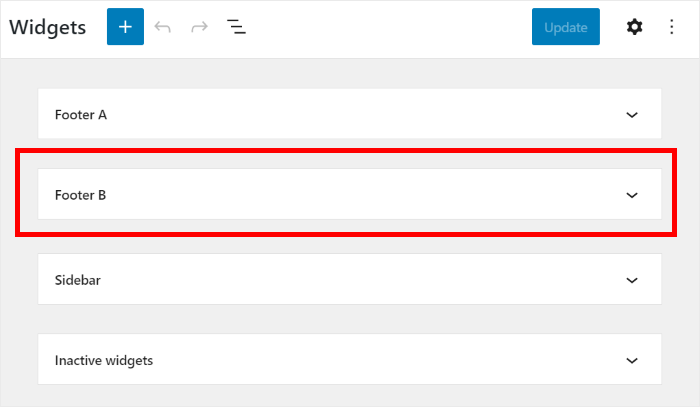
Doing this will send you to the widgets page of your WordPress website.
On this page, you can choose where you want to embed the Twitter feed widget.
To embed it on your sidebar, just click on the Sidebar panel.
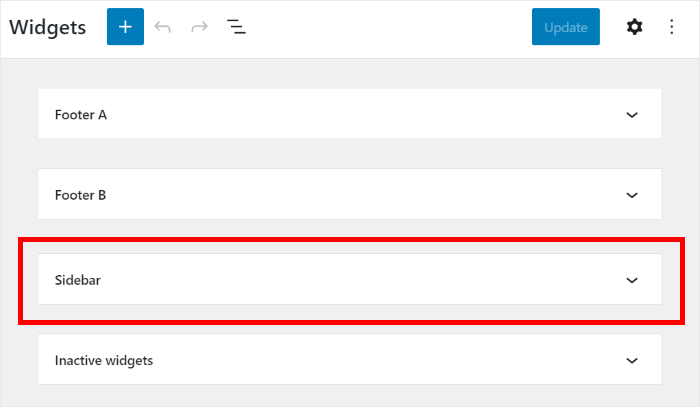
Want to use the footer instead? Then click on a Footer panel here.
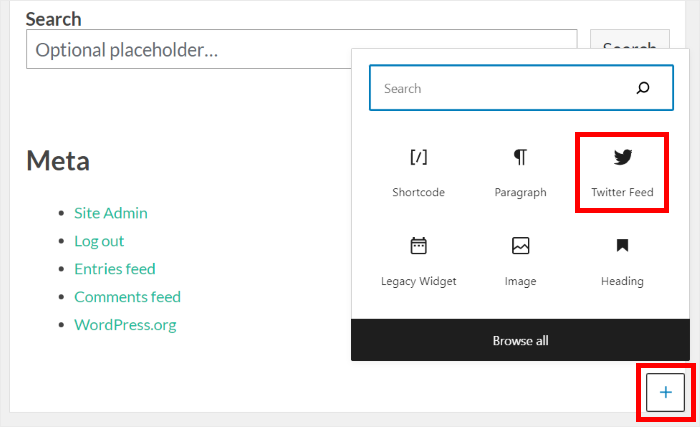
To add a new WordPress widget, click on the plus icon (+) at the bottom of the panel.
Then, select the Twitter Feed widget from all the options.
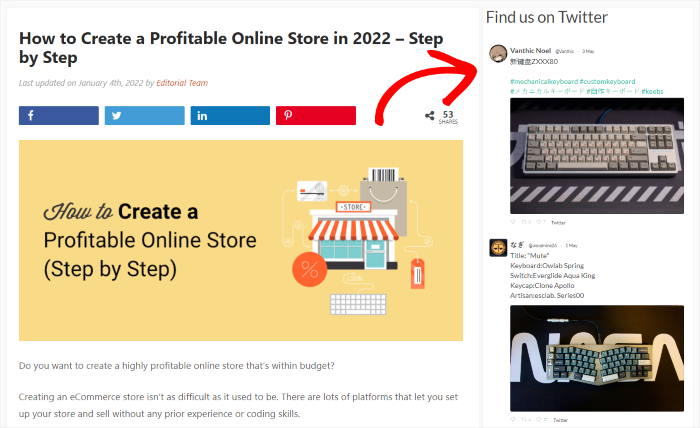
Finally, you can click on the Update button and your Twitter widget will be live on your website sidebar:
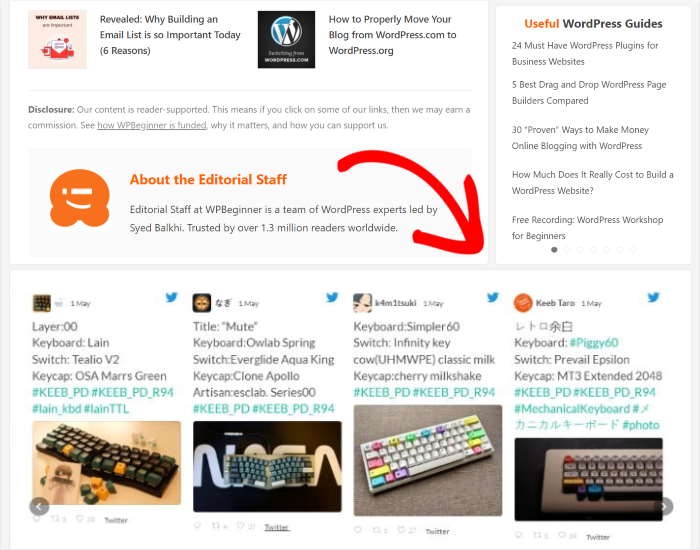
And if you pick the footer instead, then you can find the Twitter widget at the bottom of your website.
With that, let’s take a look at the old way to embed Twitter widgets on your website.
How to Add Your Twitter Widgets Manually
Our final method uses the Twitter Publish tool to add a Twitter widget in WordPress. This option lets you embed a single tweet, timeline, or Twitter button on your website.
The drawback of using this method is that you have less control over how the widget looks on your site.
Plus, you’re not able to filter the content to show specific tweets like hashtags, advanced searches, and more.
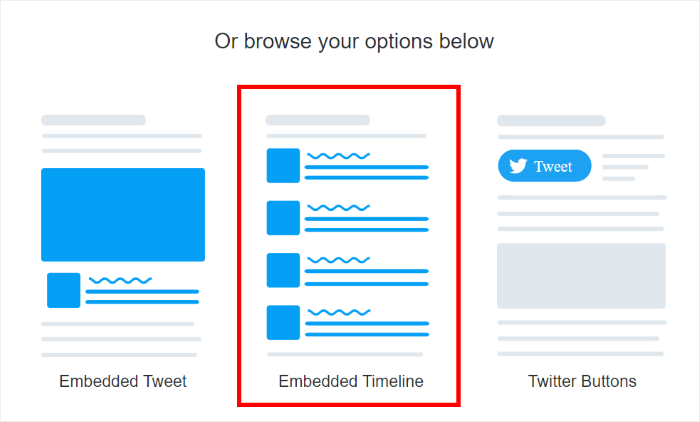
To add a Twitter feed using this method, head to the Twitter Publish website and choose the type of content you want to embed.
We’ll use the Embedded Timeline option.
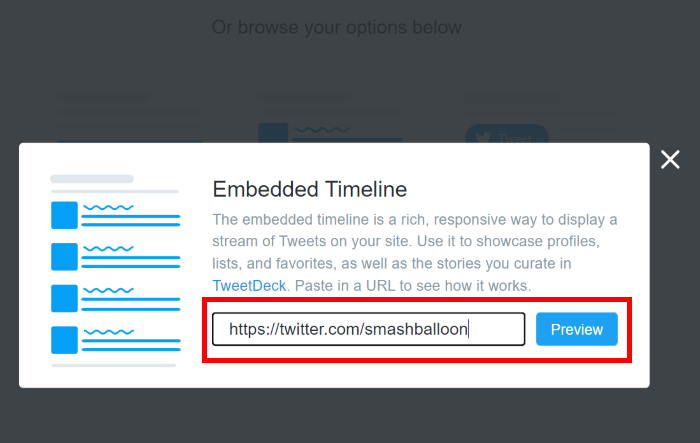
Next, enter the URL of the timeline you want to display and click Preview.
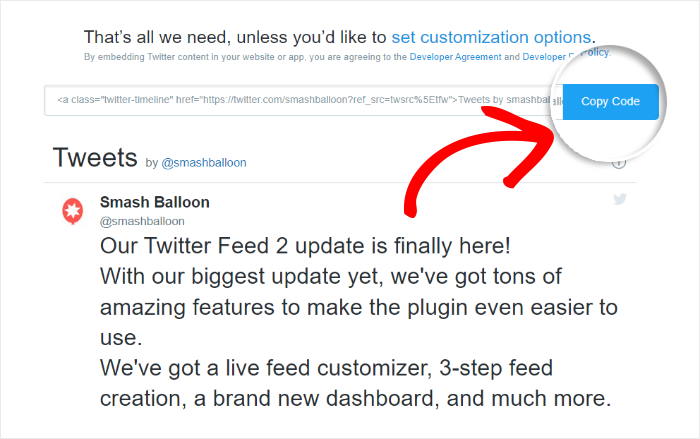
The next step is to copy the code shown at the top of the preview. Just click on the Copy button at the top.
Then you can go ahead and create a new post or page in WordPress.
To embed the code, add a new content block by clicking on the plus (+) icon on the editor.

Now search for “custom HTML” in the search bar at the top and then click on the Custom HTML block to continue.
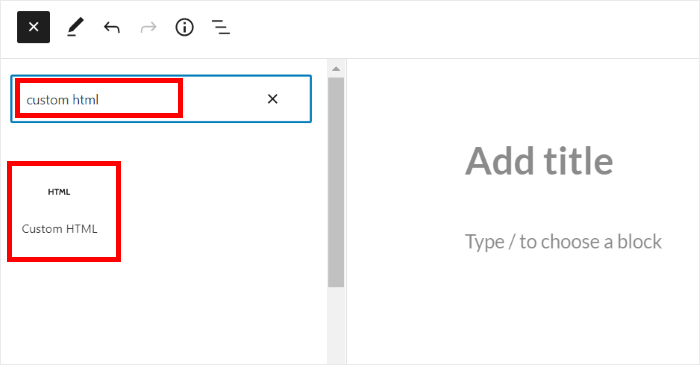
Then paste your embed code directly into the block.
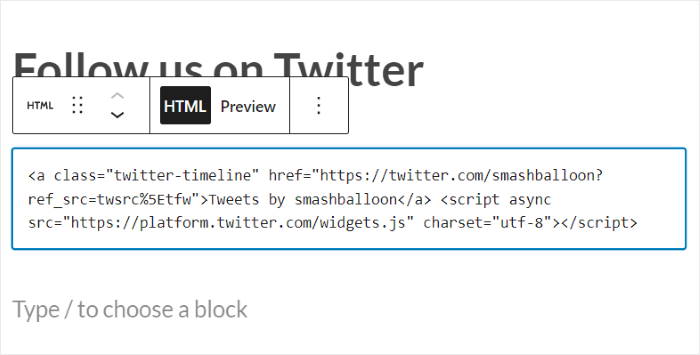
Now when you preview your new page, your Twitter widget will look similar to the example below:

It’s possible to embed your feed in a widget in your sidebar using this method.
First, navigate to Appearance » Widgets to start managing the widgets of your website.
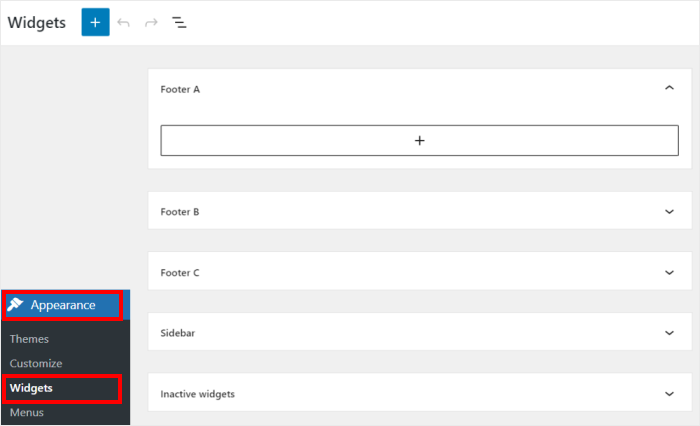
After you do that, click on the Sidebar panel to embed your widget there.

Want to add your Twitter widget to your footer? Then click on Footer instead.

Finally, click on the plus (+) icon to add a widget, and then click on the Custom HTML widget.
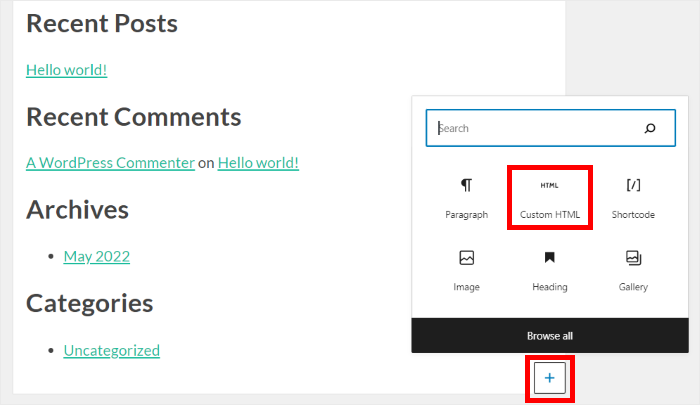
Then paste your embed code inside the widget like earlier.
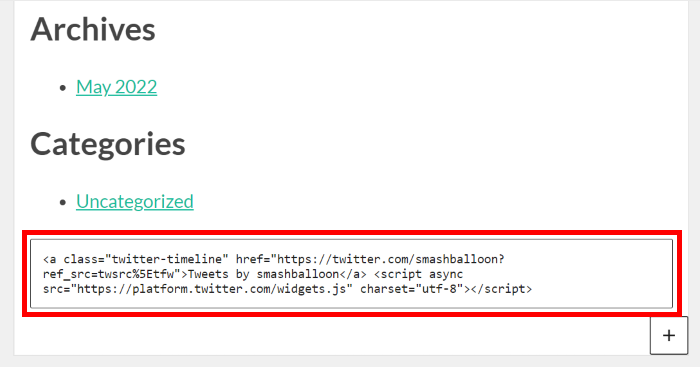
Finally, click on the Update button at the top.
When you navigate to the front of your website, your feed will look similar to the example below:

And there you have it.
You now know how to add a Twitter widget in WordPress. The critical thing to remember is that with the 3rd method, you’ll have less control over the design, layout, and content of your Twitter feed.
With the Twitter Feed Pro plugin, you can do all that in just a few easy clicks — no need for HTML, Javascript, CSS, or any kind of coding.
Ready to embed Twitter widgets? Grab your copy of Twitter Feed Pro today.
For more ways to promote your brand on social media platforms, follow this guide on how to improve your social media marketing.
If you enjoyed this article, feel free to follow us on Twitter and Facebook for more social media marketing tutorials.


