Want to easily show your Instagram feed right on your website?
Putting your latest Instagram photos, reels, and videos on your site is a great way to keep your site fresh, make it look more engaging, and help people go from your website to your Instagram page.
But getting your Instagram feed to look just the way you want it on your website using the normal Instagram options can be hard.
These embedding options often don’t give you all the choices and features you need for your Instagram feed to fit smoothly with your site.
At Smash Balloon, we’ve been helping people embed social media content with ease for 10+ years. And today, I’ll show you exactly how to use our easy method of displaying your Instagram feeds.
In This Article
- Easiest Way to Display Instagram on Your Website
- How to Display an Instagram Feed on Your Website (Easy Way)
- More Social Media Marketing Guides & Tutorials (Top Picks)
- Start Displaying Your Instagram Feed Now
Easiest Way to Display Instagram on Your Website
When it comes to displaying Instagram content on your WordPress website, you have two main methods:
1. Manual: Embedding Individual Instagram Posts
This involves manually obtaining embed codes for specific Instagram posts, then customizing and adding these code snippets directly to your site.
2. Automated (Recommended): Using a WordPress Plugin
Instead, you can use a trusted plugin to effortlessly display dynamic feeds of Instagram posts with zero coding required.
For the easiest way to display Instagram on your website, this method, specifically using Smash Balloon Instagram Feed Pro, is highly recommended.
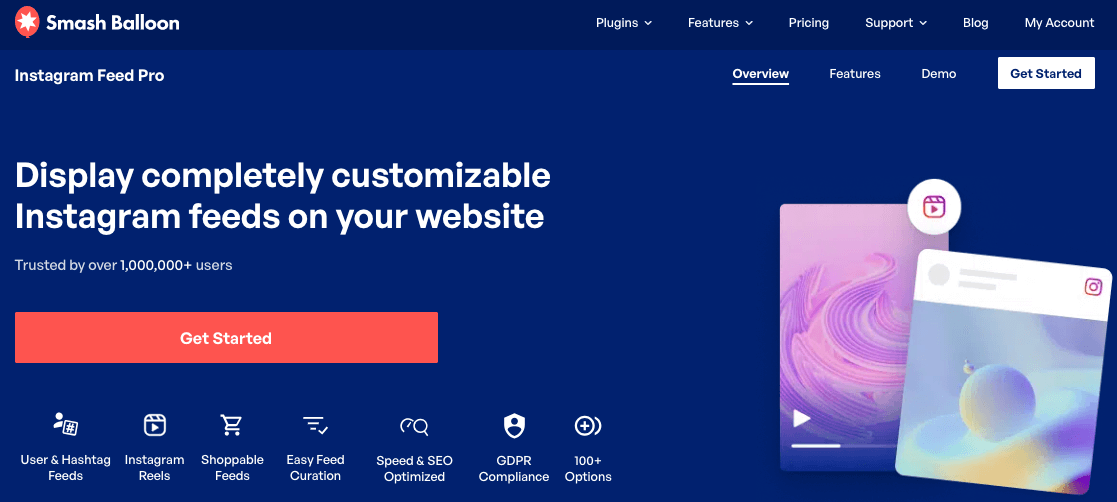
Instagram Feed Pro by Smash Balloon is widely recognized as the best Instagram feed plugin for WordPress, praised by over 1 million users for its:
- Simplicity: A guided, 3-step process (create, customize, embed) requires no coding skills.
- Versatility: Lots of supported feed types, including timeline, hashtags, and even Instagram mentions.
- Customization: I like that this plugin comes with a built-in visual feed customizer with live preview, along with templates and Instagram feed themes to import.
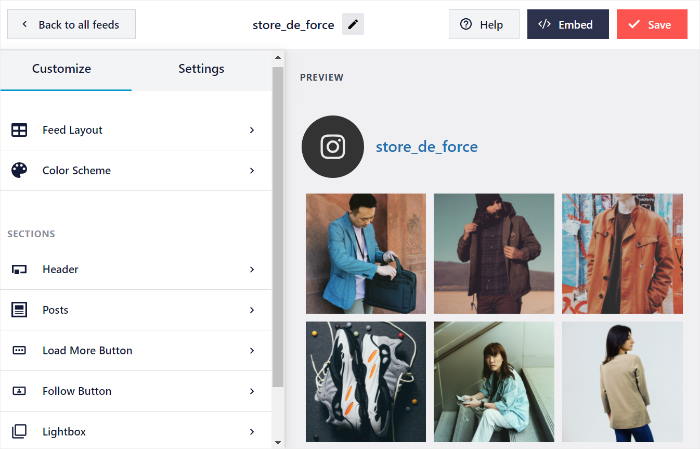
- Performance: Engineered for ultra-fast loading, ensuring your website speed is not compromised.
- Compatibility: Works seamlessly with popular WordPress builders like Divi and Elementor.
- Quality Support: Access to a dedicated team of WordPress experts for assistance.
- High Rating: A solid 4.9/5 stars from users, and the user base includes some massive brands too.

All these features make Instagram Feed Pro the perfect choice to help you gain more followers and sales without technical hassle.
Ready to start adding Instagram feeds with ease? Get your copy of Instagram Feed Pro today!
Now, let’s walk through the exact steps.
How to Display an Instagram Feed on Your Website (Easy Way)
To display Instagram posts on your website using Instagram Feed Pro, you can simply follow the tutorial below.
Let’s get started.
Step 1: Install Instagram Feed Pro on Your WordPress Site
You can start by getting your copy of Instagram Feed Pro here.
Download the plugin to your computer, then upload it to your WordPress website by installing it.
Need help with plugin installation? Refer to this helpful guide on how you can install a WordPress plugin.
Step 2: Use the Plugin to Create an Instagram Feed
The next step is easy: creating a new Instagram feed on your website.
Go to your WordPress dashboard and navigate to Instagram Feed » All Feeds. Next, click on the Add New button at the top.
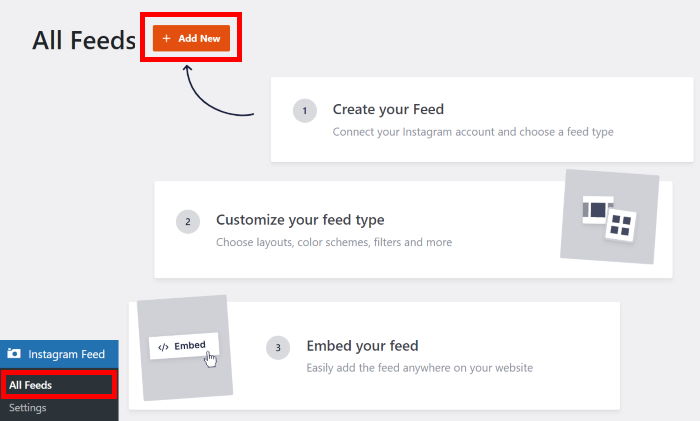
The next step to embedding your Instagram feed on your website? Decide on the type of Instagram feed that you want to display.
Instagram Feed Pro lets you choose from 3 different feed types, including:
- User Account: Embed an Instagram feed containing photos from your own account, or even embed Instagram reels.
- Public Hashtag: Embed an Instagram feed from a public hashtag of your choice. This is great for displaying customer testimonials on your website.
- Tagged: Display an Instagram feed containing posts where your Instagram account is tagged in.
You can also combine multiple feed types and show them in a single Instagram feed.
For now, select a feed type and click on the Next button.
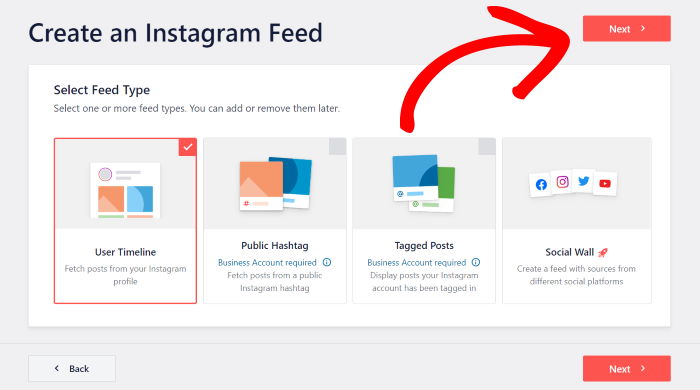
For this tutorial, I’ll go with a user timeline feed and show posts from a single Instagram profile.
Step 3: Connect Your Instagram Account to the Plugin
To display Instagram posts on your website, you can connect the new feed to your Instagram account.
For that, click on the Add Source button to get started.
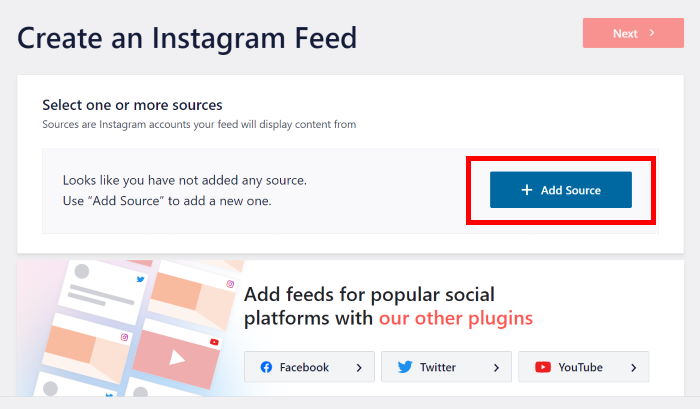
It’s time to connect your business or creator account, so the plugin can fetch Instagram content.
Before that, you can choose from 2 types of connections:
- Business Basic: Display the photos and videos from your own Instagram profile.
- Business Advanced: Unlock more content like hashtag feeds, tagged feeds, stories, and more.
Once you pick a connection type, click on Connect.
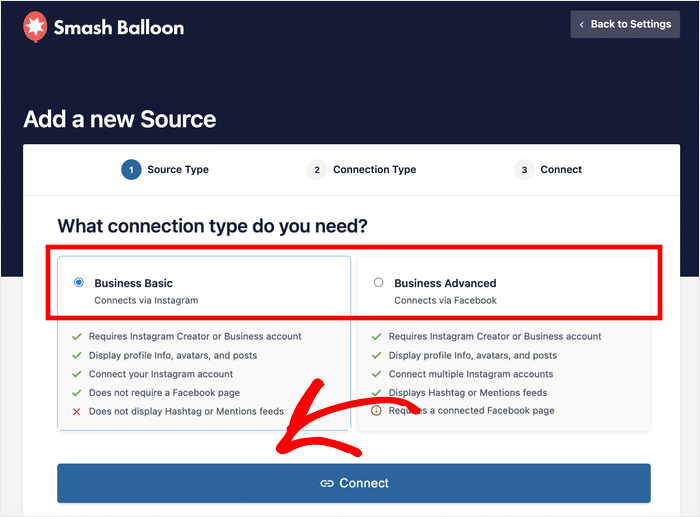
I’ll just use a Basic connection, since I’m showing posts from an Instagram profile.
Now, click on Connect with Instagram to proceed.
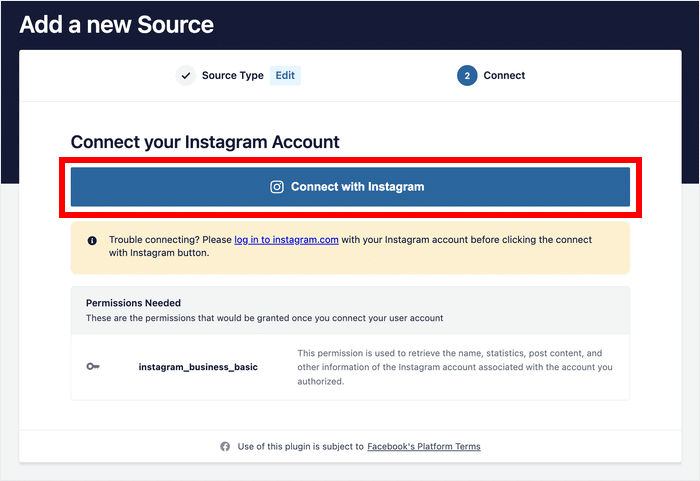
From here, you can give the plugin read-only access to your Instagram account.
The plugin will use this access to view your Instagram info, but it can’t make any changes at all. As a result, Smash Balloon is safe to use.
To finish connecting your profile, click on the Allow button here.
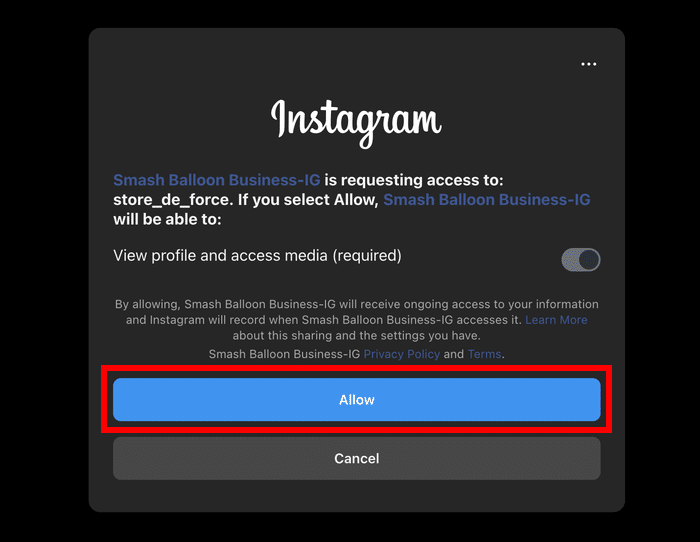
This will bring you back to your WordPress website so you can confirm this account as the source for your Instagram feed.
You can do that by clicking on Next here.
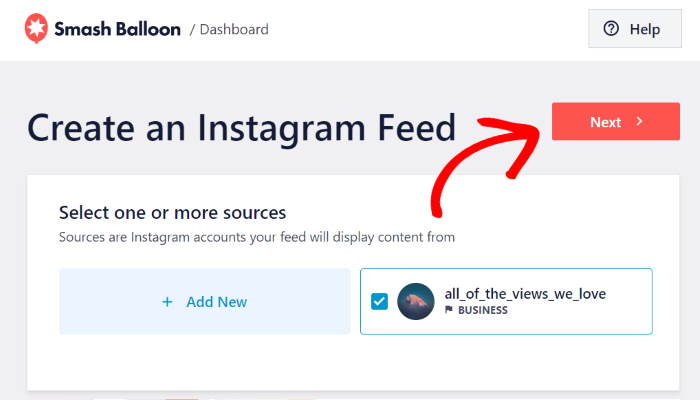
Step 4: Customize Your Instagram Feed’s Appearance
Remember when I mentioned that it’s super easy to customize your Instagram feed’s design?
You can use the live feed editor to change how your Instagram feed looks in a few simple clicks — no need to touch a single line of code.
Towards the left, you can find all the customization options for your Instagram feed, including the option to change your feed layout, header, color scheme, individual Instagram posts, button design, and much more.
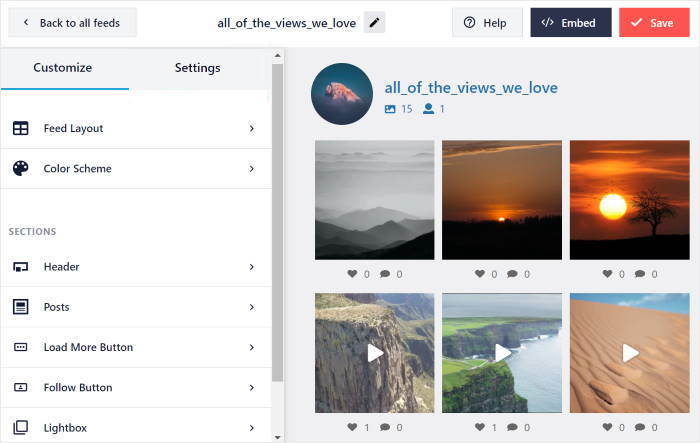
What’s more, you can see a live preview of your feed on the right and track all of your changes in real-time.
You can now click on the Feed Layout option to start changing the design of your Instagram feed.
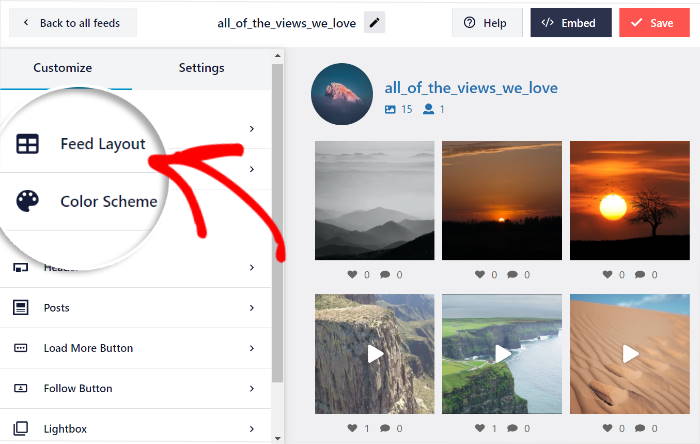
Here, you set your feed layout, which changes how the Instagram posts appear on your website.
With this plugin, you can choose from 4 different layout options: Grid, Carousel, Masonry, and Highlight.
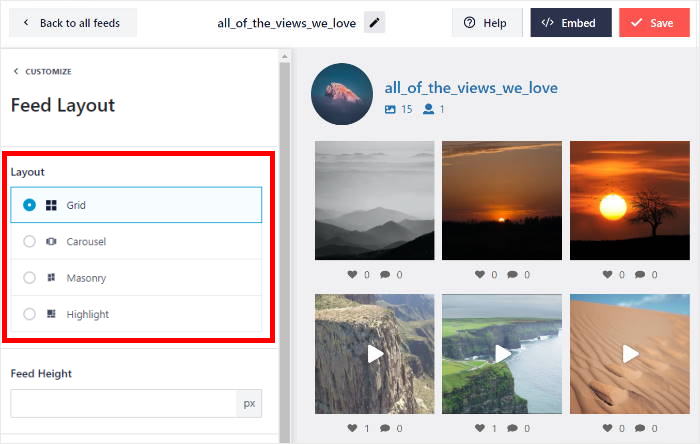
You can select the grid layout to display your Instagram posts in an organized frame full of square-cropped images like this:
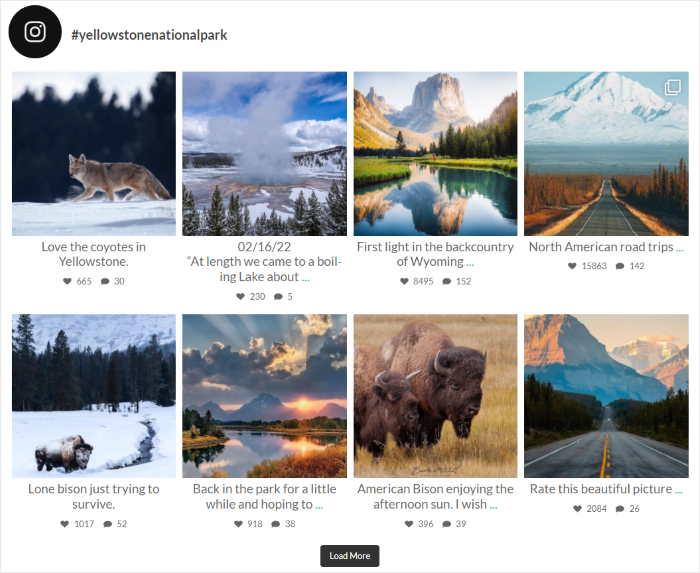
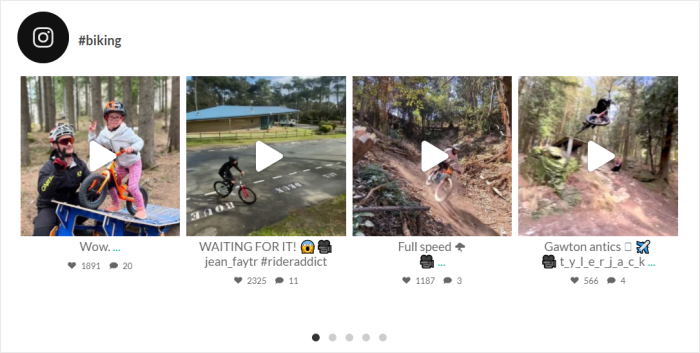
Usually, I like the carousel layout for my Instagram feed. You can select it to display your Instagram feed in a sliding horizontal layout similar to this example:
Want to display an Instagram gallery on your WordPress? Then, the masonry layout is perfect for you.
Since you’re showing images in their original aspect ratio, you can showcase your Instagram photos in their full glory, like this:

Finally, you can also select the highlight layout to make specific photos in your Instagram feed stand out, as you can see below:

Once you’ve chosen the layout of your Instagram feed, click on the Save button at the top.
Next, you can continue changing the design of your Instagram feed by clicking on Customize.
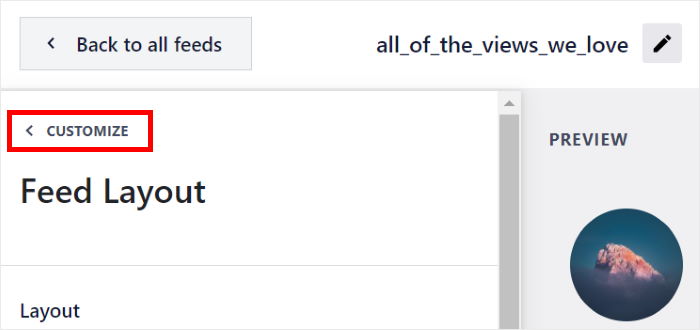
Next, you can use the customization panel on the left to edit the design of your Instagram feed once again.
To continue, click on the Color Scheme option.
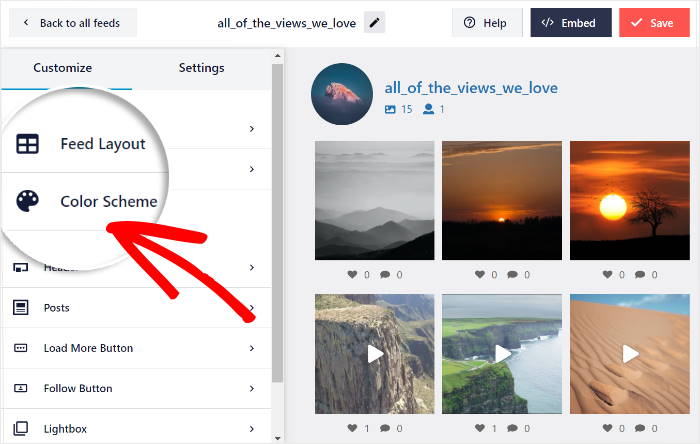
You can easily change all the colors of your Instagram feed by selecting a color scheme. There are 4 color schemes to choose from here:
- Inherit from Theme: Automatically copy the colors of your WordPress theme
- Light: Display a light background along with a dark font for your feed
- Dark: Choose a light font color with a dark background
- Custom: Manually pick all the colors for your feed yourself
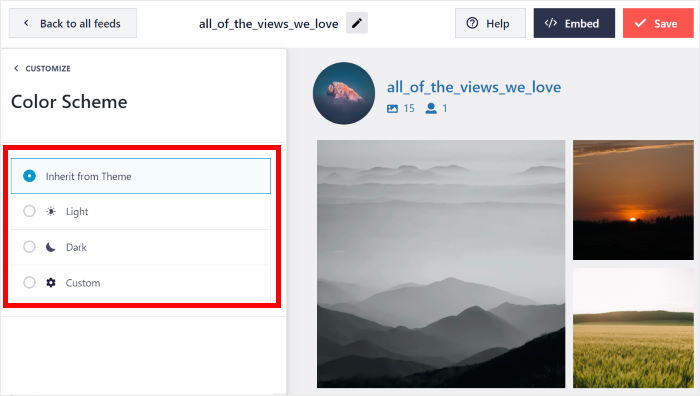
You can now use the remaining customization options to set your header design, button style, feed size, number of posts, and much more.
Satisfied with how your Instagram feed looks? Great! Remember to click on Save and move on to the final step below.
Step 5: Display the Instagram Feed on Your WordPress Website
With the help of Instagram Feed Pro, you can embed your Instagram feed in 2 different ways:
- On a WordPress Page: Integrate your feed directly into a page on your website.
- In a WordPress Widget Area: Display the feed in sidebars, footers, or other widget-ready zones.
Let’s talk about both options below.
Method 1: Embedding Instagram Feed on a WordPress Page
With Instagram Feed Pro, you can embed your Instagram feeds directly from the live feed editor in a few simple clicks.
First, click on the Embed button, which is at the top of your live feed editor.
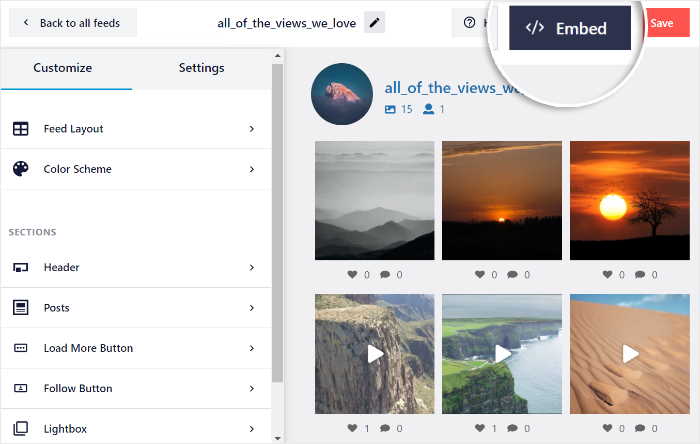
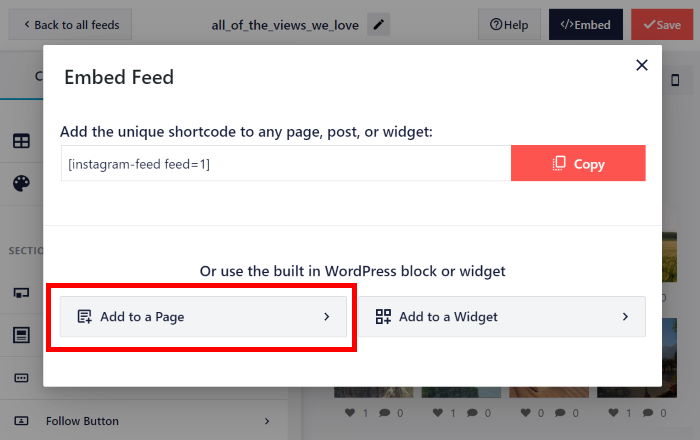
Next, Instagram Feed Pro will ask where you want to display Instagram content. From here, you can choose to add it to a page, display it as a widget, or manually copy the shortcode.
To continue, click on the Add to a Page button.
The popup will then show you a list of all the WordPress pages on your site and ask you to choose one.
Just select a page and then click on the Add button below.
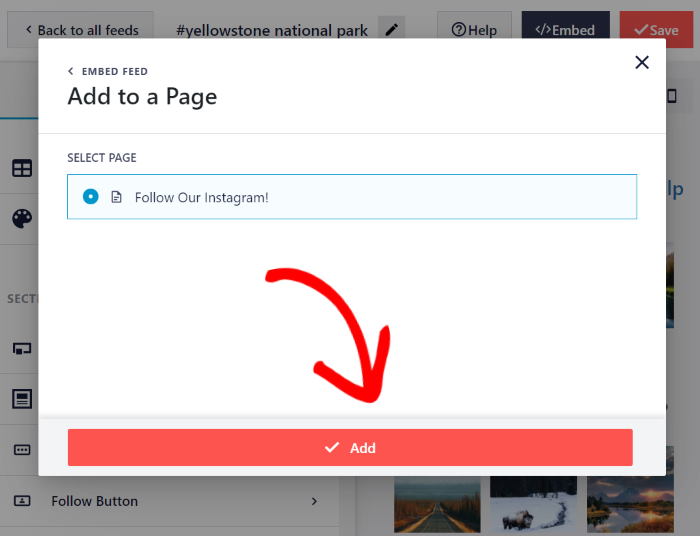
Now, the plugin will send you to that WordPress page so you can display your Instagram feed.
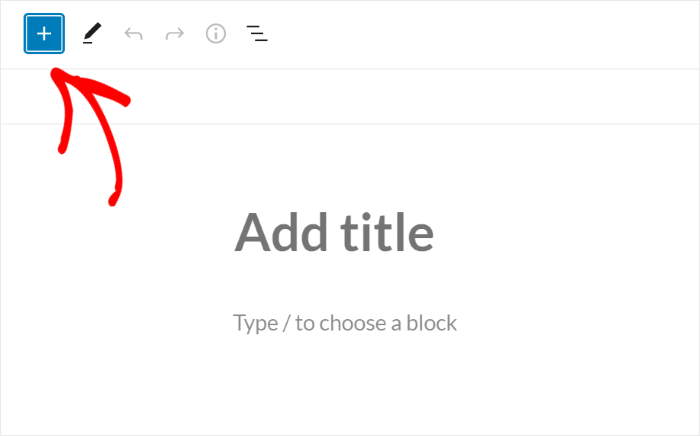
Once you’re directed to a new page, click on the plus (+) icon to add a new WordPress content block.
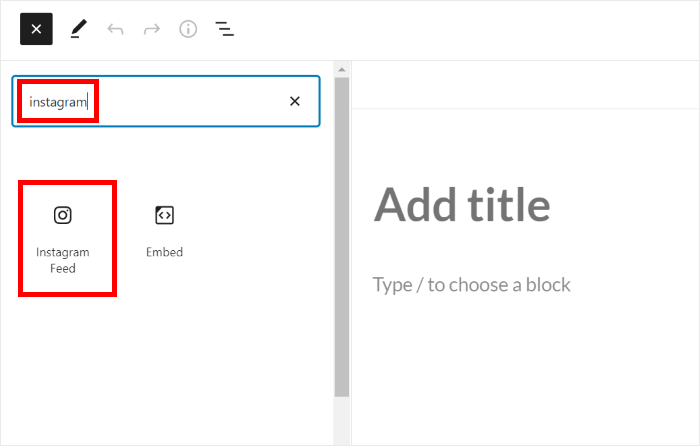
Look for the Instagram Feed block and click on it to automatically add your Instagram feed to your page.
And finally, you can click on Update so you can make it live on your WordPress website. In fact, you can open your website and see how it looks.

Now let’s look at the next way to display Instagram content on your website.
Method 2: Embedding Instagram Feed in a Sidebar or Footer
To display your Instagram feed as a widget on your website’s sidebar, first, visit your WordPress admin panel.
Then, navigate to the Instagram Feed » All Feeds menu and then click on the Instagram feed that you want to embed.
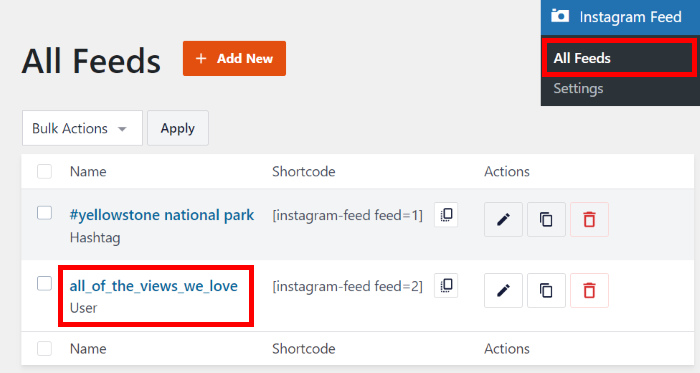
From here, click on the Embed button at the top to start embedding your Instagram feed.

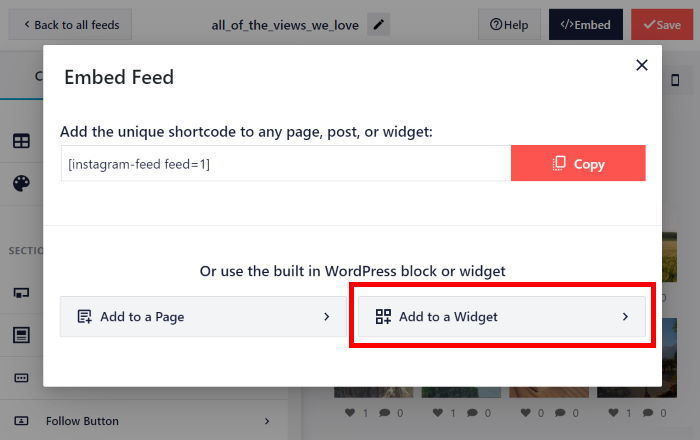
This opens the embed popup where you can choose the location of your Instagram feed.
To display your Instagram on your website’s sidebar or footer, click on the Add to a Widget button here.
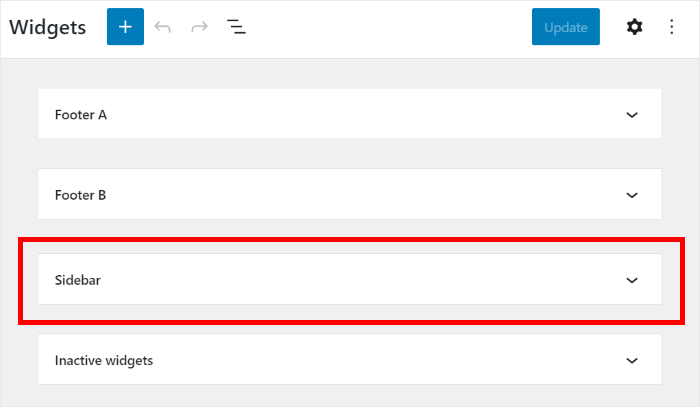
Once you click on that, Instagram Feed Pro will send you to your Widgets page. This is where you can add, remove, or manage WordPress widgets.
To continue, you can click on the Sidebar panel.
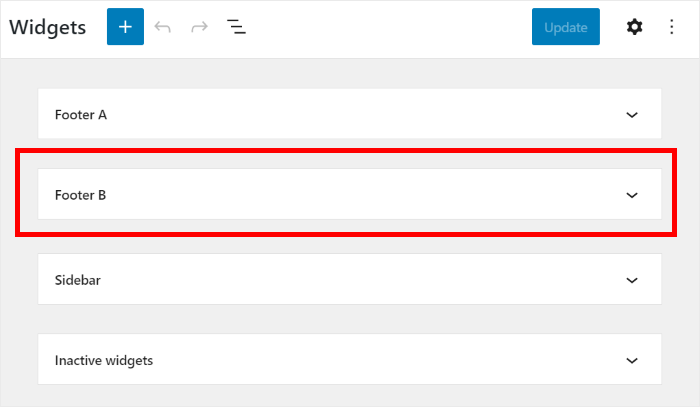
Want to display your Instagram on the website footer instead?
Then click on a Footer panel here.
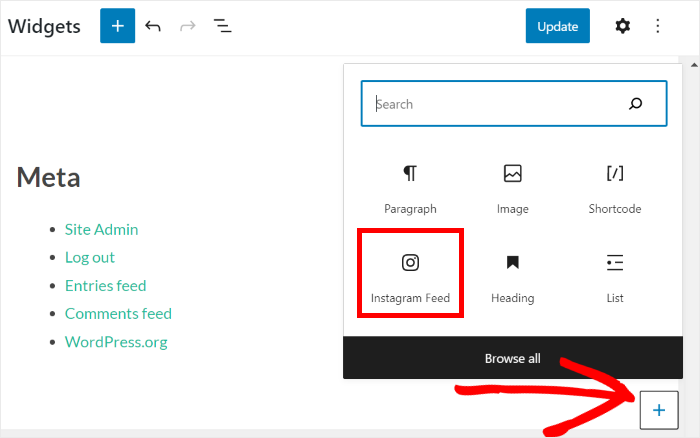
Once you do that, you can add a new widget to your website by clicking on the plus (+) icon at the bottom.
Finally, click on the Instagram Feed widget to embed your new Instagram feed as a widget.
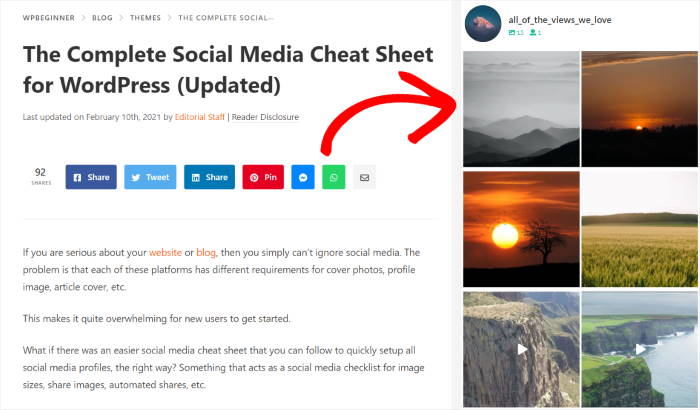
Now, when you check out your website, you can see your embedded Instagram feed in your sidebar area.
This way, your Instagram feed can be seen by your site visitors everywhere on your site!
And that’s it, folks!
I hope this step-by-step guide helped you display your Instagram on your website. By following the steps in this tutorial, you can take your Instagram marketing to the next level and get more followers and more sales in no time.
Ready to create engaging Instagram feeds? Get started with Instagram Feed Pro today!
Frequently Asked Questions
Do I need coding skills to use Instagram Feed Pro?
No, Instagram Feed Pro is designed for all users, regardless of technical ability. Its visual customizer and guided setup mean no coding is required.
Is Instagram Feed Pro safe to use with my Instagram account?
Yes, it is very safe. The plugin requests read-only access to your Instagram account, meaning it can view your content to display it, but cannot make any changes or modifications to your profile.
What types of Instagram feeds can I display?
With the manual method, you can only embed single Instagram posts. But if you’re using Instagram Feed Pro, you can display timeline feeds, hashtag feeds, mentions feeds, or even combined feed types.
Will Instagram Feed Pro slow down my website?
No, Instagram Feed Pro is built for ultra-fast performance and optimized to load your feeds quickly without negatively impacting your website’s speed.
More Social Media Marketing Guides & Tutorials (Top Picks)
- Social Media Marketing Tips for Small Businesses (+ Examples)
- Instagram Marketing Tips PROVEN To Grow Your Business
- Easy Tips to Promote Your Business on Facebook (Most Are Free!)
- How to Grow Your YouTube Channel From 0 to 1000 Subscribers
Start Displaying Your Instagram Feed Now
Adding your Instagram photos to your website is a great way to keep it interesting.
I have found that Smash Balloon Instagram Feed Pro is the easiest tool for the job. It lets you put your feed on your site quickly without needing to learn any complicated tech.
Here is how you can get started:
- Get Instagram Feed Pro now and try it risk-free for 14 days to start displaying your Instagram feed on your site.
- Change how your feed looks with the simple editor so it matches the rest of your website.
- Add your feed anywhere on your site, like a page or sidebar, just by clicking a few buttons.
- Let your feed update itself automatically, so your visitors always see your newest posts.
Your website stays fresh, and visitors can easily find your Instagram. It’s a simple change that makes a big difference.
Got questions about putting your Instagram on your website using Instagram Feed Pro? Feel free to ask in the comments below!
