Social Wall
  Feed Analytics

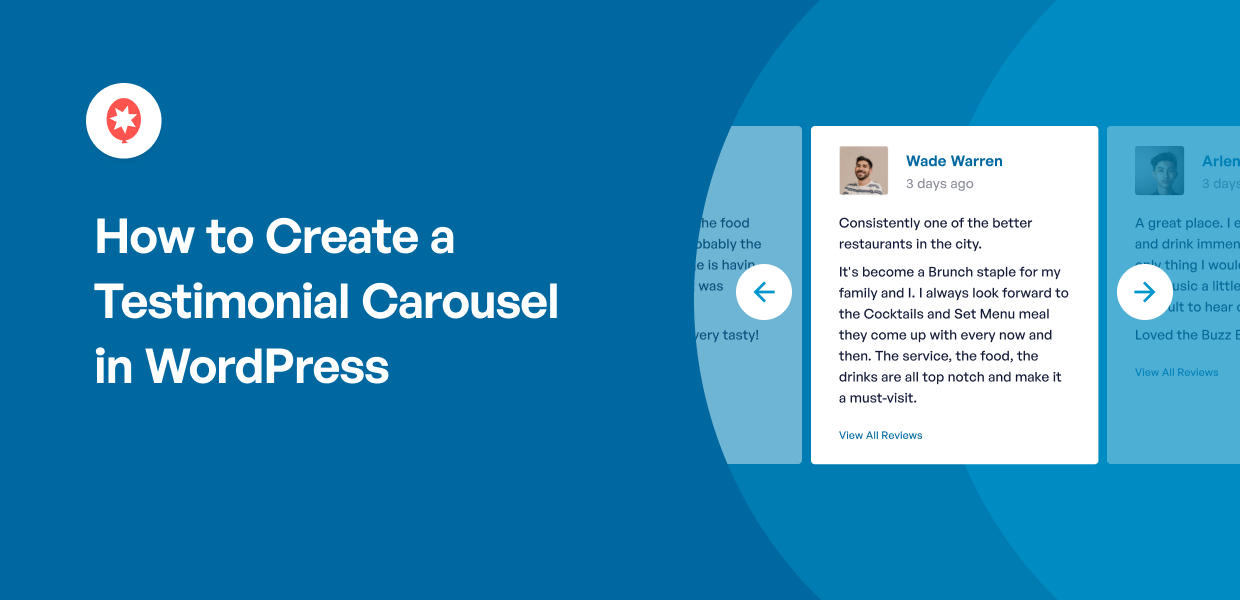
Most testimonial carousel plugins ask you to type everything in by hand. The quote, the customer’s name, their company, their photo. Then a new review comes in, and you do it all again.
There’s a faster way. Instead of copying testimonials into WordPress, you can pull them straight from the places customers already leave them, then show them in a carousel that updates itself.
This takes about 5 minutes to set up, needs no code, and you never touch it again.
Quick disclosure: I work at Smash Balloon, so our plugin is the one I’ll use to show you how.
In this Article:
Typed-In Testimonials vs. Real Reviews
Before the tutorial, it’s worth knowing what separates the two approaches, because it changes how much work you’re signing up for.
Most testimonial plugins give you a form. You paste in a quote, type a name, add a company, maybe upload a photo. It works, but it has two problems.
Every new testimonial is manual work, so the carousel goes stale within months. And visitors know a typed-in quote could say anything, because nothing links it back to a real person.
Pulling reviews from a platform solves both.
| Typed-in testimonials | Pulled from review platforms ⭐ Recommended | |
|---|---|---|
| How do testimonials get in? | ❌ You type each one manually | ✅ Pulled automatically from the source |
| What happens when a new review arrives? | ❌ You add it yourself, or it never appears | ✅ It shows up on its own |
| Can visitors verify it’s real? | ⚠️ No link back to anything | ✅ Real name, photo, and star rating |
| Setup time for 20 testimonials | ❌ An hour or more of copying | ✅ About 5 minutes, once |
| Best for | Quotes from private feedback like emails or surveys | Anyone with reviews already on Google, Facebook, or similar |
The review already exists on Google or Facebook with the reviewer’s real name, photo, and star rating attached. Nobody has to type anything, and nothing goes stale.
Typed-in testimonials still have a place. If your best feedback came in an email, that’s the only way to show it.
But if you already have reviews sitting on a platform, copying them by hand is work you don’t need to do.
The Easiest Way to Make a Testimonial Carousel
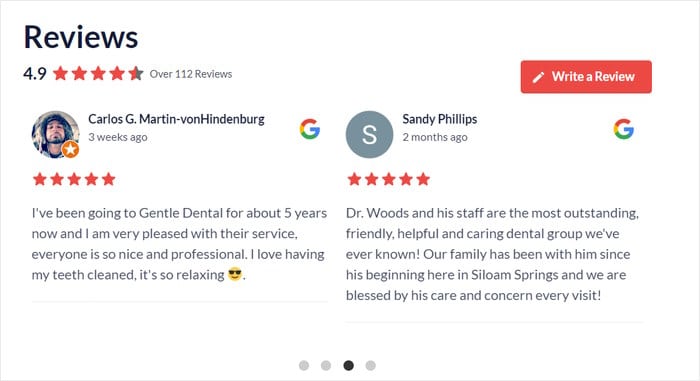
Smash Balloon Reviews Feed Pro connects to the platform where your reviews already live and displays them in a carousel on your site.
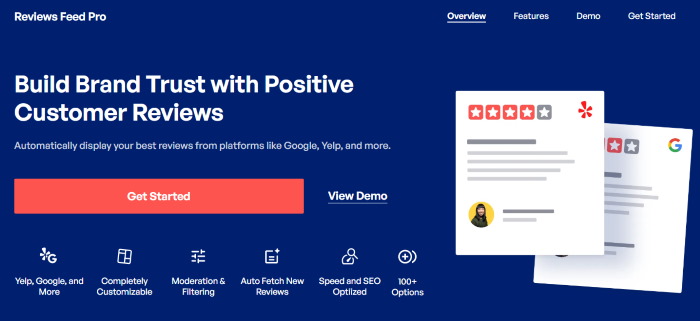
It pulls from 11 sources: Google, Yelp, Facebook, Trustpilot, TripAdvisor, WordPress.org, WooCommerce, Easy Digital Downloads, Airbnb, Booking.com and AliExpress.
Pick whichever one your customers actually use. You can also combine several into one carousel if your reviews are spread around.
Here’s what you get:
- Set up with no code. Connect your account, pick a template, embed it. No developer needed.
- Matches your theme automatically. The feed inherits your site’s existing styling, so it doesn’t look bolted on.
- Visual customizer. Change the layout, header, buttons and review elements, and watch the preview update as you go.
- Filter what appears. Set a minimum star rating so only your 4 and 5 star reviews show, or hide reviews containing specific words.
- Updates on its own. New reviews appear in the carousel without you doing anything.
- Describes your rating to search engines. Since the August 2026 update, the plugin also writes your rating and review count into the page in a format search engines read, which makes the page eligible for star ratings in results.
One thing worth knowing upfront: the carousel layout is a Pro feature. The free version covers Google and Yelp in the default layout, so you can try the plugin before deciding.
How to Add a Testimonial Carousel to WordPress
The steps below are the same whichever platform your reviews are on.
I’ll use Facebook in the screenshots, but swap in Google, Trustpilot, or any of the other sources at Step 2, and everything else stays identical.
Step 1: Install the Reviews Feed Pro Plugin
First, get your copy of Smash Balloon Reviews Feed Pro. Then install and activate it on your WordPress site.
If you haven’t installed a plugin before, here’s a step-by-step guide to installing a WordPress plugin.
Step 2: Create Your Testimonial Feed
To create your testimonial feed, you’ll need to go to the Reviews Feed » All Feeds menu from your dashboard.
After you do that, click on the Add New button at the top to create a new Facebook feed.

If it’s your first time creating a review feed, you can add a new source here. After adding a source, you can freely reuse it for as many feeds as you want in the future.
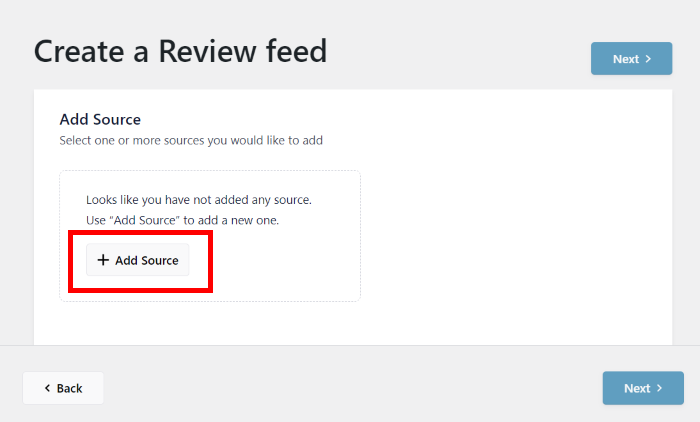
For now, click on Add Source.
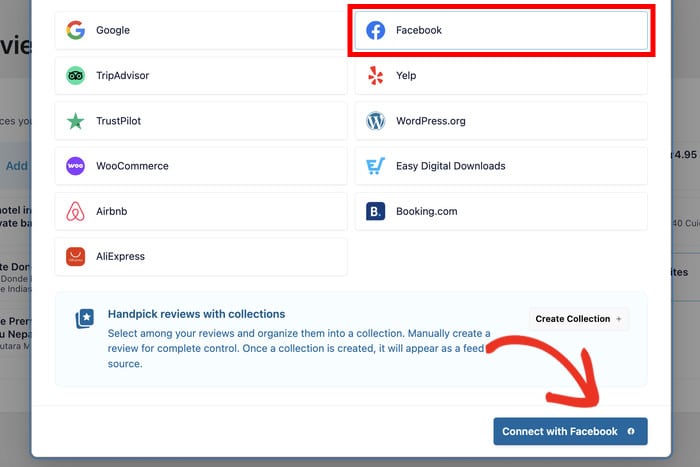
Now it’s time to choose your source. All 11 platforms appear here, so pick wherever your reviews already are.
Google is the most common choice for local businesses, Trustpilot for software, and TripAdvisor or Booking.com for hospitality.
I’m using Facebook for this walkthrough, so I’ll select Facebook and click Connect with Facebook.
Step 3: Connect to Review Source
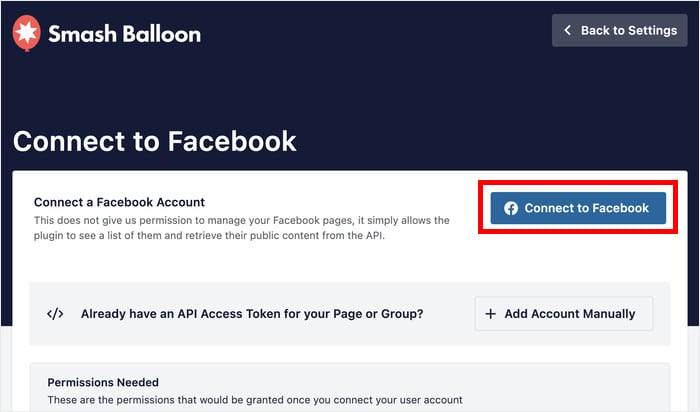
In the next popup, you can choose between connecting to a Facebook page and or adding your account manually using an API key.
Either way works, so I’ll click on the Connect to Facebook button.
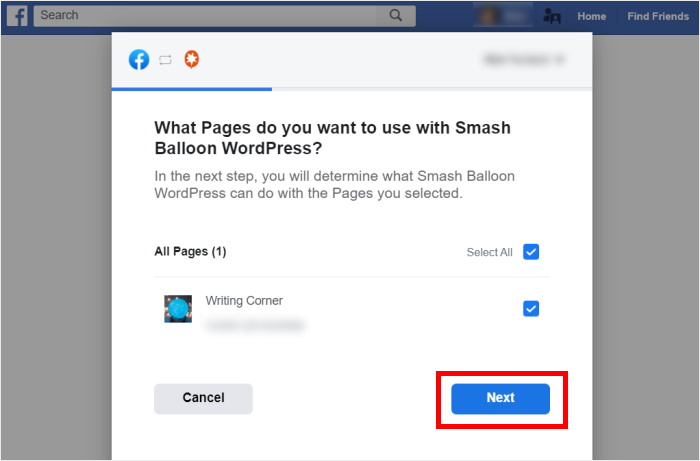
With that, you can now allow your new Facebook feed to fetch testimonials from your Facebook page.
First, select the page or group on the popup and click on Next.
Give the plugin read-only access. It can read your reviews and nothing else, so it can’t post, edit, or change anything on your account.
Here’s more on why Smash Balloon is safe to connect.
Now click on Done to finish giving the read-only access.
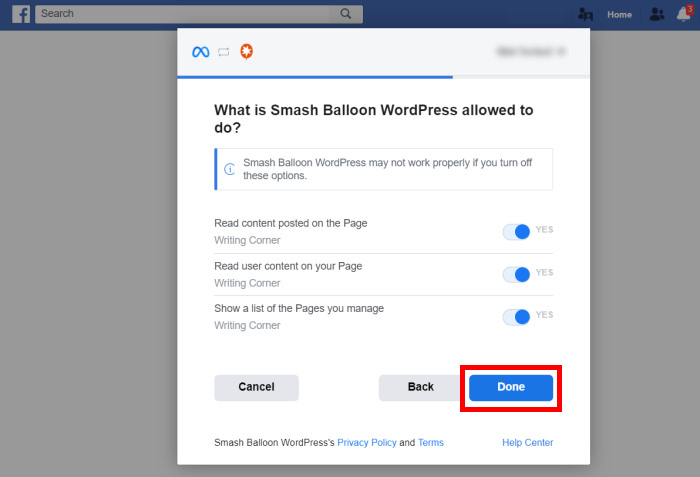
After you do that, the plugin will send you back to your site so you can confirm this page as your source
To continue, click on Add Pages as Source on the new popup.
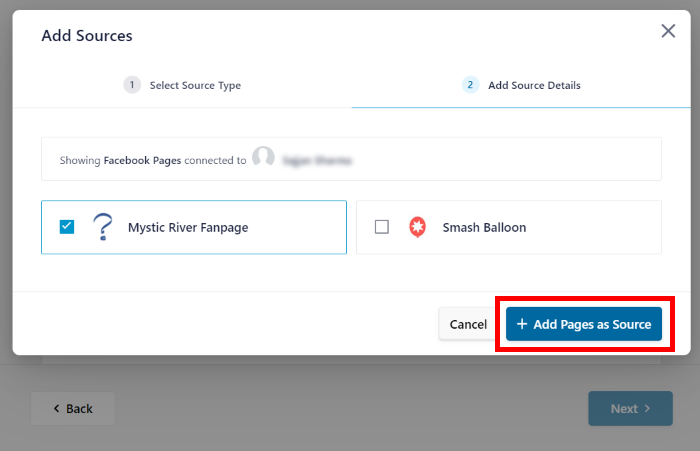
With that, you’ve connected your Facebook page to your WordPress site.
Just select Next to continue to the next step.
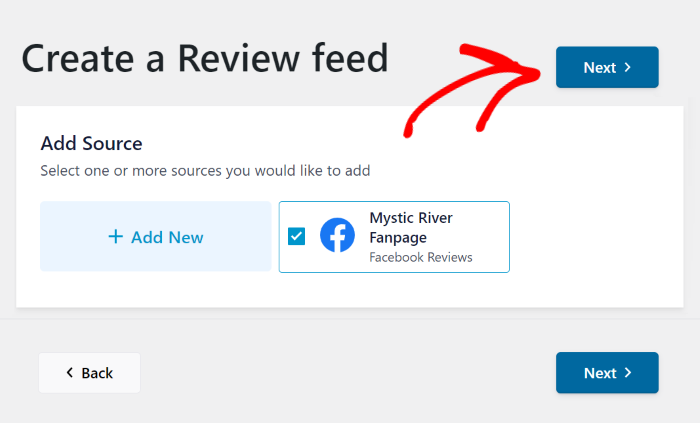
In the next step, you can enable the carousel layout and customize your new feed in detail.
Stop typing testimonials into WordPress
Pull them straight from Google, Facebook and 9 more platforms. New reviews appear in your carousel on their own.
Get Smash Balloon Reviews Feed ProStep 4: Turn On the Carousel Layout
To help you get started quickly, Reviews Feed Pro gives you different feed templates that you can import for your feed.
Here are the pre-designed templates that you can choose from:
- Default
- Simple cards
- Masonry
- Single review
- Showcase carousel
- Carousel
- Grid carousel
Once you select your template, click on Next to continue.
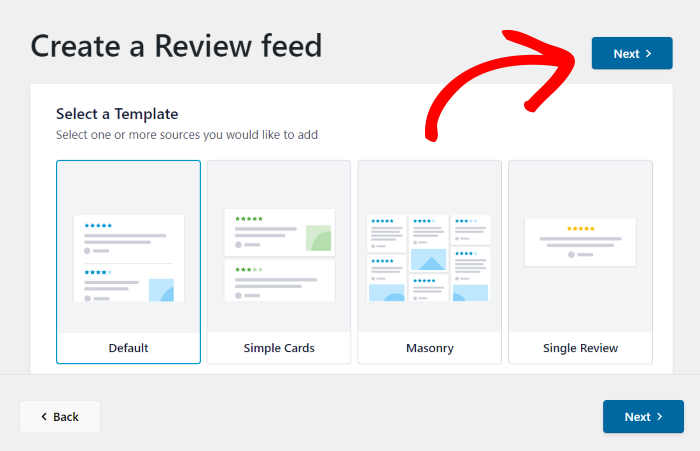
Now that you’ve selected your feed template, it will be open in the live feed editor.
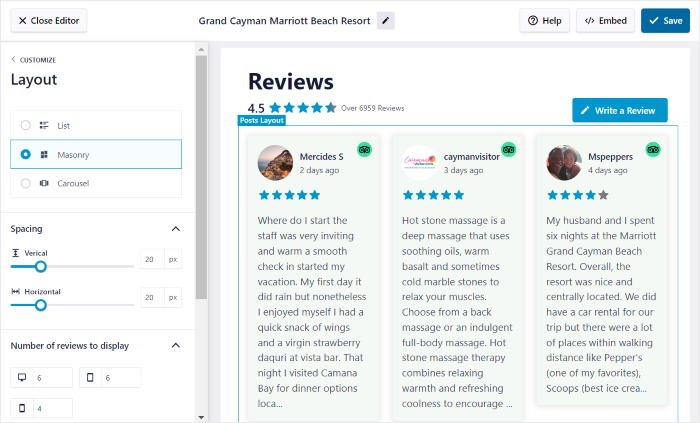
From this live feed editor, you can customize your reviews feed using the options on the left. You can set the feed template, layout, header style, review elements, and much more.
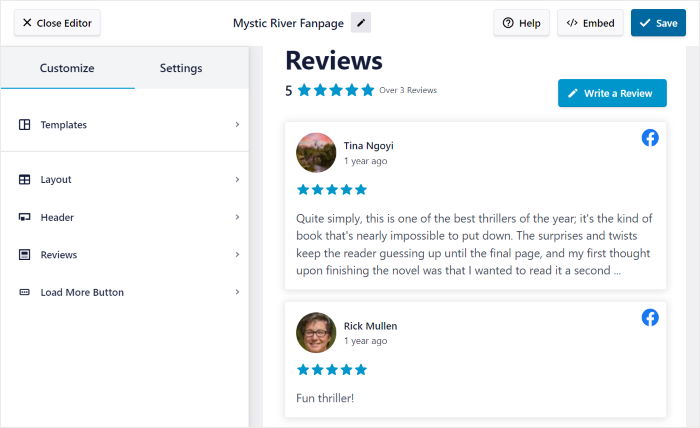
When you customize your feed, you can see the live preview of the changes on the right side.
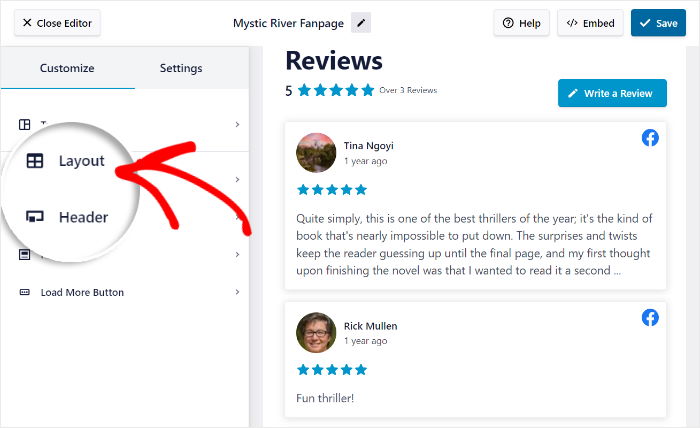
To continue, select the Layout option to enable the carousel layout for your new testimonial feed.
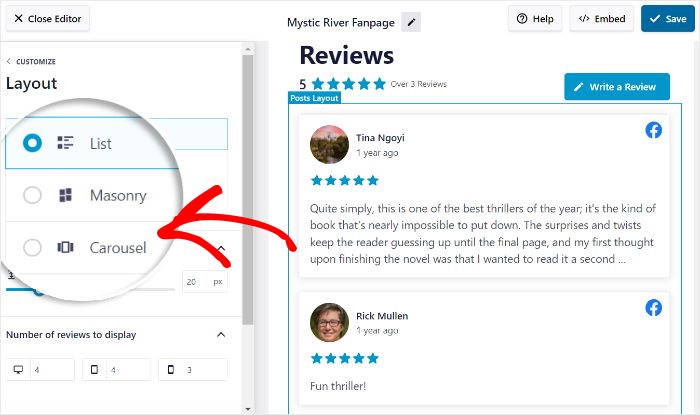
After you do that, Reviews Feed Pro lets you choose between 3 different layouts for your post.
Here, just select the Carousel option from the list.
To save your new feed layout, remember to click on the Save button at the top.
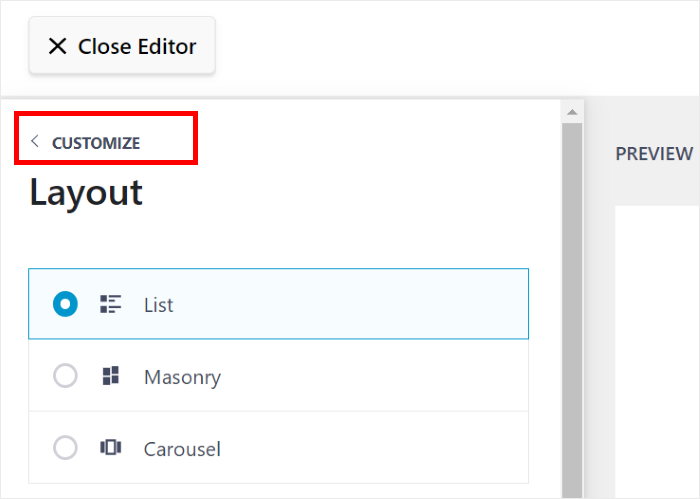
You can use the small Customize button to go back to the main customization options and continue editing your Facebook testimonial carousel.
From here, you can set the header design of your Facebook feed. For that, click on the Header option on the left.
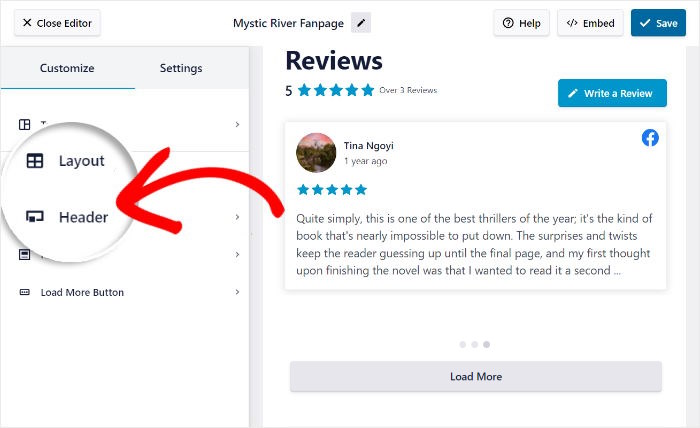
Now you can Enable or Disable the header by toggling the option at the top. Below, you’ve got different ways to customize your feed header:
- Heading: Edit the heading at the top of your feed
- Button: Customize the button that users can use to write reviews
- Average Review Rating: Show your average star rating at the top of your feed
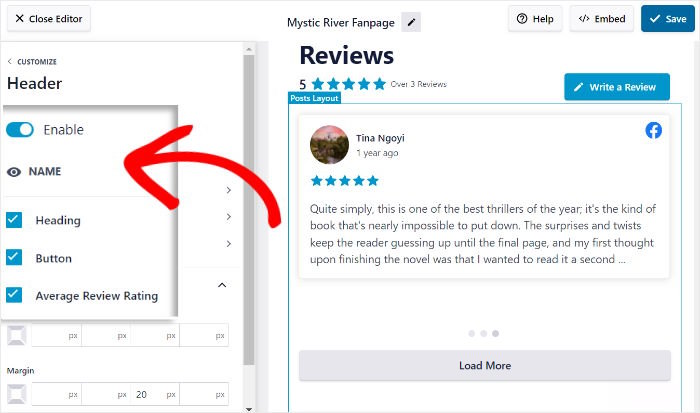
Once you’re happy with your header, just click on Save.
As you can see, it’s pretty easy to customize your testimonial carousel feed using the live feed editor. You can now go on and pick your review elements, number of reviews, button design, and more.
Finally, click on the Save button, and you can go ahead and embed your Facebook testimonial carousel.
Step 5: Embed Your Testimonial Carousel
With the customization done, you can now go on and embed your Facebook testimonial carousel.
You’ve got 2 different options depending on where you want to show your feed:
- Embed the carousel on your WordPress page
- Embed the carousel on your WordPress sidebar
Let’s take a look at how they work.
Embed the Carousel on a WordPress Page
It’s super easy to embed your Facebook testimonial carousel from your live feed editor.
First, click on the Embed button that you can find at the top right.
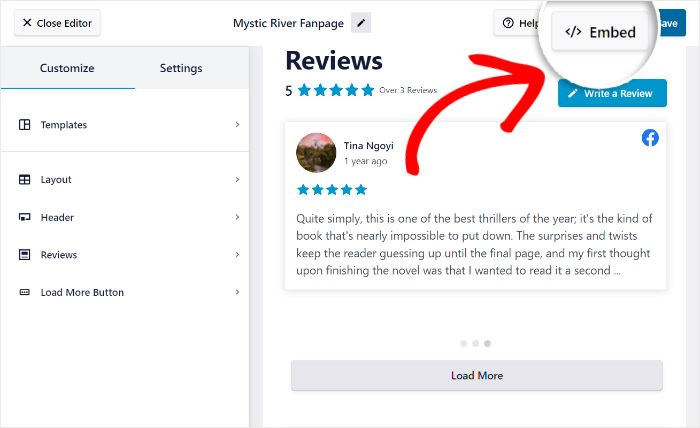
Now you can choose where to embed your Facebook testimonial carousel on the popup. For now, you can select Add to a Page here.
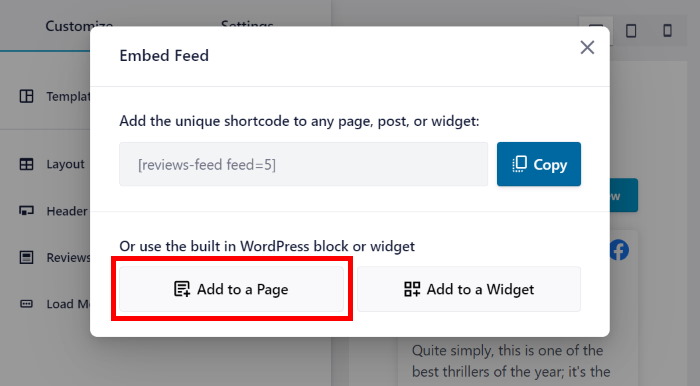
You will now see a list of your WordPress pages. Once you select the one you prefer, you can click on Add to proceed.
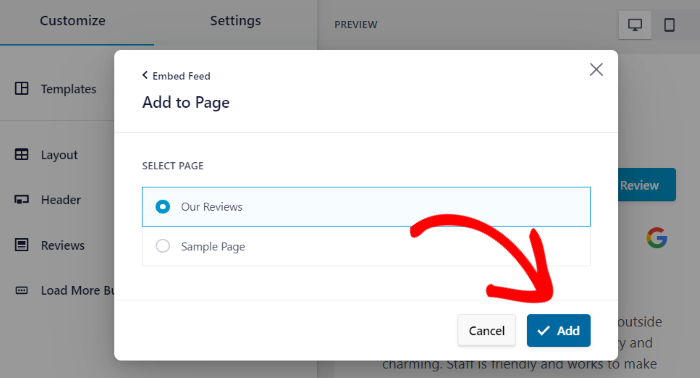
Now, the plugin will open that WordPress page so you can embed your Facebook testimonial carousel.
On the WordPress page, click on the small plus icon (+) at the top left and select the Reviews Feed widget.
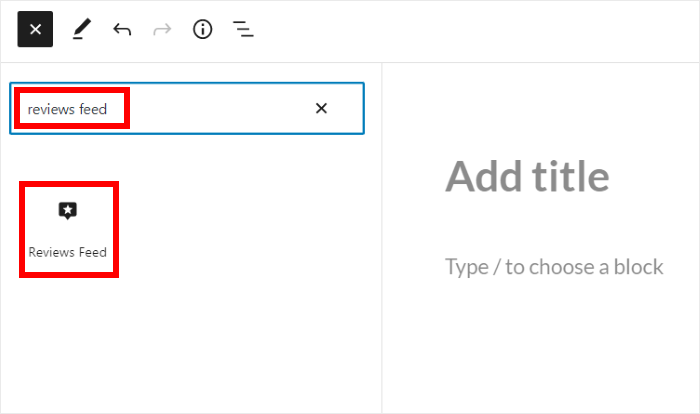
With that, click on Update to finish adding your Facebook testimonial carousel feed to your site.
You can now open your website and see how it looks.
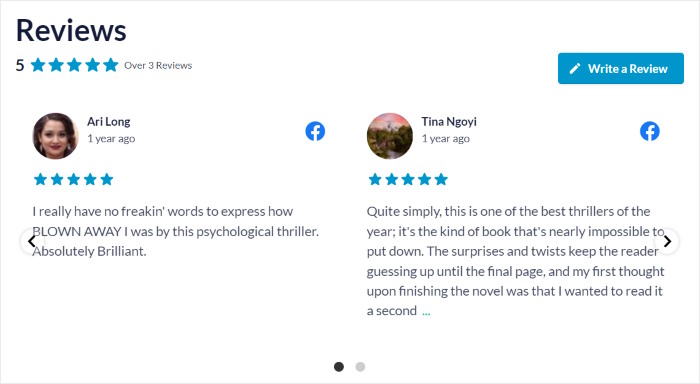
Aside from this, you can try the other way to embed your new Facebook testimonial carousel feed.
Embed the Carousel on a WordPress Sidebar
You can also embed your Facebook testimonial feed on your sidebar as a Facebook widget.
First, you need to open your Facebook testimonial carousel in the live feed editor.
To do that, navigate to the Reviews Feed » All Feeds menu from your dashboard.
Here, you can find all of your feeds listed out. Just click on your testimonial carousel feed to proceed.
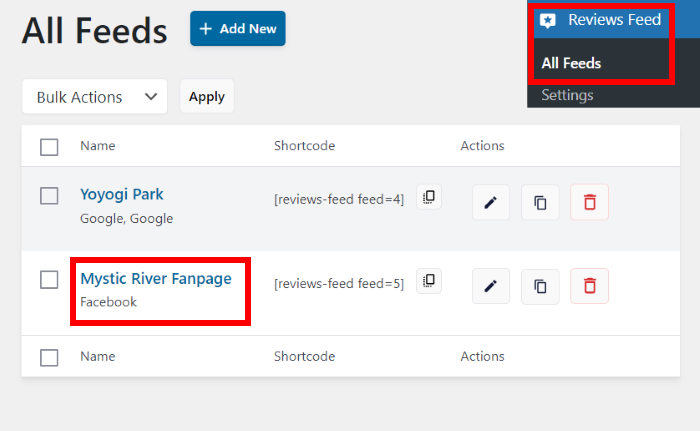
Now, the plugin will open the live feed editor once again so you can start embedding your Facebook carousel.
For that, click on the Embed button.
Like earlier, you can now see a popup with the embed options for your testimonial carousel feed.
Click on Add to a Widget on the popup to continue.
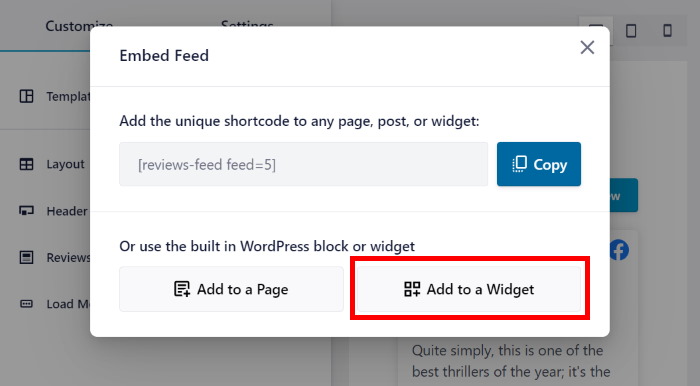
Now, the plugin will send you to the Widgets page of your WordPress website.
Here, select the Sidebar option to see all of your active widgets.
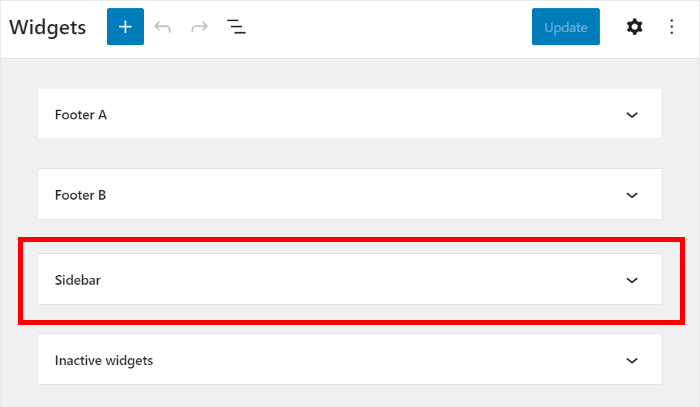
You can also select a Footer section to embed your testimonials under your main content.
We’ll use the footer for our example here.
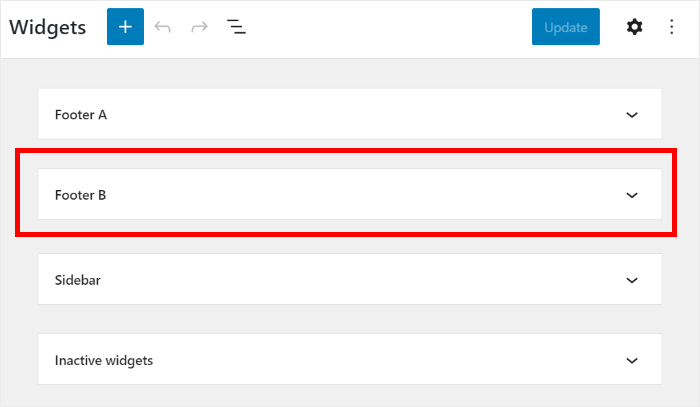
Finally, just click on the plus icon (+) and then select the Reviews Feed widget from the options.

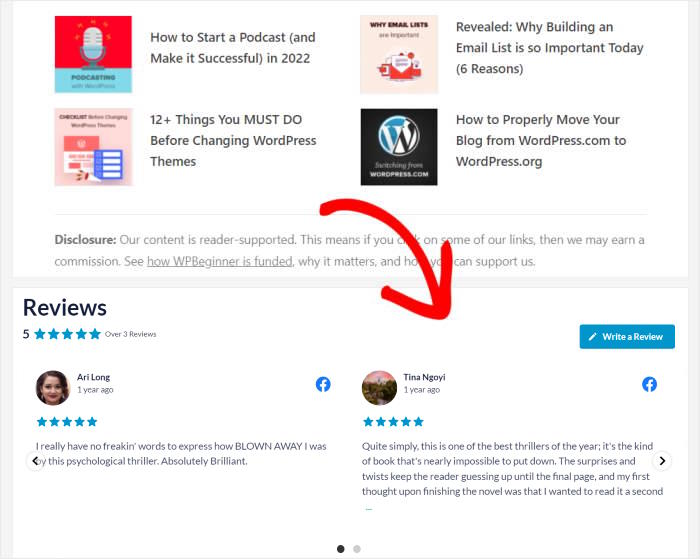
And you have a Facebook testimonial carousel feed on your WordPress website!
Now you can open your website to see how it looks to your visitors.
Testimonial Carousels: Common Questions
Can you create a testimonial carousel in WordPress for free?
Partly. The free version of Reviews Feed Pro connects to Google and Yelp, but the carousel layout is a Pro feature. Free testimonial plugins can build a carousel, though you’ll be typing every testimonial in by hand.
Can you show testimonials from more than one platform in the same carousel?
Yes. Add each platform as a source and build one feed containing all of them, so a visitor sees your Google, Facebook and Trustpilot reviews in a single slider.
How do you stop spam or fake reviews appearing in the carousel?
Set a minimum star rating in the feed settings, so anything below 4 stars never appears. You can also block reviews containing specific words, or hide individual ones.
Will a testimonial carousel slow down your site?
It shouldn’t. The plugin loads reviews from its own cache rather than calling the platform every time someone visits, so the carousel doesn’t wait on an external service to render.
Where should you put a testimonial carousel?
Near the decision. A product or pricing page, just above the buy button, or in the sidebar so it appears across the site. A carousel in the footer gets seen by almost nobody.
How many testimonials should a carousel show?
Enough to rotate without repeating, so around 8 to 15. Beyond that, nobody reaches the end anyway, and a tight set of strong reviews beats a long set of average ones.
Start Showing Your Testimonials Today
That’s the whole setup. Connect your source, switch on the carousel layout, embed it, and you’re done.
The part that matters most comes after. Every new review your customers leave appears in the carousel by itself, so there’s no copying and nothing going stale six months from now.
Want to see what a good testimonial section looks like before you build yours? Here are examples of website testimonials worth borrowing from.
Get Smash Balloon Reviews Feed Pro