Want a simple way to create a landing page in WordPress that actually converts?
After years working in digital marketing and building my own sites, I’ve seen firsthand how powerful a focused landing page can be.
Whether you want more email signups, more product sales, or just a better way to guide visitors to action, a single dedicated page can make all the difference.
The good news is that you do not need to hire a developer or wrestle with complicated code to get results.
WordPress has all the tools you need to create a beautiful, high-converting landing page quickly and with zero stress.
In this article, I’ll show you the exact 5-step process I use to build landing pages in WordPress for my business and my clients.
You’ll learn my simple, step-by-step method so you can start turning visitors into leads or customers today.
In This Article
- Why Use a Landing Page in WordPress?
- Easiest Way to Create a Landing Page in WordPress
- How to Create a Landing Page in WordPress (Easiest Way)
Why Use a Landing Page in WordPress?
A landing page is a special page where you can promote your products or services. An engaging landing page means you can turn website visitors into customers and subscribers with ease.
One thing to note is that a landing page is different from a home page. A home page tells your visitors about your business and your website so they can decide where to go.

On the other hand, the only goal of a landing page is to get your visitors to take some kind of action. This action can be:
- Buying your product
- Joining your email list
- Leaving a positive customer review
- Creating an account on your site
- And more
There’s a lot you can do with landing pages on your WordPress website. Here are a few unique ways landing pages can help you:
- With a landing page, you can remove unnecessary distractions and focus on getting people to take an action.
- Landing pages also allow you to use graphics, videos, testimonials, and more to grab people’s attention and convert them into customers or subscribers.
- You can also use your landing page for lead generation and add tons of new people to your email list.
- Since you’re only focusing on one thing, you get more space to talk about how your product or service can help your visitors.
- Your landing page can be full of keyword-rich content about a specific product or service. This means it can rank higher on the page results and boost your site’s SEO so you can easily reach interested people.
As you can see, landing pages have a lot to offer to your website. In fact, over 68% of B2B businesses use landing pages to boost conversions on their website.
Easiest Way to Create a Landing Page in WordPress
Hiring someone to build and update a professional landing page for your website can easily get very expensive. Plus, that comes with the extra hassle of finding the right developer to create your landing page.
But here’s the good news.
You don’t need to hire an expensive developer to build a high-converting landing page. All you need is the right website-building plugin, and you can build one yourself.
This is where SeedProd comes in.
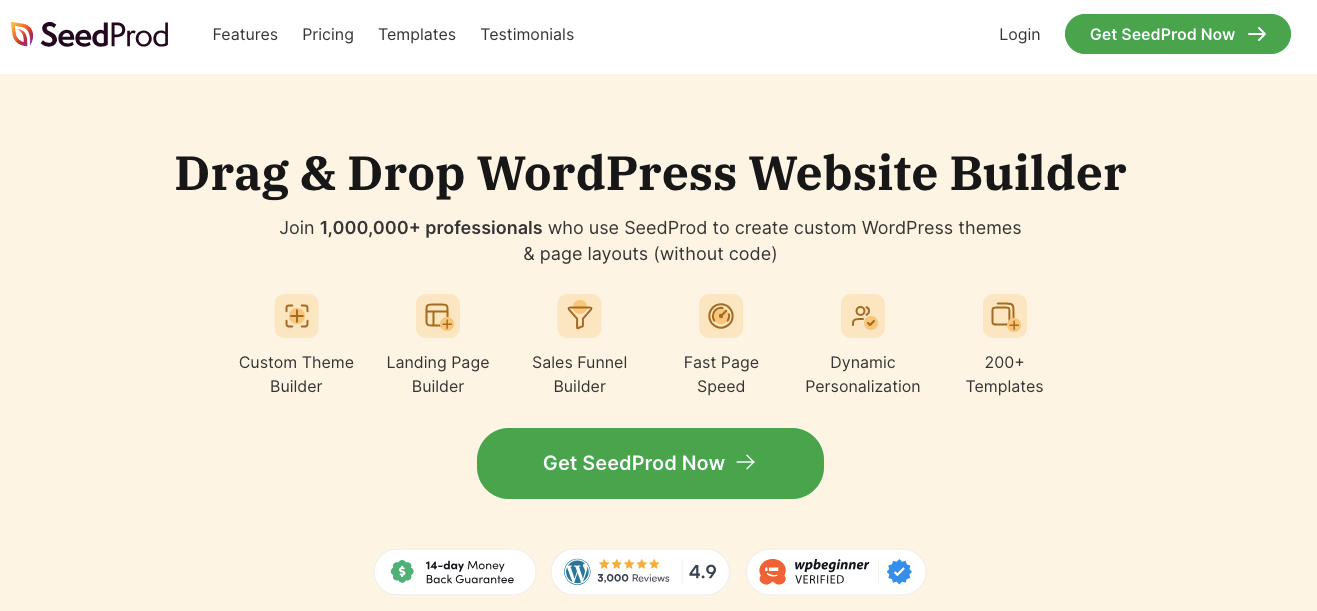
Using SeedProd, you can easily build beautiful landing pages that’ll turn your visitors into subscribers and customers.
Forget about hiring a developer or coding. SeedProd comes with a simple drag-and-drop page builder to help you create engaging landing pages even if you’re a WordPress newbie.
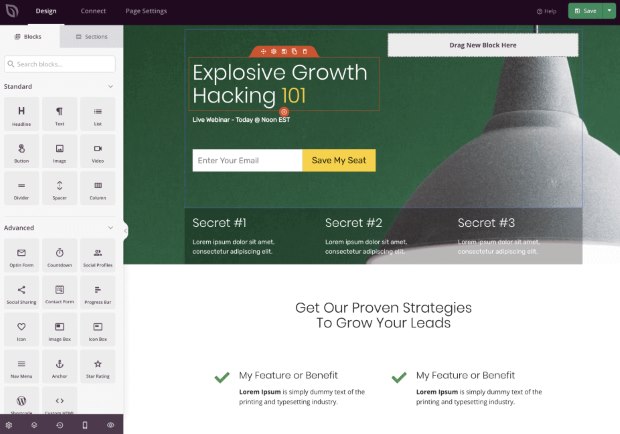
In fact, here are a few highlights that you get with SeedProd:
- Easy to use drag and drop page builder to visually create landing pages
- 300+ professionally-designed page templates for you to use
- 90+ content blocks for your landing pages
- Spam protection to protect your site from bots and fake submissions
- Integration with popular email marketing services like MailChimp and ActiveCampaign
You can see SeedProd’s list of amazing features here.
All in all, SeedProd is easily the best landing page builder for WordPress and the easiest way you can build landing pages for your site.
If you want to learn more, check out our review of SeedProd here.
How to Create a Landing Page in WordPress (Easiest Way)
To create your WordPress landing page, all you have to do is follow this step-by-step guide:
Step 1: Install and Activate SeedProd on Your Site
The first step is to go and get your copy of SeedProd here. Once you’ve downloaded the plugin, you can go on and install it on your WordPress site.
If you’re not sure how to do this, you can look at this simple guide on installing WordPress plugins.
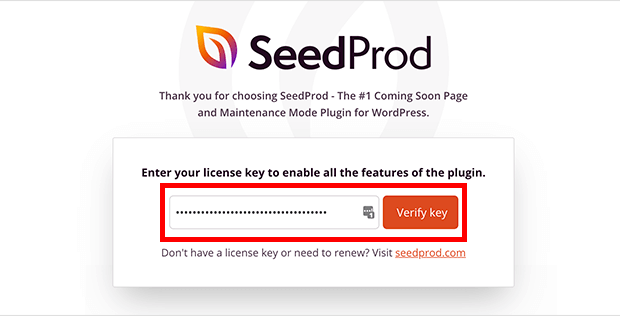
Once you’ve installed and activated the plugin, it will ask you to enter your license key.
You can find the license key under the Accounts section of the SeedProd website.
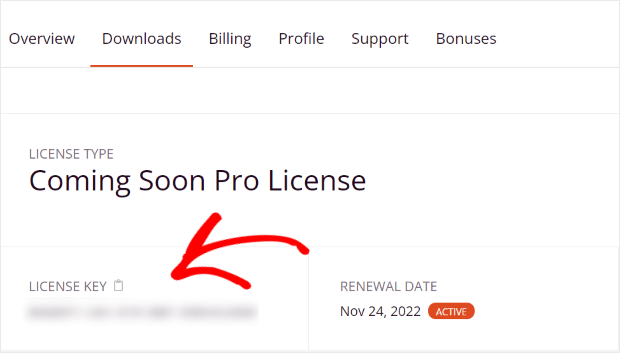
Now, copy your license key and go back to your WordPress site.
There, paste the license key and then click on the Verify Key button.
Step 2: Create a New Landing Page
To create your new landing page, first, go to SeedProd » Pages from your WordPress dashboard.
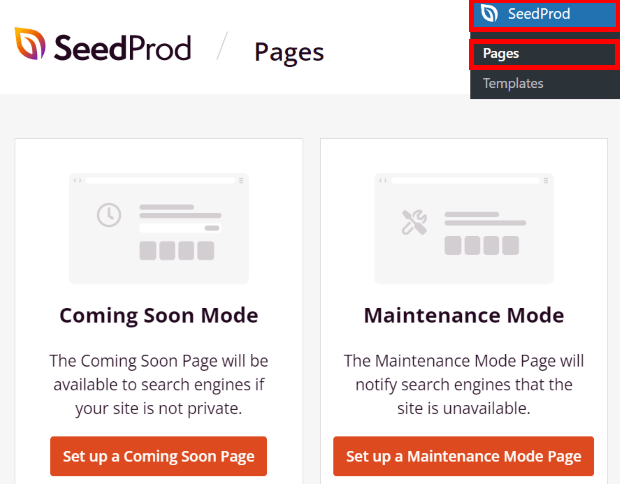
From here, you can set up different pages for your site, including the 404 page, coming soon page, login page, and more.
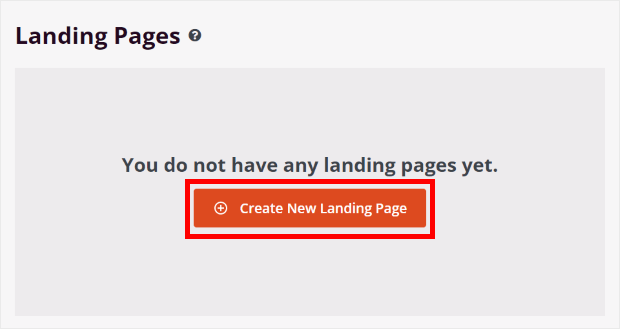
Scroll down here to find the Landing Pages section, and then click on the Create New Landing Page button.
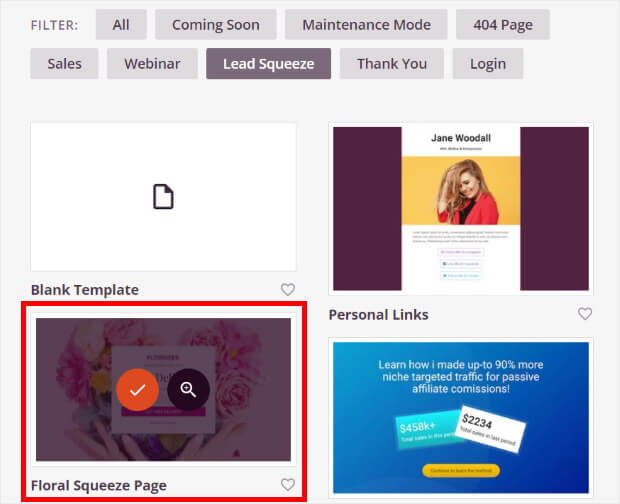
Now, you can choose the template for your landing page. Just check out the available landing page templates that you get with SeedProd.
Once you find a template you prefer, hover the mouse over the template and click on the check icon.
We’ll use the Floral Squeeze Page template for this tutorial.
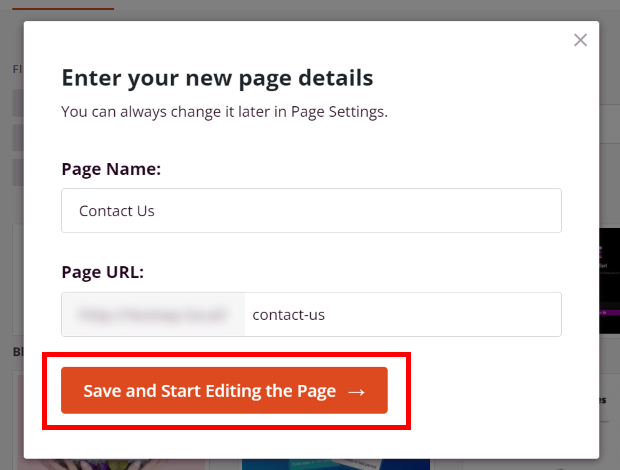
After that, you can see a popup that asks you to enter the page name and custom URL for your landing page.
Just add the details here and click on the Save and Start Editing the Page button.
Step 3: Customize Your Landing Page Template
Now that you’ve created your landing page, SeedProd will automatically open it in the drag-and-drop page builder. It’s one of the best things I love about using SeedProd, since I’m not familiar with coding at all.
You can now use the simple visual builder to add new content to the landing page.
On the left panel, you can find all the landing page blocks.
Each block contains an element that you can add to the landing page, including a headline, image, button, divider, video, text, and much more.
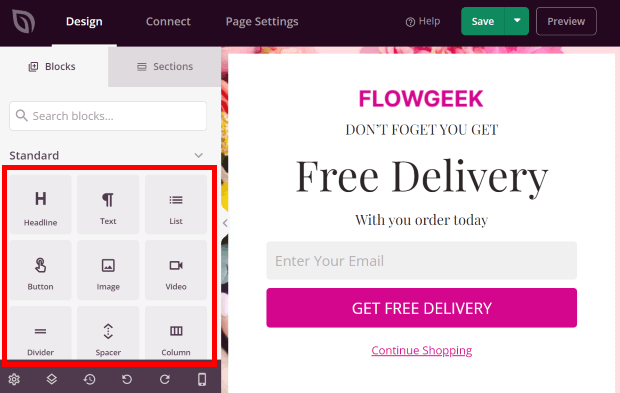
Towards the right, you have a live preview of your landing page.
To get started, you can drag a block from the left and drop it wherever you want on the right.
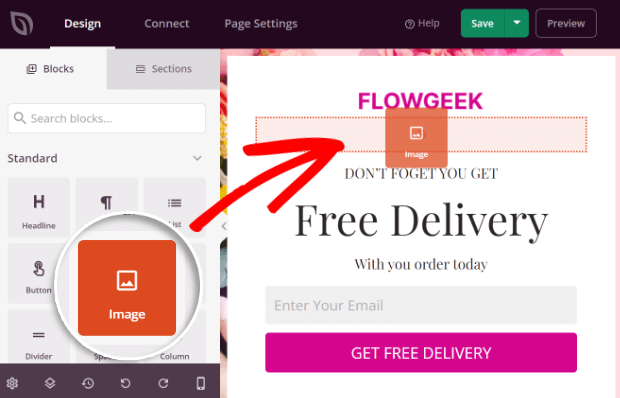
You now have a new block on your landing page.
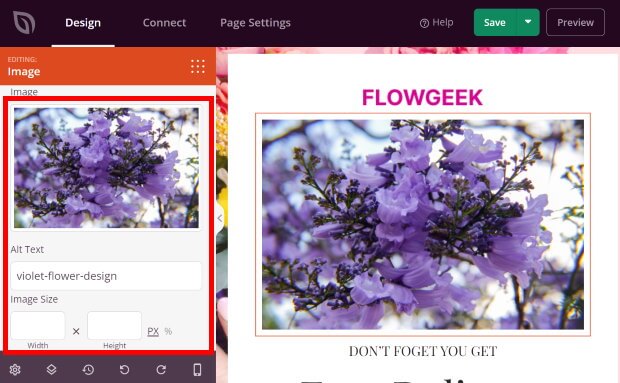
After adding a block, you can just click on it, and you’ll see its options on the left. Each landing page block has different settings here.
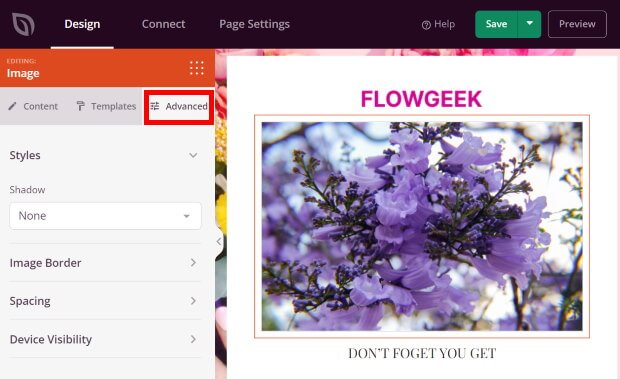
For example, if you add an image block, you can use the options to pick the image you want on your landing page, its size, the alternative text for the image, and more.
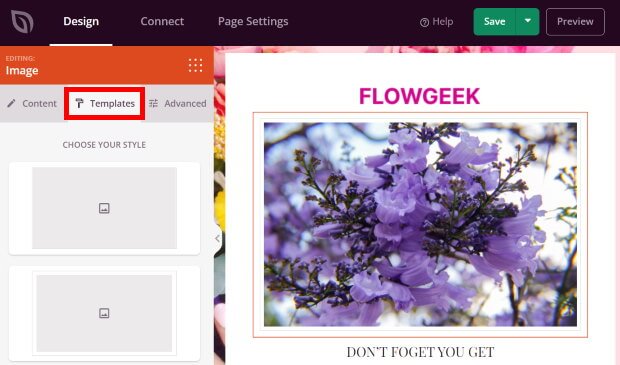
To see the other options for the landing page block, you can click on the Templates tab at the top.
Here, you can choose between a list of different styles for the landing page block.
Finally, you can go to the Advanced tab to find the remaining customization options for the landing page block.
Here, you can set the border, margins, shadow, visibility, and more.
Once you’ve added your settings, click on the Save button at the top.
After that, click on the small grid icon to return to the main customization options.
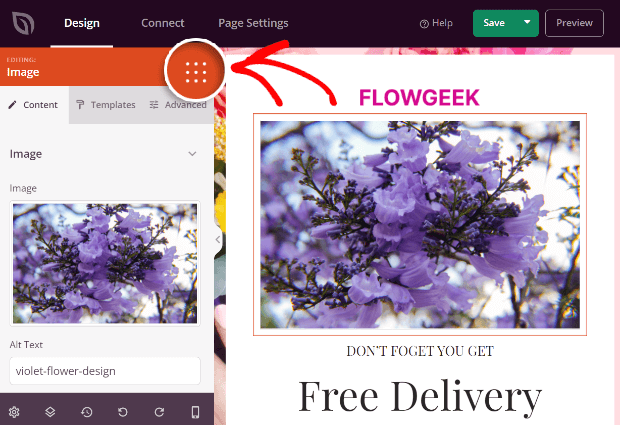
Next, you can easily add images, text, paragraphs, buttons, and much more using landing page blocks.
If you scroll down on the left section, you can also find Advanced blocks for your landing page. These include:
- Giveaway widget
- Countdown timer
- Optin form
- Progress bar
- Social media timeline
- Login form
- And more
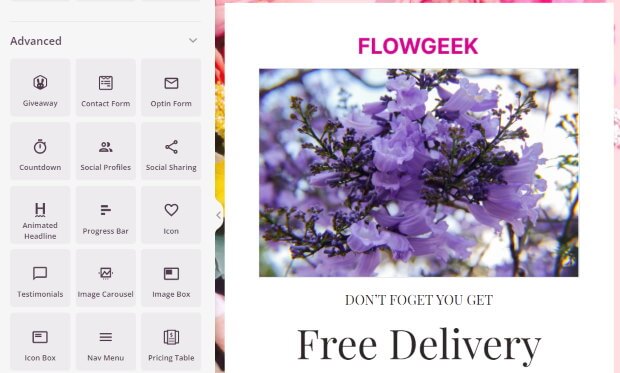
Like before, you can add these blocks to your landing page as well.
Once you’re happy with your landing page blocks, click on the Save button.
Now, you can move on to landing page sections by clicking on the Sections option at the top.
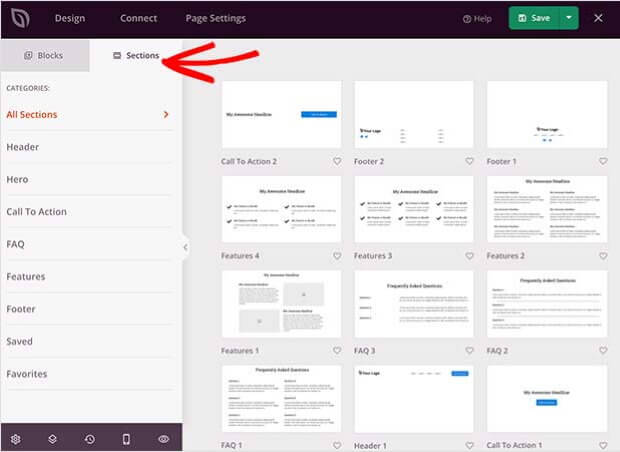
As you can guess from the name, these are different sections that you can directly add to your landing page.
These include headers, calls to action, FAQ sections, features, testimonials widgets, and much more.
To add a landing page section, hover your mouse over it and click on the plus (+) icon.
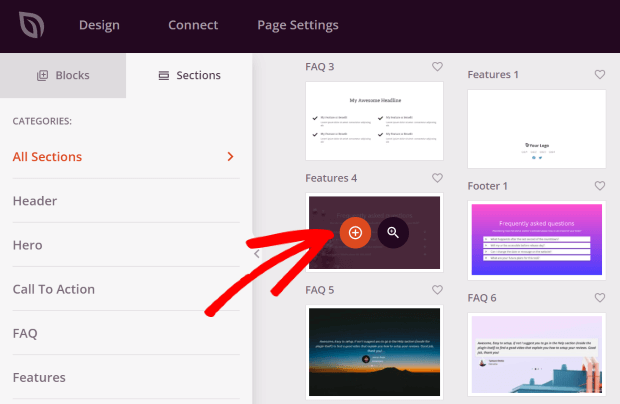
Just like your landing page blocks, you can click on the section to change the settings.
For example, let’s say you added an FAQ section to your landing page. To change the text that appears in the new FAQ section, you can just click on the section and edit the settings.
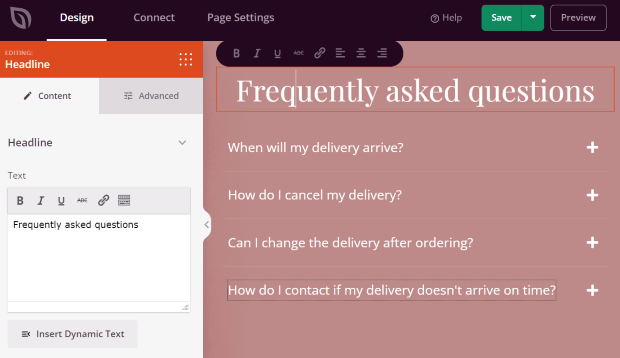
After you’ve added the blocks and sections to your landing page, click on the Save button.
You can then click on the gear icon at the bottom left to open the settings for your landing page.
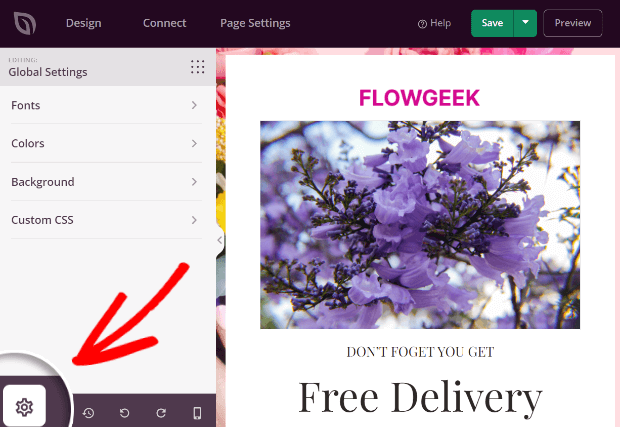
From this page, you can change the font, colors, and background of your landing page. For advanced users, there’s also the option to add custom CSS to change the landing page design.
For instance, if you click on the Colors option, you can quickly select the colors for different parts of your landing page.
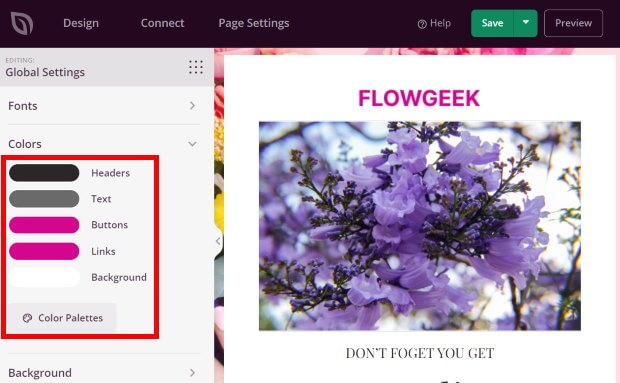
Once you’re happy with the settings, don’t forget to click on the Save button once again.
Step 4: Connect to Your Email Marketing Service
From here, you can also connect your new landing page to an email marketing service.
First, select the Connect tab at the top, and you can see all the available email marketing services.
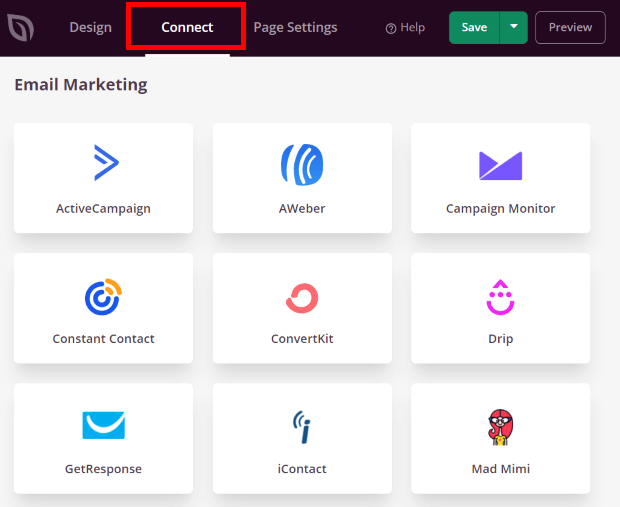
SeedProd comes with support for 13 different email marketing services, including Mailchimp, Drip, ConvertKit, Campaign Monitor, and much more.
If you scroll down, you can also see the options to connect your landing page to Google Analytics, Recaptcha, and Zapier.
To continue, click on your email marketing service here and then click on the Connect New Account button that will appear.
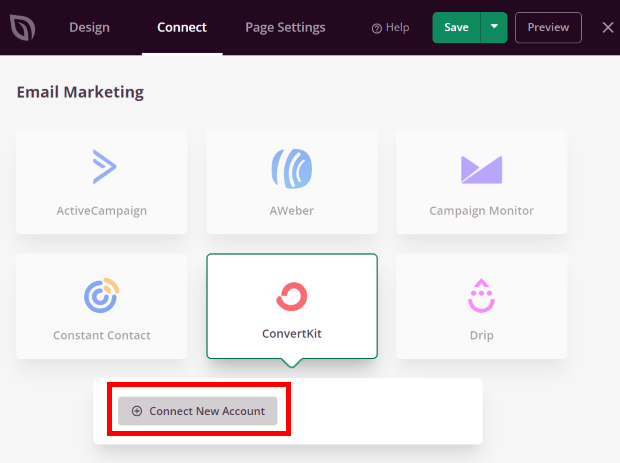
After that, just follow the on-screen instructions to verify your account.
You can now use your landing page to collect the email addresses of your visitors and include them in your email marketing campaigns.
Finally, click on the Save button to save your changes.
Step 5: Publish Your Landing Page in WordPress
Since SeedProd is the best landing page builder, it’s really easy to publish your landing page using the drag-and-drop page builder.
Just click on the arrow icon to the right of the Save button to get started.
Now, all you have to do is click on the Publish button.
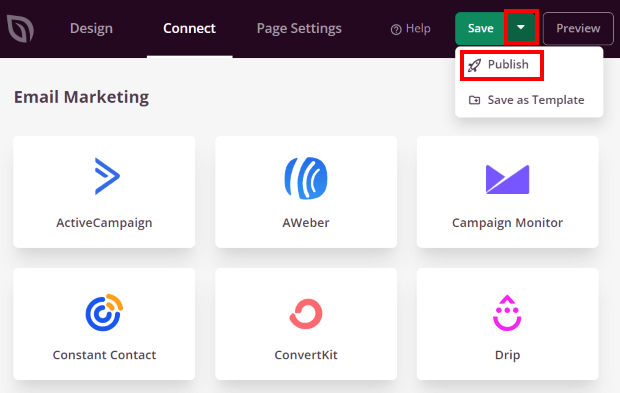
Once you do that, click on the See Live Page button on the popup to check out your new landing page.
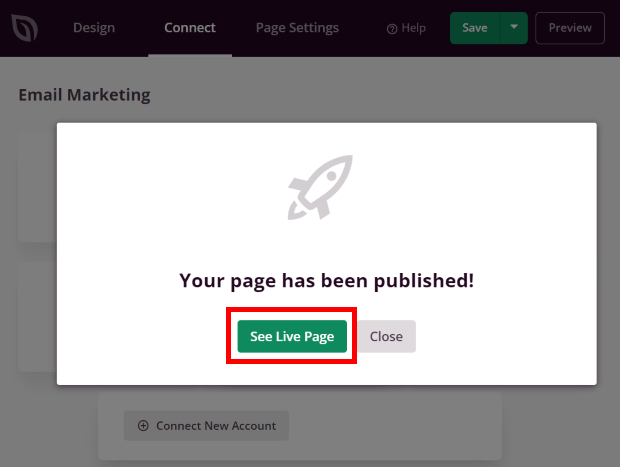
With that, you’ve officially published your new landing page! You’ll now see how it appears to your visitors.

And there you go!
Now, you know how to create a landing page in WordPress. Using SeedProd, it’ll be super easy to create a high-converting landing page.
Then, you can boost your email subscribers, get more customers, and improve your sales. And the best part is that you can do all this without touching a single line of code.
Ready to build engaging landing pages? Go and grab your copy of SeedProd today.
Looking for more ways to help out your business? Take a look at this list of the best social media marketing tips for small businesses.
Want better Linktree alternatives? You may want to see this next post on the best Linktree alternatives for your online business.
Found this list helpful? Then give us a follow on Facebook and Twitter for more tips and tutorials.
