Social Wall
  Feed Analytics

Social proof is everything for WooCommerce stores. Shoppers want to see what real customers think before they buy.
Without visible reviews, even great products get ignored. I’ve seen this happen across dozens of WordPress sites. But getting reviews to show up in the right spots is not always obvious.
I know firsthand how frustrating it can be when you want to showcase your testimonials on a custom landing page, only to find the default settings limit your options.
That is exactly why I put together this completely beginner-friendly tutorial.
Quick disclosure: I work at Smash Balloon, so our plugin shows up in this guide. I’ll also show you the free shortcode method first, because for some stores that’s genuinely all you need.
I will walk you step-by-step through how to embed WooCommerce reviews on your WordPress website so you can build social proof and boost your sales today.
- How to Embed WooCommerce Reviews (Quick Answer)
- Why Embedding WooCommerce Reviews Matters for Your Store
- What You Need Before You Start
- Step 1: Install and Activate Reviews Feed Pro
- Step 2: Create a Reviews Feed for Your WooCommerce Store
- Step 3: Customize Your WooCommerce Review Feed
- Step 4: Embed Your WooCommerce Review Feed on Your Website
- Want to Embed Google or Trustpilot Reviews Into Your Store?
- Next Steps: Get Even More From Your WooCommerce Store
How to Embed WooCommerce Reviews (Quick Answer)
There are two ways to embed WooCommerce reviews outside the product page.
- Free method: Add a
[product_reviews]shortcode via a snippet in your theme’s functions.php, or use your theme’s built-in reviews shortcode if it has one. It works, but you get one fixed layout, no filtering, and you’re editing code. - No-code method: Use Smash Balloon Reviews Feed Pro, which pulls your product reviews automatically and lets you place them on any page, sidebar, or footer with a block.
Here’s what the plugin route looks like:
- Install and activate Smash Balloon Reviews Feed Pro
- Select your products, categories, or tags as the review source
- Pick a template and filter which reviews appear
- Embed the feed with a block
Setup takes about 5 minutes. The comparison below shows which route fits your store.
Why Embedding WooCommerce Reviews Matters for Your Store
You want more sales. Your existing customers’ words are your best tool for getting them.
Think of your product reviews like word-of-mouth recommendations, except now they work 24/7 on your website, even while you sleep.
Reviews Are Your Most Powerful Sales Tool
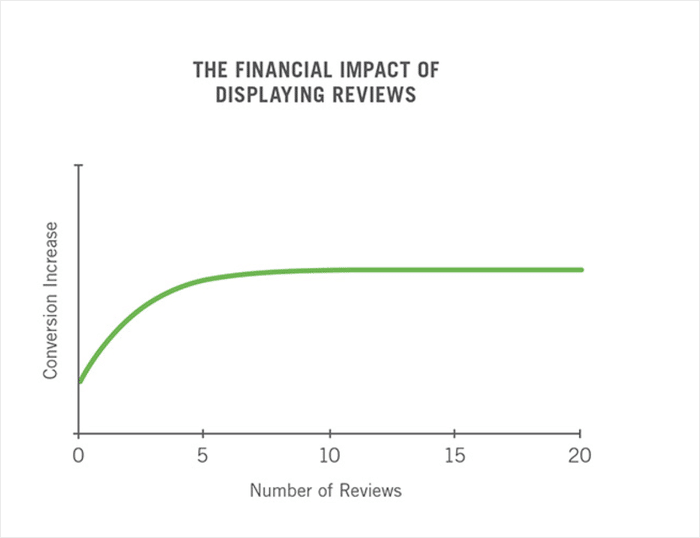
Every positive review is a mini sales pitch that costs you nothing to run, and the data backs this up.
According to the Spiegel Research Center, displaying reviews can increase conversion rates by up to 270%.
On top of that, reviews build the kind of trust that product descriptions alone can’t create.
Shoppers feel more confident hitting “Add to Cart” when they can see that real people have already bought and loved what you’re selling.
For more places to get social proof for your business, check out our guide on the best customer review platforms.
The Problem with WooCommerce’s Default Review Display
WooCommerce does include a built-in review system, but it comes with some real limitations that hold most store owners back.
By default, reviews only appear on individual product pages, and they’re stuck near the bottom.
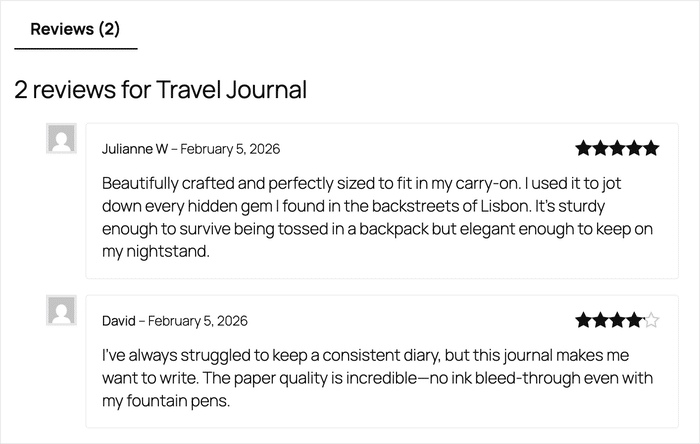
There is no easy way to pull those reviews onto your homepage, a landing page, a sidebar, or anywhere else on your site.
The visual presentation is also very basic. You can’t easily change the layout, match it to your brand colors, or control which reviews are shown. What you see is what you get.
Here’s a quick comparison to show you the difference:
| Default | Free shortcode | Smash Balloon Reviews Feed Pro ⭐ | |
|---|---|---|---|
| Where reviews show | Product pages only | Any page | Any page, sidebar, footer |
| Setup | None needed | Edit functions.php | 5-minute wizard |
| Code required? | ❌ None | ⚠️ Yes | ❌ None |
| Layouts | 1 | 1 | 7 |
| Filter by star rating | ❌ | ❌ | ✅ |
| Other review sources | ❌ | ❌ | ✅ Google, Yelp, more |
Which one do you need? If you just want reviews on one landing page and you’re comfortable editing theme files, the shortcode is free and fine. If you want control over which reviews appear and where, the plugin route is the one to follow below.
What You Need Before You Start
Before you dive in, make sure you have the following in place. This keeps the setup process smooth and avoids any surprises along the way.
- A self-hosted WordPress.org site. This is different from WordPress.com, which is a hosted service with more restrictions.
- WooCommerce installed and active. Reviews Feed Pro connects directly to WooCommerce, so you’ll need it up and running before you start.
- At least one product with reviews enabled. You’ll need some existing reviews for the plugin to pull in and display.
- Smash Balloon Reviews Feed Pro plugin. You can purchase and download Reviews Feed Pro directly from here.
That’s all you need to get started. Once these four things are in place, you’re ready to move on to the installation steps below.
Put your best reviews where buyers actually look
Your reviews are stuck at the bottom of your product pages. Move them to your homepage, landing pages, and sidebar in 5 minutes.
Get Smash Balloon Reviews Feed ProStep 1: Install and Activate Reviews Feed Pro
To get started, you’ll need to install and activate Smash Balloon Reviews Feed Pro. It’s the #1 review aggregator for WordPress and works automatically with WooCommerce.
Get a copy of Reviews Feed Pro here, then install and activate it on your WordPress site.
Note: In case you need help with this step, there’s a great guide on how to install WordPress plugins here.
Activating Your Reviews Feed Pro License
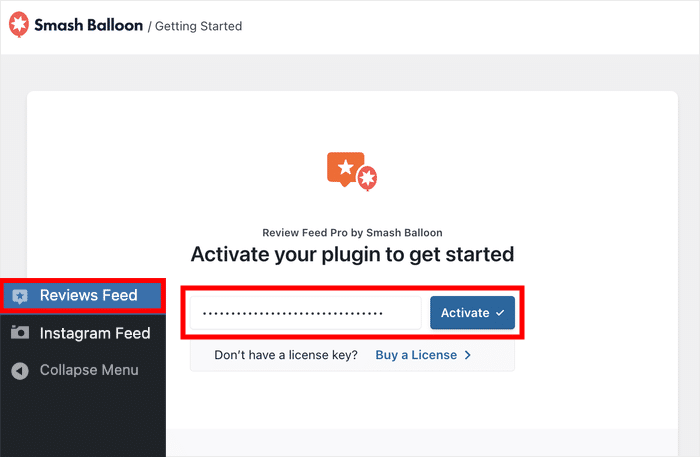
Before you can use Reviews Feed Pro, you’ll need to activate your license. This is a quick one-time step that unlocks all the plugin’s features.
You can find your license key on your Accounts page here.
From your WordPress dashboard, navigate to the Reviews Feed menu.
You’ll see a field where you can paste your license key. After that, click on the Activate button.
Step 2: Create a Reviews Feed for Your WooCommerce Store
A review feed is a collection of reviews that the plugin pulls together and displays as a visual element on your website.
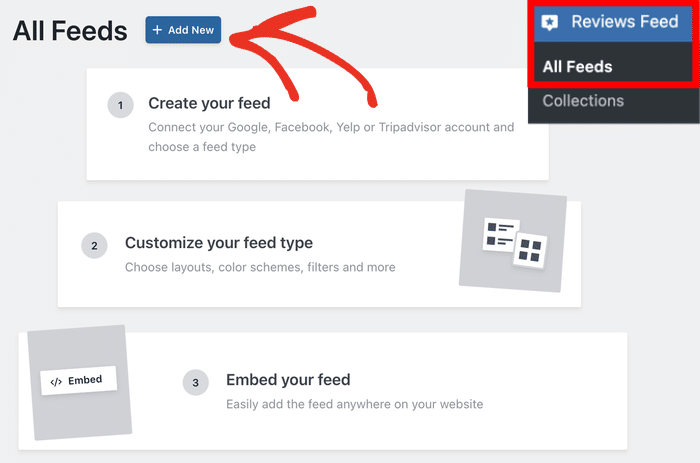
To create your first one, open the Reviews Feed » All Feeds menu from your dashboard.
Click on Add New to open the feed creation wizard.
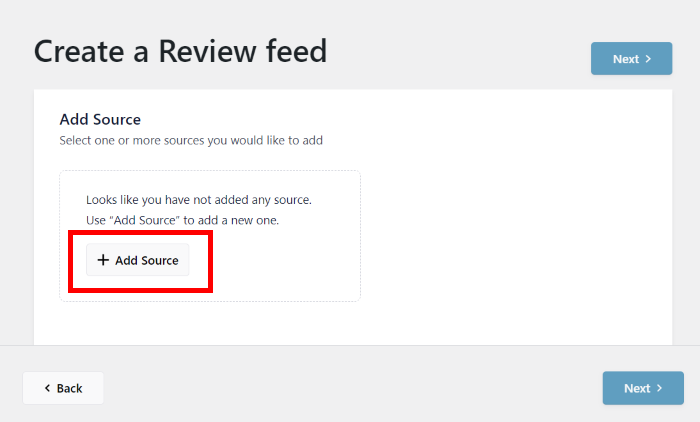
On the next page, you’ll be able to instantly connect to any sources that you’ve added in the past.
For now, click on Add New since we haven’t added a source yet.
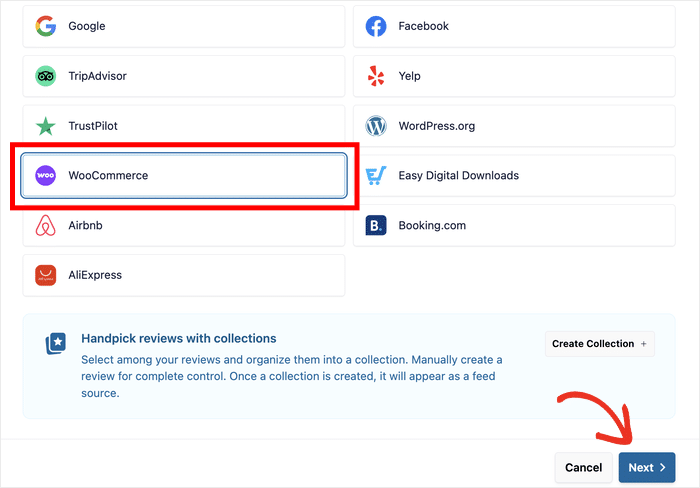
You can then use the popup to choose WooCommerce as your review source.
After you do that, click on Next to continue.
Choosing the Sources for Your Reviews Feed
Using the popup, you can choose which product reviews to add to your new feed.
Using the tabs at the top, you can add reviews in 3 ways:
- Products: Pulls all the reviews from your selected product pages
- Categories: Pick a product category and embed all of its reviews
- Tags: Display reviews for all the products with a specific tag
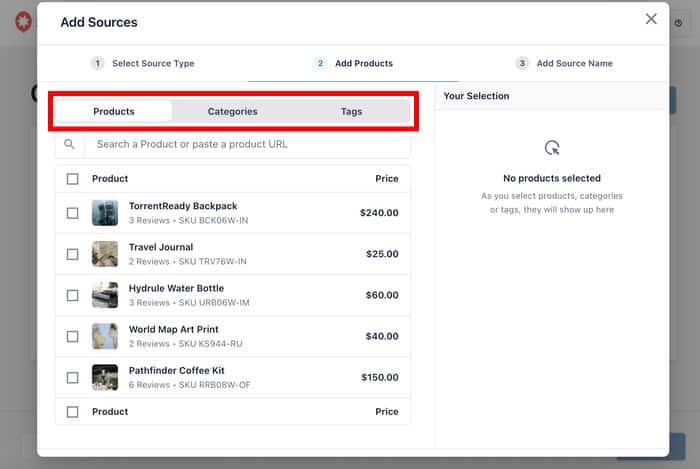
I recommend the Products option for most store owners. It gives you more control and lets you put your best-reviewed products front and center.
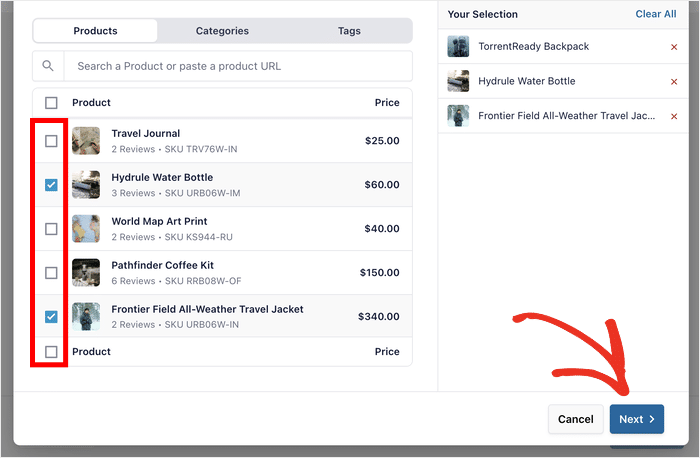
After you pick an option, use checkboxes to pick the products, categories, or tags whose reviews to embed.
Once you’ve made your selection, click Next to move into the customization step.
Step 3: Customize Your WooCommerce Review Feed
Once you’ve connected your review source, Reviews Feed Pro will show you the available templates.
This is where you choose how your review feed looks on the page. You have 7 different templates to pick from:
- Default
- Simple cards
- Masonry
- Single review
- Showcase testimonial carousel
- Carousel
- Grid carousel
Click the layout that best fits where you plan to embed the feed, and click on Next.
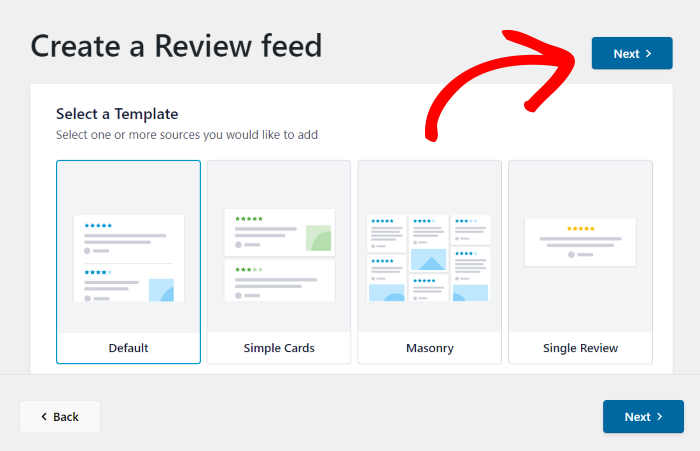
You can always change it later from the live customizer if needed.
Customizing the Look to Match Your Brand
After choosing a template, you’ll move into the live customizer. Everything here is point-and-click, with no CSS or coding required at any stage.
Whenever you make any changes, you can track the changes in the live preview.
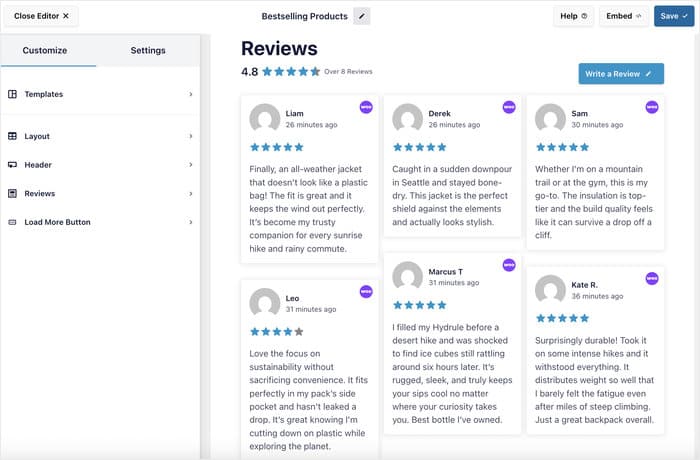
Some important design options you’ll want to pay attention to are:
- Layout: Choose between a list, masonry, or carousel layouts
- Header: Toggle the header, and change how each of the header elements look
- Post Style: Pick from a boxed design or show reviews without a border
- Edit Individual Elements: Customize every part of the displayed reviews
- Load More Button: Decide where to show the button and how it looks
Remember to click on Save to confirm your changes after you’re happy with the design here.
Filtering and Moderating Which Reviews Appear
You’re in full control of what appears in your feed, and that includes keeping low-quality or negative reviews out of sight.
Reviews Feed Pro includes a set of filtering tools that let you decide exactly which reviews are displayed.
Click on the Settings tab at the top-left, and you can see the Filters and Moderation options.
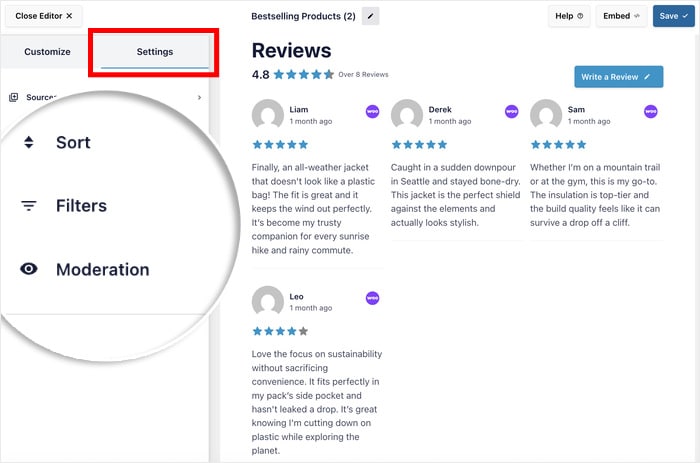
Here’s what you can control from these options:
- Minimum Star Rating: Set a threshold so only 4-star or 5-star reviews appear in the feed.
- Keyword Filtering: Include or exclude reviews that contain specific words or phrases.
- Character Count: Set a minimum or maximum character count for the selected reviews.
- Manual Control: Browse your reviews individually and choose which ones to show or hide.
I find the minimum star rating filter to be the most useful setting for store owners who are just getting started.
It’s a simple way to make sure your feed always puts your best foot forward, without having to manually review every entry.
Once you’re happy with your layout, style, and filters, click on Save to store your feed settings. You’re now ready to embed it on your site.
Step 4: Embed Your WooCommerce Review Feed on Your Website
To start embedding your reviews, click on the Embed button at the top of the visual editor.
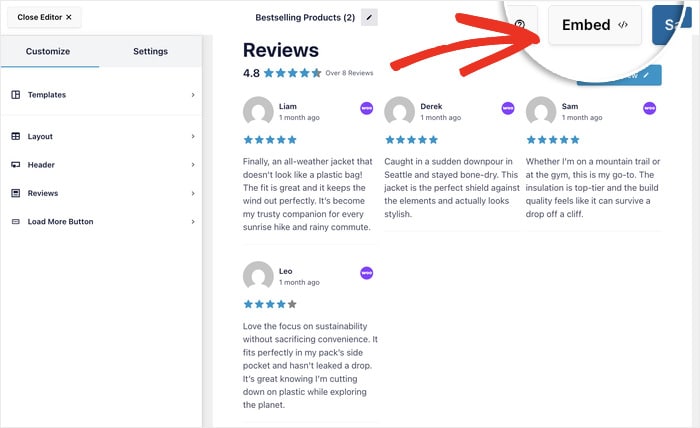
Doing that opens a popup with different ways of embedding your WooCommerce reviews.
To embed the reviews on a page, click on the Add to a Page option.
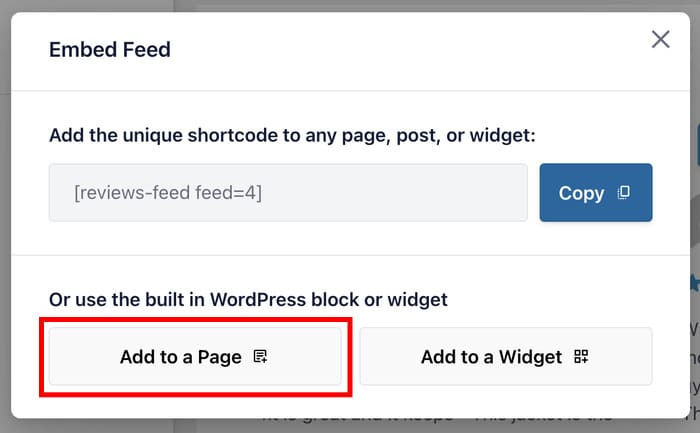
This will show a list of published WordPress pages on your website.
Select the page where you want to show the reviews, and click on the Add button.
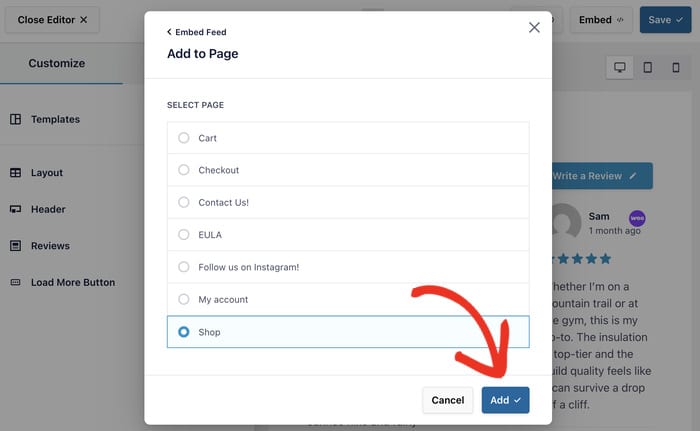
Reviews Feed Pro will automatically open this page on your browser, so you can embed your feed using a block.
To add a new block, click on the plus (+) icon.
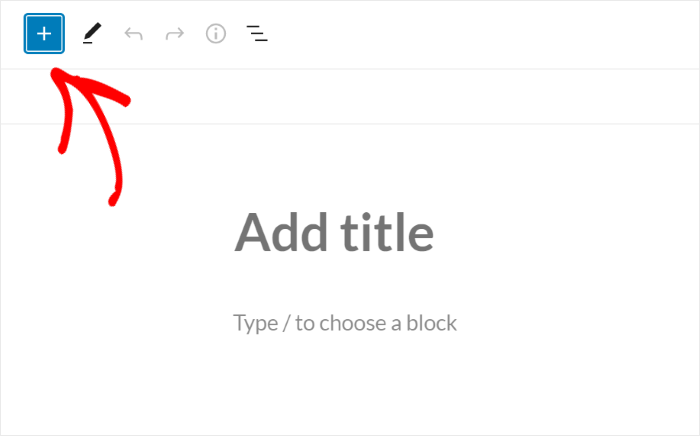
On the block selection popup, you can search for the “reviews feed” block using the search bar.
Select the Reviews Feed block from the search results below.
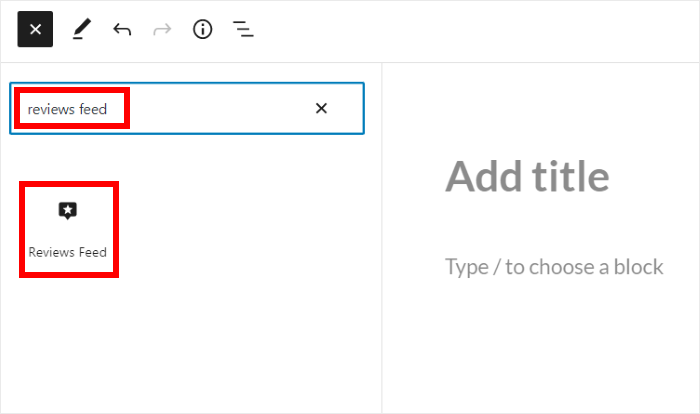
Doing that will embed your WooCommerce reviews feed on this page.
You can click on Update button and open the page to see how your reviews will appear on your website.

How to Add the Review Feed to Your Sidebar or Footer Widget
If you’d like to display your review feed in a sidebar or footer, you can do that using the live editor as well.
Like before, click on the Embed button at the top.
This time, you can select the Add to a Widget option on the popup instead.
If your theme supports sidebar or footer widgets, the plugin will automatically redirect you to the Widgets page.
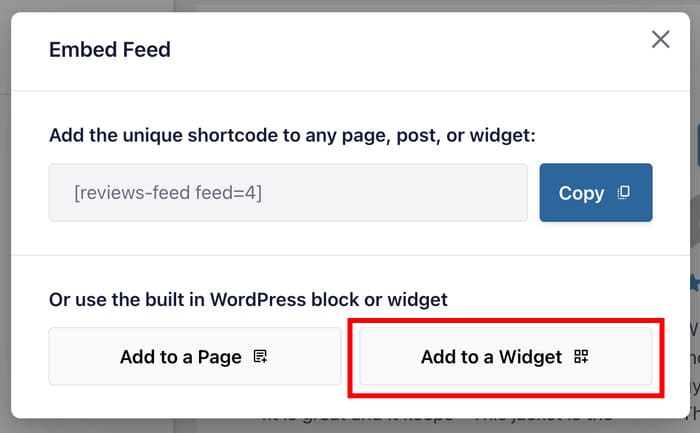
You can select the widget area where you want to show the WooCommerce reviews.
For this example, I’ll select the Sidebar option here, but the process is the same for any widget area.
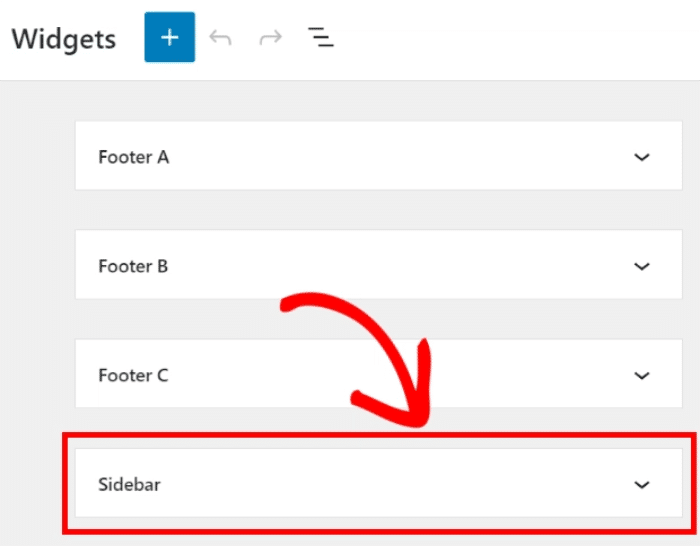
To add a new review block, click on the plus (+) icon.
Finally, select the Reviews Feed block using the selection popup.
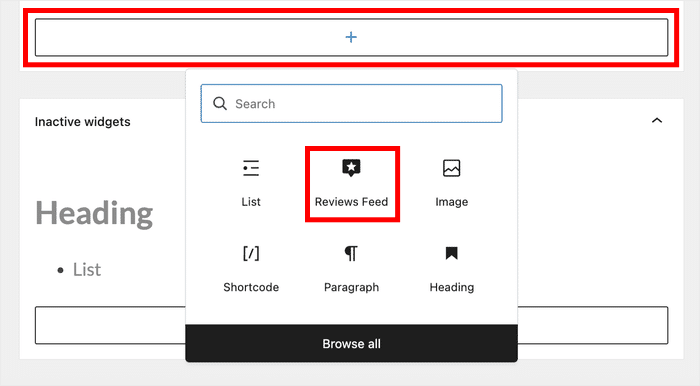
Click on Update, and your review feed will now appear in that location across your entire site.

Want to Embed Google or Trustpilot Reviews Into Your Store?
Plenty of store owners have their best reviews somewhere other than WooCommerce. If most of your social proof lives on Google or Trustpilot, your product pages aren’t showing it.
Smash Balloon Reviews Feed Pro pulls from WooCommerce, Google, Yelp, Trustpilot, TripAdvisor, Airbnb, Facebook, and more, so you can mix sources in one feed or run them separately.
A setup I’d recommend for most stores:
- Product pages: WooCommerce reviews for that specific product
- Homepage: your highest-rated reviews across every source
- Checkout or cart page: a short Google reviews carousel, where hesitation costs you the most
The steps are identical to the walkthrough above. At the source selection screen in Step 2, pick Google or Trustpilot instead of WooCommerce.
If you sell digital products too, here’s the same process for Easy Digital Downloads reviews in Elementor, and for dropshipping stores, how to add AliExpress reviews.
Next Steps: Get Even More From Your WooCommerce Store
You’ve done something great today. Your review feed is live, your social proof is visible, and your store is in a stronger position to convert visitors into buyers.
Here are some natural next moves to keep building on that momentum:
- Best WooCommerce Plugins to Skyrocket Your Sales — Discover the tools that experienced store owners use to boost sales, improve customer experience, and save time.
- Steps to Add a Social Media Review Widget to WordPress — Learn how to showcase testimonials in even more places across your site, beyond your review feed.
- Social Media and SEO: 3 Social Media Tips Proven to Boost SEO — Make sure the right shoppers can find your store in the first place with this beginner-friendly SEO walkthrough.
Ready to get started? Download Reviews Feed Pro and follow this walkthrough to have your review feed live in under 5 minutes.