Looking to add a dynamic Instagram gallery to your WordPress website?
Showcasing a gallery of your latest Instagram photos and videos directly on your site helps keep your content fresh, visually engage your visitors, and turn website traffic into Instagram followers.
But creating a customizable Instagram gallery isn’t simple using Instagram’s standard embedding options.
They often lack the flexibility and features you need for a great-looking layout on your site.
I know that trying to embed and style social media content on your website can feel a bit overwhelming if you’re not comfortable with code or complex website builders. That’s why we’ve put together this step-by-step guide.
With over 10 years of experience helping website owners easily add and customize social media feeds, we at Smash Balloon wrote this article to show you exactly how to add an Instagram gallery to your WordPress site.
What’s more? This tutorial is designed for WordPress beginners, so you can easily follow along and create your own stunning Instagram gallery, even if you’re not tech-savvy!
In This Article
- Why Add Instagram Galleries to WordPress?
- Why Use Plugins for Instagram Galleries?
- How to Create an Instagram Gallery in WordPress
Why Add Instagram Galleries to WordPress?
There are many reasons why you’d want to create an Instagram gallery in WordPress.
The most obvious reason is to get more Instagram followers. When you embed Instagram content on your site, visitors can see you have a thriving profile worth following.
You could also display a timeline of your Instagram galleries to…
- Engage site visitors with content relevant to their interests
- Show social proof with customer reviews and testimonials
- Show that your brand can respond to trends with a regularly updated feed
- Display user-generated content on product pages to increase sales
By using Instagram for business and adding Instagram galleries to your website, you can boost brand exposure and keep engagement levels high.
It also helps you build customer relationships that last long into the future.
Why Use Plugins for Instagram Galleries?
As mentioned earlier, Instagram doesn’t make it easy to embed entire galleries of photos in WordPress. The best you can do with their editing tools is to embed single posts.
That’s why we’re using a WordPress plugin to show you how to create an Instagram gallery. Plugins make it easier to create galleries because they do a lot of the work for you.
Instagram plugins connect to your profile and display your posts however you want – no coding required!
It’s not always easy to find a WordPress Instagram plugin that does everything you need, so why not start with the best plugin on the market?
Smash Balloon Instagram Feed Pro is the best Instagram feed plugin for WordPress.
It lets you show customizable Instagram galleries in WordPress without needing any tech work to get them looking great.
All Instagram galleries are completely customizable, so you can tweak them to look just right. And you can display as many galleries as you like, wherever you want them on your site.
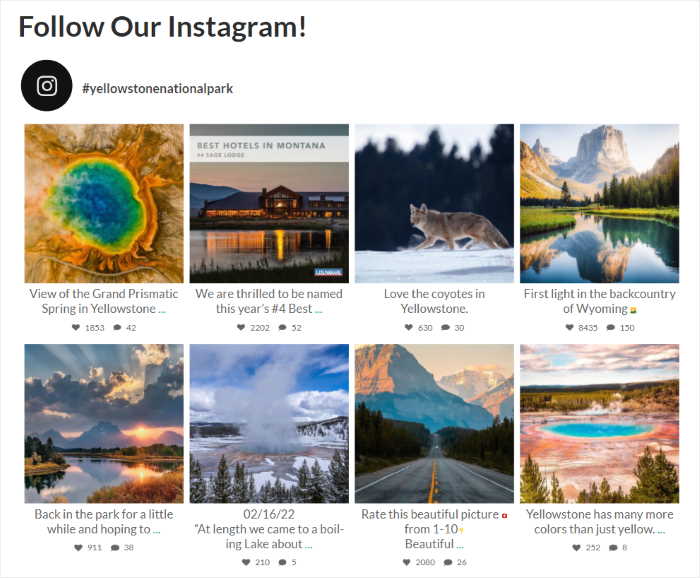
Multiple layout options let you showcase your galleries in carousels, grids, masonry grids, and more.
Plus, you can use the highlight layout to draw attention to specific posts in your gallery.
Here are a few other things you can do with the Instagram Feed plugin:
- Link posts in your gallery to product pages to create shoppable Instagram feeds
- Display your Instagram stories in full-screen lightbox popups
- Embed shoppable Instagram posts on your website
- Manage more than 1 Instagram account on the same site
- Filter your Instagram content based on hashtag, search terms, and more
- Combine many feeds into a single Instagram gallery
- Moderate posts with the powerful visual moderation system
As if that wasn’t enough, you get access to top-quality customer support and a 14-day 100% money-back guarantee.
Click here to get started with Instagram Feed Pro.
Now that you know why creating an Instagram gallery in WordPress is beneficial, let’s look at the steps for building your first gallery feed.
How to Create an Instagram Gallery in WordPress
With that, let’s get started with our tutorial and show you how to create, customize, and embed your Instagram gallery.
Step 1: Install the Smash Balloon Instagram Feed Pro Plugin

The first step is to install the Instagram Feed Pro plugin on your WordPress website.
Check out this step by step guide to Install a WordPress plugin if you’re not sure how to do that.
Then when you activate the plugin, you can create your Instagram gallery feed in step 2.
Step 2: Create Your Instagram Gallery Feed
Now that you have Instagram Feed Pro on your website, it’s time to go ahead and create your Instagram gallery.
From your WordPress admin dashboard, go to the Instagram Feed » All Feeds menu.
To create your Instagram gallery, just click on Add New.
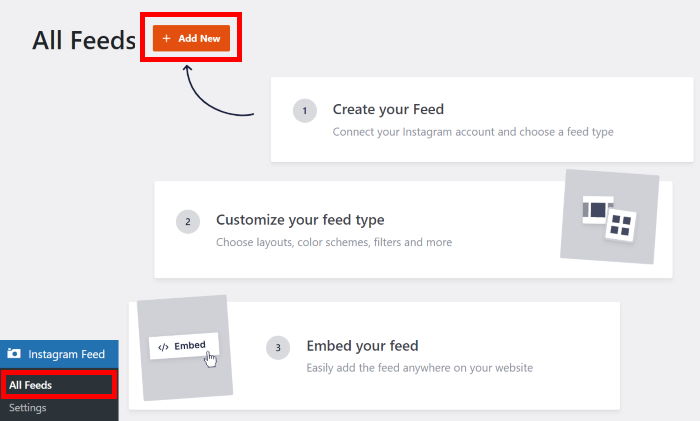
Once you do that, you can pick the type of Instagram gallery. With this plugin, you can choose from 3 types of galleries:
- User Timeline: Show a gallery of Instagram posts from an account you own.
- Public Hashtag: Create a gallery of all public posts from a hashtag instead of a user.
- Tagged Posts: Show a gallery of photos that your profile is tagged in.
To combine multiple gallery types, you can select more than 1 option here.
Select the type of Instagram gallery that you want and then click on Next.
For now, we’ll go with a user timeline in this tutorial.
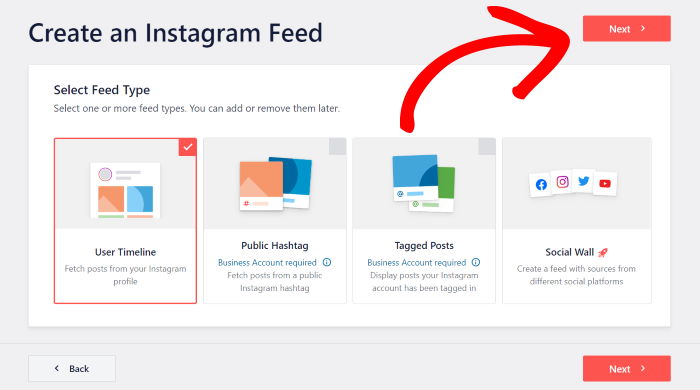
As you can see, it’s super easy to create your Instagram gallery using this plugin.
In the next step, you can connect your newly created gallery to a source.
Step 3: Connect Your Instagram Account
If you want your new Instagram gallery to show photos and videos, you can just connect it to your Instagram account.
To do that, first, click on the Add Source button on this page.
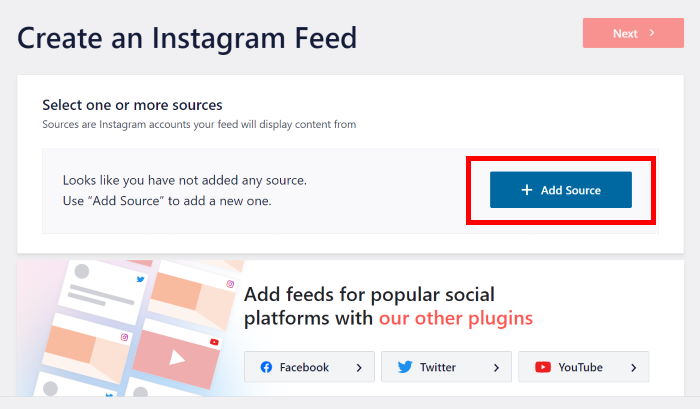
The plugin allows you to choose between 2 types of Instagram accounts: Personal or Business.
You can only show your own Instagram posts in your gallery if you go with a personal account.
To get access to more types of content for your Instagram gallery, like hashtag feeds, IGTV videos, shoppable feeds, Instagram reels and more, you can choose a business account.
Select your Instagram account type in the Select Account Type option and then click on the Login with Instagram button.
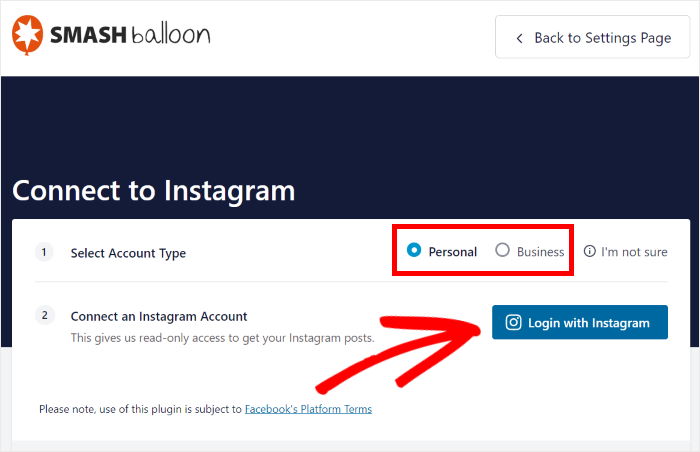
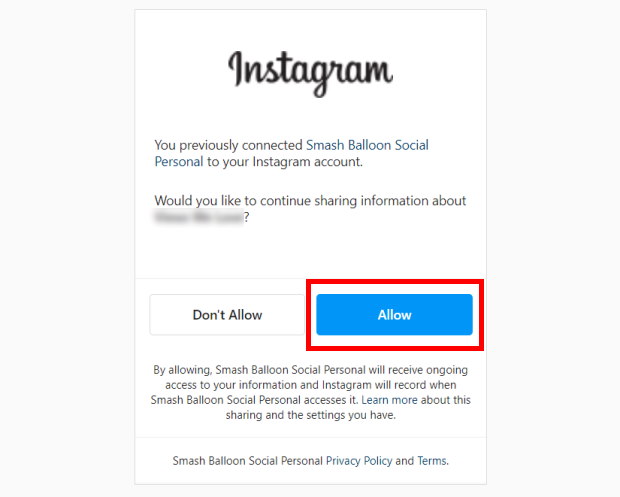
After that, the plugin will send you to Instagram. You can now give read-only access to Instagram Feed Pro so that it can show Instagram content on your website.
Your Instagram account will be completely safe since the plugin can only view your data and can’t make any changes.
To confirm the read only access, click on the Allow button.
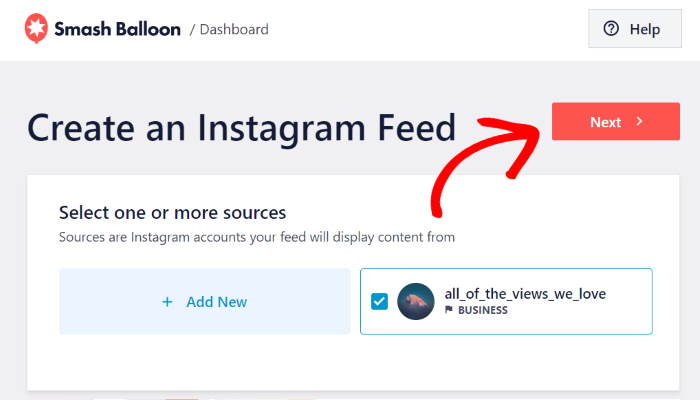
Finally, click on the Next button on this page to use your Instagram account as a source for the new Instagram gallery.
So far, you’ve created a new Instagram gallery on your site and connected it to Instagram. For the next step, you can use the customization options to change how the Instagram gallery looks.
Step 4: Customize Your Instagram Gallery Feed
Once you add a source to your Instagram gallery, you can then use the feed editor to customize its design.
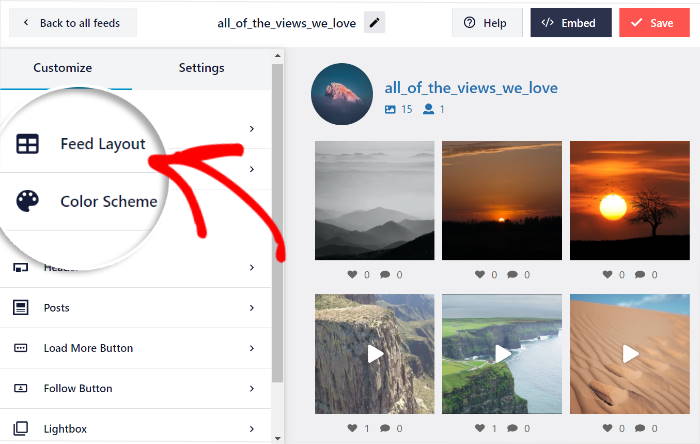
Here, you can find all the customization options on the left side of the screen. You’ve got options to customize your gallery layout, color scheme, header style, gallery size, and much more here.
And on the right, there’s a live preview of your Instagram gallery where you can see all of your changes in real-time.
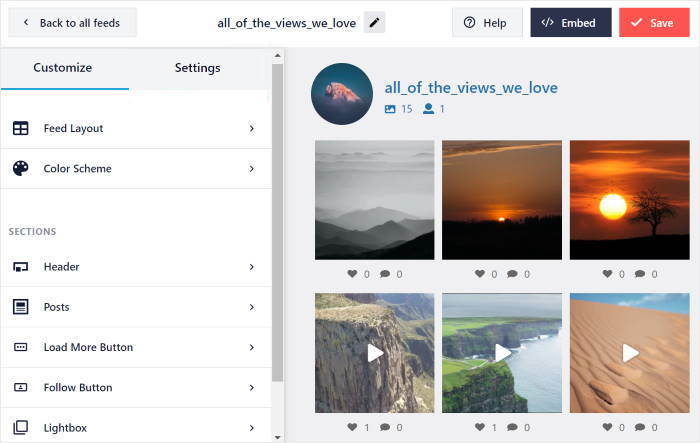
Click on the Feed Layout option on the left panel to start customizing your Instagram gallery.
As you can see, there’s 4 layout templates for you to pick from: Grid, Carousel, Masonry, and Highlight.
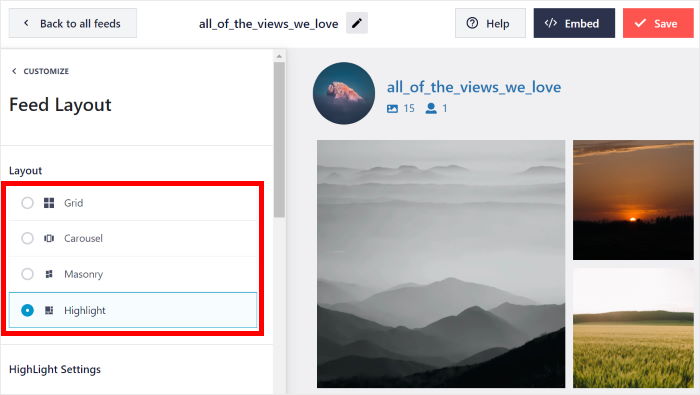
Here’s a closer look at each gallery layout with an example of how it would look on your website.
Grid Instagram Gallery
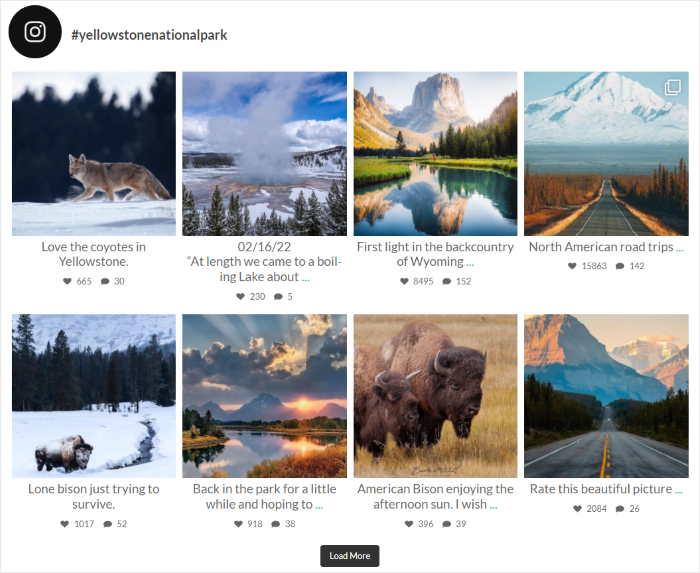
The Grid gallery type is a traditional photo gallery. It shows your Instagram posts in a uniform gird of square-cropped images.
You can customize the gallery by choosing the number of photos and columns for both desktop and mobile devices. It’s also possible to change the padding around photos.
Carousel Instagram Gallery
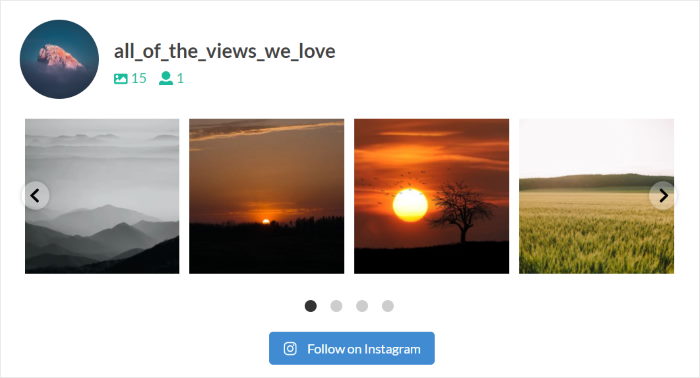
The Carousel gallery type shows your photos and Instagram videos in a horizontal slideshow carousel.
You can choose the number of rows and columns to customize the look and feel of your Instagram carousel. There’s also the ability to show or hide navigation arrows, pagination, and set the gallery to autoplay.
Masonry Instagram Gallery
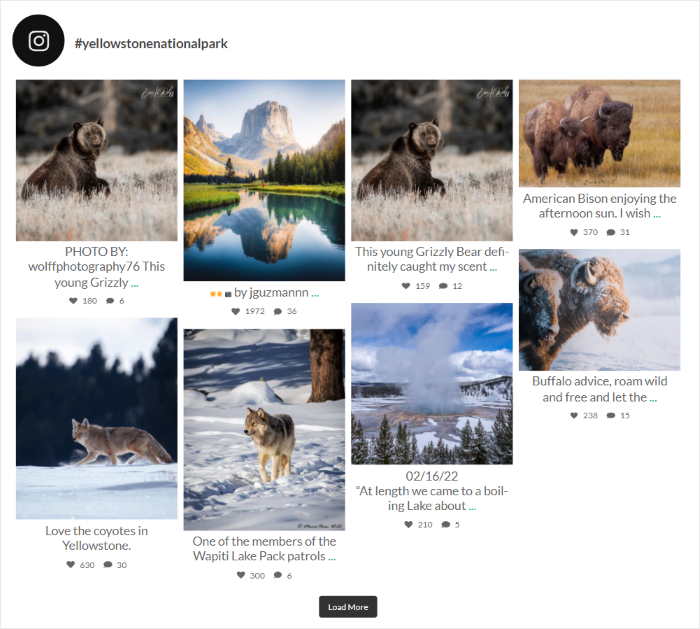
The Masonry Gallery lets you show Instagram posts in their original aspect ratio. That means portrait photos won’t get cropped to fit a specific size.
For this gallery type, you can set the number of columns and photos for desktop and mobile devices individually.
Highlight Instagram Gallery
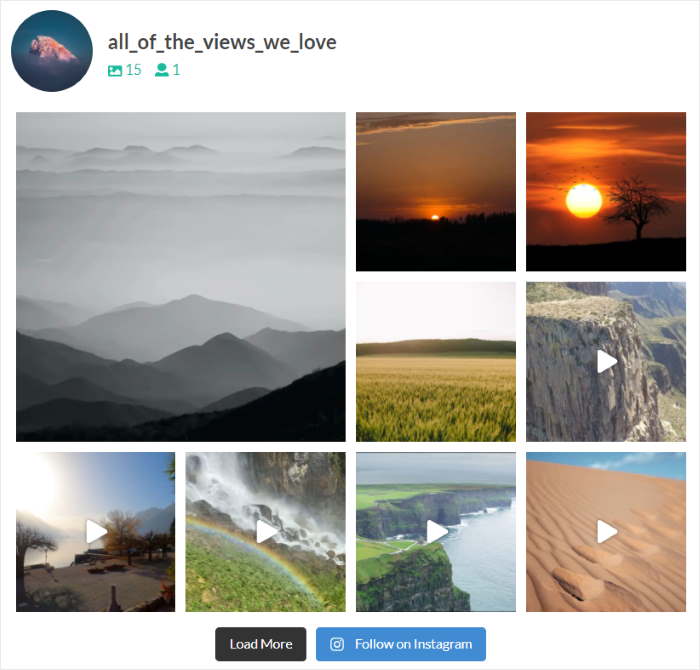
The Highlight gallery type crops your Instagram photos to uniform squares and displays them in a masonry-style.
Since highlighted posts are twice as large, you can draw more attention to them.
Take a look at the available gallery layout options and select the one that you prefer. Don’t forget to click on Save to confirm your changes.
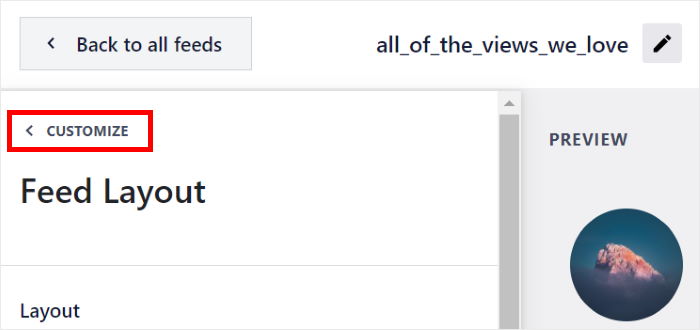
After that, click on the small Customize button at the top left to continue customizing your Instagram gallery.
Next, select the Color Scheme option to go ahead and change the colors of your Instagram gallery.
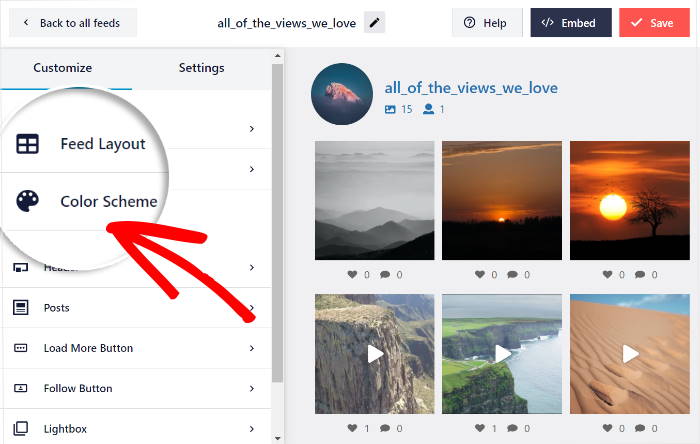
For your Instagram gallery, you’ve got 4 different color schemes that you can choose from:
- Inherit from Theme: Copy your website’s colors
- Light: Light background and a darker font color
- Dark: Darker background and a light font color
- Custom: Manually choose the colors yourself
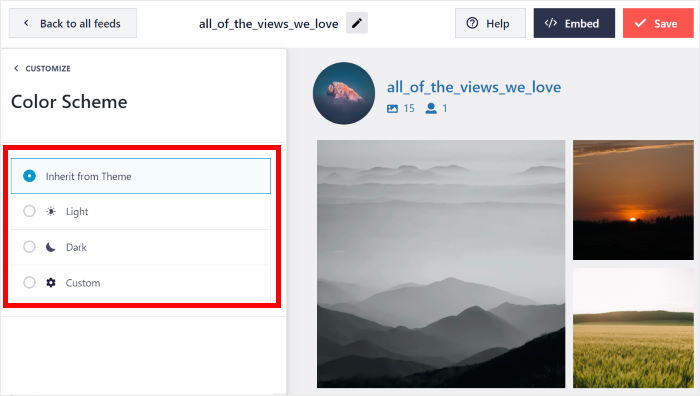
Select the color scheme that you want and then click on the Save button.
Now, you can use the rest of the customization options and change the design of your Instagram gallery. You can change your post layout, header style, gallery size, load more button, and much more.
To save your changes, remember to click on Save at the end.
After that, you can go to step 5 and embed the Instagram gallery on your WordPress website.
Step 5: Embed Your Instagram Gallery Feed on WordPress
Now that you’ve learned how to create an Instagram gallery in WordPress let’s show it off by embedding it on your site.
There are 2 ways to add your gallery to WordPress, which includes:
- Embed Instagram gallery on WordPress pages
- Embed Instagram gallery on a WordPress sidebar or footer
Embed Instagram Gallery on WordPress Pages
You can easily embed your Instagram gallery with the help of the live feed editor.
For that, look for the Embed button in the top right corner and click on it.
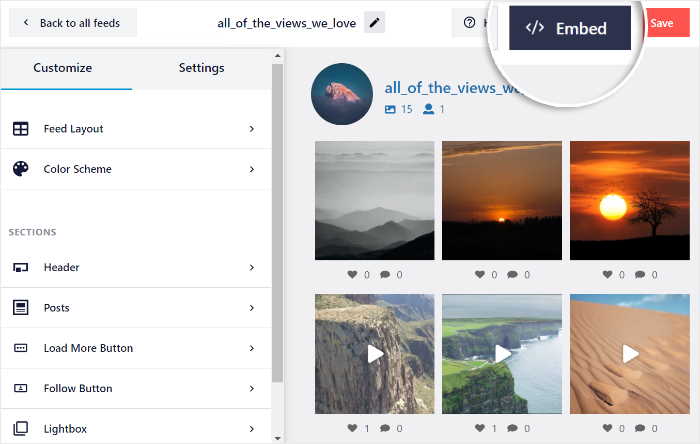
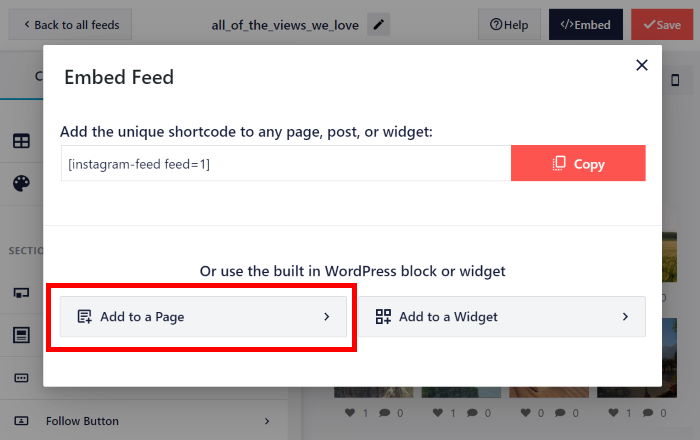
After that, the plugin will ask you to choose the location of your Instagram gallery.
Just click on the Add to a Page button to embed it on a WordPress page.
Next, select your WordPress page on the popup and then click on Add to continue.
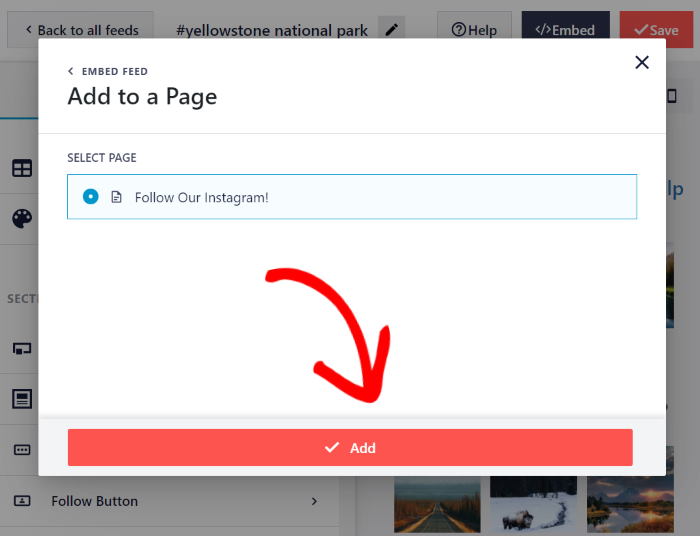
Once you do that, the plugin will then open that page in the WordPress editor.
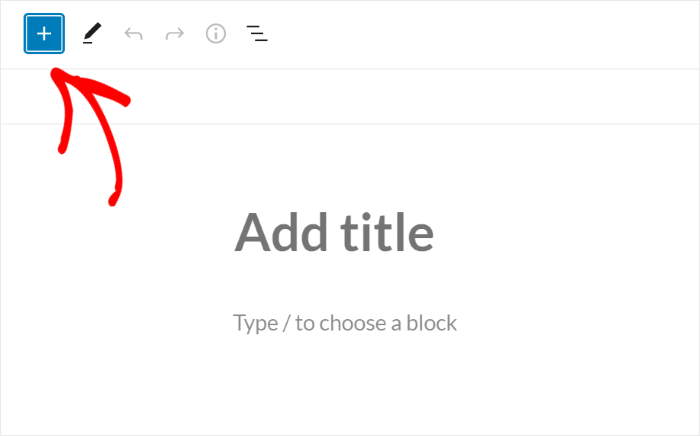
Here, click on the small plus (+) icon to add a new content block.
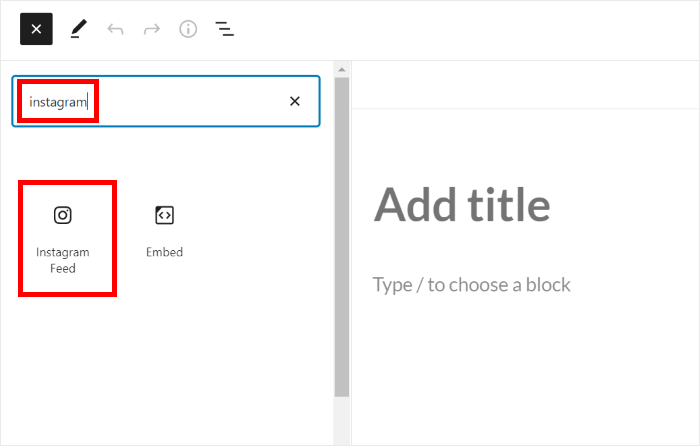
Now write “Instagram” in the search bar and then click on the Instagram Feed block below.
Now save your changes by clicking on Publish and you’ve officially embedded your Instagram gallery on your WordPress site.
Open your website and you can see how it looks.
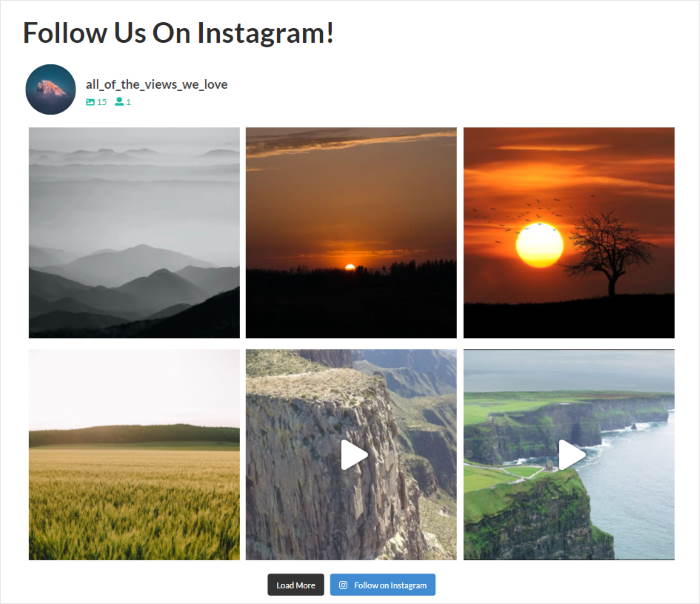
Let’s move on and check out the next way to embed your Instagram gallery.
Embed Instagram Gallery on a WordPress Sidebar or Footer
With Instagram Feed Pro, you can also embed your gallery on your sidebar or footer areas as an Instagram widget.
First, use your WordPress dashboard to go to the Instagram Feed » All Feeds menu and then click on your Instagram gallery from earlier.
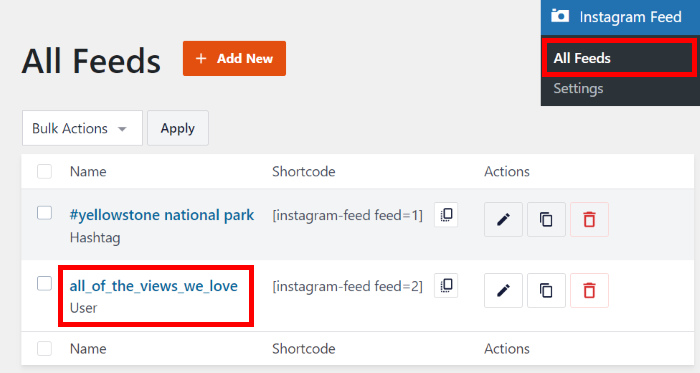
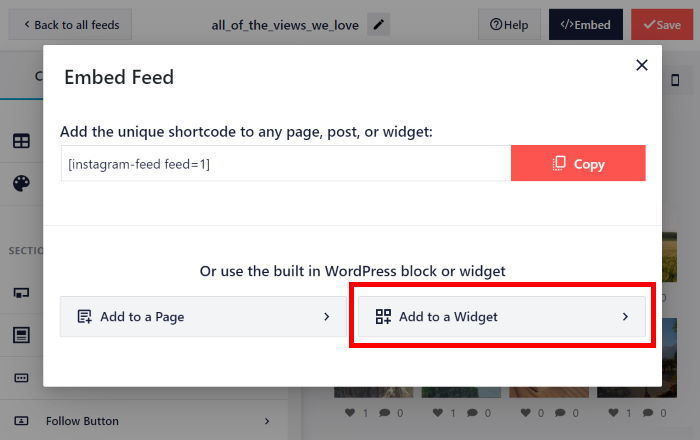
You’ll now see the Instagram gallery open in the live feed editor. From here, click on the Embed button at the top to proceed.

On the popup, you can choose where you want your Instagram gallery. For now, click on the Add to a Widget button.
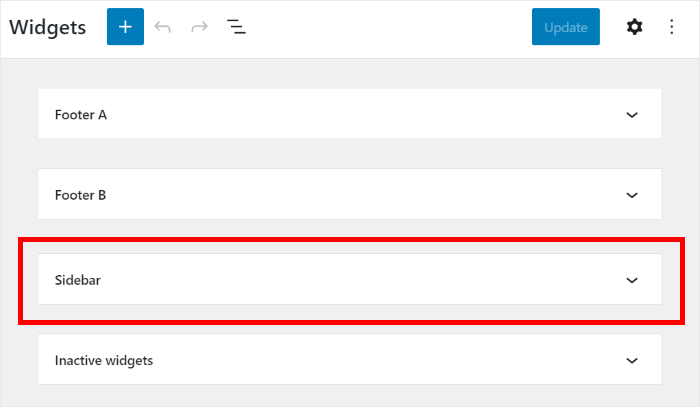
On this new page, click on the Sidebar panel to start managing the WordPress widgets in that area.
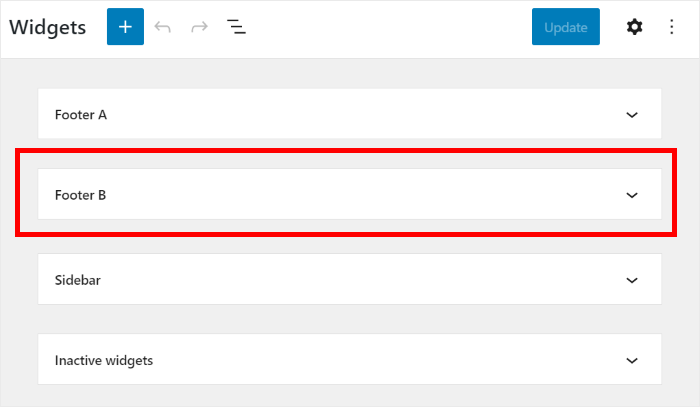
You can also click on a Footer panel if you want to embed your Instagram gallery there.
We’ll use the WordPress sidebar for this tutorial.
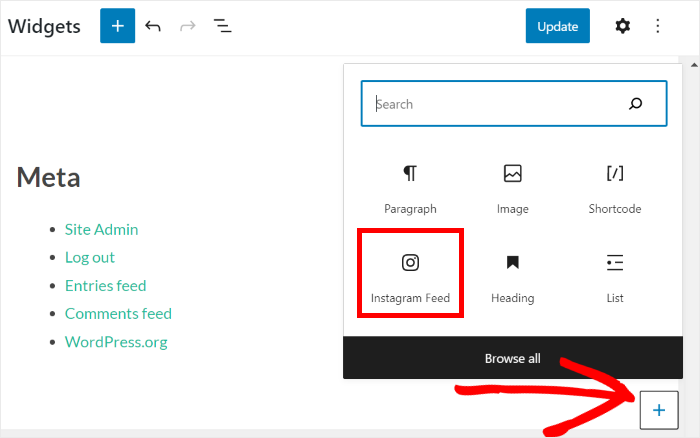
After that, add a new widget by clicking on the plus icon (+) at the bottom. Finally, select the Instagram Feed widget from the options.
Click on the Update button at the top and you’ve now added an Instagram gallery widget to your website.
Now when you navigate to the front of your website, you’ll see your gallery like this:

There you have it!
We hope this tutorial helped you learn how to create an Instagram gallery in WordPress.
Now all you need is to update your gallery with fantastic photos. Then you can continue to engage your audience, attract new followers, and ultimately grow your brand.
Ready to embed beautiful Instagram galleries? Get started with Instagram Feed Pro today.
Looking for ways to get the most out of your WordPress website? Check out our ultimate list of the best WordPress plugins for businesses.
If you have an Elementor site, here’s how you can embed Instagram feeds on Elementor.
And if you enjoyed this article, feel free to follow us on Twitter and Facebook for more helpful tutorials.
