Want to learn how to add Google Analytics to WordPress?
If you want to get in-depth information about your website, then Google Analytics is a fantastic tool.
But adding Google Analytics to your site can get confusing, especially if you’re not used to this tool.
To make it super easy, we’re bringing you this simple guide that’ll show you how to add Google Analytics to WordPress.
In this Article:
- Why Add Google Analytics to WordPress?
- How to Sign Up for Google Analytics
- How to Add Google Analytics to WordPress (Easy Way)
- How to Manually Add Google Analytics to WordPress
- More Online Marketing Guides and Tutorials
Why Add Google Analytics to WordPress?
Google Analytics is an amazing tool that can help you check your sales, learn more about your customers, track the behavior of your visitors, and so much more.
Here are some amazing features that Google Analytics can add to your website:
- Set goals for your website and track how much progress you’re making
- Check how much traffic and sales you’re getting from affiliate marketing, emails, advertisements, and more
- See the conversion rate, sales, revenue, and more on your online store
- Find out which search keywords are bringing you more visitors
- Create custom dashboards to check your important data
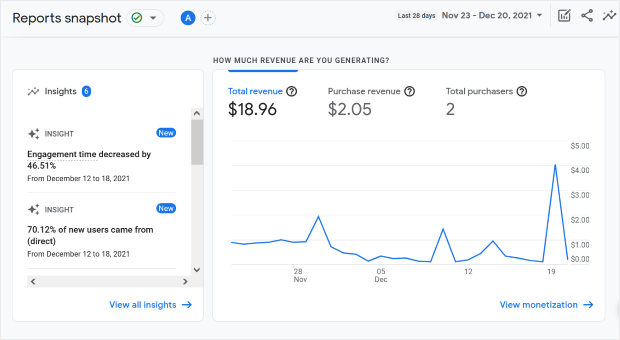
If you have Google Analytics on your website, you can clearly see how you’re performing and use that information to make the right decisions.
The best part? Google Analytics is completely free, so you can sign up right away!
How to Sign Up for Google Analytics
Just follow this step-by-step guide, and you can see how to get started with Google Analytics.
Step 1: Go to the Google Analytics Page
To sign up for Google Analytics, you’ll first need a Google account.
If you don’t have one, you can just go to the Google signup page and follow the onscreen instructions.
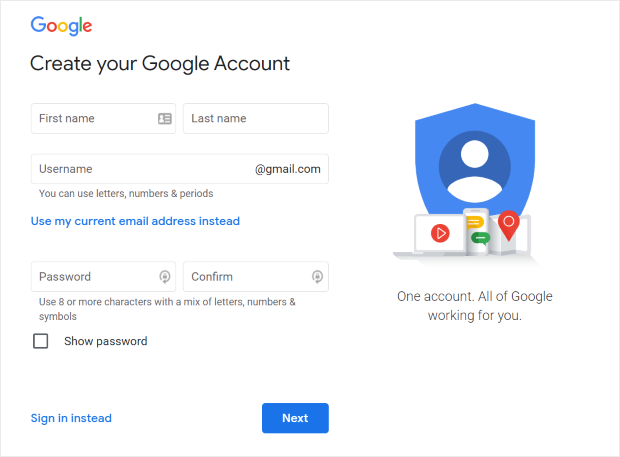
You’ll now have a Google account ready to go. You can then open google.com/analytics on your web browser to continue.
On this page, just click on the Start for free button.

Step 2: Add Your Account Details
Now, Google Analytics will ask for your details so you can create your account.
In the Account name field, you can just write a simple username that you can remember.
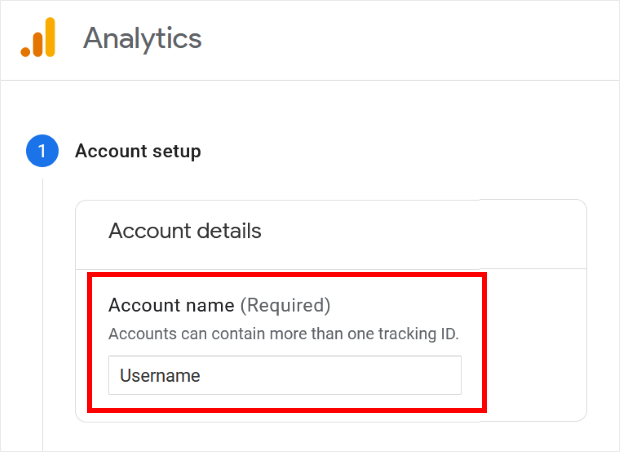
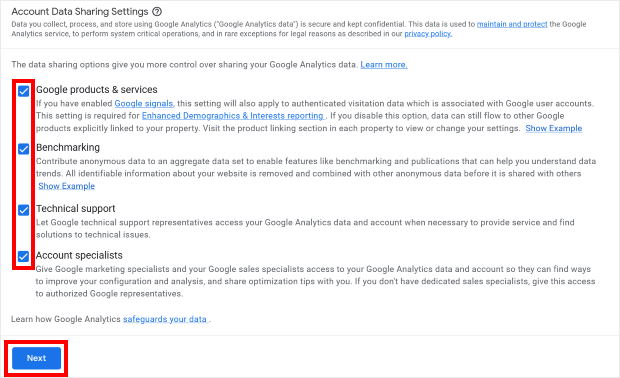
If you scroll down, you can find the Account Data Sharing Settings section. Here, you get to choose if Google can access some of your account data or not.
Just check the options here if you want to share your data with Google and click on the Next button.
Step 3: Add Your Website Details
Now, it’s time to add your website details to Google Analytics so that it can track important information for you.
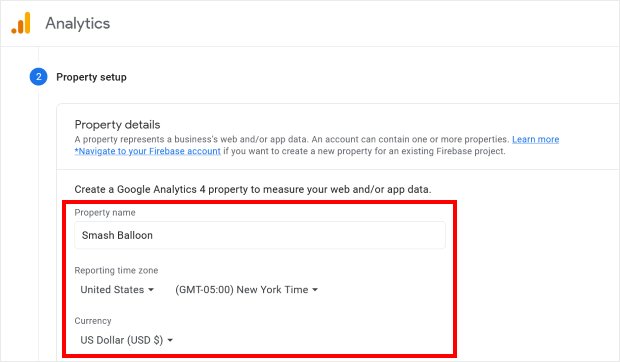
First, you can use the Property name field to enter the name of your website.
Under that, you can find the Reporting time zone option, where you can select your country and time zone.
Once you do that, just use the dropdown list under the Currency field to select the currency used by your business.
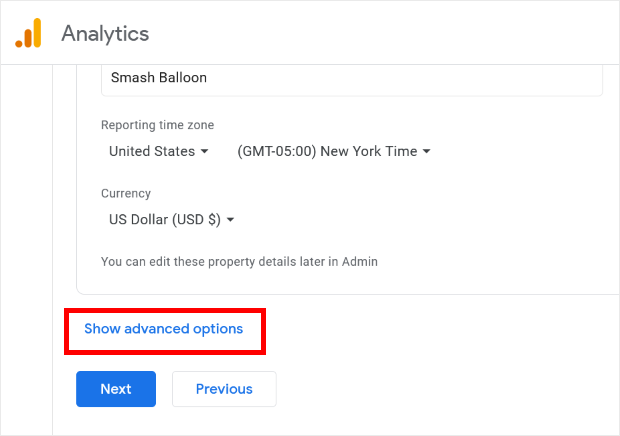
Next, click on Show advanced options to properly set up some important options for your Google Analytics account.
To get the best results from Google Analytics, enable the Create a Universal Analytics property option here.
Once you enable it, you can enter the link to your website in the Website URL field.
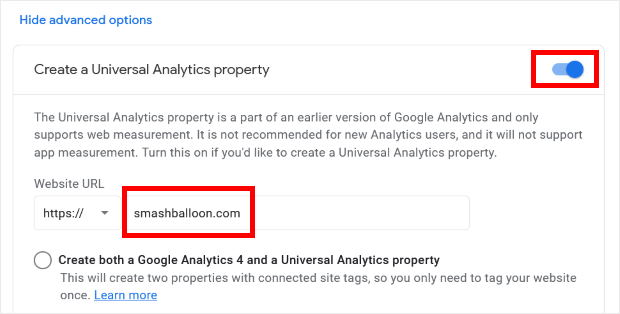
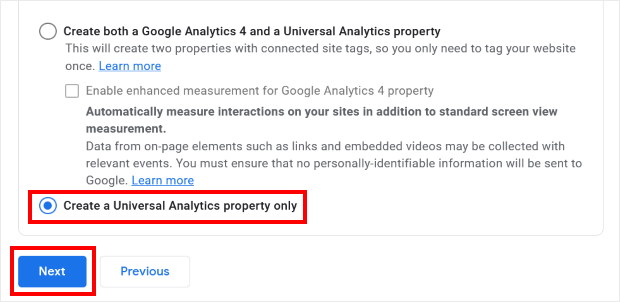
Under that, just select the option to Create a Universal Analytics property only. This way, you can avoid unnecessary glitches and errors when connecting Google Analytics to your site.
You can then click on Next to move on and add your business details.
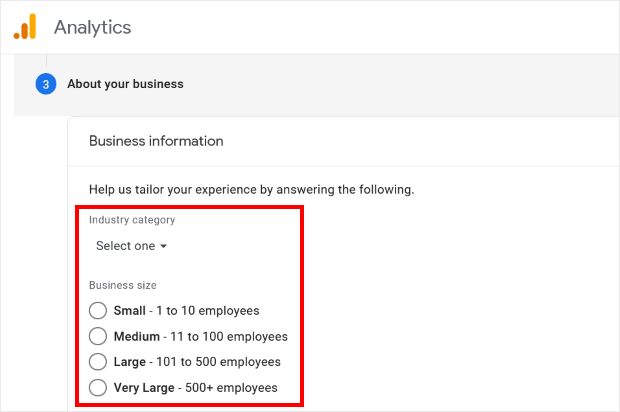
On the next page, use the Industry category and Business size options to fill in your business information for better tracking.
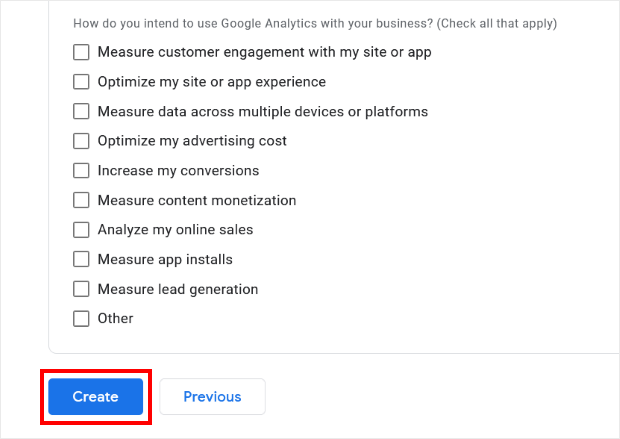
Below that, you can select the checkboxes to show how you plan on using Google Analytics. Just pick all the options that apply to your business.
Once you’re done, click on Create to submit all of your details.
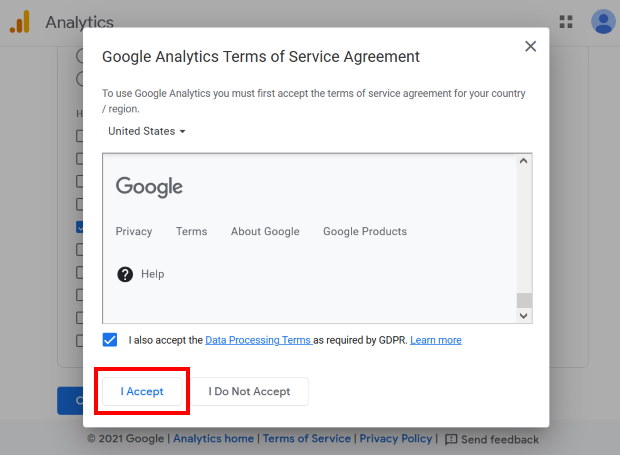
Clicking on that will show you a popup with the Google Analytics Terms of Services.
To continue, you can just click on the I Accept button,
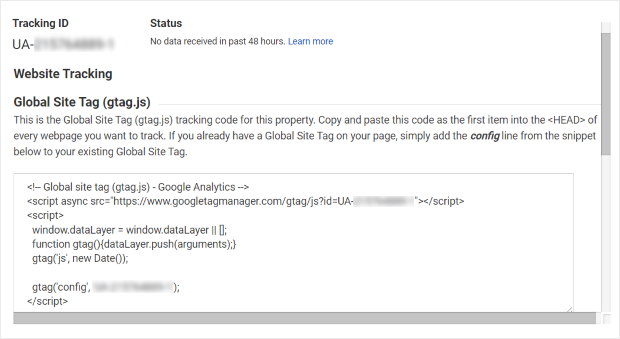
Doing that will finally send you to your Google Analytics page. Here, you’ll now see the Tracking ID and Tracking Code for your website.
You’ll need this information if you want to manually add Google Analytics to WordPress. In that case, you can keep this window open.
With that, you’ve officially signed up for Google Analytics! Now, let’s go ahead and see how you can add it to your WordPress site.
How to Add Google Analytics to WordPress (Easy Way)
When it comes to adding Google Analytics to your website, you have 2 different ways to do it.
- Use a Google Analytics Plugin (Easy Way)
- Manually Add Google Analytics (Old Way)
If you choose to manually add Google Analytics, then you’ll have to deal with complex code snippets. And if you make a mistake when handling the snippet, it can even cause errors on your website.
Plus, it takes a lot more time since you have to do everything manually by yourself. So, this method is slow and riskier.
Even after you’ve manually added Google Analytics, you also have to deal with its confusing interface whenever you want to check your data.
As a result, finding the information you want can get tough.
To solve all these issues, you can just use a Google Analytics plugin like MonsterInsights.

MonsterInsights will let you add Google Analytics to your WordPress site in just a few simple clicks — no coding needed!
On top of that, you can even check your Google Analytics data right from your WordPress dashboard. That means you can see all the important information without leaving your website.
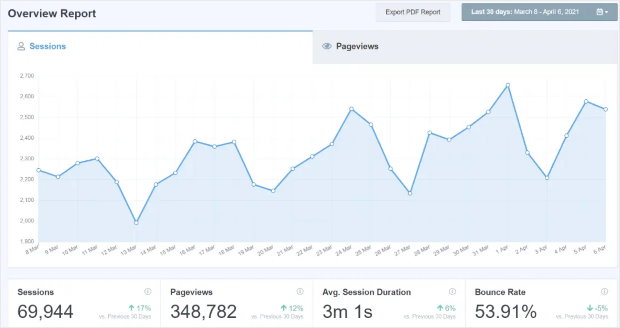
As you can see, MonsterInsights can save you a ton of time when it comes to adding and using Google Analytics.
Plus, you also get an expert support team with MonsterInsights. With their help, you’ll have an easy experience using Google Analytics for WordPress.
And that’s just the start. Just take a look at all these amazing features you can get with MonsterInsights:
- With this plugin, you can get reports on your website performance, site speed, SEO rankings, visitor behavior, and much more.
- MonsterInsights can work with all the big online store plugins like WooCommerce to track your sales, refunds, conversion rates, revenue, and much more.
- The plugin will also help you avoid unnecessary fines by making sure your website follows all the privacy regulations like GDPR.
- MonsterInsights even gives you an easy way to check how your ads are performing. You can then see where to place your ads if you want them to get tons of clicks
As the best Google Analytics plugin, MonsterInsights is packed with amazing features that can help you get the most out of Google Analytics.
If you want a simple and effective way of using Google Analytics, then give MonsterInsights a try.
Now, we can go ahead and show you how to add Google Analytics to WordPress using MonsterInsights.
Step 1: Download and Install MonsterInsights
First of all, go ahead and grab your copy of MonsterInsights here. Once you have the plugin downloaded, you can simply install and activate it from your WordPress dashboard.
Not sure how to do so? Well, we have this simple guide on how to install WordPress plugins to help you.
Step 2: Connect MonsterInsights
Once you install and activate MonsterInsights, you’ll see a welcome message on your site.
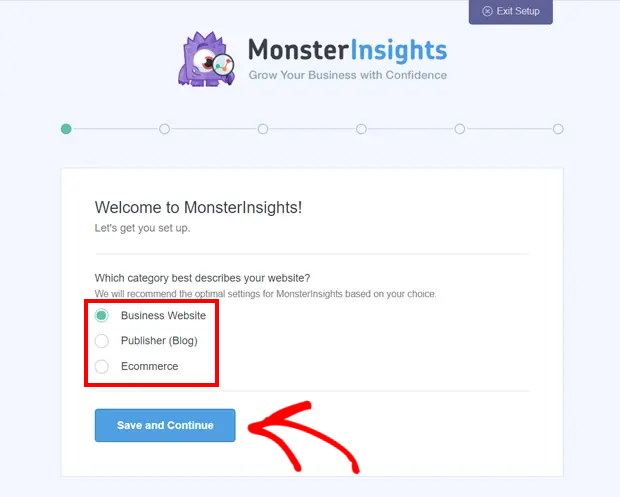
There, you can also set the category of your website. There 3 options for you to pick from here: Business Website, Publisher (Blog), and Ecommerce.
Select the option that fits your website, and then click on Save and Continue.
After this, you can use your license key to activate MonsterInsights for your website.
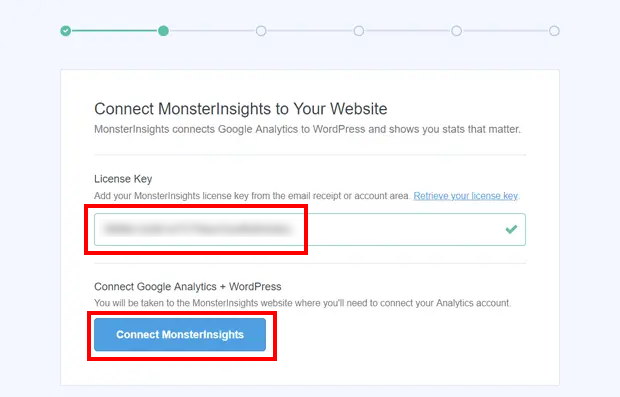
You can find your license key on your email receipt for the plugin or on the accounts page of the MonsterInsights website.
Once you find your key, paste it into the License Key field and then click on the Connect MonsterInsights button.
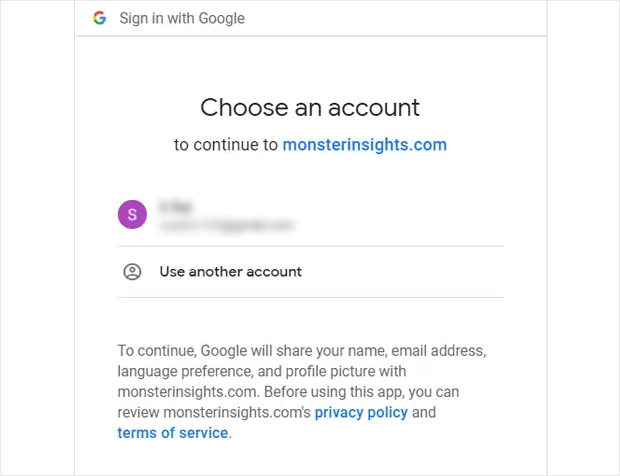
Now, you’ll see a popup where you can pick your Google account. To continue, select the Google account that you used to sign up for Google Analytics.
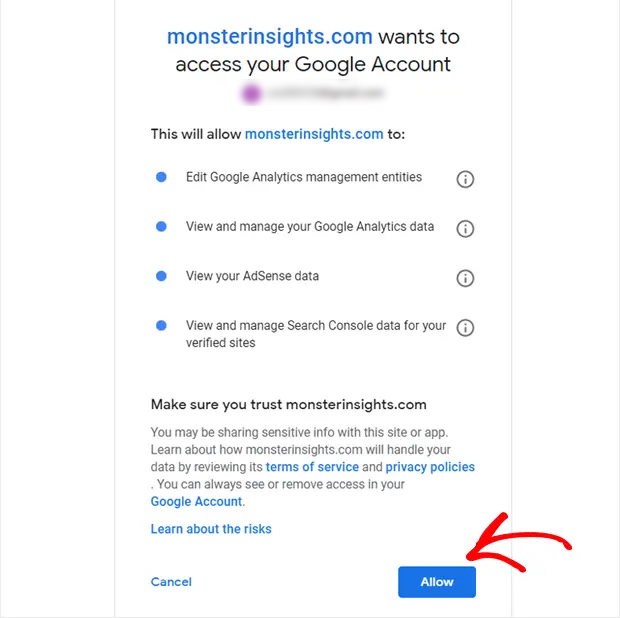
Then, click on the Allow button so MonsterInsights can see your Google Analytics data.
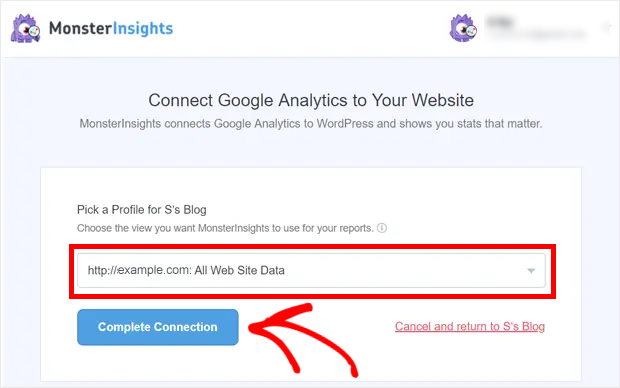
After you do that, you can set up your MonsterInsights profile to start tracking your website.
If you have a multisite setup, you can use the dropdown field here to pick the website you want to track.
Finally, click on the Complete Connection button, and you’ve officially connected your site to Google Analytics!
Step 3: Run the Setup Wizard
Since you’ve connected your site to MonsterInsights, it’s time to choose your settings so that you can start tracking the data you need.
For that, you can just follow the guided setup process for MonsterInsights, also known as the setup wizard.
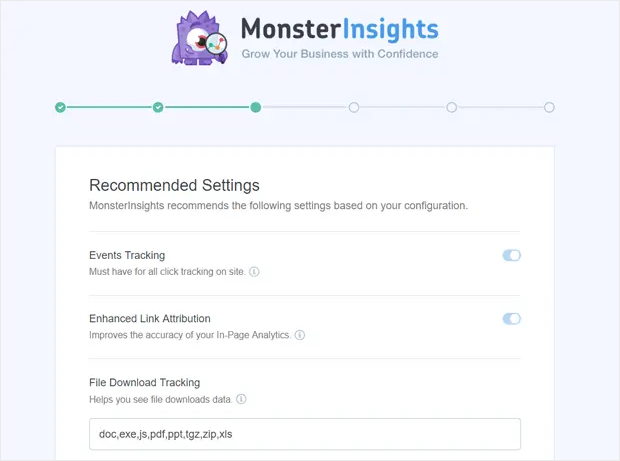
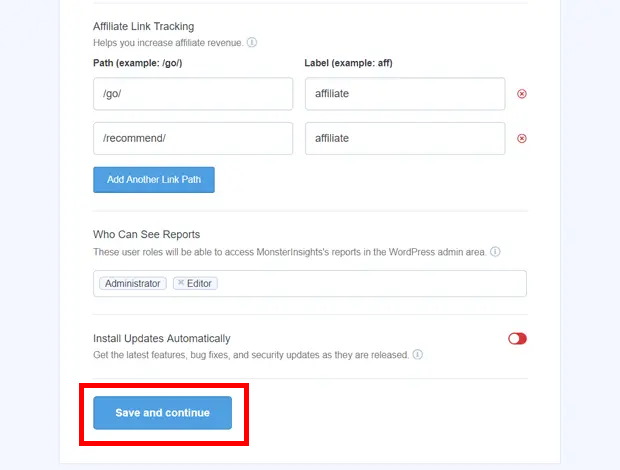
Here, you can enable or disable settings like:
- Events Tracking: To track all the clicks and important events on your website
- File Downloads Tracking: See all the downloads that your visitors have done
- Enhanced Link Tracking: Check how your visitors interact with the links on your website
- Automatic Plugin Updates: To keep MonsterInsights updated and get the latest features
- Role Access to MonsterSight reports: If you want to limit who can see the MonsterInsights reports
The good news is that MonsterInsights will automatically analyze your profile and show you the best settings for your website.
So, all the features you need will be enabled by default. You can just scroll down and click on the Save and Continue button.
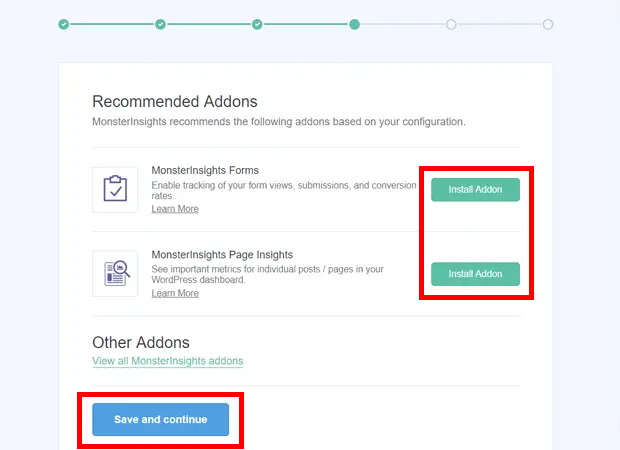
After that, MonsterInsights will recommend some add-ons for your website. With these add-ons, you can get extra features like form tracking, insights for specific pages, and more.
You can click on the Install Addon buttons if you want to get them right now.
To continue, just click on the Save and Continue button.
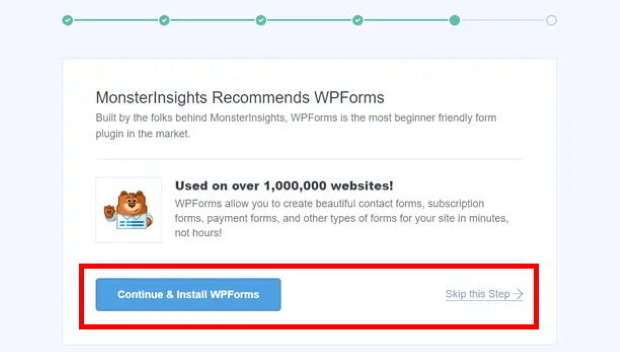
Next, you’ll see a recommendation for WPForms, which is made by the same team as MonsterInsights.
As the best WordPress form plugin, WPForms is a fantastic tool if you want to reach your customers, boost conversions, collect useful information, and much more.
For more details, you can check out our review of WPForms, where we take a close look at it.
To add WPForms to your site, just click on Continue & Install WPForms.
Or you can click on Skip this Step if you want to go ahead without WPForms.
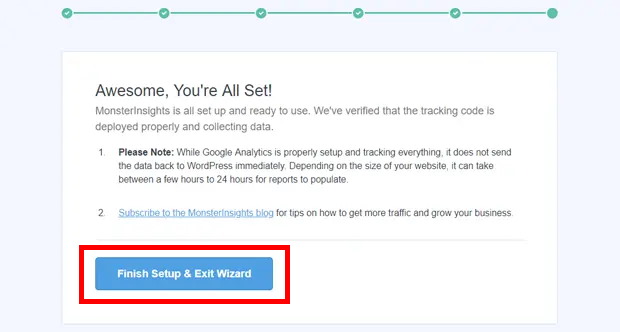
Finally, click on Finish Setup & Exit Wizard, and you’re done!
Step 4: Check Your Google Analytics Reports
With MonsterInsights, you can access your Google Analytics reports at any time on your website.
For this, navigate to Insights » Reports from your WordPress dashboard.
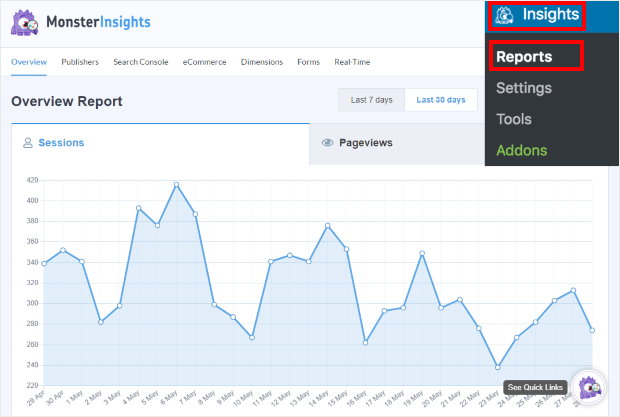
Here, you can see an overview report that shows how your website is performing. Plus, you also get some more useful data, including:
- Page Views and Sessions: Shows page views, sessions, and average session duration over a certain time
- Top viewed landing pages: Find out which landing pages are more popular on your website
- Link and Button tracking: Check which of your buttons and links get the most clicks
- Form tracking data: See your form views, submissions, responses, and conversion data
- Site Speed: Test how fast your website is to your visitors
And that’s just the tip of the iceberg. With MonsterInsights, you can see tons of amazing data that can help you understand your customers, track your progress, and make the right decisions.
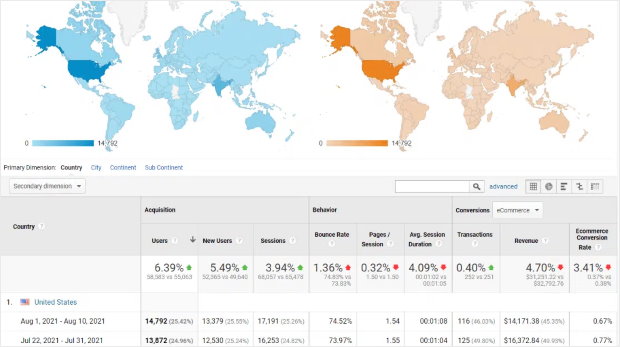
As you can see, you can add Google Analytics to your website without touching a single line of code with MonsterInsights.
Now, let’s take a look at how you can manually add Google Analytics to your website without using MonsterInsights.
How to Manually Add Google Analytics to WordPress
If you don’t want to use a Google Analytics plugin, you can manually insert the Google Analytics tracking code on your website.
To do that, you can modify your WordPress theme files, which can be risky. Plus, you don’t get all those useful features as you did with MonsterInsights.
With that, let’s go ahead and see how to manually add Google Analytics to WordPress.
Step 1: Install the Insert Headers and Footers Plugin
For the easiest way to add the tracking code to your website, we recommend using the WPCode plugin.
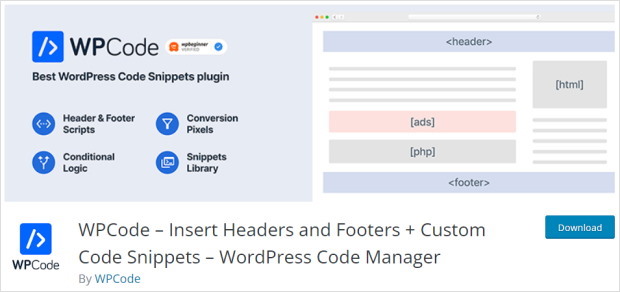
Using this plugin, you can insert custom codes and scripts to your headers and footers without breaking the rest of your WordPress theme.
To continue, go ahead and install the plugin on your WordPress site. You can just follow the steps from this guide on installing WordPress plugins if you’re not sure how.
Step 2: Insert the Google Analytics Tracking Code
From your WordPress dashboard, go to Code Snippets » Header & Footer after activating the plugin.
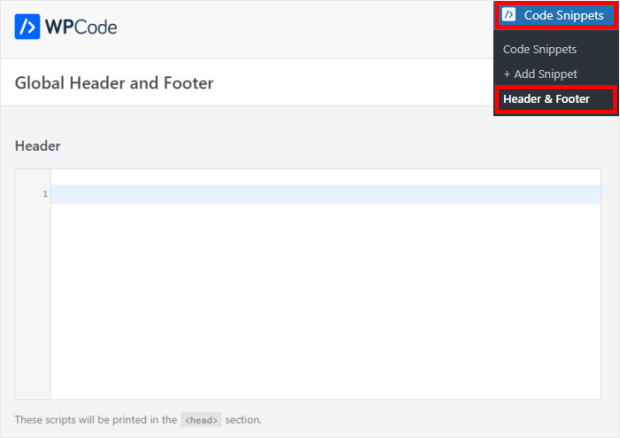
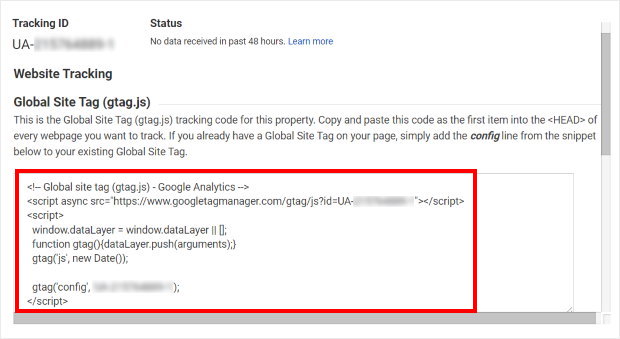
Now, open the Google Analytics page on your browser and check the Global Site Tag section for your tracking code. Just copy your tracking code here and then return to your website.
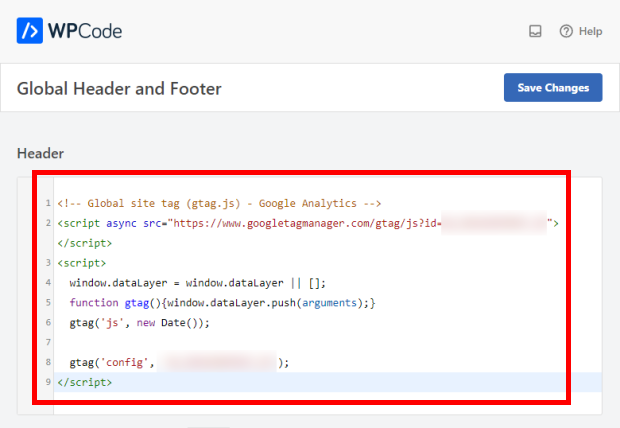
On your website, just paste your Google Analytics tracking code into the Header section.
Finally, click on Save to finish adding the code to your website.
If you use this method, you can’t check Google Analytics from your WordPress dashboard as you could with MonsterInsights. And you don’t get comprehensive reports about your business either.
Instead, you’ll have to open Google Analytics and navigate its interface every time you want to learn about your website.
To get the best out of Google Analytics for your business, we suggest going for MonsterInsights instead.
And that’s it!
As you can see, it’s super easy to add Google Analytics to WordPress using MonsterInsights. After that, you can track your site and easily check important information directly from your dashboard.
MonsterInsights will help you effectively use Google Analytics to make better business decisions and grow your brand.
Ready to grow your business with smart analytics? Grab your copy of MonsterInsights today!
More Online Marketing Guides and Tutorials
- Best Social Media Analytics Tools for Online Growth (Expert Picks)
- Easy Tips to Promote Your Business on Facebook (Most Are Free!)
- How to Improve Your Social Media Marketing (Proven Tips)
- How to Get Facebook Reviews for Your Business Page
