Are you looking for an easy way to add Facebook posts to your WordPress website?
Here’s the thing: you’ve worked hard building up that Facebook engagement. Those likes, comments, and shares represent real connections with your audience.
So why not leverage that social proof on your website too?
In my years of working with WordPress sites, I’ve learned that cross-promoting social content is one of the most effective ways to boost your overall online presence.
Adding Facebook posts to your WordPress is a fantastic way to grab even more followers, spark conversations, and yes, even boost those sales over time.
I know what you might be thinking: embedding Facebook posts sounds complicated, technical, maybe even a little intimidating.
But here’s the thing I want you to know: adding Facebook posts to WordPress is actually incredibly straightforward.
Today, I’m going to share the quickest, most effective methods I’ve learned – the ones we even recommend to our own users at Smash Balloon – to seamlessly “add facebook posts to wordpress”.
In this guide, I’ll show you exactly how to embed Facebook posts by adding a timeline feed to your WordPress site.
Trust me, by following this step-by-step tutorial, you’ll have your Facebook feed up and running in just 5 simple steps, even if you’re not tech-savvy.
In This Article
- 2 Ways to Embed Facebook Posts on WordPress
- Adding Facebook Posts to WordPress (Easily)
- Conclusion and Next Steps
- Popular Posts on Adding Social Media Posts to WordPress
2 Ways to Embed Facebook Posts on WordPress
Before we dive into the solution, let me break down the two main approaches you can take:
1. The Manual Method (Not Recommended)
I’ve seen many website owners try this route initially. Here’s what it involves:
- Manually copying embed codes for each Facebook post
- Switching back and forth between Facebook and WordPress
- Dealing with complex code snippets for customization
- Risk of breaking your site with incorrect code
- No dedicated support if things go wrong
I’ll be honest. While this method is free, it’s incredibly time-consuming and risky. One small coding error could break your entire page.
Plus, when Facebook updates their embed codes (which happens regularly), you’ll need to update everything manually. Over and over again.
2. The Automatic Method (Recommended)
On the other hand, automatically adding Facebook posts to WordPress is super simple.
It’s as easy as installing a WordPress social media plugin, connecting it to your Facebook account, and letting it do the hard work for you.
You can make everything easier by using the best Facebook feed plugin for WordPress: Facebook Feed Pro.
Facebook Feed Pro helps you create, customize and display Facebook post feeds on your website — no coding needed.
Plus, Facebook Feed Pro works great with any WordPress website. You can use its simple and clear options to add Facebook posts to any page you want in just minutes.
Facebook Feed Pro also has lots of features to help you display your Facebook posts effectively on your website. Here are a few highlights:
- Super Quick Setup: Setting up Facebook Feed Pro is incredibly fast. It only takes a few minutes, meaning you can embed Facebook posts in 5 minutes or less, and you don’t need any coding skills.
- Embed Facebook Posts and More: Facebook Feed Pro can do more than just embed posts. You can also show your whole Facebook feed, videos, Facebook events, albums, even Facebook livestreams – all with the same plugin!
- Matches Your Website Look: The Facebook posts you embed will automatically look like they fit right into your website’s design.
- Facebook Posts That Work Everywhere: This Facebook WordPress plugin ensures your embedded posts look great on all devices. They’ll look fantastic and work perfectly on phones, tablets, and computers, so everyone can see them.
What I especially like about this top-rated plugin for Facebook feeds is its visual feed customizer.
It lets you control exactly how your embedded posts look and what content they show with just a few simple clicks.
To make things even better, if you happen to need any help at all, the dedicated Facebook Feed Pro support team is always ready and happy to help you every step of the process.
Lots of people use Facebook Feed Pro and it has a fantastic rating of 4.9/5 stars. It’s a plugin from Smash Balloon, a name used and loved by over 1.75 million websites to add social media feeds to WordPress.

Ready to start embedding Facebook posts on your WordPress website in just a few simple clicks?
Get started with Facebook Feed Pro now!
Adding Facebook Posts to WordPress (Easily)
With these in mind, let’s talk about a step-by-step tutorial on how you can easily add Facebook posts to your WordPress website below.
Step 1: Install Facebook Feed Pro Plugin
To get started, the first thing you need to do is to get your own copy of the Facebook Feed Pro plugin here.
Simply download the plugin to your computer. Next, install and activate it on your WordPress website.
If you’re not familiar with that, don’t worry. You can check out this step-by-step tutorial on how to install a WordPress plugin as a guide.
Step 2: Create a New Facebook Post Feed
To add your Facebook posts to WordPress, you need to create a Facebook feed first.
To do that, use your WordPress dashboard and go to the Facebook Feed » All Feeds menu.
Clicking on that will open a new page. There, click on the Add New button at the top.
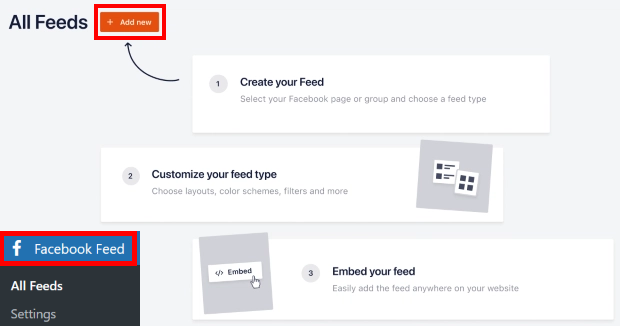
You’ll then see a popup that asks you to pick the type of Facebook feed that you want to create.
Depending on the type of Facebook posts you want to show, there are 9 options here: such as timeline feed, reviews feed, videos feed, events feed, Facebook photos feed, albums feed, and much more.
Feel free to pick the feed type from the options and click on the Next button.
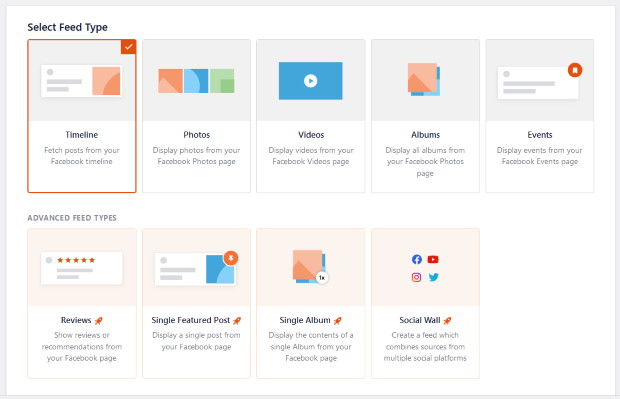
Since this is a tutorial on adding Facebook posts to WordPress, I selected the timeline feed for our example.
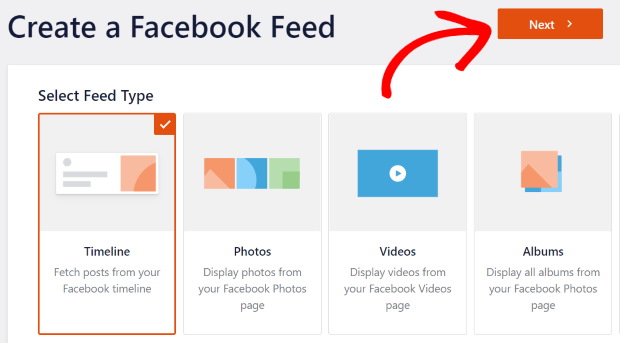
With that, you have a new Facebook feed which will show posts from your Facebook timeline.
You can now move on to the next step and connect it to your Facebook account.
Step 3: Connect the Post Feed to Your Facebook Page
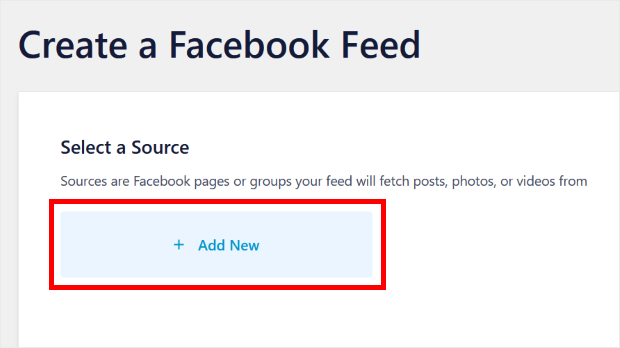
To show Facebook posts on your WordPress site, you need to connect your new feed to a Facebook page.
Click on the Add New button to start connecting the feed.
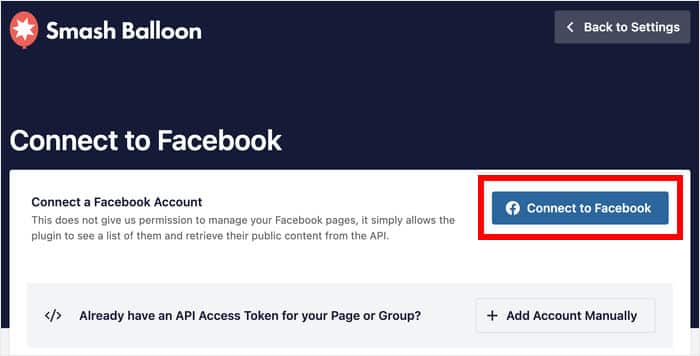
On the next page, you can choose between connecting your account manually or using the usual method. I like to make things simple, so let’s just click on the Connect to Facebook button.
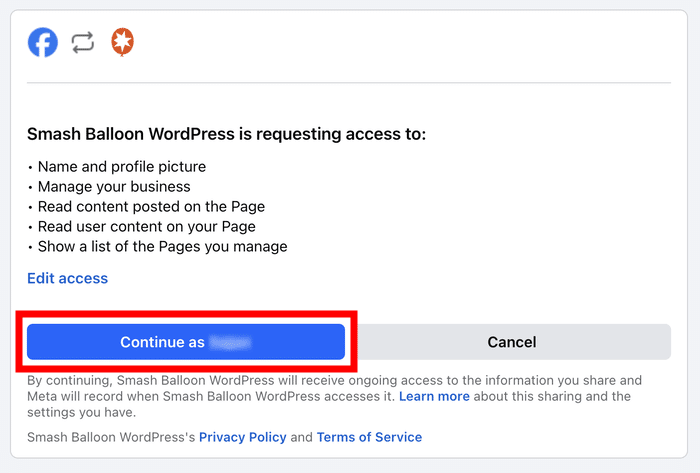
Next, you’ll be redirected to Facebook, where the plugin will ask for permissions to view your Facebook content and info.
Don’t worry – the plugin can’t really change anything, so it’s secure. Smash Balloon plugins are safe, after all.
So, click on the Continue button here.
After clicking on the Continue button, you will now be back on your WordPress website.
Go ahead and select the Facebook page you want to use as source and then click on Add.
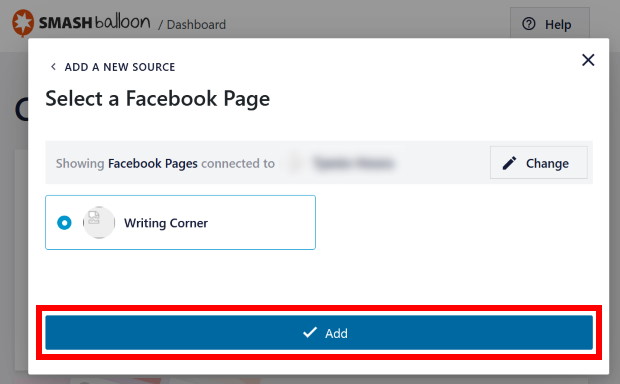
After that, just click on Next, and you’re finally done connecting your new feed to Facebook.
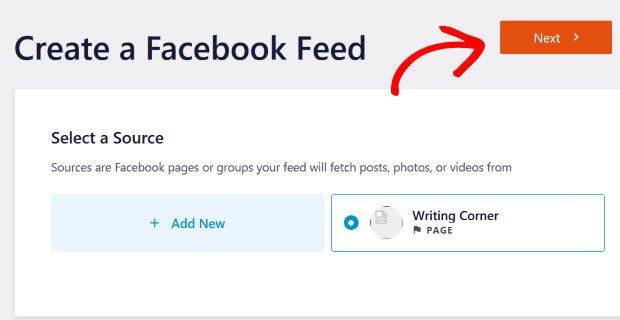
Great work! The Facebook page you just connected will be the source of Facebook posts that you’ll be displaying on your website.
In the next step, you can customize how your Facebook posts look on your WordPress site.
Step 4: Customize Your Facebook Posts Feed
Now, your new Facebook feed will appear in the visual feed customizer, where you can customize it.
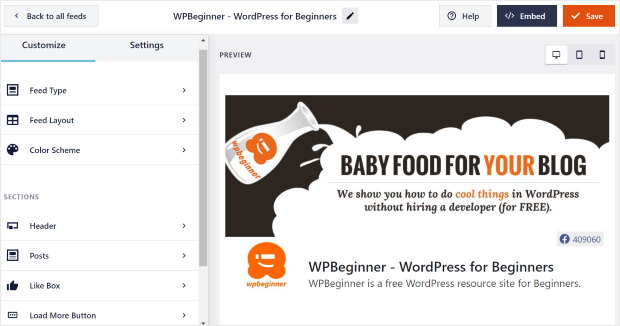
You can check out the panel on the left and see all the options to change the looks of your Facebook posts.
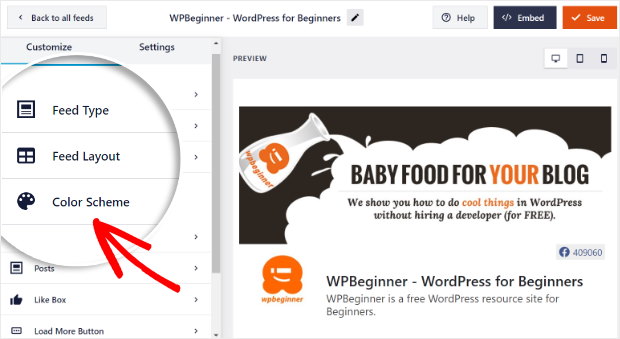
There, you can set your post layout, feed layout, color scheme, header style, like box style, Facebook feed themes and much more.
Whenever you make any changes, you can check how your feed looks using the live preview on the right.
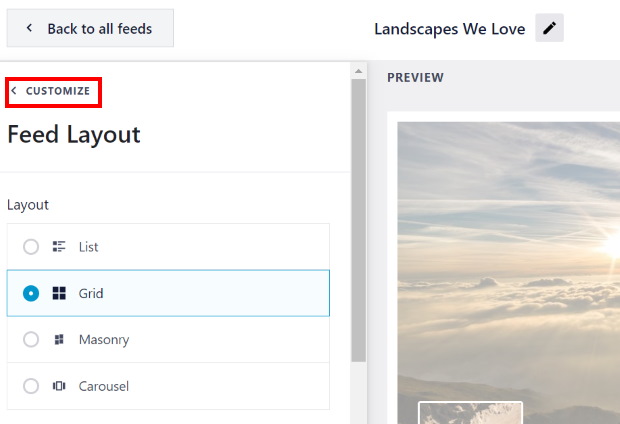
To start customizing, I like tweaking my feed’s layout first. To do this, click on the Feed Layout option on the left.
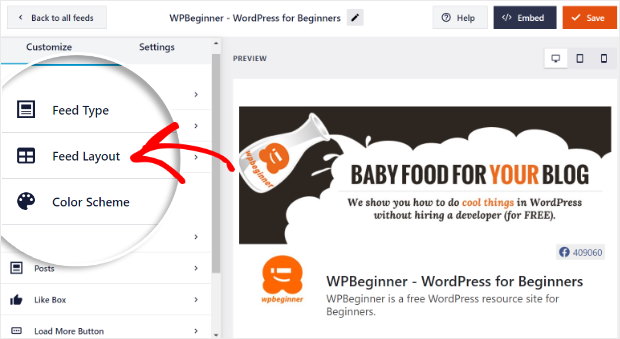
After that, you can choose the layout for your Facebook posts on the feed. There are 4 different options to pick from here: List, Grid, Masonry, and Carousel.
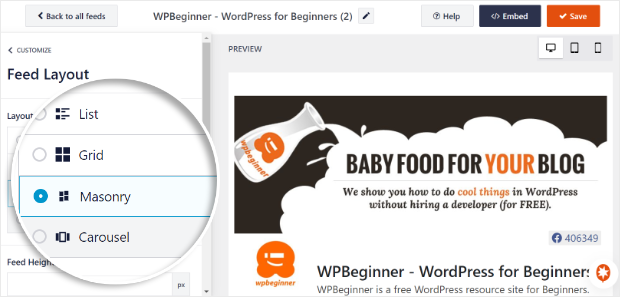
You can go with the list layout to show your Facebook posts vertically, one after the other. Since there’s only one column here, you can have more space for each Facebook post.
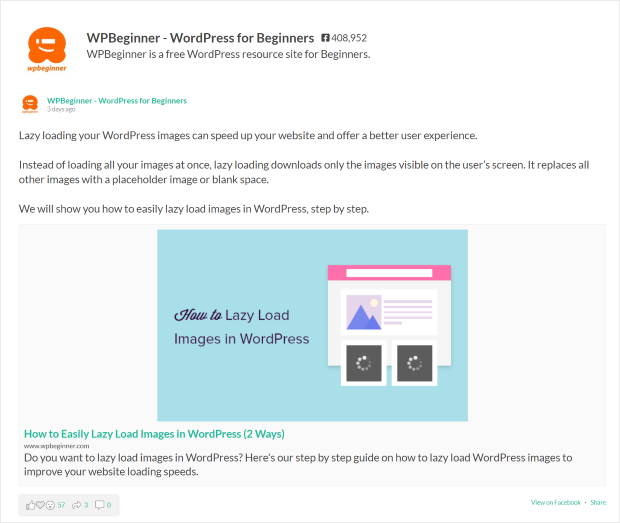
Next, you have the grid layout where your Facebook posts will appear in rows and columns.
I usually choose this because it’s a great way to show lots of Facebook photos or videos at the same time on your WordPress site.
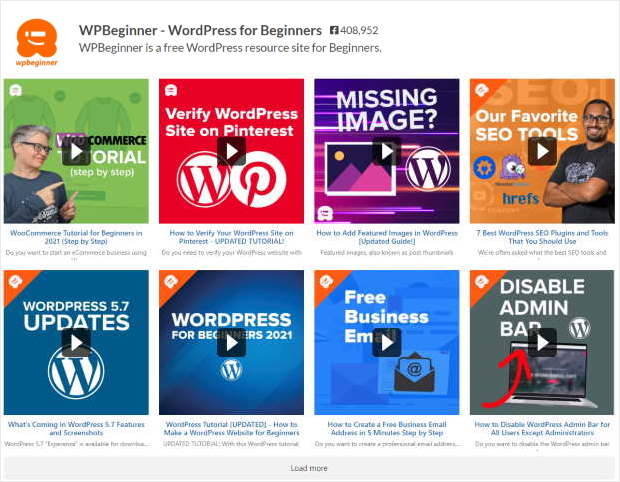
Want to show your Facebook posts in different columns? Well, the masonry layout can do that for you.
Plus, it also shows your Facebook posts with their original proportions.
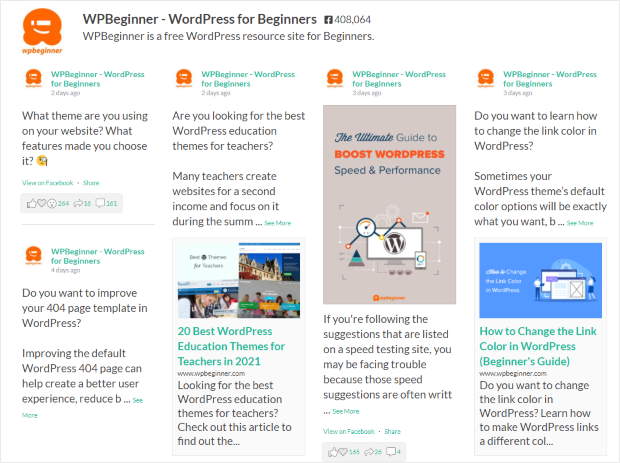
You can also get visitors to interact with your site using the Facebook carousel layout option.
So people can use a carousel slider to check out your Facebook posts at their own pace.
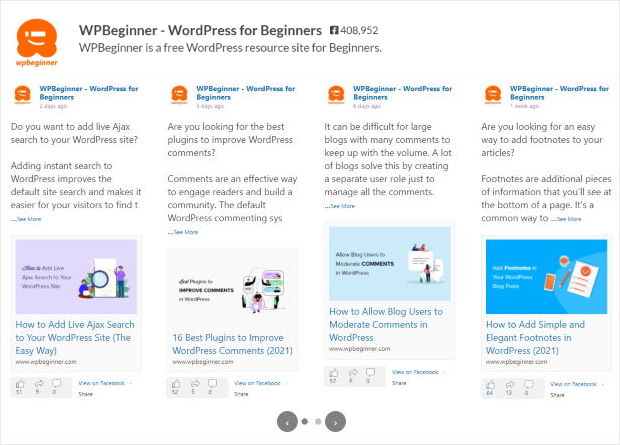
You can just select the layout you want and then click on the Save button at the top.
After you do that, click on the small Customize button to return to the main customization menu.
The next step here is to select the Color Scheme option on the left. Using this, you can change all of the colors on your Facebook feed.
With Custom Facebook Feed Pro, you have 4 different color schemes:
- Inherit from Theme: Use the colors of your website for your Facebook posts
- Light: Give your posts a bright background and darker text
- Dark: Show a dark background with a lighter text color
- Custom: Pick all the colors yourself
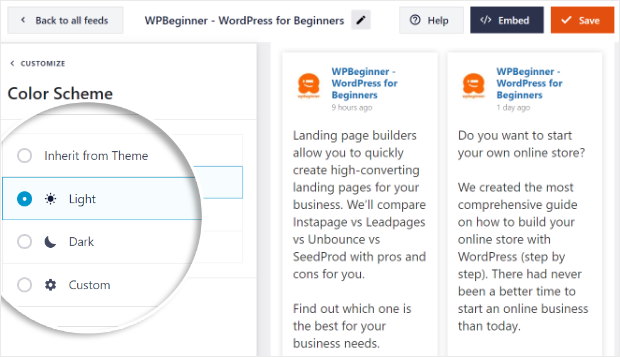
After you select your color scheme, remember to click on Save.
And just like this, you can use the rest of the customization options to change the design of your Facebook feed.
You can set the header style, post elements, like box, feed margins, background, feed themes and much more.
After that, click on the Save button at the top and save your changes. Once you do that, you can finally go to step 5 and add your Facebook post feed to WordPress.
Step 5: Add Your Facebook Post Feed to WordPress
Now, you can go ahead and embed your new Facebook feed on your site. With the Facebook Feed Pro plugin, you have 2 ways to do that:
- Add your Facebook feed to your WordPress page
- Add your Facebook feed to your WordPress sidebar
Let’s check them out.
Add Your Facebook Feed to Your WordPress Page
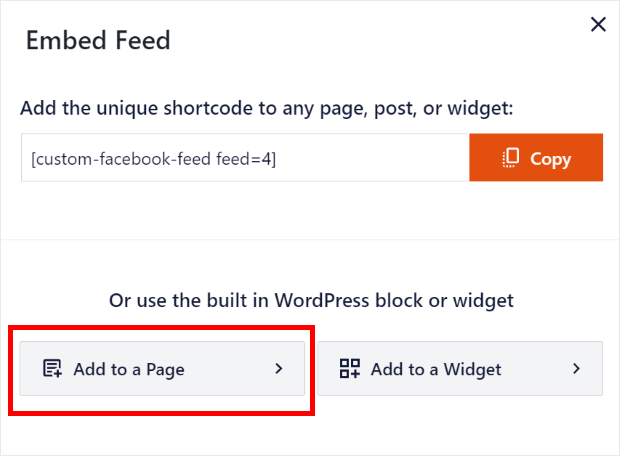
It’s easy to embed your Facebook feed on your page using the live feed editor. First, click on the Embed button in the top right corner.
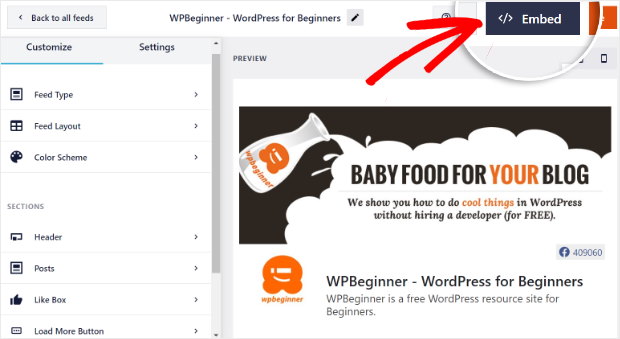
This will open a popup where you can choose the location of your Facebook post feed. For now, click on the Add to a Page option to continue.
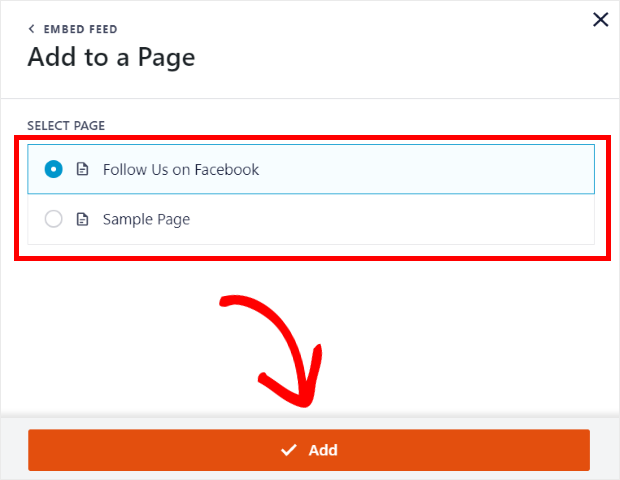
Then, you’ll see a list of all the WordPress pages that you have on your website. Once you select the page you want, click on Add.
As soon as you do that, the plugin will open that WordPress page for you.
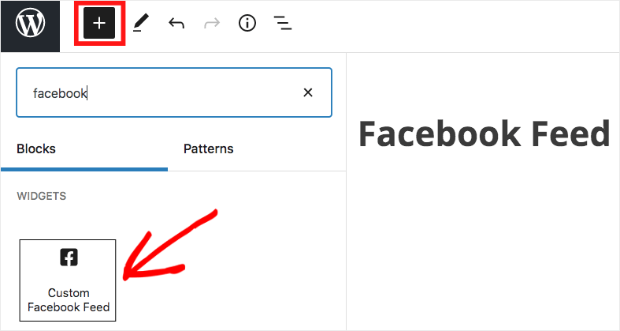
Now, click on the small plus icon (+) at the top of that WordPress page and add a new block.
After that, choose the Custom Facebook Feed block from the options there.
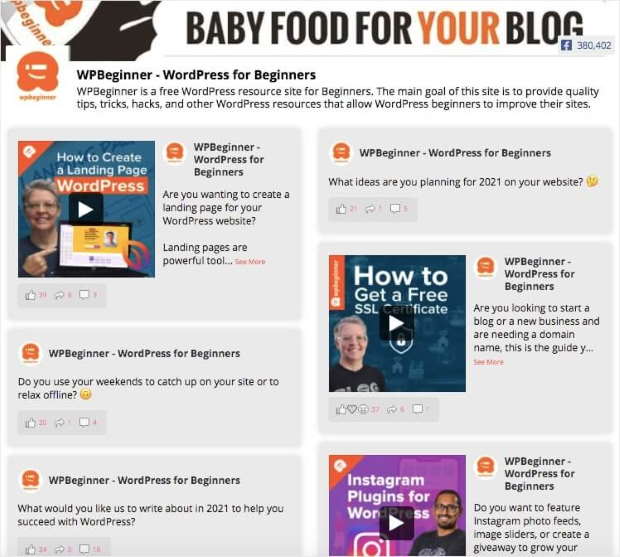
Now click on Publish to finish adding your Facebook post feed to WordPress. To see how it looks, you can open your website and check.
Add Your Facebook Feed to Your WordPress Sidebar
It’s also really easy to add your Facebook posts to the WordPress sidebar as a Facebook widget.
You can do that right from the live feed editor. First of all, go to the Facebook Feed » All Feeds menu from your dashboard.
There, you can see a list containing all of your Facebook feeds. From that list, just click on the Facebook feed that you just created.
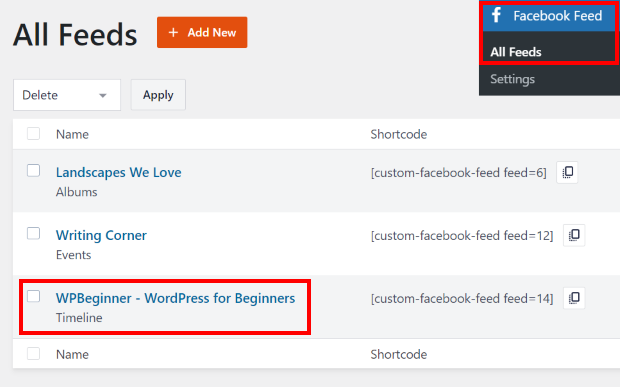
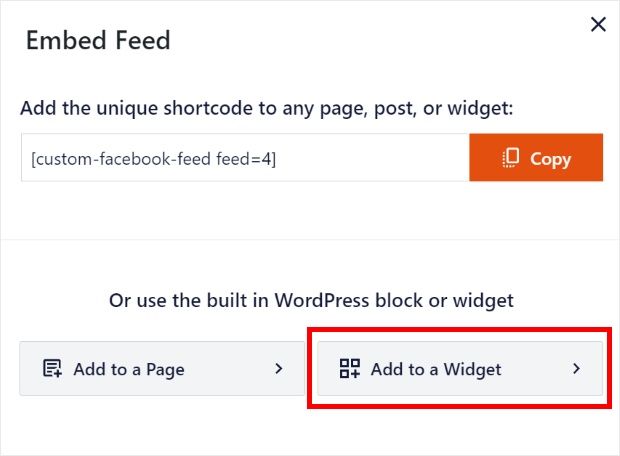
Doing that will open the live feed editor once again. To continue, click on the Embed button at the top.

This opens up a popup where you get to pick the location for your Facebook post feed. You can just select Add to a Widget here to continue.
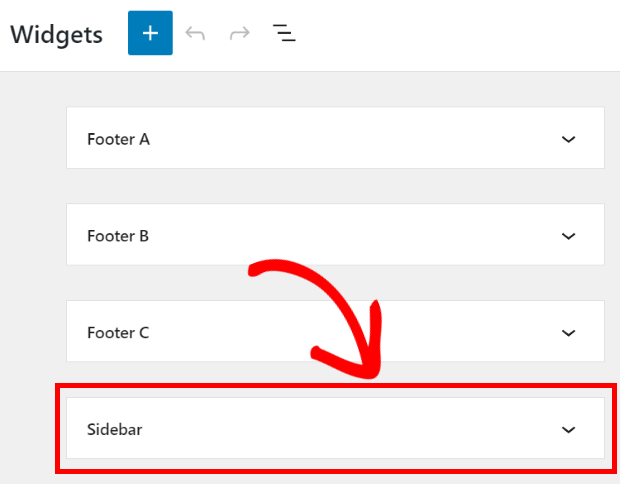
Now, the plugin will open the Widgets page of your website. On this page, you can manage all of your WordPress widgets.
To add your Facebook posts to the WordPress sidebar, first click on the Sidebar panel.
Now click on the plus icon (+) and then select the Custom Facebook Feed widget.
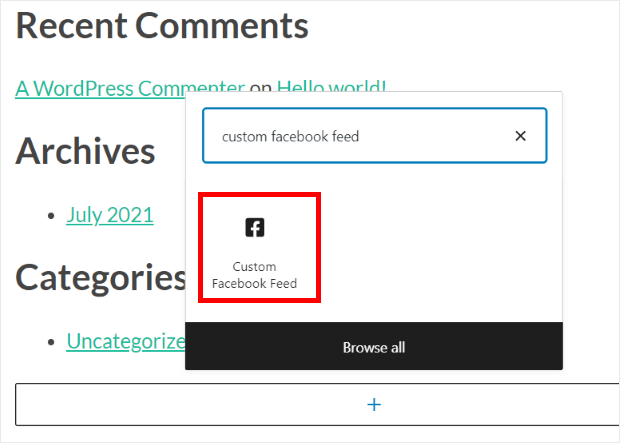
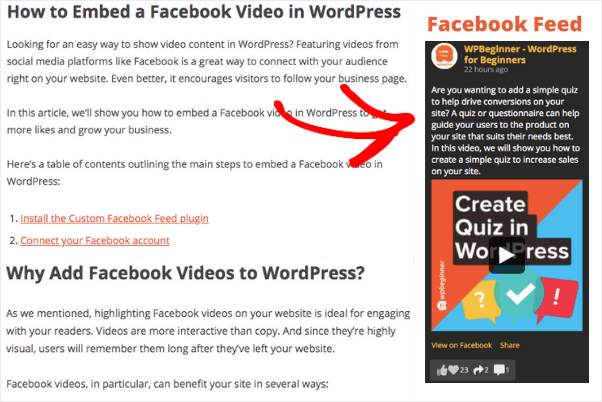
With that, you’ve added your new Facebook post feed to your sidebar. As a result, your visitors can now see your Facebook content right there on your site.
In fact, you can open your site right now and check how it looks.
And so, there you have it!
In just 5 easy steps, you’ve now learned how to add Facebook posts to your WordPress website. And the cool part? You’re able to do this easily — even if you’re not tech-savvy.
Ready to add Facebook posts on your WordPress in just a few clicks?
Get started with Facebook Feed Pro today.
Conclusion and Next Steps
Adding Facebook posts to your WordPress site doesn’t have to be complicated. With Facebook Feed Pro, you can have a professional-looking social media feed up and running in minutes, not hours.
Here’s what I recommend you do next:
- Get your copy of Facebook Feed Pro (comes with a 14-day money-back guarantee!)
- Follow the setup steps above
- Test your Facebook post feed on different devices
- Monitor engagement and adjust as needed
Remember, social proof is powerful. Showcasing your Facebook content on your website can significantly boost your credibility and engagement.
Have questions about setting up your Facebook feed? Drop them in the comments below!
Popular Posts on Adding Social Media Posts to WordPress
- How to Embed Instagram Posts on Your Website
- How to Embed TikTok Videos on WordPress
- How to Embed Google Reviews on Your WordPress Site
Do you have other social media accounts? You may want to check this next post on how to embed social feed widgets on your website.





Nice tips! Thanks for sharing!
yea super excited of Your plugins
Very useful
thanks for information
wow some interesting things
awesome info, thanks for the chance 🙂
thanks much!!
Great step by step for those of us who need them. thank you
This guide is so thorough and easy to understand. Thank you!
Nice that there are automatic and manual options.
Why not!
Does this work with PRIVATE facebook groups? We want to feed excerpts from our FB page to our website. Reason: Controls commenting management to FB only.
Hi John,
Thank you for contacting us! I’m sorry for the long delay in our response; your comment went out of our radar. The Facebook plugin works with private/closed groups. If you have any other questions, feel free to contact us using the support form here https://smashballoon.com/support/
Thanks! 🙂