Want to add a Google review slider to your WordPress site without any coding or hassle?
Displaying positive Google reviews in a slider is a proven way to boost conversions, build trust, and show new visitors why real customers love your business.
In fact, 74% of consumers say that ratings and reviews are a key way they learn about products they haven’t purchased before.
But if you’re not comfortable working with code or technical settings, adding reviews to your site can feel tricky.
Using my experience at Smash Balloon helping WordPress users display reviews, I’ve discovered the quickest way to get a stylish and effective Google review slider up and running.
In this article, I’ll walk you through simple, step-by-step instructions to embed a WordPress Google review slider.
TL;DR: The easiest way to add a Google review slider to WordPress is using a plugin like Smash Balloon Reviews Feed Pro. It allows you to connect your Google Business Profile and display reviews in a carousel without coding.
In This Article
- What is a Google Review Slider, and Why Your Website Needs One
- The Easiest Way I Know to Add Google Review Sliders to WordPress
- How to Add a Google Review Slider to Your WordPress Site
- Start Adding Your Google Review Slider Now
What is a Google Review Slider, and Why Your Website Needs One
A Google review slider is a dynamic widget that automatically shows your brand’s Google reviews in a rotating carousel.
Instead of static testimonials, this slider pulls real reviews directly from your Google Business profile and presents them in an engaging, visual way.
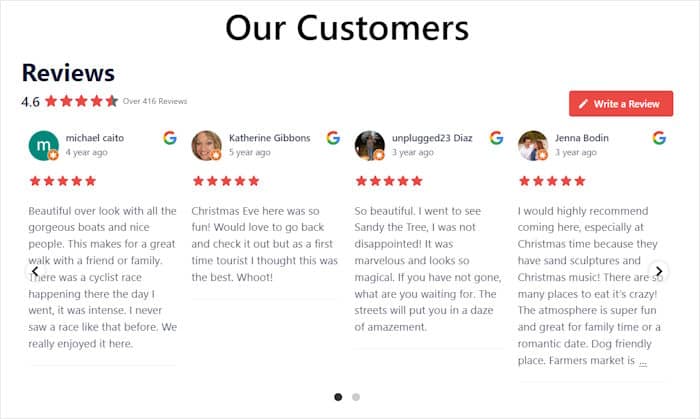
The slider typically shows customer names, star ratings, review text, and photos in a smooth, rotating display that catches visitors’ attention without overwhelming your page design.
Why Embed a WordPress Google Review Slider
Before deciding to buy anything online, most people will check online reviews and see if others like the product, too.
93% of customers will read online reviews before making a purchase, with 47% spreading the word about a positive experience
Dixa, Reconnecting the Customer Experience
As you can see, positive reviews can work as social proof and help boost your sales. And when it comes to reviews, Google is easily the #1 platform out there.
By embedding a WordPress slider with Google reviews, you’ll be able to:
- Convert more potential customers and get more sales for your e-commerce site with ease.
- Make your website more interactive and engaging with a beautiful slider.
- Show fresh content with relevant keywords and boost your website’s search engine ranking.
- Get new product reviews from your customers once they finish making a purchase.
The Easiest Way I Know to Add Google Review Sliders to WordPress
[Disclaimer: As I work with Smash Balloon, I’m naturally going to highlight our plugin as a solution. However, based on my professional experience testing many review plugins, I genuinely believe it’s the easiest and most effective way for most WordPress users to create a review slider.]
For the simplest way to display Google review sliders, you can use Smash Balloon Reviews Feed Pro.
As the best WordPress Google review slider plugin, you can start showing positive reviews to your visitors using this tool in just a few simple clicks.
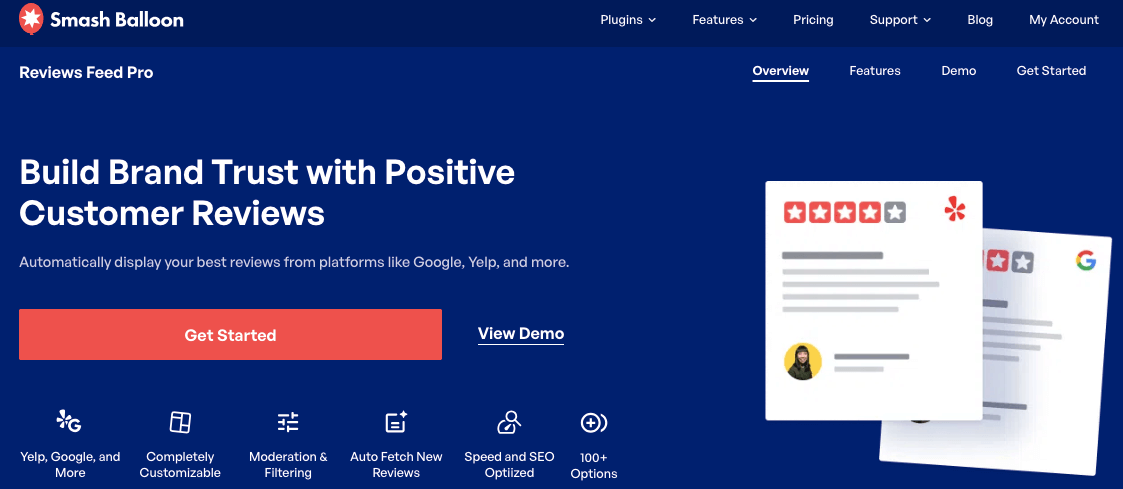
On top of letting you embed Google reviews, Reviews Feed Pro even supports other major platforms like Trustpilot reviews, Yelp reviews, Tripadvisor, WordPress.org reviews, and Facebook reviews.
Honestly, this reviews feed plugin is the best tool for this job for a reason. As you’ll see in the steps below, Reviews Feed Pro is designed to make this entire process quick and easy.
Why I Recommend Reviews Feed Pro Over Other Options
- Starts with slider templates. You can choose from several pre-built carousel layouts to get the exact look you want with a single click.
- No coding, ever. You can build, customize, and display your Google review slider without touching a single line of code.
- Matches your website’s design. The plugin automatically copies your theme’s fonts and styles, so your Google slider blends in perfectly from the start.
- Shows reviews from many sites. Today you’re adding Google reviews, but you can also use it to show reviews from Facebook, Yelp review widgets, Trustpilot, and more.
- Customize with a live preview. The visual feed customizer lets you change your slider’s design and see the results instantly, right on the screen.
What I especially appreciate about Reviews Feed Pro is the complete control it gives you.
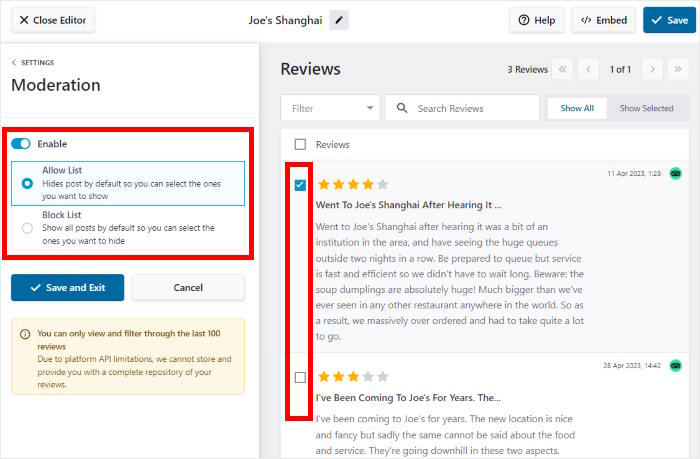
I love how you can use the moderation settings to create an “Allow List” which lets you hand-pick only your very best reviews for the slider. It’s like creating a highlight reel of your happiest customers!
And if you need any help with setup, the expert support team for Reviews Feed Pro is always ready to assist you.
Many website owners use Reviews Feed Pro to showcase social proof, and it has an amazing rating of 4.9 out of 5 stars.
After all, it’s a social feed plugin from Smash Balloon, a name used and trusted by over 1.75 million websites and well-known brands to add social media feeds to their WordPress websites.

Ready to display an eye-catching Google review slider on your website in just a few minutes? Get started with Reviews Feed Pro now!
How to Add a Google Review Slider to Your WordPress Site
With that, I’ll show you how you can use Reviews Feed Pro to display a WordPress slider to showcase your best customer reviews.
Step 1: Install the Smash Balloon Reviews Feed Pro Plugin
First, get your copy of Reviews Feed Pro here before you install and activate the plugin on your WordPress website.
Want a quick refresher on how to do that? Check out this beginner’s guide on how to install WordPress plugins.
Step 2: Create a Google Review Feed
You can now use the plugin’s guided flow to create a new reviews feed with ease.
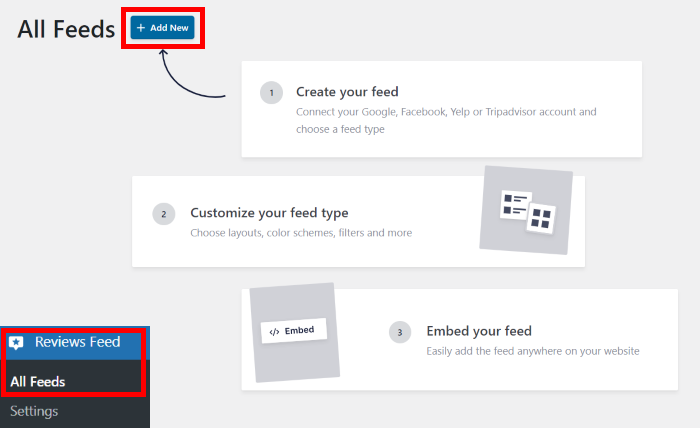
First, open the Reviews Feed » All Feeds menu from the dashboard, and then click on Add New.
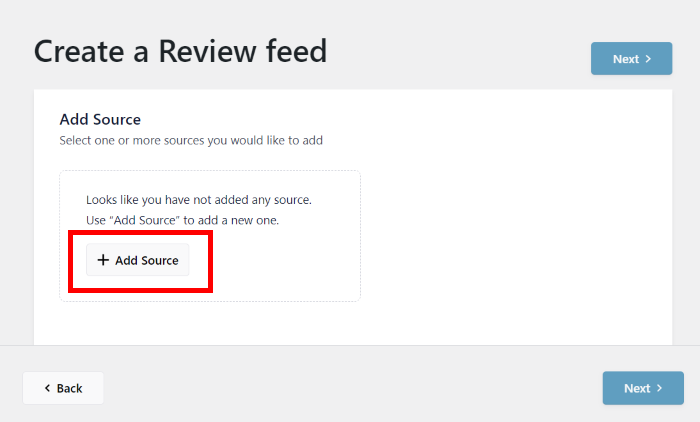
Next, Reviews Feed Pro asked me to add a new source. This turned out to be pretty simple — I just had to connect this review feed to the Google business page whose reviews I wanted to display.
To start doing that, click on the Add Source button here.
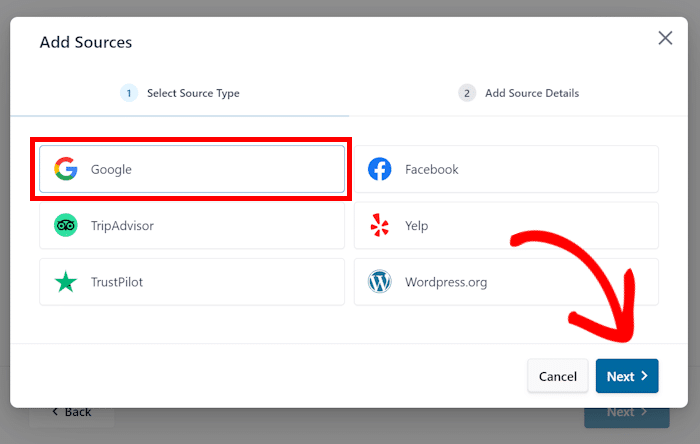
Next, Reviews Feed Pro lets you choose between 6 different review platforms:
- Tripadvisor
- Yelp
- Trustpilot
- WordPress.org
For now, we can select Google before clicking on the Next button.
Step 3: Connect Your Google Business Page
To connect your brand’s Google business page, the easiest way is to use your brand’s Google Place ID.
Yes, you don’t even need to deal with API keys, as Reviews Feed Pro makes it effortless for you.
Confused? Well, a Place ID is simply a unique code that’s given to each business on Google.
After you enter a Place ID here, the plugin will embed reviews of the business that has that specific ID.
Finding Your Place ID
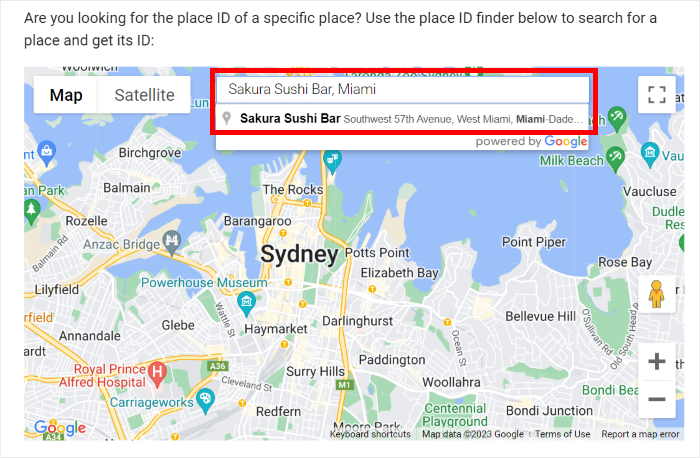
First, open the Place ID generator and scroll down to find the Google map there. Using the search bar, you can look for your business here.
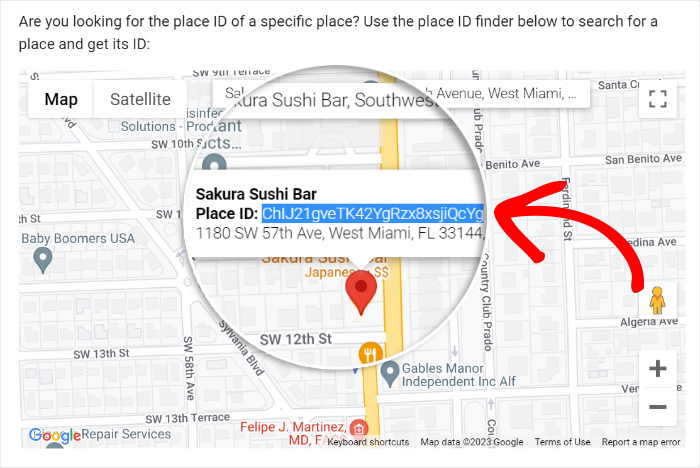
Once you’ve done that, the map will show more information about your business below.
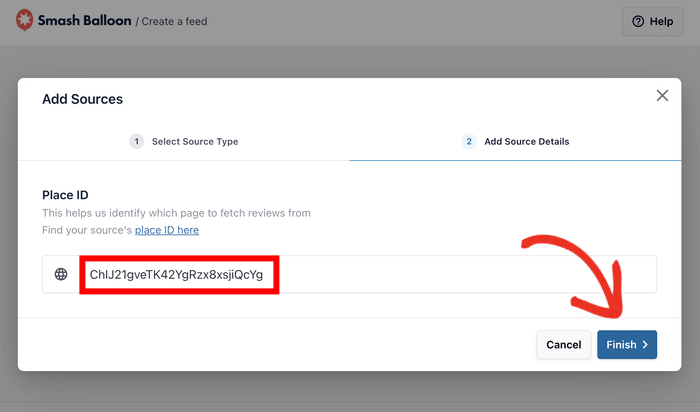
To continue, you can copy the code in the Place ID field.
Enter Your Google Place ID
Finally, return to your website and paste the code into the Place ID field.
After that, click on Finish, and your business will be added as a source.
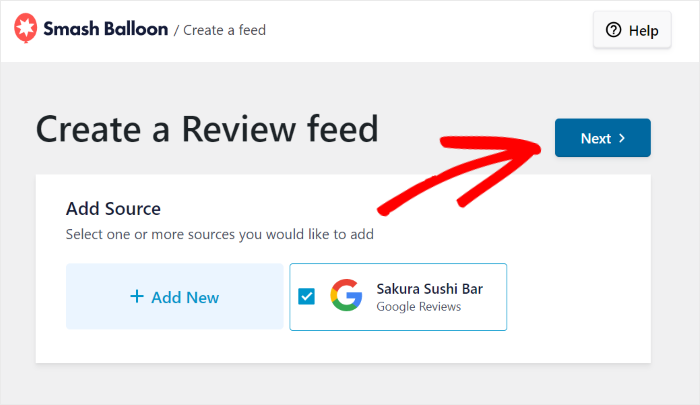
Once you add your business profile, the plugin will keep it stored. So, you can freely select your business as the source when you create review feeds.
For now, select your business and then click on Next.
Step 4: Select the Carousel Template
Reviews Feed Pro will automatically fetch your reviews and create a new Google reviews feed on your WordPress site.
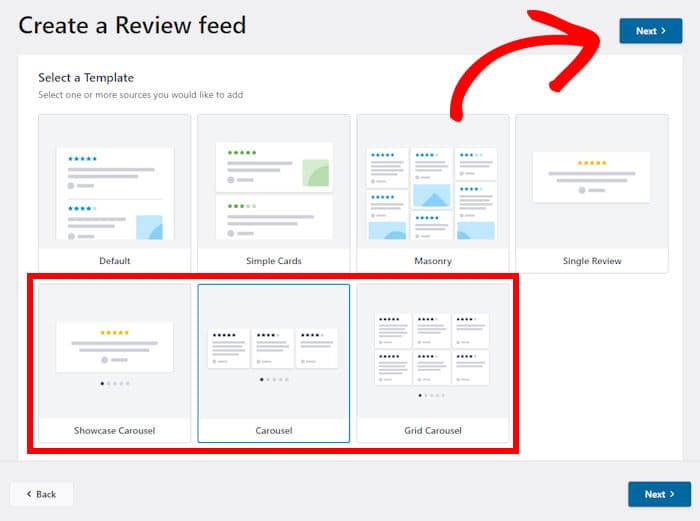
Next, you can turn this reviews feed into a carousel by importing a template in just a single click.
Once you see all the template options, then you can choose from 3 different templates:
- Showcase Carousel: Use the review slider to highlight one specific review
- Carousel: Show a row of different reviews in a sliding carousel
- Grid Carousel: Place reviews in different grids before showing them in a slider
Pick a template and then click on Next to continue.
Step 5: Customize Your Google Review Slider
Now, this Google Reviews plugin will automatically convert your feed into a proper Google review slider.
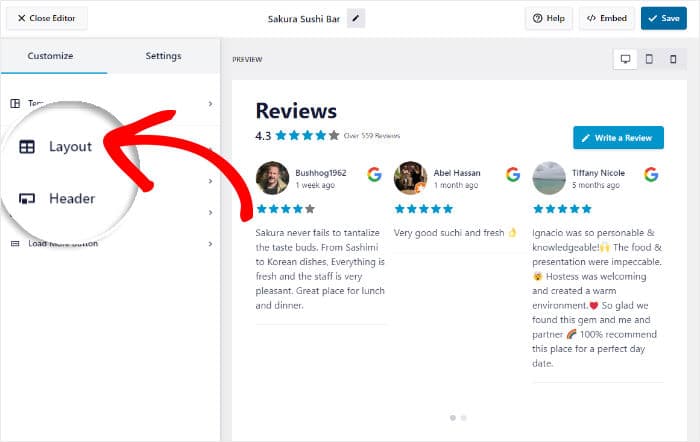
You’ll then see the review slider in the visual customizer, where you can customize the design even more. On the left, you can find the option to change your layout, review elements, header, and more.
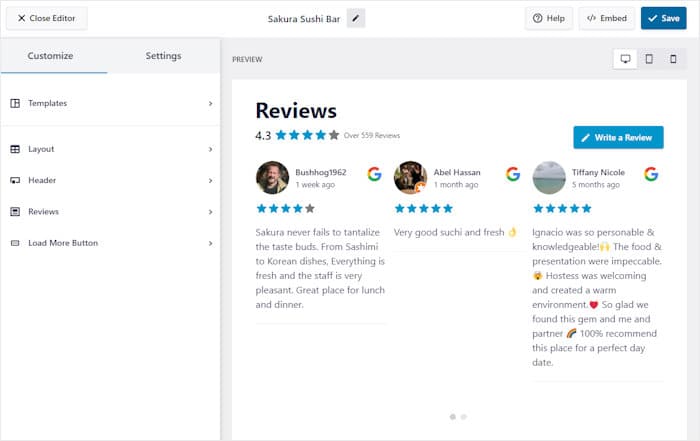
On the right, you can see a live preview to track any of your changes in real-time.
Let’s use the visual customizer to change the Layout of the review slider.
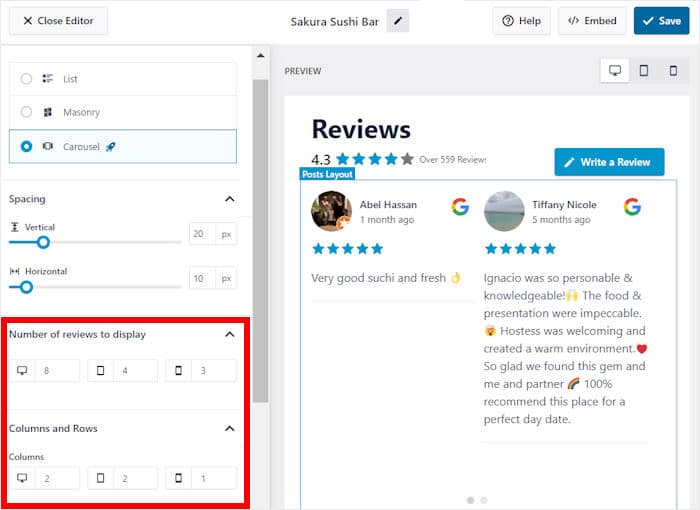
If you scroll down on the left, you can set the Number of reviews to display on your slider.
You can choose how many Google business reviews you want to show on a desktop, tablet, as well as mobile phone.
Below, you can select the number of Columns and Rows for your Google review slider.
Like before, you can select different values for desktop devices, tablets, or phones.
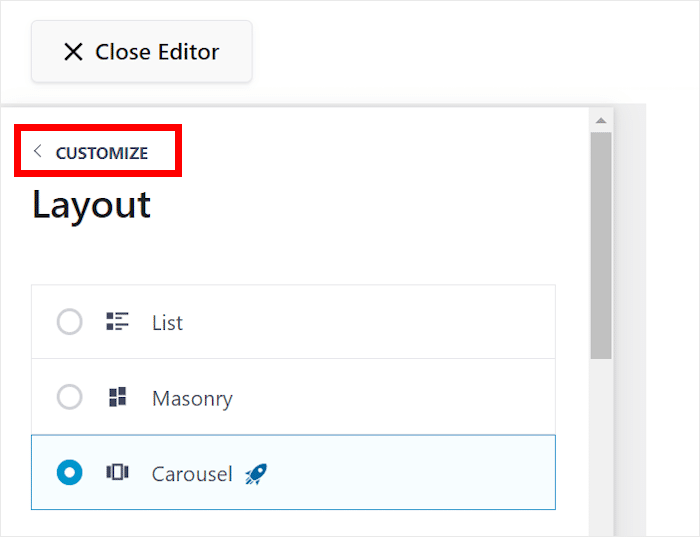
You can even find the option to show reviews in a single row or a masonry gallery here. Once you’re happy with your layout, click on the Save button at the top.
Next, you can return to the main customization options by clicking on the small Customize button.
You can use the remaining customization options to change your header design, review elements, buttons, and more.
Once you’re happy with your new Google review slider, click on the Save button to keep the new look.
Now, you can use the Settings tab at the top to open even more options for your review slider.
From there, let’s explore the Moderation option for now.
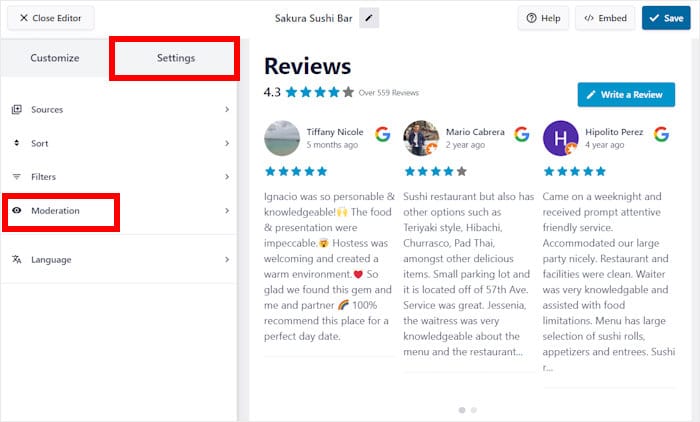
Using the option on the left, you can Enable or Disable moderation for your Google review slider.
Below that, you can pick from 2 different moderation options:
- Allow List: Select the reviews that you want to display on your slider
- Block List: Choose the Google reviews to hide from your visitors
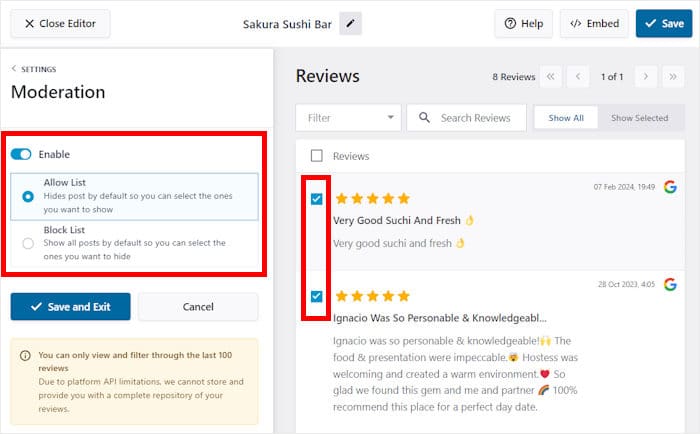
Once you’re done moderating your feed, click on the Save and Exit button on the left.
To get more control over your Google review slider, you can use the filter functionality. That way, you can set up banned words, add minimum ratings, or only show reviews with specific keywords.
For example, you can use filters to only show 5-star reviews and create a slider with your best reviews. Plus, you can hide negative reviews from bots and spammers.
Step 6: Embed WordPress Google Review Slider
Finally, you can start embedding this review slider by clicking on Embed.
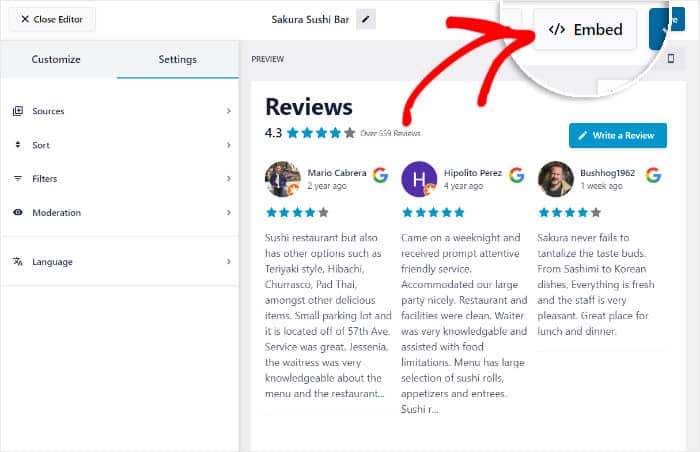
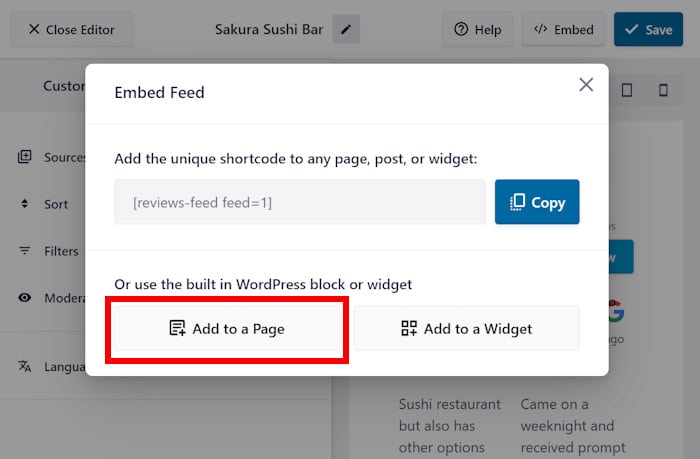
You’ll then see different ways of embedding the Google review slider on your website:
- Add to a Page: Display the review slider on one of your existing WordPress pages
- Add to a Widget: Show a Google reviews widget on your sidebar or footer
- Copy: Copy the shortcode to add the review slider anywhere on your website manually
For this example, we’ll embed the Google review slider on our WordPress page.
To do that, click on the Add to a Page button on the popup.
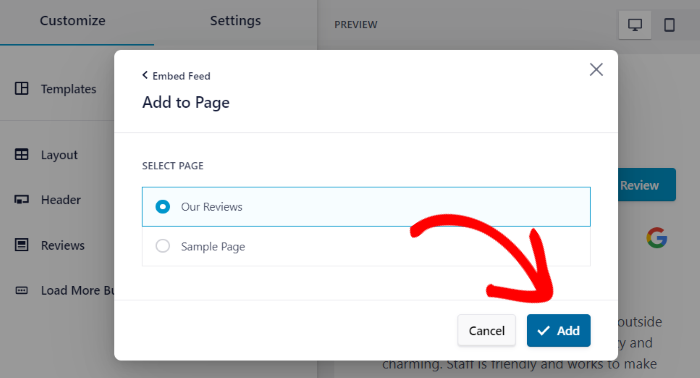
The plugin now shows a list of WordPress pages on your website. Just select the page where you want to show your reviews.
Then, click on the Add button below.
Doing that opens your selected WordPress page in the block editor so you can embed your Google reviews feed.
First, click on the plus (+) icon here to add a new block.
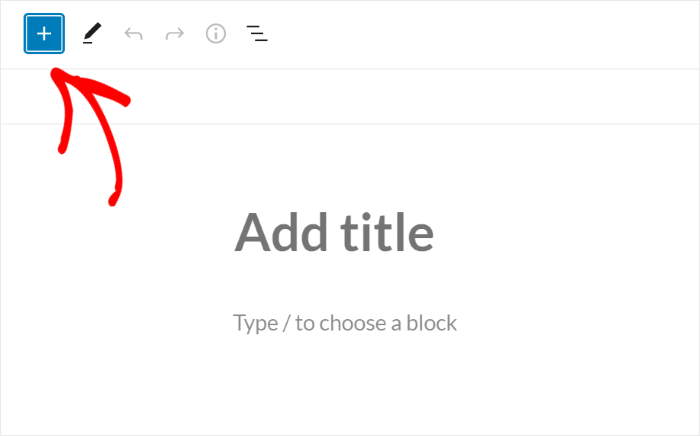
Using the search bar, you can now look for the “reviews feed” block.
After you do that, simply click on the Reviews Feed in the search results.
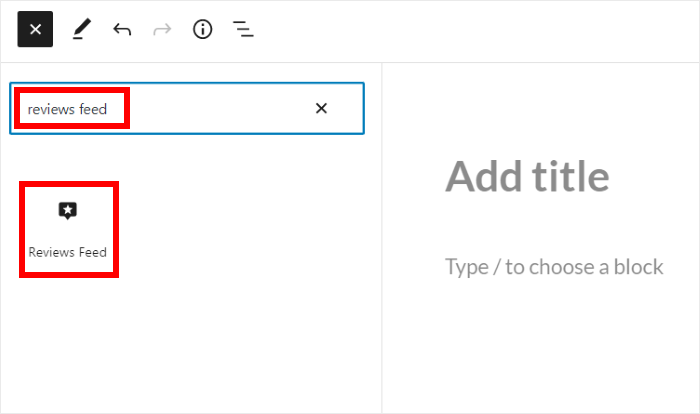
After you do that, Reviews Feed Pro will automatically embed the Google review slider on this web page. Just click on Update, and your visitors can check out the reviews as well.
If you open your WordPress page now, you’ll see a Google review slider similar to my example here:

And there you have it!
Just like that, you can embed a WordPress Google review slider and get tons of new conversions and sales with ease – no need to touch a single line of code.
Using Reviews Feed Pro, you can create, customize, and embed feeds of reviews from the biggest review sites out there. So, you can use this WordPress Google review plugin to supercharge your business.
Get Reviews Feed Pro today and embed Google reviews on your site with ease.
Start Adding Your Google Review Slider Now
As you can see from the steps above, creating a Google review slider for your site doesn’t have to be hard.
I can personally say that Smash Balloon Reviews Feed Pro streamlines this entire process, letting you build a dynamic and professional-looking slider in just a few minutes, all without writing any code.
Here is what I recommend you do next:
- Get your copy of Reviews Feed Pro. (It includes our 14-day money-back guarantee!)
- Follow the 6 steps we’ve detailed to create and launch your slider.
- Choose the showcase carousel or another slider template to best fit your design.
Remember, a review slider is more than just a design element. It actively presents your best customer feedback in an engaging way, helping to convince new visitors that your business is a trusted choice.
Do you have any questions about using Reviews Feed Pro to create your Google review slider? Please ask me in the comments below.
If you want another great online marketing hack, you can get started with this list of the best WordPress giveaway plugins.
Frequently Asked Questions
Can I filter negative Google reviews from the slider?
Yes, plugins like Reviews Feed Pro allow you to set moderation rules. This lets you only show reviews with your selected star ratings.
Does a review slider slow down my WordPress site?
It depends on the plugin. Optimized plugins like Reviews Feed Pro use smart caching to ensure your page speed remains fast even when you’re showing lots of reviews..
Can I combine Google reviews with reviews from other platforms?
Yes, advanced plugins allow you to create social wall feeds. For example, Reviews Feed Pro lets you combine reviews from Google and other popular sources like Facebook, Yelp, Trustpilot, Tripadvisor, and WordPress.org.


