Once you’ve got a Thrive website up and running, adding Google reviews can be the perfect way to start boosting your sales.
But manually adding Google reviews to your website comes with several issues.
In my years of experience with online marketing, I’ve seen a lot of website owners that want to show reviews but dealing with code and API was too much of a hassle for them.
So, I’ve put together a simple guide that can show you how to add Google reviews to Thrive Architect – all without coding.
In this Article:
- Why Add Google Reviews to Your Thrive Website?
- Easiest Way to Embed Google Reviews in Thrive
- How to Embed Google Reviews on Thrive Architect
Why Add Google Reviews to Your Thrive Website?
- Since it’s the biggest platform for reviews, showing Google reviews is a great way to build trust in your brand
- You can add positive reviews and testimonials to product pages to directly boost your sales
- Displaying reviews also shows that you pay attention to reviews, which can convince visitors to leave new reviews
- Adding Google reviews that contain relevant keywords can be great for your website’s SEO ranking.
Easiest Way to Embed Google Reviews in Thrive
Disclaimer: If you’re totally comfortable handling code and dealing with the Google API, then manually adding reviews can work as a solution.
But this still has some downsides. The biggest ones are the time needed and a lack of any technical support if something messes up.
The good news is that you can sidestep all this hassle using a WordPress plugin
And for Thrive Architect, Reviews Feed Pro is pretty much the best option available.

The best thing about the plugin is that it’s an all-in-one solution for displaying customer reviews. After all, it supports the biggest platforms out there that are trusted by millions:
- Yelp
- Tripadvisor
- Trustpilot
- WordPress.org
It’s so user-friendly that you can create a review feed, pick a design, and add it to your website in just minutes. There’s even a guided flow to make this super easy.
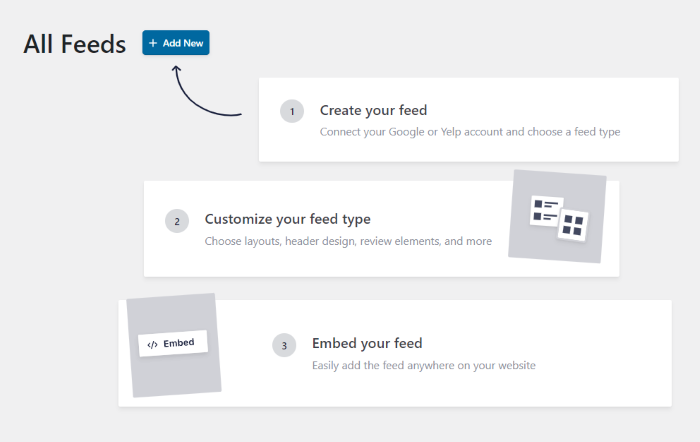
To save some more time for you, all the review feeds you create will automatically copy the design of your website.
You also get lots of control over the design. There’s a live editor that lets you customize your layout, header, buttons, review elements and more.
And as another great bonus, you can use filters or moderation to choose which reviews to show on your Thrive website.
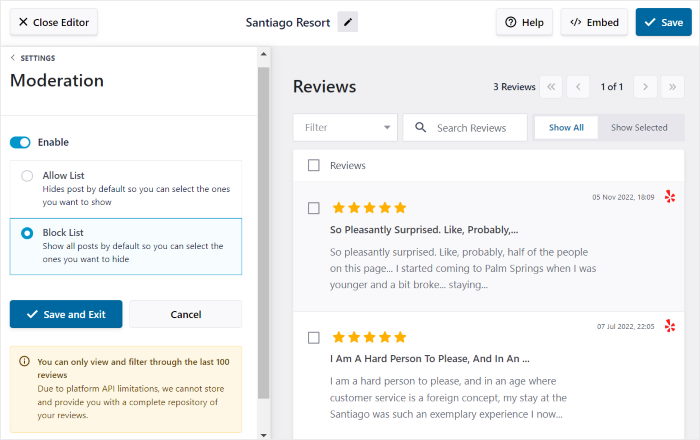
This means you can show off high-quality reviews from trusted sources and hide spam, trolls, and fake reviews to create a great impression of your brand.
You also get a dedicated support team to help you out in case you need help, or if you’re stuck on something.
Ready to grow your brand by adding Google reviews? Get your copy of Reviews Feed Pro right here.
How to Embed Google Reviews on Thrive Architect
With that out of the way, you can go ahead and follow the steps below to add the Google reviews to your Thrive website.
Step 1: Add the Plugin to Your Thrive Website
Ready to start? You can get your copy of the Reviews Feed Pro plugin here.
Once you have the plugin, install it on your Thrive website and activate it.
The installation is the same as any other WordPress plugin. In case you need a refresher, check out this guide on installing WordPress plugins.
Step 2: Create a New Google Reviews Feed
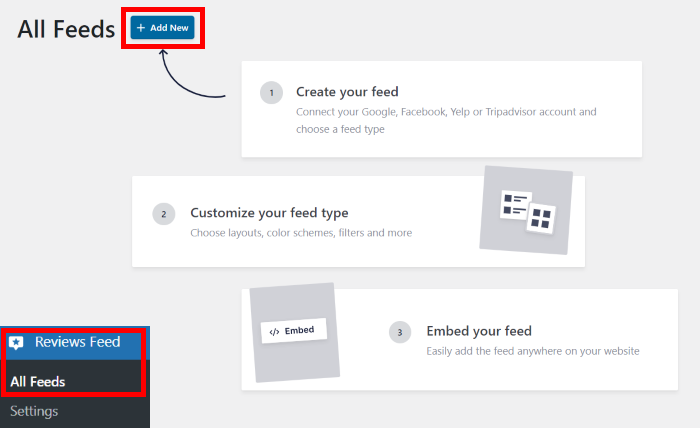
Activating the plugin will add a new Reviews Feed menu on the left panel of your WordPress dashboard.
This is where you can get started. First, open the Reviews Feed » All Feeds menu from the dashboard.
On the new page, click on the Add New button.
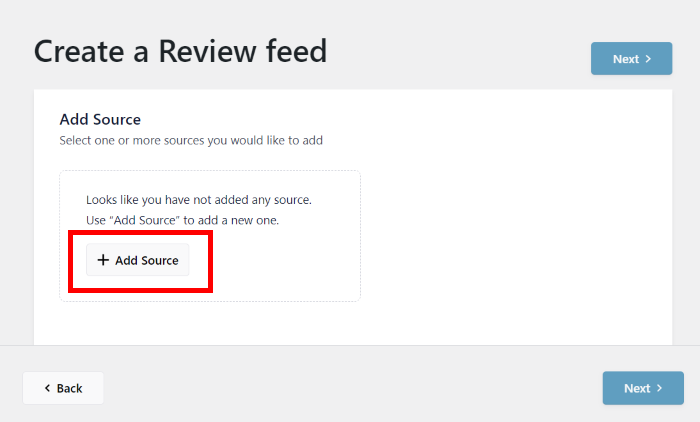
Now, the plugin needs to know where to fetch the reviews from. This is known as the source.
Once you add your Google business page as a source, you can freely use for as many feeds as you like.
For now, just click on Add Source.
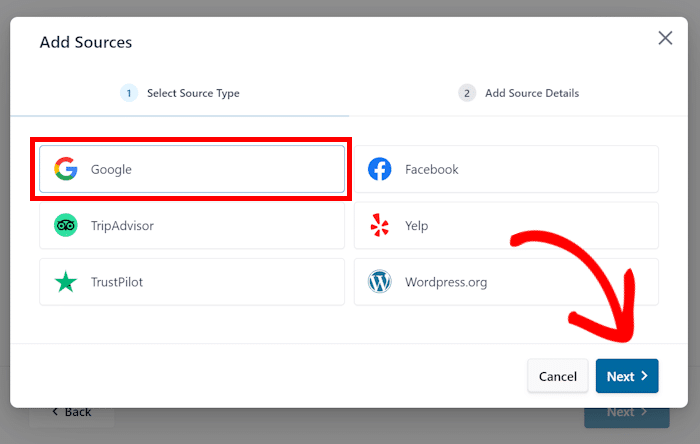
On the new popup, you can see all the supported review platforms:
- Tripadvisor
- Yelp
- Trustpilot
- WordPress.org
The overall process for each platform is the same. So, you can redo the steps from here to create Yelp review feeds later if you want.
But right now, select the Google option and click on Next.
Step 3: Connect Your Review Feed to Google
Your new feed can fetch reviews and embed them to your site only after you connect your new feed to Google.
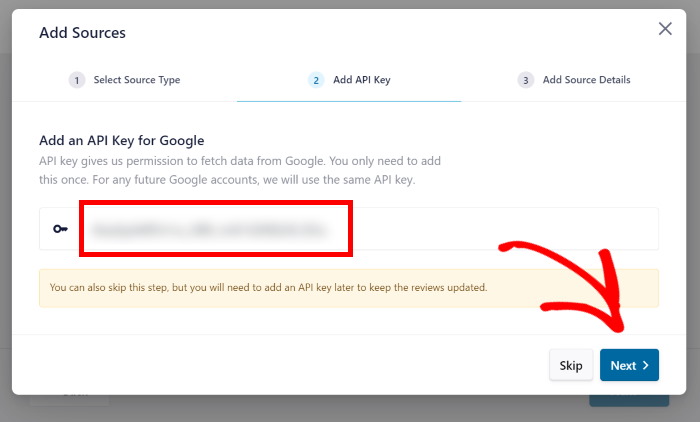
To do so, the easiest way is to use your Google API key.
If you don’t have the key yet, just follow this guide on how to create a Google API key.
After you obtain the key, just paste it into the popup, and press the Next button to continue.
Now, it’s time to let the plugin know which Google reviews to display. You can do this by entering the Place ID of the business whose reviews you want to show.
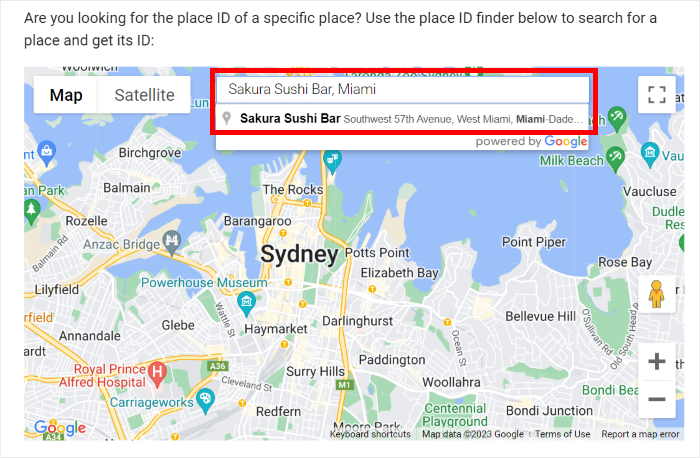
It’s a pretty simple process. Just open Google’s official Place ID generator, then find the map there.
Now, enter the business name and location on the search bar above the map.
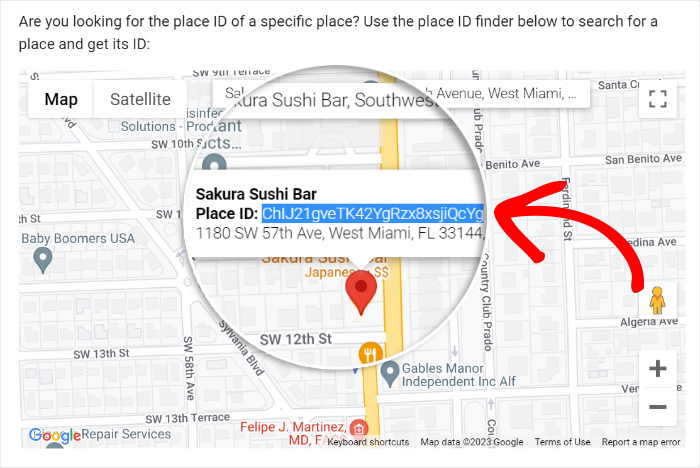
The map will now focus on the business that you just searched for. You’ll also see some more info on the map.
To continue, copy the code that’s shown as the Place ID.
Go back to your Thrive website and paste the code into the Place ID field.
After you do that, click on Finish to move on.
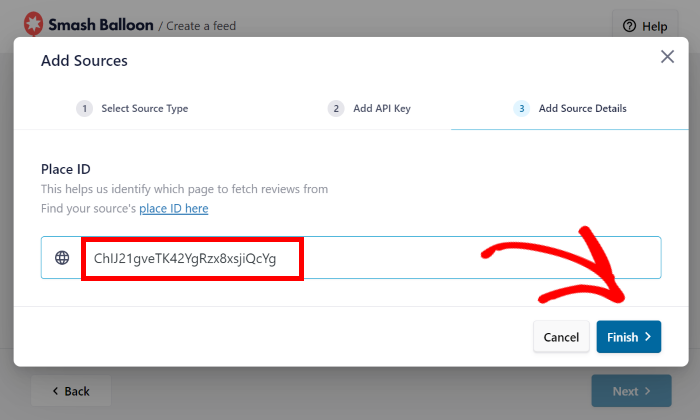
Like I said before, you can now use this source for any new review feeds that you create. You can also combine different sources for a single review feed if you like.
To finish up here, select the source and click on Next.
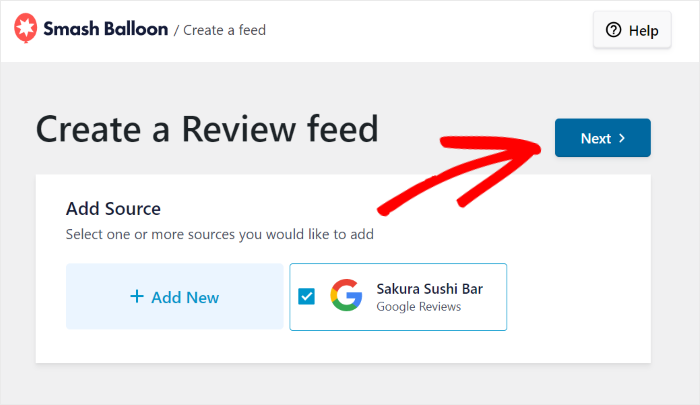
Step 4: Pick a Design for Your Google Reviews
The plugin comes with different templates that have unique layouts and vibe. You have 7 options to pick from:
- Default
- Simple cards
- Masonry
- Single review
- Showcase carousel
- Carousel
- Grid carousel
Pick any template you like and click on Next.
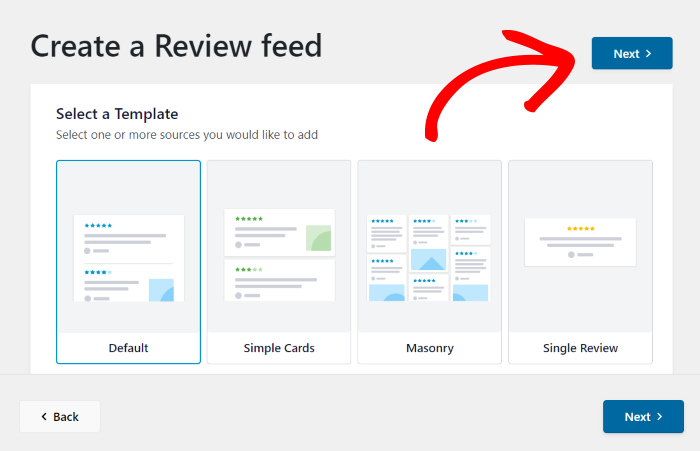
I went with the Default template for this guide to keep things simple. Personally, I prefer the Masonry template for the homepage since it shows lots of reviews in a pretty stylish way.
After you pick your review template, the plugin will take a few seconds to put your Google reviews feed together.
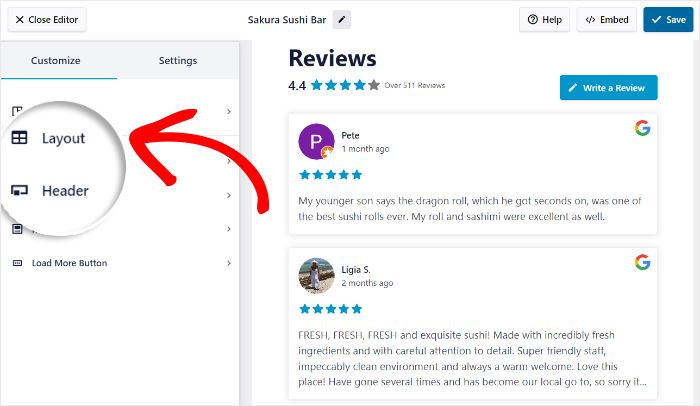
You’ll then see the plugin open in the visual editor. The pale on the left has all the customization options and you track your changes with the live preview on the right.
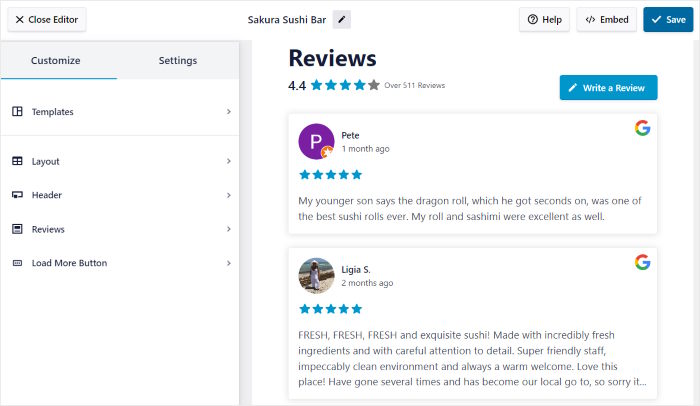
I’ll demonstrate one of the many customization options here. Once you get the idea, you can edit any part of your Google reviews feed from here.
For now, click on the Layout option on the left.
After you do that, you can choose a feed layout from the 3 available options:
- List: Show reviews one after another so each review is clearly displayed
- Masonry: Convince visitors by showing lots of reviews in multiple columns
- Carousel: Show a review feed carousel to boost your site’s engagement
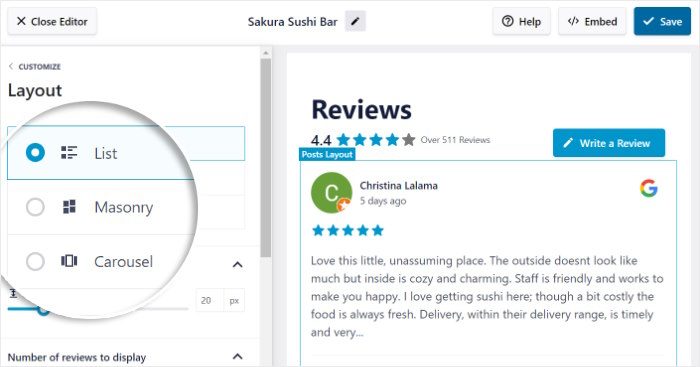
You can also change the number of reviews, rows, and columns from here.
After you pick your layout, click on Save to keep your changes.
Then, click on the Customize button and you’ll be back on the main customization options.
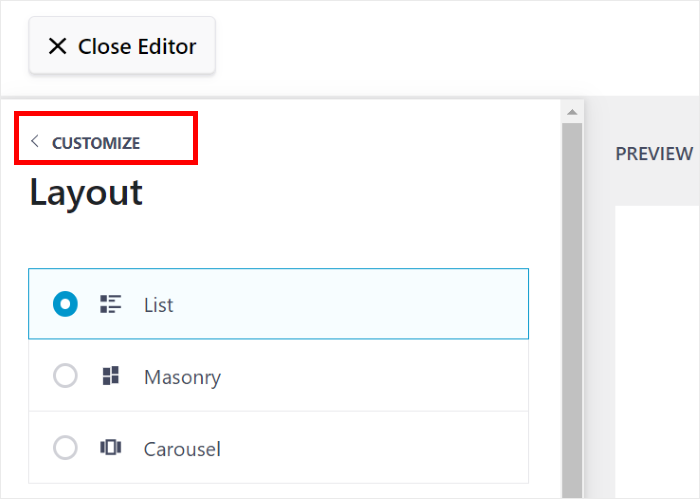
Similar to how we edited the layout, you can use the other options to change your review elements, header, buttons, and more.
Just remember to Save your changes after you change something.
Now, I’ll show you how to control the Google reviews that are displayed on your website.
First, open the Settings tab at the top, then click on the Filters option.
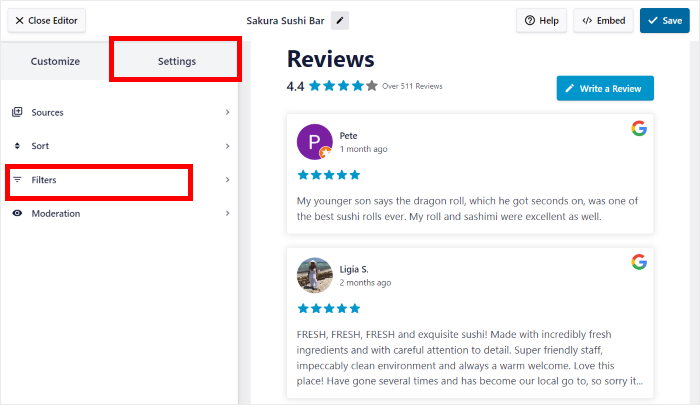
On the left panel, you can select which star ratings to show on your Google reviews feed.
Use the checkboxes to pick the star ratings and the feed will automatically updated to hide the remaining reviews.
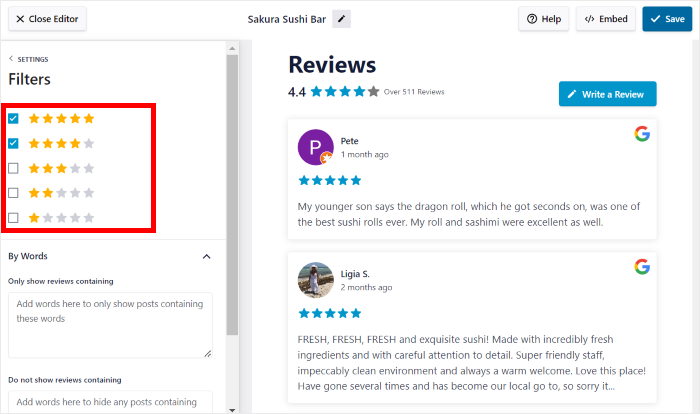
You can also add word filters to hide or show reviews that have specific keywords. After you’re happy with the filters, click on the Save button.
For direct control over the reviews, you can also moderate the feed. This lets you pick the reviews to show or hide. And like before, click on Save once you’re done.
Step 5: Embed Google Reviews in Thrive
Look for the Embed button at the top of the customizer and click on it.
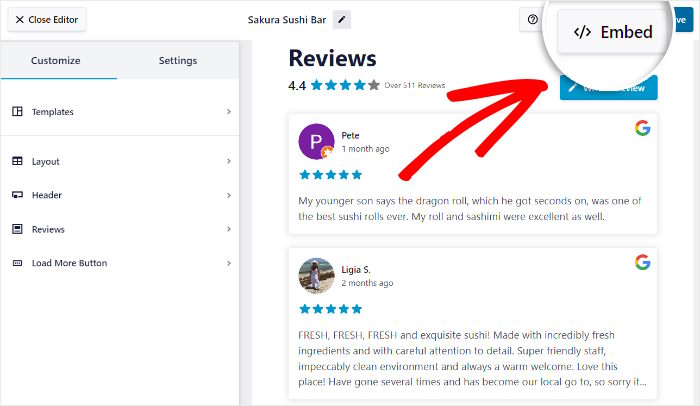
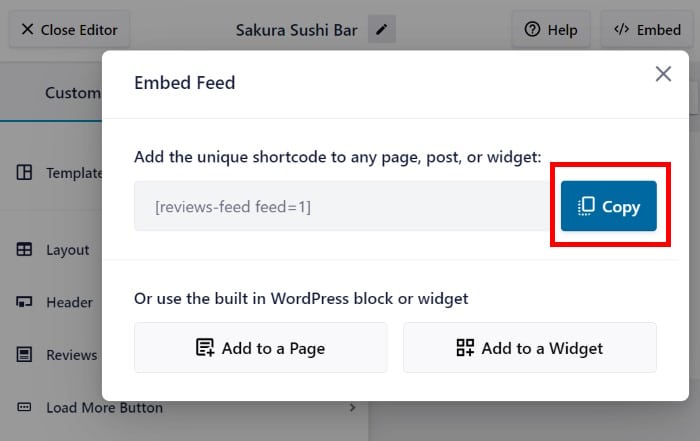
Clicking on that opens a new popup which shows all the ways to embed Google reviews on your website.
You can add it to WordPress pages or show it on your sidebar or footer as a widget.
But we’re adding Google reviews to your Thrive page. And for that, click on Copy.
If you have a Thrive Architect page where you want to add the Google reviews, go ahead and open it.
And in case you don’t – no worries. We can create a new Thrive page for now.
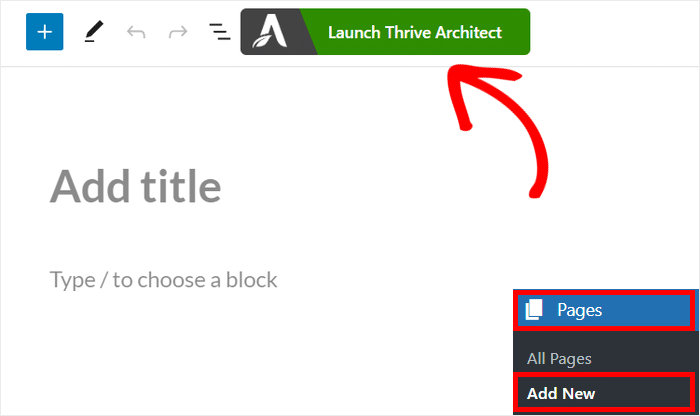
From your WordPress dashboard, click on the Pages » Add New menu.
After doing that, click on the Launch Thrive Architect button at the top.
Before you continue, Thrive will ask you to pick the type of page you want to make:
- Normal Page: Start editing a blank page
- Pre-built Landing Page: Import a design before editing it
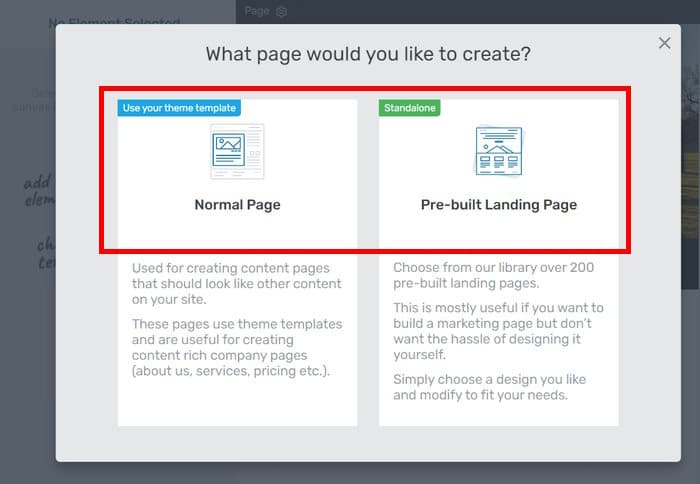
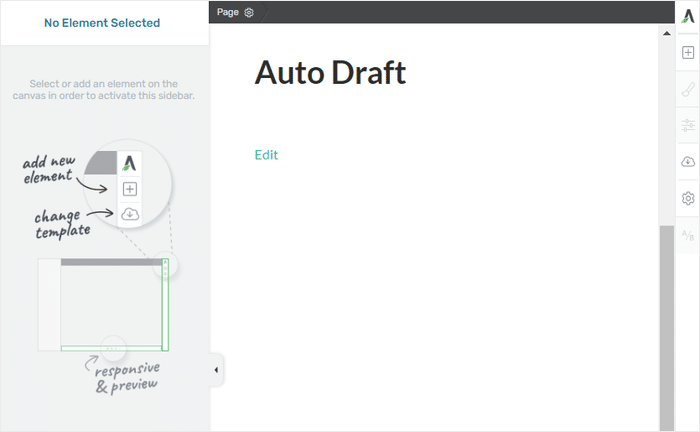
If you went with a Normal Page, you can immediately start editing your page using Thrive Architect.
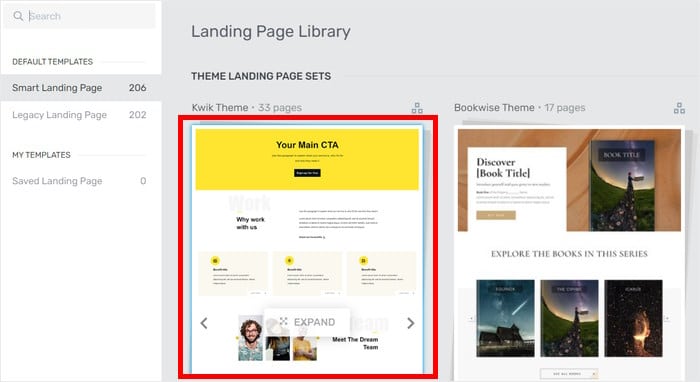
But if you picked Pre-built Landing Page, you’ll see a popup with the available designs that you can import.
Take your time and look through the options before clicking on the one you want to use.
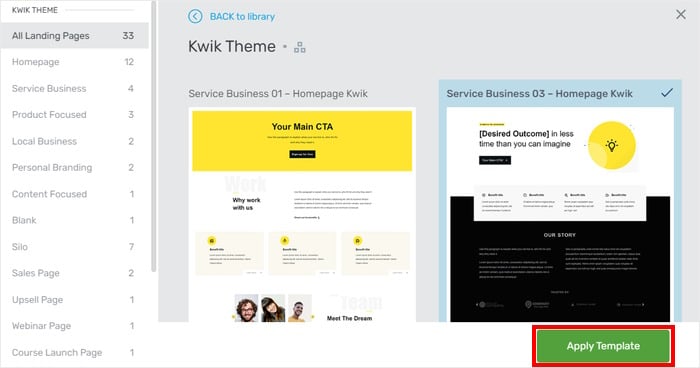
Once you click on a design, you’ll see the different page templates on the popup.
Look through the options and pick one that you like before clicking on Apply Template.
Now you’ll be sent to the Thrive Architect editor. Regardless of the page type you picked, the rest of the instructions are the same.
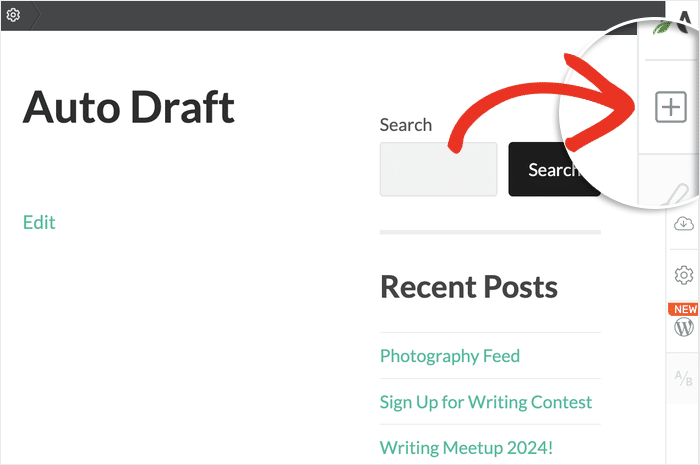
First, click on the plus (+) icon on the right to add a new element to the page.
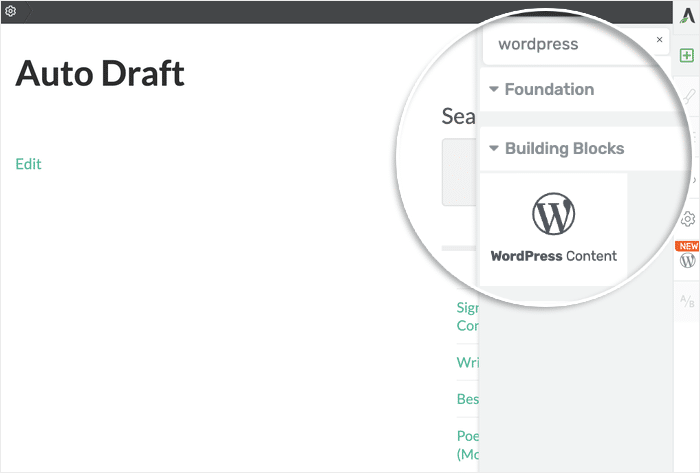
Use the search bar at the top and type in “wordpress” to proceed.
Doing that will show the WordPress Content element in the search results below.
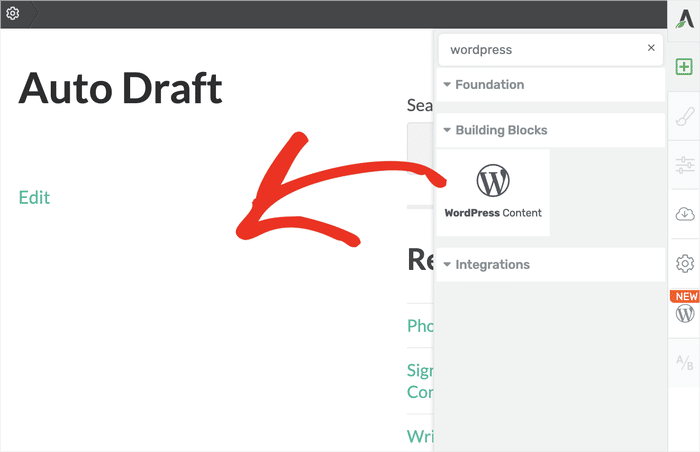
Now, drag this element from the right and drop it to your Thrive page on the left.
It’s just like adding any other element to Thrive Architect.
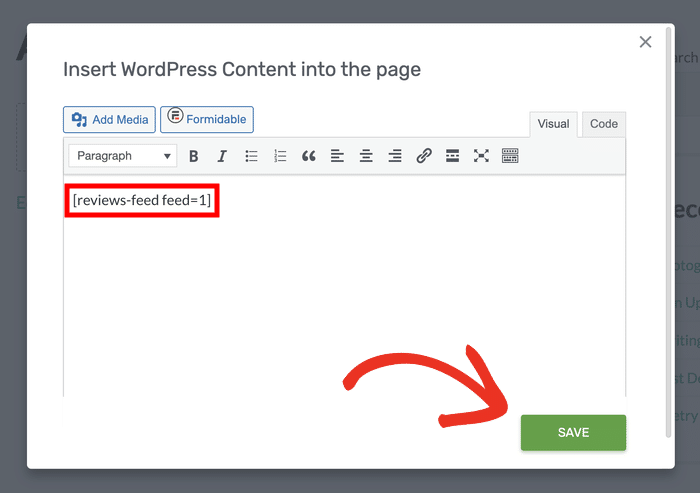
Once you do that, you’ll see a popup. If you’ve been using WordPress for a while, this might remind you of the old classic editor.
To continue, paste the shortcode from earlier into the text field and click on Save.
Just like that, you’ve added your Google reviews to your Thrive website.
Now, you can sit back and let Reviews Feed Pro handle the rest. If you followed the steps, you’ll see a feed that looks something like my example below:

And that’s all! It’s really that easy to add Google reviews to Thrive, or any other type of WordPress website.
Once you display convincing reviews, you’ll be able to boost sales, build customer trust, and take your business to the next level.
Ready to start adding Google reviews to Thrive? Grab your copy of Reviews Feed Pro plugin right here!
Google reviews can be pretty versatile too. If you want more ways to grow your brand online, check out this list of the best Google review examples.
More Thrive Architect Guides and Tutorials
- How to Add a Twitter/X Profile to Your Thrive Architect Website
- How to Display TikTok Feed on Your Thrive Architect Site
- How to Embed YouTube Feed on Your Thrive Architect Website [For Newbies]
- How to Embed Instagram Feed on Your Thrive Architect Website
- How to Embed Facebook Feed on Your Thrive Architect Website [Best Way]


