Scheduled Instagram posts not working?
Don’t worry, you’re not alone! Many people have reached out and asked us for a way to fix their scheduled Instagram content.
So, we’ve created this guide that’ll help you deal with common Instagram issues that can stop you from scheduling your posts.
Just follow the steps, and you can start scheduling your Instagram content with ease.
Why Schedule Your Instagram Posts
- You can prepare content for busy periods like Black Friday or the holiday season beforehand and schedule them in advance.
- By scheduling your posts when users are online, you can make sure your content reaches them at the right time to get the most engagement.
- If your older Instagram posts perform well, you can reschedule them for later and get tons of interactions with ease.
- In case you’re working with a team, you can have people check and review the scheduled posts before it’s online, so everything fits your brand guidelines.
How to Fix Your Scheduled Instagram Posts Not Working
To fix your scheduled Instagram posts, you can just go through the steps below. Let’s get started!
Step 1: Test Your Internet Connection
If your internet connection is slow or unstable, it can interfere with your ability to schedule Instagram posts.
To see if you have internet issues, you can use online tools like the Google Speedtest and see for yourself.
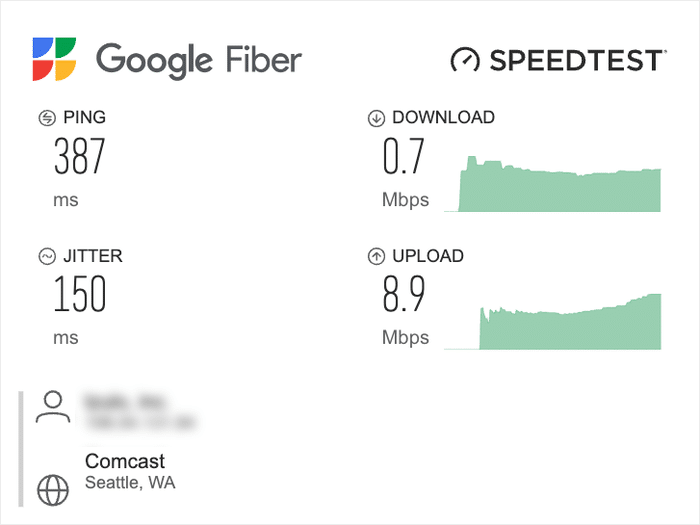
In case you’re dealing with internet issues, you can take the following steps:
- Restart your internet router
- Check your LAN cable if you’re using one
- Bring your device closer to the router if you’re using Wi-Fi
- Talk to your internet service provider if the problem persists
If your internet is fine, and you’re still having issues scheduling Instagram posts, you can move on to the next step.
Step 2: Check if You’re Using a Personal Account
Unfortunately, you can only schedule posts from a professional account that’s connected to a business.
So, you can simply check if you’re using a professional Instagram account when trying to schedule your posts. To check, just open your Instagram profile and see if you have the Professional dashboard.
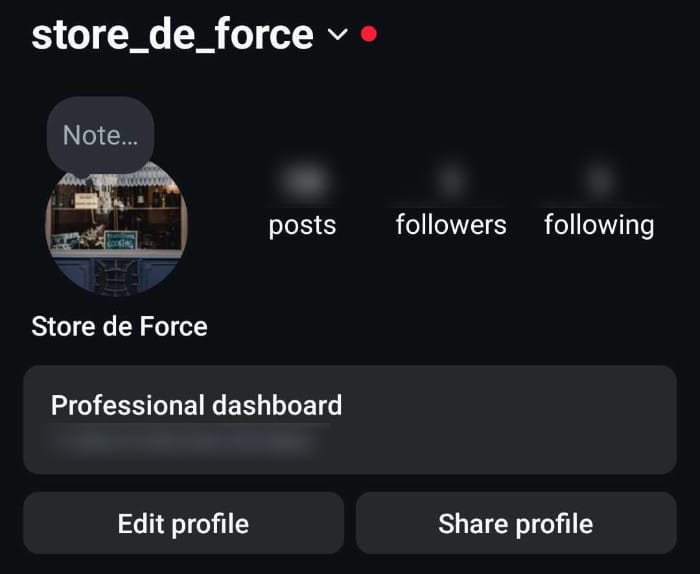
In case you don’t, you can switch to a professional account and enable scheduling Instagram posts.
For more information, we’ve got a step-by-step guide on how to switch to a professional Instagram account here.
If you have a professional account, and you still can’t make your posts, continue to the next step.
Step 3: See if Your Instagram Account is Connected to Facebook
Next, you can check if your Instagram account is connected to your Facebook page.
After all, connecting to Facebook is required to unlock a lot of professional Instagram features, including post scheduling.
Not connected to Facebook?
We’ve got you covered. Just follow our guide on how to link your professional Instagram account to Facebook.
But if you’ve already linked a Facebook page but still can’t schedule posts, you can go to step 4 below.
Step 4: Check if Instagram is Down
In some cases, Instagram itself might be offline, which can stop your scheduled posts from going online.
So, you can just check sites like Downdetector and see if there are any issues with Instagram right now.
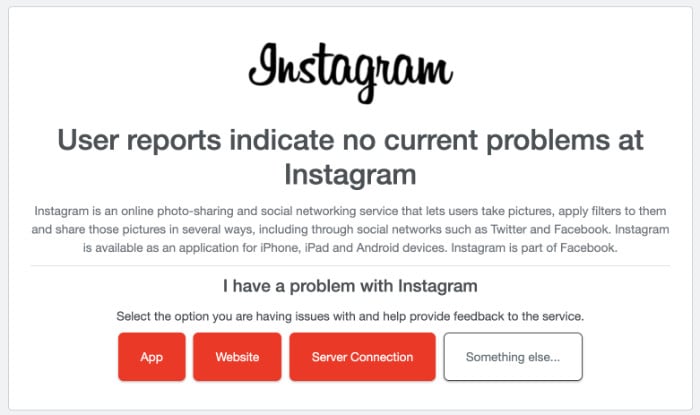
If Instagram is down or facing issues, you can wait until it’s back up and check if your scheduled post is online again.
But in case Instagram is online, and your post still isn’t being published, you can try the step below.
Step 5: Update Your Version of Instagram
Instagram is constantly releasing updates that change how the app works, so having an outdated app can stop your scheduled posts from working.
The good news is that it’s super easy to fix as well. Open the app store on your phone and look for Instagram.
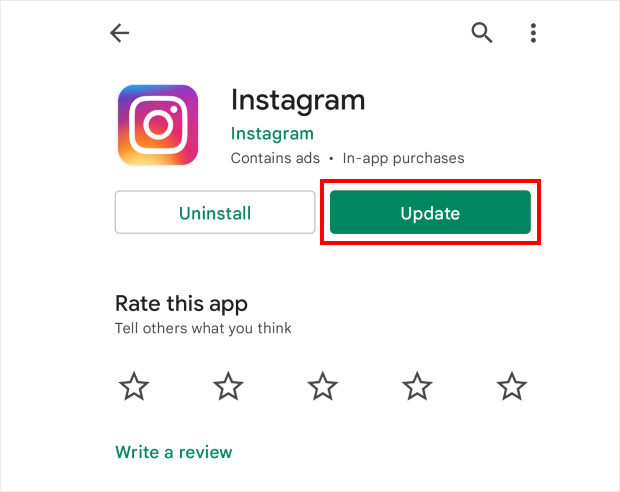
In case you see an Update button here, click on it and your version of the app will automatically be updated.
After you do that, open Instagram again and try to schedule your posts.
If the scheduled Instagram posts aren’t working still, then you can go for the tried-and-tested solution in the final step.
Step 6: Use an Instagram Scheduling Tool
An easy solution that you can try if none of the previous steps work is to use a third-party social scheduling tool.
That way, you can let the Instagram scheduler handle publishing your posts for you.
When it comes to scheduling Instagram posts, the best option in the market is ClickSocial.
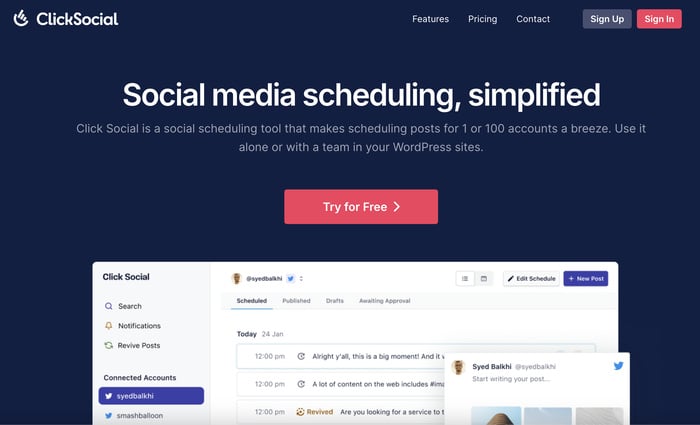
As the #1 social scheduling tool in the market, ClickSocial makes it super easy to schedule posts for Instagram.
You can do it in just minutes, even if you’re new to Instagram marketing. Better yet, this lets you schedule Instagram posts directly from your website.
To make Instagram scheduling super easy, it comes with tons of helpful features:
- In just a single click, you can schedule social media posts on the biggest platforms out there: Facebook, Instagram, and Twitter/X.
- You get a handy post calendar where you can track all your scheduled posts, published posts, and drafts.
- Since this tool integrates with WordPress, you can run revival campaigns that reuse evergreen content from your WordPress site and get tons of engagement and traffic.
- From the post composer, you can quickly draft your Instagram posts, attach photos, add videos, or link WordPress posts.
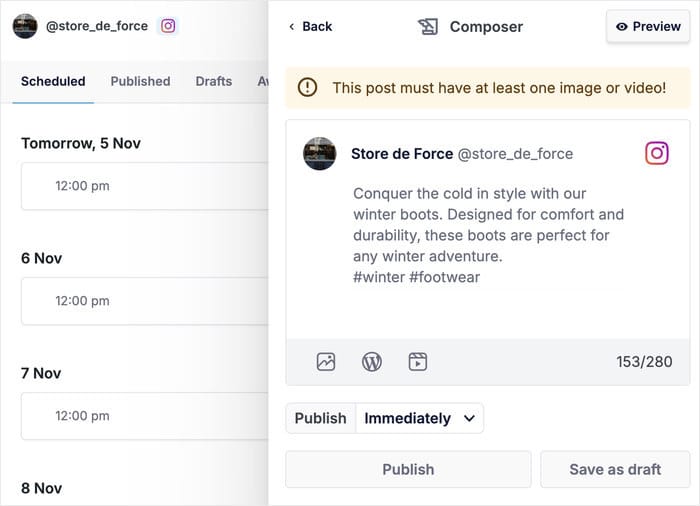
And that’s just the start! You get plenty of other features to get the most out of Instagram and level up your social media marketing.
Ready to schedule Instagram posts with ease? Get your copy of ClickSocial here!
To learn more, just check out our easy tutorial on scheduling Instagram posts below.
How to Schedule Your Instagram Posts (Easy Way)
We’re going to show you our fool-proof way of scheduling Instagram content. It’s super easy to do and only takes a few minutes, so check it out:
Step 1: Create a ClickSocial Account
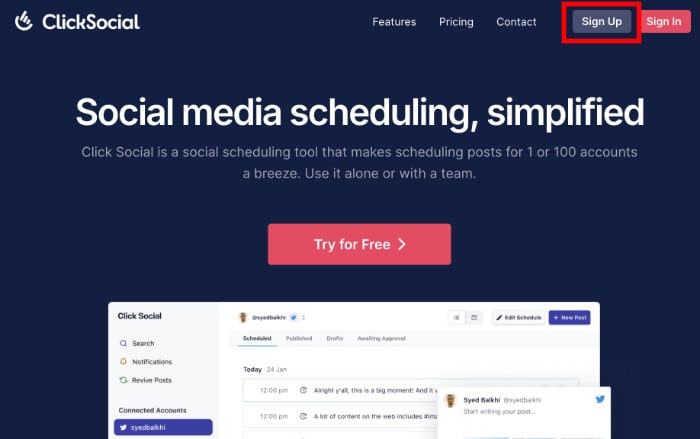
First, create a new account on the ClickSocial website here.
Just open the site and then click on the Sign Up button at the top to get started.
Once your account is ready, return to your site and open the Plugins » Add New Plugin menu from your dashboard.
You can now look for the “ClickSocial” plugin using the search bar at the top.
Now, you can use the search bar at the top to look for the “ClickSocial” plugin.
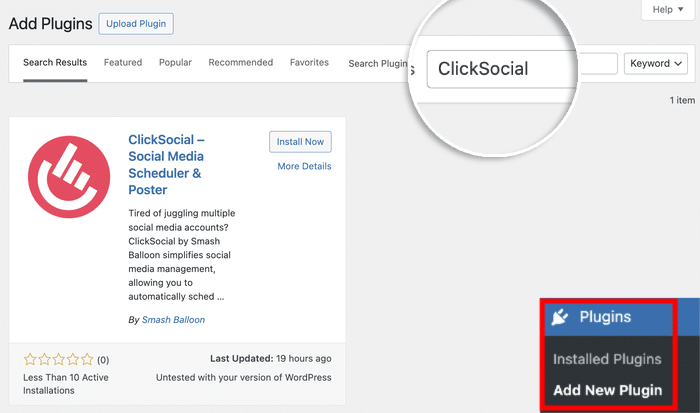
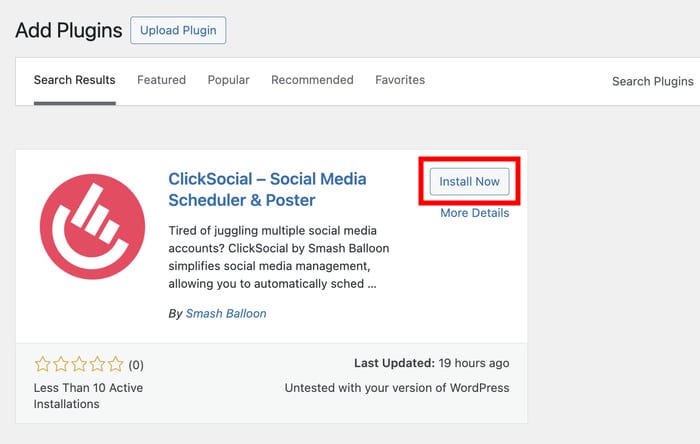
Doing that will show you the plugin in the search results below.
To proceed, click on the Install Now button.
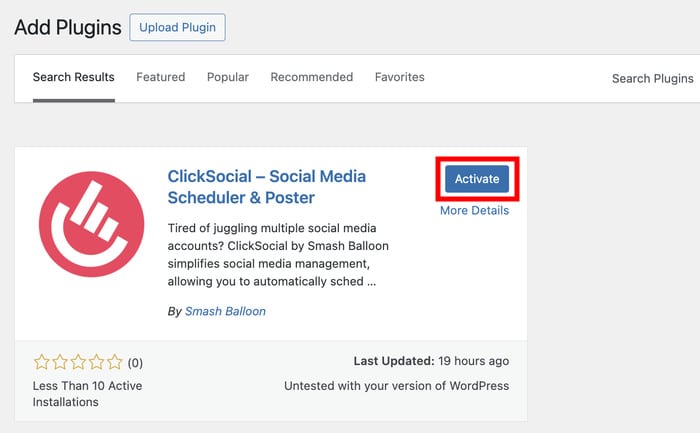
After waiting for the plugin to finish installing, click on the Activate button to turn the plugin on.
Step 2: Connect Your Website to ClickSocial
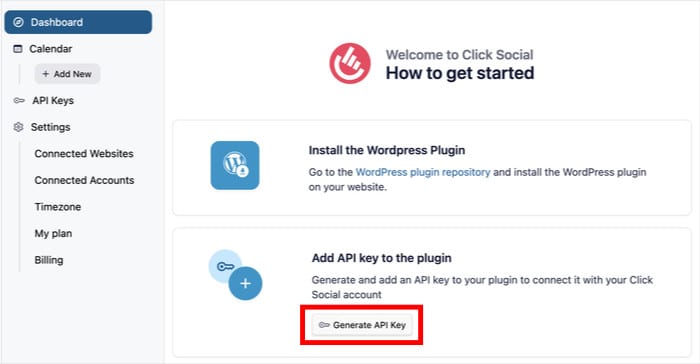
After you do that, return to the ClickSocial dashboard. From here, you can generate a unique API key for your website.
This key will let ClickSocial connect to your website, so remember to keep it safe.
To create his key, first, click on the Generate API Key button.
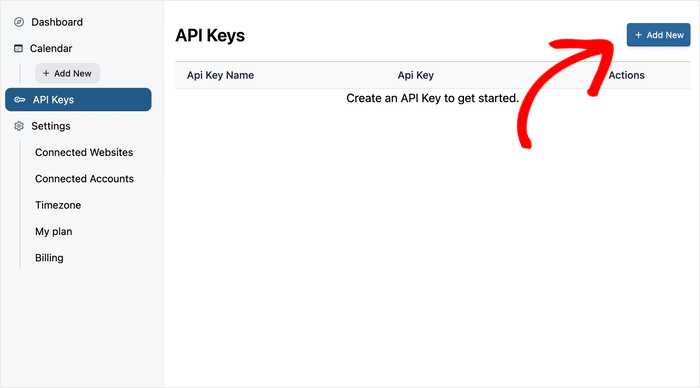
On this page, ClickSocial will show you all the API keys you create for different websites.
For now, click on the Add New button.
Doing that will open a popup where you can set a name or label for your website.
Just enter the name and click on Generate API Key.
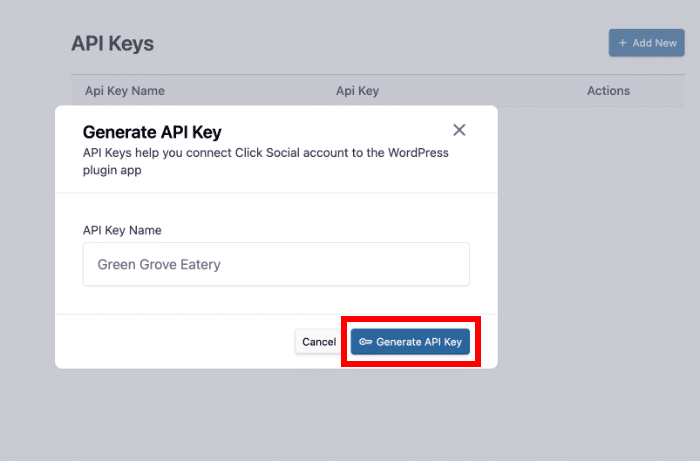
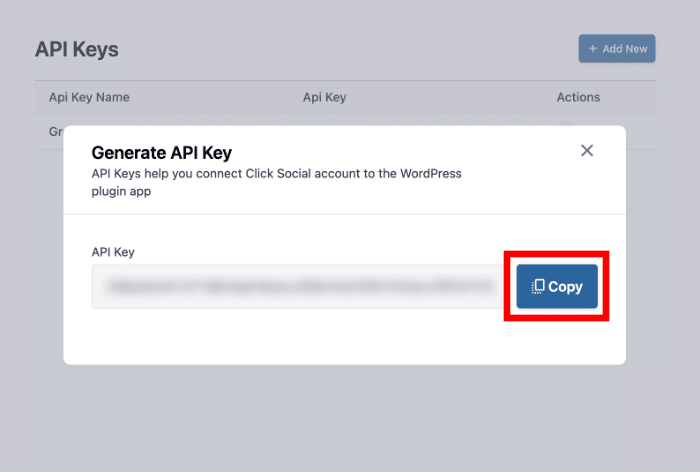
Just like that, an API key will be created for your website.
Now, Copy this key and return to your WordPress site once more.
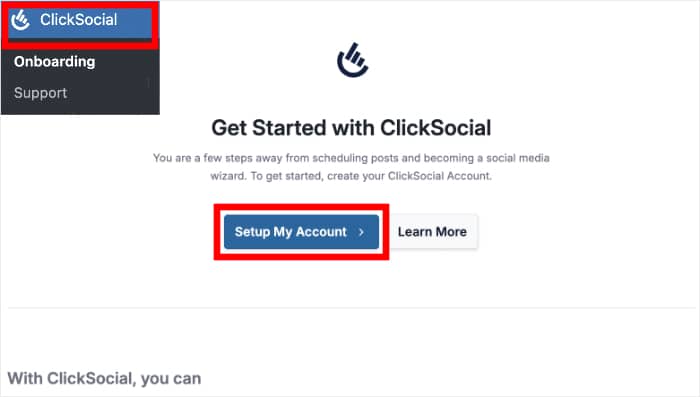
From your website’s dashboard area, click on the ClickSocial menu to continue.
On that page, simply hit the Setup My Account button to proceed.
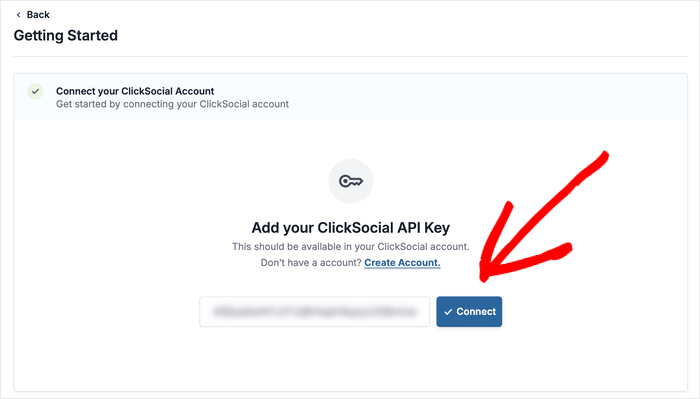
Finally, you can paste the API Key that you created earlier into the popup.
After that, click on Connect.
Step 3: Connect Your Instagram Account
Just like that, your site is connected to ClickSocial. In this step, you can connect your site to Instagram so you can start scheduling posts with ease.
Ready to get started? Just click on the Add Account button here.
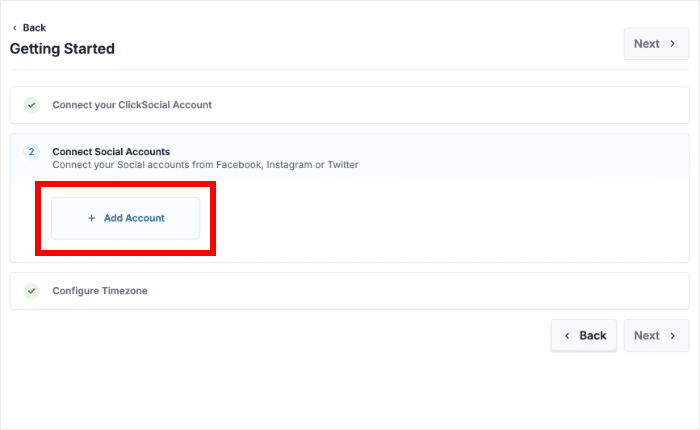
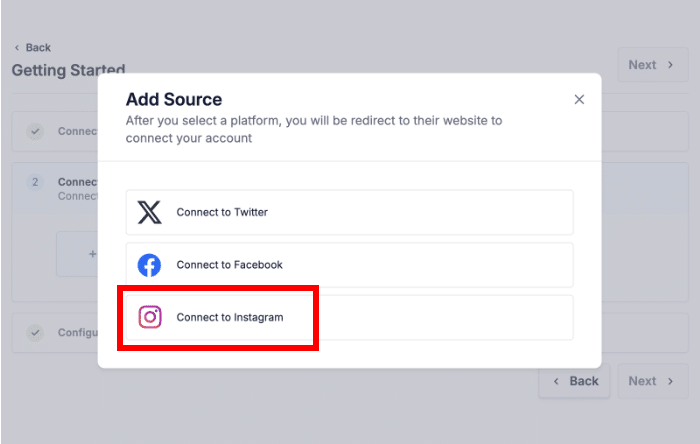
This opens a popup where you can choose from 3 of the biggest social media sites:
- Twitter/X
While ClickSocial supports any of these platforms, you can click on Connect to Instagram for now.
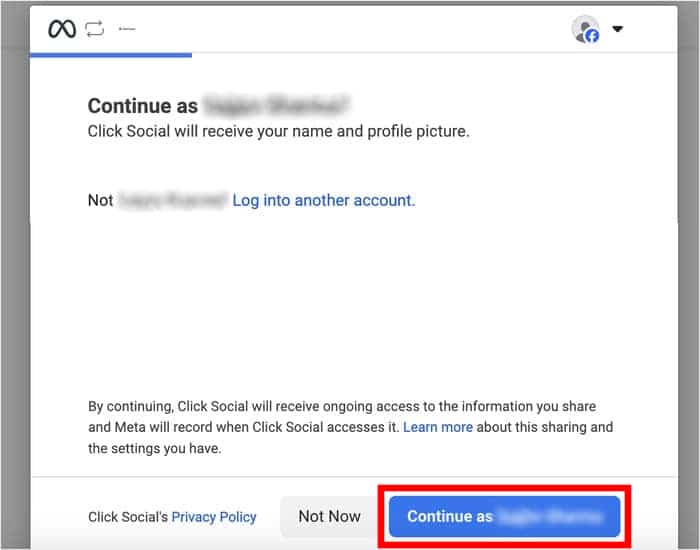
ClickSocial will redirect you to Facebook, where you can confirm your Instagram account and business. This is because Facebook handles post scheduling for Instagram accounts.
In case you haven’t connected your account to Facebook yet, here’s a quick guide that you can follow.
After that, you can select the account that you want to use and click on Continue.
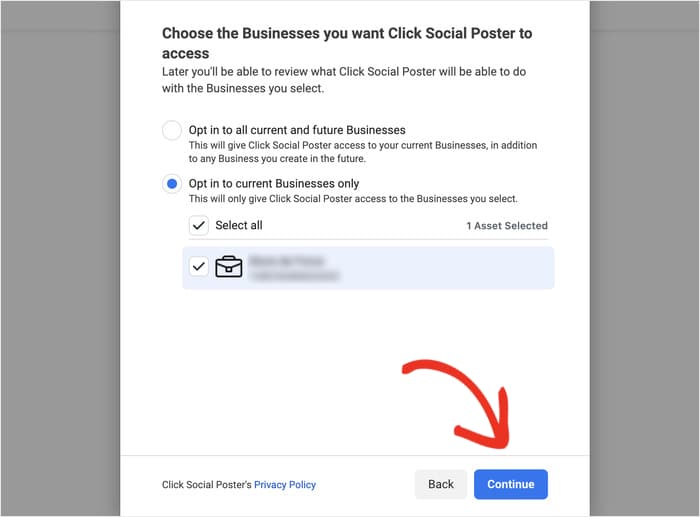
Once you do that, the popup will show you a list of businesses that you’ve connected to Instagram.
You can select an option and click on Continue.
After that, you’ll see a list of Facebook pages on your account.
Select the page that you’ve linked to Instagram and hit the Continue button.
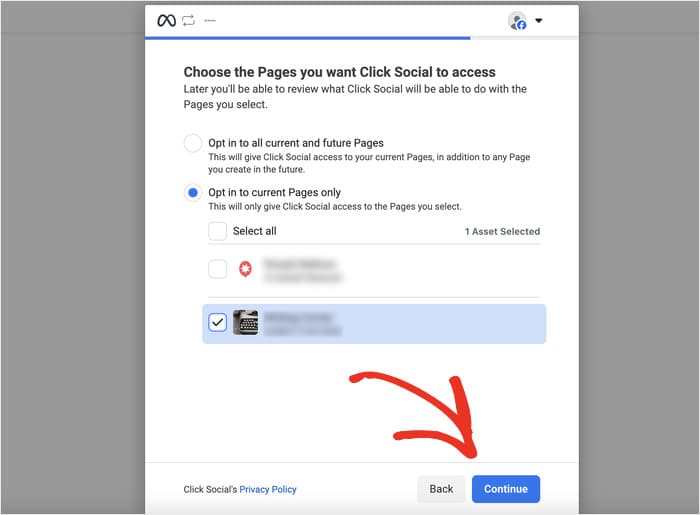
Finally, you’ll see all the Instagram accounts that you’ve connected to Facebook.
Similar to earlier, select the option you prefer and click on Continue.
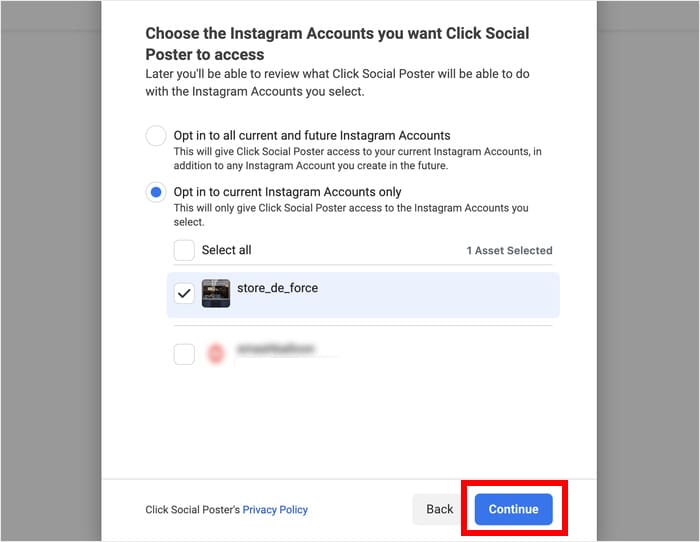
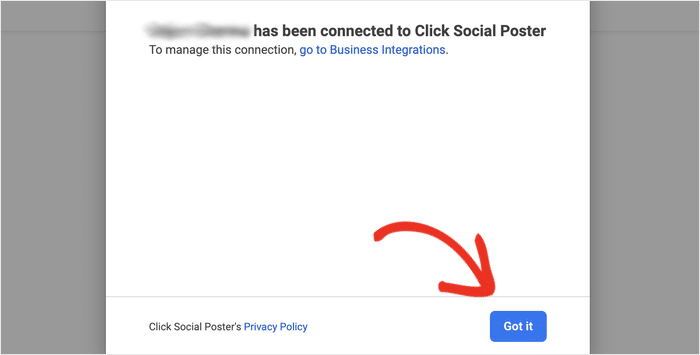
Then, ClickSocial will show you a list of permissions it needs to schedule posts for you. You can rest easy because ClickSocial respects your privacy and is 100% safe.
So, you can click on Got it to finish connect your site to Instagram.
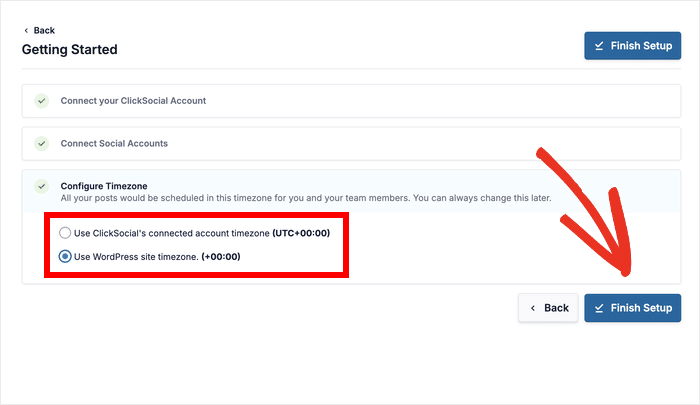
Before you continue, this social scheduling tool asks you to select a time zone from 2 options:
- Use ClickSocial’s connected account timezone
- Use WordPress site timezone
Select either of these options and you can click on Finish Setup.
Step 4: Set Up Your Post Calendar
You’ll then see a post calendar where you can track your scheduled and published Instagram posts. Plus, you can also use the tabs the top to look for drafts and posts that are awaiting approval.
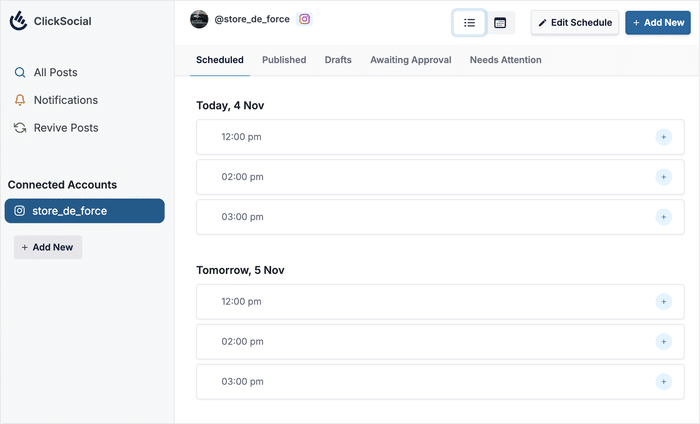
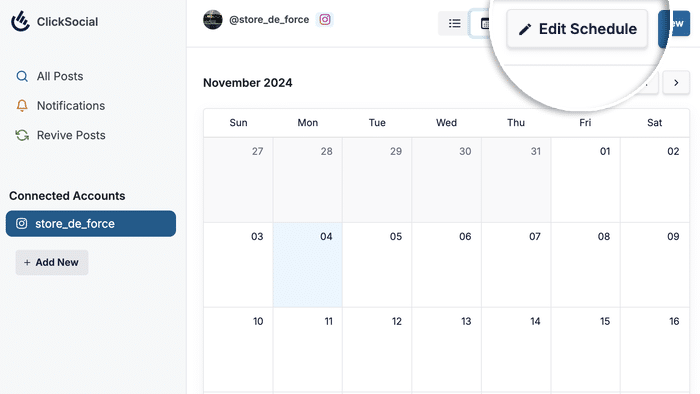
Before we start scheduling Instagram posts, I’ll show you how to change the time slots where you can publish your Instagram content.
You can start doing that by clicking on the Edit Schedule button.
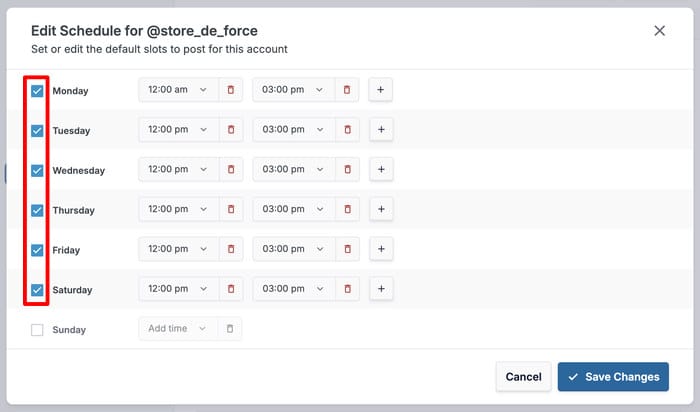
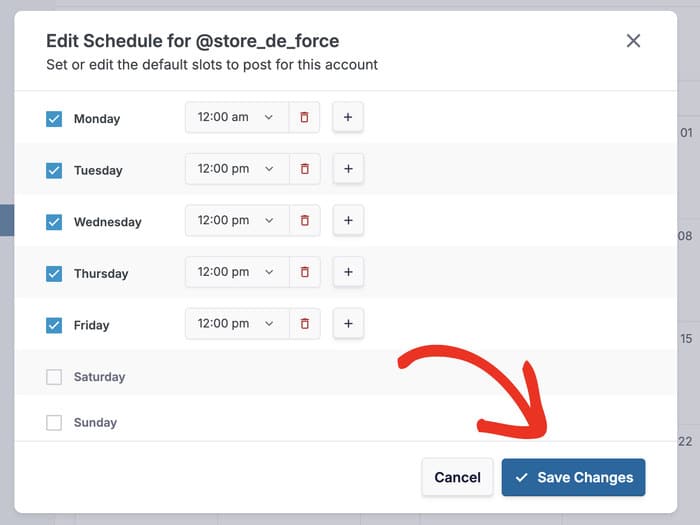
Next, you’ll see a popup with all the days and times where you can publish your Instagram posts.
First, use the checkboxes on the left to pick the days where you want to schedule content.
Now that you’ve selected the days, you can use the dropdown menu to change the time slots.
You can also delete slots by clicking on the red trash icon and add new slots using the plus (+) icon.
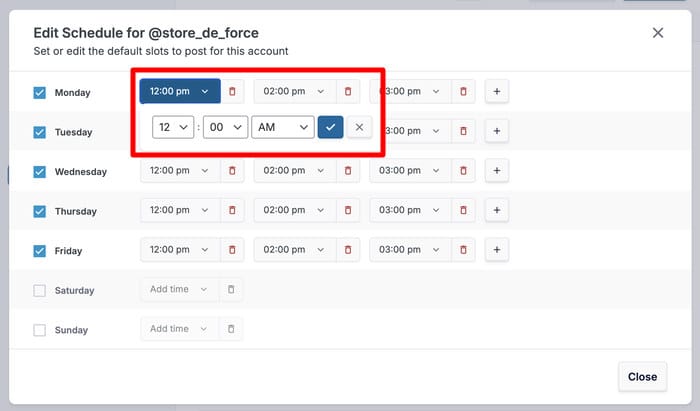
Just like that, you can choose the different days and times where you can schedule Instagram posts.
Finally, click on the Save Changes button to confirm your time and days.
Step 5: Schedule Your Instagram Post
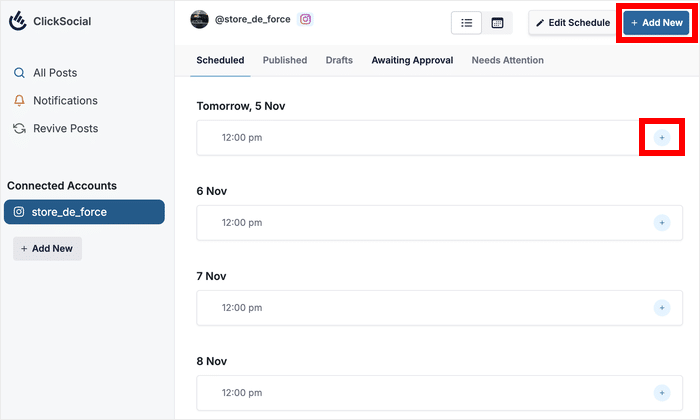
To start, you can click on the Add New button at the top.
Or, you can click on the plus (+) icon besides any of the time slots.
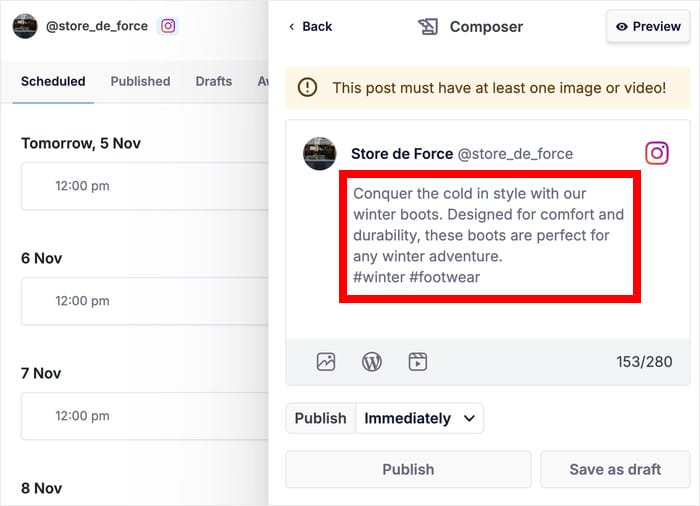
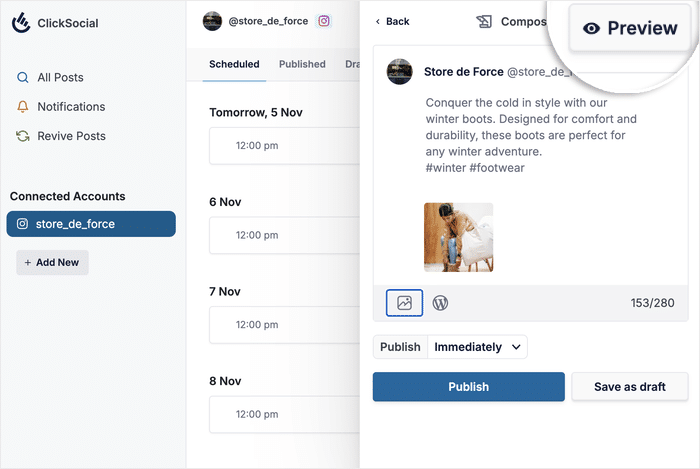
You’ll see the convenient post composer where you can draft Instagram posts and add media files as well.
To start, just write the caption for your Instagram post into the text box.
Next, you can use the icons below the post to add different types of content to your Instagram post:
- Photo
- WordPress
- Video
For example, I’ll add a photo from the media gallery to this Instagram post.
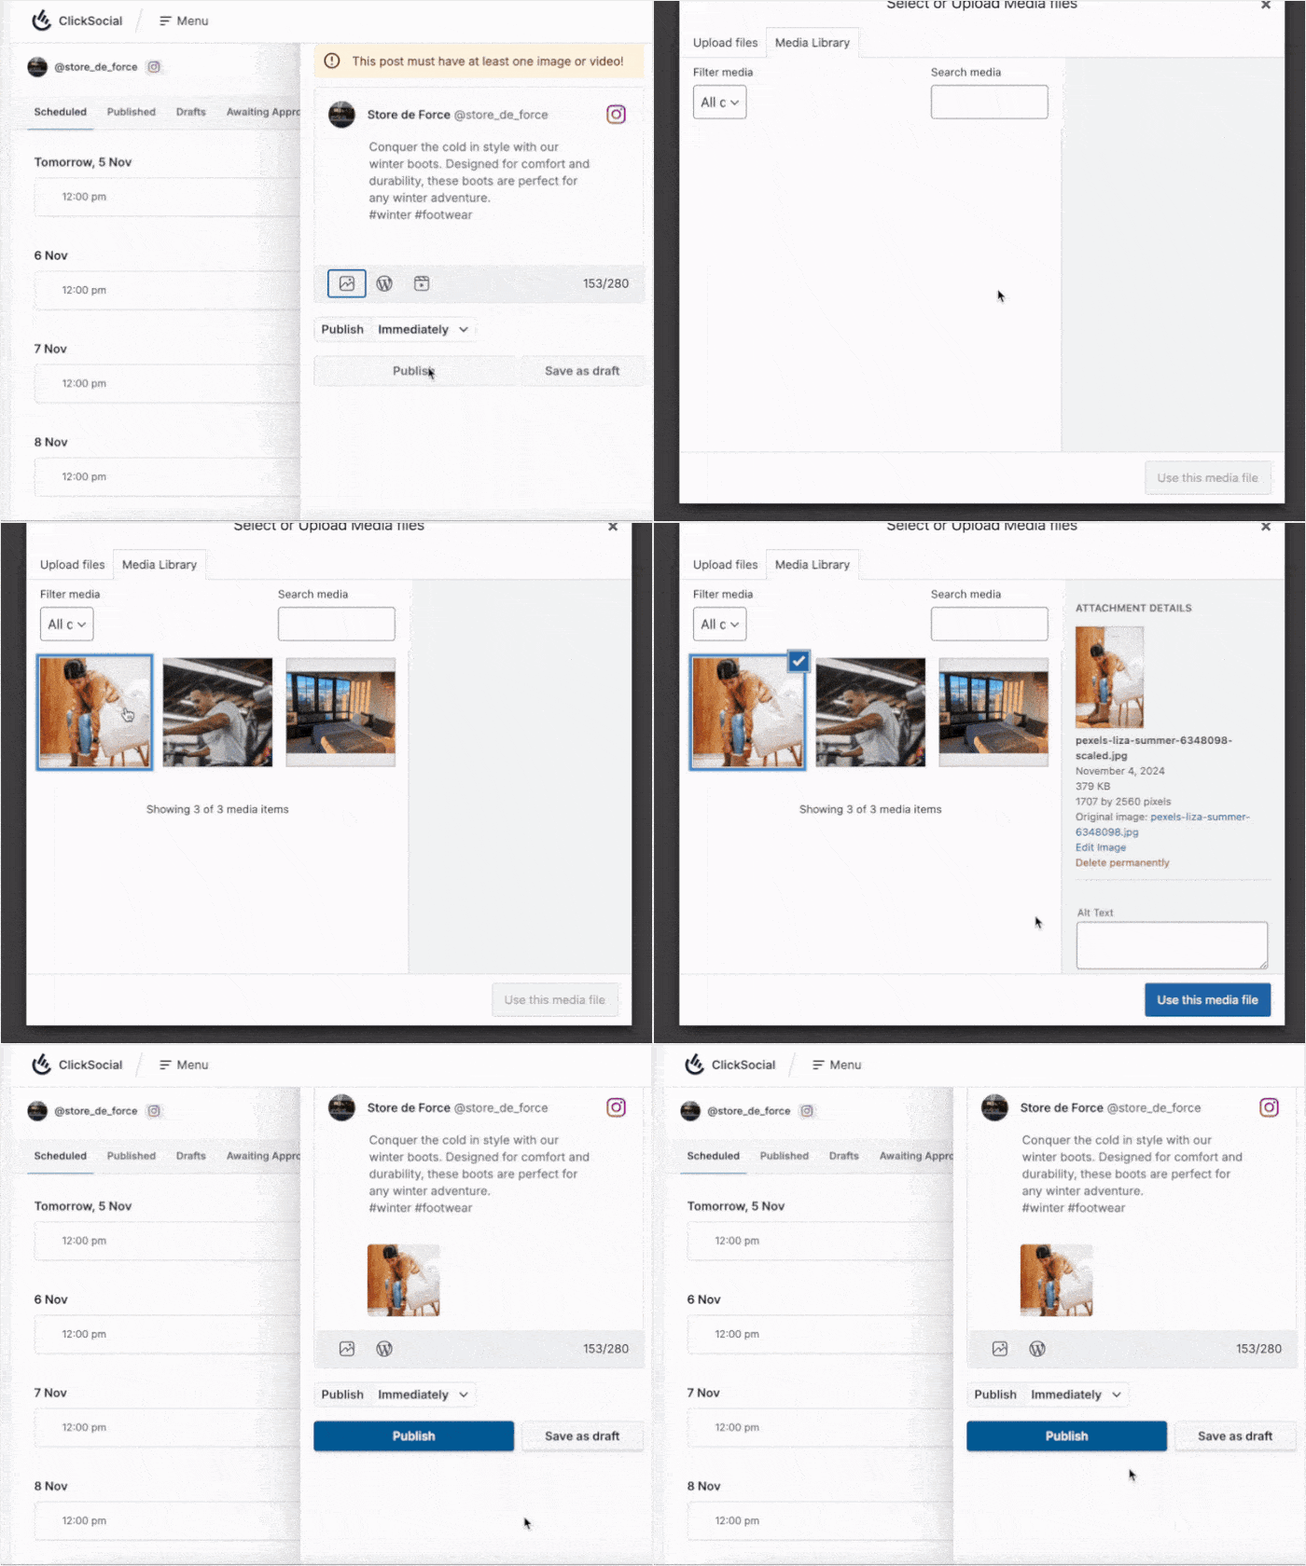
Just like that, you can attach videos or WordPress posts along with your Instagram caption.
To check how the post will look to your Instagram followers, you can click on the Preview button.
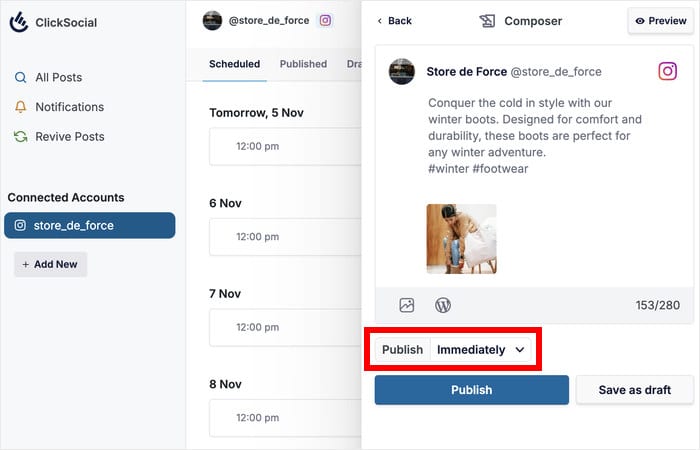
After you finalize your Instagram post, it’s time to go ahead and schedule it.
First, click on the dropdown menu to the right of the Publish option.
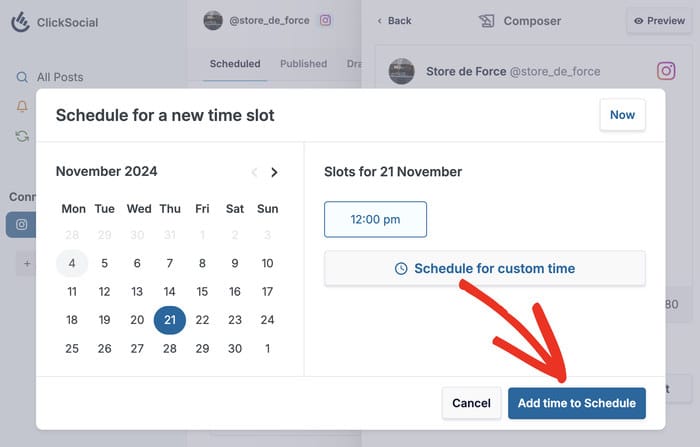
On the popup, you can use the calendar on the left to choose the day when you publish your Instagram post.
Then, you can pick from the available time slots on the right or Schedule for custom time.
Finally, click on the Time to Schedule button below.
With that, you’ve drafted your Instagram post, added media files, and selected the time slot – all from your website.
Finally, you can click on the Schedule Post button.
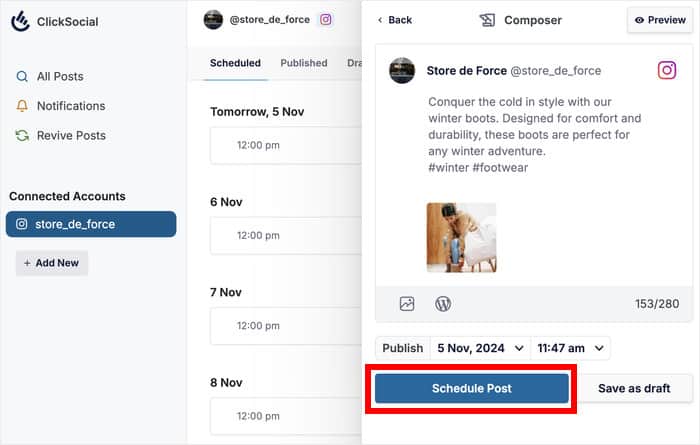
Once you click on that, this scheduling tool will handle the rest. You just need to wait for your scheduled time slot.
As you can see, ClickSocial makes it easier than ever to schedule Instagram posts and lets you completely sidestep all the common issues.
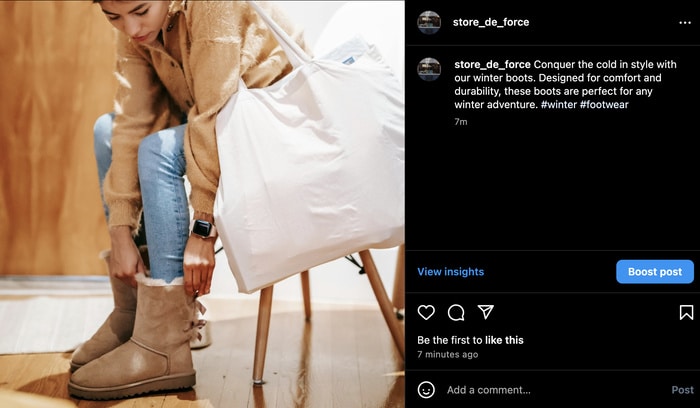
And there you go!
If your scheduled Instagram posts are not working, you can simply try these steps so your Instagram posts reach your followers at the right time.
When it comes to scheduling social media posts, ClickSocial is easily the best option in the market. With it, scheduling your Instagram content is super easy and only takes minutes.
Sign up for ClickSocial here and start scheduling your Instagram posts with ease.
Want to get more sales using Instagram? We’ve got a handy guide on how to set up Instagram shopping.
More Social Media Marketing Tutorials and Hacks
- How to Schedule a Facebook Post Easily (Step-by-Step Guide)
- YouTube Shorts vs TikTok: Which Is the Best For You?
- How to Auto Share WordPress Posts on Instagram (5 Easy Steps)
- Best YouTube Plugins to Increase Your Subscribers Right Now
- How to Embed Your Instagram on Your Website (Easiest Way)
