Want to add Google reviews widget to your website?
Since so many people trust Google for business reviews, embedding them on your website can be a simple way to grow your business.
But manually embedding Google reviews can get expensive as well as time-consuming. Plus, you’ll have to deal with a lot of code.
Instead, you can just follow our guide, and we’ll show you the simplest way to embed Google reviews — no need for HTML, CSS, Javascript, or any kind of code.
But first, let’s see how displaying a Google reviews widget can help your business grow.
Or you can click here and skip directly to the tutorial.
Why Embed Google Reviews Widget for Your Website
Did you know that 54.7% of customers check 4 or more reviews before buying something online?
Since so many people turn to Google when searching for reviews, embedding them on your website can be a great way to convince potential customers to buy from you.
By embedding a Google reviews widget on your website, you’re showing visitors that real people out there are happily using your products.

These reviews can work as social proof, which can convert your website visitors into paying customers.
On top of that, showing the latest reviews on your site can show visitors that your website is regularly updated.
Plus, search engines like Google love fresh content like new reviews and will help boost your site’s SEO.
Now you know how a Google reviews widget can help your business. With that, let’s look at the ways to embed a Google reviews widget.
Ways to Get a Google Reviews Widget in WordPress
Want to display a Google reviews widget on your website? You have 2 options to choose from:
- Manual way: Purchase access to the Google Places API, fetch the Google reviews with coding, and then display them on your WordPress site.
- Easy way: Automatically display Google reviews on your website using a WordPress plugin.
If you’re not familiar with coding already, using the manual method can be challenging as well as time-consuming.
What’s more, you’ll have to edit the code yourself or hire a developer to change how the Google reviews widget looks.
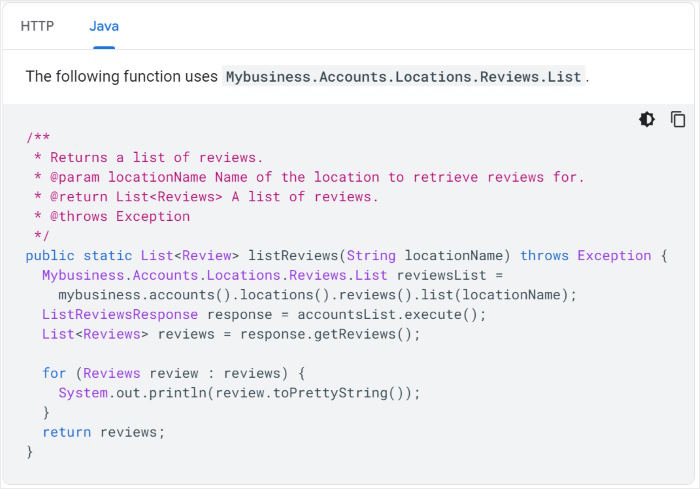
Embedding the widget manually also means you won’t have a support team to turn to for help if something goes wrong.
For an easier way, you can simply use a reviews aggregator plugin like Reviews Feed Pro.

As the fastest-growing reviews aggregator out there, Reviews Feed Pro can help you engage visitors and boost conversions with ease.
In just a few clicks, you can create widgets to showcase reviews from Google, along with other top platforms like Yelp, Tripadvisor, and Facebook.
A huge benefit of the plugin is that you get total control over the reviews that show up on your widgets.
You can filter reviews by rating, hide reviews with banned words, only show reviews specific reviews, and much more.
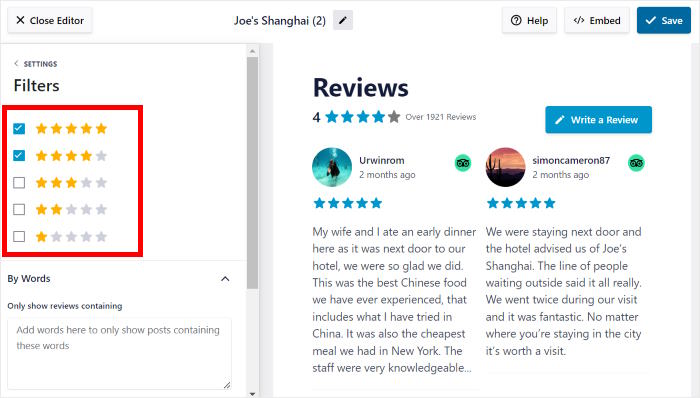
With these powerful filters and moderation options, you can show high-quality reviews and hide the reviews made by trolls and spam bots.
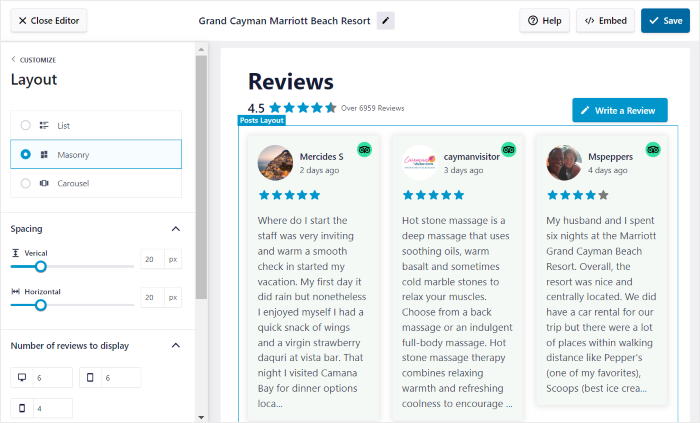
To make customization easy, the Reviews Feed Pro plugin comes with a visual customizer that you can use.
In a few simple clicks, you can freely change your widget’s layout, template, header design, button design, and much more.
Once you’re happy with your Google reviews widget, you can quickly embed it on your website using a WordPress block – absolutely no coding needed.
Want to embed Google review widgets with ease? Get your copy of Reviews Feed Pro here.
With that, let’s get started with our tutorial so you can use the plugin to create your Google widget.
How to Add Google Reviews Widget to Your Website
If you’re ready to add a Google reviews widget to your site, just follow our step-by-step guide below.
Let’s get started!
Step 1: Install and Activate Reviews Feed Pro
The first step is to get Reviews Feed Pro, the best reviews aggregator plugin out there. Next, install and activate the plugin on your website.
If you need help with that, you can check out our guide on how to install plugins in WordPress.
After you’ve installed and activated Reviews Feed Pro, you can create your widget in step 2.
Step 2: Create a Google Reviews Widget
Once your plugin is ready, you can follow the guided flow to create your new widget.
First, open the Reviews Feed » All Feeds menu from your dashboard and then click on Add New.
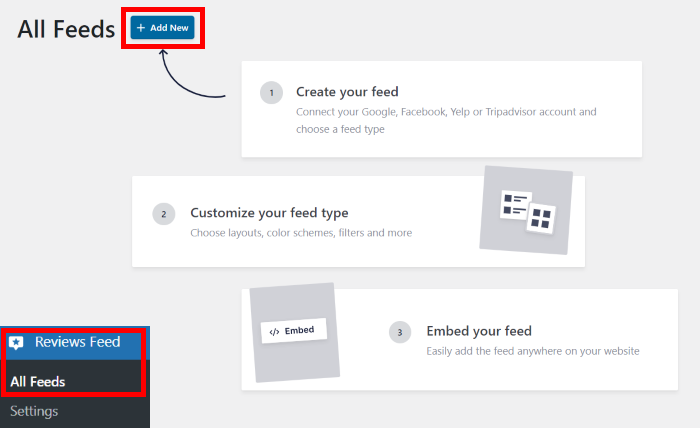
After you do that, the plugin will ask which review platforms you’d like to use for your reviews widget.
On top of Google, you can use the plugin to embed Facebook reviews, Tripadvisor reviews, as well as Yelp reviews.
Since we’re creating a Google reviews widget, select the Google option and then click on Next.
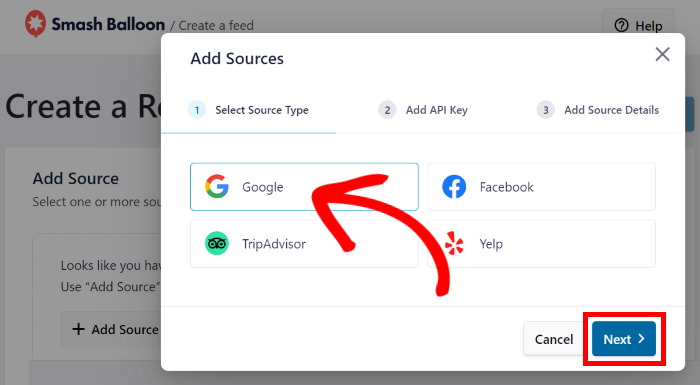
With that, you now have a new Google reviews widget for your website. If you move on to step 3 below, you can connect this widget to Google and start embedding online reviews.
Step 3: Connect Your Widget to Google
Using Reviews Feed Pro, it can be super easy to connect your reviews widget to Google.
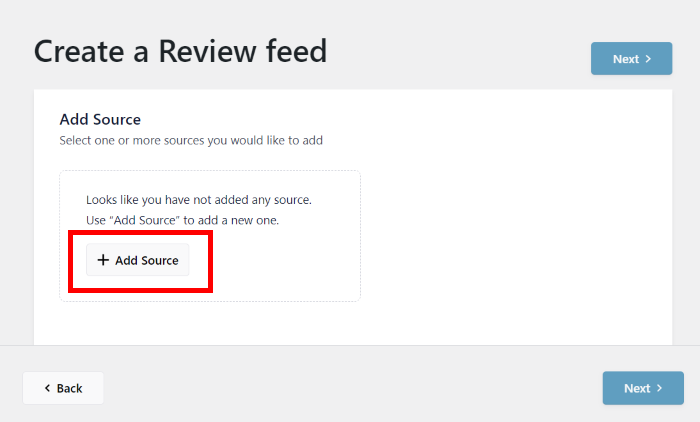
To get started, click on the Add Source button.
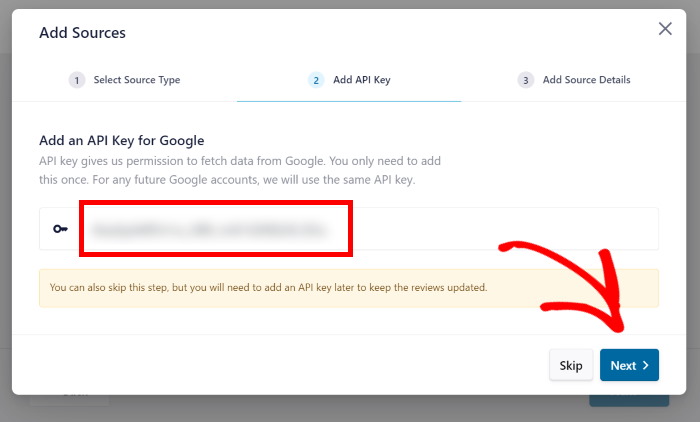
Optionally, you can enter the Google API so the plugin can keep your reviews widget up-to-date.
Plus, the plugin will automatically use the key for all the new Google widgets you create so you can display the latest reviews on your site.
If you don’t have your API key yet, we’ve got a guide on creating an API key from your Google account.
Once you have the key, paste it on the popup and then click on Next.
Or, you can click on Skip if you want to create your reviews widget without using the Google API key.
After that, you can select which business to show using your Google reviews widget. You can do this by entering the Place ID of that Google business page.
Don’t know your Place ID yet? You can create one in just seconds.
First, navigate to the official Place ID generator and scroll down until you see a Google map.
Here, enter the name and location of a business in the search bar at the top.
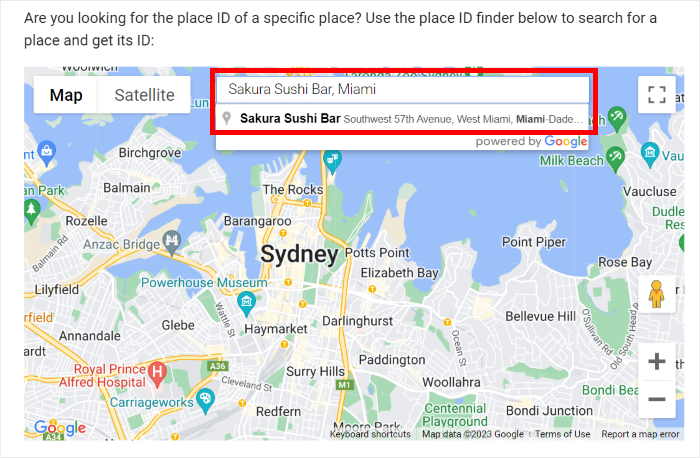
From the drop-down list, select the business whose reviews you’d like to embed.
Once you do that, Google will show you the Place ID of that specific business profile.
Just look for the Place ID field on the map and then copy the code beside it.
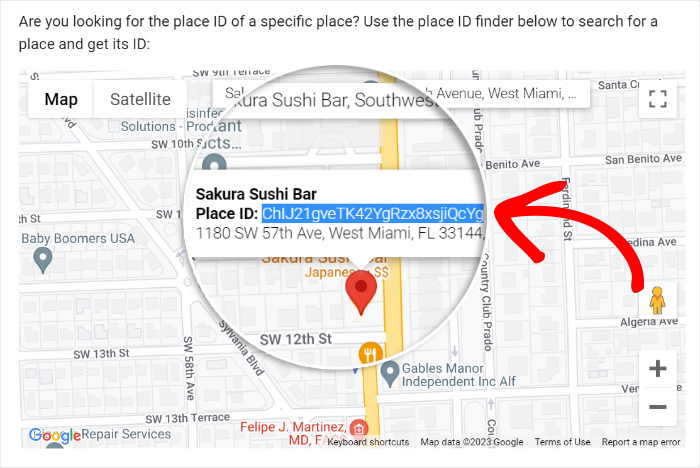
After you do that, return to your website so you can finish entering your Google widget’s source.
For that, paste the code from earlier into the Place ID field before clicking on the Finish button below.
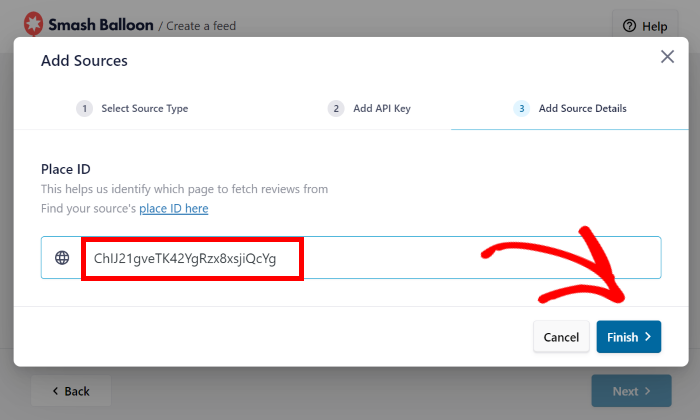
Just like that, you’ve connected your new reviews widget to Google and added a source. Now, you can reuse this source whenever you create new widgets using this plugin.
From here, select your new source and click on the Next button to proceed.
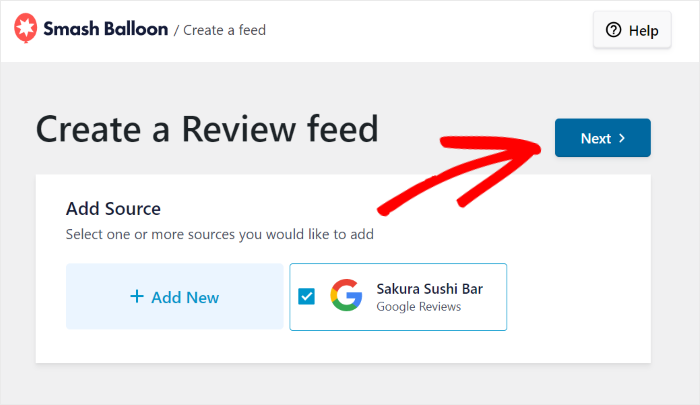
Your Google widget will now automatically copy your WordPress website’s design, so your reviews look beautiful right out of the box.
Before embedding your widget, you can use the plugin’s customization options to control how the reviews appear on your site.
Step 4: Customize Your Google Reviews
To make it easy to create unique Google widgets, the plugin will allow you to import a pre-designed template. Here are the templates that you get to choose from:
- Default
- Simple cards
- Masonry
- Single review
- Showcase carousel
- Carousel
- Grid carousel
All you have to do is select a template here and click on Next.
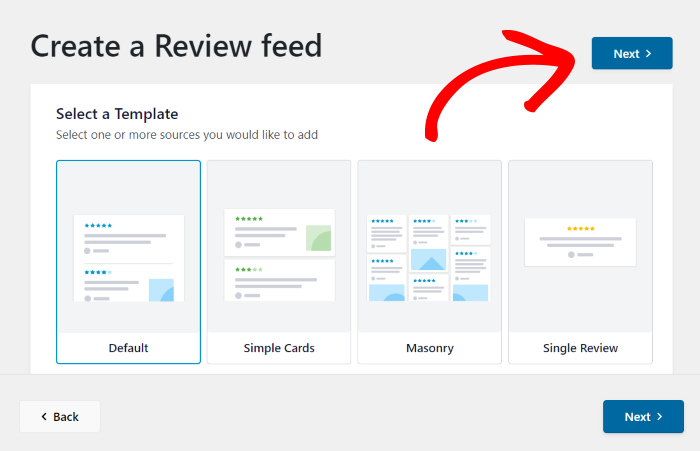
Your widget will then instantly copy that template’s design as well. Next, you can customize your new Google reviews widget in detail using the visual customizer.
With the help of the customization panel on the left, you can quickly change your layout, header design, review elements, load more reviews button, and a lot more.
You can even open your widget’s settings and control which customer reviews will be visible on your website.
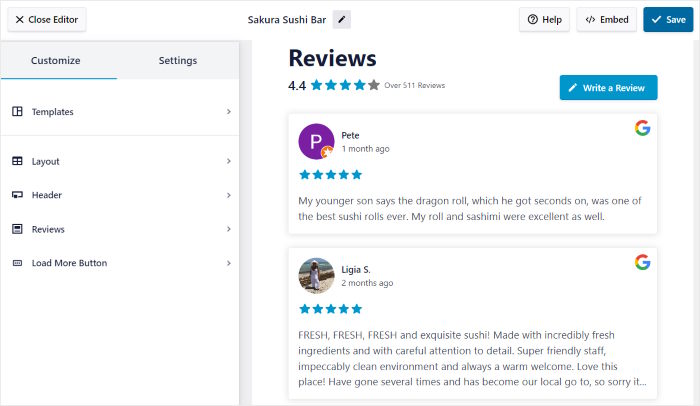
Whenever you make any changes, the live preview on the right will show you how your widget looks in real time.
Ready to change the design of your Google reviews widget? Click on the Layout option on the left.
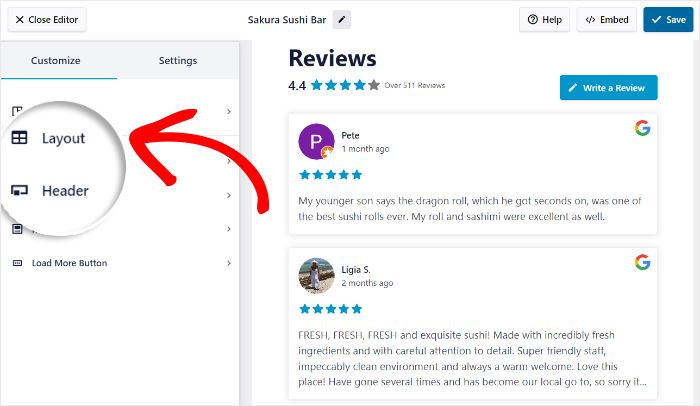
By changing the layout, you can choose how the reviews will be embedded on your WordPress site. You have 3 widget layouts to pick from here:
- List: Show your reviews in a single column, so each review is clearly visible on your site
- Masonry: Embed tons of reviews at once using a Google widget with multiple columns
- Carousel: Engage your visitors by showing Google reviews in a beautiful slideshow
After selecting a layout on the left, click on the Save button.
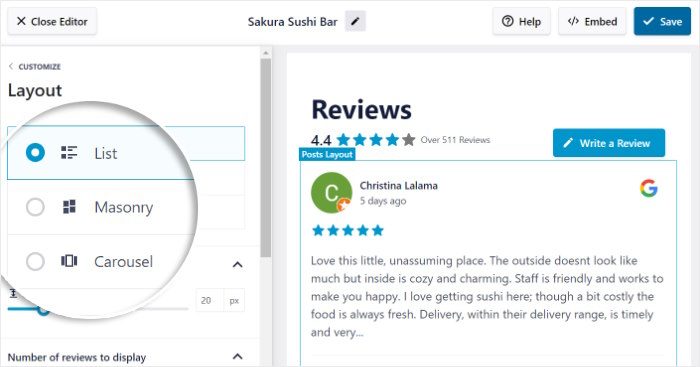
To continue editing your widget, you can use the live preview on the right and directly click on the section that you’d like to customize.
Or, you can return to the main customization options by clicking on the Customize button.
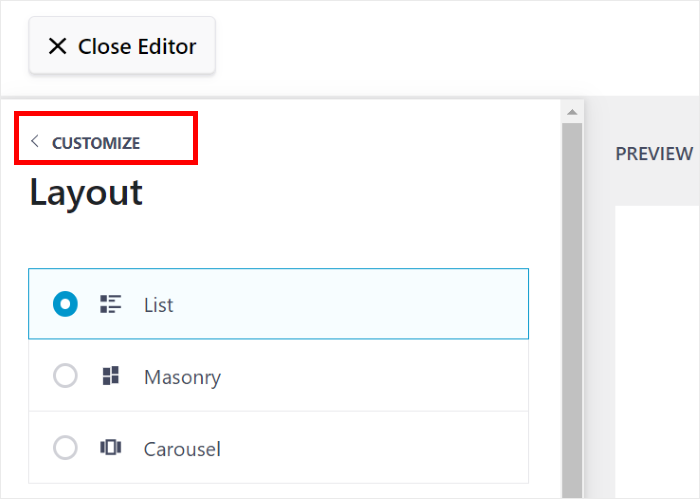
Using the remaining customization options, you can easily change the design of your widget’s header, buttons, review elements, and more. Like before, click on Save if you want to confirm your changes.
With the Reviews Feed Pro plugin, you can even choose which Google reviews you’d like to embed on your site.
Just click on the Settings tab at the top and then select the Filters option.
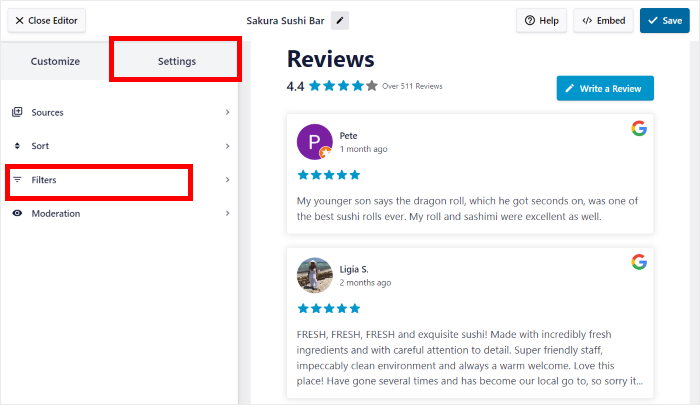
From here, you can choose to show Google reviews with specific star ratings. That way, your Google widget can showcase high-quality positive reviews and help you convert visitors easily.
To continue, use the panel on the left to select the star ratings that you’d like to show.
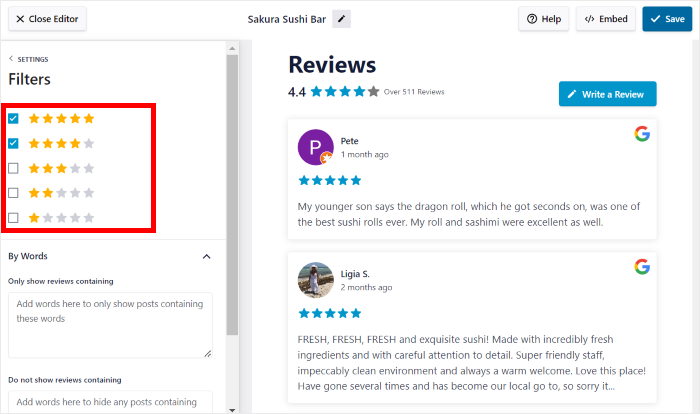
Once you’ve selected your filters, click on Save to update your Google reviews widget. The widget will then show star reviews with your chosen rating.
Using the remaining options, you can also filter reviews based on certain terms or manually choose to hide or show certain reviews. Remember to click on Save at the end to confirm your changes.
Finally, it’s time for step 5, where you embed your new Google reviews widget in your WordPress site.
Step 5: Embed Google Reviews Widget on Your Website
Now that you created your reviews widget, connected it to Google, and customized how it looks, it’s time for the final step.
Here, you can choose between 2 ways of embedding your Google reviews widget.
- Embed Google reviews on a web page
- Embed Google reviews on the sidebar or footer
We’ll take a look at both of these methods below.
Embed Google Reviews Widget on a Web Page
To help you embed your Google reviews widget with ease, you can get started directly from the visual customizer.
From the editor, first, click on the Embed button at the top.
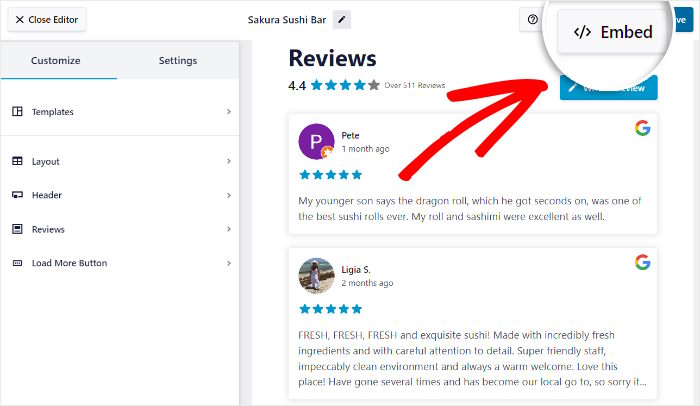
After you do that, the plugin will open a popup with all the ways you can embed your Google reviews widget.
You can choose to display the widget on a page, show it on the sidebar or footer, or even copy the shortcode manually.
This time, click on the Add to a Page button to continue.
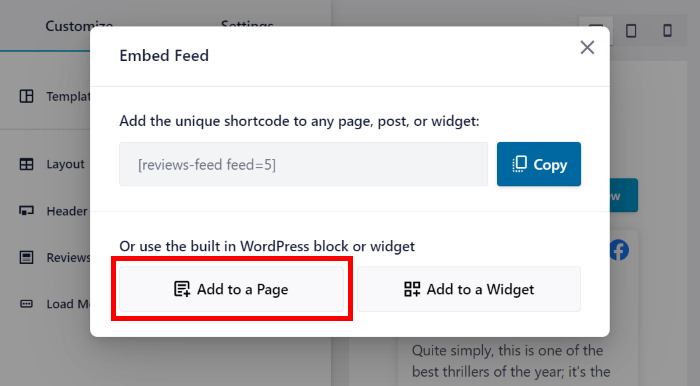
Next, the popup will show you a list of all the webpages on your WordPress site.
Just select a page where you want to show the widget and then click on the Add button below.
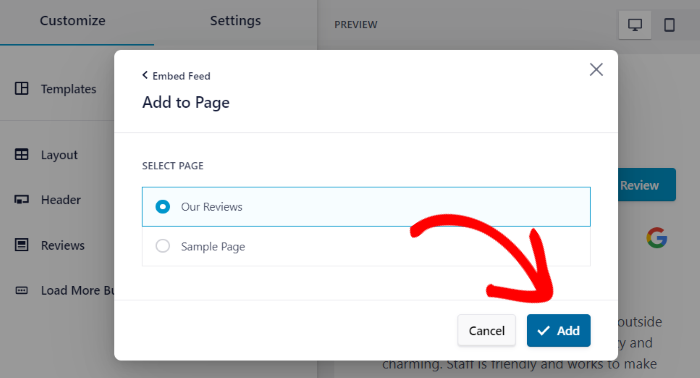
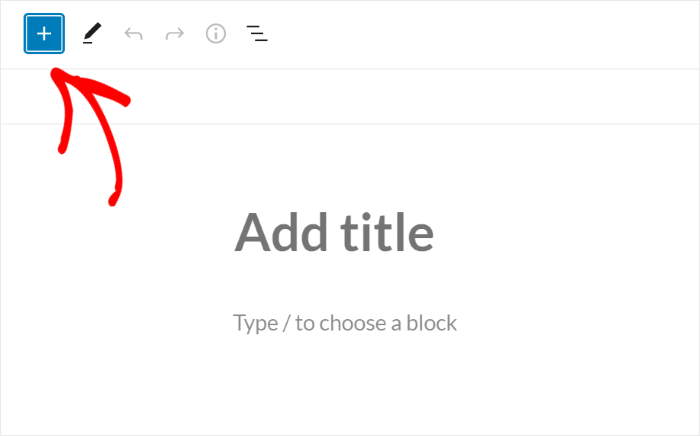
Doing that will send you to the WordPress block editor, where you can embed your widget.
To do that, first, click on the plus (+) icon to add a new WordPress block.
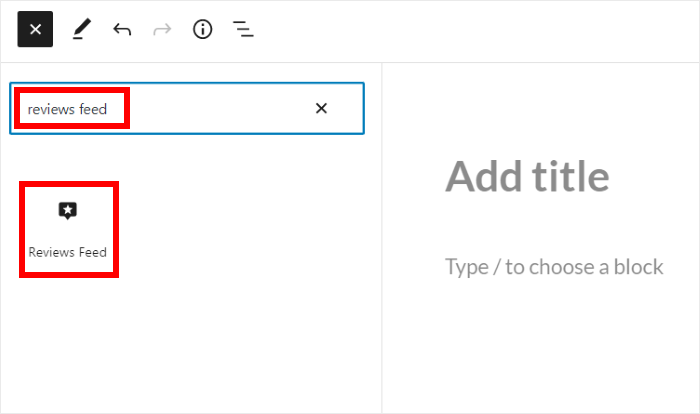
Now, use the search bar at the top to look for the “reviews feed” block.
After you do that, click on the Reviews Feed block from the search results below.
Finally, click on Update, and the Google reviews widget will be added to your WordPress site.
If you open your web page now, you can see how your new Google reviews widget looks.

As you can see, Reviews Feed Pro makes it simple to embed your Google widget — even if you’re a WordPress beginner.
Next, let’s look at another way to embed Google reviews on your site.
Embed Google Reviews Widget on the Sidebar or Footer
Another way you can embed your Google reviews widget is to show them on your sidebar or footer as a social media review widget.
Like the previous method, you can do this from the visual customizer.
To open your widget in the customizer once more, navigate to the Reviews Feed » All Feeds menu from your dashboard.
From there, click on the reviews widget that you want to embed.
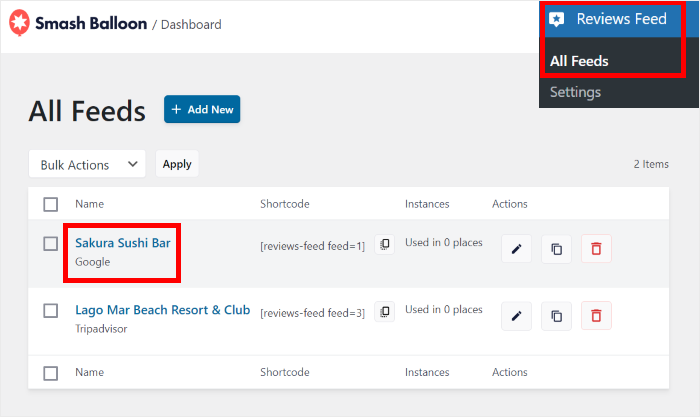
Clicking on that will open the widget in the visual customizer once more. Just like earlier, click on the Embed button here to continue.

Reviews Feed Pro will then show a popup with all the ways you can embed your Google reviews widget.
To continue, you can click on the Add to a Widget button.
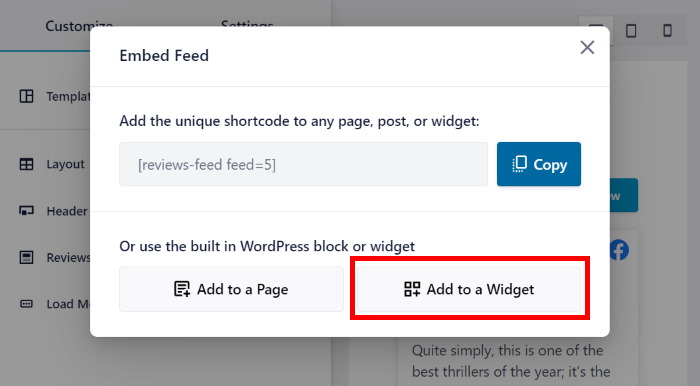
Once you do that, it will redirect you to your website’s Widget page so you can embed your Google reviews widget.
To show the reviews widget on the sidebar, click on the Sidebar panel.
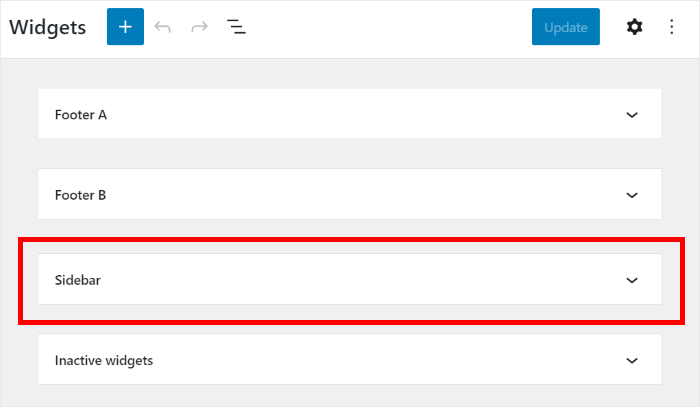
We’ll also use the website sidebar for our example.
Want to show Google reviews on your footer instead? Click on the Footer panel here in that case.
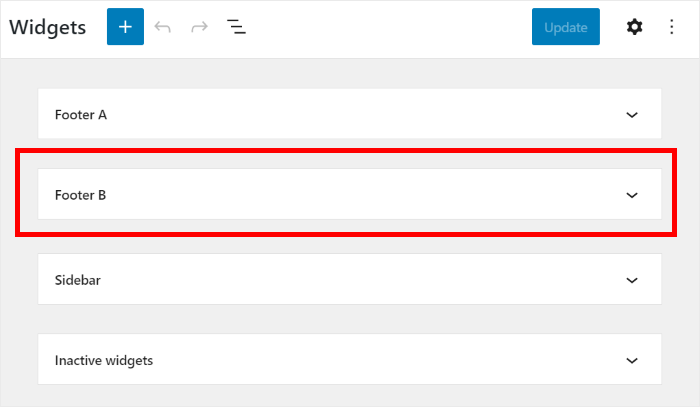
Now that you’ve chosen where to display the Google reviews widget, click on the plus icon (+) below.
Next, click on the Reviews Feed widget from the options.
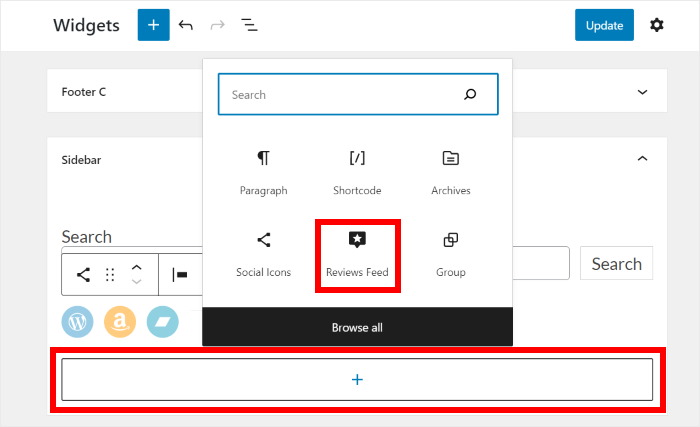
Finally, you can save your new widget by clicking on the Update button
Just like that, anyone visiting your website will be able to see your Google reviews widget. You can just open your website now if you want to see how it looks.

And there you have it!
Just follow these steps, and you can have a beautiful Google reviews widget to boost your conversions, grow your sales, and create a great impression of your brand,
On top of Google widgets, you can use the Reviews Feed Pro plugin to embed content from the biggest review platforms out there.
Want to build your Google reviews widget? Get Reviews Feed Pro for your site today!
While you’re here, you can check out our list of proven testimonial designs that you can copy for your website.
Don’t forget to follow us on Facebook and Twitter for more social media marketing tips and tricks.


