Want to learn how to add testimonial sliders in Elementor?
As a popular page builder, lots of people are using Elementor to create websites to promote their business online.
If you want to get more sales on your Elementor site, you can just display a testimonial slider of your products.
But adding testimonials to WordPress can be challenging – especially if you’re not used to coding.
The solution? We’ll show you the easiest way to embed an Elementor testimonial slider.
Before that, let’s look at all the ways adding testimonial sliders to Elementor can help your brand.
Or you can click here to skip directly to the tutorial.
Why Add a Testimonial Slider to Your Elementor Website
Elementor is a popular website-building solution for people who want to promote their brand online without dealing with code.
But if you want to convert even more visitors into customers, you can simply display positive testimonials and reviews of your products.

That way, anyone visiting your site can see that real people are happily using your products.
As a result, you can have social proof on your site to convince visitors to give your brand a chance.
What’s more, displaying user-generated content (UGC) like testimonials is a great way to show that you listen to your customers.
So, people will be more likely to reach out to you or even share their opinions using testimonials and reviews.
Easiest Way to Add a Testimonial Slider to Your Elementor Site
If you want to create a testimonial slider in WordPress without plugins, you’ll need to deal with lots of embed codes and even purchase access to API.
As a result, this can be complicated and time-consuming – especially if you’re not used to dealing with code.
For the simplest way to display online testimonials on your website, you can use a reviews aggregator plugin.
And the best option in the market that you can use is Reviews Feed Pro.

Reviews Feed Pro lets you easily display testimonials and reviews from highly-trusted platforms on the internet: Google Reviews, Facebook, Yelp, and Tripadvisor.
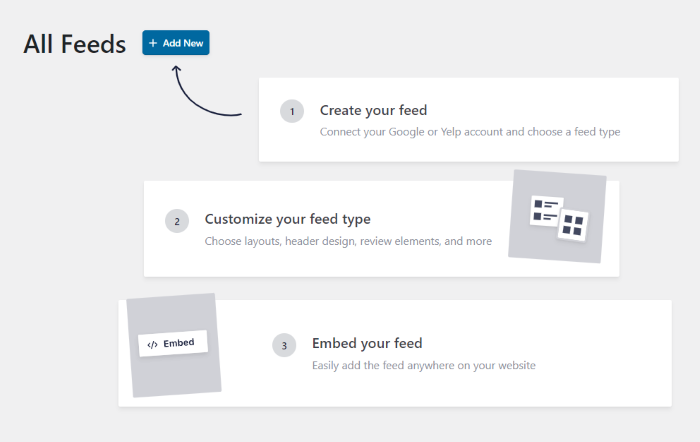
Simply follow the plugin’s 3-step guided flow, and it’ll take you through the process of creating, customizing, and embedding feeds of online testimonials – no coding needed!
The best part? You get total control over your Elementor testimonial feeds.
For one, you can import a template or use the visual customizer to quickly personalize your testimonials in a few clicks.
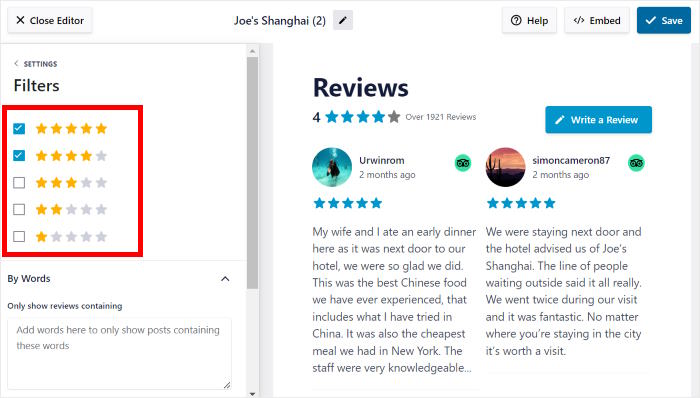
On top of that, you can also add filters and moderate your feed to choose which testimonials will show up.
As a result, you can showcase high-quality testimonials that can convert more people into paying customers.
What’s more, the plugin comes with a team of WordPress experts who are always ready to lend you a hand.
If you have any questions or need help, just reach out to the dedicated support team.
All in all, Reviews Feed Pro is the best testimonial slider plugin for WordPress and a great addition to your Elementor business website.
Ready to add testimonials to your Elementor site? Grab your copy of Reviews Feed Pro here!
With that, let’s get started with our tutorial below.
How to Add Testimonial Sliders in Elementor (Step-by-Step)
All you have to do is follow the simple steps below, and you can start boosting your sales with testimonials.
Step 1: Install and Activate the Reviews Feed Pro Plugin
The first step is to get your copy of the Reviews Feed Pro plugin here and download it to your computer.
Next, you can simply install and activate the plugin on your Elementor website.
For more information on how to do this, all you have to do is follow the step-by-step guide on how to install WordPress plugins.
You can then move on to step 2 and create a feed for your testimonials.
Step 2: Create a New Testimonial Feed
From the plugin’s guided flow, you’ll have an easy time creating a new testimonial feed for your Elementor website.
First, open the Reviews Feed » All Feeds menu from your dashboard and then click on Add New.
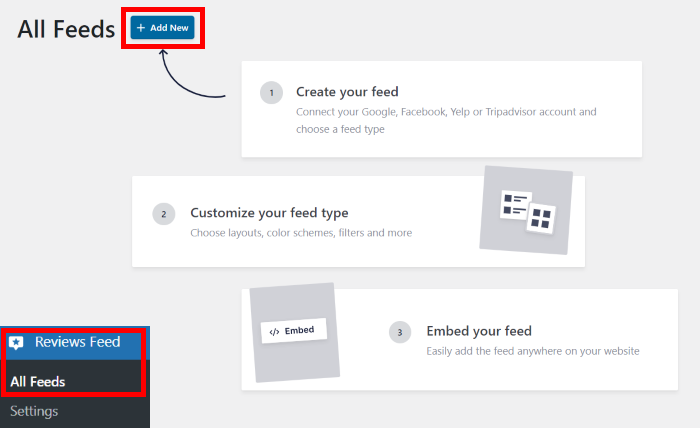
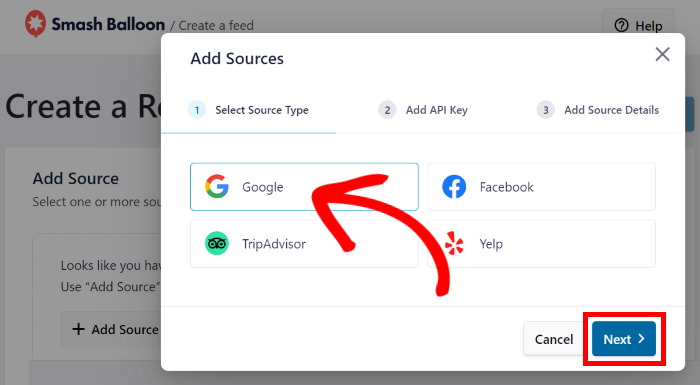
With the help of Reviews Feed Pro, you can display testimonials from 4 of the biggest testimonial platforms out there:
- Google Reviews
- Tripadvisor
- …and Yelp
For our example, we’ll go with the Google option here.
Once you select the platform you want to use for your testimonials, click on the Next button.
Now, you’ve created a Google testimonial feed for this Elementor website. In step 3, you can connect it to your business page.
Step 3: Add a Source for Your Testimonial Feed
By adding a source, your feed can start fetching testimonials and displaying them on your website.
To do that, first, click on the Add Source button.
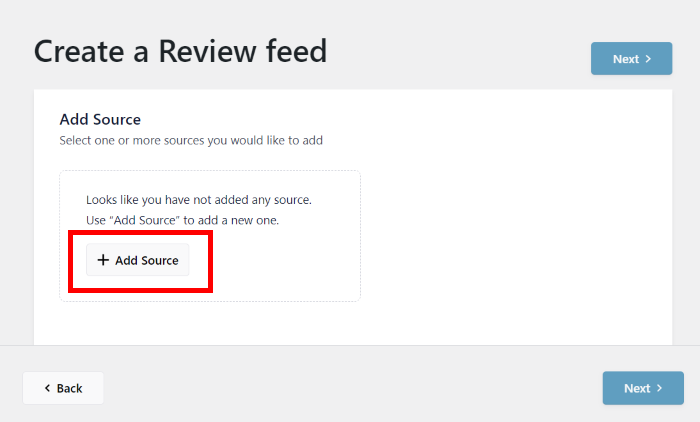
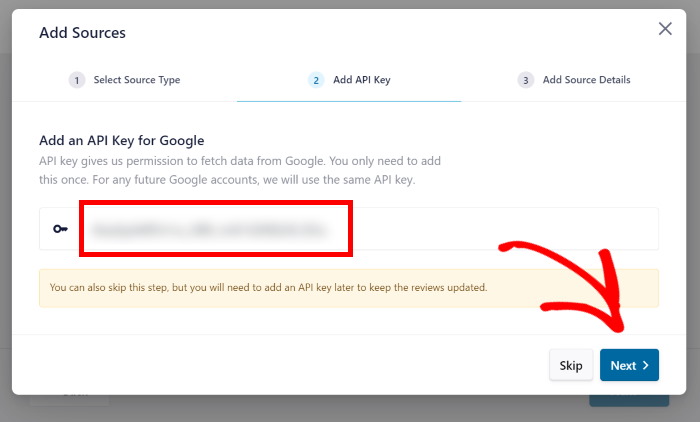
Next, you can enter your Google API key to create unlimited Google testimonial feeds on your site and automatically keep them updated.
In case you don’t have your API key yet, you can follow our simple guide on creating a Google API key.
Finally, you can paste the key into the popup and then click on Next.
Or, you can click on the Skip button to proceed without using an API key.
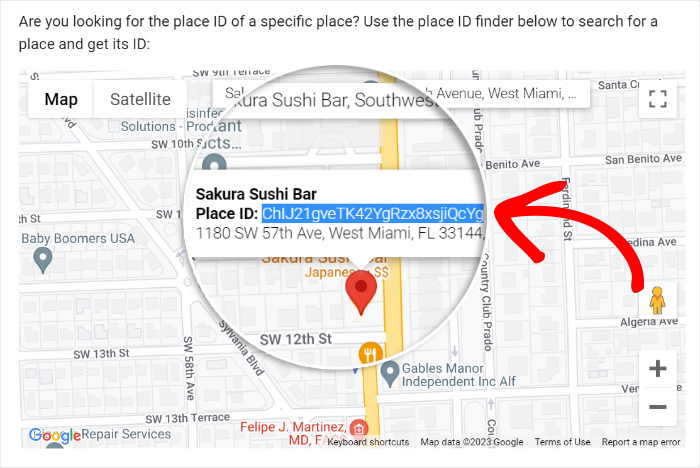
You can then select the Google business page that you’d like to fetch testimonials from. And the easiest way to do that is to enter your Place ID.
To find your Place ID, go to the official Place ID generator and enter your business name and location on the search bar.
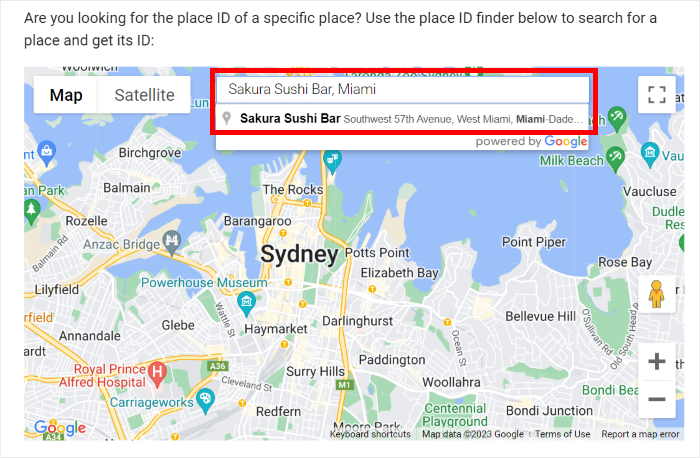
Then, you can simply select your business from the dropdown list, and Google will show additional info in the map below.
After that, you can copy the code in the Place ID field below.
Now that you have your Place ID, you can return to your website once more.
You can then paste the Place ID into the popup before clicking on the Finish button.
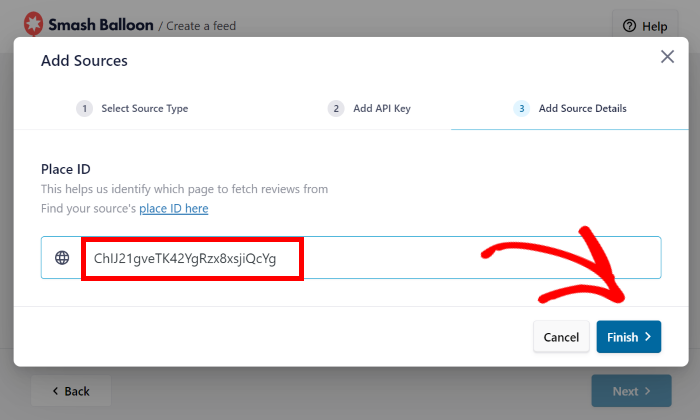
Since you’ve added this business as a source for your Elementor site, you can freely reuse it for any of your future feeds without leaving your site.
Finally, click on the Next button to continue.
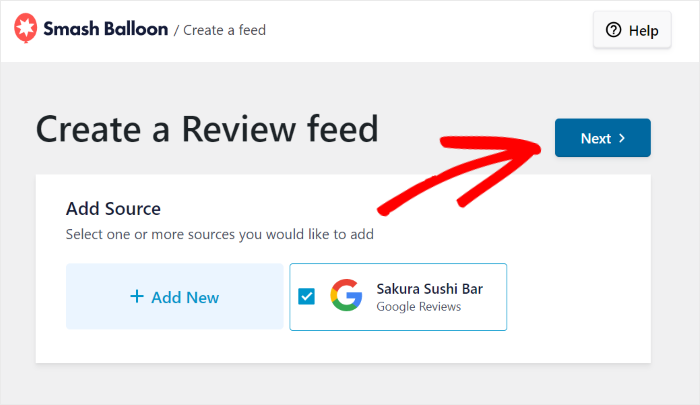
Just like that, you’ve created a new testimonial feed and then connected it to your Elementor website.
You can now personalize your testimonials in the next step.
Step 4: Customize Your Elementor Testimonials
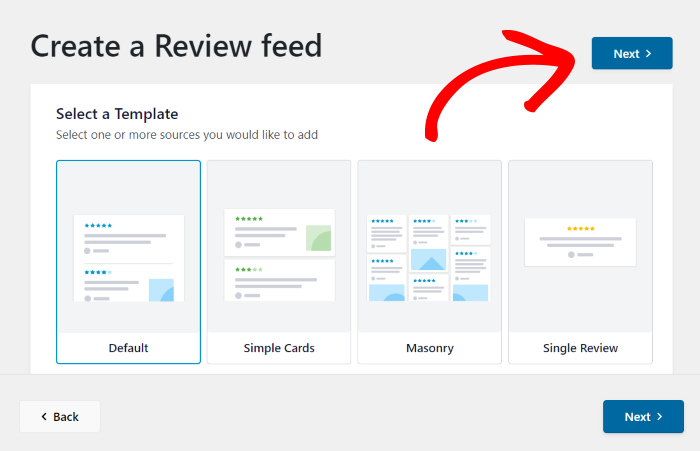
Before you can customize your testimonials in detail, the plugin lets you import a pre-designed template with a unique design.
You have 7 different templates that you can choose from:
- Default
- Simple cards
- Masonry
- Single review
- Showcase carousel
- Carousel
- Grid carousel
After selecting your template, you can go ahead and then click on Next.
Now, you’ll see your testimonial feed open in the visual customizer. Here, you can easily change your layout, header, button design, review elements, and much more in just a few simple clicks.
What’s more, the live preview on the right will show you a real-time preview of your testimonials.
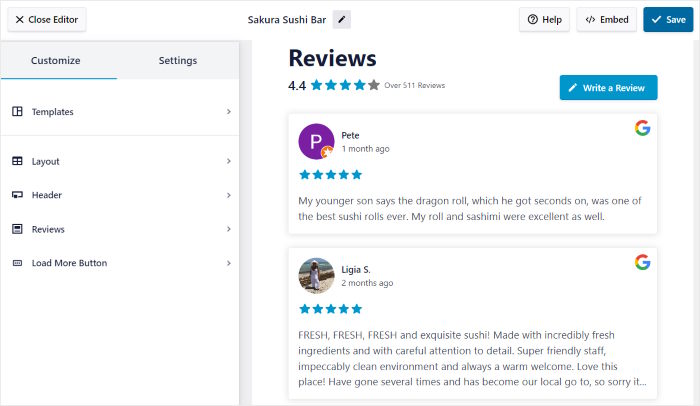
Ready to start customizing your testimonials?
First, look for the Layout option on the left and then click on it.
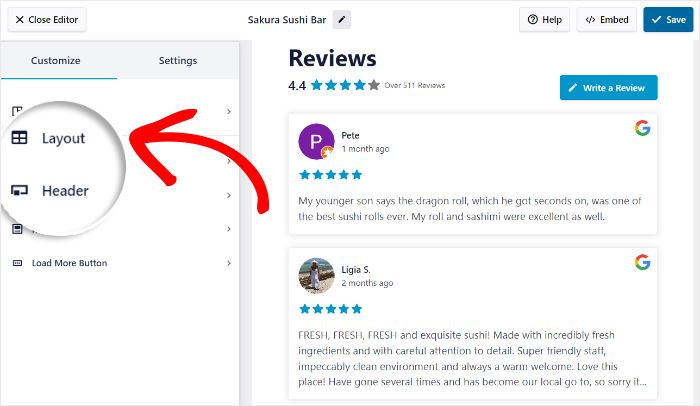
With Reviews Feed Pro, you have 3 different layouts that you can choose from:
- List: Select a single-column layout for your feed so each testimonial is clearly visible
- Masonry: Display tons of testimonials at once with the help of multiple columns
- Carousel: Turn your feed testimonial into an interactive carousel slideshow
Since we’re embedding a testimonial slider in Elementor, you can select the Carousel layout here.
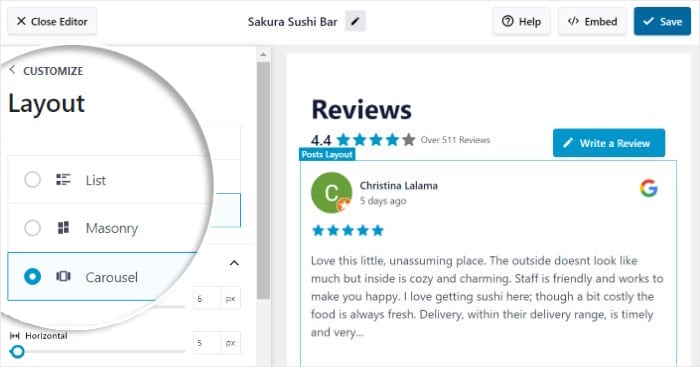
After picking your feed layout, click on Save to confirm your changes.
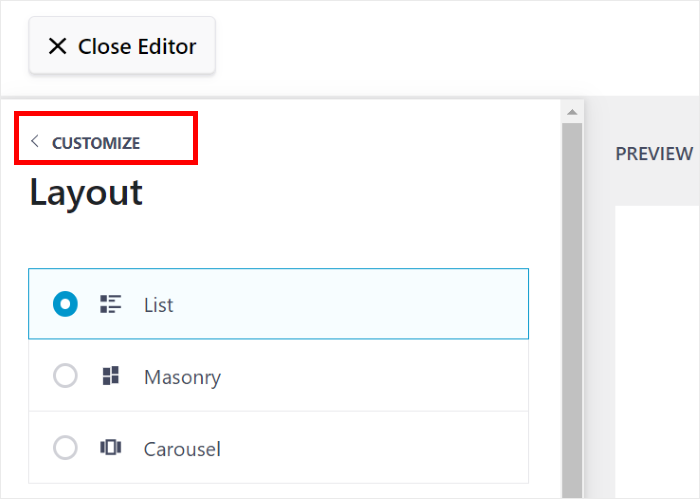
You can then click on the small Customize button to return to the main options once more.
Next, we can use the visual customizer to choose which testimonials will appear on your feed.
On the visual customizer, click on the Settings tab at the top and then click on Filters.
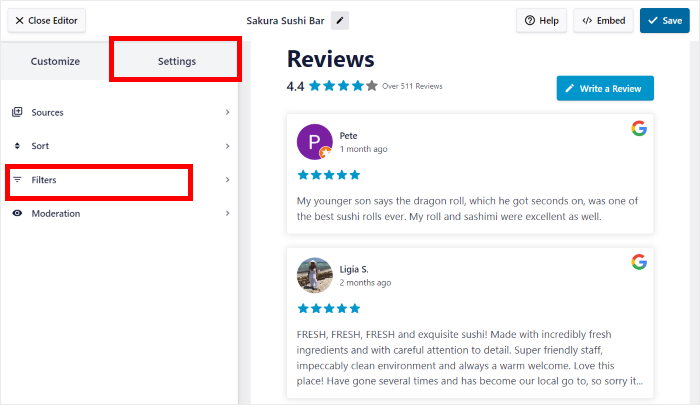
Using the filters, you can choose to hide or show your testimonials based on their ratings or keywords.
To get started, you can select a star rating on the left to only show reviews with that rating.
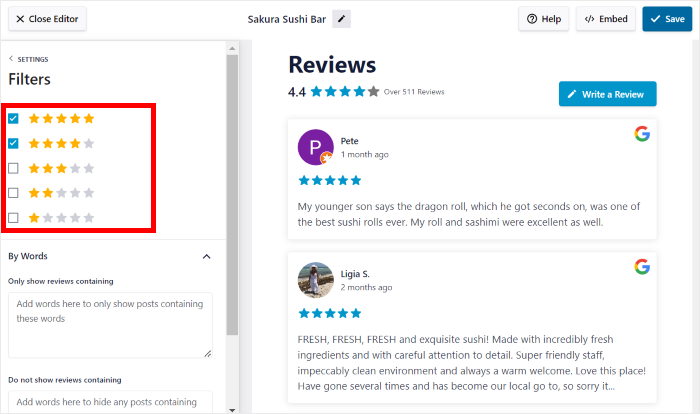
Once you’ve added the filters, click on Save once more.
As you can see, Reviews Feed Pro makes it super easy to personalize how your testimonials will look.
In just a few clicks, you can change your header design, buttons, review elements, and much more. What’s more, you can even moderate your feed to manually choose which testimonials are visible on your site.
After you’re happy with how your testimonial sliders look, click on the Save button.
Finally, it’s time to embed your testimonials on your Elementor WordPress website.
Step 5: Add Testimonial Slider to Elementor
Since this plugin is so user-friendly, you can directly start embedding your testimonials from the visual customizer.
To get started, click on the Embed button at the top.
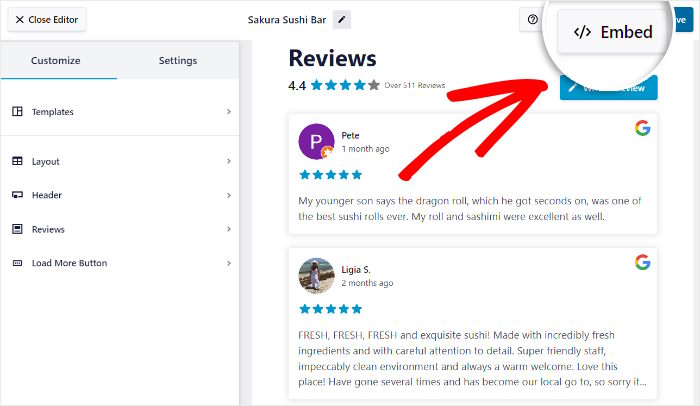
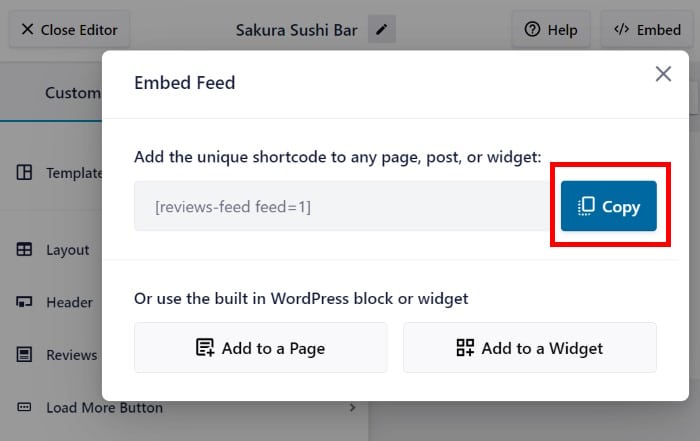
The plugin will then show you all the ways you can embed testimonials on your website.
You can embed it on a page or display it on your website’s widget-ready areas like the sidebar or footer.
For now, you can click on the Copy button on the popup and copy the shortcode.
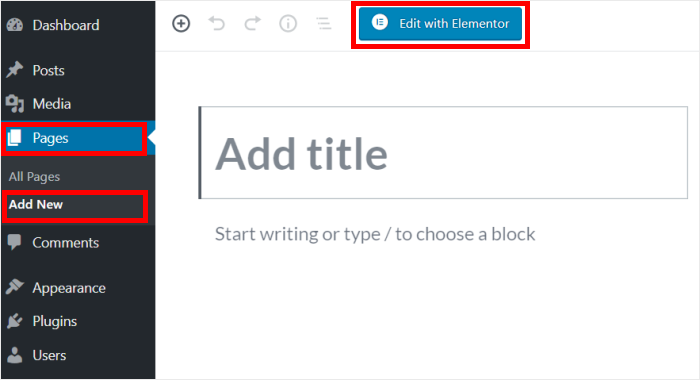
Next, navigate to the Pages » Add New menu from your dashboard area to create a new WordPress page.
Once the page is created, click on the Edit with Elementor button.
Alternatively, you can display it on your Elementor WordPress post as well.
For that, open the Posts » Add New menu from your dashboard area instead.
Just like with a page, you can then click on the Edit with Elementor button.
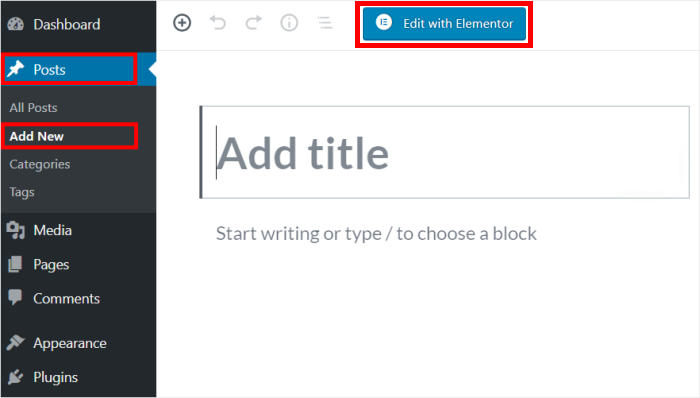
Doing that will open your page or post in the drag-and-drop Elementor editor. On the left, you can see all the Elementor widgets, and on the right, you can find a preview of your page or post.
Look for the search bar in the top-left and then look for the “shortcode” widget.
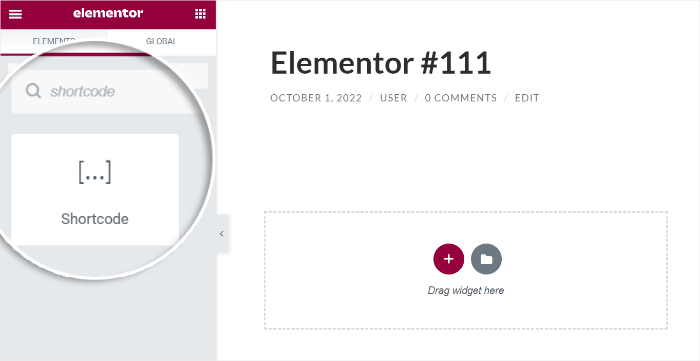
Just like that, you can find the Shortcode widget in the search results below.
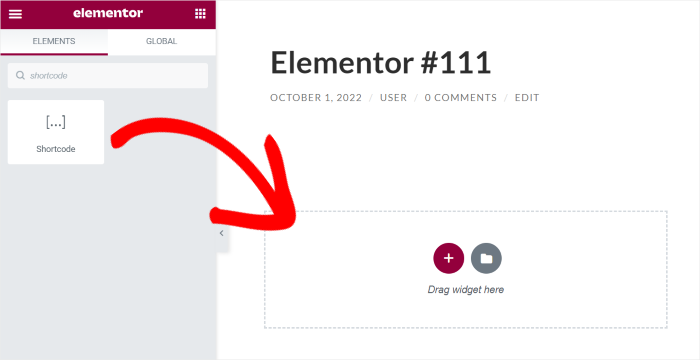
Now drag this widget and then drop it on your page or post on the right.
On the left, you can now see additional options for your Shortcode widget.
Here, look for the Enter your shortcode field and then paste the shortcode that you just copied.
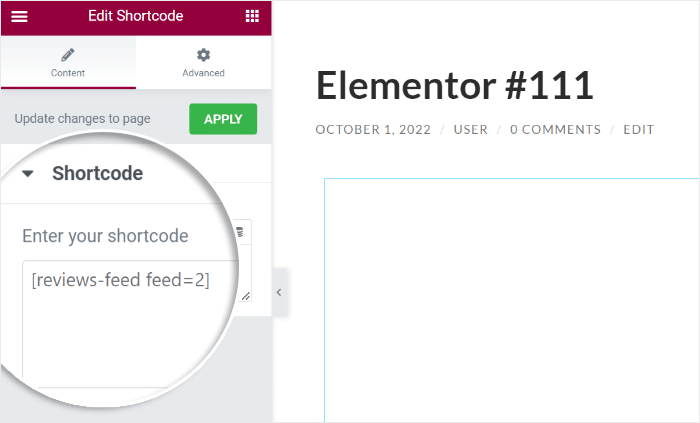
Finally, click on Publish, and your new Elementor page or post will be online for your website visitors to see.
In fact, you can open your website and check out how your Elementor testimonial slider looks to your visitors.

And there you go!
Now you know how to add testimonial sliders to Elementor in just a few simple clicks – no need to touch a single line of code.
With Reviews Feed Pro, you can embed testimonials from highly-trusted platforms like Facebook, Google, Tripadvisor, and more to grow your business with ease.
Want to add testimonial sliders in Elementor? Click here to get Reviews Feed Pro today!
If you want more amazing tools for your Elementor site, check out our list of the best social media feed plugins.
Found this helpful? You can follow us on Facebook and Twitter for more helpful social media marketing tips and tricks.
