Showing a YouTube livestream is a fantastic way to keep people glued to your Elementor website.
But the downside is that manually embedding live videos means dealing with complex embed codes. And honestly, it’s a huge time sink as well.
So, I’ll show you the simplest way of adding YouTube live videos to Elementor. It’s super easy and the whole process only takes a few minutes.
- Easiest Way to Add YouTube Live Streams to Elementor
- Why Embed Your YouTube Live Stream on Elementor?
- How to Embed YouTube Live Streams on Elementor
Easiest Way to Add YouTube Live Streams to Elementor
First things first, you need a tool that can fetch the livestreams and display them on your Elementor site.
Out of all the options, I settled on YouTube Feed Pro for a few important reasons:
- On top of embedding livestreams, you can also display YouTube playlists, channels, and search results.
- YouTube Feed Pro is perfectly compatible with Elementor, as well as other popular site builders like Divi, Thrive Architect, Beaver Builder, and more.
- For a quick and easy you to embed YouTube content, you can just follow a 3-step guided flow – no coding needed
- Since the plugin is super lightweight, you can embed tons of videos and streams and your site will load as fast as ever.
- From the visual customizer, you can change the design of your videos in just a few simple clicks.

It’s also rated 4.9/5 stars with over 100k users, so a ton of people seem to be happy with this YouTube embed tool.
To give this a try, you can grab your copy of YouTube Feed Pro here.
Why Embed Your YouTube Live Stream on Elementor?
- You can show YouTube live streams for important news and announcements and reach tons of people with ease
- By embedding your live streams, you can get tons of new viewers and subscribers to grow your YouTube channel
- Since live streams let you interact with viewers in real-time, you can build relationships with your visitors and convert them into dedicated customers
- Using your live streams, you can show positive reviews and testimonials of your products. With this social proof, you can get more sales on your website.
- And much more…
How to Embed YouTube Live Streams on Elementor
Below, we’ve listed the simple steps you can follow to embed YouTube live streams on your Elementor WordPress site.
Let’s get started!
Step 1: Install YouTube Feed Pro
To get started, go and grab your copy of the YouTube Feed Pro plugin here. Next, install and activate the plugin on your WordPress website.
If you need a quick refresher on how to do that, you can check out this guide on how to install WordPress plugins.
Step 2: Create a YouTube Live Feed
Using the guided flow, you can now create a new feed for your YouTube live streams.
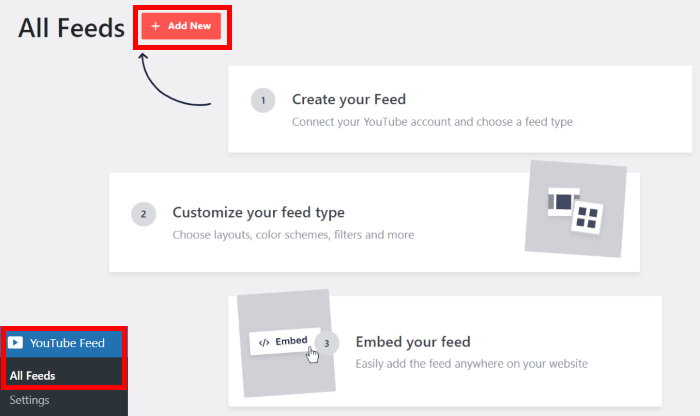
First, open your WordPress dashboard and then click on the YouTube Feed » All Feeds menu.
On the new page, click on the Add New button at the top.
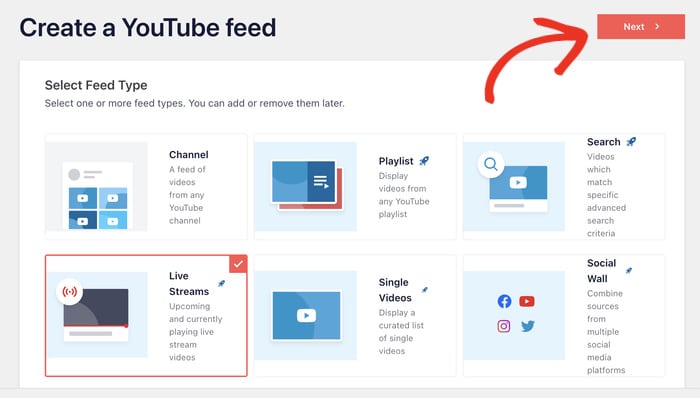
YouTube Feed Pro will now let you choose which type of YouTube feed you want to create.
On top of YouTube live streams, you can choose to import channels, playlists, search results, and more.
To continue, select the Live Streams option from the list and then click on the Next button.
Step 3: Connect Your YouTube Account
Since you’ve created your YouTube feed, you can connect it to your account so it can display live streams on your site.
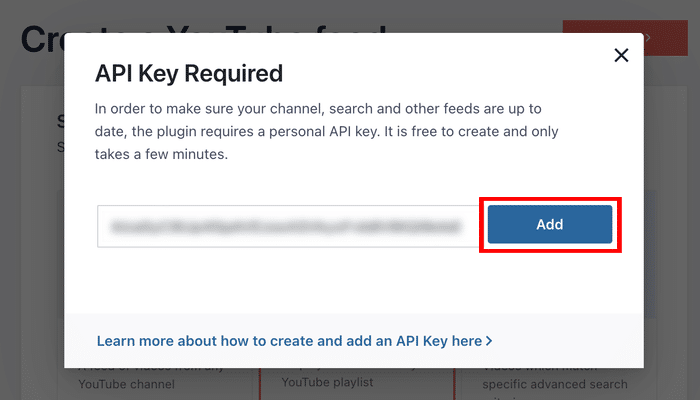
To do that, you can simply enter a YouTube API Key.
Don’t have your API key yet? You can just follow this step-by-step guide on creating your YouTube API Key.
Finally, paste the YouTube API key into your popup before clicking on the Add button.
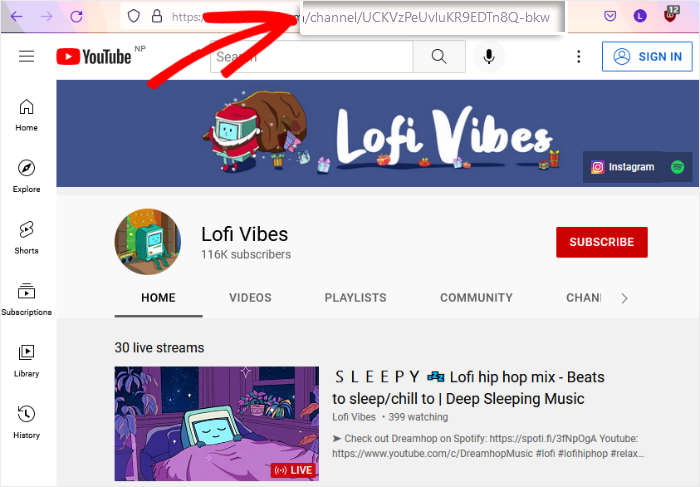
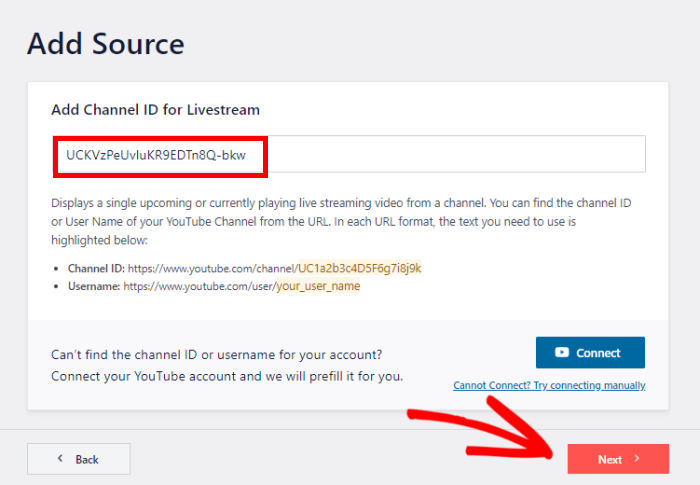
You can now select which live streams you’d like to embed on your Elementor website. For that, open your YouTube channel and then check the URL at the top.
There, copy the code after “/channel/” or “/user/” at the end of the URL.
Next, return to your website once more and paste the code into Add Channel ID for Livestream field.
Finally, you can click on the Next button to connect your live streams.
Step 4: Customize Your YouTube Live Streams
Since the plugin is super user-friendly, your YouTube live feed will now automatically copy the design of your website.
On top of that, you can quickly change your video’s looks by importing a pre-built tempalte:
- Default
- Carousel
- Cards
- List
- Gallery
- Latest video
- Showcase carousel
- Widget
Select a template that you prefer before clicking on the Next button.
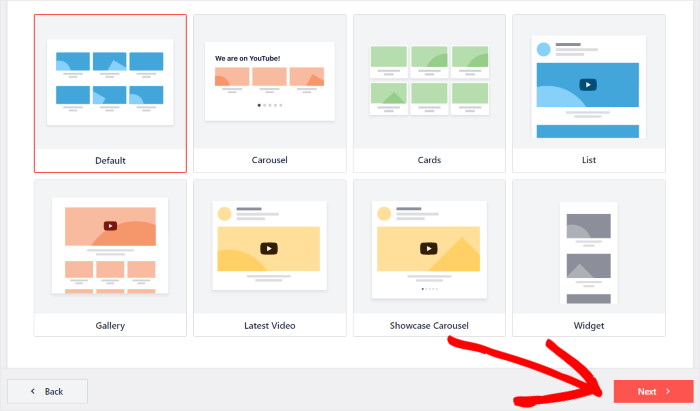
I’m not looking for anything fancy, so I went with the default design.
After you pick your template, the plugin will open the visual customizer where you can personalize your live streams in detail.
Using the options on the left, you can change the design in a few clicks. And the live preview can help you track your changes.
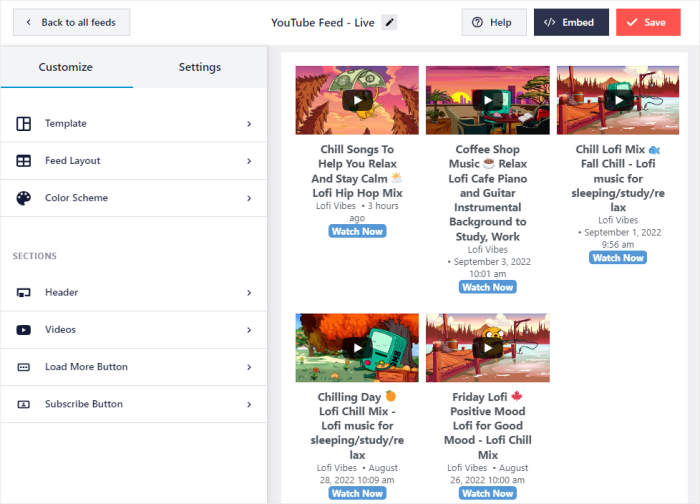
There are a bunch of options here, so feel free to check them out and find the design you like.
For now, let me take you through a few major options.
To get started, select the Feed Layout option.
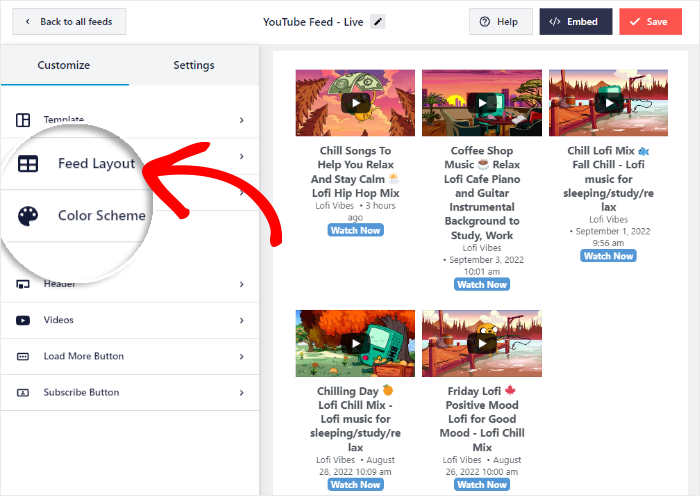
You can now choose from 4 different layouts for your YouTube videos:
- Grid
- Gallery
- List
- Carousel
Let’s look at these layouts below:
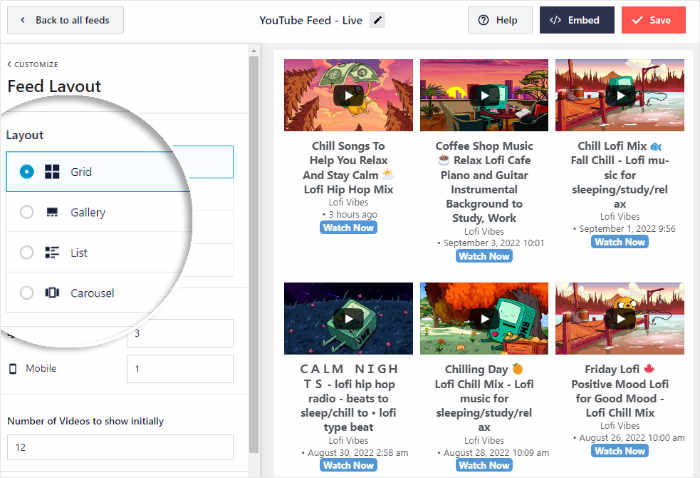
If you want to embed lots of YouTube videos at once, you can select the grid layout.
Your YouTube videos will appear in different rows and columns that way.
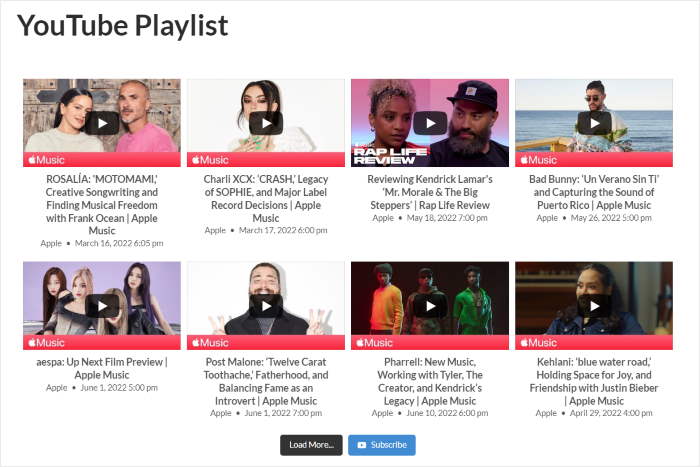
Next, you have the YouTube gallery layout, which will show a large video player and small thumbnails underneath.
It’s a great way to highlight your current live stream and get tons of new viewers.

Another great layout that you can choose is the list option.
You can show YouTube videos in a single column that way so each video is clearly visible.

Finally, you have the carousel layout that shows live streams in a YouTube slideshow.
With this interactive slider, you’ll have an easy time engaging your visitors.

To confirm your new layout, click on the Save button at the top.
You can also click on Customize to continue personalizing your YouTube live streams.
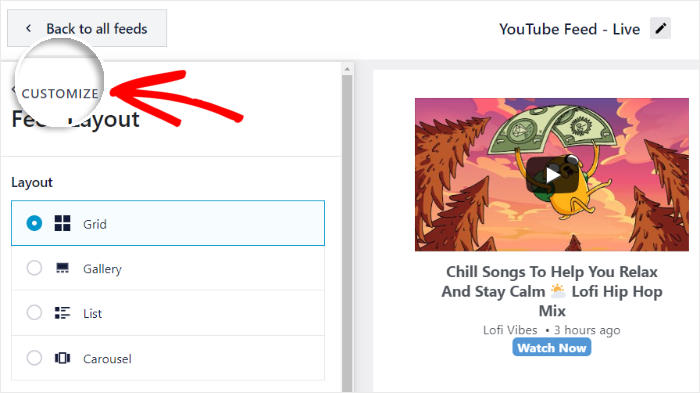
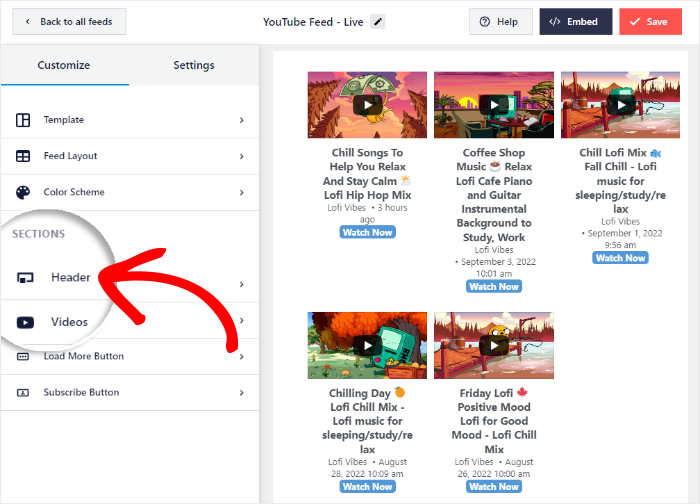
You can also customize how the header above your YouTube live feed looks.
For that, just select the Header option on the left.
At the top, you can find the option to Enable or Disable your header.
Once you enable your YouTube header, you can choose from 2 header styles:
- Standard: Display your channel name, icon, subscriber count, and more
- Text: Write a custom header to show at the top of your YouTube feed
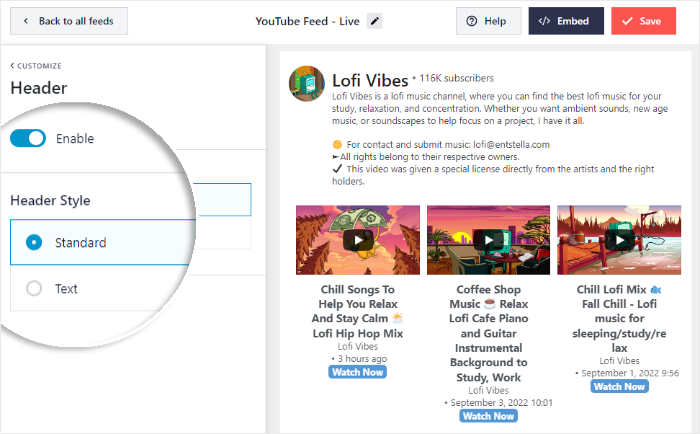
Remember to click on the Save button at the end to confirm your new header.
As you can see, YouTube Feed Pro lets you customize your color scheme, load more button, filters, and much more with ease. All you have to do is use the remaining options on the visual customizer.
Don’t forget to click on the Save button once you’re happy with your YouTube feed.
Step 5: Add Your Instagram Feed to Elementor
Once you’re done customizing, it’s time to add your YouTube live streams to Elementor. And you can do that right from your visual customizer — no HTML code needed.
On top of Elementor, you can even embed YouTube videos using the Gutenberg block editor or the classic editor.
Ready to get started? First, click on the Embed button at the top.
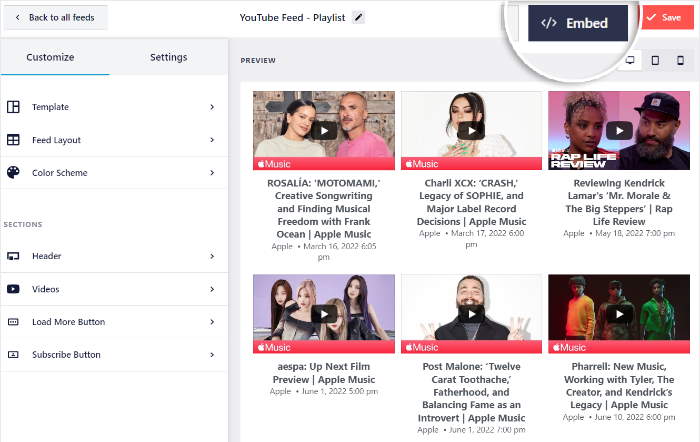
Doing that will open the embed options for your YouTube feed. You can embed it on a page, sidebar, or footer directly from here.
For now, click on the Copy button to copy your shortcode.
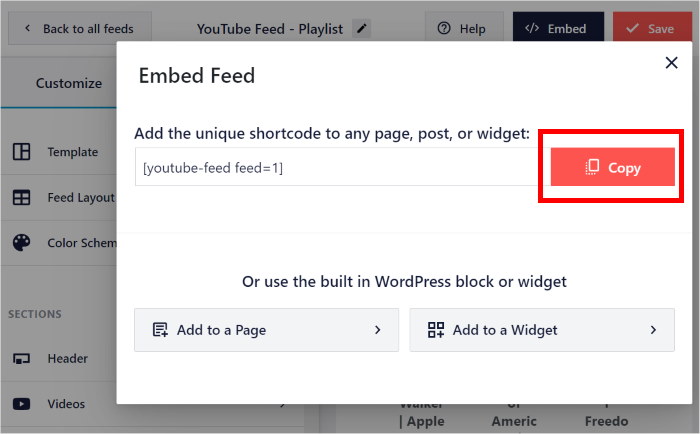
Next, you can insert this shortcode into an Elementor page or post.
To use a WordPress page, navigate to the Pages » Add New menu from your dashboard and then click on Edit with Elementor.
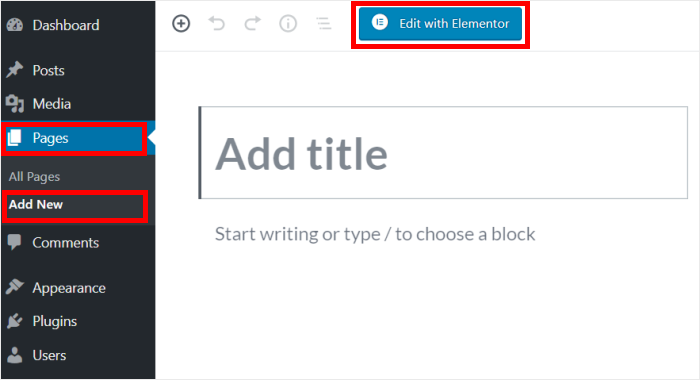
Want to use a post instead? For that, open the Posts » Add New menu from your dashboard.
Once you’ve done that, just select Edit with Elementor.
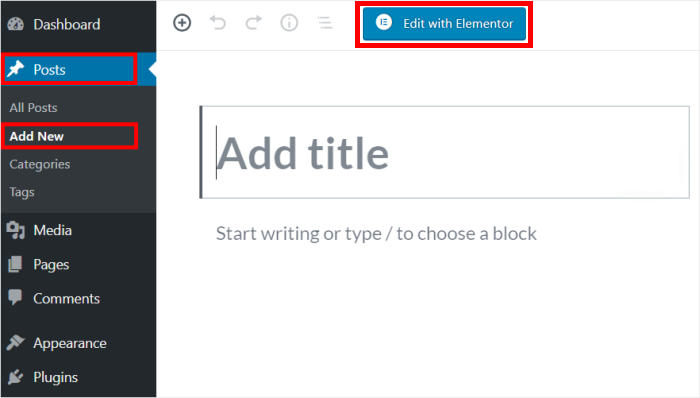
For our example, we’ll go ahead and use an Elementor page.
Now that you’ve opened the Elementor editor, you can find all the Elementor widgets on the left.
Using the search bar at the top, you can now look for the “shortcode” widget.
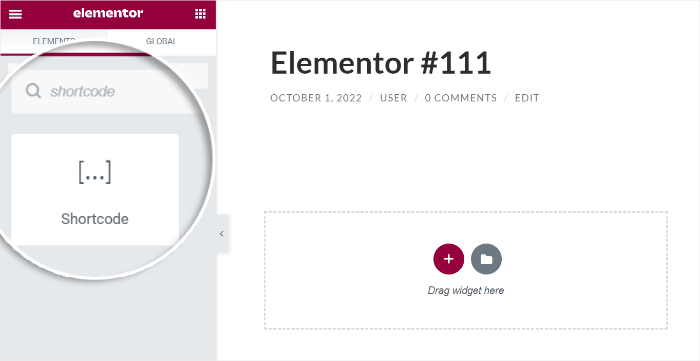
You’ll then see the Shortcode widget in the search results below.
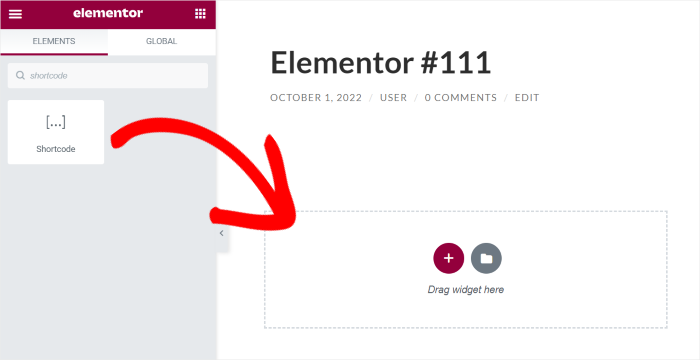
To continue, drag the widget from the left and then drop it on the page.
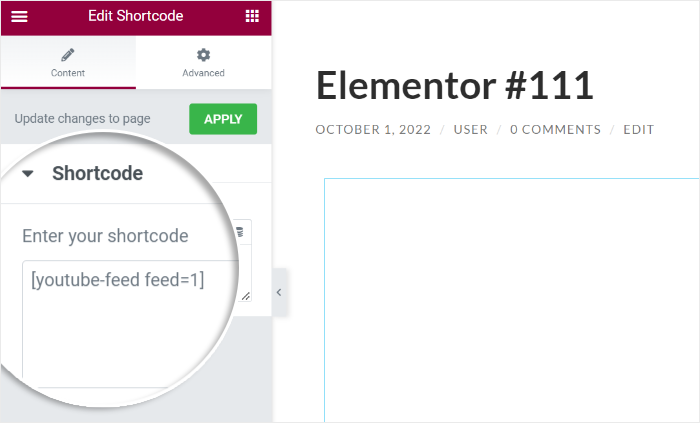
Finally, paste the shortcode that you copied earlier into the Enter your shortcode field.
Doing that will embed your YouTube live-stream videos on the right.
To save your new YouTube live feed, click on the Publish button on the bottom left.
Just like that, you have a feed of YouTube live streams on your Elementor website. And with this YouTube WordPress plugin, you can have beautiful YouTube feeds in just minutes.

And that’s it!
Now you know how to embed YouTube live streams on Elementor websites the easy way. Just like that, you can boost your views, engage your visitors, grow your YouTube channel, and much more.
All you need is the YouTube Feed Pro plugin, and you’ll have an easy time embedding all kinds of YouTube content. The best part? You can do all that with absolutely no coding at all!
Ready to embed YouTube live streams on Elementor? Get YouTube Feed Pro today!
Want to grow your YouTube channel easily? You can look at this guide on how to embed a YouTube channel on your website.
More Social Media Marketing Guides and Tips
- How to Add a YouTube Video Gallery for Elementor
- Types of YouTube Videos to Skyrocket Your Subscribers Easily
- How to Add Your Twitter Feed to Elementor (In 5 Minutes)
- Best YouTube Plugins to Increase Your Subscribers Right Now
- How to Make Money on YouTube Without Showing Your Face
