Social Wall
  Feed Analytics


Do you want to embed an X (Twitter) profile on your website?
Displaying your X (Twitter) profile is the easiest way for you to get new likes, replies, and followers from your website.
In this tutorial, we’ll show you how to embed X (Twitter) profiles with ease – no coding needed.
Here’s what this guide will cover. Just click on a section if you want to skip ahead.
- Why Embed an X (Twitter) Profile on Your Site?
- Easiest Way to Embed an X (Twitter) Profile in WordPress
- How to Embed X (Twitter) Profile Timeline on Your Website
Let’s get started!
Why Embed an X (Twitter) Profile on Your Site?
By embedding recent X posts from your own profile, you can easily turn your website visitors into new followers.
Since people on your site are already interested in your content, they’re more likely to follow your X (Twitter) account.

Plus, you can also embed content from other X (Twitter) users on your website. That way, you can have relevant X posts, photos, and videos on your site to keep your visitors interested.
You can also highlight the latest news and announcements from your X (Twitter) profile. As a result, all the people on your site can get updates about your business.
On top of that, you can show user-generated content like reviews, testimonials, product demonstrations, and more from other people’s X (Twitter) profiles. This can act as social proof and convince visitors to buy from you.
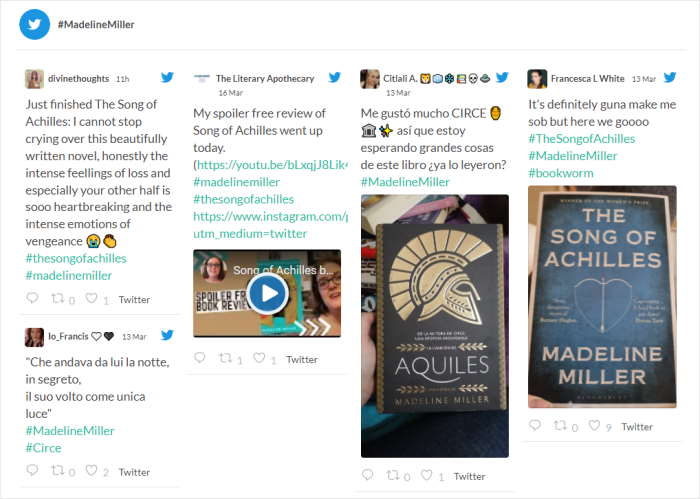
And when people spend more time on your website, you get much better SEO. So, your website can reach even more potential customers with ease.
Now that you know why you should embed X (Twitter) content, let’s go and see how you can embed X (Twitter) profiles the easy way.
Easiest Way to Embed an X (Twitter) Profile in WordPress
When embedding your X (Twitter) profile, there are 2 different options that you can try:
- Manual Way: Use the official X (Twitter) embed code generator, tweak the code, and then add it directly to your website.
- Easy Way: With the help of an X (Twitter) plugin, you can embed X (Twitter) profiles on your site automatically.
Using the manual way, you’ll have to open publish.twitter.com on your browser and then generate an HTML code to embed an X (Twitter) profile.
Once you insert that HTML code into your website, you’ll finally be able to show the X posts from that profile.
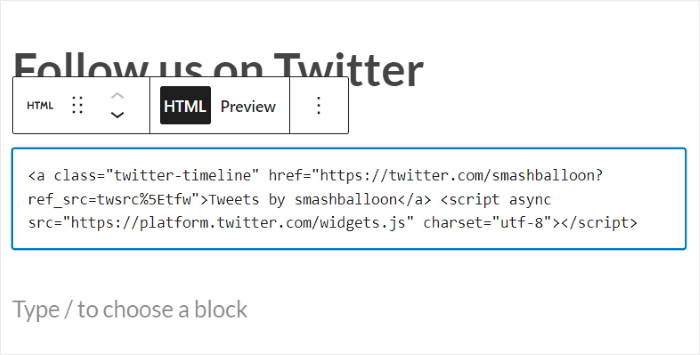
As you can see, this method can get confusing since you’ll have to manage complicated embed codes.
On top of that, you’ll have no way of tracking the X (Twitter) profiles you’ve embedded on your site.
Plus, your X (Twitter) profile won’t match the design of your website’s theme, so it might clash with your branding.
And if you want to customize how the X posts look, you need to either manually edit the code or hire a developer to do that for you.
The good news is that there’s a simple way to embed X (Twitter) profiles on your website — X (Twitter) Feed Pro.

Using this plugin, you can display X (Twitter) content on your WordPress site in just minutes — no need for HTML, CSS, Javascript, or even iFrames.
Plus, all the X (Twitter) content you embed will automatically copy the design of your website. So, your X (Twitter) profile will match your brand’s look perfectly.
X (Twitter) Feed Pro also comes with in-depth customization options that let you set how the X (Twitter) feeds appear on your website. You even get a live preview to check how the X (Twitter) profile will look on your website.
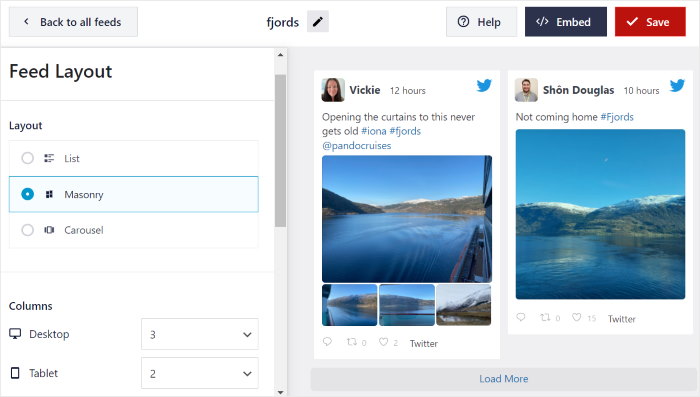
Another great feature of X (Twitter) Feed Pro is that it automatically saves a cached copy of your X (Twitter) feeds. So, your site can show the saved copy instead of loading your feed from scratch each time.
As a result, your website will load much faster, and you can get better SEO as well.
The best part? X (Twitter) Feed Pro comes with high-quality dedicated support from a team of experts who are always ready to help you out.
With a rating of 4.9/5 stars from over 150,000 active users, X (Twitter) Feed Pro really is the best X (Twitter) feed plugin in the market.

Just like that, you can embed social media content from X (Twitter) to engage your visitors, get tons of X (Twitter) followers, boost conversions, and more.
Ready to embed X (Twitter) profiles on your site? Get your copy of X (Twitter) Feed Pro today!
Now that you know the easiest way to embed X (Twitter) profiles, let’s get started with our tutorial below.
How to Embed X (Twitter) Profile Timeline on Your Website
To embed your X (Twitter) profile with the help of X (Twitter) Feed Pro, all you have to do is follow the step-by-step guide below:
Let’s get started!
Step 1: Download the X (Twitter) Feed Pro Plugin
The first step is to get your copy of X (Twitter) Feed Pro here and then install the plugin on your WordPress website.
If you’re not sure how, then check out our guide on how to install WordPress plugins on your website.
After you install and activate the plugin, move on to step 2 to get started with X (Twitter) Feed Pro.
Step 2: Create a New X (Twitter) Feed
You’re ready to create a new X (Twitter) feed for your website using this plugin.
The best part? You can do that by simply following the plugin’s guided flow.
First, open the X (Twitter) Feed » All Feeds menu from your dashboard and then click on the Add New button at the top.
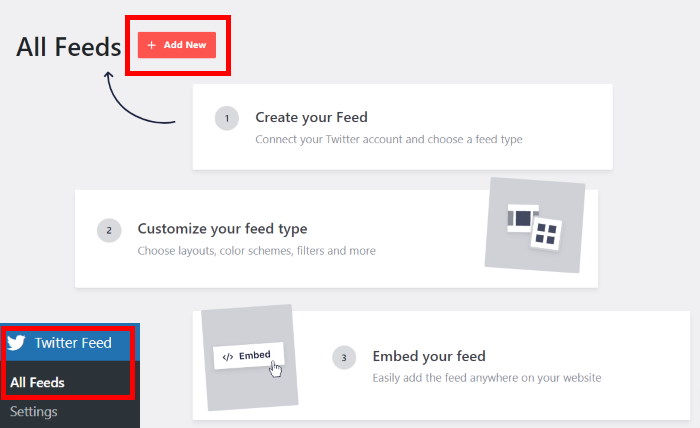
You can then select the type of X (Twitter) feed you want on your website. To continue, select User Timeline and then click on the Next button.
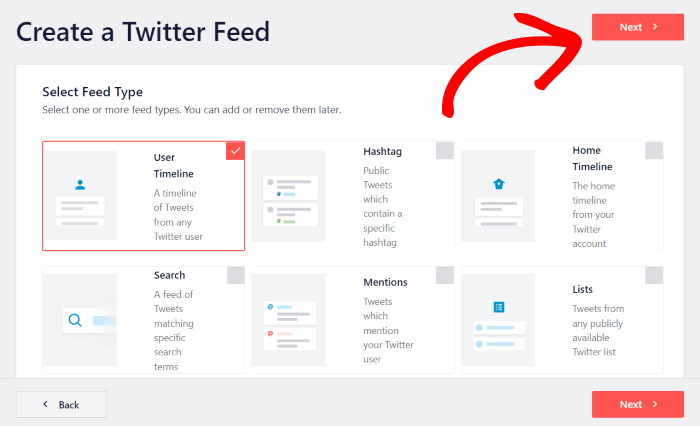
Now that you’ve created an X (Twitter) feed using this plugin, the next step is to connect it to your X (Twitter) account.
Step 3: Connect Your Feed to X (Twitter)
If you want your X (Twitter) feed to embed a profile on your website, you can just connect it to your X (Twitter) account.
You can click on the Connect button here to get started.
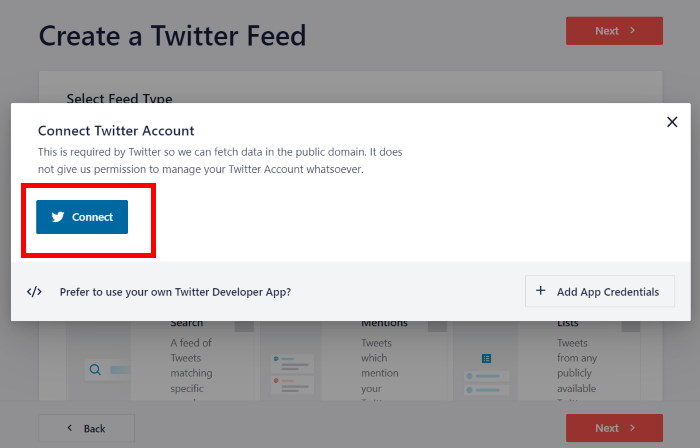
Next, X (Twitter) Feed Pro will ask for read-only access to your account so it can fetch X posts and then display them on your website.
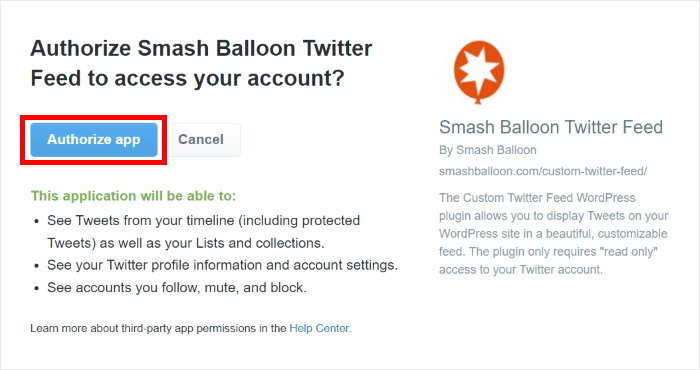
The plugin can’t make any changes to your account and can only view information on X (Twitter). As a result, you can safely use Smash Balloon’s X (Twitter) Feed Pro plugin.
To give read-only access to X (Twitter) Feed Pro, click on the Authorize app button.
After you connect your X (Twitter) account, you can choose the X (Twitter) profile that you want to show on your website.
Enter your selected X (Twitter) profile in the User Timeline field.
Finally, click on the Next button to proceed.
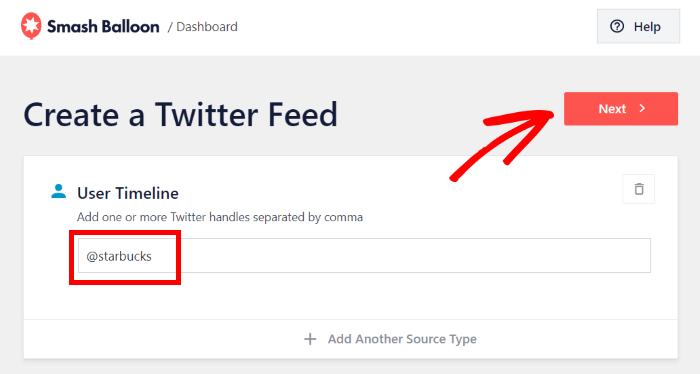
Now that you’ve added a source for your X (Twitter) profile feed, you’re ready for step 4. There, you can customize the design of your new feed.
Step 4: Customize Your X (Twitter) Profile Feed
Since the plugin automatically matches your website’s design, your X (Twitter) feed will fit your brand perfectly.
On top of that, you can also customize your X (Twitter) profile feed in detail.
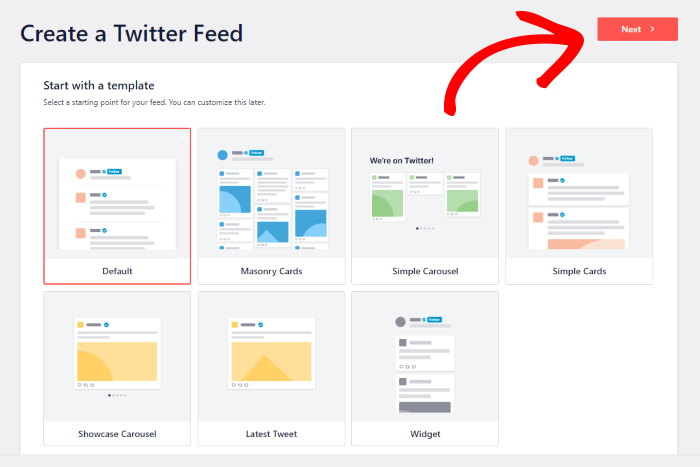
First, the plugin gives you 7 feed templates you can choose from. Just select the option that you want to use for your feed:
- Default
- Masonry cards
- Simple carousel
- Simple cards
- Showcase carousel
- Latest X Post
- Widget
After selecting your feed template, click on Next.
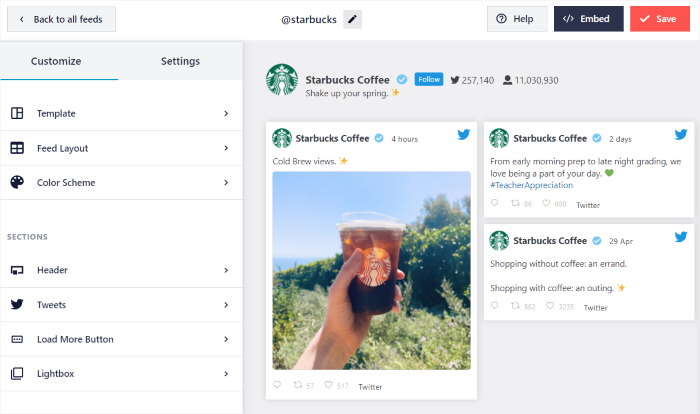
Now, the plugin will open the live feed editor so you can customize your X (Twitter) feed even more.
You can see the customization options on the left side of the editor. From there, you can set up your X (Twitter) feed’s layout, background, colors, header style, button design, and much more.
On the right side of the editor, you can see a real-time preview of your X (Twitter) feed. That way, you can easily track your changes.
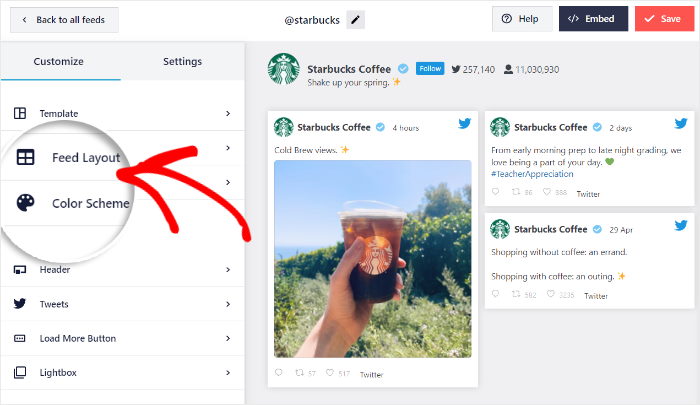
You can now use the live feed editor to change the layout of the X posts on your website.
Click on the Feed Layout option on the left to get started.
The plugin will then show you 3 different layouts that you can use for your X (Twitter) feed:
- List
- Masonry
- and Carousel
Let’s go through each of these layouts below:
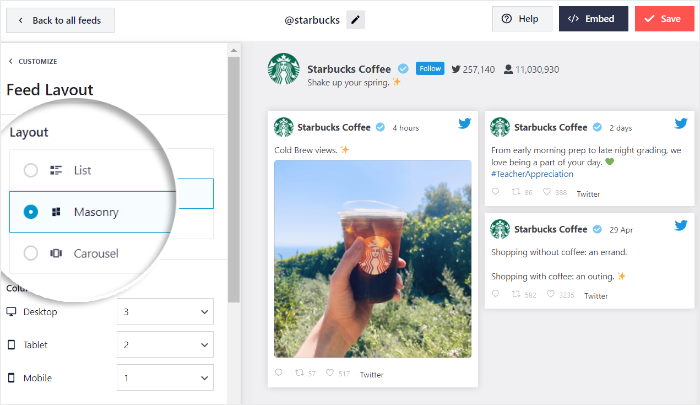
If you pick the list layout, your X posts will appear in a single column that resembles an official X (Twitter) feed.
Plus, your single X posts will stand out more on your website with this layout.

Want your X posts to appear in multiple columns instead? Then select the masonry layout instead.
As a bonus, you can use this layout to show tons of X (Twitter) posts at once.

Next, there’s the carousel layout which places your X (Twitter) content in a slideshow carousel.
On top of being interactive, you can show tons of X posts without taking up much space using this layout.

After you select a layout you want, click on the Save button.
Ready to customize your X (Twitter) feed some more? In that case, click on the Customize button at the top.
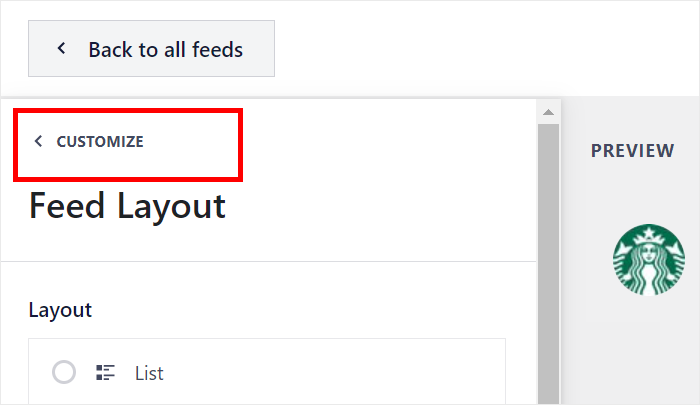
Now you’re ready to change the colors of your X (Twitter) profile feed. And with the live feed editor, this can be super easy.
First, click on the Color Scheme option on the left.
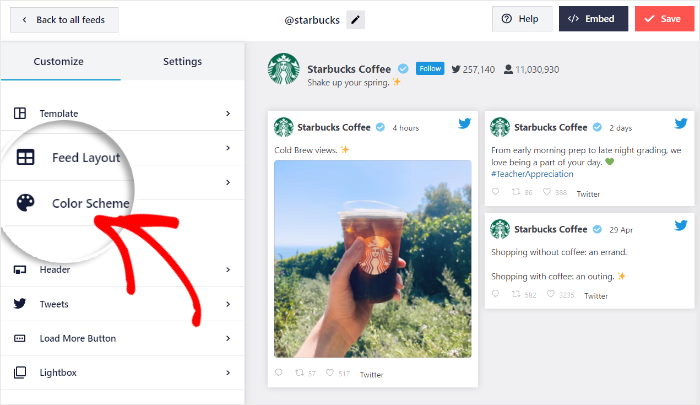
Next, you can see 4 different color schemes that can help you change the colors of your feed with ease:
- Inherit from Theme: Copy the colors of your WordPress theme
- Light: Show a light background color and a dark font
- Dark: Pick a dark color for the background and a light font color
- Custom: Select all of your colors manually
Once you select a color scheme, don’t forget to click on Save to keep your changes.

You can now use the remaining customization options to change your X (Twitter) feed’s header design, load more buttons, number of X posts, lightbox settings, and much more.
Once you’re happy with how your feed looks, click on Save once again.
Finally, you’re ready to embed this X (Twitter) profile on your website in step 5.
Step 5: Embed X (Twitter) Profile on Your Website
X (Twitter) Feed Pro gives you 2 different ways to show your X (Twitter) profile on a WordPress site:
- Embed X (Twitter) profile on a WordPress page
- Embed X (Twitter) profile on the WordPress sidebar or footer
Let’s go through both of these methods below.
Embed X (Twitter) Profile on a WordPress Page
Since X (Twitter) Feed Pro is so user-friendly, you can start to embed your feeds directly from the live feed editor.
All you have to do is click on the Embed button to get started.
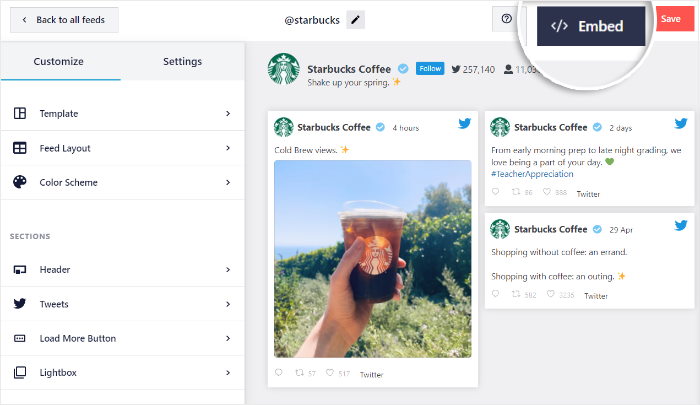
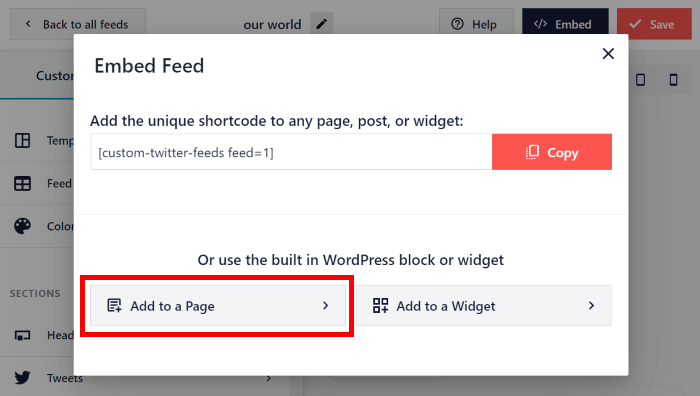
On the new popup, you can find different ways to add your X (Twitter) feed to your site.
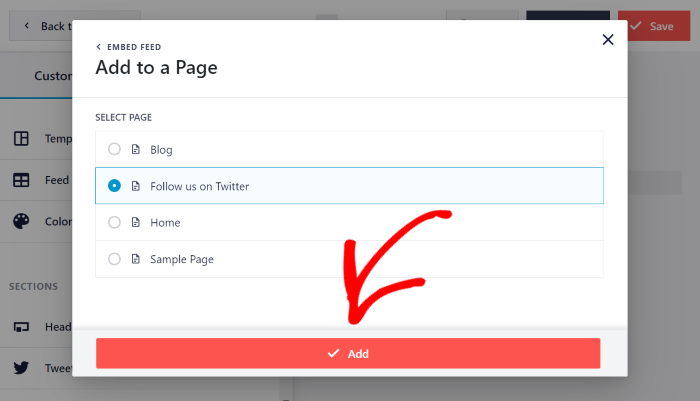
Since we’re embedding it on a page this time, click on Add to a Page to continue.
The popup will now show a list of all the WordPress pages on your website.
Once you select a page from the options, click on the Add button.
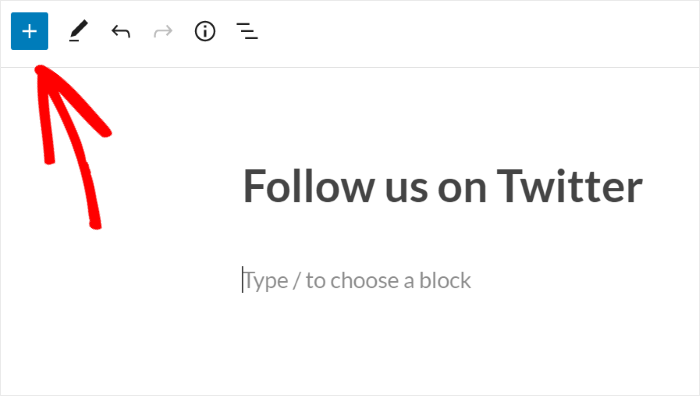
Now, you can see that page open in the official WordPress editor. Here, you’ll be able to embed your X (Twitter) feed using a content block.
First, add a new block by clicking on the plus (+) icon.
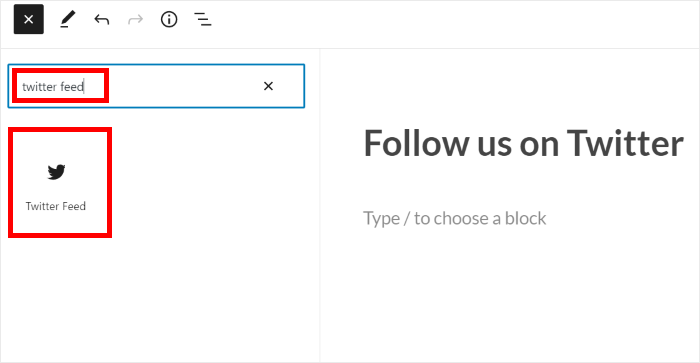
You can then look for the “twitter feed” block using the search bar at the top.
Finally, click on the X (Twitter) Feed widget from the search results below.
Once you’re ready to make your X (Twitter) timeline widget live, click on the Update button.
If you go ahead and open the webpage now, you can see how the X (Twitter) profile will look to your website visitors.

Now that you’ve embedded this X (Twitter) profile on a WordPress page, let’s look at the next way to embed X (Twitter) content.
Embed X (Twitter) Profile on the WordPress Sidebar or Footer
You can also use an X (Twitter) widget to embed X posts from your chosen X (Twitter) profile. Like the previous option, you can do this from the live feed editor.
First, navigate to the X (Twitter) Feed » All Feeds menu from your WordPress dashboard and click on your X (Twitter) feed from earlier.
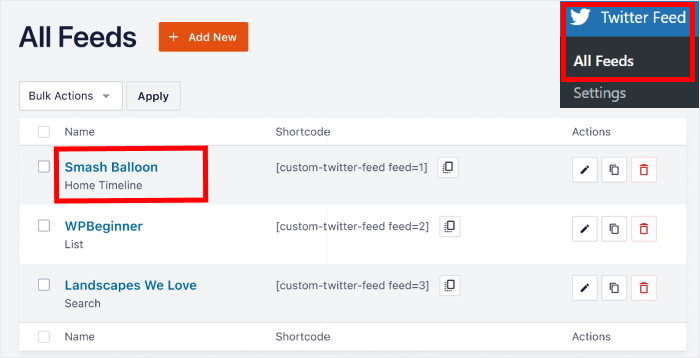
As you can see, it’s super easy to open a feed in the live feed editor once again. You can freely customize your X (Twitter) feed here — just like before.
You can click on the Embed button at the top to start embedding your X (Twitter) feed.
From the popup, you can choose where you’d like to embed the X (Twitter) profile.
To continue, click on the Add to a Widget button there.
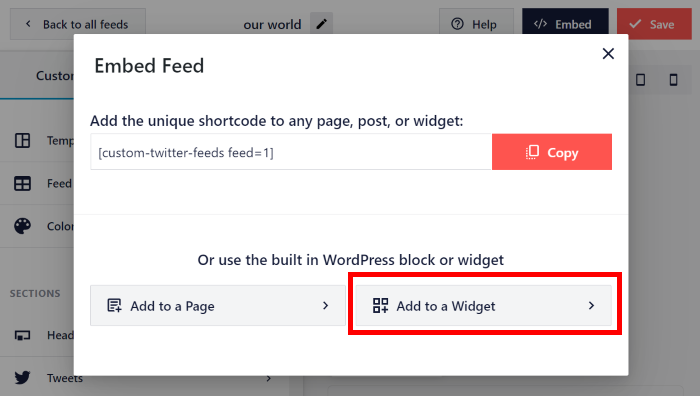
Once you do that, X (Twitter) Feed Pro will send you to the Widgets page of your site. You can use this page to add, remove, or manage your WordPress widgets.
To get started, you can choose where you want to embed your X (Twitter) profile.
If you want to embed it in your sidebar area, click on the Sidebar panel.
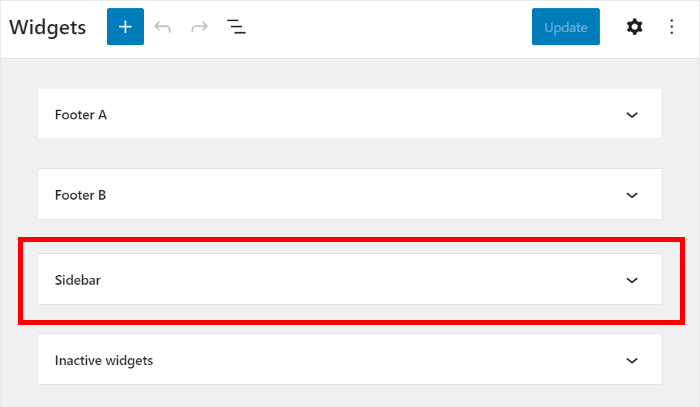
We’ll use the WordPress sidebar for our example below.
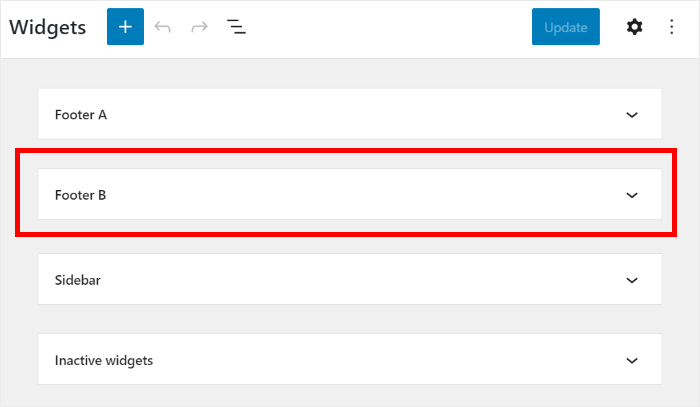
You can click on the Footer panel instead if you want to show your X (Twitter) profile on the footer area of your site.
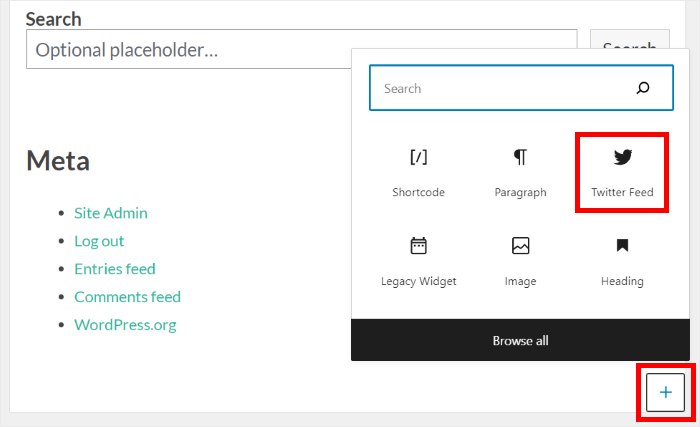
To add a new widget on the sidebar or footer, you can click on the plus icon (+) at the bottom.
Finally, click on the X (Twitter) Feed widget from the options to embed your X (Twitter) profile.
Once you click on the Update button, your X (Twitter) profile widget will be live on your website.
Want to see how it looks? Just open your site, and you can see your X (Twitter) profile embedded for everyone to see.
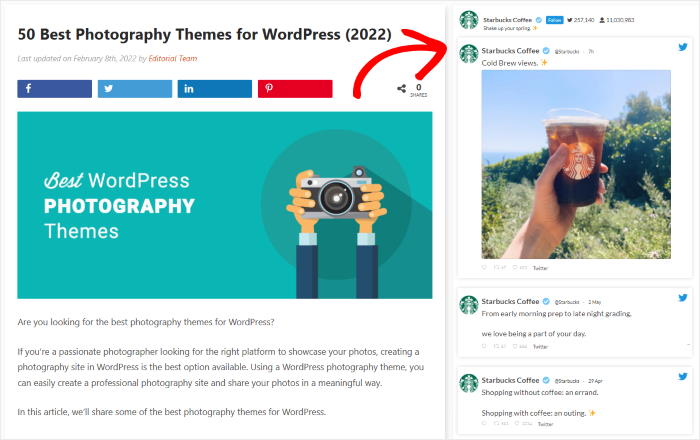
And that’s it!
Now you know how to embed an X (Twitter) profile on your website in a few clicks. With X (Twitter) Feed Pro, it’s easier than ever to show X posts on your WordPress site.
Want to embed X (Twitter) profile feeds? You can get X (Twitter) Feed Pro from here.
If you want to learn more ways to integrate X (Twitter) with your website, you can look at our list of the best X (Twitter) widgets to embed on your website.