Looking for an easy way to embed a Facebook feed in WordPress?
Displaying your Facebook updates on your website encourages your visitors to engage with your Facebook page — right on your site!
If you use the Facebook plugin to add your Facebook feed to your site, it’s hard to customize your feed’s design if you don’t have any coding skills.
Today, we’ll show you how to embed a Facebook feed on WordPress with no technical knowledge needed.
In this Article:
- Methods for Embedding Facebook Feeds on WordPress
- Embed Facebook Feed in WordPress Easily
- How to Embed Facebook Feeds in WordPress (Easy Guide)
Methods for Embedding Facebook Feeds on WordPress
There are 2 main ways to embed Facebook feeds on your WordPress website:
- Use Facebook’s plugin to manually embed your Facebook feed on your website.
- Use an authentic WordPress plugin to connect your Facebook account and automatically add your feed with just a few clicks.
The 1st method is pretty confusing since it involves multiple web pages and copying and pasting lots of code snippets into your WordPress.
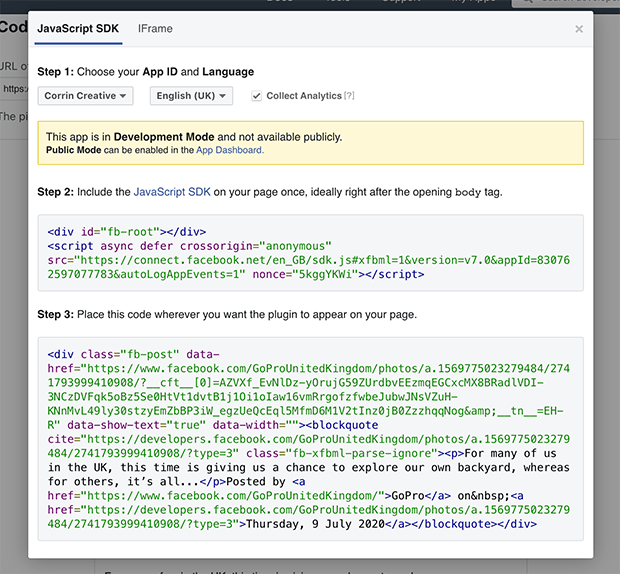
Also, you can’t really customize the default Facebook plugin design if you aren’t familiar with HTML or Javascript.
You can potentially break your website if you have errors in your code snippet. If you encounter any problems, you don’t have a support team to help you either.
But if you use a WordPress plugin to embed your Facebook feed, you won’t have those issues at all.
Embed Facebook Feed in WordPress Easily
There’s an easy way to add your Facebook feed to your website using the best Facebook feed plugin for WordPress: Facebook Feed Pro.

This user-friendly plugin makes creating and embedding Facebook feeds in WordPress so easy even complete beginners can use it.
Key Features of the Facebook Feed Pro Plugin:
- With the guided flow, you can easily set it up and display your Facebook feed on your website in less than 5 minutes!
- You can embed Facebook pages, photos, albums, live streams, events, reviews, and more — all from the same plugin.
- Since it’s built with the users in mind, the plugin is designed to be blazing fast, even when you have tons of Facebook content on your site.
- All the Facebook feeds you create will automatically inherit your site’s design and load perfectly on all screen sizes.
- For even more customization, you can import templates, themes, and even design the feed in detail from the visual customizer.
Finally, the plugin comes with a team of WordPress experts behind it. Feel free to send them a message while you’re embedding your Facebook feed, and they’ll be happy to assist you with your concerns.
With an outstanding 4.9/5 star rating, Facebook Feed Pro is well-liked by its 250,000+ users.
Ready to create Facebook feeds? Get Facebook Feed Pro today.
How to Embed Facebook Feeds in WordPress (Easy Guide)
To embed Facebook feeds on your WordPress site, all you have to do is follow the simple steps below.
Let’s get started:
Step 1: Install the Facebook Feed Pro Plugin
To add your Facebook feed to your site, you first need a copy of Facebook Feed Pro here.
After downloading the plugin to your computer, the next step is to install and activate it on your website.
If you need a refresher on how to do this, check out this helpful post on how to install a WordPress plugin.
Step 2: Create a New Facebook Feed
Since you now have the Facebook Feed Pro plugin on your site, it’s time to create your Facebook feed.
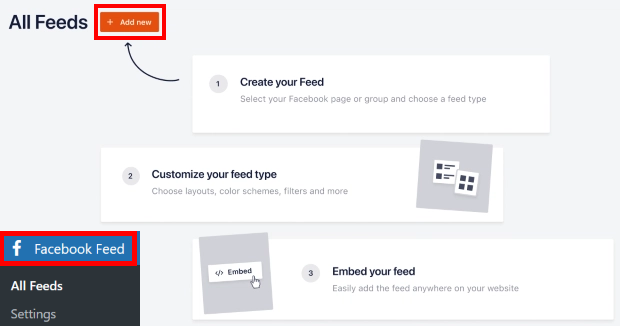
First, go to the Facebook Feed » All Feeds menu from your WordPress dashboard.
On the new page, just click on the Add New button at the top.
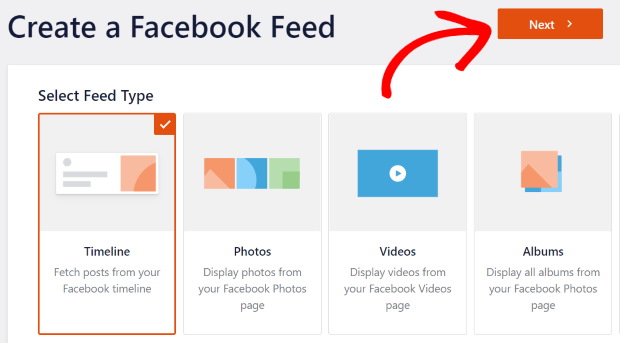
Next, you can pick the type of Facebook feed that you want.
There are 9 different options to pick from here, such as timeline feeds, review feeds, photo feeds, album feeds, video feeds, and much more.
To proceed, you can just pick the feed type that you want and then click on Next.
For this tutorial, we’ll be using a timeline feed.
Step 3: Connect Your New Feed to Facebook
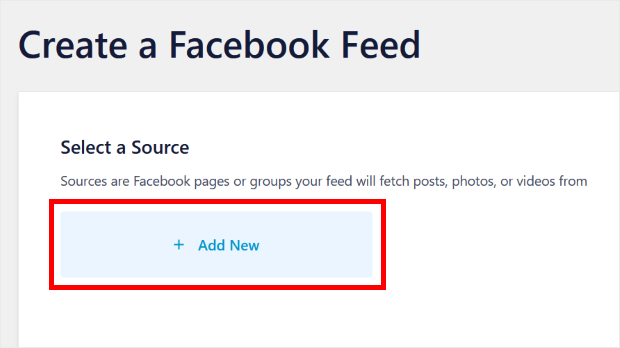
If you want your feed to display content from Facebook, you’ll have to connect it to a Facebook page or group first.
To get started with that, click on the Add New button.
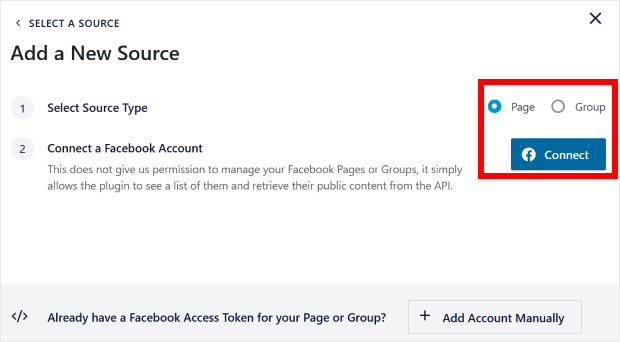
After that, the plugin will ask you to pick between a Facebook group or page. Just select the option you prefer and then click on Connect.
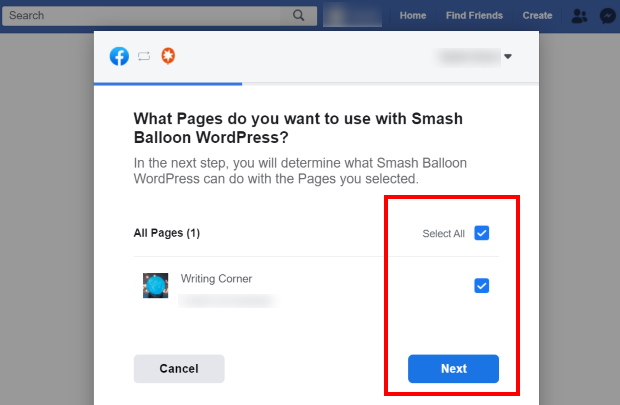
Now, the plugin will send you to Facebook so you can choose the page or group that you want to connect to your feed.
On the popup, just select the Facebook page or group and then click on Next.
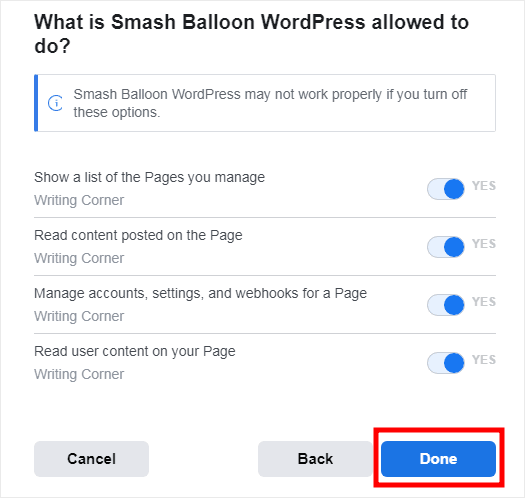
The plugin will now ask for read-only access to your Facebook account so that it can show your Facebook posts.
With this access, it can only read your posts and can’t actually make any changes. So, Facebook Feed Pro is completely safe.
Now, just click on Done to give the read-only access.
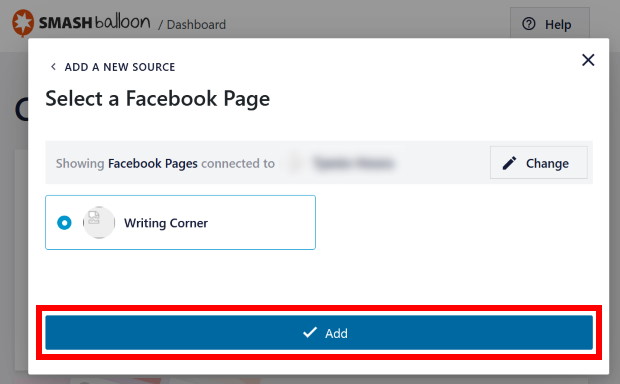
This will bring you back to your website. Here, just click on the Add button to add the Facebook page or group as a source.
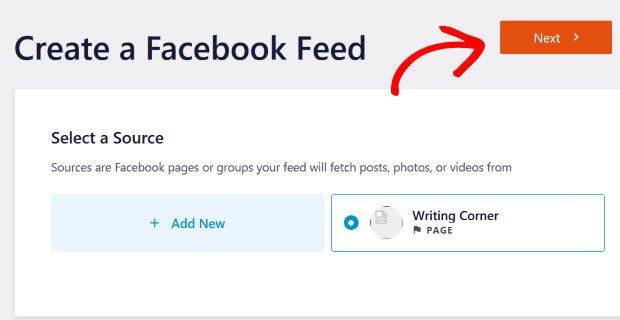
With that, you can just click on the Next button to finally connect your feed to Facebook.
Step 4: Customize Your Facebook Feed
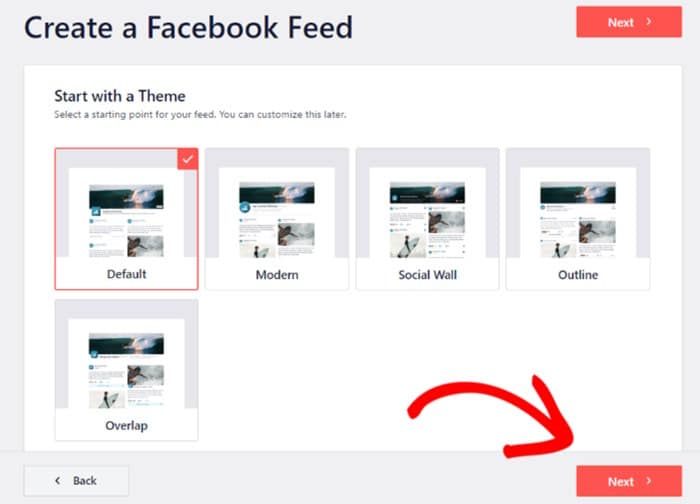
Now that you’ve connected your feed to Facebook, you can quickly choose a unique design for your feed by importing a feed theme.
You have 5 different themes to choose from here:
- Default
- Modern
- Social Wal
- Outline
- Overlap
After selecting the theme that you prefer, click on the Next button.
Once you do that, Facebook Feed Pro will give you different templates to choose from. Each template will change the layout of the posts on your site.
Just select the template you like and then click on Next once more.
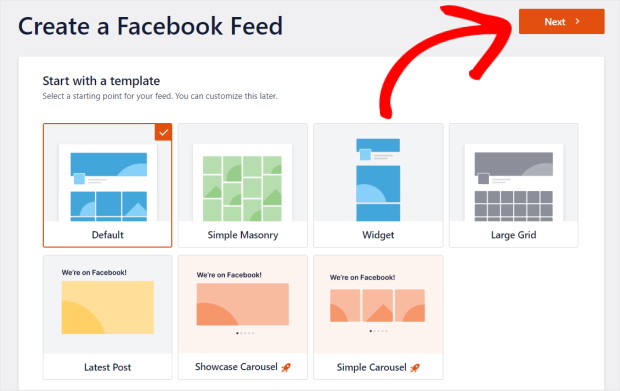
After picking your template, your feed will be open in the live feed editor.
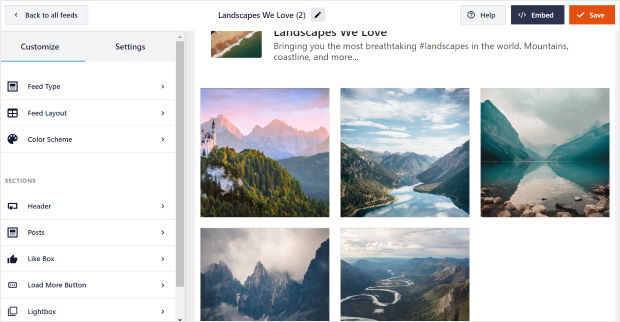
On the left panel of the live feed editor, you can find all the customization options for the feed. With these, you can change the feed type, layout, color scheme, header design, like box, post style, and much more.
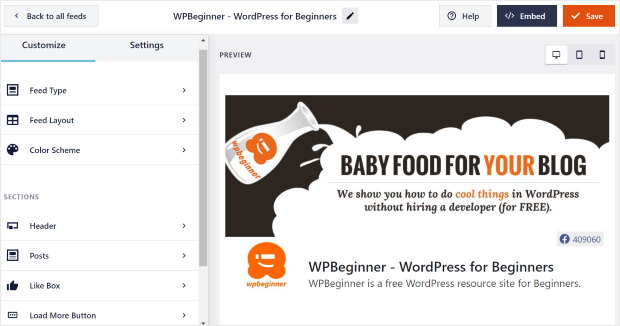
On the right, you can see a live preview of your Facebook feed, which shows all of your changes in real-time.
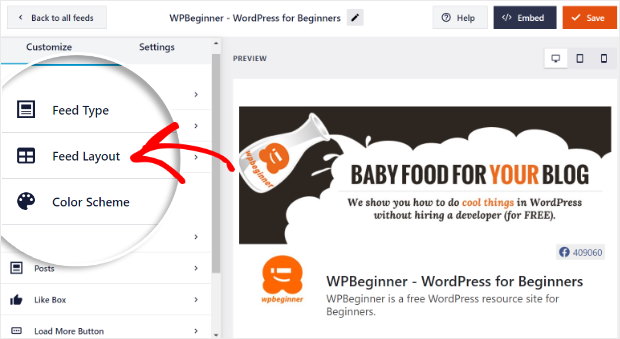
First, click on the Feed Layout option to go ahead and customize the layout of your Facebook feed.
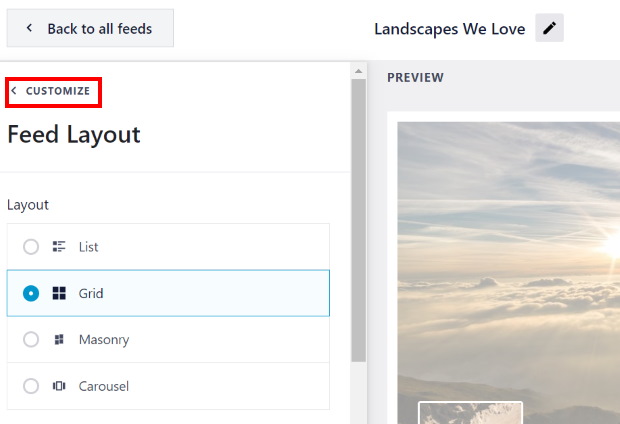
For your Facebook feed, you get 4 different feed layout options: List, Grid, Masonry, and Carousel.
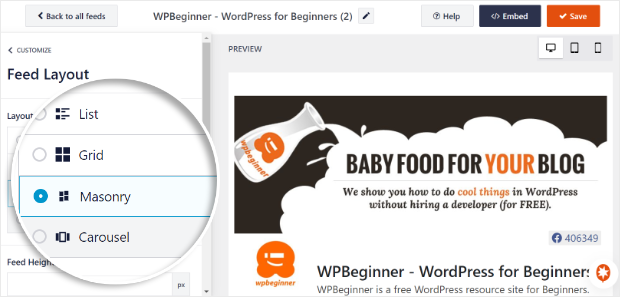
The first option is the list layout, which shows your Facebook posts in a single column.
As a result, each Facebook post gets more room on the page, so it’s more visible.
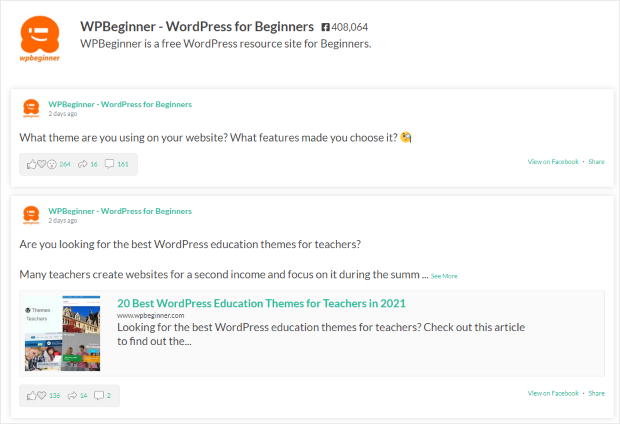
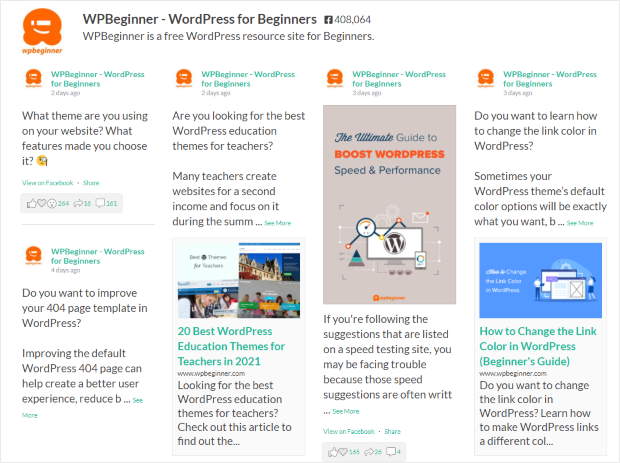
Next, you have the grid layout that can show a ton of Facebook posts at the same time. In this layout, your posts will be shown in rows and columns, with each post taking less space.

You can also go for the masonry layout, which shows your Facebook posts in multiple columns.
If you want to keep the original proportions of your Facebook posts, then this layout is for you.
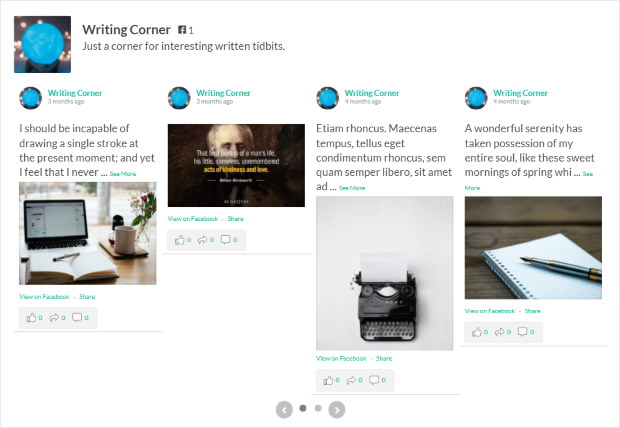
Want to give your visitors more control over how they see your Facebook posts? You can try the Facebook carousel layout in that case.
After you select the feed layout option that you prefer, just click on Save.
To see the main customization options again, click on the Customize button.
With that, you can go on and change the colors of your Facebook feed. For that, click on the Color Scheme option.
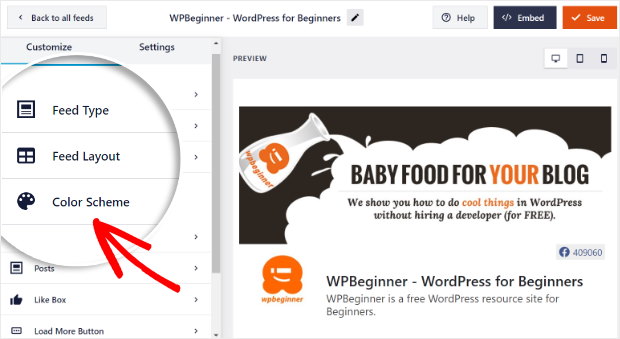
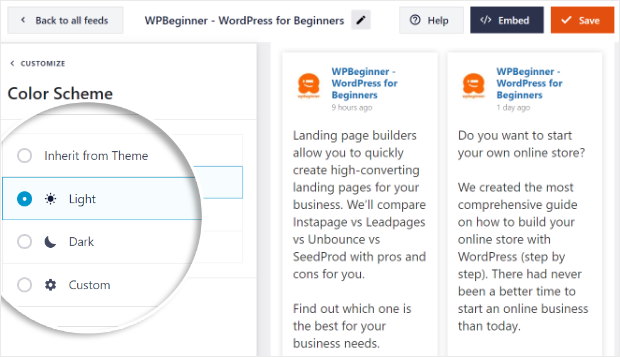
When it comes to the color scheme of your Facebook feed, you have 4 options to choose from:
- Inherit From Theme: Use the colors of your site’s theme for your feed
- Light: Show a feed with a lighter background and dark font color
- Dark: Use a darker background along with a lighter font color for your feed
- Custom: Manually pick all the colors of your feed yourself
Just select the color scheme that you prefer for your Facebook feed and then click on Save.
After that, you can use the rest of the customization options to change the design of your new Facebook feed.
You can set your header style, like box, post layout, feed size, background, and much more, with absolutely no coding needed. Finally, click on Save after you’re done customizing your Facebook feed.
Step 5: Embed Your Facebook Feed on Your Website
Once you’re done with the customization, you can go ahead and post your new Facebook feed. You can do that in 2 different ways:
- Embed the Facebook feed on your WordPress page
- Embed the Facebook feed on your WordPress sidebar or footer
Now, let’s take a look at both of them.
Embed the Facebook Feed on Your WordPress Page
Using the live feed editor, you can easily embed your Facebook feeds on your site. To get started, click on the Embed button at the top.
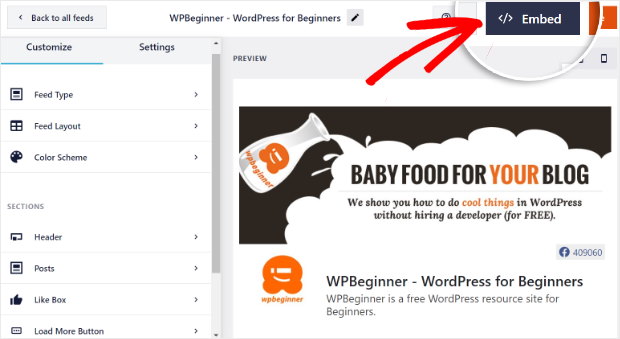
After that, you’ll see a popup with different options for embedding your Facebook feed. To continue, select the Add to a Page option.
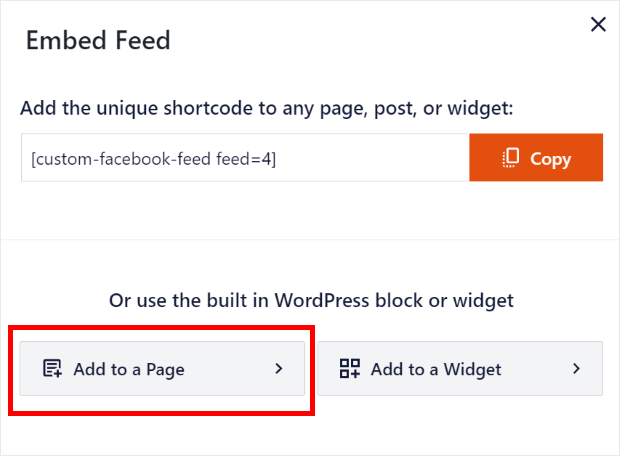
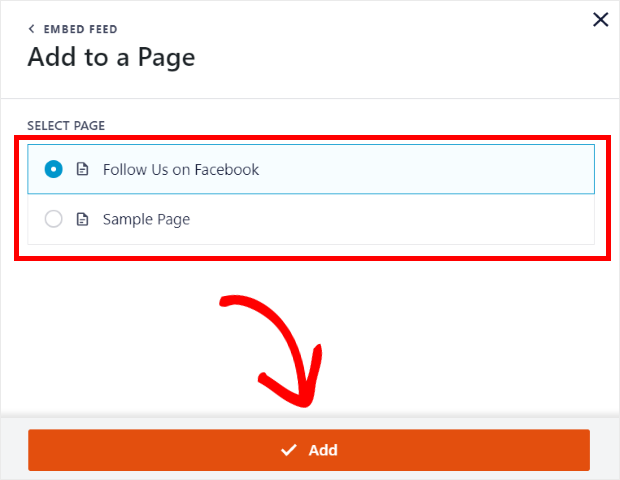
You can now choose where you want to embed the Facebook feed. Just select your WordPress page on the popup and click on the Add button.
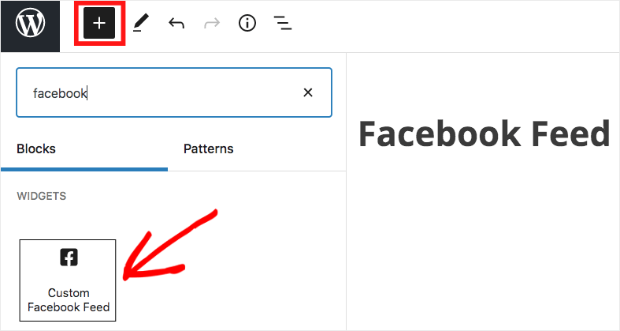
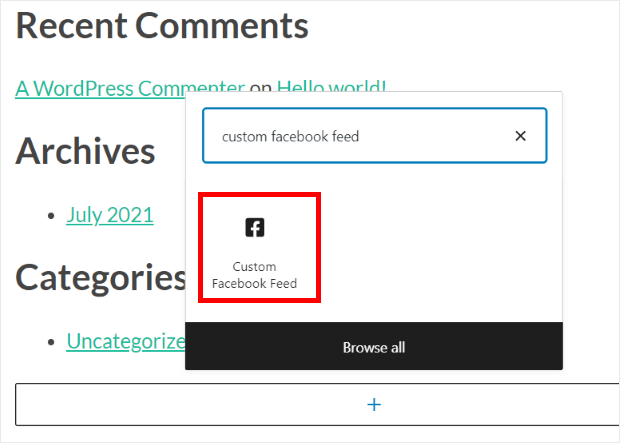
Clicking on it will send you to that WordPress page. There, you can click on the small plus icon (+) to add a new block.
Now, pick the Custom Facebook Feed widget from all the options.
Finally, you can finish adding your Facebook feed by clicking on the Publish button.
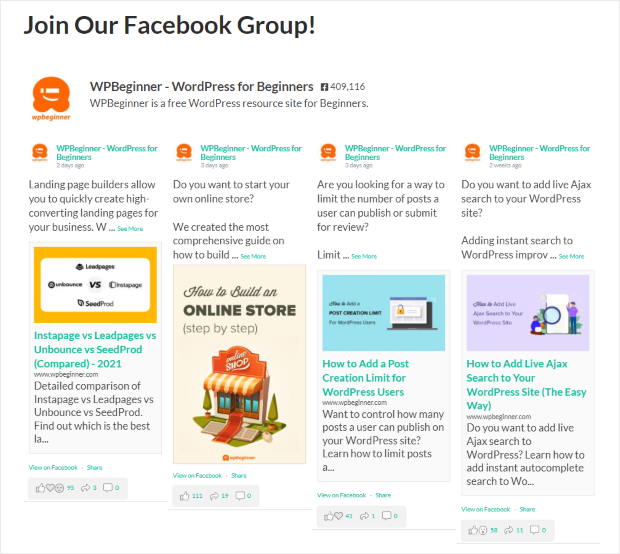
With that, you’ve embedded your Facebook feed on your WordPress website. Now, you can open your website and see how it looks right there.
Embed the Facebook Feed on Your WordPress Sidebar or Footer
The next place that you can embed your Facebook feed is on your sidebar or footer. And you can do that from the live feed editor as well.
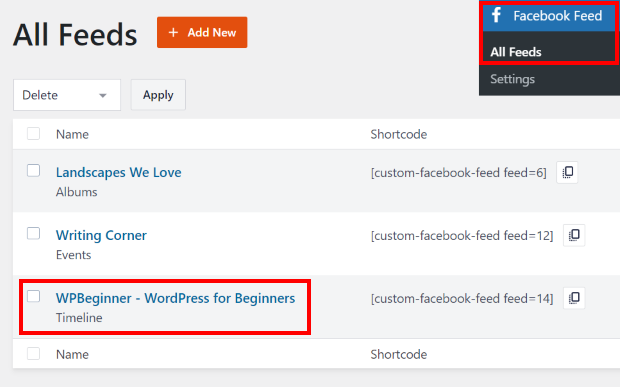
First, go to the Facebook Feed » All Feeds menu from your WordPress dashboard.
On that page, you can find all of your Facebook feeds listed. Find your new Facebook feed here and just click on it.
After that, you’ll see the live feed editor once again. Click on the Embed button at the top to continue.

Once you do that, it’s time to pick where you want to embed your Facebook feed. Just select Add to a Widget on the popup to continue.
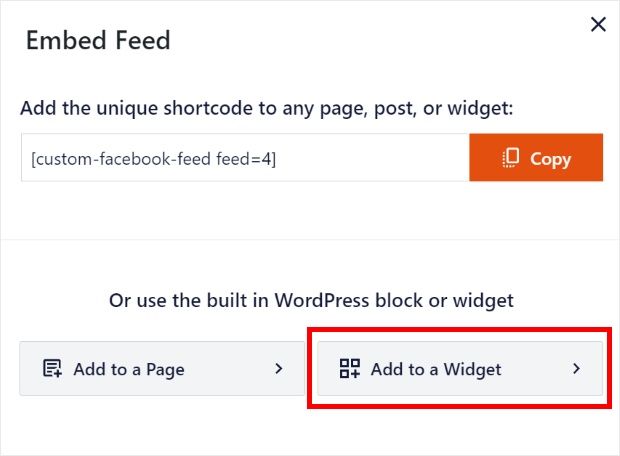
This will open the Widgets page of your WordPress website. Here, you can now embed your feed as a Facebook widget.
So click on the Sidebar panel here to start managing your sidebar widgets.
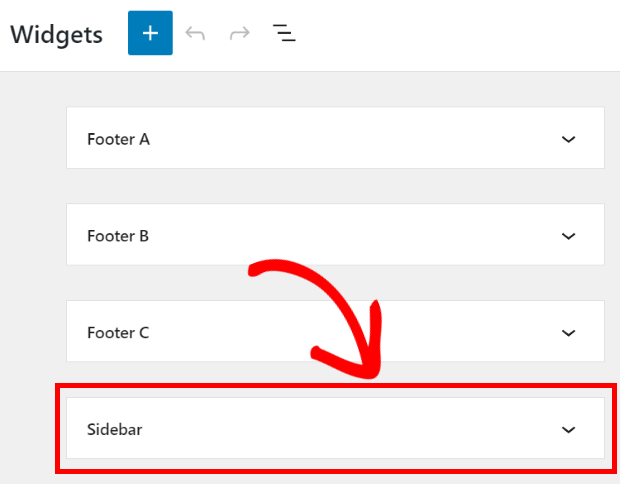
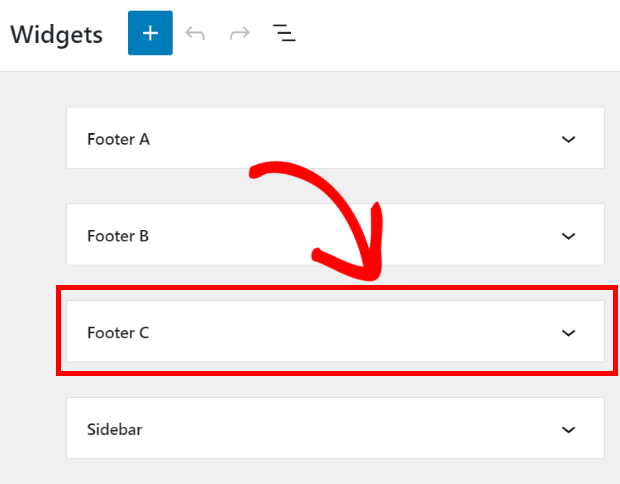
To embed your Facebook feed on your WordPress footer, you can instead click on one of the Footer panels.
We’ll embed the Facebook feed on the sidebar for this tutorial.
Now click on the plus icon (+) to add a new widget there, and then select the Custom Facebook Feed widget from the options.
Now, your Facebook feed will be embedded automatically on your sidebar area, like this:

And now we’re done — it’s as simple as that!
We hope this article helped you how to embed a Facebook feed in WordPress. With the help of Facebook Feed Pro, you can do that in just a few simple clicks.
Now, you can easily do this to supercharge your page engagement and increase your followers.
So, what are you waiting for? Get started with Facebook Feed Pro today.
Want to give your Facebook marketing a boost? Check out our guide on how to get more likes on your Facebook page.
If you thought this was helpful, don’t forget to follow us on Twitter and Facebook for more helpful social media content.
