Many people believe the primary goal of a live broadcast is just getting views on X (Twitter).
It makes a lot of sense — live streams can hold viewers 10 to 20 times longer than pre-recorded videos, after all.
But if you place these broadcasts on your website, you can keep people engaged on a platform that you control instead of sending them to Twitter.
Just like that, you can turn your website into a central hub for all your brand’s activity.
The great news is that creating this viewing experience is easy. In this guide, I’ll walk you through the simple steps to embed an X live stream on your website — with zero coding!
In this Article:
- Why Display Live X (Twitter) Broadcasts on Your Website
- Easiest Way to Embed X (Twitter) Live Streams on Your Website
- How to Embed X (Twitter) Live Streams on Your Website in 5 Steps
- Key Takeaways and Next Steps
Why Display Live X (Twitter) Broadcasts on Your Website
- Increase Dwell Time and SEO: When visitors stay to watch your live content, it increases their time on site, which is great for your search engine rankings.
- Promote Your Products: Live broadcasts let you showcase new products or services in real-time, creating excitement and urgency that can drive immediate purchases.
- Grow Your Twitter Following: When people discover your live content on your site, they’re more likely to follow your X/Twitter account for future updates.
- Boost Engagement and Brand Trust: Live video creates a personal connection with your audience, helping build credibility and stronger relationships with potential customers.
I’ve actually found that businesses using live streams on their websites see better visitor engagement compared to those who only share links to external platforms.
The key is making it easy for your audience to access your content without leaving your site.
Easiest Way to Embed X (Twitter) Live Streams on Your Website
The simplest method to add X live streams to your WordPress site is with the Twitter Feed Pro plugin.
This tool makes the entire process straightforward, even if you’ve never worked with social media plugins before.

Twitter Feed Pro offers a 3-step guided flow that makes it super easy to embed Twitter content without any coding knowledge.
Once you set it up, live broadcasts will automatically appear on your website whenever your chosen Twitter handle goes online.
Here’s what makes this plugin particularly useful for live streams:
- The broadcasts get saved as videos automatically, so people can check out the content even after the live session ends.
- On top of live streams, you can also embed Twitter profiles, hashtag feeds, lists, and search results.
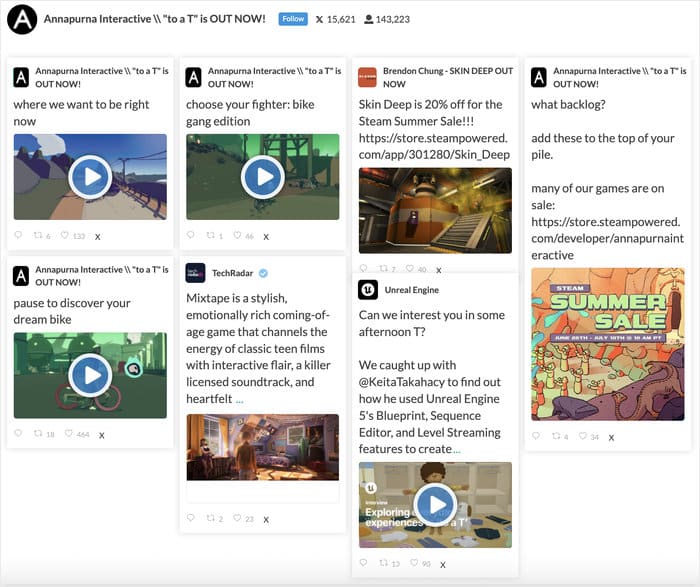
- Your feeds automatically copy your website’s design and load perfectly on all screen sizes, from desktop computers to mobile phones.
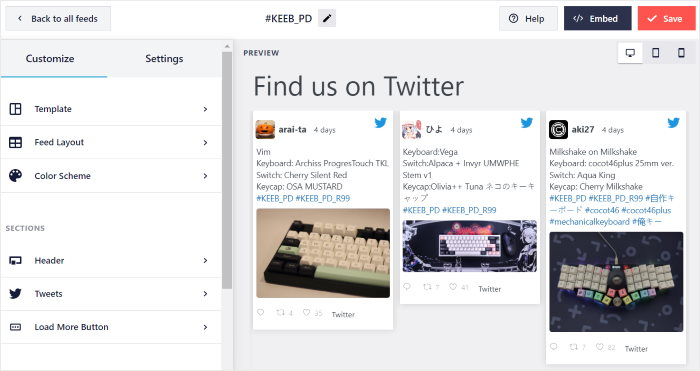
- The plugin includes templates you can import with just one click, or you can use the live visual customizer to design beautiful feeds that match your brand.
Plus, there’s a high-quality support team ready to help whenever you need assistance.
I recommend Twitter Feed Pro because it handles all the technical aspects automatically while giving you complete control over how your content appears.
Ready to start displaying Twitter live streams with ease? Get your copy of Twitter Feed Pro from here!
How to Embed X (Twitter) Live Streams on Your Website in 5 Steps
Now I’ll walk you through the complete process of setting up live X streams on your WordPress site. This method works for any WordPress website, and takes just a few minutes.
In these steps, you’ll learn how to install Twitter Feed Pro, create a Twitter feed, connect it to your account, customize its design, and display it on your website.
Step 1: Download and Install Twitter Feed Pro
First, you’ll need to get the Twitter Feed Pro plugin and add it to your WordPress site.
Once you have the plugin, install and activate it on your site (see our beginner’s guide if you want help).
Step 2: Create a New Twitter Feed
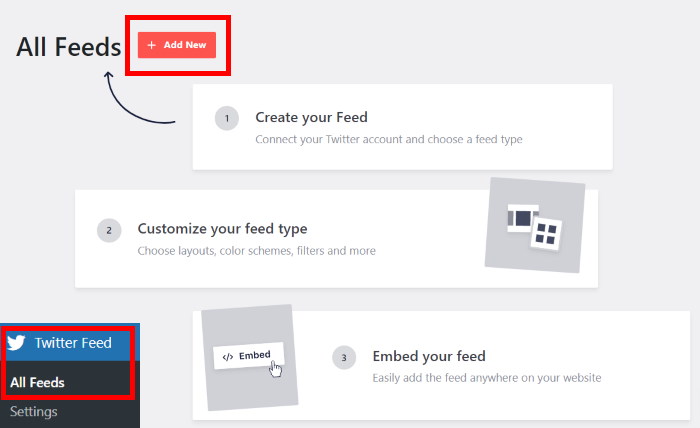
Now you’ll set up your first Twitter feed that will display the live streams. Go to your WordPress dashboard and navigate to Twitter Feed » All Feeds.
After that, click the Add New button to start creating your feed.
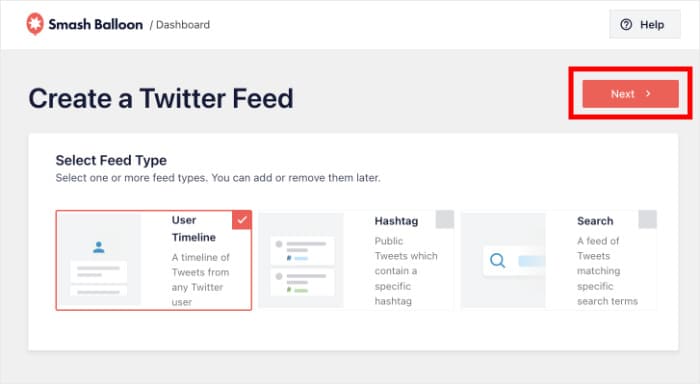
On the next screen, select User Timeline as your feed type and click on Next.
This feed type is specifically designed to show live broadcasts and regular posts from Twitter accounts in chronological order.
Step 3: Connect Your Feed to Twitter
Now you need to authorize the plugin to access your X account so it can pull in your live streams.
Click the Connect button when you see the connection popup.
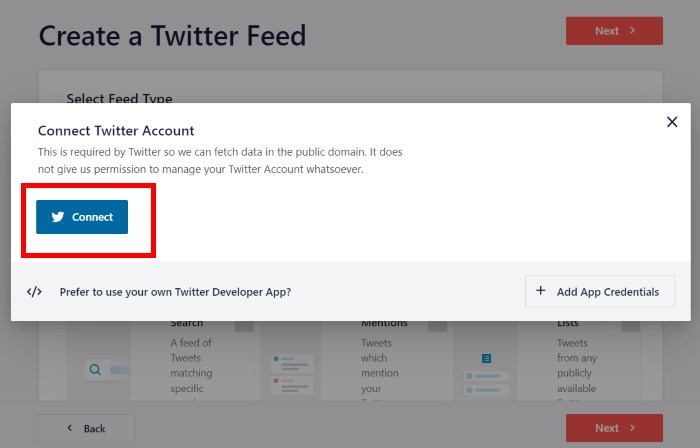
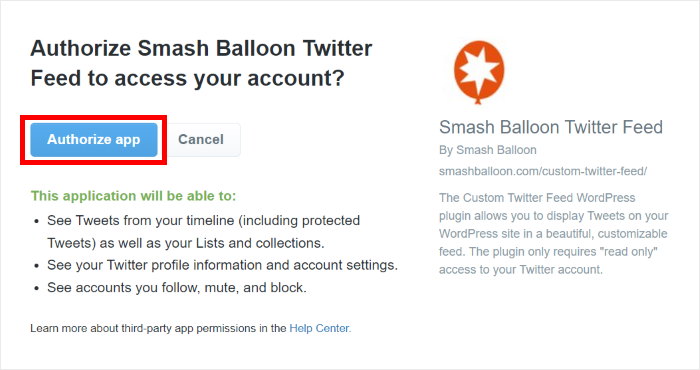
Once you do that, the plugin will redirect you to Twitter and ask for read-only access to your X account, which is completely safe.
This permission only allows it to view your content – it can’t actually make any changes.
Click Authorize App to grant the necessary permissions.
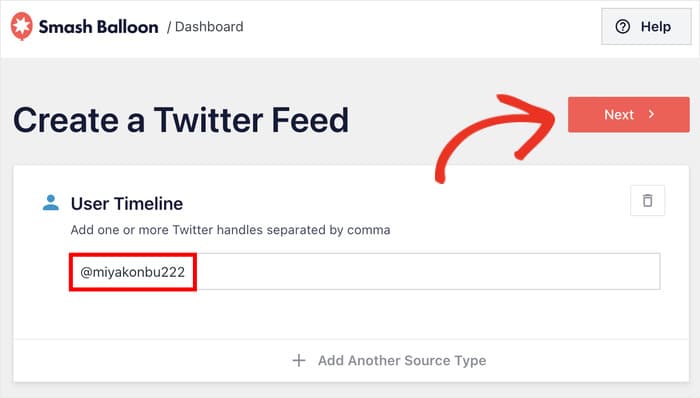
After authorization, the plugin will bring you back to your website.
Here, type in the Twitter handle of the account whose live streams you want to display on your website.
Once you type the handle, click on Next to continue.
Step 4: Customize Your Twitter Feed
This is where you can choose how your Twitter live stream will look on your website.
To make this process quick, your new Twitter feed will automatically match your website’s design. On top of that, you get lots of customization options as well.
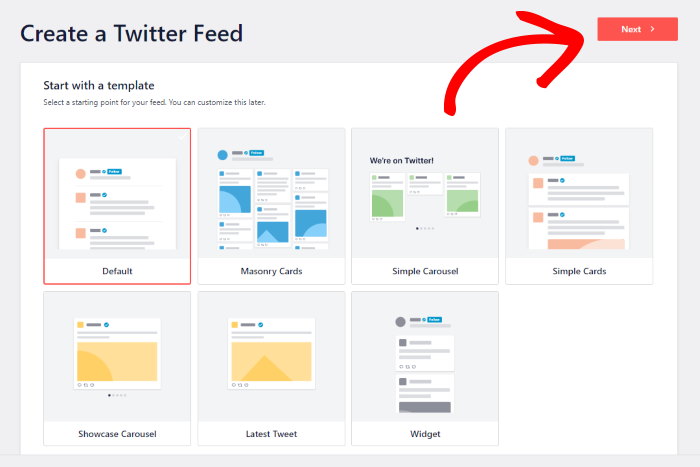
First, you can choose from 7 pre-built templates designed by professionals:
- Default
- Masonry cards
- Simple carousel
- Simple cards
- Showcase carousel
- Latest tweet
- Widget
Pick a template that fits your planned design and click on Next to import it.
You’ll now see the live feed customizer, which shows your feed preview on the right and customization options on the left.
Any changes you make appear instantly in the preview, so you can see exactly how your feed will look.
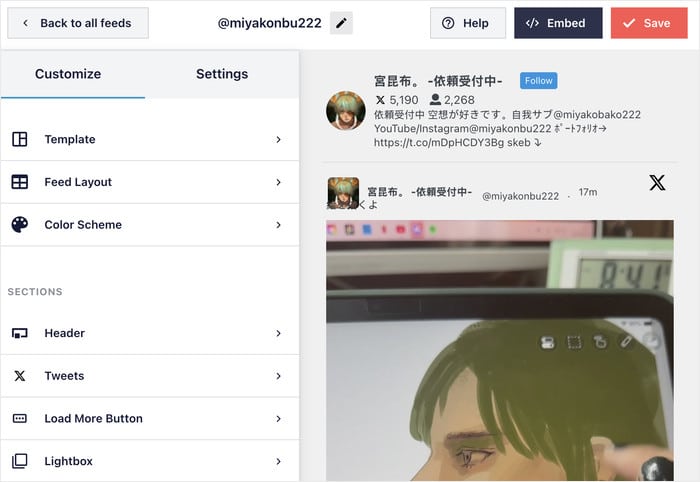
Let’s explore a few options here so you can get a hang of the customizer.
First, click on the Feed Layout option in the left panel.
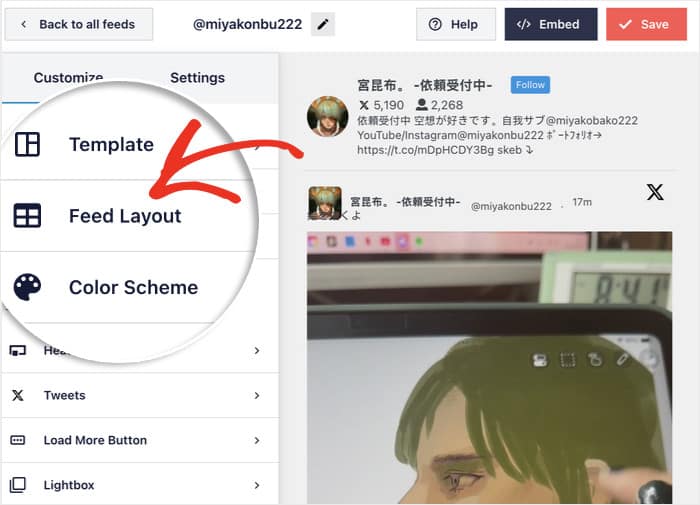
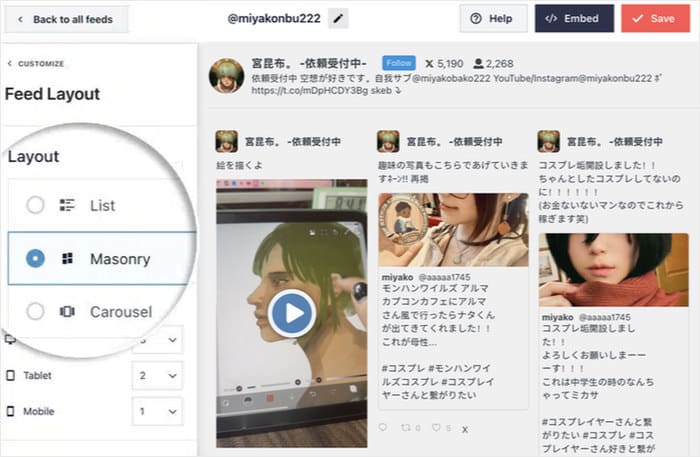
Here you can choose from 3 different layout styles:
- List: Each post gets plenty of focus and space, perfect for highlighting important live streams.
- Masonry: Display many tweets at once in a Pinterest-style grid layout.
- Carousel: Create an interactive sliding experience that visitors can navigate through.
Pick the layout that works best for your website and click on Save.
I recommend either the List or Masonry layout for Twitter live streams since the video will always be visible.
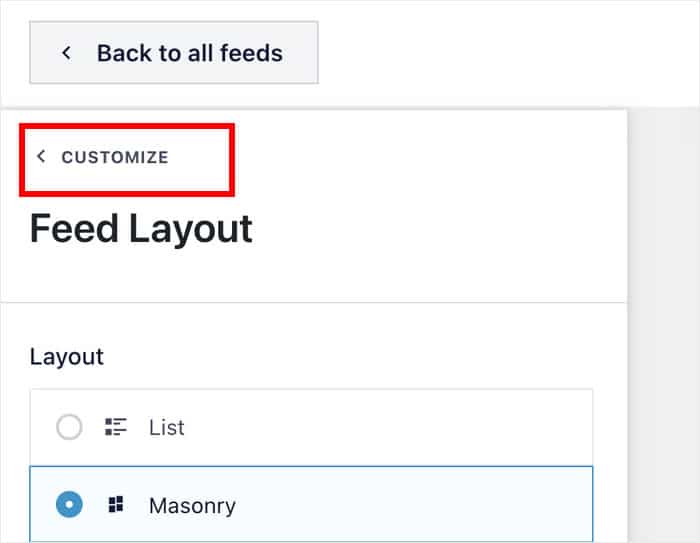
Next, click Customize at the top left to return to the main options.
After that, you can pick another part of your Twitter live stream feed to customize.
This time, let’s change the colors of your new Twitter feed.
Select the Color Scheme from the menu on the left to start doing that.
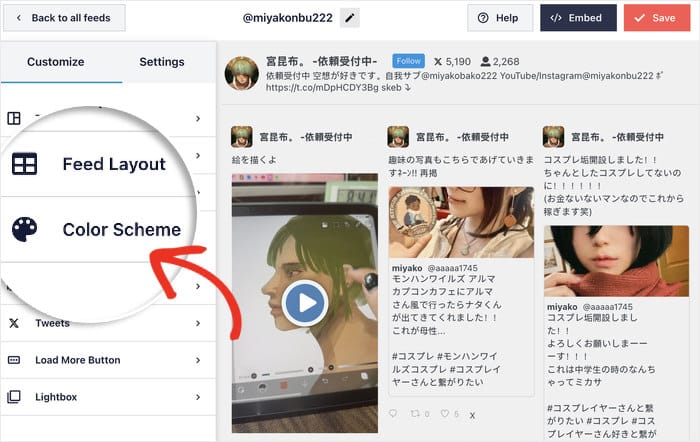
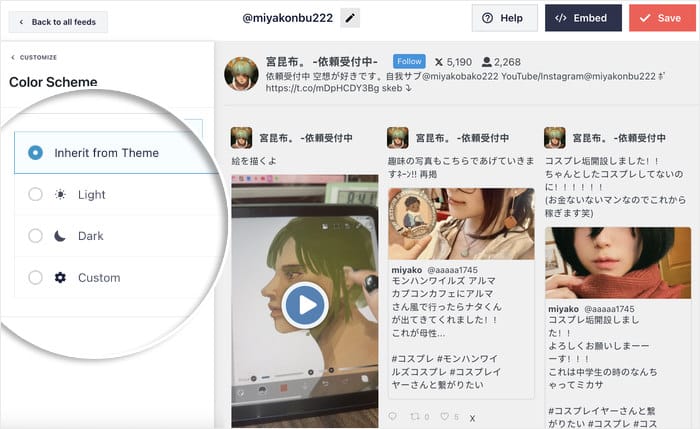
For a quick and easy way to change the colors, you can choose from 4 color scheme options:
- Inherit from Theme: Automatically copies your WordPress theme’s colors for seamless integration
- Light: Uses a light background with dark text, great for most websites
- Dark: Features a dark background with light text, perfect for modern designs
- Custom: Lets you pick all colors yourself for complete control
Like before, select your color scheme and Save your changes.
Use the remaining customization options to adjust your header, tweet style, buttons, and other visual elements until everything looks exactly how you want it.
Step 5: Display Twitter Live Stream on Your Website
Now comes the exciting part — actually adding your live Twitter feed to your website. You can do this directly from the customizer without leaving the current screen.
Click the Embed button in the top right corner of the customizer.
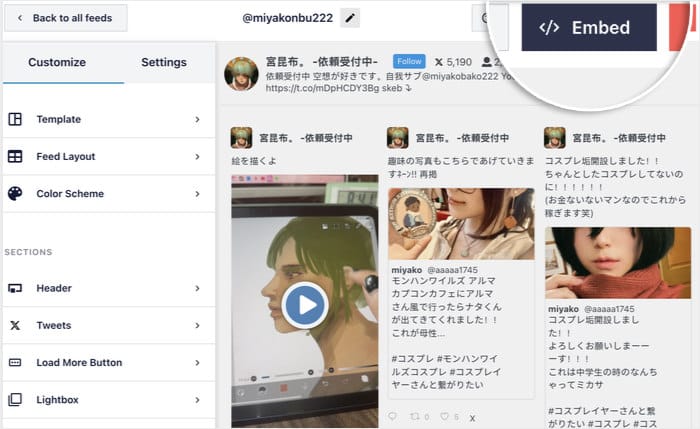
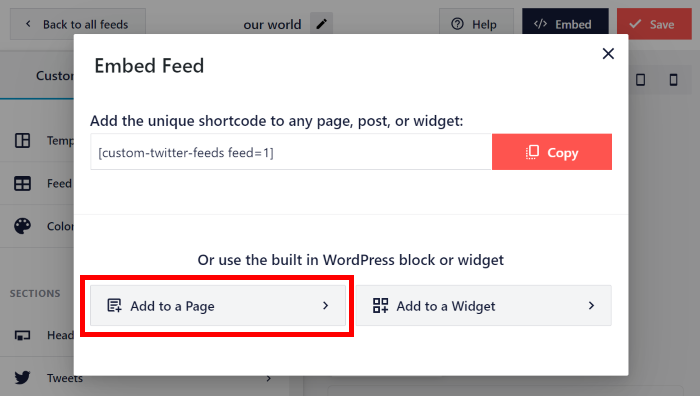
This will show you a popup with 3 different ways to add your Twitter live stream feed to your site:
- Copy Shortcode: Copy the shortcode to insert the feed anywhere on your site.
- Add to a Page: Display the feed on one of your published WordPress pages.
- Add to a Widget: Show the stream in a widget-ready area like your sidebar or footer.
For this example, I’ll use the page method since it gives a lot of visibility to the stream.
To continue, click on the Add to a Page button.
You’ll see a list of all your published pages where you can add the Twitter feed.
Select the page where you want your live stream to appear and click Add.
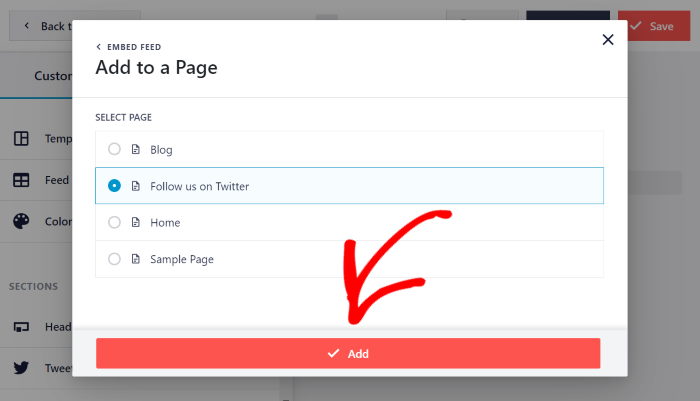
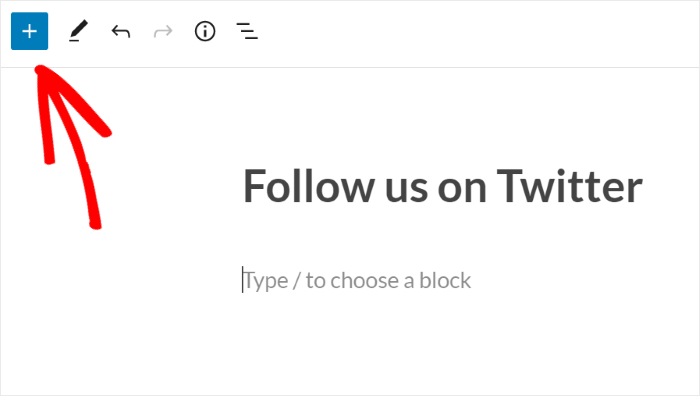
This will redirect you to that WordPress page in the block editor. Now you need to add the Twitter feed to your page content.
Click the plus (+) icon to add a new block to your page.
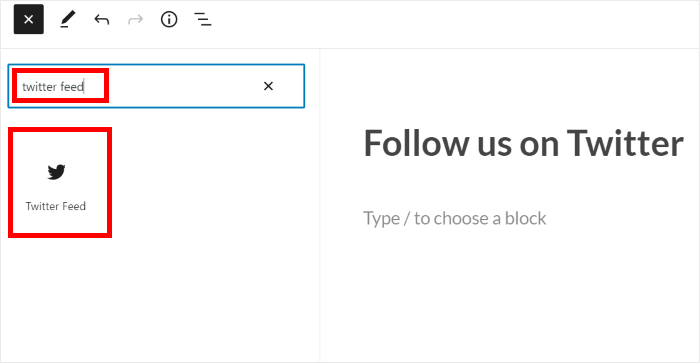
In the block search bar, type “twitter feed” to find the plugin’s block.
Next, click on the Twitter Feed block when it appears in the results.
The block will be added to your page, automatically displaying your customized Twitter feed.
You can now Update the page to save your changes and make the feed live on your website.

Whenever your chosen Twitter account goes live, the live broadcast will automatically appear on your website for visitors to watch.
Then, people can click on your live video and watch it directly on your site.

Key Takeaways and Next Steps
You’ve successfully learned how to embed X (Twitter) live streams on your WordPress website using the easiest method.
Now you can use Twitter live streams on your site to boost engagement, grow your Twitter following, and keep visitors on your platform longer. And all you need to do is:
- Install and activate the Twitter Feed Pro plugin.
- Create a new Timeline feed and connect it to your account.
- Customize the feed’s appearance to match your website design.
- Display the feed on your chosen page using the Twitter Feed block.
Ready to start displaying your Twitter streams? Get Twitter Feed Pro today!
Want to get more out of Twitter? We’ve also got a guide on the best ways to make money on Twitter/X.


Great walkthrough on embedding X live streams! Does Twitter Feed Pro also support embedding scheduled live events before they go live?