Making your website feel welcoming is key to keeping visitors around. You want them to easily find what they need and feel comfortable reaching out.
It can be frustrating to know that people are leaving your site simply because they couldn’t get a quick answer.
An easy way to solve this is by using a tool that people already know and trust, like Facebook.
By providing an instant and familiar way to chat, you can answer their questions and build the confidence they need to make a purchase.
In this guide, I will show you exactly how to add Facebook Chat to your WordPress website in just 5 simple steps.
- Why Add a Facebook Chat to Your WordPress Website
- Easiest Way of Adding Facebook Chat to WordPress
- 5 Steps to Add Facebook Chat to Your WordPress Website
Why Add a Facebook Chat to Your WordPress Website
In my experience, visitors can abandon websites when they can’t get immediate answers. After all, they can simply open Google on a new tab and look for the information.
Facebook Chat solves this problem by providing instant communication in a format most people already use daily.
Here are a few great ways adding Facebook Chat can help your website:
- Prevents Lost Sales: Visitors can get quick answers instead of leaving to check competitors. This immediate response often makes the difference between a sale and a lost opportunity.
- Improves Customer Satisfaction: Fast issue resolution shows you value their time. Minutes instead of hours builds loyalty and encourages repeat purchases.
- Zero Learning Curve: Most visitors already use Facebook to chat with others daily. They don’t need new accounts or unfamiliar systems to contact you.
- Grows Your Social Media Presence: Every chat connects visitors to your Facebook Business Page. After that, they can easily follow you for more updates.
Easiest Way of Adding Facebook Chat to WordPress
The simplest way to add Facebook Chat to your website is by using a WordPress plugin. This method requires no coding knowledge and takes just a few minutes to set up.
Out of the available chat plugins for WordPress, WPChat stands out as the best option.
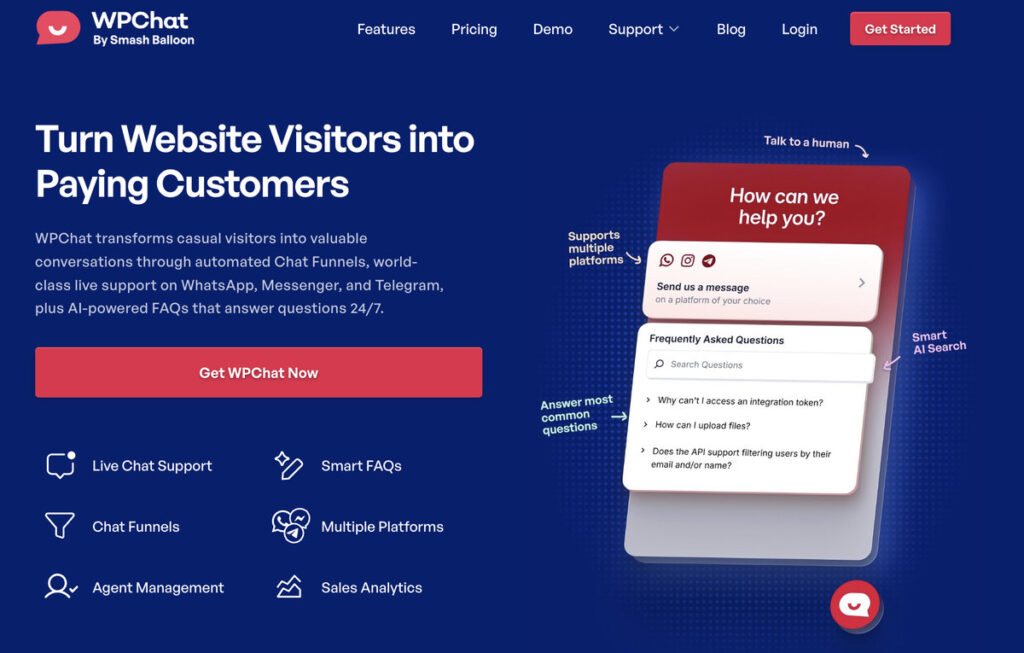
WPChat is a WordPress chat plugin that integrates multiple messaging platforms, including Facebook.
It adds a floating chat widget to your website that visitors can click to start conversations directly through your Facebook Business Page.
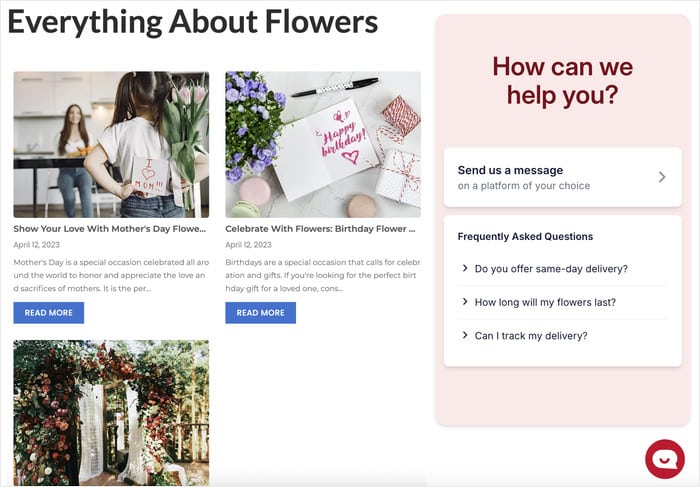
On top of Facebook, WPChat also lets your visitors reach you on popular platforms like WhatsApp, Telegram, and Instagram.
To help you provide instant answers to site visitors, you can even use WPChat to create FAQs or automated Chat Funnels.
All in all, WPChat can be a fantastic addition to your website and gives you everything you need to connect with site visitors.
Ready to add Facebook Chat to your website? Get your copy of WPChat today!
5 Steps to Add Facebook Chat to Your WordPress Website
Just follow the simple steps below, and you can have a chat assistant on your website that lets your visitors reach you using Facebook.
Let’s get started.
Step 1: Install and Activate the WPChat Plugin
First, you’ll need to get the WPChat plugin from their official website. Once you have the plugin, you can install and activate it on your website.
You can check out this guide on installing WordPress plugins if you want to learn how.
Step 2: Set Up a Facebook Chat Assistant
Now that WPChat is installed, it’s time to configure your chat assistant. This is the interactive widget that will appear on your website for visitors to use.
To get started, navigate to the WPChat menu in your WordPress dashboard and click the Set Up button.
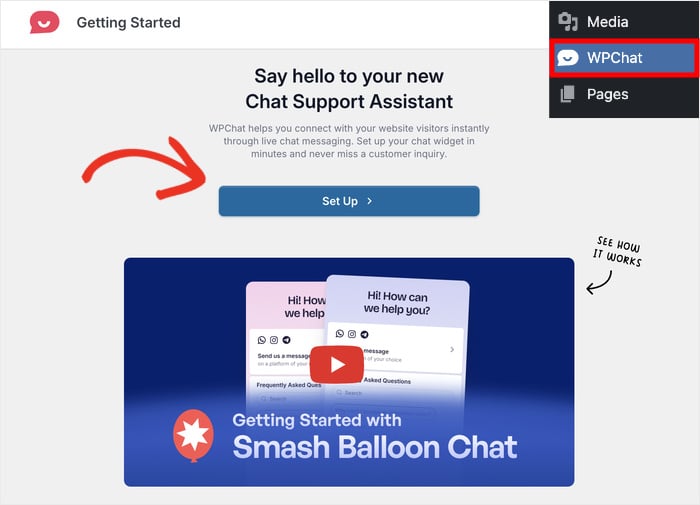
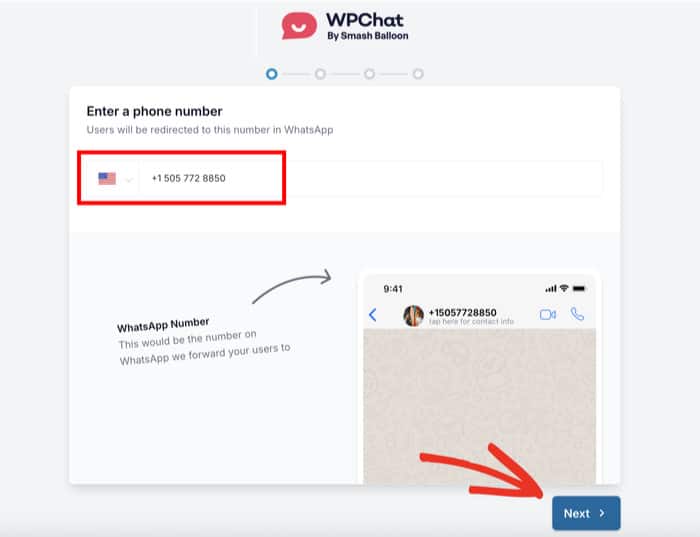
On the setup screen, you’ll see a field asking for your WhatsApp number.
Enter your number and click Next to continue.
Next, you’ll choose a visual theme for your chat widget. WPChat offers three pre-designed options: Basic, Night, and Pastel.
Each theme has a different color scheme and style. I recommend previewing each one to see which matches your website’s design best.
Once you’ve selected your preferred theme, click Next to move forward with the configuration.
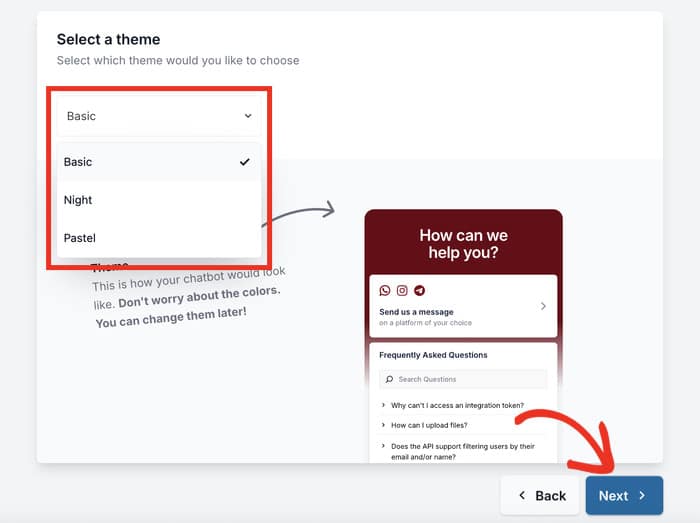
Don’t worry — you can change the theme and even customize your Facebook Chat assistant in detail later.
Step 3: Choose Where Facebook Chat is Visible
This step lets you control exactly where your Facebook Chat assistant appears on your website. First, choose your visibility preference from the two available options:
- Display on all pages: The Facebook Chat assistant will appear across your entire website with this option.
- Display only on specific pages: Enable the Facebook Chat assistant only on certain areas of your website.
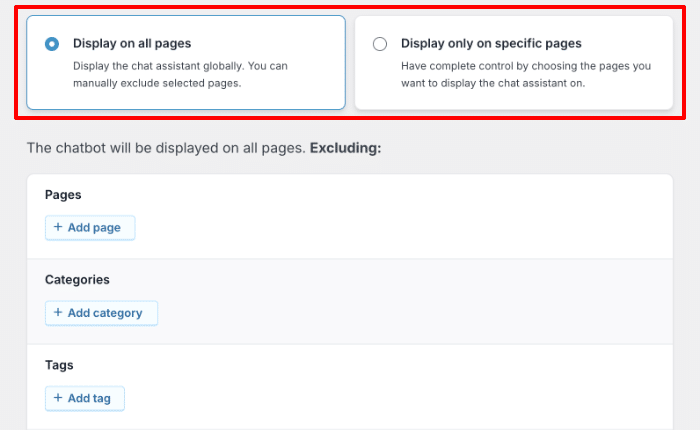
After selecting your display option, scroll down to fine-tune your settings.
You can choose which Pages, Tags, Categories, and Custom Post Types should include or exclude the chat widget.
For example, you might want to exclude the chat from your privacy policy page or only show it on product pages.
Once you’ve set up your visibility, click on Next to continue.
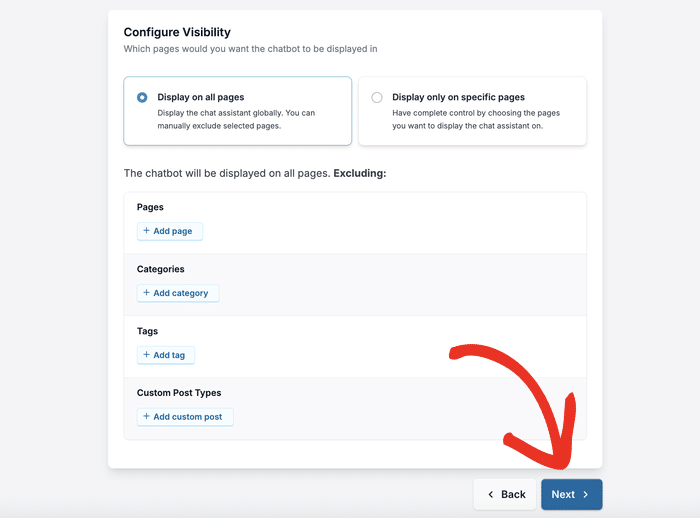
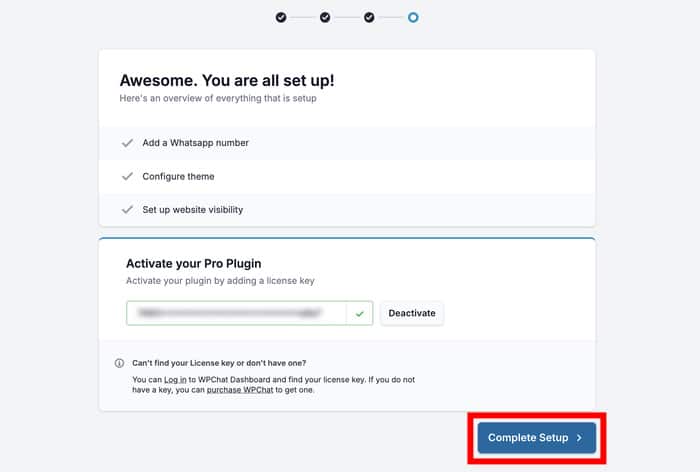
On the next screen, enter your WPChat license key that you got with the plugin.
After entering the key, click on Finish Setup to complete this stage of the configuration.
Step 4: Customize Facebook Chat Assistant
With the basic setup complete, you can now customize how your chat assistant looks and feels. That way, you can make sure the Facebook Chat feels like an official part of your website.
To access the customization options, click on the Customize button.
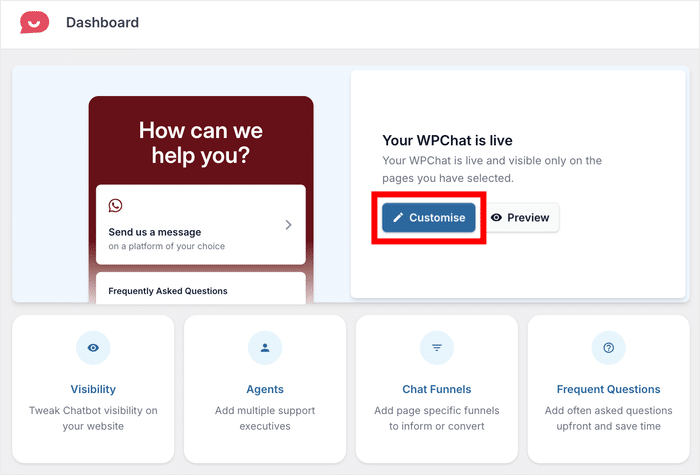
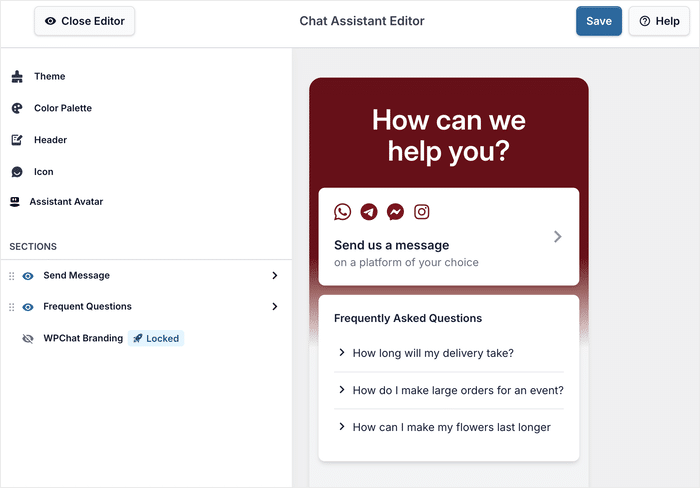
This opens WPChat’s live editor, where you can design your Facebook Chat assistant in detail.
You can find the different customization options on the left and track the changes in real-time on the right.
Pick Your Assistant Avatar
The avatar is the small image that appears in your assistant, which redirects your visitors to Facebook Chat.
A professional avatar makes your chat feel more personal and trustworthy.
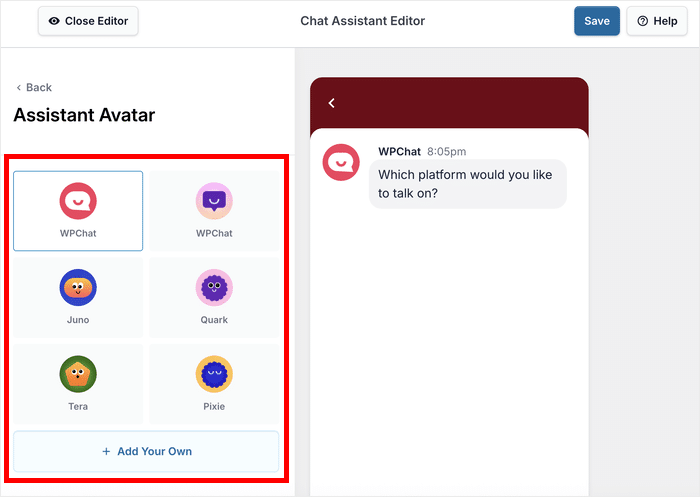
To change it, click on Assistant Avatar in the left panel.
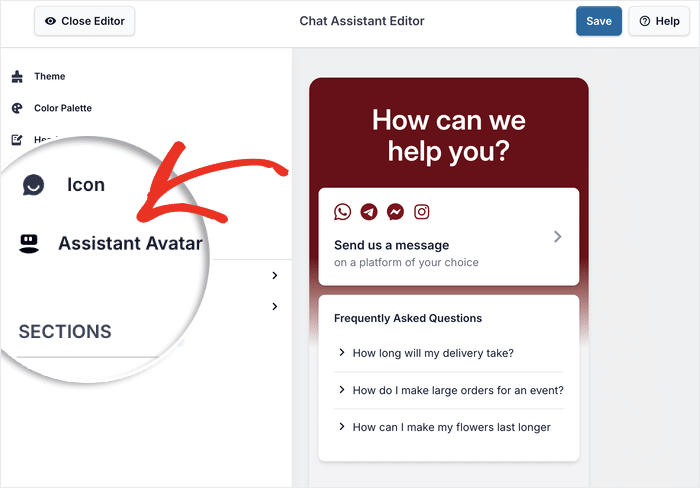
You’ll see several pre-made avatars with different designs that you can choose from.
If you prefer to use your own image, click on Add Your Own.
Next, click on Upload to select an image from your computer.
After uploading your image, enter a name for the avatar.
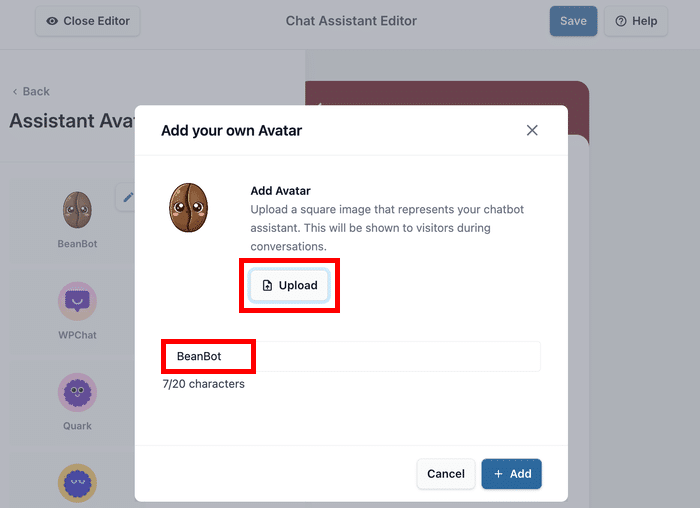
There are no hard rules here, but it’s better to have a name that matches the avatar.
After you’ve added the name and image, click on Add to confirm your avatar.
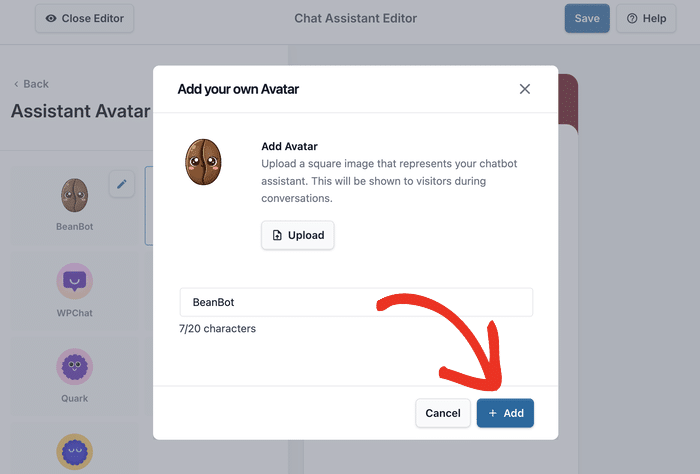
Once you’re happy with your Facebook assistant avatar, then click on Save to store your changes.
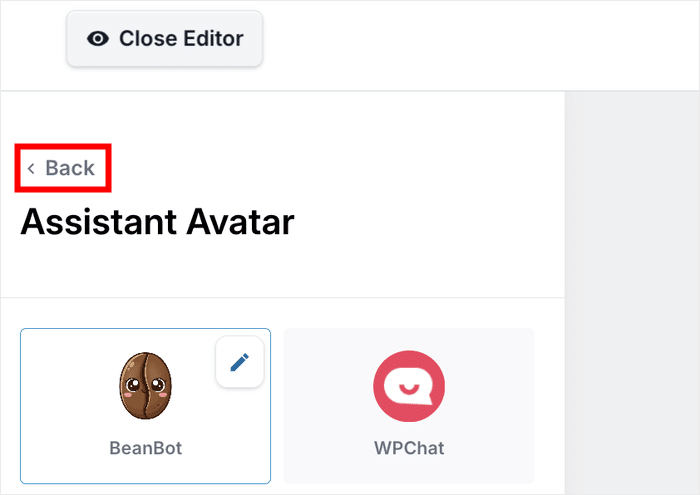
Click on the Back button to return to the main customization menu.
Edit Chat Assistant Header
The header is the greeting message visitors see when they open your chat widget. A warm, welcoming message encourages people to start conversations.
First, you can select the Header option on the left.
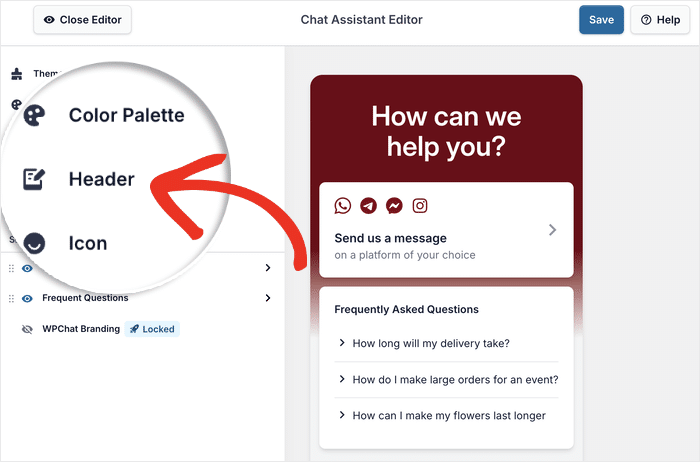
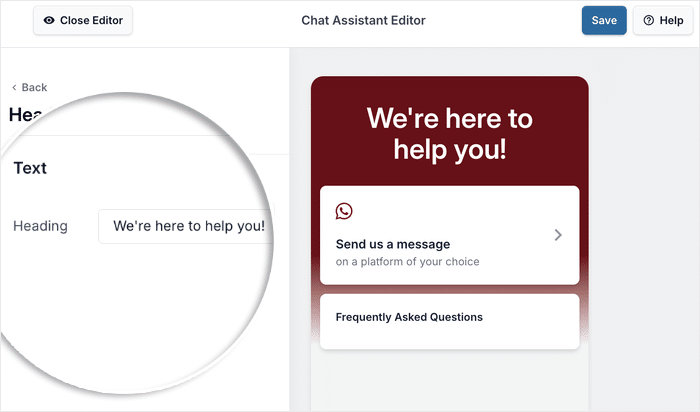
In the header settings, enter a fitting greeting message. For example: “Hi! How can we help you today?” or “Questions? We’re here to chat!”
Once you’ve entered your message, click on Save to confirm your new header.
If you want to explore further, WPChat offers additional customization options for colors, icons, and button styles.
Feel free to experiment with these settings to create the perfect look for your site.
Step 5: Connect Your Assistant to Facebook
The final step is connecting your chat widget to your Facebook Business Page. So, when visitors click the chat button, they can actually message you through Facebook Chat.
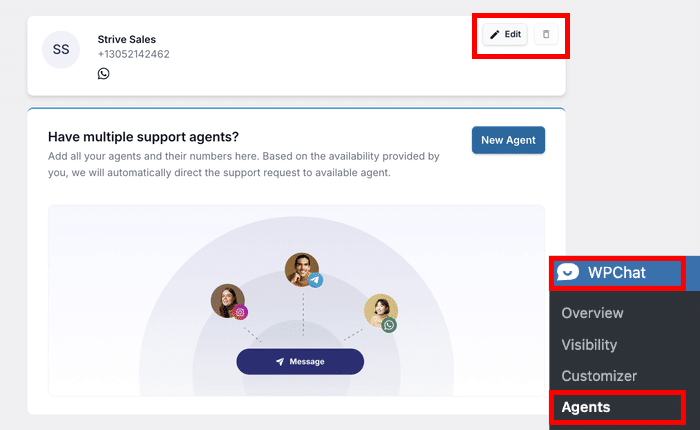
First, navigate to the WPChat » Agents menu from your WordPress dashboard.
From here, you can create different agents to represent members of your support team.
Click on Edit to customize the default agent and connect it to Facebook.
First, you can upload a professional image for the agent if you’d like. This is optional, but it helps visitors know who they’re chatting with.
Click on Upload to select an image from your computer.
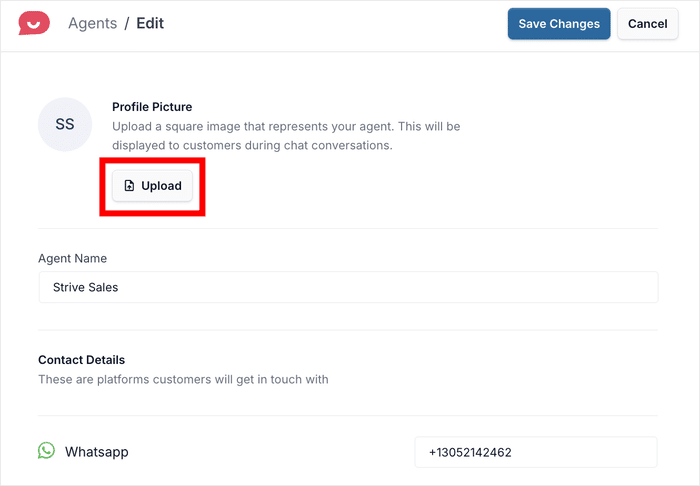
You can go for a company logo to represent your whole company or a professional photo to represent a single person.
After that, enter a fitting Agent Name in the field below.
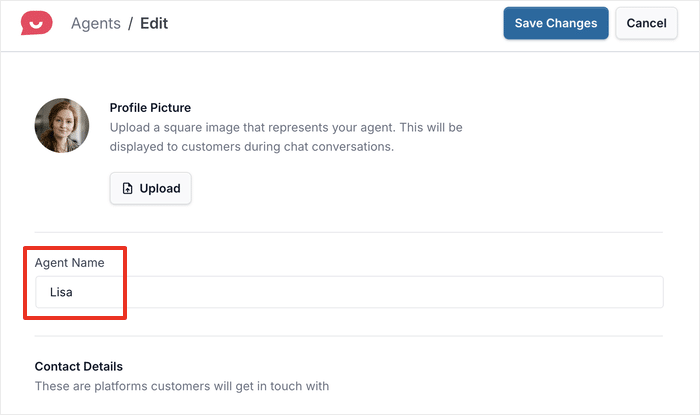
Now, scroll down to find the Facebook Messenger field below.
In this field, enter your Facebook ID or username. Just like that, this agent is connected to your Facebook.
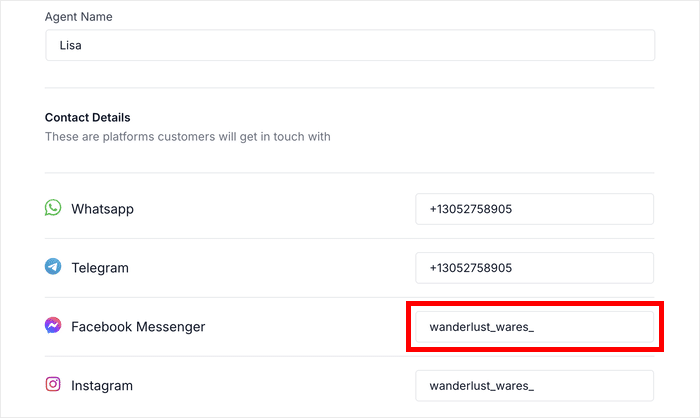
Once you’ve entered your Facebook information, click Save Changes to confirm your changes.
To check how the Facebook Chat assistant will look to your website visitors, just open your website and test it out now.
And that’s it!
As you can see, adding Facebook Chat to your WordPress website is quick and straightforward with WPChat.
In just five simple steps, you’ve created a powerful communication channel to connect with visitors and grow your business.
You can add frequently asked questions to provide instant answers, set up automated responses for common inquiries, and connect other messaging platforms.
Ready to add your Facebook Chat to WordPress? Grab a copy of WPChat today!
Want more ways to leverage Facebook for your business? We’ve got a list of proven tips to promote your business on Facebook.
