When I talk to business owners about their websites, one frustration comes up again and again. They get plenty of traffic, but visitors leave without taking action.
Even with contact forms on their site, people just leave without even reaching out to them.
That’s when many of them discovered live chat made all the difference. Instead of abandoning the site, visitors could get instant answers to their questions. Conversion rates improved almost immediately.
In this tutorial, I’ll show you how to add a live chat to WordPress in just 5 steps. I’ve tested this method myself and included screenshots to guide you through the entire process.
By the end, you’ll have a fully functional chat system that helps you connect with visitors in real-time and stop losing leads to slow response times.
Best Way of Adding a Live Chat to Your WordPress Site
The best way to add live chat to WordPress is by using a plugin instead of manually coding a solution.
Using these plugins, you can add a handy floating widget to your site that visitors can click to open a chat assistant.
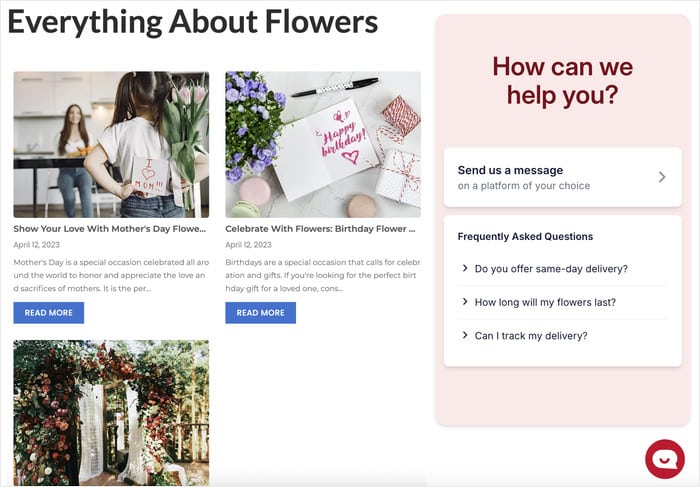
Better yet, they let visitors choose which live chat platform they want to use. This means people can chat with you on platforms they already know and trust, like WhatsApp, Facebook Messenger, or Instagram.
Out of the options out there, the easiest way to set this up is with WPChat — the best live chat plugin for WordPress.
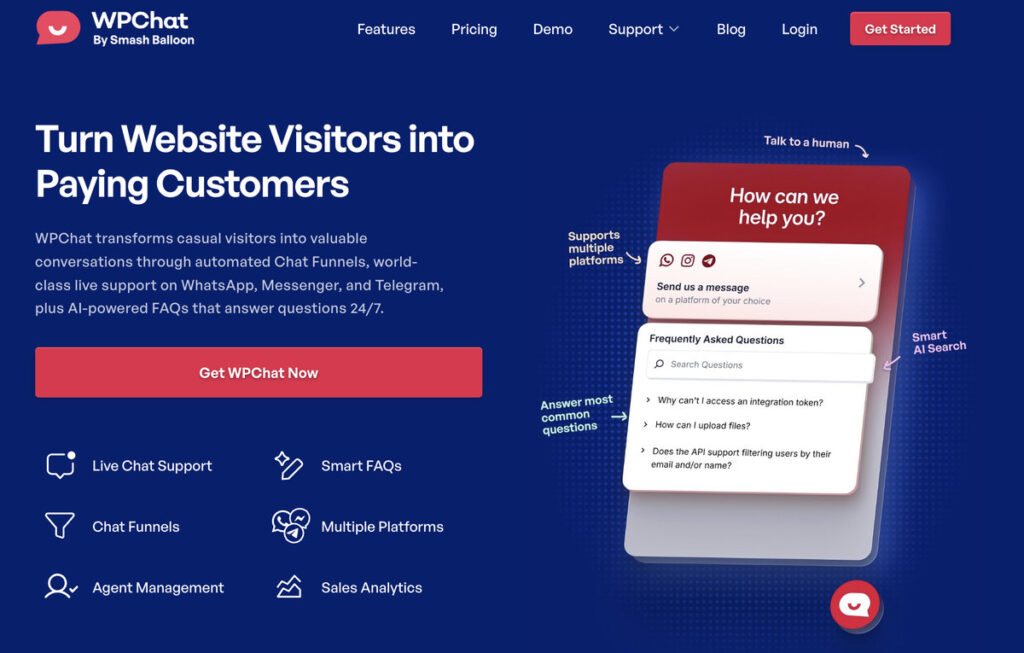
Why WPChat Is the Best Choice for Live WordPress Chat
WPChat stands out because it instantly connects your site to the biggest chat platforms without requiring any technical knowledge.
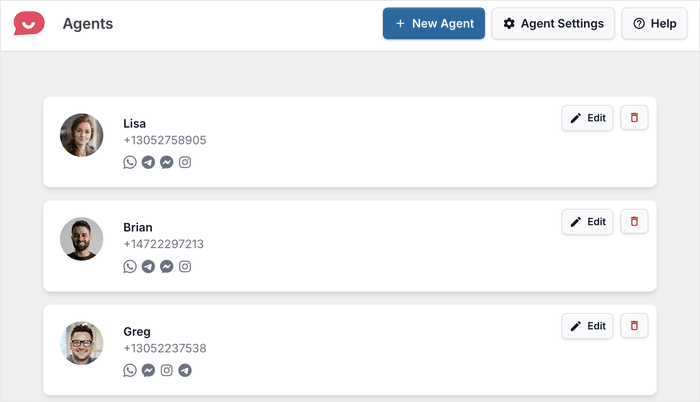
What I really appreciate is the agent feature. You can create agents to represent your support team, so visitors feel like they’re speaking to real people rather than a faceless business.
To reach visitors on their preferred platform, WPChat comes with support for the biggest messaging platforms: Facebook Messenger, Telegram, Instagram, and WhatsApp.
It also comes with a ton of customization options so your live chat won’t look like a generic add-on—it’ll feel like a natural part of your site.
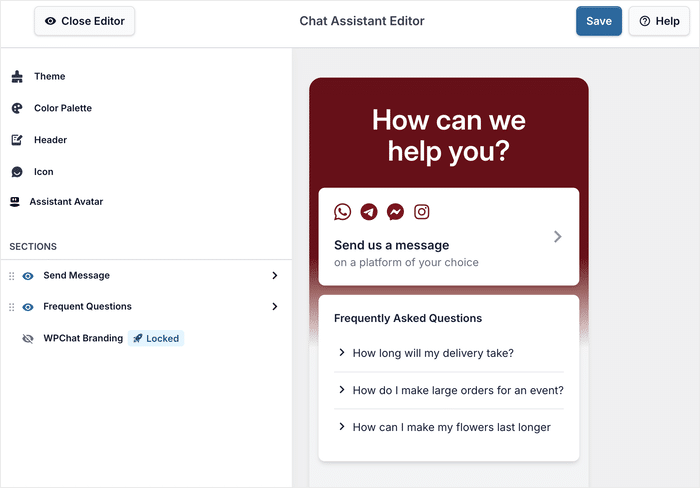
You can also create FAQs and chat funnels to provide instant answers and reduce the load on your support team.
On top of that, you also get powerful analytics to keep track of your chat assistant, agents, FAQs, and more and see how effective the plugin is.
Ready to stop losing leads to slow response times? Get WPChat now and start turning more visitors into customers today.
5 Steps to Add Live Chat to WordPress Sites
Now that you understand why WPChat is the best solution, let’s walk through the exact process of setting it up on your website. These five steps will take you from installation to a fully functional live chat system.
Step 1: Install and Activate WPChat on Your Website
First, you’ll need to add the WPChat plugin to your WordPress site.
Head over to the WPChat website and grab a copy. Then install and activate it on your site.
Check out this step-by-step guide on how to install WordPress plugins if you need help with this.
Step 2: Create a Chat Assistant
Now that WPChat is active, it’s time to create your first chat assistant.
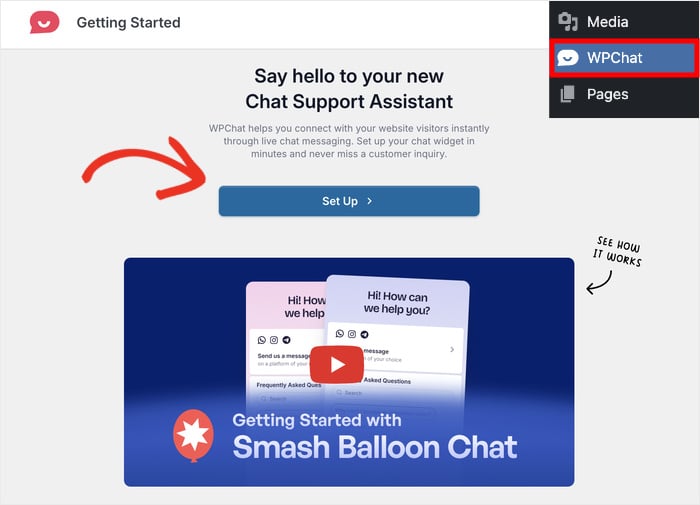
Open the WPChat menu in your WordPress dashboard and click on Set Up.
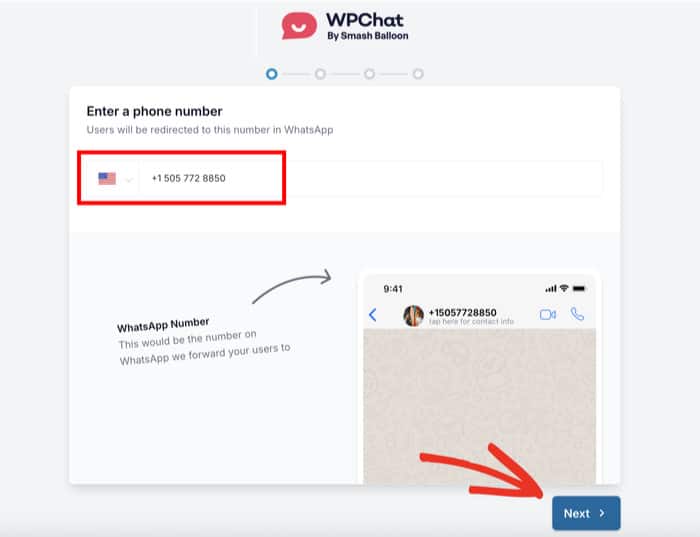
The plugin will ask you to enter your WhatsApp number in the field here.
Enter the number along with your country code, then click on the Next button.
On the next screen, you’ll see 3 theme options to choose from: Basic, Night, and Pastel.
Each one offers a different visual style for your chat assistant. So, pick a theme you like and click on Next.
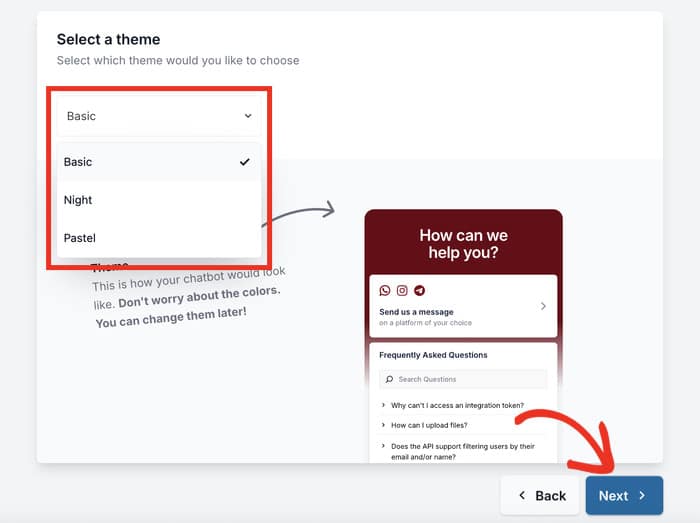
Don’t worry if you’re not completely sure—you can always customize the colors and appearance later in the process.
Step 3: Choose Visibility for Live Chat Assistant
This step lets you control where your chat assistant appears on your website. You’ll see 2 main visibility options: Display on all pages or Display only on specific pages.
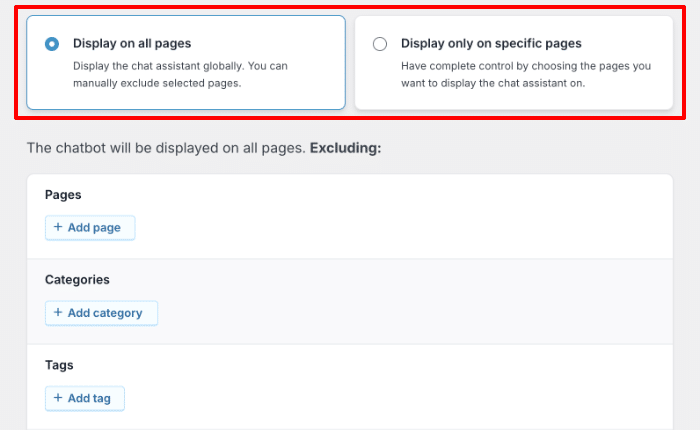
Next, use the filters below to include or exclude specific Pages, Tags, Categories, and Custom Post Types from your chat assistant.
Once you’ve made your selection, click on Next to move forward.
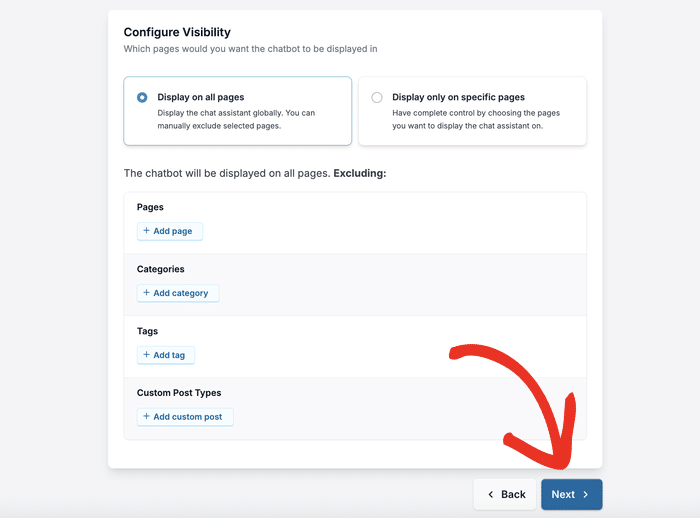
I recommend starting with all pages enabled so you don’t miss any potential conversations. You can always refine this later once you see how visitors interact with your chat assistant.
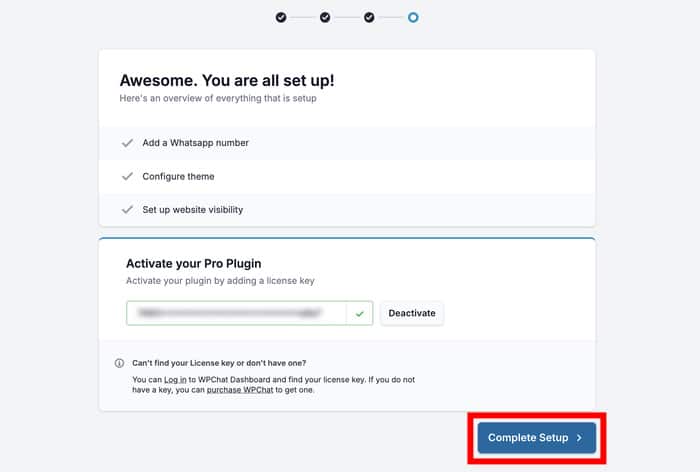
On the final setup screen, you’ll need to enter your WPChat license key to enable plugin features.
After entering it, click on Complete Setup, and you’re done here.
Step 4: Customize Your Chat Assistant
With the basic setup complete, it’s time to make your chat assistant look exactly how you want it.
Click on the Customize button to open the live editor where you can see changes in real-time.
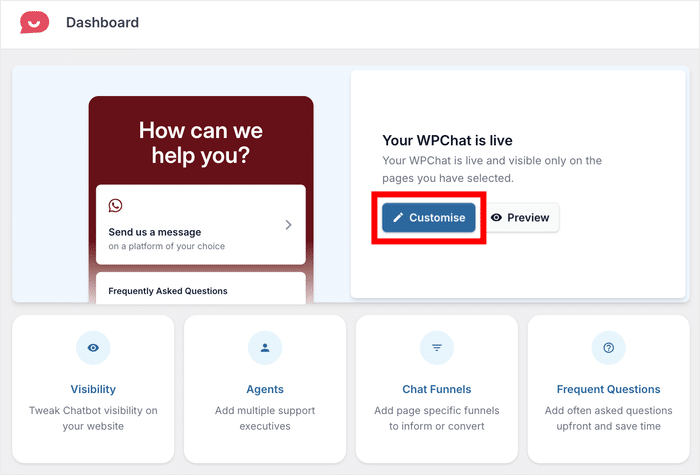
First, let’s set up your assistant avatar. Your visitors will interact with this avatar before they pick a platform to chat on.
Click on Assistant Avatar in the left menu to access the avatar options.
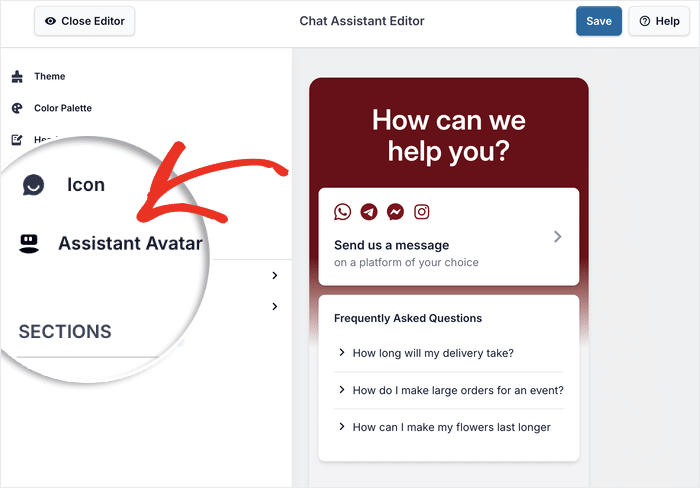
You can either pick a pre-made avatar from the available options.
Or click on Add Your Own to create a new custom avatar for your brand.
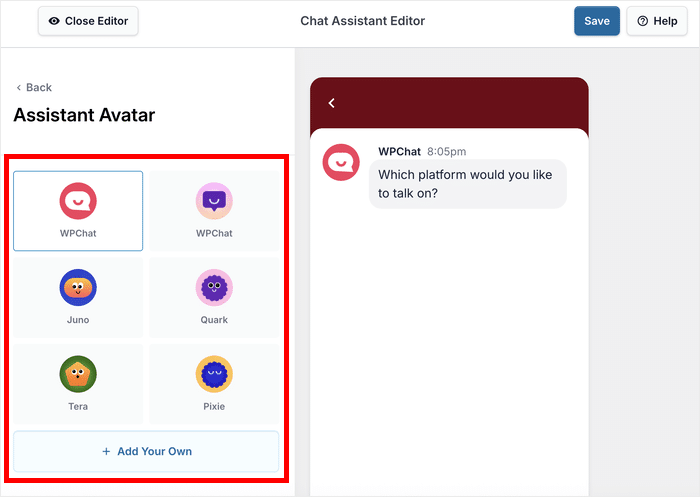
To create a new avatar, click on Upload to select the avatar image from your media library.
Once the image is uploaded, enter a name for your avatar in the field below.
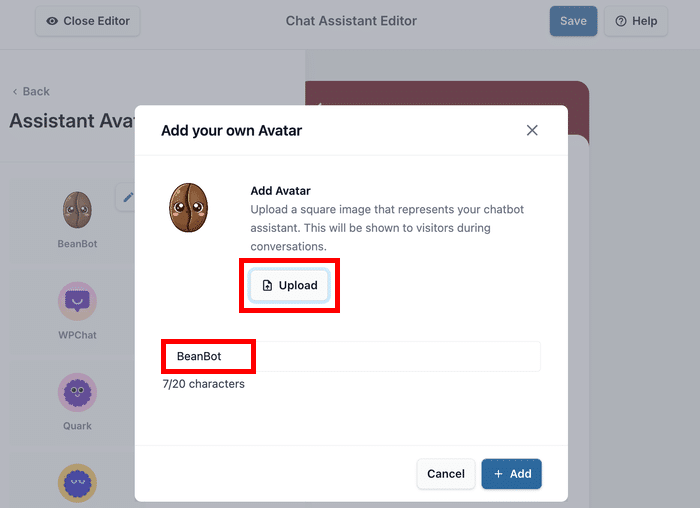
Finally, click on Add to confirm the avatar.
Remember to click on the Save button afterwards to lock in your changes.
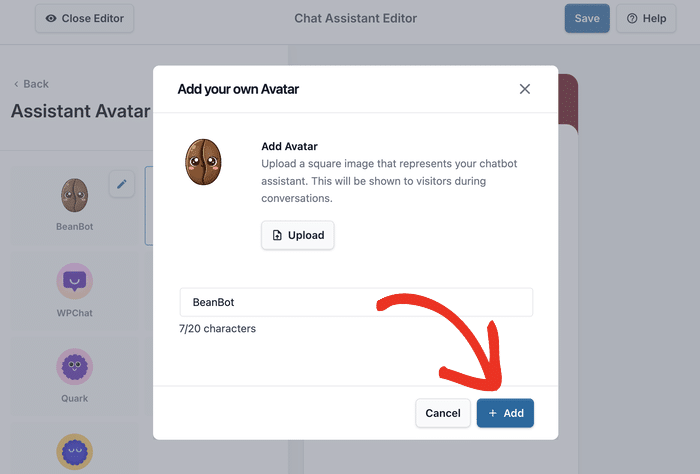
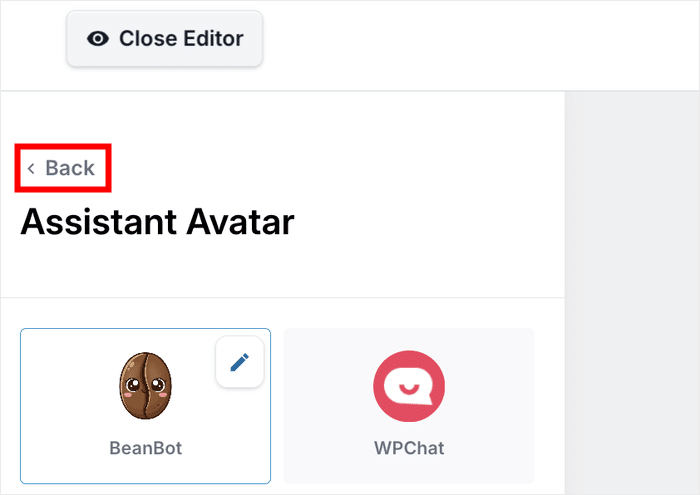
After that, click on the Back button to return to the main customization menu.
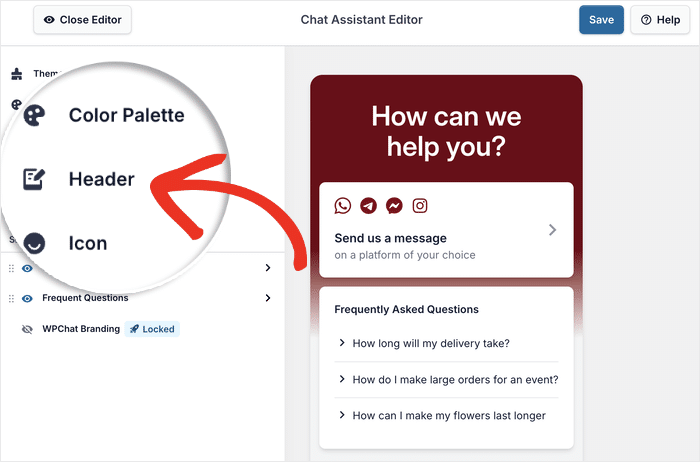
Next, select the Header option from the left sidebar.
This is where you can personalize the greeting message visitors see when they open the chat assistant.
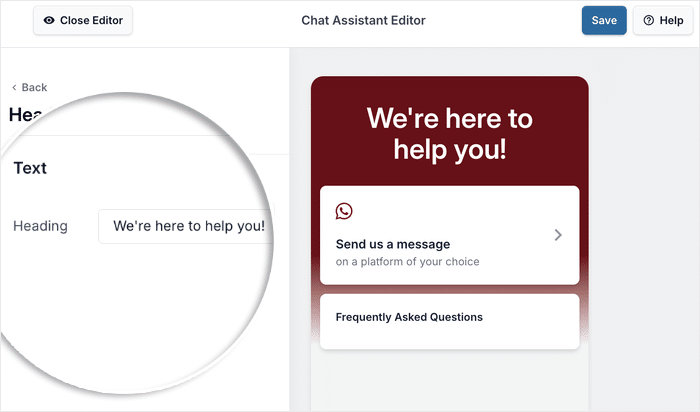
Enter a fitting heading for your chat assistant—something welcoming like “How can we help you today?” or “Chat with our team.”
Just enter the text into the Heading field and click on Save once more.
Use the remaining options to customize the floating icon, color palette, visible sections, and much more.
Once you’re happy with how your chat assistant looks, click on Save, and you can move on to the final step.
Step 5: Set Up Your Chat Agents
Agents are the people who will be handling conversations with your visitors. This can be the members of your support team, or you can even create an agent to represent yourself.
Setting them up properly makes your chat feel more personal and shows visitors they’re talking with a real person.
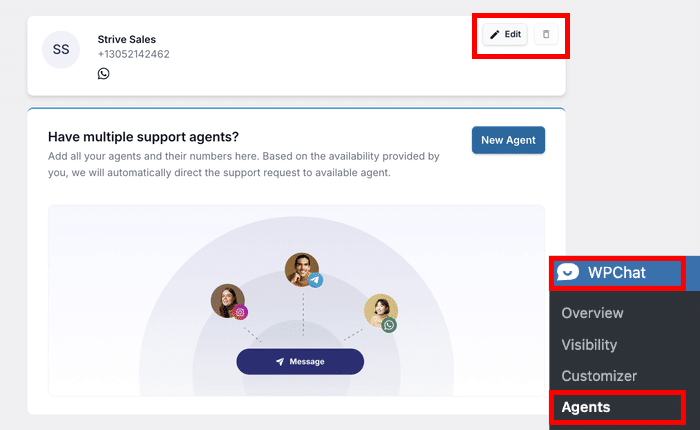
Navigate to WPChat » Agents from your WordPress dashboard. You’ll see a default agent, which you can customize to match your team.
Click on Edit to customize the default agent.
The first thing you’ll want to do is add a professional image.
To pick a new image, click on Upload and select a fitting image.
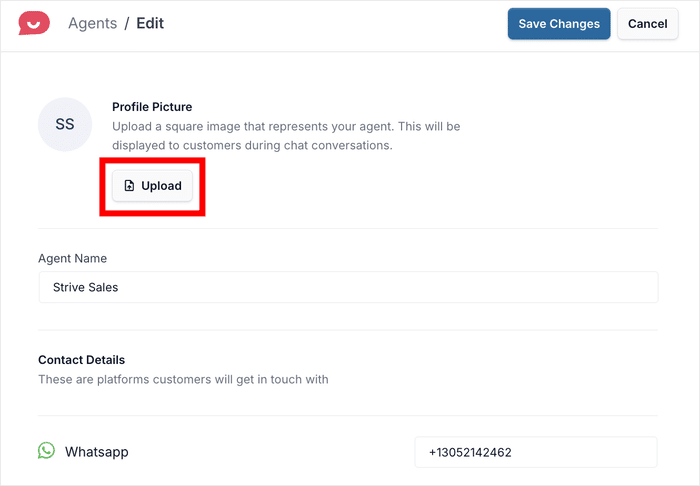
This could be a professional headshot for a person, a mascot image, or even your company logo if you prefer a more branded approach.
After uploading the image, enter a fitting name in the field below the image.
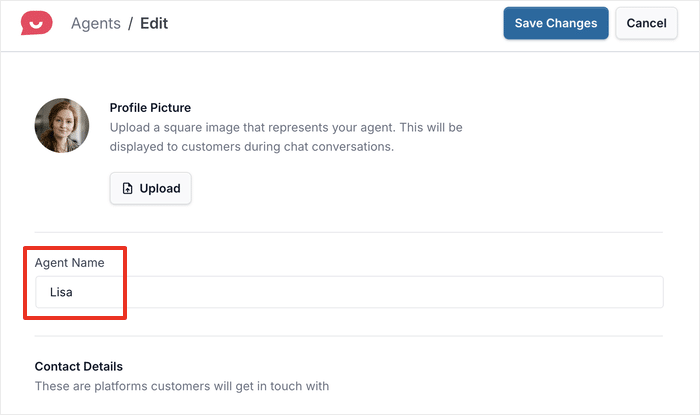
You can use real names for team members or role-based names like “Support Specialist” or “Sales Team.”
Scroll down to find the contact details section where you can add information for other platforms.
You can enter usernames or profile links for Telegram, Facebook Messenger, and Instagram.
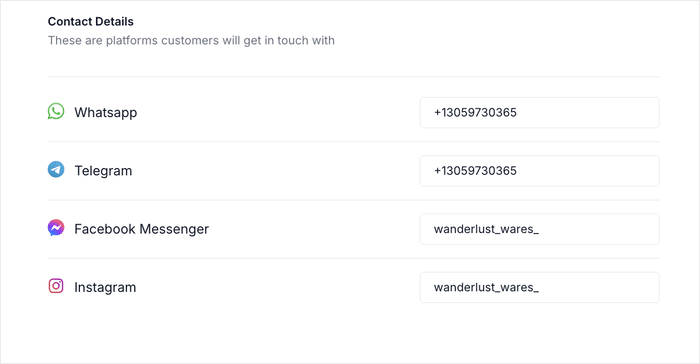
This allows visitors to connect with you on whichever platform they prefer. Once you’ve filled in all the relevant details, click on Save Changes to update your agent profile.
If you have multiple team members, you can repeat this process to create additional agents. WPChat will automatically assign different chats to different agents and balance out the workload.
You can open your website and check out how your new live chat will look to your WordPress visitors.
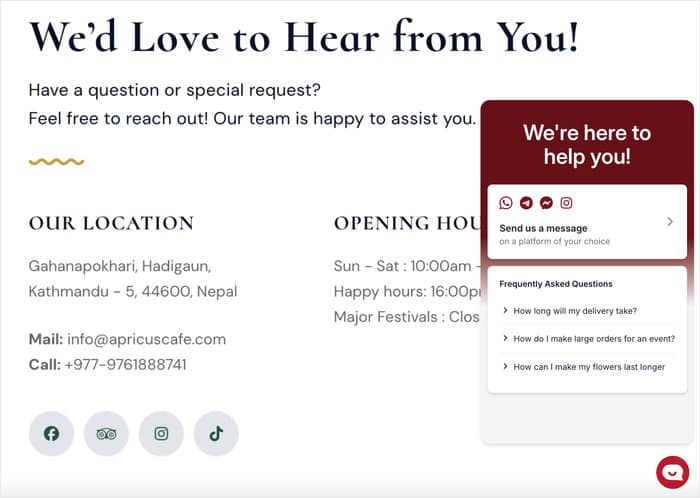
And that’s it!
Now you know how to add live chat to your WordPress and connect with visitors with the help of the WPChat plugin.
When visitors can reach you instantly on platforms they already use daily, they’re far more likely to start a conversation. This means fewer abandoned carts, more completed sales, and stronger relationships with your audience.
Ready to start conversations instantly and turn visitors into customers?
Get WPChat now and start connecting with your audience.
In case you want easy ways to grow your online presence, just check out this list of the best social media marketing tips for small businesses.
