Whenever I’m looking for a quick way to improve a site’s conversion rate, the first thing I check is how easy it is for a visitor to ask a question.
Too often, the only option is a slow and impersonal contact form. This small annoyance can end up causing potential customers to leave without ever reaching out.
But imagine if they could just tap a button and start a direct conversation with you on an app they already use every day.
The good news is that it’s actually quite simple. In this article, I will show you exactly how to add WhatsApp chat to your WordPress website, step by step.
- How Adding a WhatsApp Chat Helps Your Brand
- Easiest Way to Add WhatsApp Chat Function to WordPress
- How to Add WhatsApp Chat to Your WordPress Site (in 5 Steps)
How Adding a WhatsApp Chat Helps Your Brand
By adding a WhatsApp chat option to your website, you can open a direct line of communication with your visitors. Better yet, it’s on a platform that they already know and trust.
Better yet, they can reach you on a trusted platform that they’re already familiar with.
Just like that, it’s much easier to offer great customer support, clarify sales questions, and turn curious visitors into happy customers.
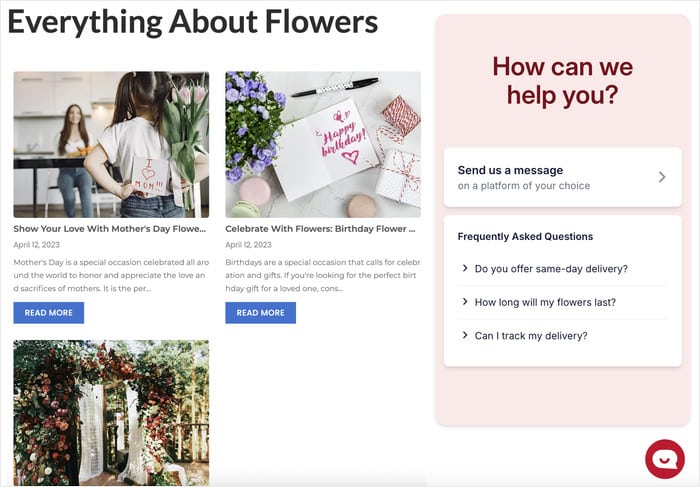
Here are the key benefits of adding a WhatsApp chat to WordPress:
- Giving visitors a fast way to get answers about your products can significantly reduce site abandonment and boost sales.
- Since WhatsApp already has over 2 billion users, your customers won’t need to install or learn an unfamiliar tool just to reach you.
- It allows for ongoing conversations, letting you follow up with exclusive offers or helpful information right on their phone.
- The experience is mobile-native, offering a much smoother interaction than trying to fill out a tiny contact form on a phone screen.
Easiest Way to Add WhatsApp Chat Function to WordPress
Trying to connect WhatsApp to your website by yourself can be a real headache. It means a lot of coding and complicated technical steps that can be overwhelming if you’re not a developer.
A much simpler solution is to use a dedicated WordPress plugin. These tools handle all the technical details for you, letting you add a chat widget in just a few clicks.
After looking at the different plugins, WPChat stands out as the top choice for adding WhatsApp chat to WordPress.
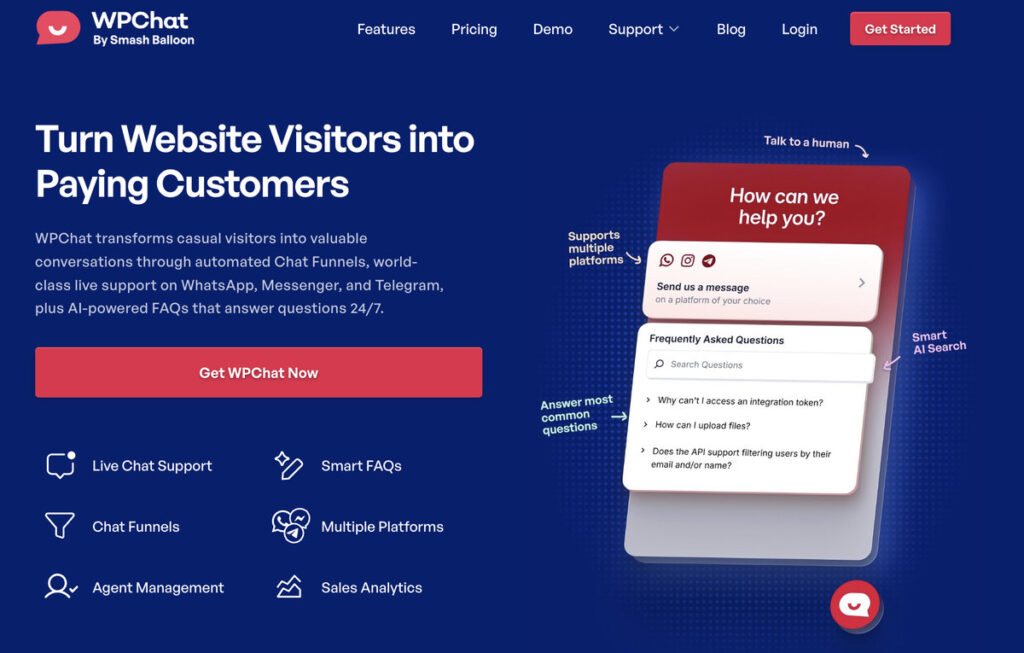
It’s built to give you a professional chat system without any of the headaches. Here are some of the key features:
- Quick Installation: You can get your chat system running in minutes with a simple setup process that requires no code.
- Display Rules: You have complete control to show the chat widget only on the parts of your website you choose.
- Supports Multiple Platforms: WPChat lets you connect your WordPress site to the biggest messaging services out there: WhatsApp, Facebook Messenger, Instagram, and Telegram.
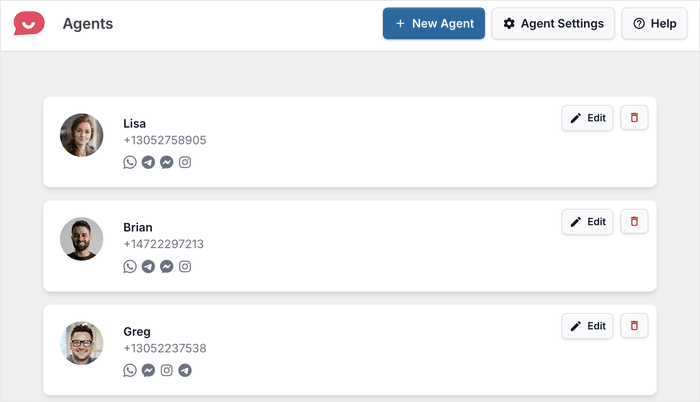
- Multiple Team Members: You can create separate profiles for your support agents to add a professional, personal touch.
- Automated Answers: With its FAQs, you can provide instant responses to common questions, which helps customers and saves you time.
- Guided Conversations: Create automated chat flows to guide visitors toward a purchase or the right department.
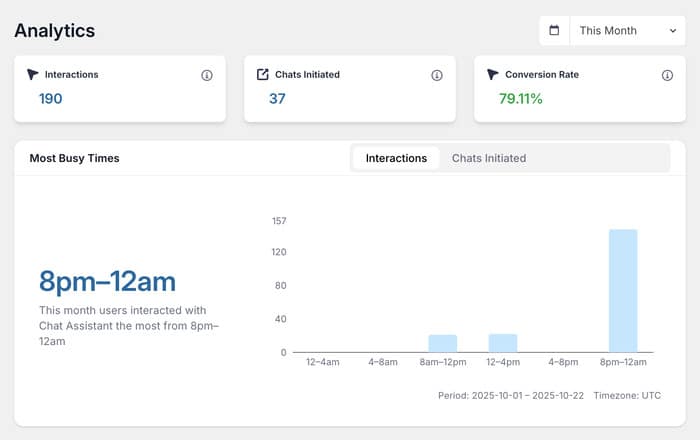
- Performance Tracking: See how well your chat is working with built-in analytics for your agents, FAQs, and funnels.
In short, WPChat removes all the technical barriers to adding WhatsApp to your website. It’s a straightforward and powerful way to connect with your customers.
Ready to start having real-time conversations with your visitors? Get WPChat today.
How to Add WhatsApp Chat to Your WordPress Site (in 5 Steps)
Now I’ll show you how to get WPChat up and running and then enable WhatsApp chat for your website.
The five steps below will take you from installation to a fully customized chat widget, and it only takes a few minutes.
Step 1: Install WPChat on Your Website
To begin, you will need to get the WPChat plugin from their website.
After you have the plugin, it’s time to install and activate it on your site.
If you’re new to this, don’t worry! You can check out this complete guide on how to install a WordPress plugin that will walk you through every step.
Step 2: Create Your WhatsApp Chat Assistant
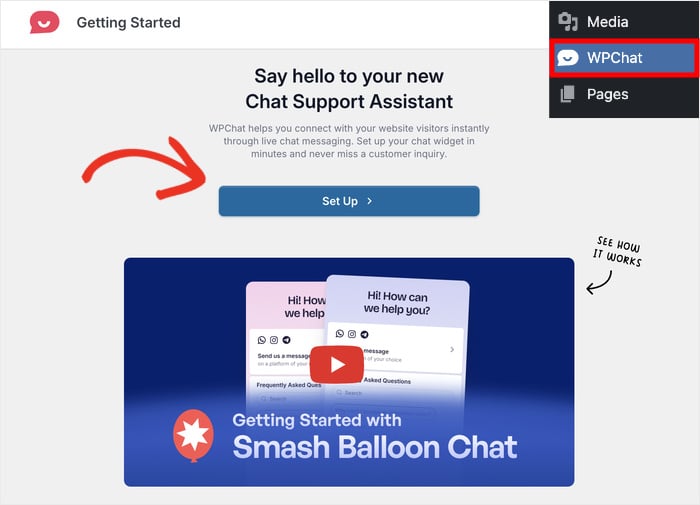
With the plugin active, you’ll see a new WPChat menu in your WordPress dashboard.
Click on it and then select the Set Up button.
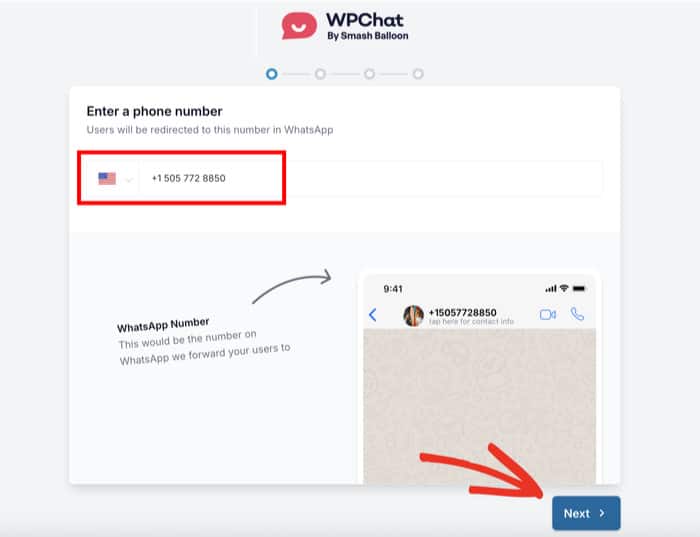
The plugin will then ask you for the WhatsApp phone number you want to connect. Enter it and click on Next.
Next, you get to choose a design for your chat box. WPChat offers three distinct themes: Basic, Night, and Pastel.
After picking a theme, click on the Next button to proceed.
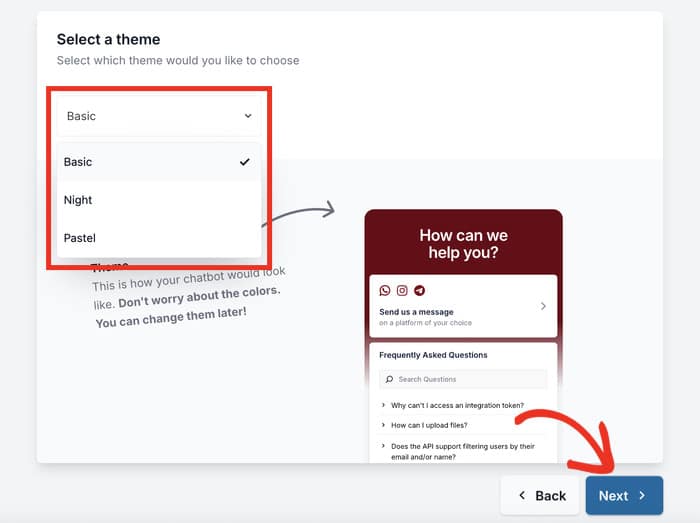
Remember: you can easily switch themes later and customize the assistant even more.
Step 3: Set Visibility for WhatsApp Chat Assistant
In this step, you’ll decide where the chat assistant should appear. WPChat has 2 main choices:
- Display on all pages
- Display only on specific pages
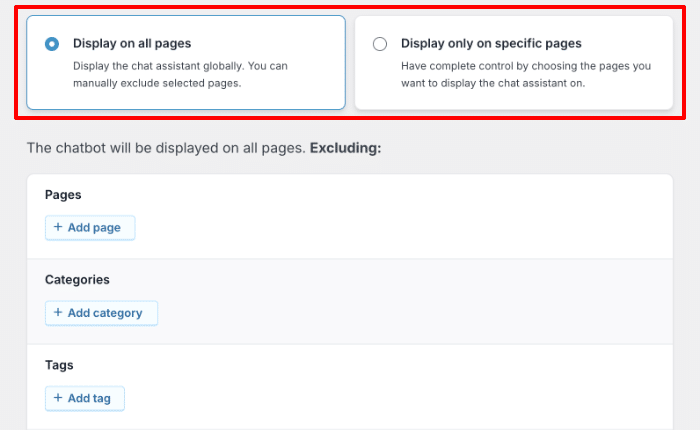
If you want to show it everywhere, you can use the filters below to exclude certain pages.
Alternatively, you can handpick the parts of the site where it appears if you went with the second option.
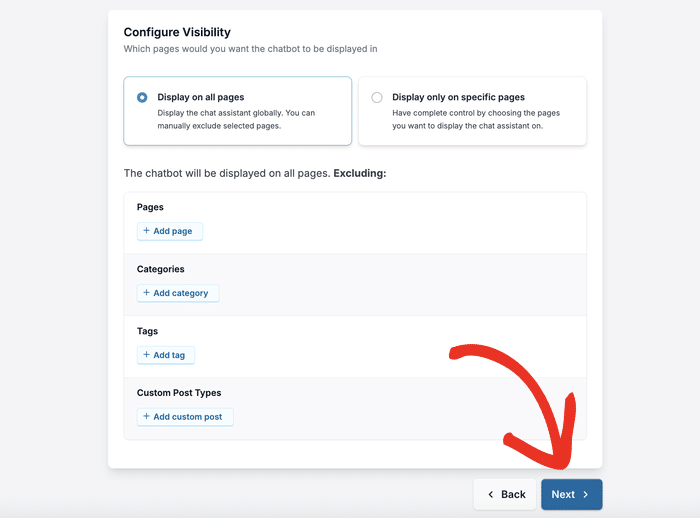
To continue, just use the filters to include/exclude certain Pages, Categories, Tags, and Custom Post Types.
After setting the visibility, click on Next.
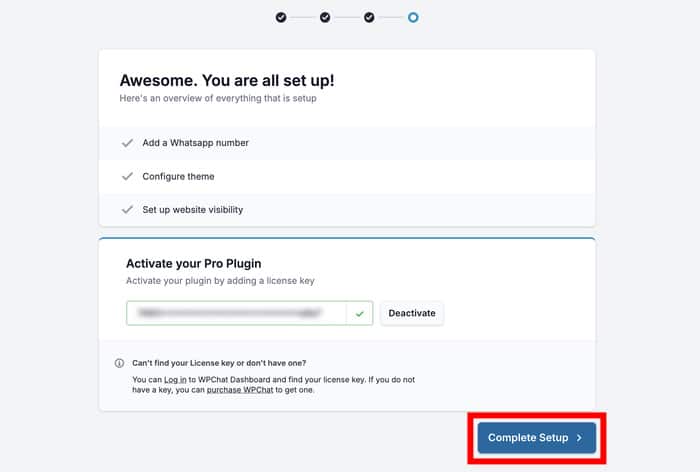
The next screen will ask for your license key. You can find this in your account area on the WPChat website.
Paste it into the field and click on Complete Setup. Just like that, your WhatsApp chat assistant is ready to be customized.
Step 4: Customize WhatsApp Chat Assistant
After the setup is complete, you will land on the WPChat dashboard. Click on the Customize button to open the live editor.
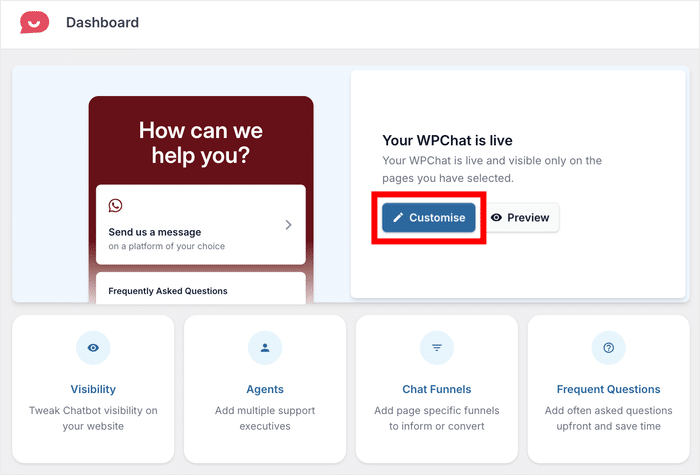
This interface is pretty user-friendly: you’ll see a live preview on the right and all your design options on the left.
As a result, you can see your changes in real-time and customize your chat assistant more accurately.
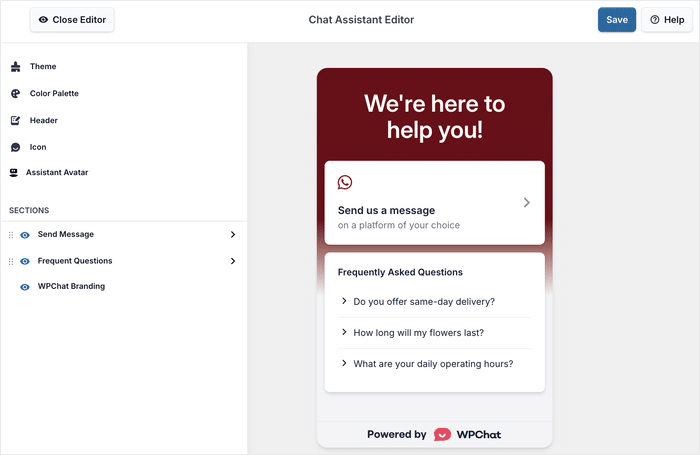
Let’s check out some of the major customization options for your WhatsApp chat assistant.
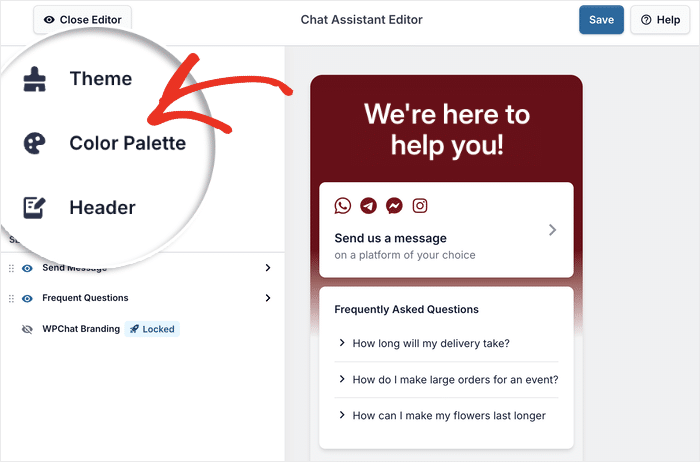
First, you can click on Color Palette on the left.
After that, you now choose from a collection of pre-made color schemes:
- Default
- Mystic Bloom
- WhatsApp Dark
- Minimal
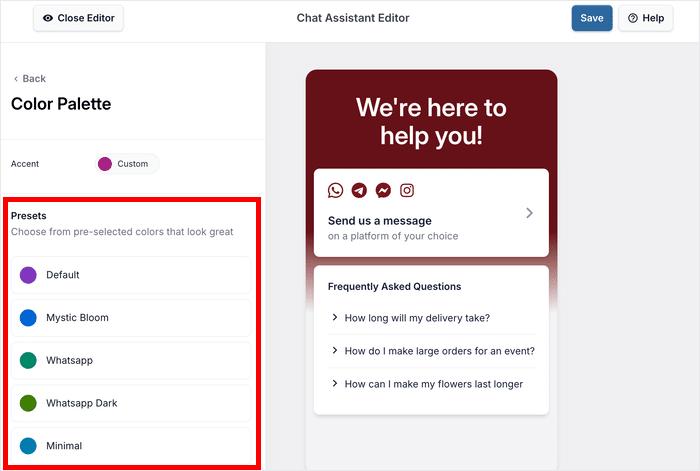
You can pick from any of these or use the Custom button to pick a color yourself.
This can be your brand’s colors, or just a color that complements your website — it’s your choice.
Once you’re satisfied, click on Save.
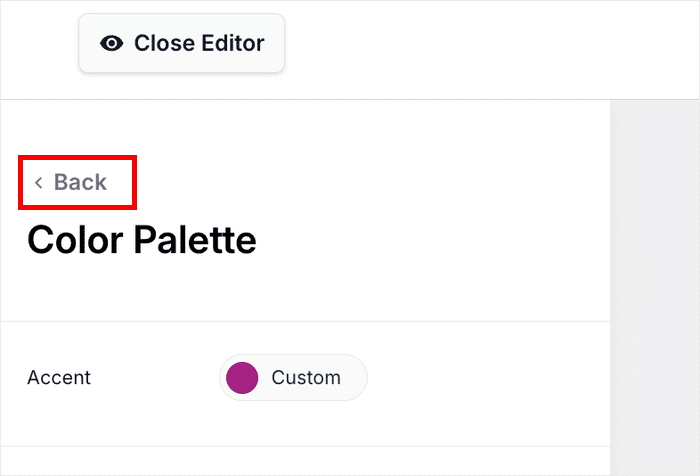
To continue customizing your chat assistant, click on the Back button on the top left.
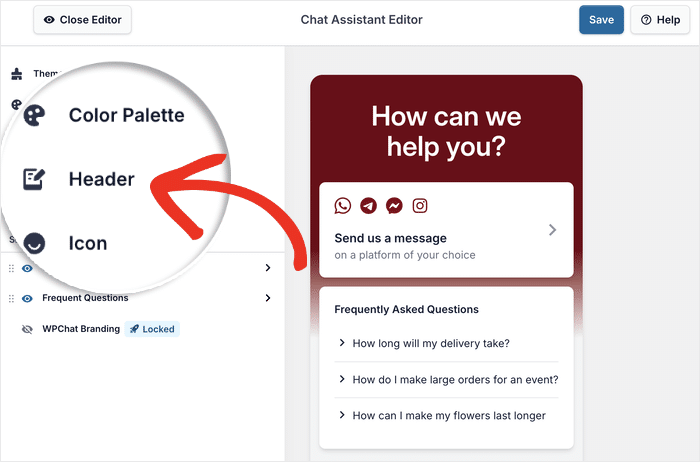
Next, click on the Header option on the left.
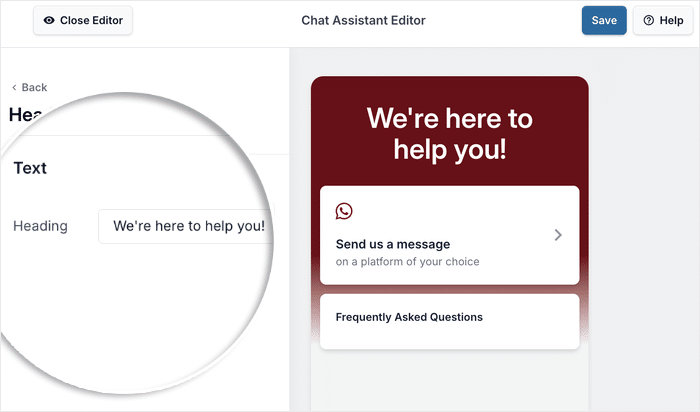
This setting lets you change the text at the very top of your chat box.
You can enter a welcome message to let visitors know this chat assistant is here to help.
Like before, click on Save to keep the changes.
You can use this same point-and-click method to change many other details. Feel free to adjust the chat assistant’s name, upload a new icon, or modify the visible sections.
Take a few minutes to look through the options and make the chat widget your own. Remember to Save any changes you make.
Step 5: Set up Your WhatsApp Chat Assistant
Now, let’s make your chat feel more personal by setting up chat agents. This allows you to add individual profiles for your team members, so visitors know exactly who they’re talking to.
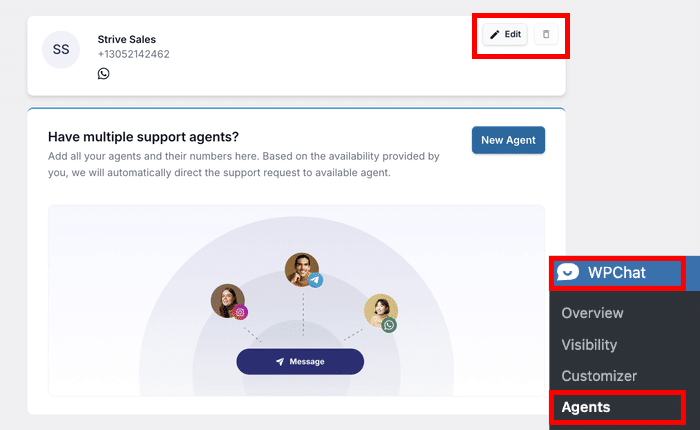
First, go to WPChat » Agents in your WordPress dashboard menu. This page is where you will manage all of your chat agents.
You can go ahead and click Edit on the default agent that’s already there.
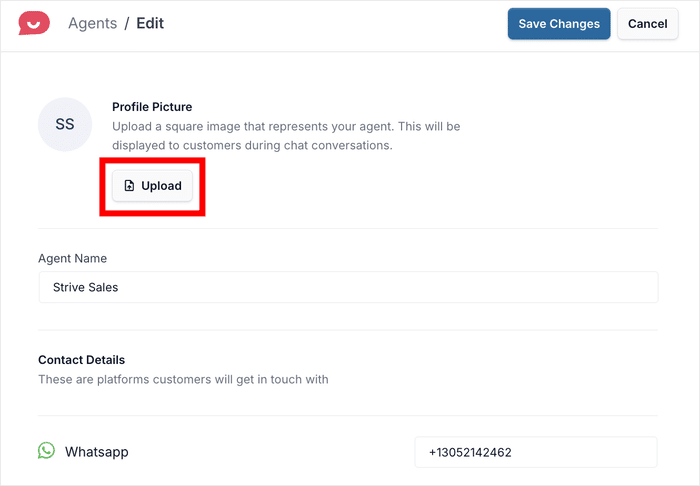
On the edit screen, click the Upload button to add a profile picture for the agent.
Pro Tip: A friendly, smiling headshot can often make your business feel more trustworthy and approachable than a company logo!
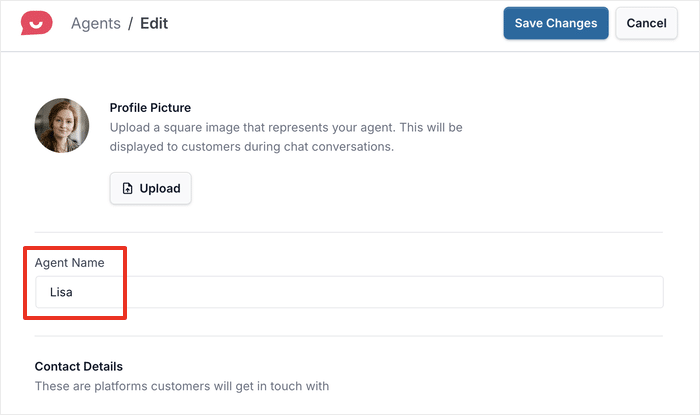
After uploading a picture, add the agent’s name in the Agent Name field.
While you can use a generic name like “Support Team,” using the name of your support staff can add a human touch.
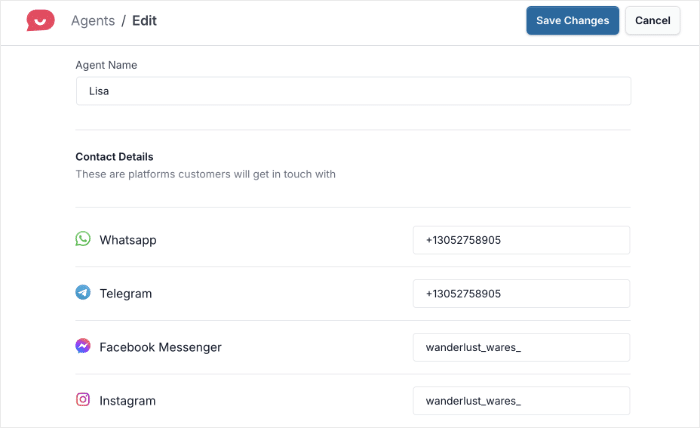
If you scroll down, you can also change your WhatsApp number or connect other popular messaging platforms:
- Telegram
- Facebook Messenger
After you’re done setting up the chat agent, click on Save Changes.
With that, your new WhatsApp chat assistant is fully configured and ready for your website’s visitors to use.
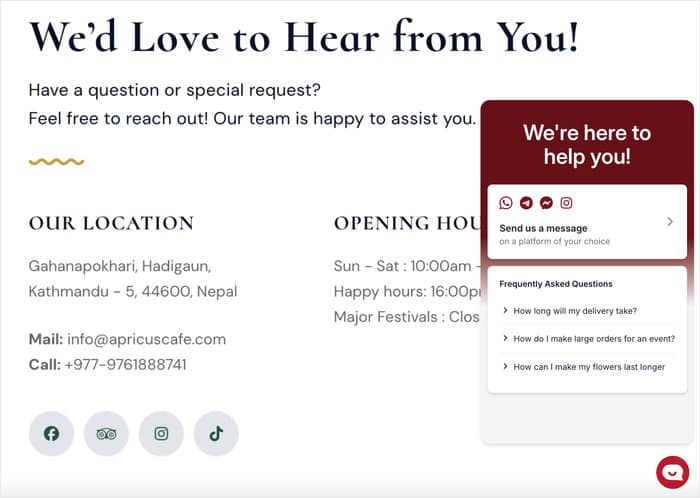
And there you have it!
Now that you’ve included WhatsApp chat in your WordPress site, you have a direct line to your visitors, making it easier than ever to offer support and build trust.
With a tool like WPChat, you can do all this in just minutes without dealing with complex codes. What’s more, the plugin has even more great features that you can try out:
- Add FAQs: Answer common questions automatically to save your team time.
- Create Chat Funnels: Guide visitors with automated questions to help them find products or direct them to the right team member.
- Set Agent Schedules: Show the chat widget only when your team is available to answer questions live.
Ready to boost your conversions and connect with your audience? Get started with WPChat today!
