Do you want to engage your website visitors by showing your latest Facebook posts right in your sidebar or footer?
Adding a Facebook feed widget to WordPress is a fantastic way to boost social proof, increase time on site, and grow your social media following.
However, the default WordPress options can be limiting, and Facebook’s own plugins often lack customization.
In this tutorial, we will show you how to create a completely refreshing and responsive Facebook feed widget on WordPress using the best plugin on the market.
- Why Add a Facebook Feed Widget to WordPress?
- What's the Easiest Way to Make a Facebook Widget?
- 2 Methods to Add a Facebook Widget for Your Website
Why Add a Facebook Feed Widget to WordPress?
Your website sidebar or footer is prime real estate. It appears on almost every page of your site (depending on your theme), making it the perfect place to highlight dynamic content.
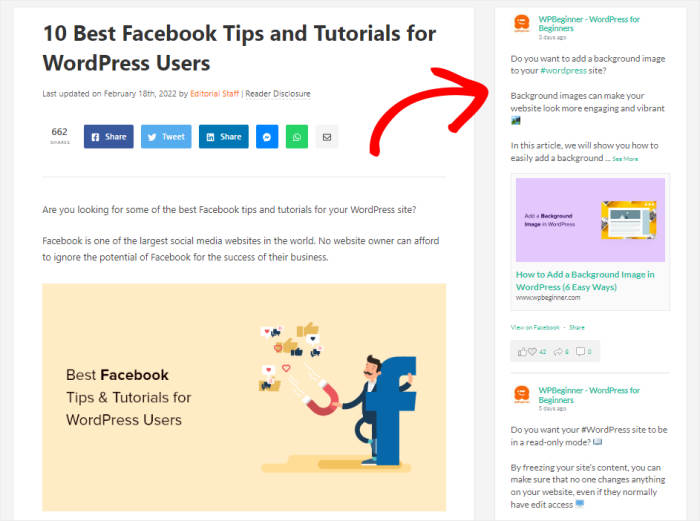
By displaying a Facebook feed widget, you can:
- Keep content fresh: Your site automatically updates whenever you post on Facebook.
- Build trust: Showcasing real-time interactions and an active community proves your brand is alive and responsive.
- Get more followers: Visitors can like your page or follow you directly from your website without leaving the page.
What’s the Easiest Way to Make a Facebook Widget?
You can create a Facebook widget by manually connecting to the Facebook API and generating embed codes. It has a lot of limitations, though:
- You’ll have to go through a long process of registering with Facebook as a developer: create an application, verify your account, set necessary permissions, and generate an access token.
- Want to change your feed’s background color? You can’t. How about font size? You can’t, either.
- Well, what if you want to change the Facebook icon on your feed? You also can’t.
- Okay, then. What if you just want to customize your feed, so it smoothly integrates with your site’s theme? Use code.
- Changing the feed’s header? Use code? Displaying the feed on WordPress? Use code, too.
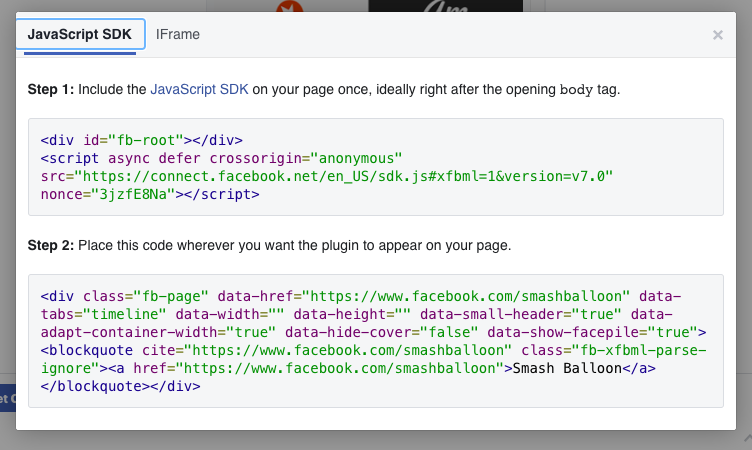
For a much easier way, you can get a Facebook feed plugin that will fetch the posts and embed them on your website for you.
While there are a bunch of options out there, I’ll go with Facebook Feed Pro for this guide. This plugin stands out as the #1 option for a few reasons:
- Super simple to set up: Once you’ve installed the plugin, you can have everything set up in under 5 minutes!
- Customizable layout: Your Facebook feed can have posts shown in different sizes: thumbnails, half-width, and full-width.
- Different feed types to choose from: The plugin allows you to show Facebook posts, photos, videos, live streams, albums, events, and reviews.
- Lightning-fast loading time: Since the plugin efficiently caches data, your feed loads ultra-fast on your site. Plus, your site will still display a feed, even if Facebook’s temporarily down.
- Responsive theme: It’s mobile-friendly and looks great on any screen size.
- SEO friendly: By automatically showing fresh content from Facebook, you can rank higher in search engine results.
- Easily customize your feed’s visuals: Change the background color or the font styles easily with just a few clicks.
2 Methods to Add a Facebook Widget for Your Website
Now that we have our plugin, let’s get started with the tutorial. For the sake of convenience, I’ll split it into two different methods.
1. Add a Facebook Widget to WordPress Posts and Pages
First, let’s add a Facebook widget to a page or post on your WordPress website. It’s pretty straightforward and only takes a few minutes.
Step 1: Install the Facebook Feed Pro Plugin
To start, get your own copy of the Facebook Feed Pro plugin here. And then install and activate it on your website.
Not sure how to do this? You can use this helpful tutorial on installing WordPress plugins as your guide.
Step 2: Create Your Facebook Widget
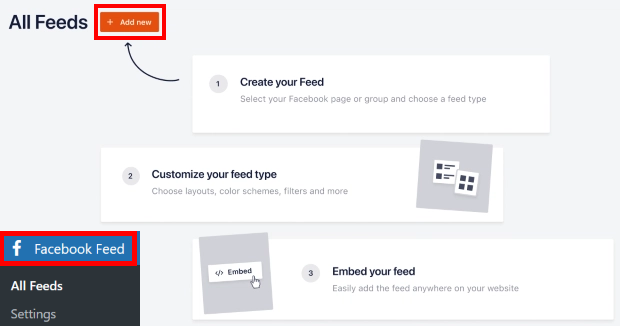
To create your Facebook widget, go to the Facebook Feed » All Feeds menu from your dashboard.
After that, just click on the Add New button at the top.
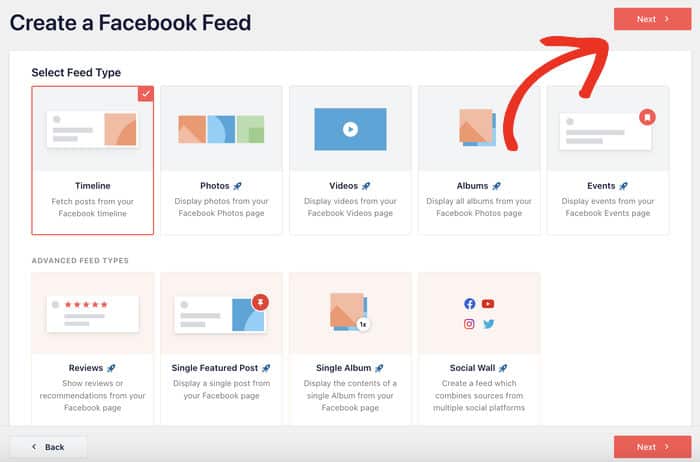
Next, you will be asked to select the type of Facebook feed you want to create. The plugin allows you to create various widget types, including:
- Timeline
- Photos
- Videos
- Albums
- Events
- Reviews
- Single Features Post
- Single Album
Just select the type of feed you want and click on Next.
For this tutorial, I’ll select the timeline feed option here.
Step 3: Connect to Your Facebook Account
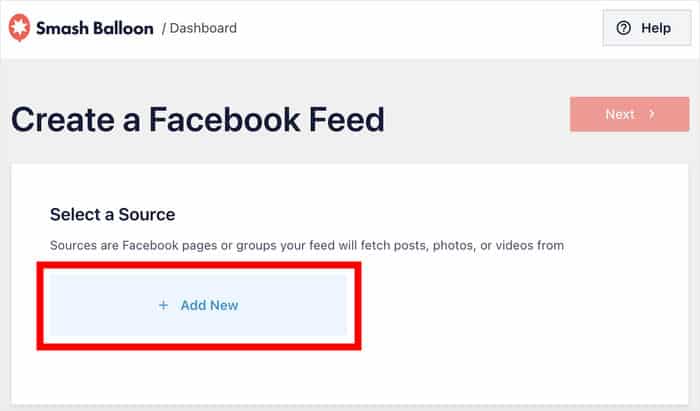
With this step, you can add a source, which can be a Facebook page.
So, your Facebook widget can show the posts, photos, or videos from that page.
To add a new source, click on Add New on this popup.
You can now see another popup that asks you to choose between using the easy connection wizard or manually connecting to Facebook.
For now, you can just click on Connect to Facebook.
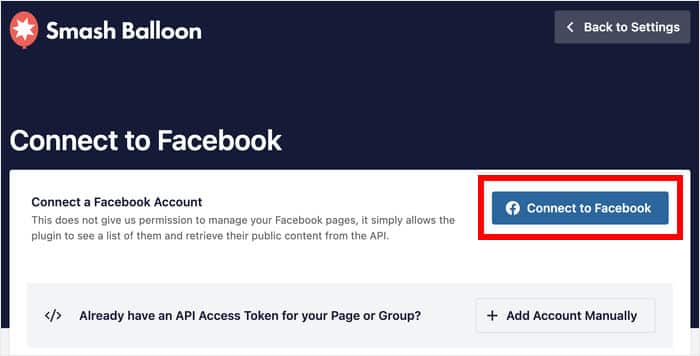
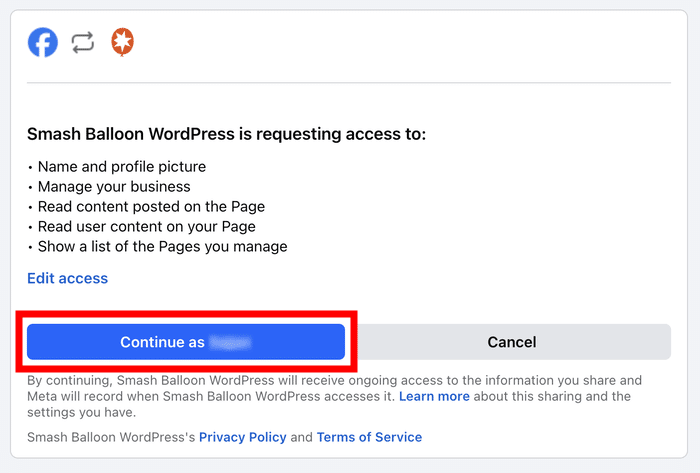
Once you do that, the plugin will redirect you to Facebook. There, you can give read-only access to the plugin so it can show your Facebook posts.
And since the access is read-only, your data is still safe, and the plugin can’t actually change anything.
To proceed, just click on the Continue button on the popup.
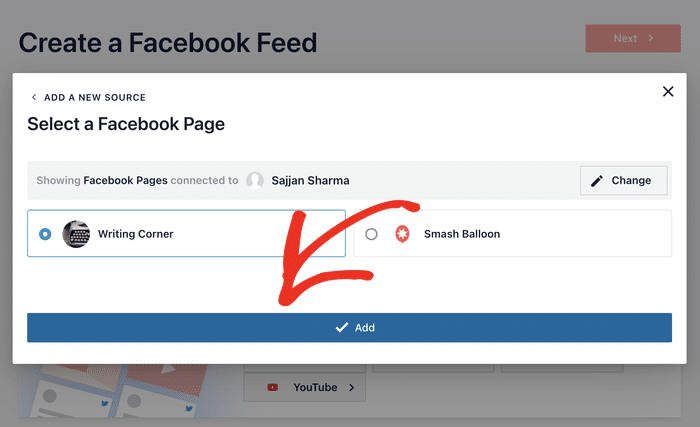
Now you’ll be back on your website. Select your Facebook page here and then click on the Add button to add it as a source.
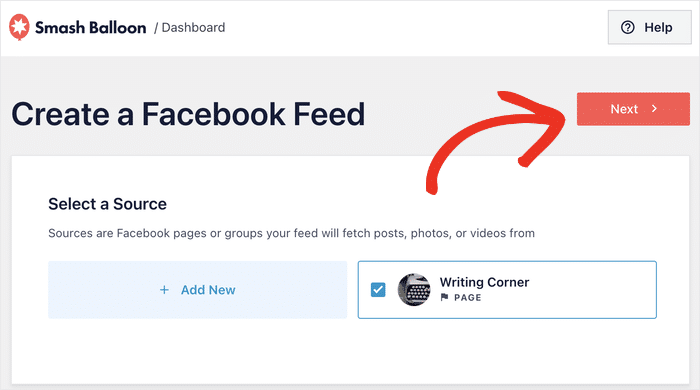
Now you can connect your Facebook widget to the source by clicking on the Next button.
Step 4: Customize Your Facebook Widget
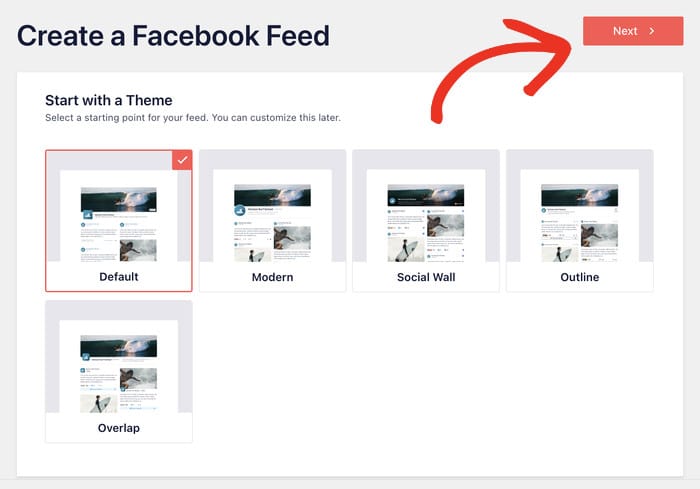
To help you customize your Facebook widget with ease, the plugin lets you import the design of a pre-built theme.
There are 5 themes you can choose from, and each has a unique design:
- Default
- Modern
- Social Wall
- Outline
- Overlap
To continue, select the theme that you’d like to use and then click on Next.
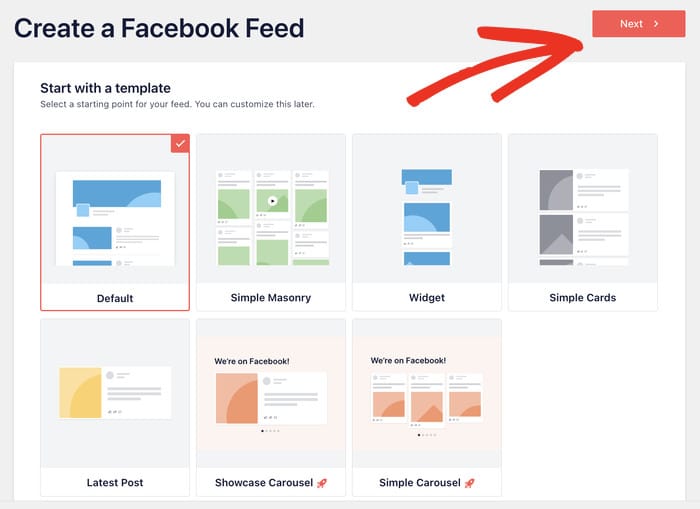
Facebook Feed Pro also lets you quickly import a template to change the layout of the Facebook posts in your widget.
You have 7 templates to choose from:
- Default
- Simple Masonry
- Widget
- Large Grid
- Latest Album
- Showcase Carousel
- Simple Carousel
To continue, select your template, and click on Next.
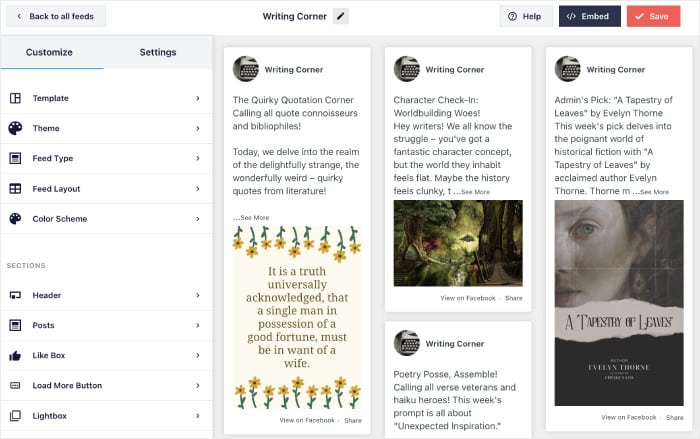
Now, you can see your Facebook widget open in the live feed editor.
If you check the left side of the screen, you can see all the available customization options there. So you can use these options to change your feed type, feed layout, color scheme, post elements, background, and much more.
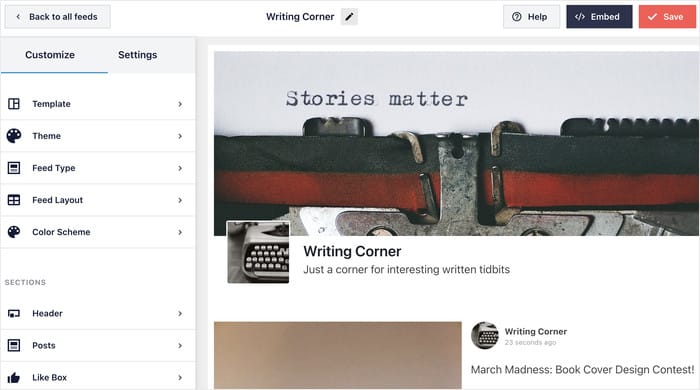
When you change any of these options, you can see a live preview on the right. So, you can see how your Facebook widget will look when you’re customizing it.
Configure Widget Layout
So let’s get started and customize the layout here. To do that, just select the Feed Layout option.
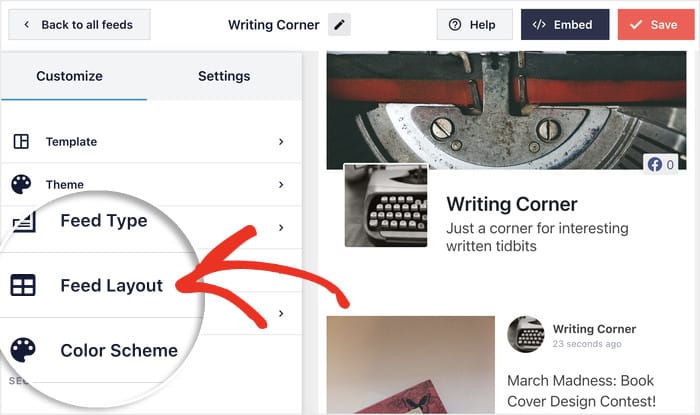
With this plugin, you have 3 different layout options to pick from: List, Masonry, and Carousel.
I’ll go through each of these options below:
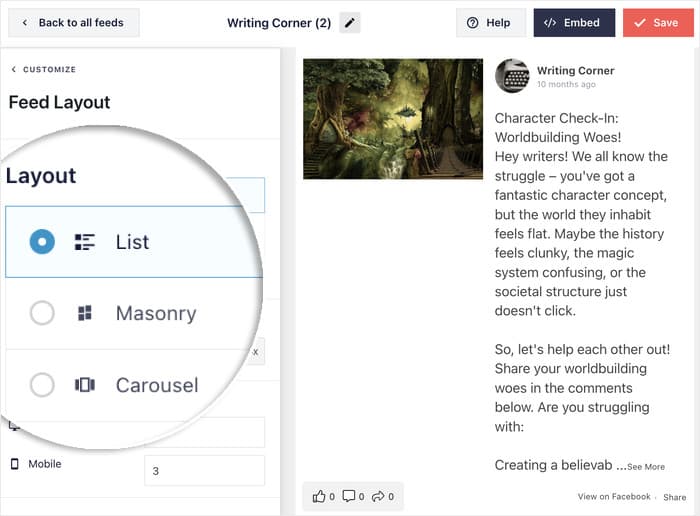
Want to show your Facebook posts in a single column? You can choose the list layout then.
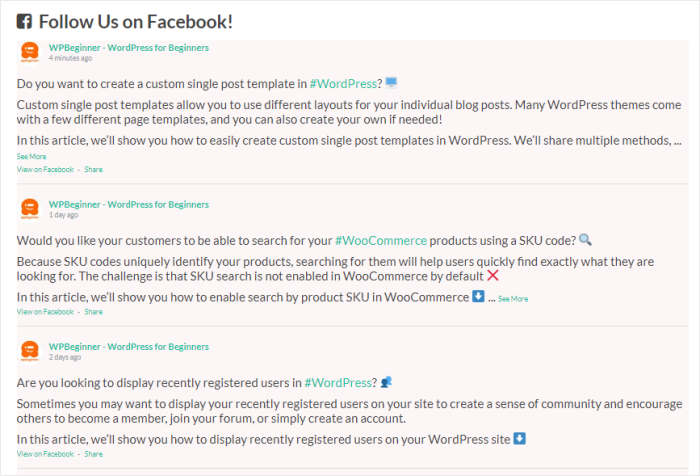
But if you want to show lots of posts at once on your Facebook widget, you can go for the masonry layout.

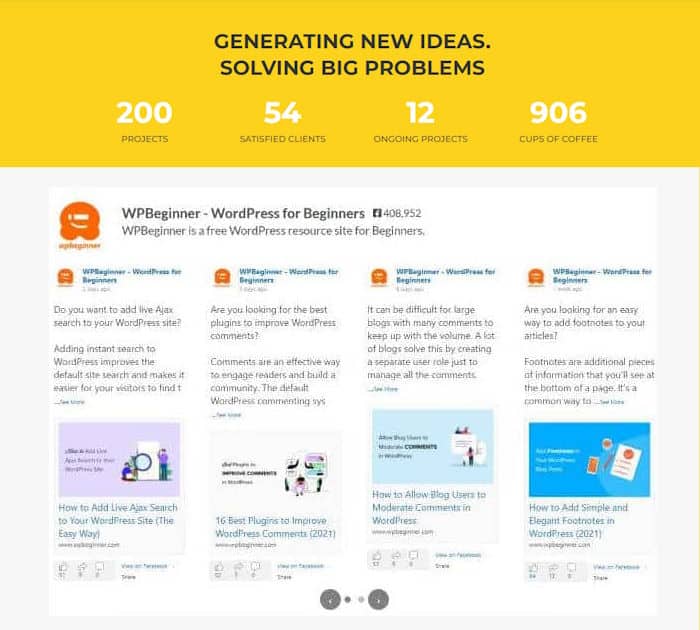
Finally, you have the carousel option that shows your posts in a Facebook carousel slider. It’s a great way to get people to interact with your website.
Once you pick the feed layout you want, click on the Save button on the top right corner.
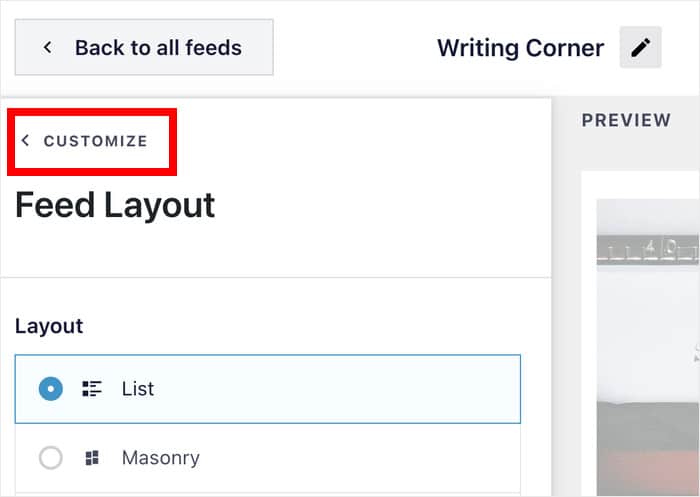
If you want to get back to customizing your feed, you can click on the small Customize button.
Set Color Scheme for Widget
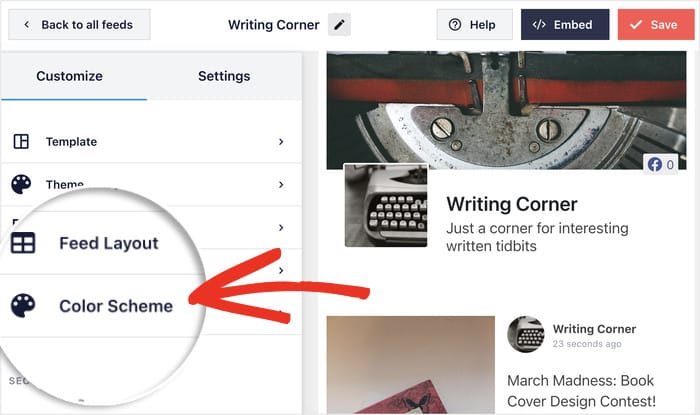
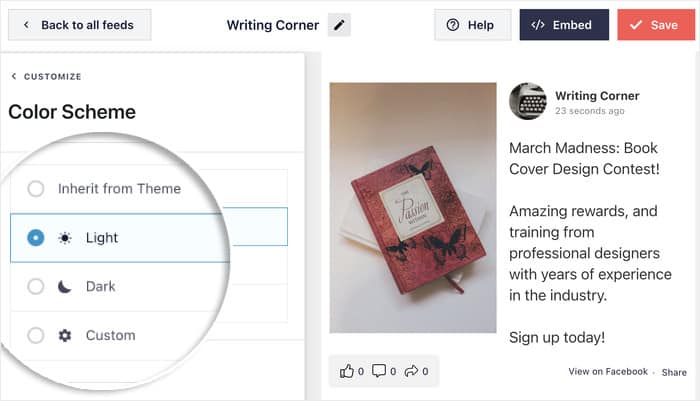
You can also customize the colors of your Facebook widget here. For that, select the Color Scheme option.
Now you get to choose between 4 different options for your Facebook widget’s color scheme.
- Inherit From Theme: Copy the colors of your WordPress theme
- Light: Show a light-colored background with a darker text
- Dark: Use a darker background instead and have a light color for your text
- Custom: Pick all the colors of your Facebook widget yourself
After you pick the color scheme you like, click on Save.
And that’s just the start.
With the live feed editor, you can also customize the header, cover photo, like button box, post elements, background, margins, and a lot more. Plus, it’s all super easy and requires zero HTML, Custom CSS, or any coding.
After you’re done customizing your feed, click on the Save button once again.
Step 5: Embed Your Facebook Widget
You can embed your Facebook feeds right here, directly from the live feed editor.
To get started, click on the Embed button in the top right corner.
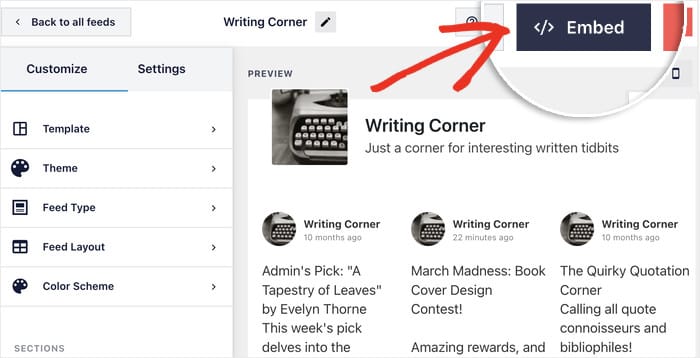
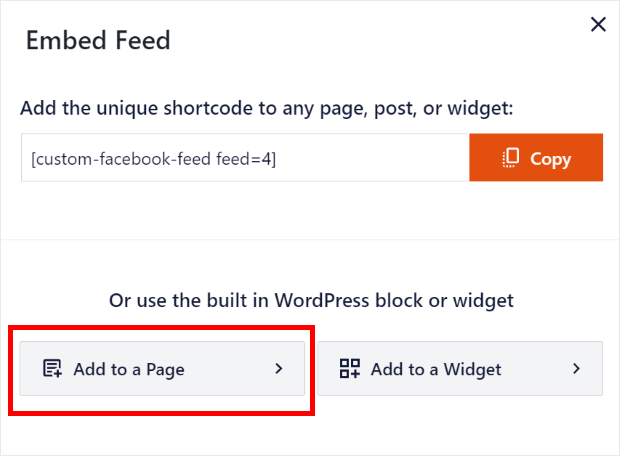
You will now see a new popup that asks you to pick where to embed your Facebook widget.
On the popup, just click on the Add to a Page option to continue.
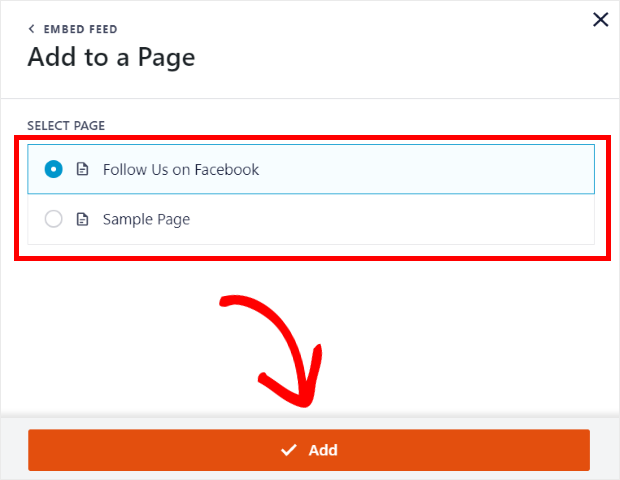
You can then see all the pages where you can add your new widget. Once you select your page, you can go ahead and click on the Add button.
Next, the plugin will open that page so that you can post your new Facebook widget.
To do that, first click on the small plus icon (+) to add a new block.
Now all you have to do is select the Custom Facebook Feed block under the Widgets section.
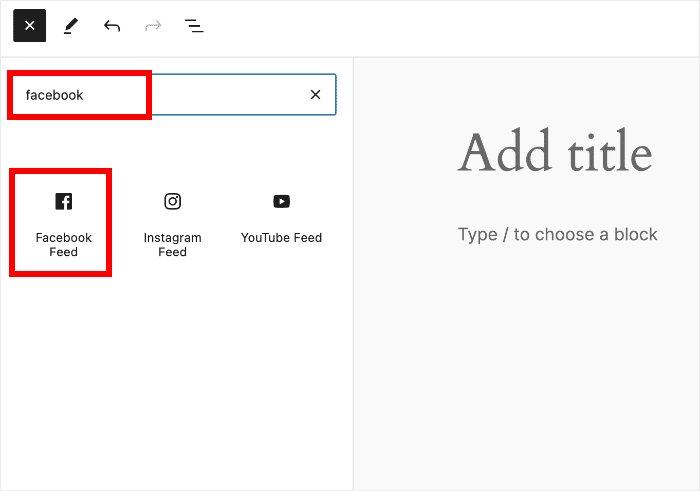
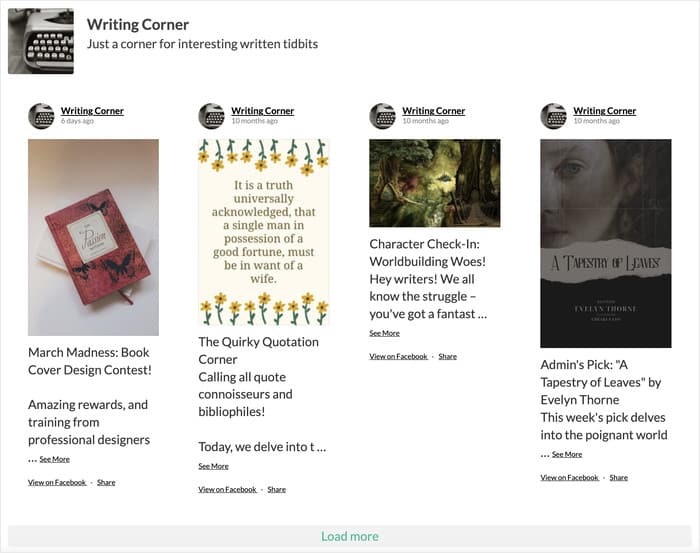
Finally, click on Publish, and you’ve successfully embedded your Facebook feed widget. Now you can open up your site and check how it looks on the front end.
2. Add the Facebook Widget to Your WordPress Sidebar
In addition to your WordPress posts and pages, your sidebar is a widget-ready area, too. Learn how to add a Facebook feed widget to your sidebar area by following the steps below:
Step 1: Open Your Facebook Widget in the Live Feed Editor
Before you embed your Facebook widget, you’ll need to open it in the live feed editor. For that, navigate to Facebook Feed » All Feeds from your WordPress dashboard.
From there, click on your Facebook widget from earlier to open it.
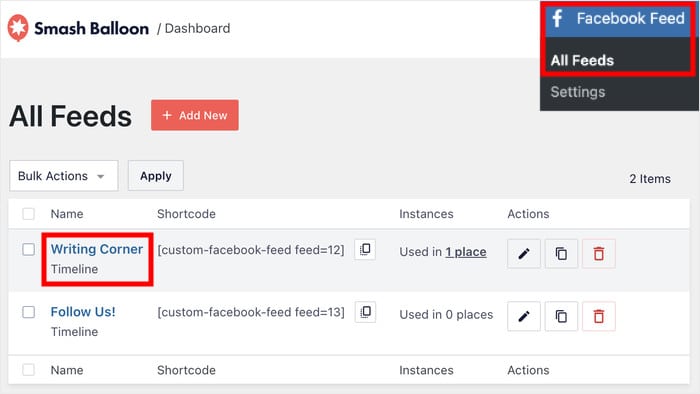
Now that it’s open in the live feed editor, you can go ahead and embed it.
Step 2: Embed Your Facebook Widget on the Sidebar
First, click on the Embed button at the top of the page.

Doing that will open a popup that asks you to select where you want to embed your widget. Here, just click on Add to a Widget.
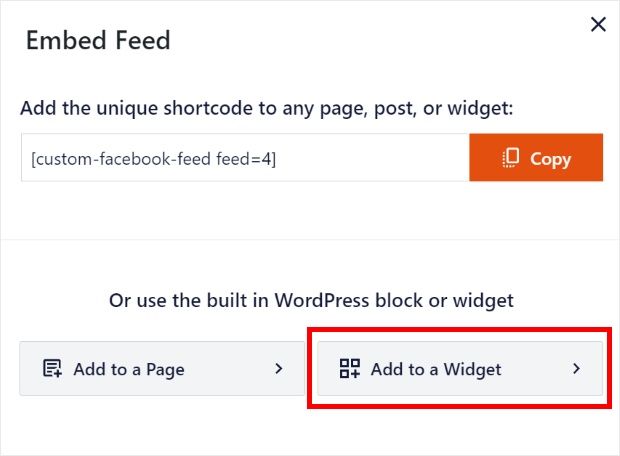
Now, the plugin will send you to the Widgets page, where you can manage all of your current widgets and add new ones.
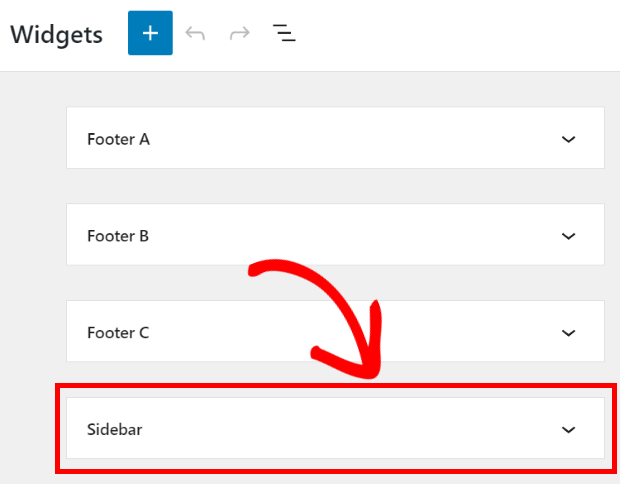
To continue, click on the Sidebar panel.
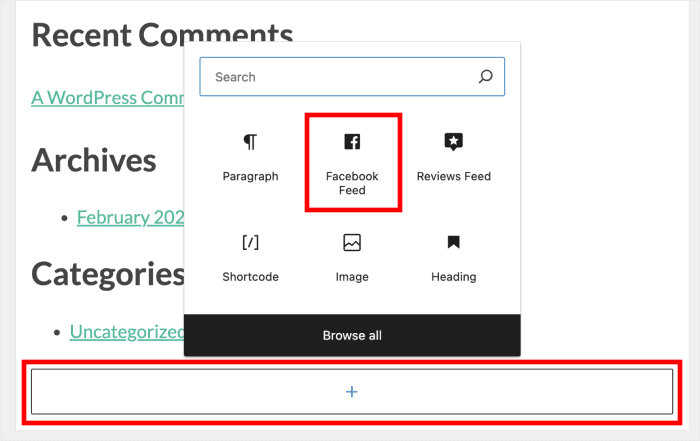
After that, click on the plus icon (+) at the bottom. Now, just select Custom Facebook Feed from all the options there.
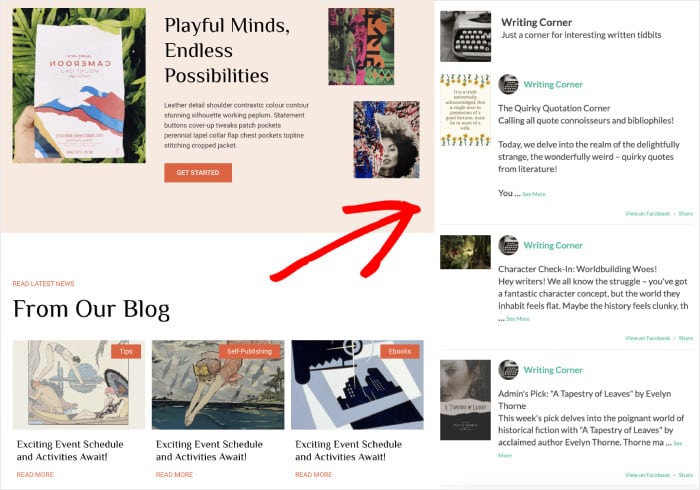
As you can see, it’s super easy to create a FB widget for WordPress with the help of this plugin. You can then open your site and see how your widget looks.
And that’s it!
You’ve finally learned how to add a Facebook widget to your website. And you didn’t have to bother with complex embed codes, HTML, or Javascript either.
After all, if there’s a simpler way to achieve your goal, why wouldn’t you do it, right?
Ready to try it for yourself? You can get your copy of Facebook Feed Pro here.
While you’re here, you can take a look at this guide on how to embed an Instagram feed on your WordPress website.
More Social Media Tutorials and Guides
- How to Auto Share Old WordPress Posts to Social Media (Easy Way)
- TikTok is Your Secret Weapon: Best TikTok Ideas for Small Businesses
- How to Schedule Facebook Posts from WordPress (Step-by-Step)
- Best Facebook WordPress Plugins for Your Website
