If you want more site traffic and engagement, sharing your old articles to Facebook can be a great solution.
But manually sharing each post is more hassle than it’s worth. The results are nice, but it just takes so much time and effort.
The solution?
You can follow this guide and set up your articles to be automatically reposted on Facebook.
- Easy Way of Reposting WordPress Articles to Facebook
- Why Share Old WordPress Content on Facebook?
- How to Auto Repost Old WordPress Articles to Your Facebook
Easy Way of Reposting WordPress Articles to Facebook
Instead of sharing each post to Facebook yourself, you can let a social scheduling tool handle it for you.
While there are a few options out there, I’ll use ClickSocial for this article since it’s easy to set up and use.
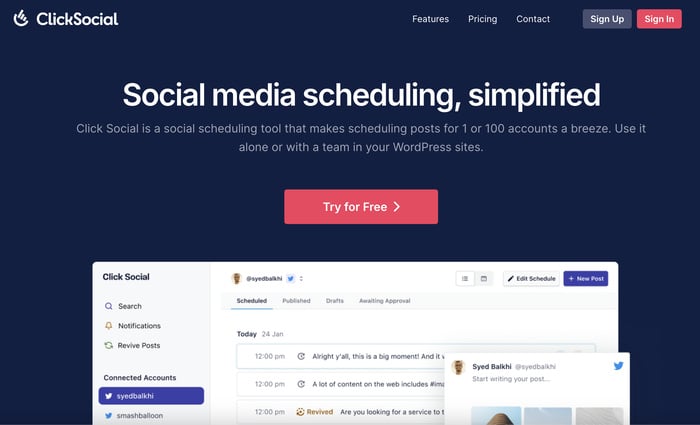
Plus, it even comes with a bunch of useful features that you can play around with:
- Auto share content on the biggest social media platforms out there: Facebook, Instagram, and Twitter/X.
- Plenty of filters so you can control which WordPress content will be shared on your social media.
- User-friendly editor that you can use to draft Facebook posts from scratch and add photos, videos, or WordPress posts.
- Involve your whole team in the process by assigning different roles to different people and work together.
- Track all of your scheduled posts, published content, and drafts from the post calendar.
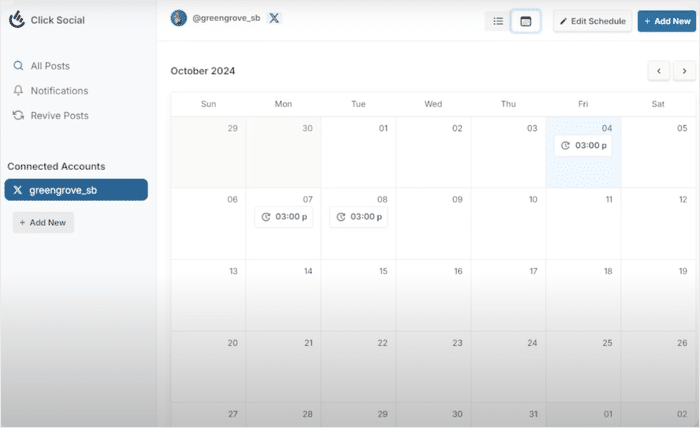
If you want to try out all these features yourself, you can get started with ClickSocial here.
Why Share Old WordPress Content on Facebook?
- Send Facebook followers to your website so you get more traffic and potential customers.
- Boost the SEO for your old articles so they rank higher in Google search and reach more people.
- Reuse articles that performed well for your old sales, announcements, events, and more.
- Engage your Facebook followers with a flow of relevant content – without any extra effort.
How to Auto Repost Old WordPress Articles to Your Facebook
You can follow the step-by-guide below to start auto-sharing your WordPress content to Facebook in no time.
Let’s get started!
Step 1: Create a ClickSocial Account
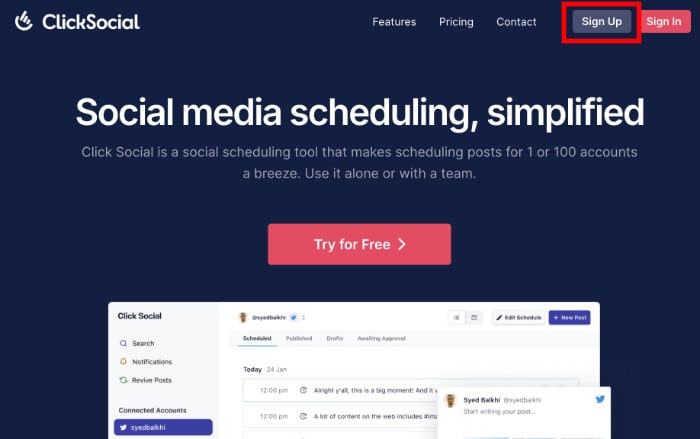
To get started, open the ClickSocial website on your browser.
From here, you can Sign Up for a new account.
After you have your ClickSocial account, return to your WordPress website to install the plugin.
Open the Plugins » Add New Plugin menu from your dashboard and look for the “ClickSocial” plugin.
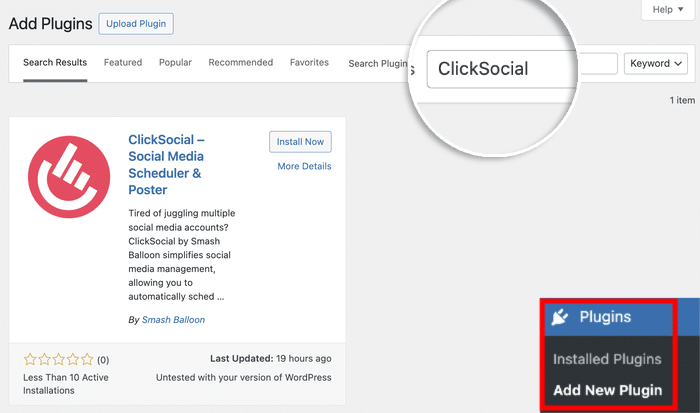
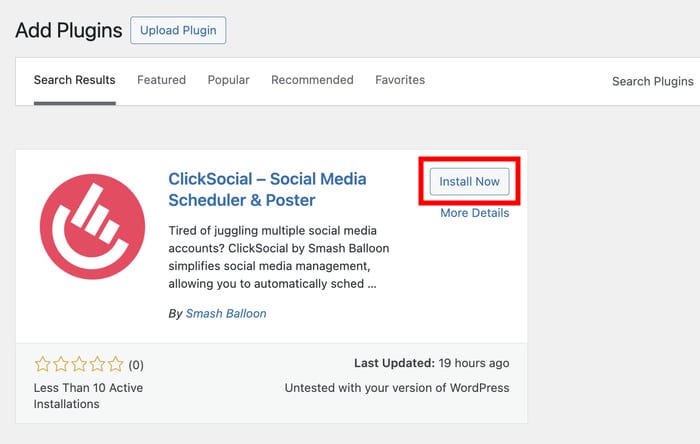
Once you see the plugin in the search results, click on the Install Now button.
After clicking on that, you can wait a few seconds for the installation and then Activate the plugin.
Step 2: Connect Your Website to ClickSocial
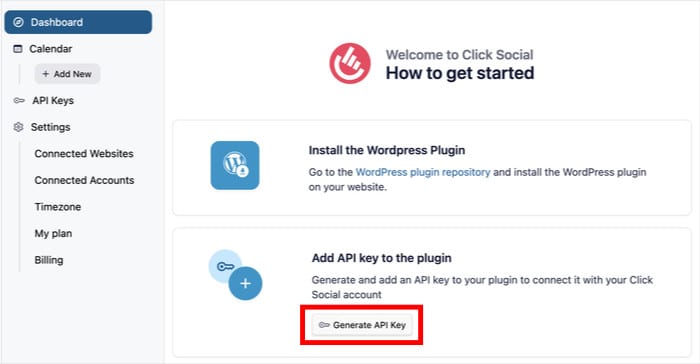
Now, you can use an API Key to connect your WordPress site to ClickSocial. That way, ClickSocial can start reposting content for you.
From your ClickSocial dashboard, click on the Generate API Key button.
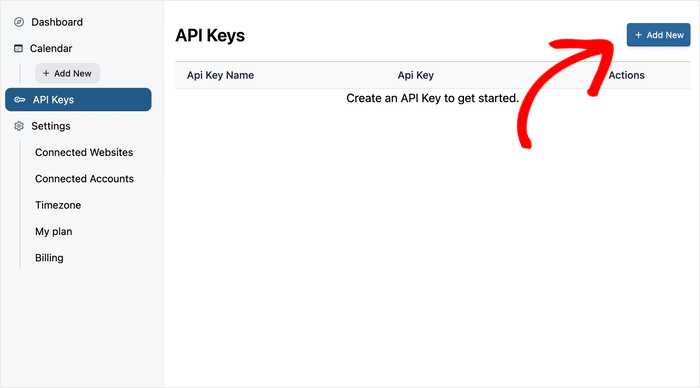
Once you’ve connected your website, it will be listed here. It can be really useful if you’re using ClickSocial with multiple sites.
For now, let’s click on the Add New button.
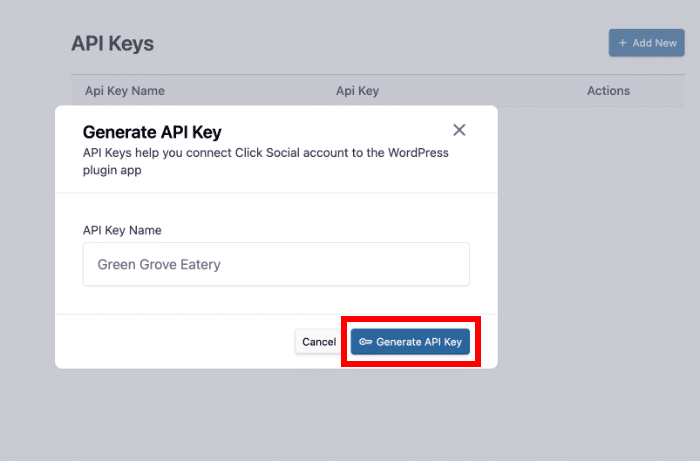
Doing that opens a new popup where you can enter a name or label for your website.
After you do that, click on Generate API Key.
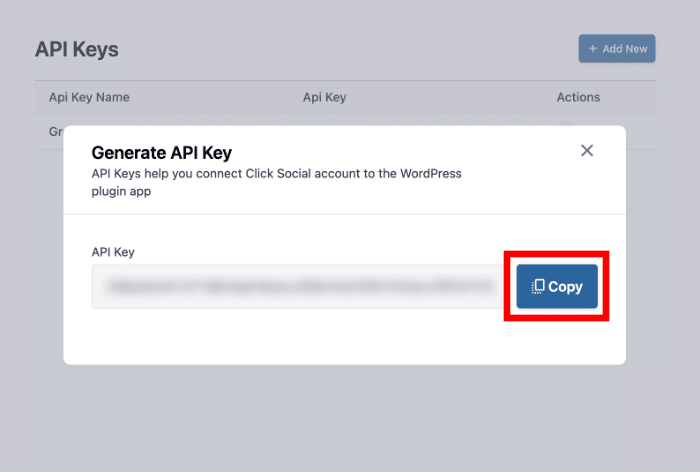
After that, the popup will show you the API Key. This key is pretty important, so remember to keep it safe.
To continue, click on Copy and return to your WordPress site.
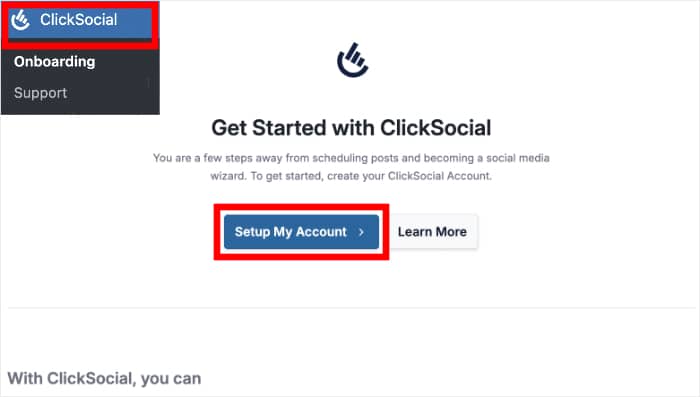
To finish connecting your website, open the ClickSocial menu that’s been added to your dashboard.
After doing that, you can simply click on Setup My Account.
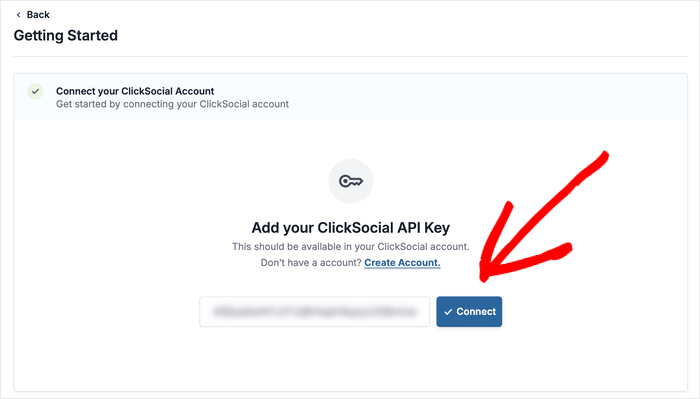
Finally, paste the API key from earlier and click on the Connect button.
Step 3: Connect Your Facebook Account
Once you connect your Facebook account, you can repost content to Facebook or even draft new posts directly from your website.
Click on the Add Account button here to proceed.
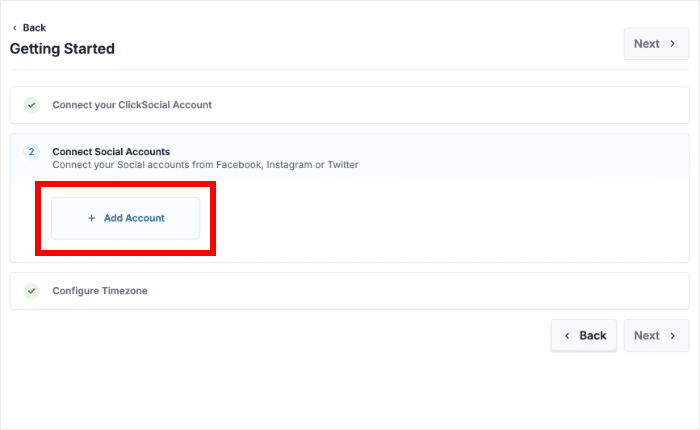
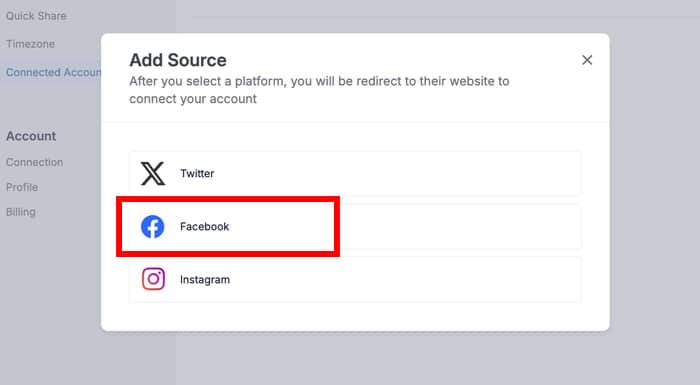
Now, a popup will ask you to choose the social media platform you want to connect to.
Another plus point of ClickSocial is that the entire process is the same for each of these platform.
For now, I’ll click on Facebook here.
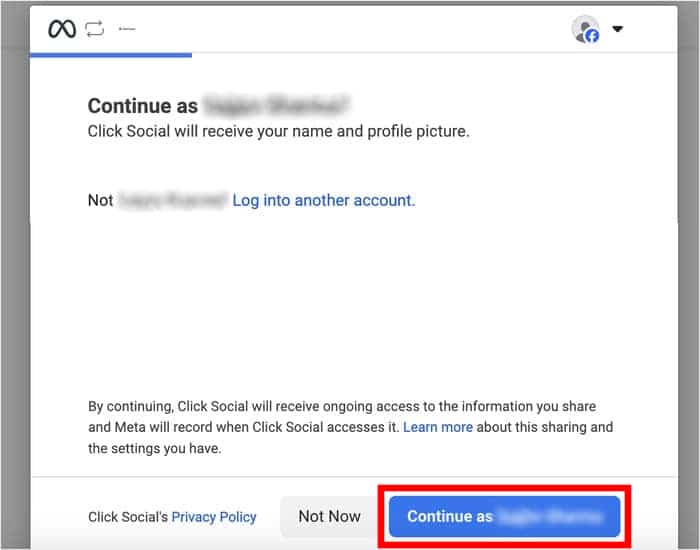
You should now see Facebook on your web browser.
Simply pick your account and click on the Continue button.
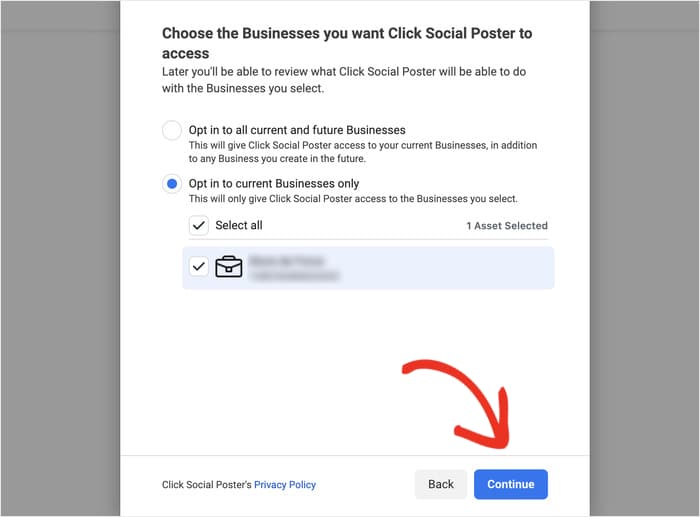
Next, select the business that you’ve connected to Facebook.
Like before, click on Continue on the popup.
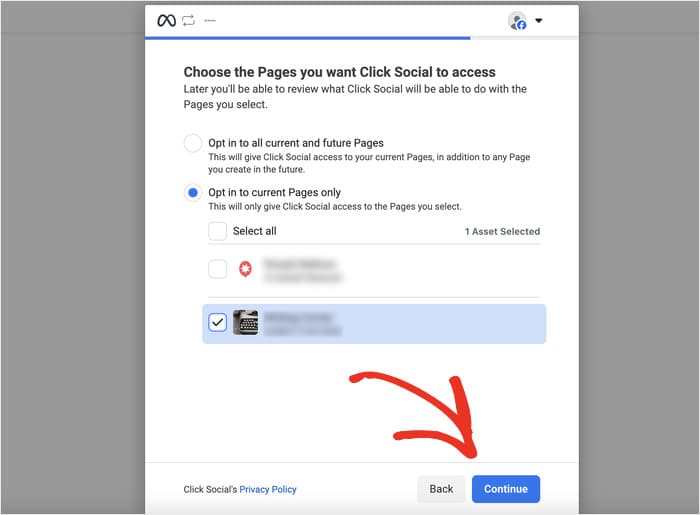
After doing that, you can select the page where you want to repost WordPress articles.
Use to Continue button to move on.
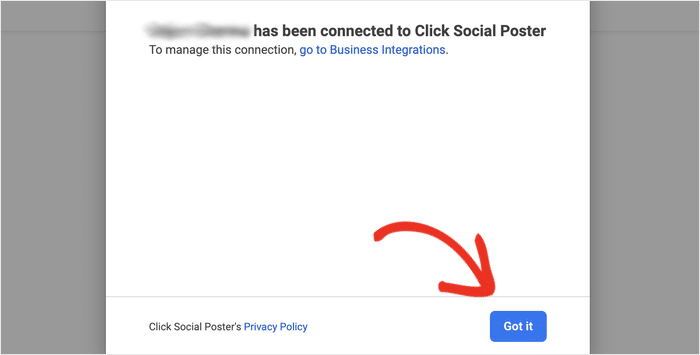
Finally, you can click on Got it to finish connecting your Facebook account.
After that, ClickSocial will take you back to your WordPress site.
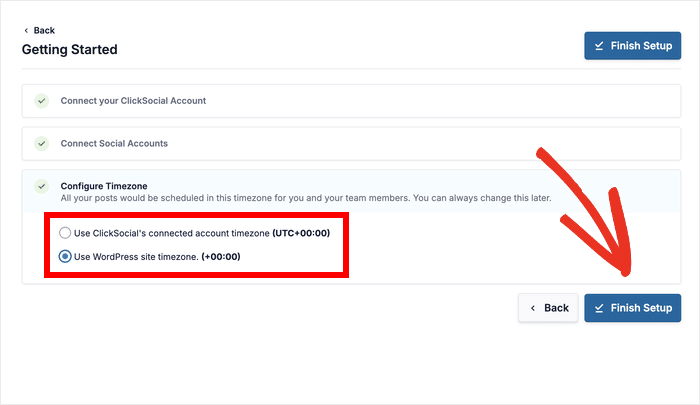
Before you continue to the next step, you can choose between your website’s timezone and your Facebook account’s time zone.
After picking an option, click on Finish Setup.
Step 4: Set Up Revival Posts
ClickSocial also comes with a feature that lets you pick the posts that you want to share on Facebook automatically.
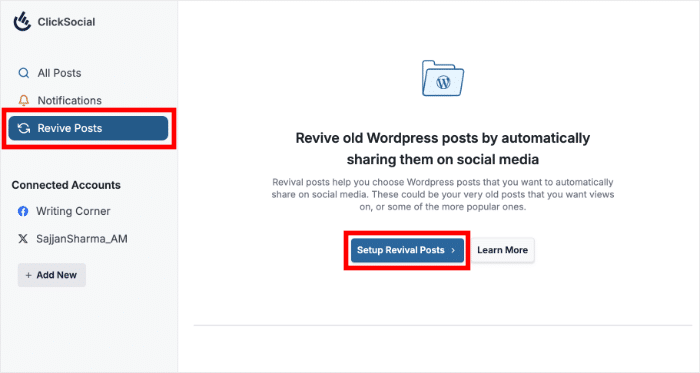
To get started, select the Revive Posts option on the left.
Then, click on Setup Revival Posts.
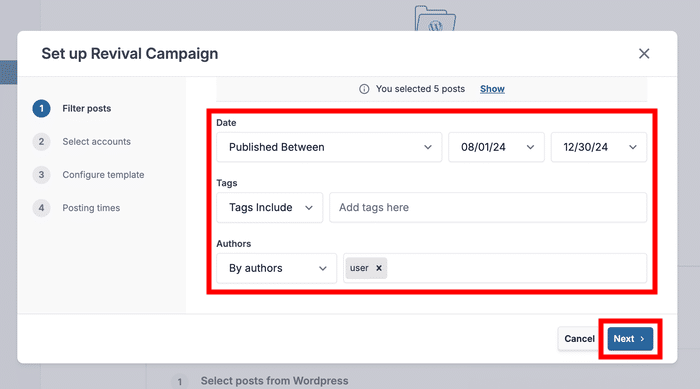
Next, you can use the filters to control the articles that will be resposted for your fans on Facebook:
- Date: Pick when the articles you want to share were published
- Tags: Include or exclude articles with specific tags
- Author: Select the authors whose articles you want to repost
I’m keeping things simple here, but feel free to set up the filters any way you like.
Then, you can click on Next.
Step 5: Configure Your Post Template
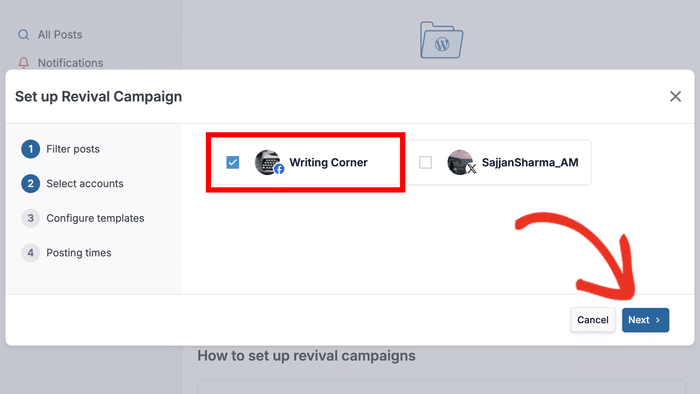
First, use the popup to pick the Facebook account that you want to use.
Like I said, the process is the same for each social platform, so you can use any other account as well.
To proceed, click on the Next button.
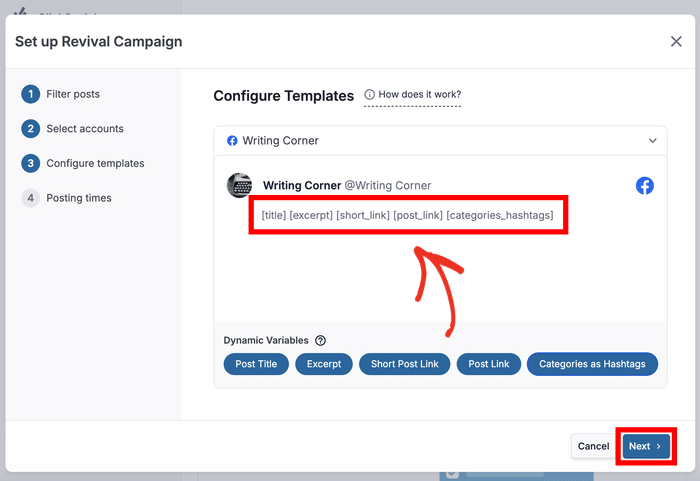
Now, you can add Dynamic Variables to your Facebook posts. This lets you control how your shared WordPress article will look on Facebook.
Each dynamic variable can add another detail to your Facebook post:
- Post Title
- Excerpt
- Short Post Link
- Categories as Hashtags
Select the variables that you want to use and click on Next.
Step 6: Choose Posting Times
After you do that, the popup lets you choose the time and day when your WordPress articles will be reposted.
Use the checklists on the left to select the days of the week.
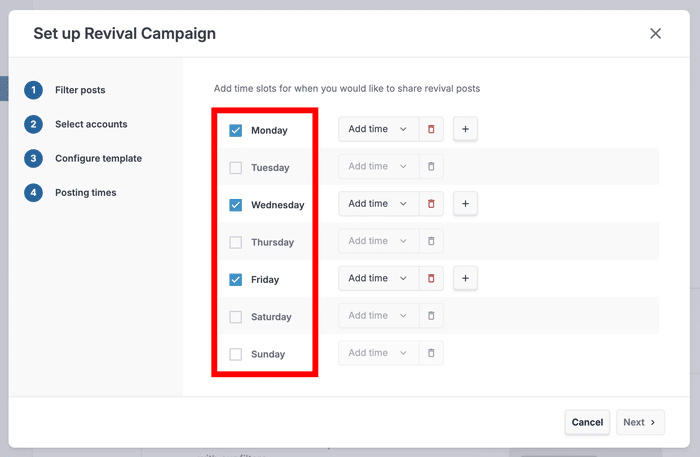
After you select your days, use the Add time dropdown menu to pick your posting time.
You can also add new time slots for each day using the plus (+) icon, or remove a slot using the red trash icon.
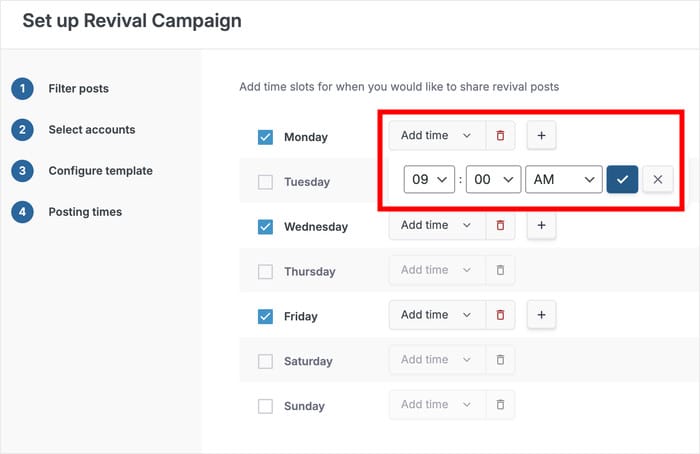
I’m using a simple schedule which reposts my WordPress articles three times a week at 9:00 AM.
After you’re happy with your schedule, click on Next.
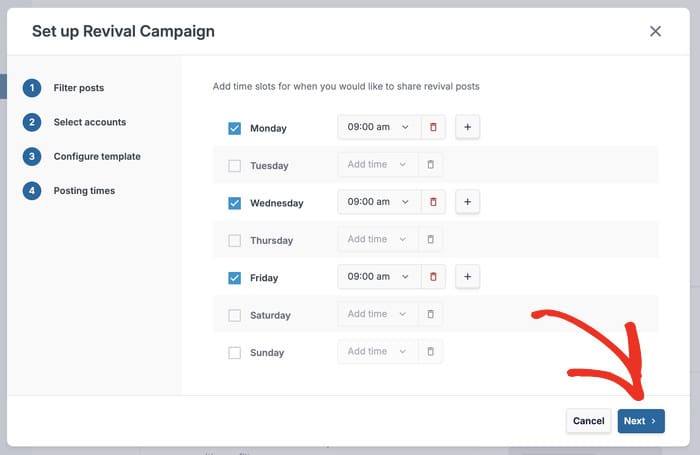
Just like that, ClickSocial will handle the rest and automatically post your content at the right time.
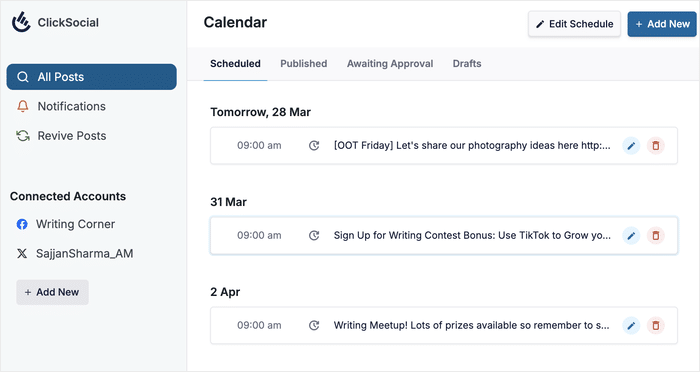
You can even use the post calendar to check up on your scheduled content. As a bonus, this social scheduler also lets you freely edit these posts or delete them from schedule.
Now you know the simplest way of reposting WordPress articles on Facebook. There’s a lot more you can do with this tool, so feel free to experiment and see what works for your brand.
It’s a great solution for anyone looking for more website traffic and engagement. And the best part is that you can set it up once and let the plugin work it’s magic .
To try it for your website, you can sign up for ClickSocial here.
If you want to use WordPress to supercharge your online presence, check out our guide on embedding social media feeds to WordPress.
More Social Media Marketing Tips and Guides
- How to Embed Multiple TikTok Videos at Once (Zero Coding Method)
- How to Schedule Instagram Reels: Video Marketers Love This Hack
- TikTok is Your Secret Weapon: Best TikTok Ideas for Small Businesses
- Best WordPress Social Media Plugins that Pro Marketers Swear By
