Social Wall
  Feed Analytics

An X (Twitter) feed is a good way to show live updates on your site, right up until it takes over your sidebar and pushes everything else down the page.
That’s the usual reason people go looking for a post limit. A feed of three or four posts sits neatly in a column and keeps visitors focused on the rest of your page.
Twenty of them just look like clutter, and they make the feed harder to navigate with a screen reader too.
If you’ve already tried capping it through X (Twitter)’s own embed code, you’ve probably found that it no longer works. That isn’t your mistake, and I’ll explain what changed further down.
I’ve spent a lot of time setting up social feeds on websites, so here’s how I control the post count instead: a few clicks in a feed editor, no code, and the number stays exactly where you set it.
In This Article
- Why Limit the Number of Posts in an X (Twitter) Widget?
- What's the Easiest Way to Limit X posts in WordPress Widgets?
- Can You Still Limit Posts in X (Twitter)'s Own Embed Code?
- Start Limiting Your X (Twitter) Feed Today
Why Limit the Number of Posts in an X (Twitter) Widget?
When you’re adding an X (Twitter) feed to your website, it’s tempting to show everything. But sometimes, less is actually more!
Here’s why it’s often a smart idea to limit your X posts:
- Keep Your Website Clean & Organized – Think about your website’s X (Twitter) feed widget in sidebar or footer — it’s valuable space! Showing too many posts can make these areas look cluttered. Limiting them keeps your design clean, professional, and easy on the eyes.
- Make Sure Your X (Twitter) Content Stays Relevant to Your Website – Not every post belongs on your website. Limiting your embedded X posts lets you display only content that interests your website visitors.
- Focus Visitor Attention – Too many X posts can be distracting and pull attention away from your main message. Limiting your X posts helps keep your visitors focused on the important parts of your website.
- Improve Website Accessibility – Long feeds are hard to navigate with a screen reader. Keeping the count down makes your site easier to use for everyone.
So, as you can see, limiting the number of X posts in your widget isn’t about showing less of your X (Twitter) activity. It’s about making your website better, more focused and more user-friendly for everyone.
Want to learn more about how to effectively limit your X posts and display them perfectly on your website? Keep reading!
What’s the Easiest Way to Limit X posts in WordPress Widgets?
The easiest way to reduce the number of X posts in your WordPress X (Twitter) widget is to use a WordPress plugin specifically for X (Twitter) feeds.
Plugins extend your website’s functionality and add useful features with no need to bother with coding.
And if you want to show X (Twitter) content on your website using a plugin, the best option is Smash Balloon X (Twitter) Feed Pro.

Using this plugin, you can create, customize, and embed X (Twitter) feeds and widgets with just a few simple clicks — no coding needed.
Just follow the guided flow and you can have beautiful X (Twitter) content on your website to engage your visitors.
Besides being able to integrate X (Twitter) feeds on your site, X (Twitter) Feed Pro lets you easily limit the number of X posts displayed in an X (Twitter) widget with a few clicks.
What I like about Smash Balloon feed plugins is their user-friendly visual feed customizer.
In fact, using the feed customizer with live preview, you can customize the layout, number of X posts, colors, buttons, and much more.
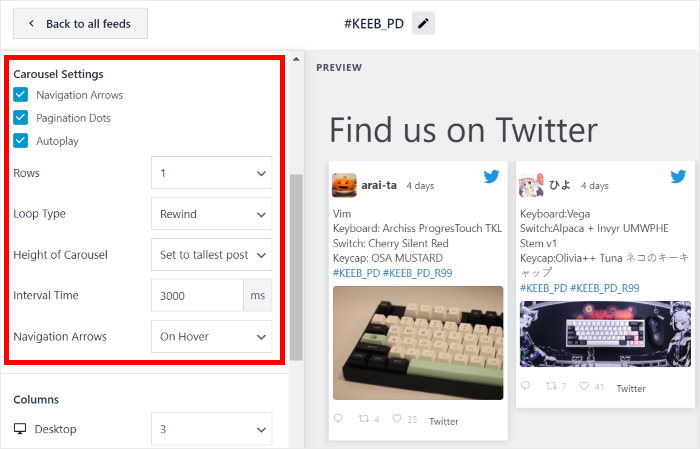
You can even moderate your feed freely to remove or show X posts that you want.
As the #1 X (Twitter) feed plugin on the market, X (Twitter) Feed Pro has over 100,000 websites using the plugin, with an average 4.9/5 star rating.
More importantly, Smash Balloon has an excellent customer support team to hold your hand through the process.
No question is too small. As a result, creating an X (Twitter) feed with a limited number of X posts will take no time at all.
Get started with X (Twitter) Feed Pro here!
Then follow the instructions below to install the plugin and limit the number of X posts in your X (Twitter) widget.
Step 1: Install Smash Balloon X (Twitter) Feed Pro Plugin
The first step is to go and get the X (Twitter) Feed Pro plugin from here.
Once you do that, just install and activate the plugin on your website. You can follow this guide to learn how to install a WordPress plugin if you need a little help.
With that, you can move on to step 2 and start creating X (Twitter) feed widgets.
Step 2: Create a New X (Twitter) Feed
Using X (Twitter) Feed Pro, creating new feeds can be super easy.
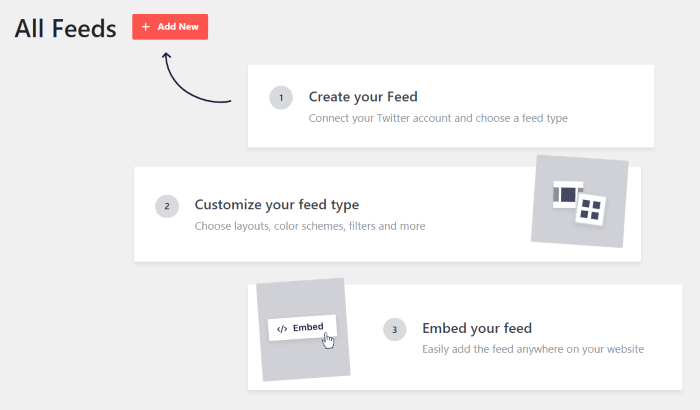
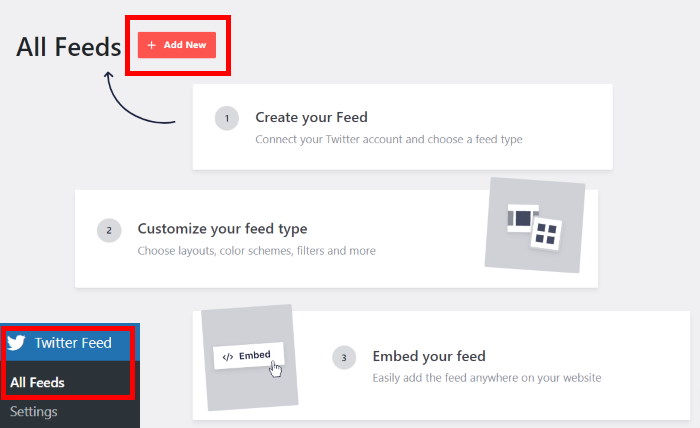
First, navigate to the X (Twitter) Feed » All Feeds menu from your WordPress dashboard.
Then, click on the Add New button at the top.
Now pick the type of feed you want to show. The plugin comes with 4 feed types, which cover most of the X (Twitter) widget examples you’ll want on a site:
- User Timeline: The default. It shows posts from your own timeline, or from any X (Twitter) user you enter.
- Hashtag: Shows posts containing a specific hashtag, which is useful for branded campaigns.
- Search: Uses X (Twitter)’s search to build a fully tailored feed from a query you define.
- Lists: Enter the ID of an X (Twitter) list to show posts from everyone on it.
Click on your chosen feed type, then click on Next to move on to the next step.
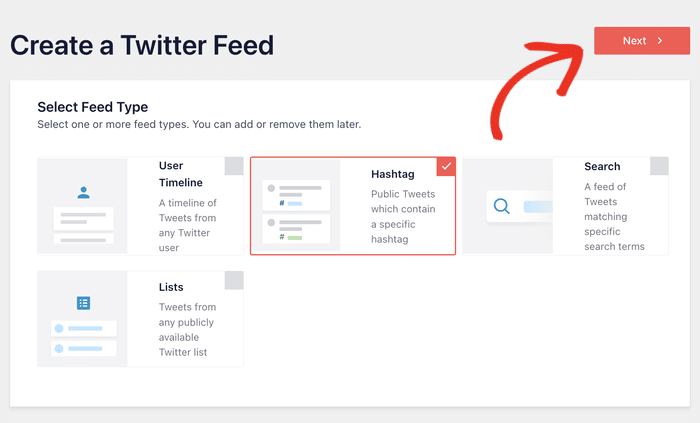
For this tutorial, I’ll use the hashtag option since I want to show a branded hashtag in our example X (Twitter) widget.
After this, you can move on to step 3 and connect your X (Twitter) account to your new feed.
Step 3: Connect Your X (Twitter) Account
The next step is to connect the plugin to your X (Twitter) account. To do that, click the Connect button on the popup.
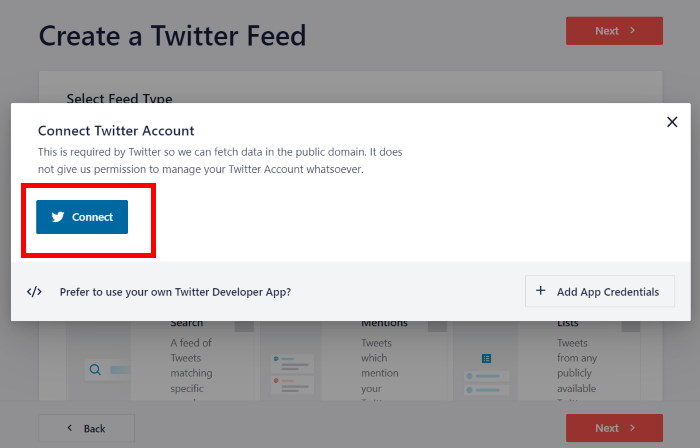
Clicking on that will open up X (Twitter) so you can give the plugin read-only access to your account.
X (Twitter) Feed Pro will use this access to view X (Twitter) content and it doesn’t have the access to make any changes at all. So, it’s completely safe to use X (Twitter) Feed Pro.
To continue, click on the Authorize app button on the popup.
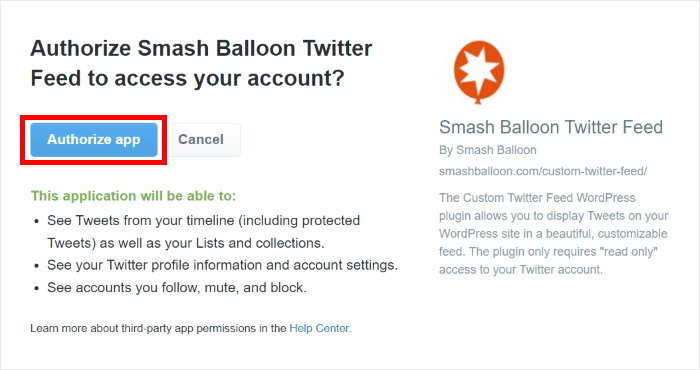
Just like that, you’ve connected your X (Twitter) account to this plugin.
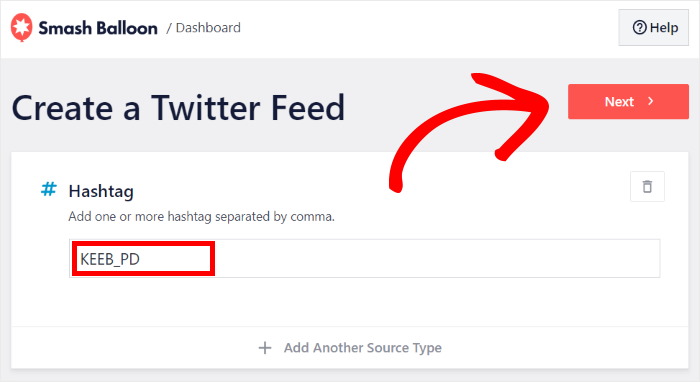
To set up your new X (Twitter) feed, you can now add a source. This source can be a user timeline, hashtag, X (Twitter) list, and more that you want to show.
For this article, I’ll enter the hashtag “KEEB_PD” as the source.
Once you enter the source, click on the Next button.
Next, X (Twitter) Feed Pro will ask you to pick a template for your new feed. You can pick from 7 unique designs here, including masonry cards, simple carousel, showcase carousel, and more.
My favorite X (Twitter) feed template is simple carousel, but for this example, let’s go ahead and choose Default.
To continue, select a template from the list and click on Next.
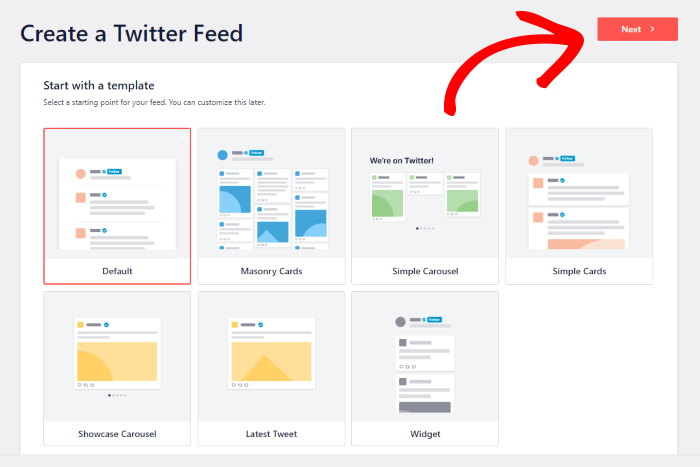
As you can see, X (Twitter) Feed Pro makes it easy to create X (Twitter) feeds and connect your account.
It’s now time for step 4 where you can limit the number of X posts that you want to embed on your site.
Step 4: Limit The Number of X posts in Your X (Twitter) Feed
You can now choose how many X posts you want to show in your X (Twitter) widget. This is easy to do with the X (Twitter) Feed Pro plugin.
Now, you can see your new X (Twitter) feed open in the live feed editor. On the left side of the screen, you can see all the customization options, like feed layout, color scheme, header style, follow button, and much more.
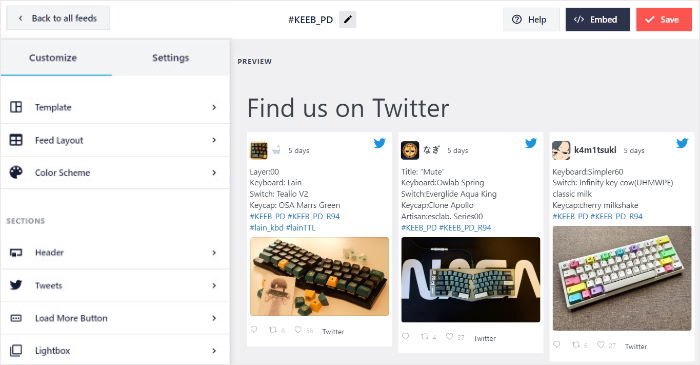
On the right, you can find a live preview of your X (Twitter) feed so you can track the changes in real-time.
To get started and limit the number of X posts, click on the Feed Layout button on the left.
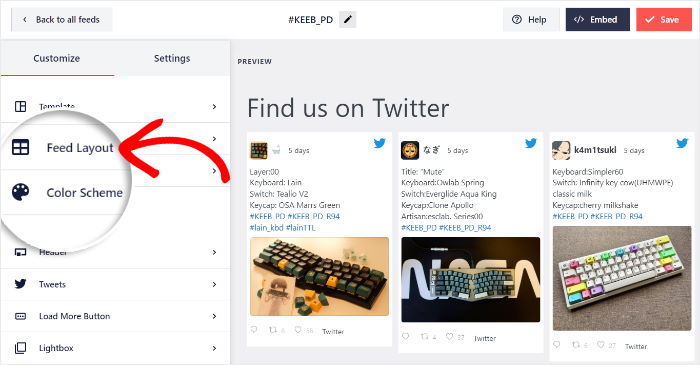
On the left, you can find the Number of X posts to display field.
Using this field, enter how many X posts you want to show on your widget.
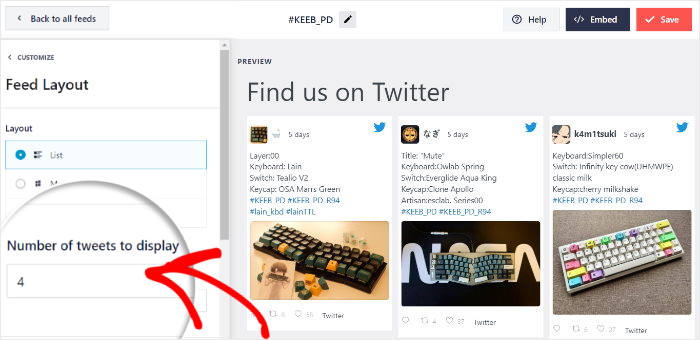
After that click on Save to confirm your changes.
Just like that, you can easily limit the number of X posts on your X (Twitter) feeds. Now, let’s go ahead and finish setting up your new X (Twitter) feed.
Step 5: Customize Your X (Twitter) Widget
Now let’s look at how to customize the design and layout of your X (Twitter) widget. To do that, you can simply use the live feed editor.
To get started, you can use the layout option on the left to choose from 3 different feed layouts: List, Carousel, or Masonry.
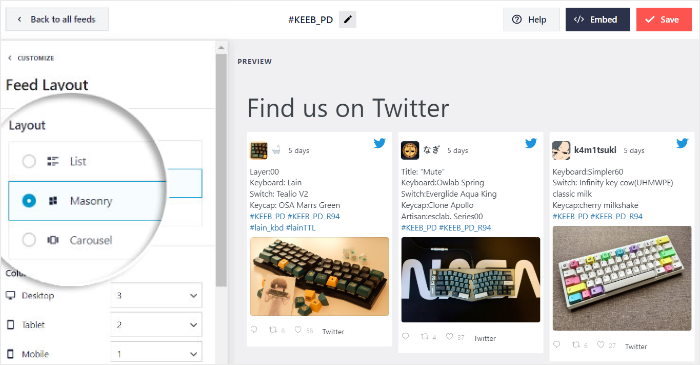
With the list layout, your X posts will appear in a single column one after the other. As a result, this layout can show the X posts as they appear on X (Twitter).

Want to show lots of X posts at once? The masonry layout uses lots of columns to show your X posts so you can show a lot of content easily.
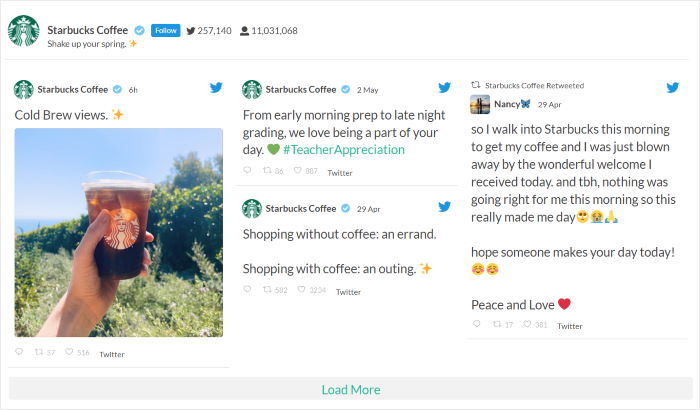
Finally, the carousel layout can show the content in a beautiful X (Twitter) carousel slider which makes your site more interactive.

Click the Save button when you’re happy with your layout.
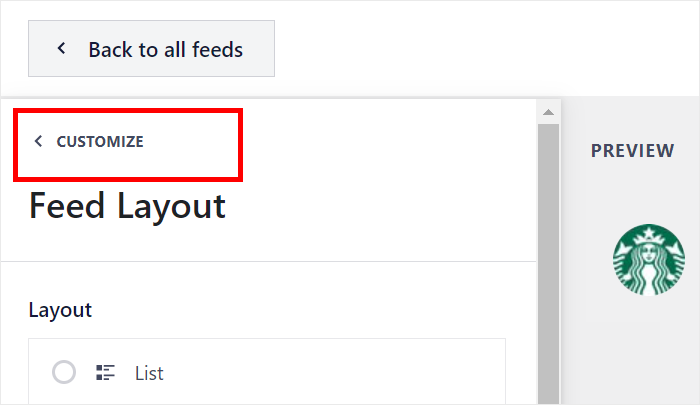
For more design options, you can click the Customize button at the top and return to the main options.
Now, click on the Color Scheme option on the left to start setting up the colors for your X (Twitter) feed.
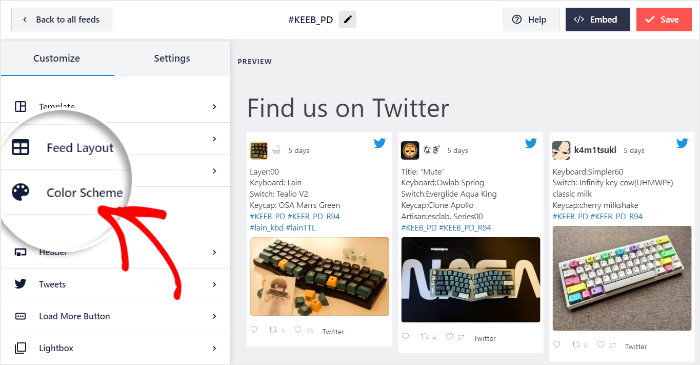
To make choosing colors simple, X (Twitter) Feed Pro comes with 4 color schemes that you can pick from:
- Inherit from Theme: Use the colors of your website so your feed matches your branding
- Light: Pick a bright look that has a light background and dark font color
- Dark: Show a dark look instead, which has a dark background and light font color
- Custom: Manually pick all of the colors yourself
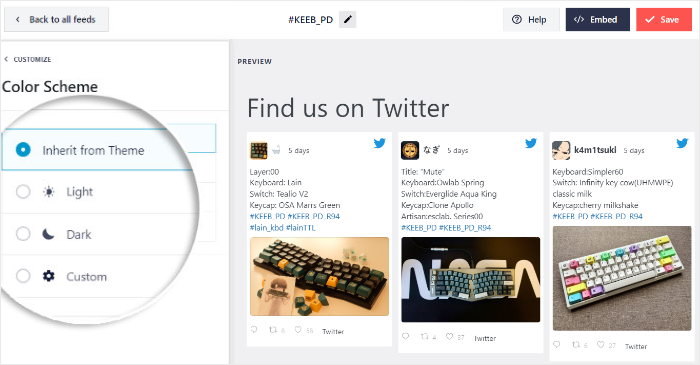
Select your X (Twitter) feed’s color scheme here and then click on the Save button.
After this, keep customizing your feed in the live editor. You can set your header style, post box design, button style, feed size, and much more.
Remember to click on Save to confirm your changes before moving on.
Now, you’re ready to embed this X (Twitter) feed on your website with ease.
Set the post count in one click
No attributes, no embed code. Type a number in the feed editor and watch the preview update.
Get Smash Balloon X (Twitter) Feed ProStep 6: Add Your X (Twitter) Widget to Your Website
With X (Twitter) Feed Pro, you can embed your X (Twitter) feed in 2 different ways:
- Add Your X (Twitter) Widget to a WordPress Page
- Add Your X (Twitter) Widget to a WordPress Sidebar or Footer
Let’s see how both of these methods work:
Add Your X (Twitter) Widget to a WordPress Page
Ready to get started?
First, click on the Embed button in the top-right corner.
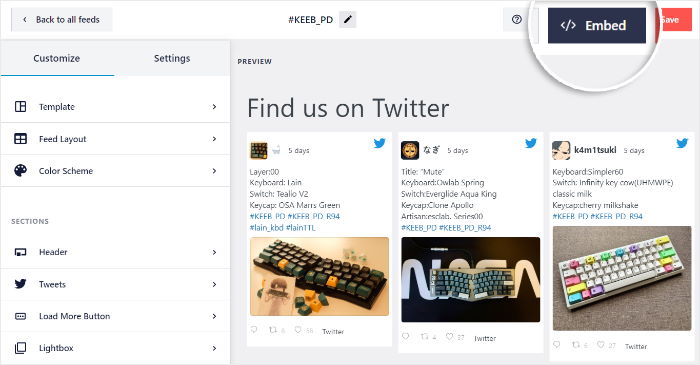
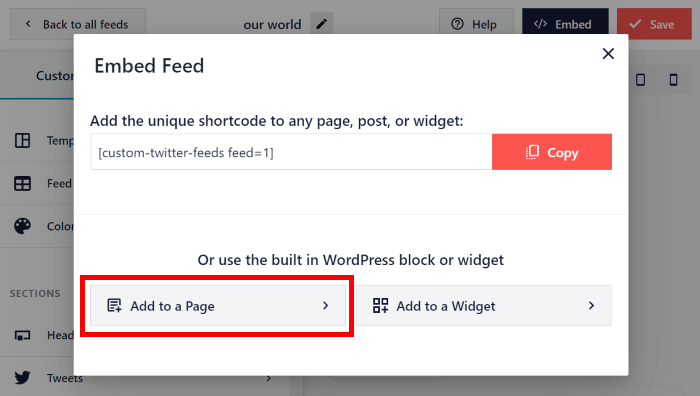
Now, you’ll see a popup where you can choose the location of your new X (Twitter) feed.
To continue, click on the Add to a Page button.
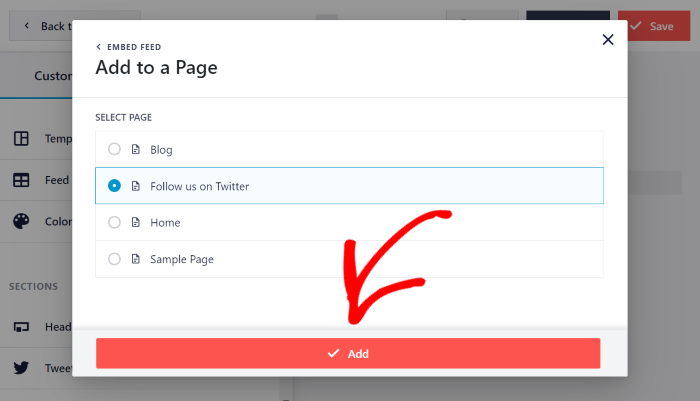
You can now see a list of your WordPress pages on the popup.
Just select your page from the list and click on the Add button.
Once you do that, the X (Twitter) Feed Pro plugin opens that page in the WordPress editor.
To start embedding your feed, look for the Plus (+) icon at the top and click on it.
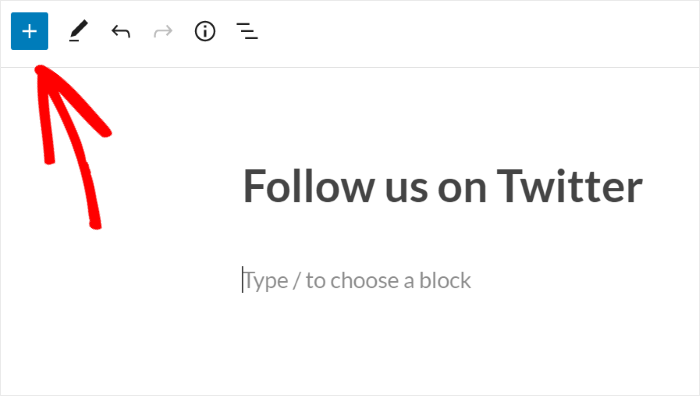
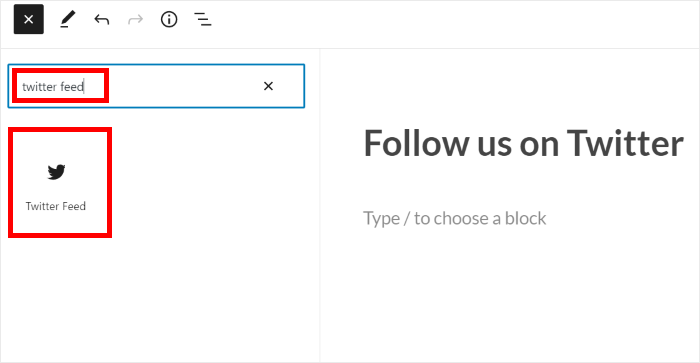
After clicking the Plus (+) icon, you’ll see a list of available WordPress blocks and a search bar. In the search bar, type “twitter” and click the X (Twitter) Feed block.
If you’re happy with your page, click the Publish button. When you preview the page, you’ll see your X (Twitter) widget live on your site, complete with a limited number of X posts.

Now, let’s see how to add this X (Twitter) feed to your widget areas.
Add Your X (Twitter) Widget to a WordPress Sidebar or Footer
It’s also possible to add an X (Twitter) widget to your sidebar or footer areas in WordPress.
Plus, you can do that using the live feed editor as well.
To open your X (Twitter) feed in the live feed editor, first, navigate to X (Twitter) Feed » All feeds from your WordPress dashboard.
On this page, click on the X (Twitter) feed that you want to embed.
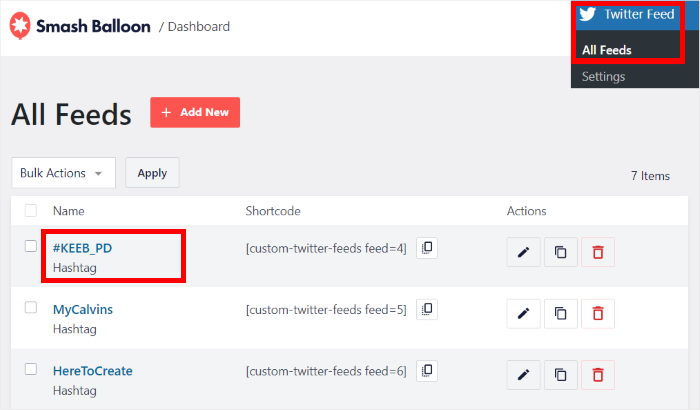
You can now see your X (Twitter) feed open in the live feed editor.
Like before, click on the Embed button at the top to start adding this feed to your website.
This will show a popup that asks you to pick the location of your X (Twitter) feed.
For now, click on the Add to a Widget option on the popup.
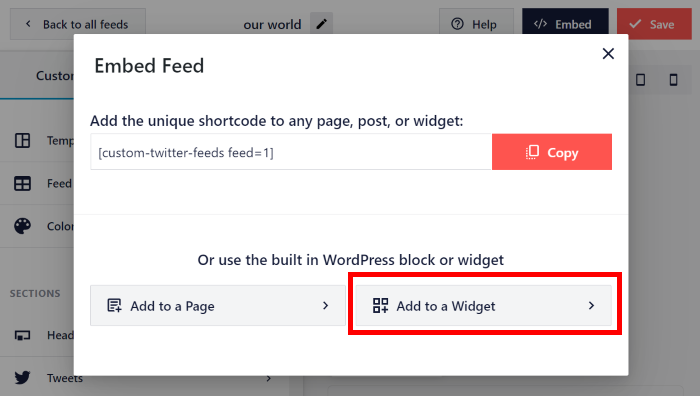
After you do that, X (Twitter) Feed Pro will open the widgets page of your WordPress website.
To start managing the widgets on your sidebar, click on the Sidebar option.
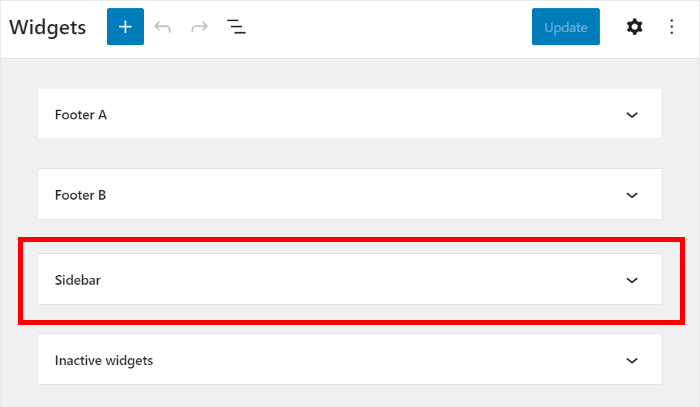
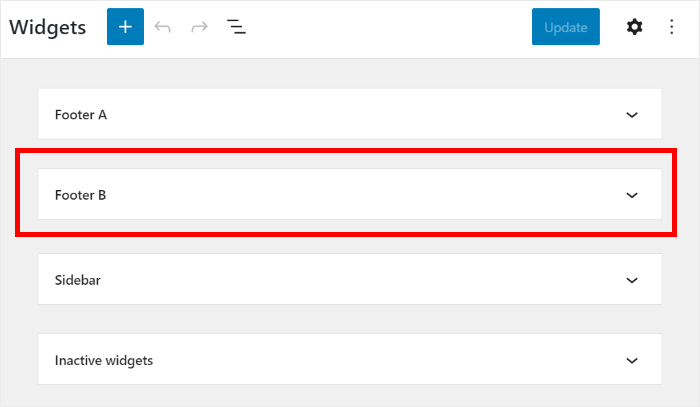
For another option, you can click on the Footer option instead.
We’ll use the WordPress sidebar for this tutorial.
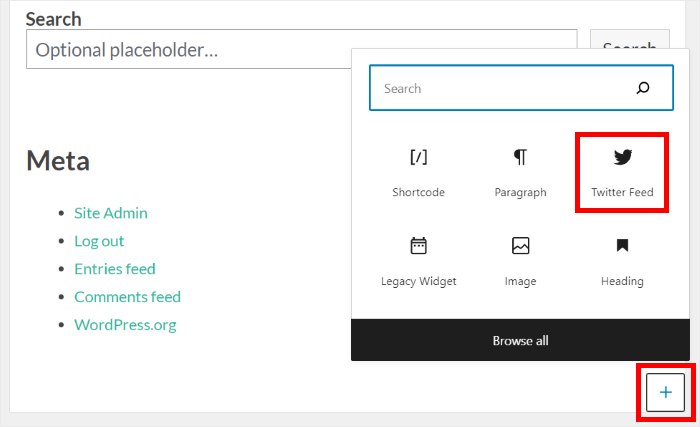
Then, click on the plus (+) icon to add a new widget. Next, find the X (Twitter) Feed widget to add the feed to your sidebar or footer.
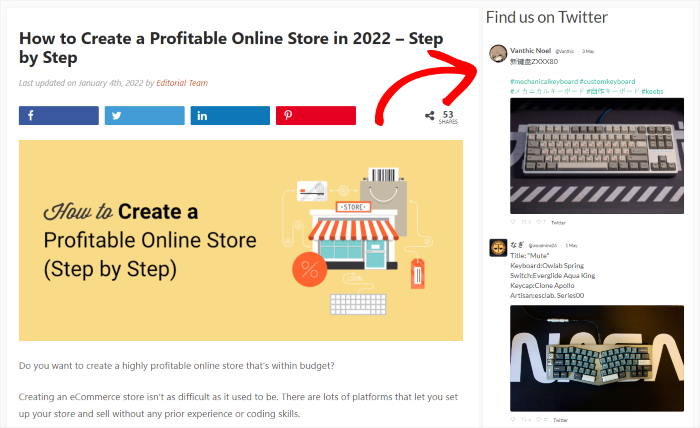
When you navigate to your main website, you’ll see your X (Twitter) feed widget. And since you’ve limited the number of X posts shown, it won’t take up too much room.
That’s the plugin method done.
You may be wondering whether you can skip all this and just limit posts in X (Twitter)’s own embed code. It’s worth knowing why that no longer works.
Can You Still Limit Posts in X (Twitter)’s Own Embed Code?
Short answer: not reliably, and not anymore.
X (Twitter)’s developer documentation still lists a data-tweet-limit attribute that accepts a number between 1 and 20. On paper, adding it to your embed code should cap how many posts appear.
In practice it stopped working, and there are open bug reports from developers watching it display the full timeline regardless of what they set.
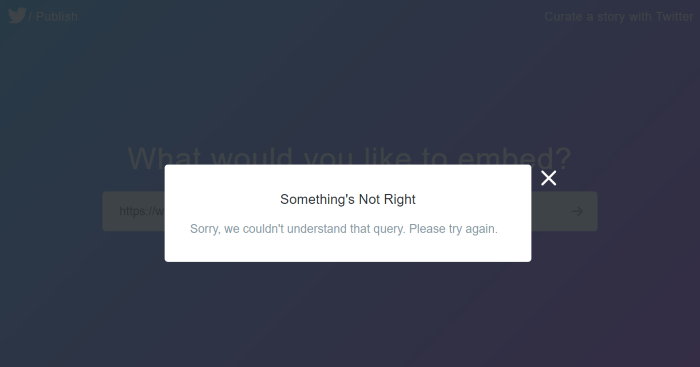
It goes further than one broken attribute. The option to limit posts was removed from X (Twitter)’s own embed generator at publish.twitter.com, so you can’t even produce that code through the official tool now.
Embedded timelines themselves have become unreliable: they largely only render for visitors already logged into X (Twitter), which means most of your audience sees an empty space where your feed should be.

The Government of Canada’s Web Experience Toolkit, which maintained an official X (Twitter) timeline component for years, now marks it deprecated and states plainly that it no longer functions because of changes on X (Twitter)’s end.
Their fallback just shows a link to the profile instead.
If you’re wondering why your existing embed shows nothing, or shows everything, that’s why. It isn’t your code.
What still works: embedding individual posts one at a time through publish.twitter.com. That’s fine for quoting a single post inside an article, but it’s not a feed, and you’d be updating it by hand forever.
For an actual feed with a post limit you control, you need a plugin that connects to X (Twitter) properly and renders the posts itself rather than handing the job to X (Twitter)’s widget script.
That’s the method in the first half of this guide, and at this point it isn’t the easier option so much as the only one.
Start Limiting Your X (Twitter) Feed Today
Set the number once in the feed editor and your widget stays the size you want it, whether that’s three posts in a sidebar or a dozen on a landing page.
The wider point is worth remembering. X (Twitter)’s own embed code can’t give you a working post limit anymore, and embedded timelines don’t render for most visitors at all. If your feed is showing nothing, or showing everything, that’s why.
A plugin sidesteps all of it by pulling your posts and rendering them itself, so your feed looks the same to every visitor whether they use X (Twitter) or not.
Get Smash Balloon X (Twitter) Feed Pro