Want to add a Google reviews widget to Beaver Builder? Don’t worry – you’re not alone!
Lots of people have asked us for a way to embed Google reviews that works with the Beaver builder plugin.
To help you folks, we’ve put together this beginner-friendly guide on adding a Google reviews widget to your site.
But first, let’s see how adding Google reviews can help out your business.
Why Add Google Reviews to Your Beaver Builder Website
Think about that time you bought something online? The chances are you checked reviews or ratings for the product before pulling the trigger.
When that happens, the type of review people see first will have a huge impact on their purchasing decisions.
[..] positive experiences are shared by nearly half of all customers, negative experiences make a particularly lasting impact with 95% of customers spreading the word when something goes badly.
Dixa
As you can see, it’s more important than ever to create a great first impression with reviews from happy customers. And the best way to do that is to add a reviews widget with positive reviews directly on your site.
Since it’s the #1 customer review platform out there, Google is a fantastic place to find customer reviews and testimonials of your business.

All you have to do is add a Google reviews widget, and your e-commerce site can convert even more visitors into customers.
What’s more, showing fresh reviews with relevant keywords is great for your website’s SEO as well. So, you can rank higher in search results and reach more potential customers.
How to Add Google Reviews Widget to Beaver Builder (Tutorial)
All you have to do is follow the beginner’s guide below, and you can have a beautiful reviews widget to promote your business.
Let’s get started!
Step 1: Install and Activate the Reviews Feed Pro Plugin
If you want to display review widgets the easy way, you can simply try the Reviews Feed Pro plugin.
As the best reviews widget plugin, Reviews Feed Pro lets you display customer reviews in just a few simple clicks – no coding needed!

The best part is that Reviews Feed Pro works perfectly with WordPress page builders like Beaver Builder. In fact, your Google reviews widget will automatically copy your site’s design right away.
To get started, you can get your copy of Reviews Feed Pro here. Once you do that, install and activate the plugin on your website.
You can find more information on how to do that in this guide on installing WordPress plugins.
Step 2: Create a Google Review Widget
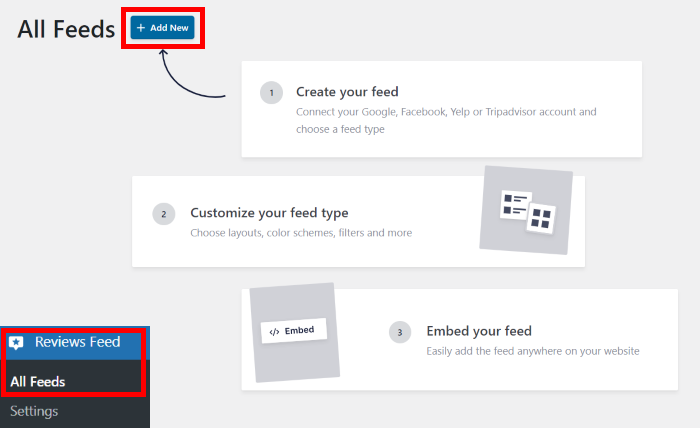
Now, go to your WordPress dashboard area and then open the Reviews Feed » All Feeds menu.
Once you’re there, click on Add New to proceed.
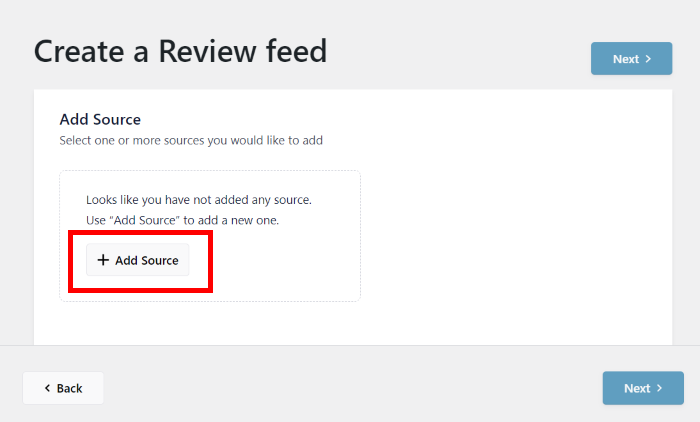
You can now start adding a source to this review widget. The plugin will then fetch reviews from this source and embed them on your website.
To proceed, you can hit the Add Source button here.
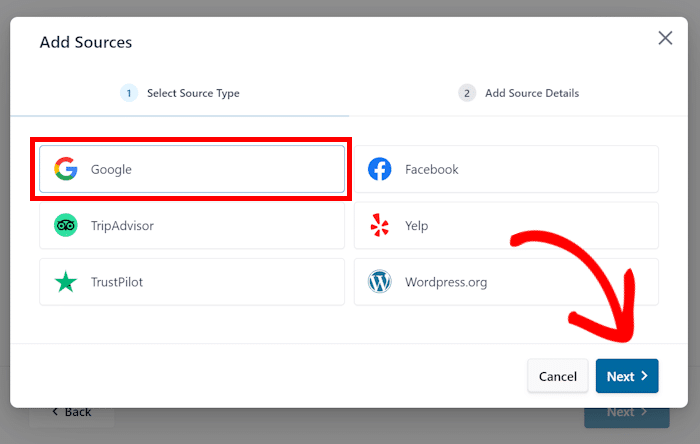
Next, you can choose the review platform that you want to use as a source. Aside from Google, you can also display reviews from other trusted platforms like Facebook, Tripadvisor, Yelp Reviews, Trustpilot, and WordPress.org.
I just selected the Google option here but you can go for any other platforms if you like.
After that, click on the Next button.
Step 3: Connect Your Google Business Page
By connecting your Google business page, your new widget can start fetching the reviews of your business.
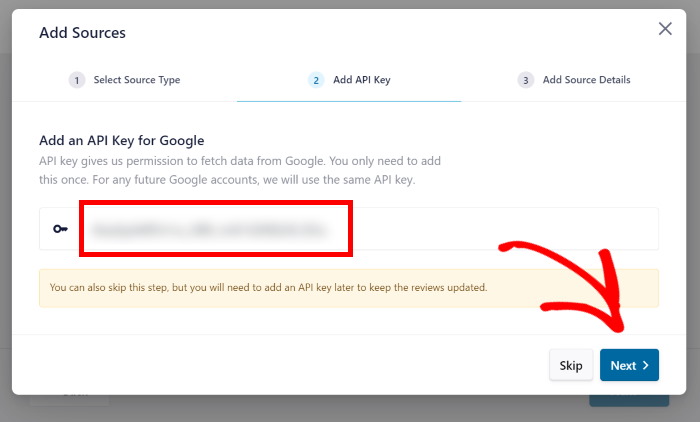
For that, the simplest way is to use your Google API key.
Don’t have your API key yet? Then, you can follow this tutorial on how to create a Google API key.
After that, you can paste your API key into the popup before clicking on Next.
You can then enter the Google Place ID of your business so this reviews widget will start fetching your reviews.
To do that, open the Place ID generator and scroll down to find the Google map widget. There, you can use the search bar to look for your business.
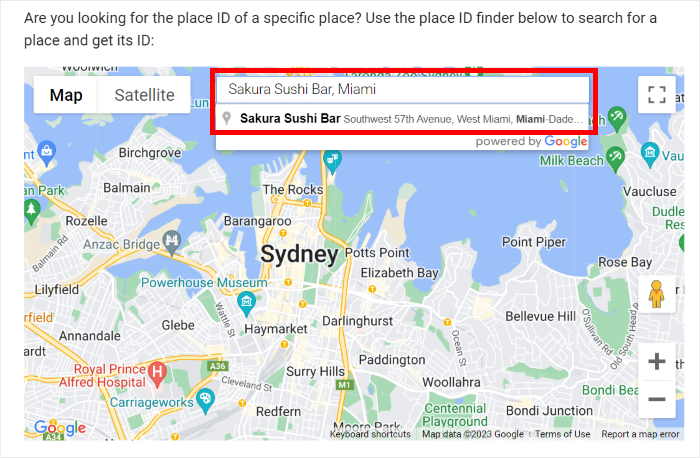
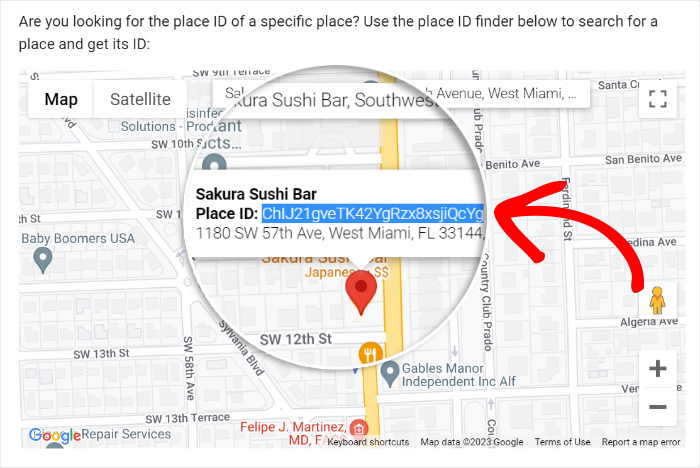
Once you select your business, Google will show additional information in the map below.
You can copy the code beside the Place ID field there.
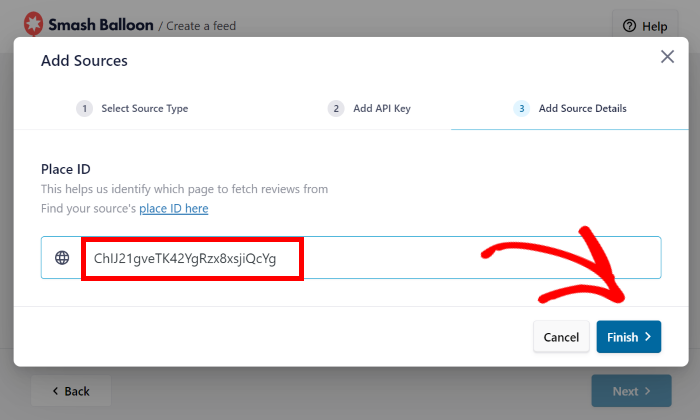
After that, return to your website so you can enter this ID into the widget.
Simply paste the code into the Place ID field before clicking on the Finish button.
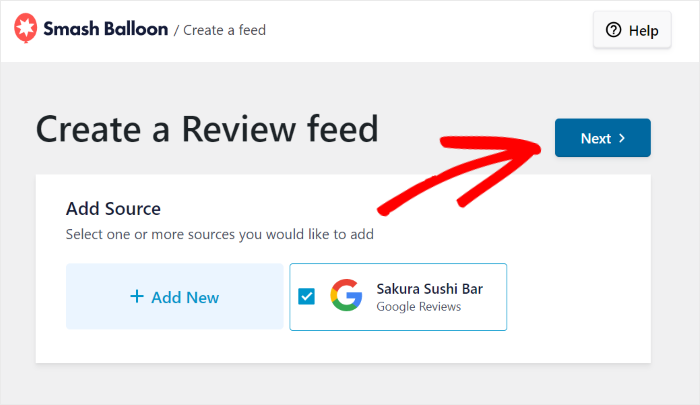
Just like that, you have a new source that you can use for your review widgets.
To continue, select the source and click on Next.
Step 4: Customize Your Google Review Widget
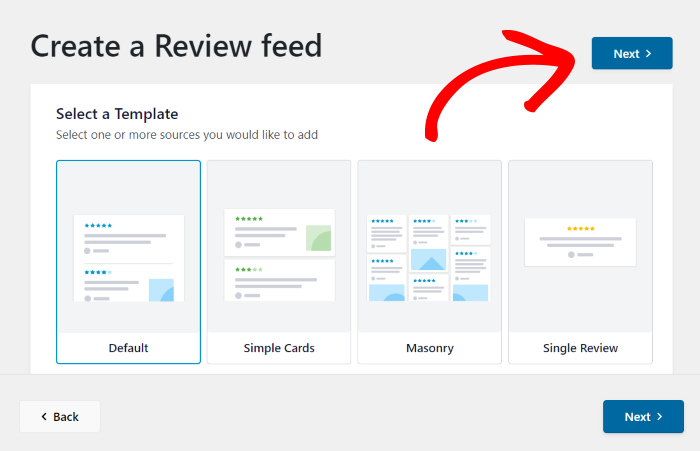
Now, this user-friendly plugin will let you import templates to quickly create review widgets with unique designs. You can choose from 7 different options here:
- Default
- Simple cards
- Masonry
- Single review
- Showcase carousel
- Carousel
- Grid carousel
Once you do that, click on Next and the template’s design will be imported to your widget.
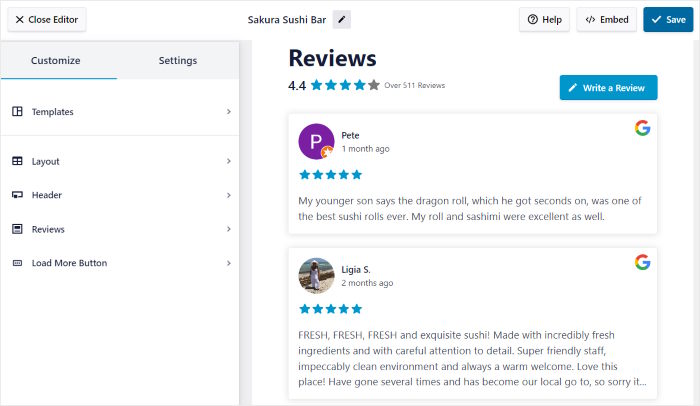
You’ll then see the reviews widget open in the plugin’s visual customizer. On the right, you have a live preview of your widget to track your changes easily.
Then on the left, you can see the different options to customize your layout, review elements, header, and more.
Ready to customize how your Google reviews widget looks?
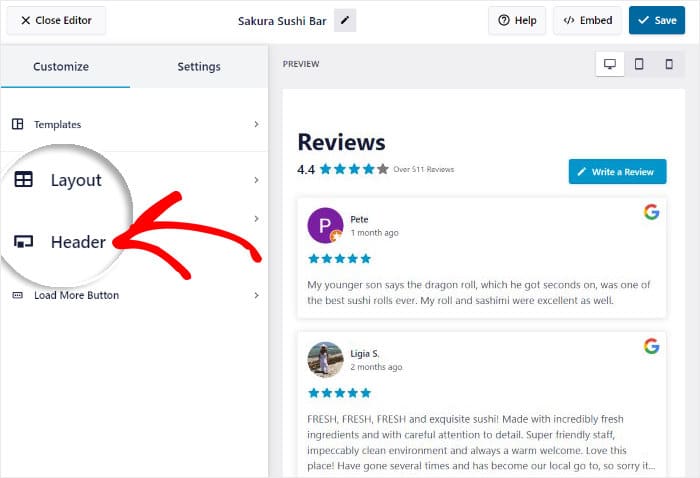
First, let’s change how the header above the widget looks by opening the Header option.
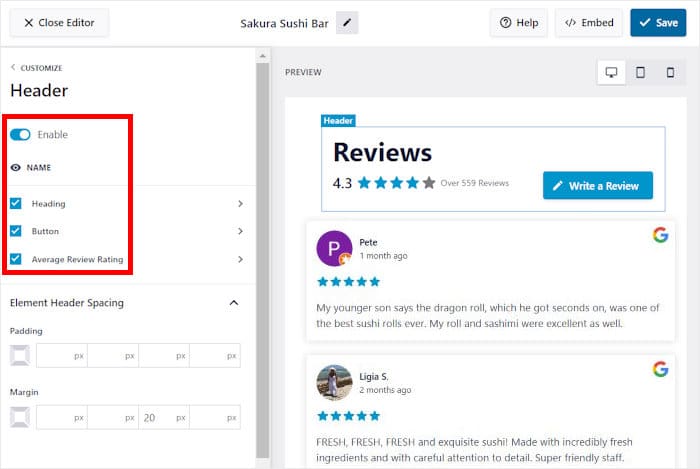
You can find the option to Enable or Disable the header above the Google reviews widget.
Under that, you can find other customization options for the header:
- Heading: Enter a line to be shown along with the header
- Button: Customize the button that lets users add a new review
- Average Review Rating: Choose how the average rating will be displayed
Plus, you can also use the checkbox to show or hide each of these elements.
Once you finish setting up your header, remember to click on Save to confirm the changes.
After that, click on the small Customize button to return to the main customization options.
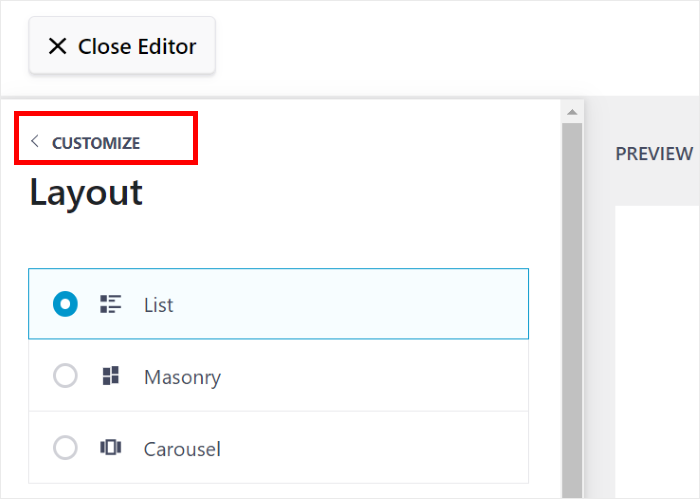
Using the remaining customization options, you can change your review elements, layout, load more button, and more.
Remember to Save the changes once you’re happy with how your reviews fee widget looks.
After that, click on the Settings tab at the top and select the Moderation functionality.
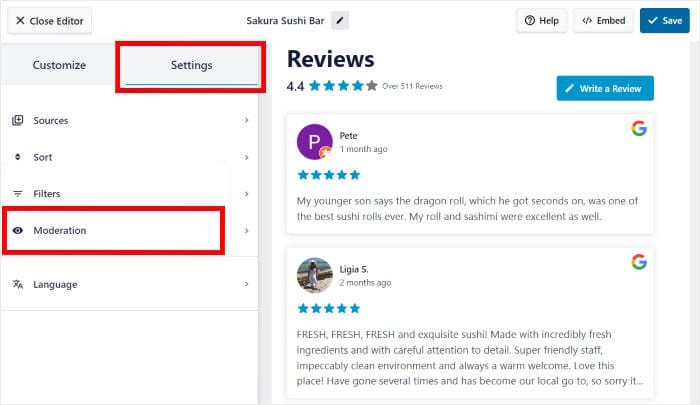
On the left, you can choose to Enable moderation for your feed.
Then, you can choose from 2 ways of moderating your feed:
- Allow List: On the right, select the reviews that you want to show
- Block List: Choose the reviews that you want to hide from your widget
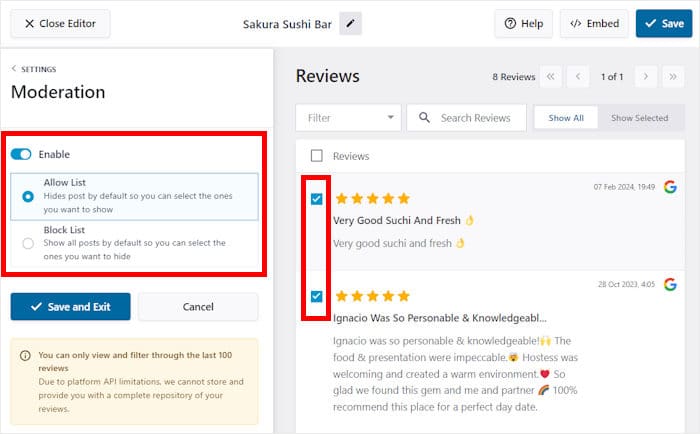
Finally, you click on the Save and Exit option to confirm your new Google reviews widget.
On top of that, you can also use filters to set up banned words or only show business reviews with specific keywords or star ratings.
After you’re done moderating your feed and setting up the filters, remember to click on Save once more.
Step 5: Add Google Reviews in Elementor
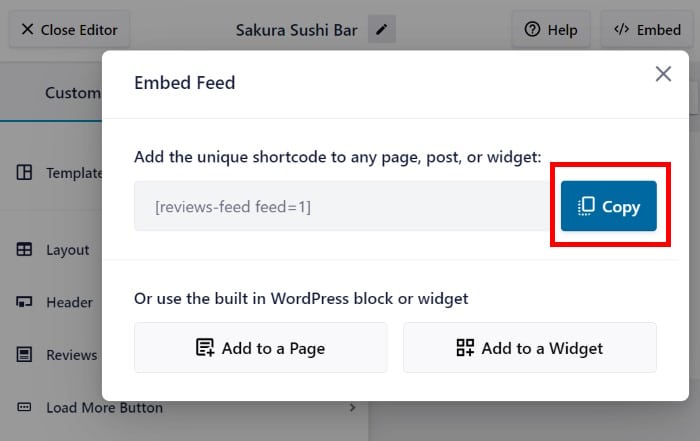
Finally, you can start embedding your widget right here from the visual customizer. Click on the Embed button to do that.
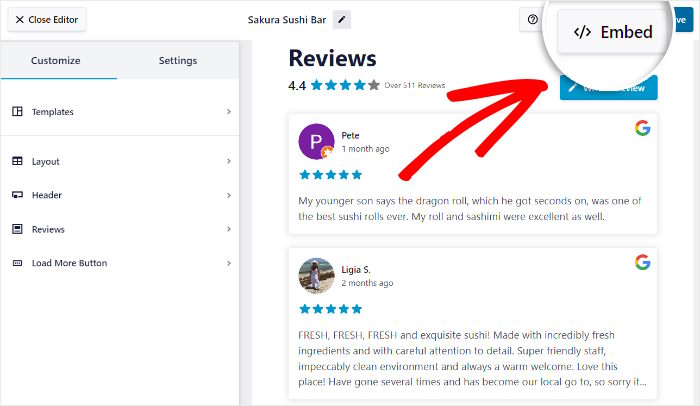
Reviews Feed Pro will show you different ways to embed this Google reviews widget on your website. You can add the widget to your page, sidebar, or even the footer.
While this plugin works perfectly with website builder plugins, you can also use the default Gutenberg block editor to embed review widgets.
For now, use the Copy button on the popup.
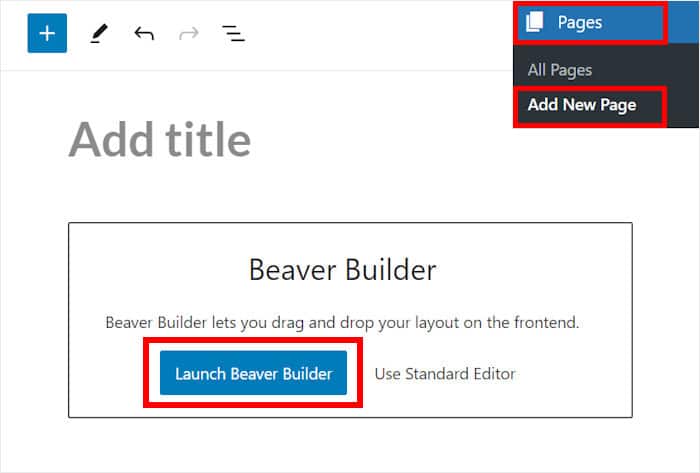
After doing that, open the Pages » Add New menu from your dashboard to create a new page on your site.
Then, click on the Launch Beaver Builder button to open this page using your page builder.
Then, you’ll see the page open in Beaver Builder, where you have a real-time preview on the left and different design options on the right.
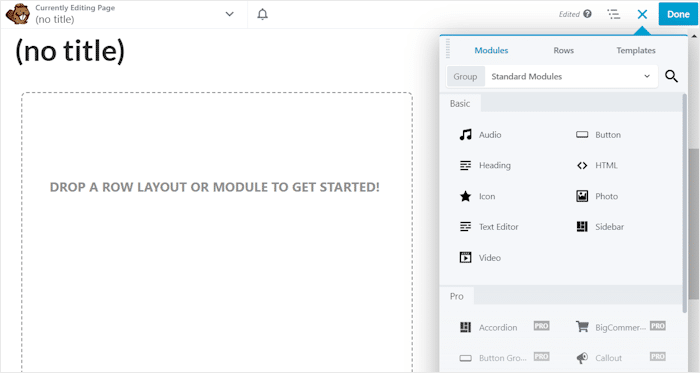
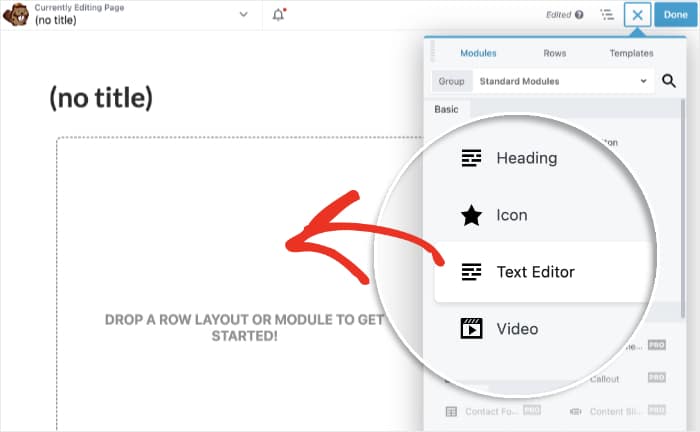
To embed your Google reviews widget, first, look for the Text Editor module on the right.
Then, drag and drop this module onto your page on the left.
Doing that will open the options to set up your new module.
There, paste your shortcode into the text field before clicking on the Save button below.
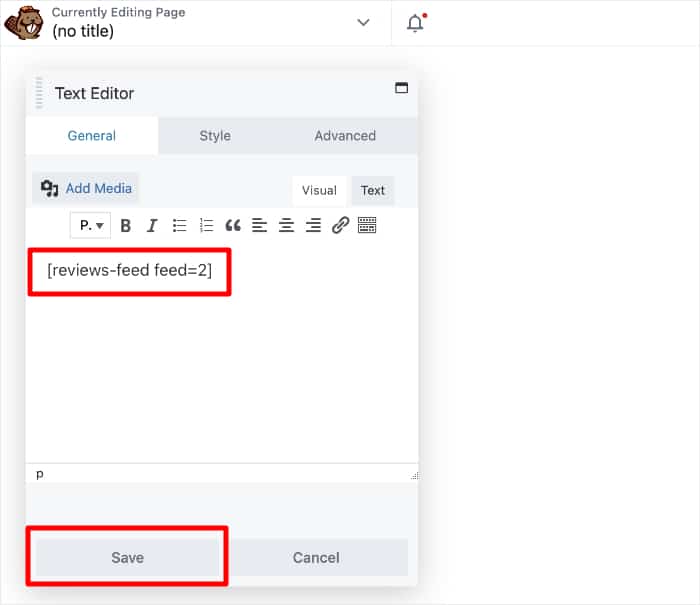
Finally, hit the Done button at the top so you can Publish this page.
After you do that, your newly created Google reviews widget is going to be live on your Beaver Builder website. If you open the page, you can check out how it looks to your website visitors.
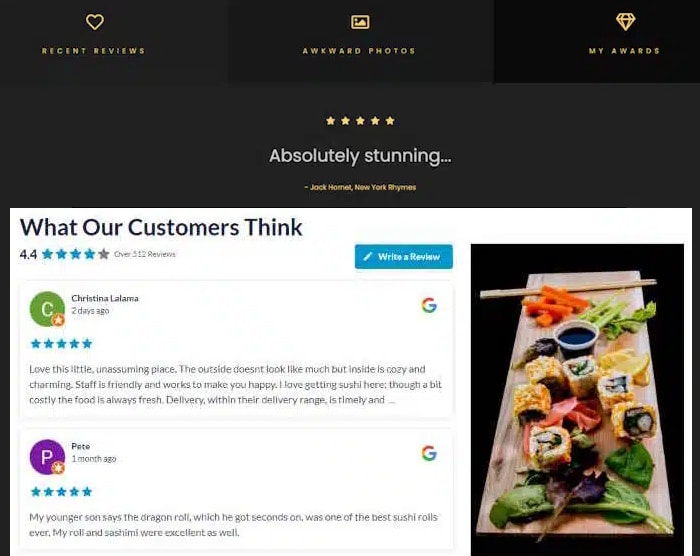
And there you go!
Now, you can add a Google reviews widget to your Beaver Builder site in just a few minutes – no need for HTML, CSS, Javascript, or any embed codes.
With the Reviews Feed Pro plugin, you can display reviews from the biggest online platforms and grow your business with convincing social proof.
Want to show a Google reviews widget in Beaver Builder easily? Get your copy of Reviews Feed Pro here!
If you want to get more out of social media, you can look at this list of the best tips to get more Twitter followers.
For more social media marketing tips and tricks, just follow us on Twitter and Facebook.
