Are you looking to accelerate your professional growth and consistently share valuable content on LinkedIn?
Efficient content scheduling is vital for maintaining a strong professional presence and building your network on LinkedIn.
To make sure your content reach your network at the right time, this comprehensive guide will show you how to schedule LinkedIn posts on WordPress.
We’ll walk you through the process step-by-step using ClickSocial, the leading social media scheduling tool designed for seamless WordPress integration.
In this Article:
- Easiest Way to Schedule LinkedIn Posts From WordPress
- How to Schedule Your LinkedIn Profile Posts from WordPress
- Conclusion: Accelerate Your Professional Growth Today
- Further Professional & Social Media Marketing Resources:
Easiest Way to Schedule LinkedIn Posts From WordPress
For a truly simple and efficient method of managing your LinkedIn content and advancing your professional brand, we recommend ClickSocial.
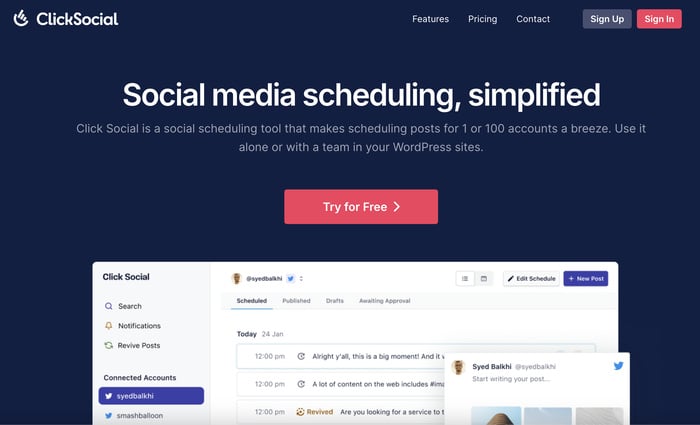
Recognized as a top social media scheduling tool, ClickSocial empowers you to draft, schedule, and publish posts for multiple platforms—all from your WordPress dashboard.
Key Features of ClickSocial for LinkedIn Scheduling:
- One-Click Scheduling: Streamlines the process of publishing content, making consistent LinkedIn profile updates easier than ever.
- Multi-Platform Support: Seamlessly manage posts for LinkedIn, Facebook, Instagram, and Twitter/X from a single interface for a unified social media strategy.
- Deep WordPress Integration: Boost site traffic by sharing existing WordPress posts and new content directly to your LinkedIn profile or company pages.
- Intuitive Post Calendar: Gain a clear overview of all scheduled posts, published content, and drafts, allowing for easy content planning and consistency.
- Automated Revival Campaigns: Re-share your evergreen WordPress content on LinkedIn to continuously drive engagement.
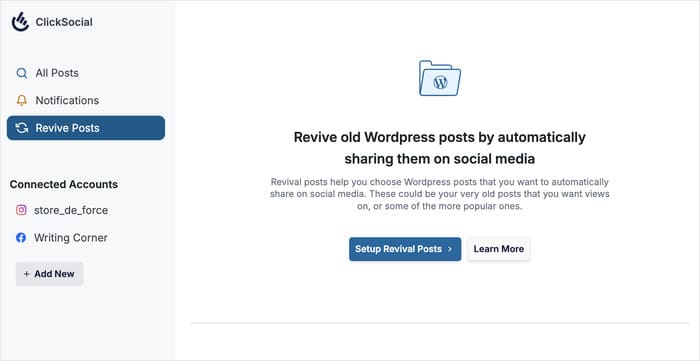
Plus, you can do all that from the comfort of your website. On top of that, you can access a dedicated support team ready to assist with any questions or issues any time you want.
Ready to streamline your LinkedIn posting and boost your professional growth?
Get started with ClickSocial today!
How to Schedule Your LinkedIn Profile Posts from WordPress
Let’s walk through the exact steps to schedule your LinkedIn content directly from your WordPress dashboard using ClickSocial:
Step 1: Create Your ClickSocial Account & Install the Plugin
The first step is to set up your ClickSocial account and add it to your WordPress site.
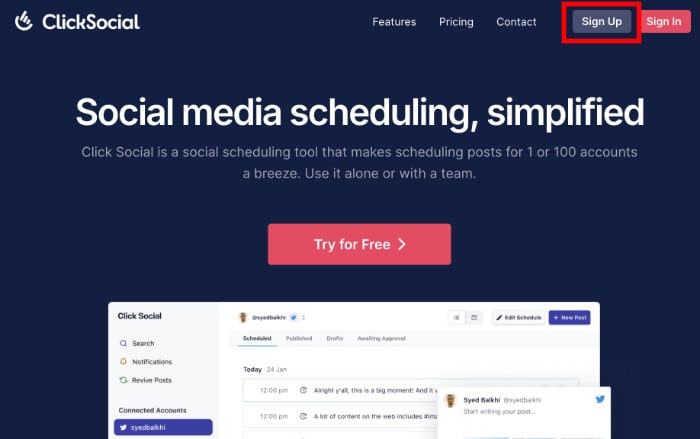
To do that, open the ClickSocial website and click on Sign Up.
Then navigate to your WordPress dashboard and open the Plugins » Add New Plugins menu on the left.
In the search bar at the top, type in “ClickSocial” to search for the plugin.
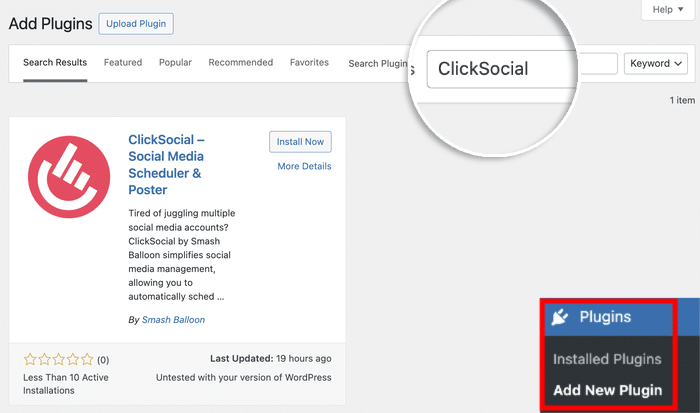
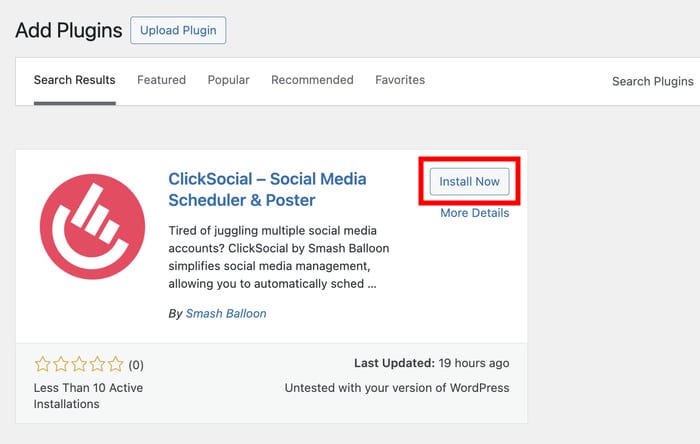
Next, locate the ClickSocial plugin in the search results below and click on Install Now.
Wait a few seconds for it to install, then hit the Activate button.
Step 2: Connect Your WordPress Website to ClickSocial
In this step, you can connect your site to ClickSocial using a unique API key created just for you.
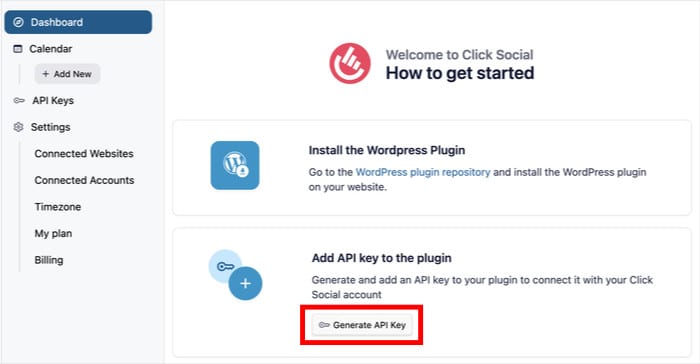
To access the key, open your dashboard on the ClickSocial website and click on Generate API Key.
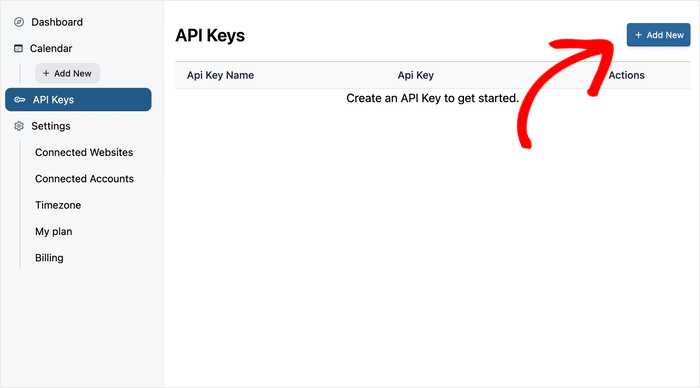
All the websites you’ve connected to ClickSocial will be listed here.
Since you’re using the plugin for the first time click on Add New.
On the popup, enter a label (e.g., your website name) for the API key, and click Generate API Key.
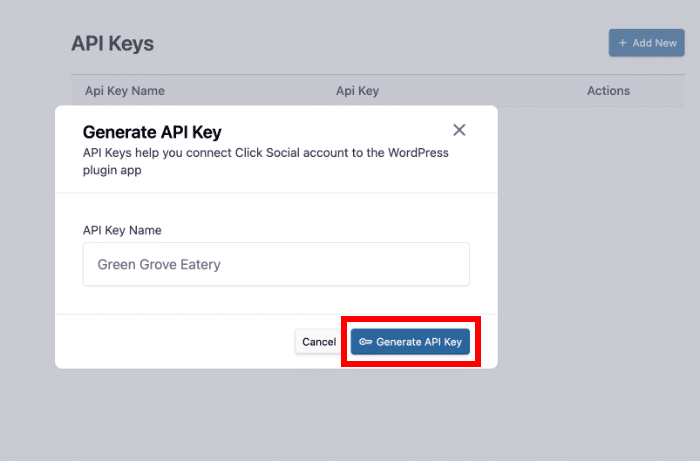
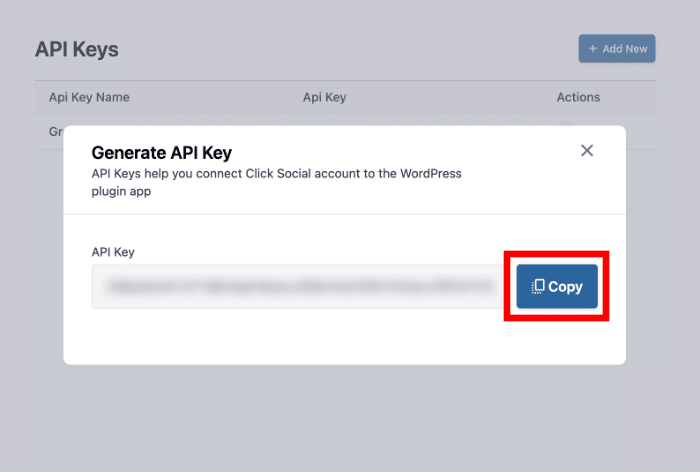
Remember to Copy this unique key immediately and keep it safe.
Then you can go back to your website to proceed.
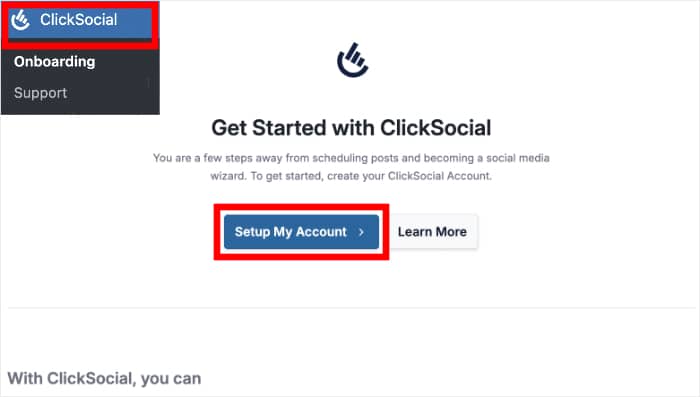
Return to your WordPress dashboard and access the ClickSocial menu from the dashboard.
Then click on Setup My Account to start connecting to ClickSocial.
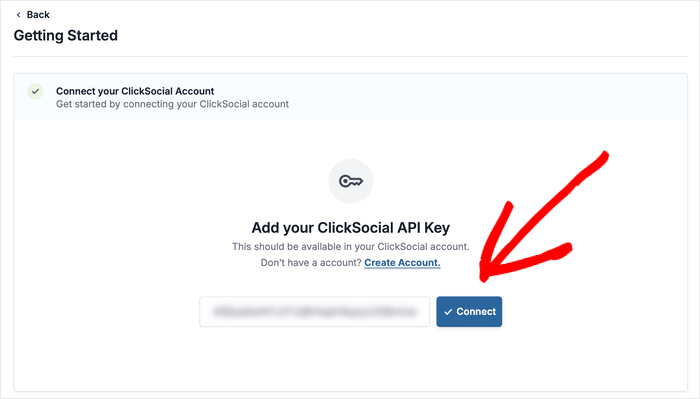
In the popup, just paste the API key that you copied earlier.
Finally, click on the Connect button to link your WordPress site to ClickSocial.
Step 3: Connect Your LinkedIn Account to ClickSocial
With your site connected, it’s time to link your LinkedIn account for posting.
To start this step, click on the Add Account button.
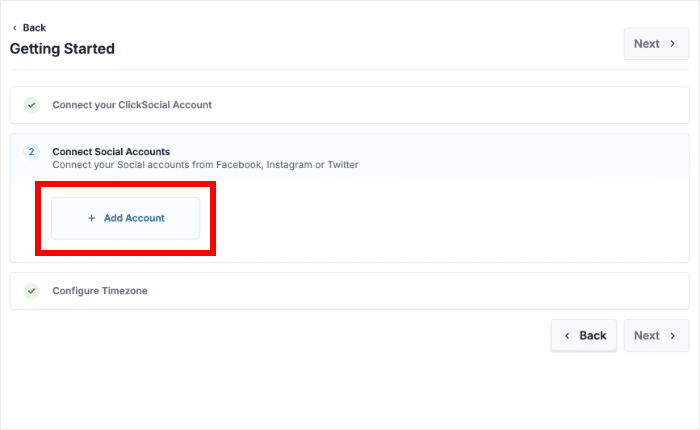
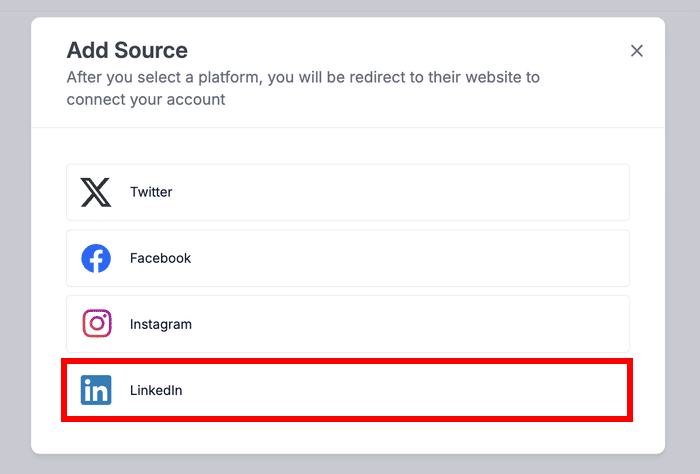
On the popup, you can find all the social media platforms supported by ClickSocial:
- Twitter/X
For now, choose LinkedIn from the list of social media platforms.
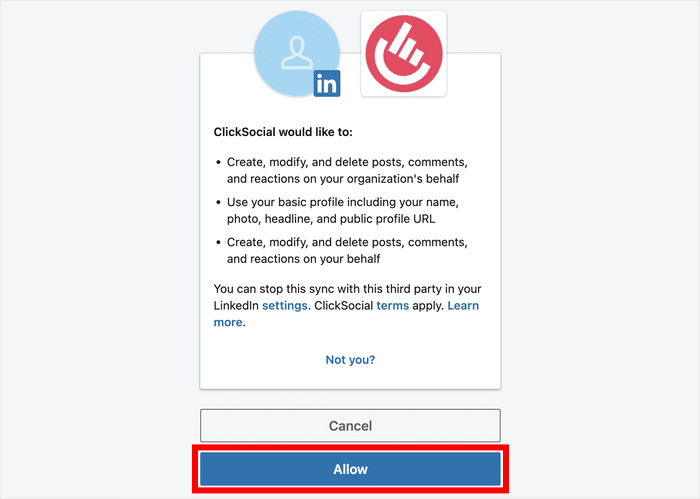
After doing that, the plugin will open LinkedIn on your web browser.
Click on Allow to confirm permissions for ClickSocial to schedule posts on your behalf.
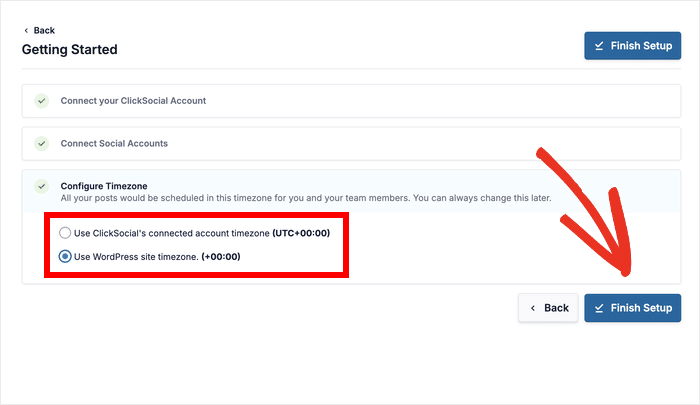
Select your preferred timezone from the 2 options:
- Use ClickSocial’s connected account timezone
- Use WordPress site timezone
Finally, you can click on Finish Setup and move to the next step.
Step 4: Set Up Your LinkedIn Post Calendar
After connecting your LinkedIn account, ClickSocial will lead you to the post calendar.
From here, you can control when the posts go online and optimize your LinkedIn posting schedule. You can also manage posts, drafts, and approval queues for your LinkedIn profile content.
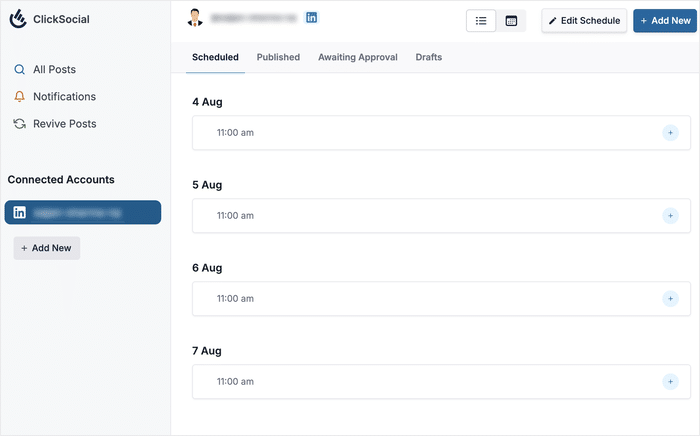
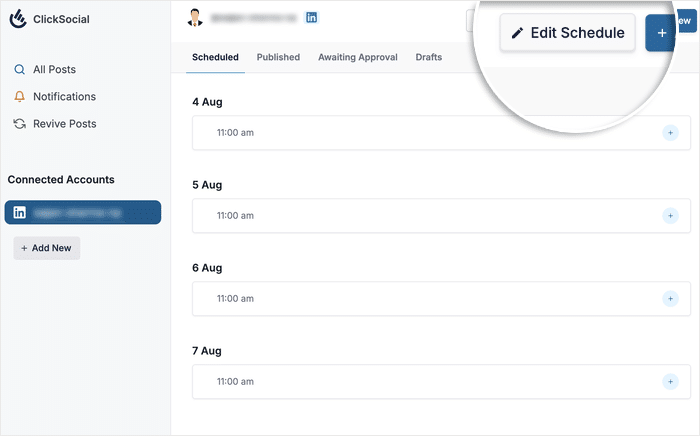
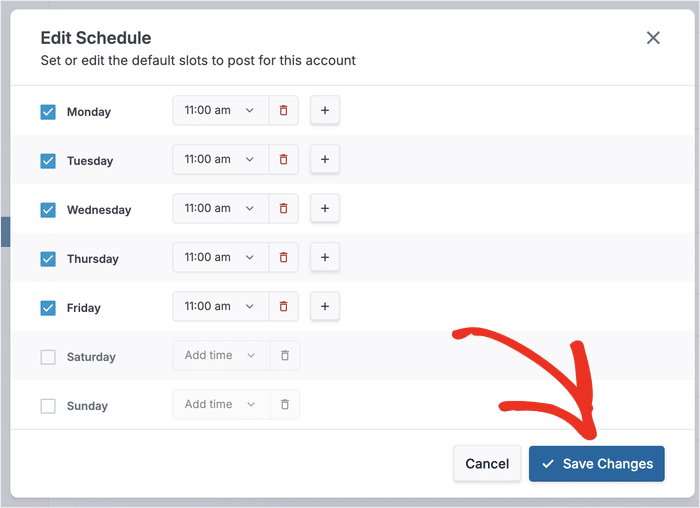
Click on the Edit Schedule button at the top to start configuring your posting times.
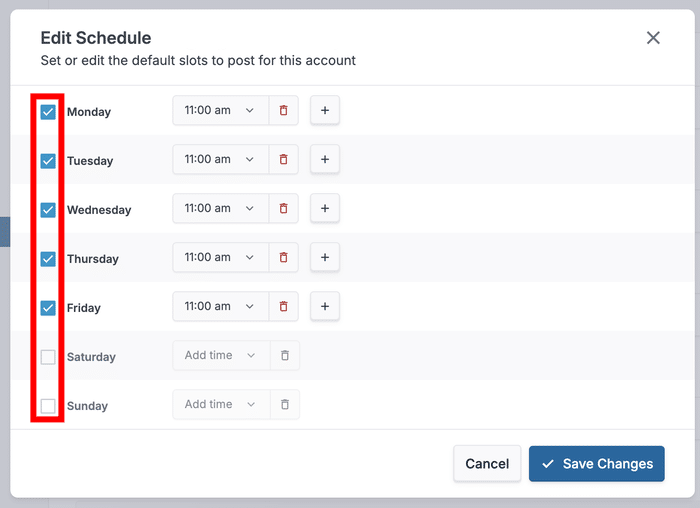
From here, you can use the checkboxes on the left to select the days you want to post.
Simply check the days when you want to make LinkedIn posts.
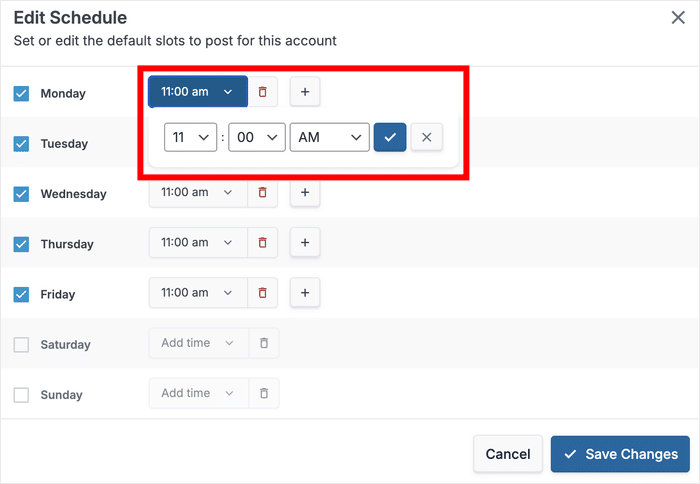
Once your days are set, use the dropdown menu on the right to adjust specific time slots.
You can also add new slots with the plus (+) icon or remove them with the red trash icon.
Click on the Save Changes button to apply your new schedule.
Remember, you can also set custom times for individual LinkedIn posts later.
Step 5: Schedule Your First LinkedIn Post
Finally, create and schedule your LinkedIn content directly from the ClickSocial composer.
To add a post, you can either click the plus (+) icon for a time slot or use the Add New button.
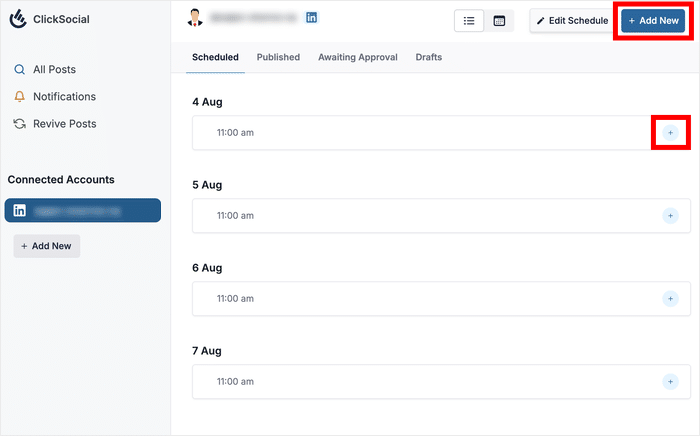
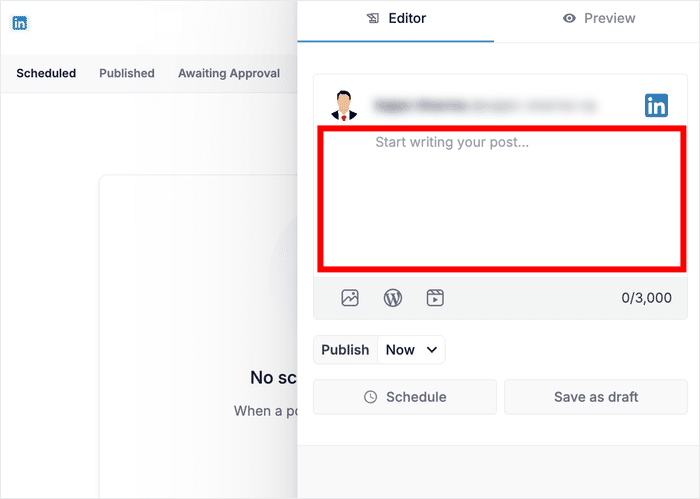
This will open the post composer on your WordPress site. You can use this same composer to create posts on Twitter/X, Facebook, and Instagram if you like.
Enter your LinkedIn post text, including relevant hashtags or links to professional resources.
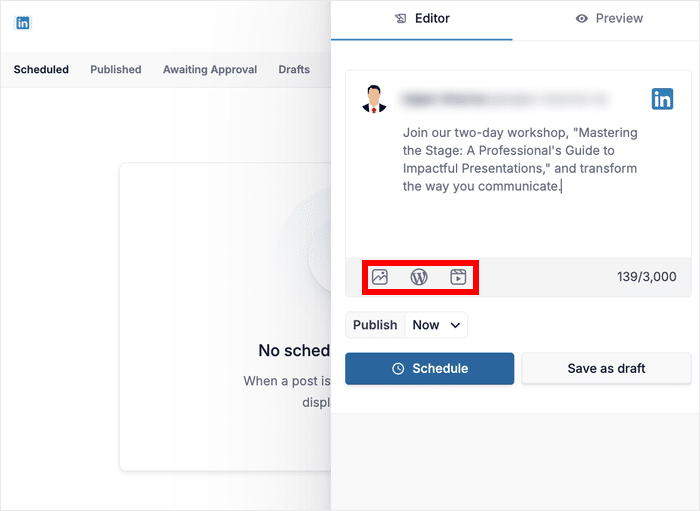
Use the icons below the text field to attach content to your LinkedIn post.
By clicking on the right icon, you can add a photo, existing WordPress post, or video from your media library.
Once you’ve added the content, you can click the Preview button to see how your post will appear on LinkedIn.
Finally, click on the Publish option below the post.
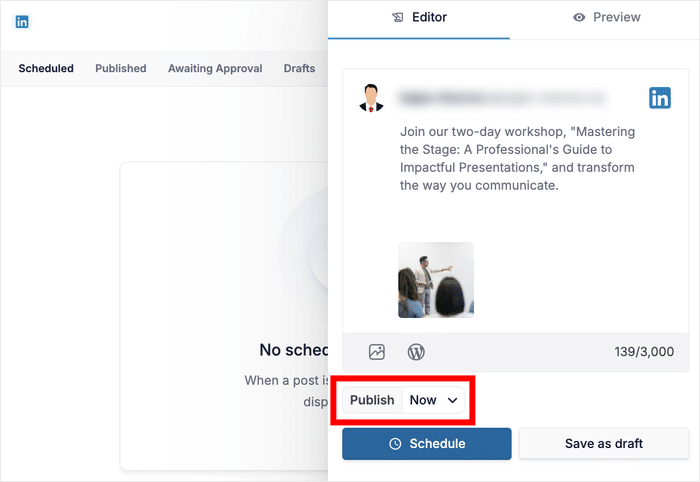
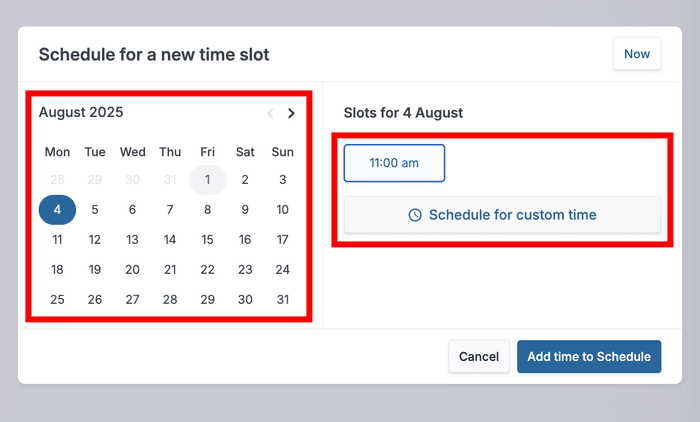
In the popup, use the calendar on the left to pick your desired publishing day.
On the right, select an available time slot or click Schedule for custom time for a precise time.
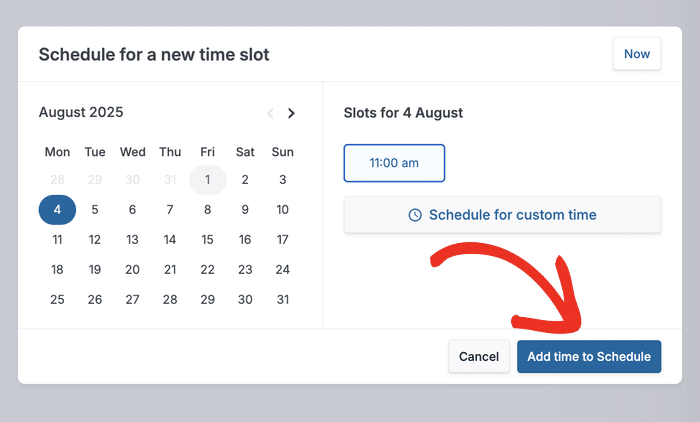
After selecting your time, click on the Add time to Schedule button.
You can now do the final checks to make sure your LinkedIn post is good enough to schedule.
Once you’re satisfied, click the Schedule button on the composer.
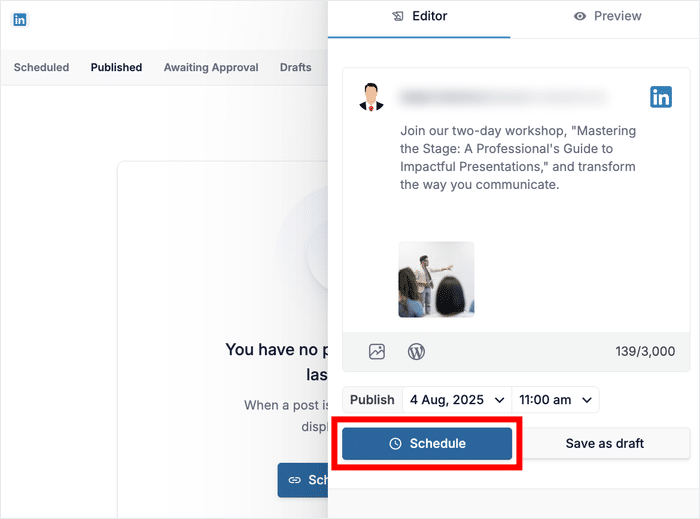
ClickSocial will now automatically publish your LinkedIn content at the designated time, all managed seamlessly from your WordPress dashboard.
Conclusion: Accelerate Your Professional Growth Today
You’ve now mastered the straightforward process of scheduling LinkedIn posts directly from your WordPress dashboard using ClickSocial.
This simple method lets you to efficiently plan your professional content on LinkedIn. That way you can maximize engagement, expand your professional network, and accelerate your professional growth.
Key Takeaways for LinkedIn Scheduling:
- Scheduling LinkedIn posts from WordPress ensures a consistent professional presence and saves valuable time.
- ClickSocial provides a centralized solution for managing LinkedIn, Facebook, Instagram, and Twitter/X content.
- The process is simple: account setup, website and LinkedIn connection, calendar setup, and post creation.
Sign up for ClickSocial today and take control of your LinkedIn content strategy.
Further Professional & Social Media Marketing Resources:
- Proven Tips on How to Get More Followers on TikTok [Revealed]
- How to Tweet Directly from Your WordPress Website (Easy Guide)
- Best Social Media Analytics Tools for Online Growth (Expert Picks)
- How to Schedule a Video Post on Facebook (Step-by-Step Guide)
