Looking for a way to embed YouTube channels in Elementor?
As a popular page builder, Elementor can let you create an engaging website to help promote your brand and get more followers.
Plus, you can display your YouTube videos as an easy way to boost your engagement and grow your online presence.
In this guide, we’ll show you the easy way to embed a YouTube channel in Elementor WordPress sites — no coding needed!
Ways to Embed Elementor YouTube Channel
You can choose to add YouTube Feeds to Elementor using 2 different methods:
- Manual method: Grab the embed code for a video and add it to Elementor.
- Easy method: Use a WordPress plugin to quickly embed YouTube videos into Elementor.
The manual method requires you to open YouTube and fetch the embed link for a video manually.
You can do this by clicking on the Share button on any YouTube video and then clicking on Embed.
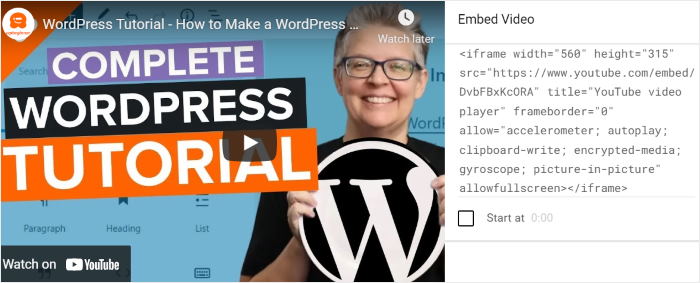
This will give you a video embed code that you can add to any post/page using Elementor.
However, this method can take a lot of time and effort if you want to embed multiple YouTube videos.
What’s more, you’ll have to go through the whole process once again every time you have another new video to embed.
Plus, you won’t be able to customize how your YouTube video embeds look with this layout. So, your YouTube content can end up clashing with your carefully designed Elementor site.

The good news? You can sidestep all these problems simply by using a WordPress plugin instead.
And the best plugin out there that you can use is YouTube Feed Pro.
As the #1 YouTube feed plugin in the market, you can use it to create, customize, and embed videos on your Elementor site with ease – no coding needed!
Just follow the plugin’s 3-step guided flow, and you can have feeds of YouTube videos ready to go in just minutes.
Plus, you get total control over the design of your YouTube video feeds. From the live feed editor, you can change how your feed looks in a few simple clicks.
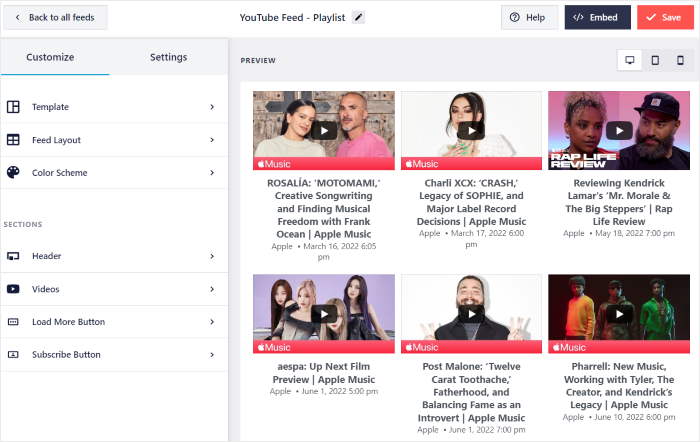
On top of YouTube channels, the plugin lets you embed videos from your favorites list, YouTube playlists, live streams, and much more.
Since YouTube Feed Pro was designed with speed in mind, you can embed as many videos as you want, and your website will still load as fast as ever.
And the best part is that YouTube Feed Pro comes with a dedicated support team of WordPress experts.
Whenever you have any issues or questions, you can simply reach out to them for help.
With all these features and functionalities, YouTube Feed Pro is easily the best YouTube feed plugin in the market.
Ready to embed your YouTube channel? You can grab your copy of YouTube Feed Pro here.
How to Embed YouTube Channel on Your Elementor
For our tutorial, we’ll be showing you how you can embed YouTube videos to Elementor using YouTube Feed Pro.
Let’s get started!
Step 1: Install the YouTube Feed Pro Plugin
First, grab your copy of YouTube Feed Pro and download it to your computer. Next, install and activate your plugin on your WordPress Elementor website.
If you want to learn how to do so, you can use our tutorial on how to install WordPress plugins with ease.
Once you have your plugin activated and installed, you can go ahead and proceed with the next step.
Step 2: Create a New YouTube Channel Feed
First, you’ll need to open the plugin’s feed menu by clicking on YouTube Feed » All Feeds on your WordPress dashboard.
Then, click on Add New on the top.
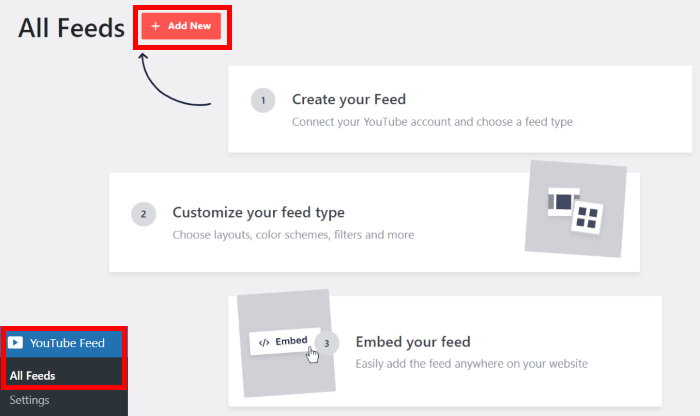
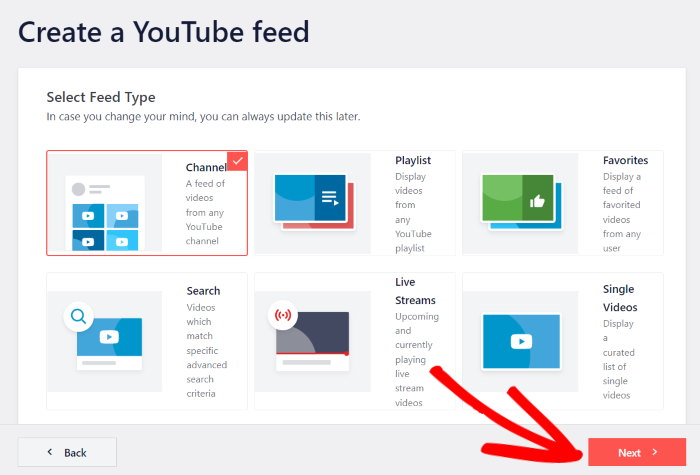
You will then be given the option to create a video gallery using 6 different unique feed type options.
On top of embedding content from your channel, you can select a playlist, favorites list, search term, and more.
To continue, select the Channel option and then click on the Next button.
Now that you’ve created your new YouTube feed, you’ll need to connect it to your channel to display your videos.
Follow the next step of our guide to learn how to do that.
Step 3: Connect Your YouTube Channel
When connecting this feed to your YouTube channel, there are 2 options that you can choose from:
- Use your YouTube API key
- Connect your YouTube account
If you want to embed more types of YouTube content, then you can click on Add API Key on the popup.
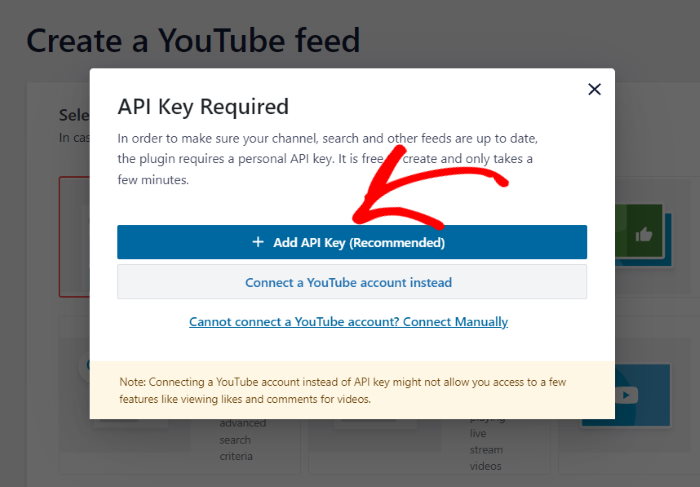
If you don’t have your key yet, check out this tutorial on how to create your YouTube API key.
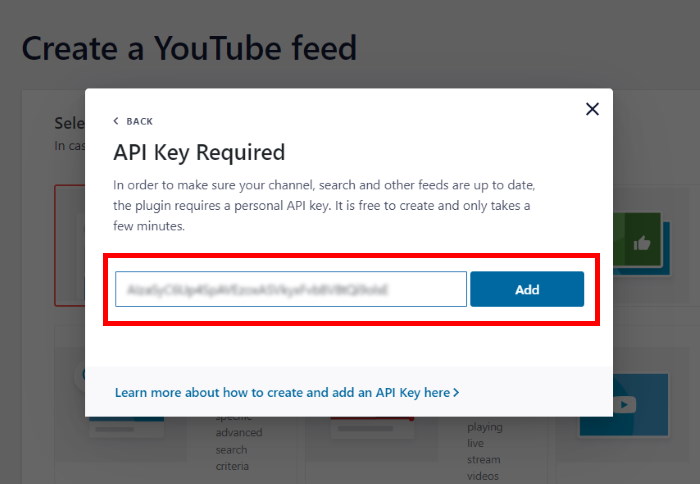
Once you have your API key, copy it and return to your website once more.
Then paste in your API in the pop and click on Add.
Don’t want to use your YouTube API key?
In that case, you can click on the Connect a YouTube account instead option on the popup.
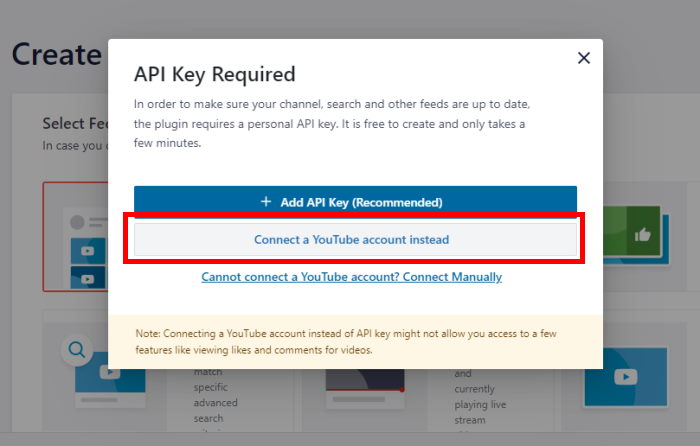
Doing that will redirect you to a new page where you can give the plugin read-only access to your YouTube content.
With this access, YouTube Feed Pro can only view your content and won’t be able to make any changes at all. As a result, it’s 100% risk-free.
To proceed, click on the Continue button on the popup.
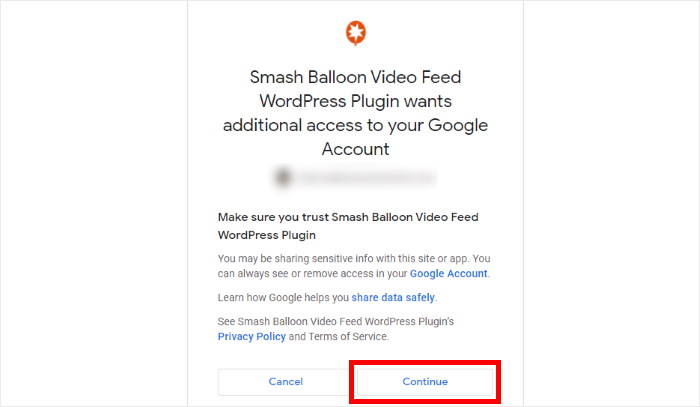
In the next step, you can select your YouTube channel so that the plugin can start fetching videos for your website.
Step 4: Select Your YouTube Channel
First, open https://www.youtube.com/ on your web browser and then open your YouTube channel.
There, you can find the URL of the YouTube channel at the top of the page.
All you have to do here is copy the code at the end of the URL.
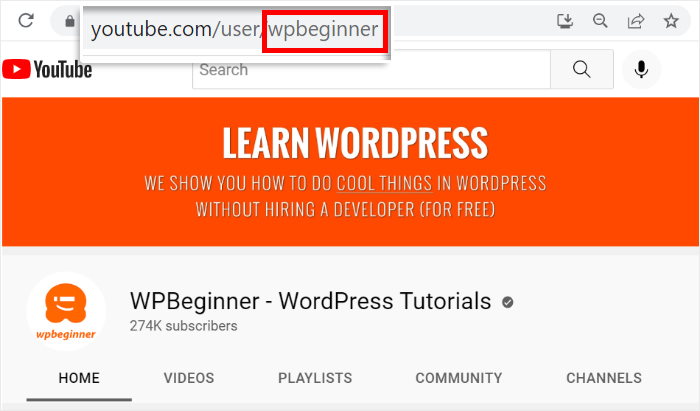
Finally, you can return to your WordPress website and then paste in the ID on the Channel ID or Username field.
With that, click on Next to finish connecting your YouTube account.
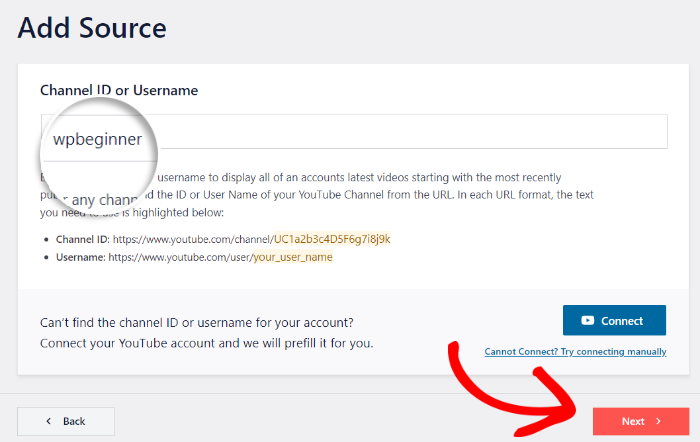
After that, your new Elementor YouTube channel feed is ready to go online. The plugin will automatically copy your website’s design and look beautiful right out of the box.
Before embedding your feed, you can customize how it looks in the next step.
Step 5: Customize Your YouTube Channel Feed
YouTube Feed Pro gives you a huge number of customization options that you can use for your feeds and galleries. Let’s look at some of these options and how you can enable them.
First, go ahead and choose a Template for your feeds. The plugin gives you 8 different template options to choose from:
- Default
- Carousel
- Showcase Carousel
- Cards
- Gallery
- List
- Latest Video
- Widget
Select the template that you’d like to use and then click on Next. For our demo, we’ll be using the Default option.
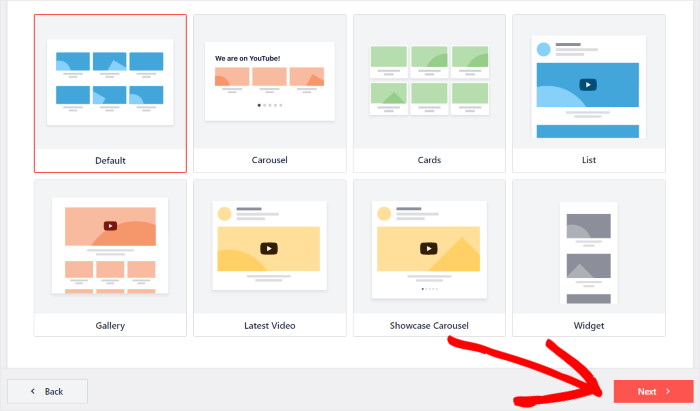
After clicking on Next, you’ll be able to use the live feed editor to customize all the details of your YouTube feed.
The left panel provides you with all the feed editor options that you can customize. You can change your layout, colors, video elements, and much more.

The right live preview panel shows you a preview of all your changes in real-time so you can easily judge which options suit your feed the best.
Now, let’s look at some of these customization options briefly. Click on Feed Layout on the left panel.
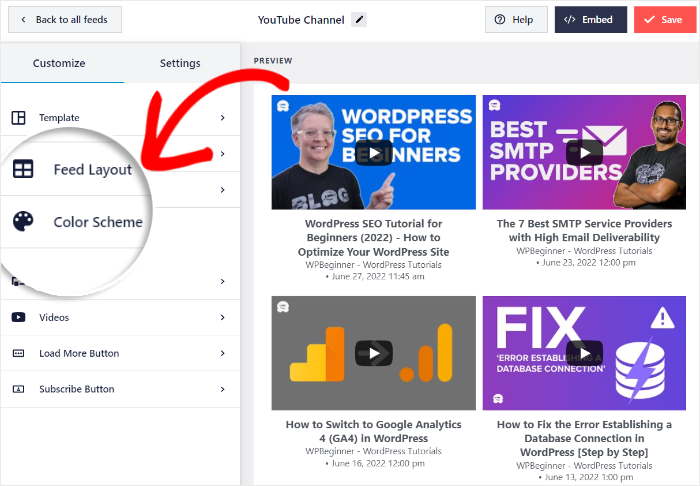
This will give you 4 different layouts for your Elementor video gallery: Grid, Gallery, Carousel, and List.
All these layout options will showcase your YouTube channel in different ways.
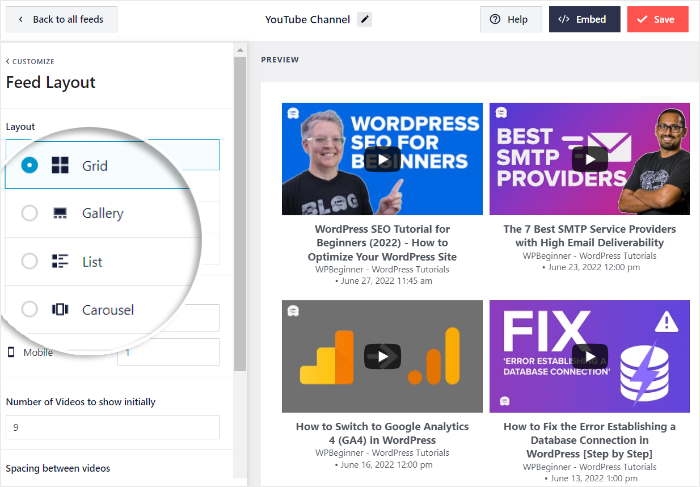
The grid layout provides you with a table grid that displays your videos in neat rows and columns.
This way, you can display your videos all at once in a clean layout.
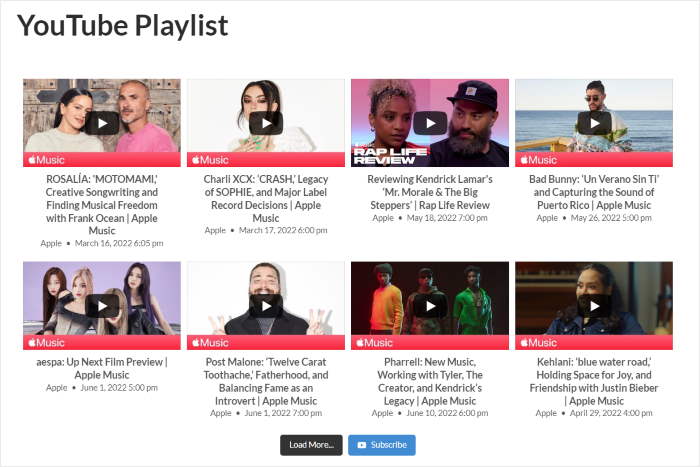
The gallery layout lets you put specific emphasis on a particular video while the rest of the videos are shown with smaller thumbnails on the bottom.
If you want extra attention to be directed at a particular video, this is the option for you.

Similarly, the list option shows your video in a single large column.
This gives you a much larger space to display multiple YouTube videos.

And finally, the carousel option lets you add your videos to a minimal slideshow/carousel that your users can interact with.

Once you’re done choosing the carousel perfect for your feed, click on Save to preserve your changes.
Next, let’s look at how you can customize the headers for your YouTube feeds. Go back to the main options panel by clicking on the Customize button.
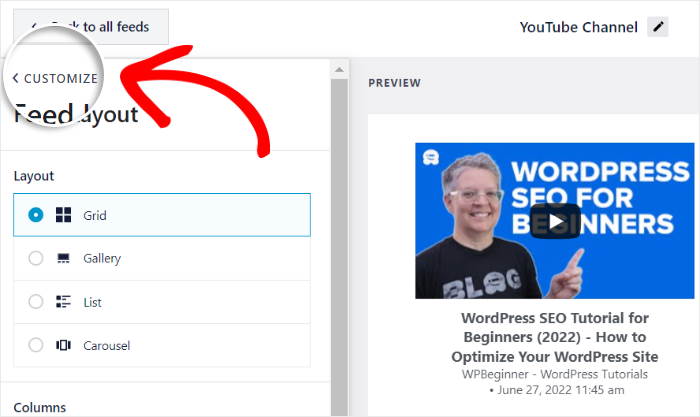
Want to change the header that appears above your YouTube channel?
Then, click on the Header option on the left.
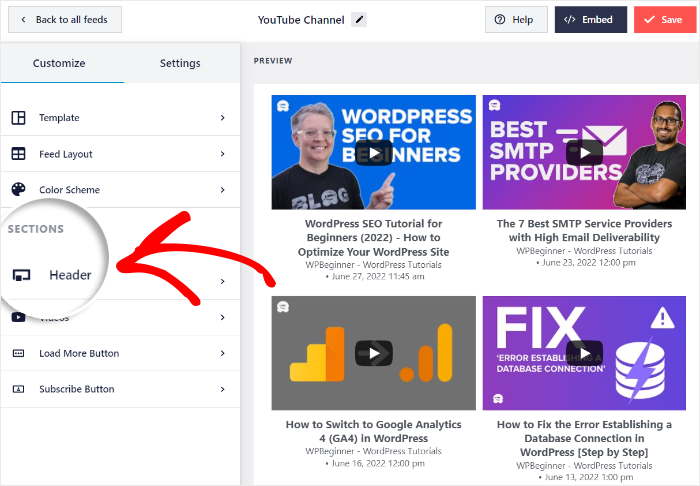
At the top, you can find the option to Enable or Disable a header for your YouTube channel feed widget.
Under that, you can choose from the 2 Header Style options:
- Standard: Show the channel name, icon, and other info at the top of your feed
- Text: Write a heading to show on top of your YouTube channel feed
Finally, you have the option to show or hide the Channel Descriptions and the number of Subscribers.
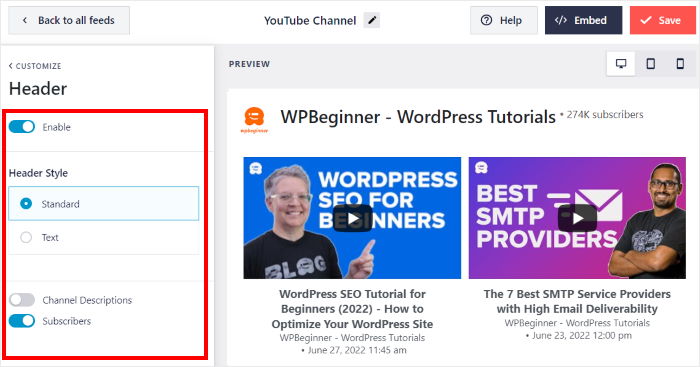
Again, after you finish customization, click on Save to confirm your changes.
After you’re done customizing your color scheme, you can look into other customization options, such as changing your load more button or adding filters to your Elementor gallery.
Once you’re done customizing, click on Save once more.
With that, you’re ready to add your YouTube channel to your Elementor website.
Step 6: Embed YouTube Channel in Elementor
To embed your YouTube feed to Elementor, you can get started directly from the live feed editor.
First, click on the Embed button on the top.

This will give you a unique shortcode for your feed that you can add to any Elementor widget, page or block.
Click on the Copy button next to the shortcode to save it on your clipboard.
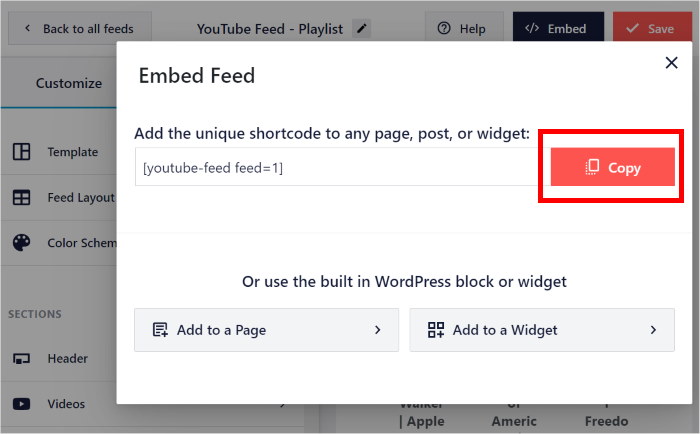
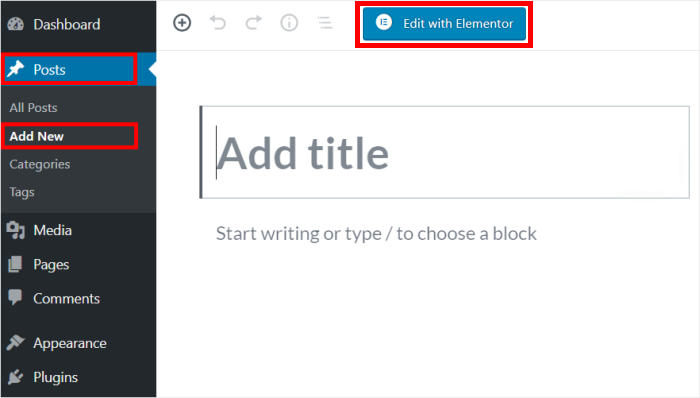
Then, open a new page by clicking on Pages » Add New on your WP admin dashboard.
Then, click on Edit with Elementor to customize the page in the Elementor editor.
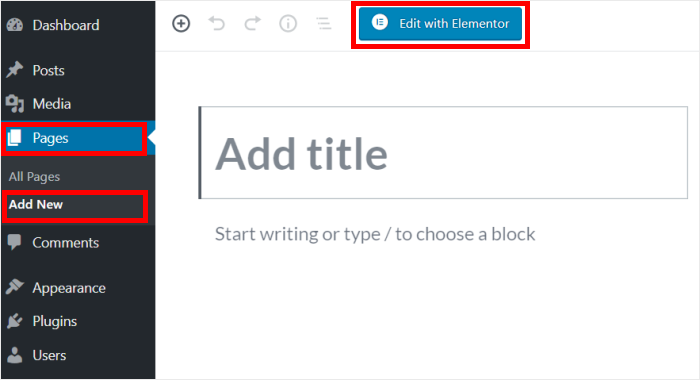
Naturally, you can also add the YouTube feed to a new post by clicking on Posts » Add New.
After that, click on Edit With Elementor to open Elementor’s visual editor.
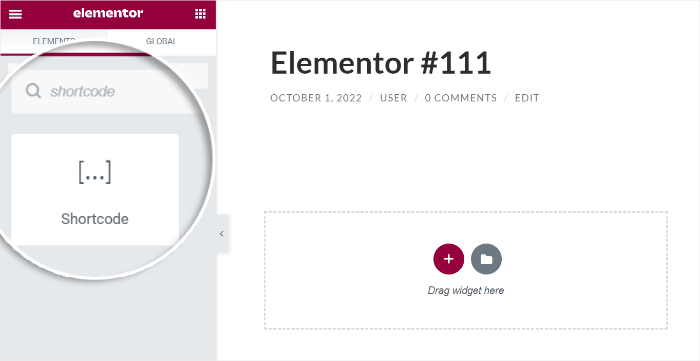
Once the page/post is open in Elementor, you’ll see a left panel with all your Elementor widgets.
From here, you can use the search bar on the top and search for the “shortcode” widget.
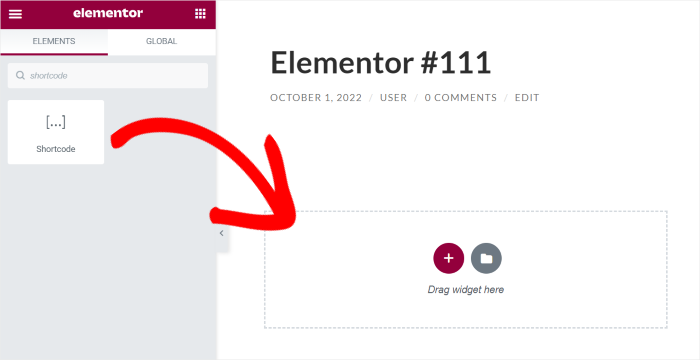
You can then simply drag in the Shortcode widget to the live customizer on the right.
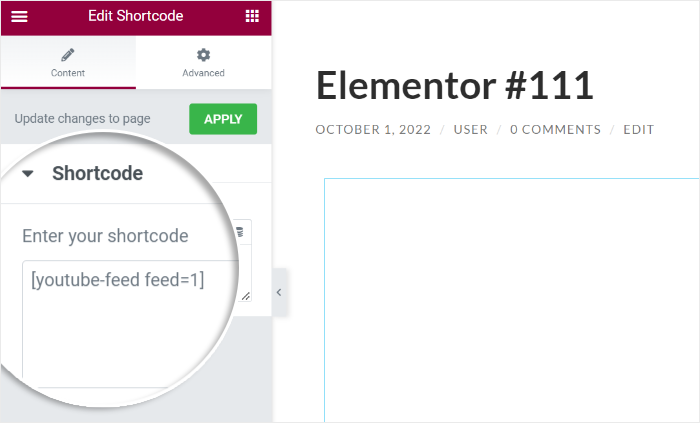
You can now see more options to change how the shortcode widget works.
Now, look for the Enter your shortcode field on the left panel and then paste the shortcode that you saved earlier.
Finally, click on the Publish button in Elementor, and your YouTube channel will be embedded on your Elementor site.
As you can see, YouTube Feed Pro makes this whole process super easy. You can check out the post or page to see how the Elementor YouTube feed looks to your visitors.

And there you go!
Now you know how to embed your YouTube channel in Elementor with the help of a WordPress plugin — even if you’re a WordPress beginner.
Just like that, you can engage your visitors, get more views, and grow your YouTube channel with ease. It’s a great way to boost your brand’s online presence and reach more people.
Ready to embed YouTube channels on your site? Get started with YouTube Feed Pro here.
Want to embed a YouTube playlist instead? You can follow our guide on how you can embed a YouTube playlist on Elementor.
Finally, if you found this guide helpful, go ahead and follow us on Twitter and Facebook for more useful YouTube tutorials.
