Want to use a Divi Facebook reviews feed to grow your business?
Showing your Facebook reviews in Divi can be a great way to convince more website visitors to buy from you and promote your business.
But integrating Divi with Facebook can be tricky – especially if you’re not familiar with coding.
As a solution, we’ve put together this simple guide on adding Facebook reviews in Divi with ease. Since this is 100% beginner-friendly, you can get started right away.
Why Embed a Divi Facebook Reviews Feed?
- Positive user reviews can work as social proof and convince more of your website visitors to buy from you.
- Embedding Facebook reviews with relevant keywords can be great for your SEO – especially if you’re regularly adding new reviews.
- You can post detailed reviews on your product pages to inform people about your product features, highlights, and other details.
- If you want to create a great first impression and grab people’s attention, you can add a Facebook reviews carousel directly on your homepage.
Easiest Way to Embed Facebook Reviews on Your Divi Site
For the simplest way of displaying Facebook reviews, you can try using the #1 reviews aggregator in the market – Reviews Feed Pro!
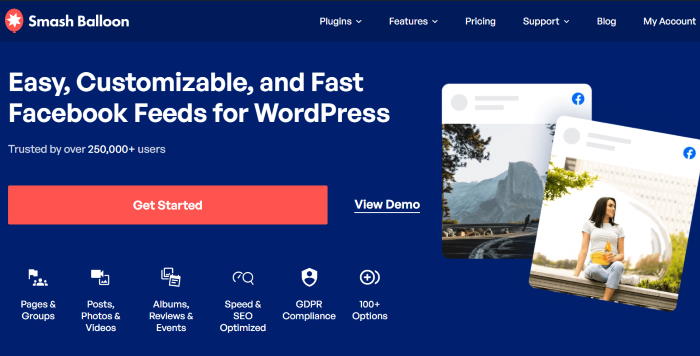
With the help of this tool, you can showcase convincing Facebook reviews on your site in just minutes and start boosting your conversion rates.
The best part? You can do all that and more without touching a single line of code!
In fact, Reviews Feed Pro is packed with amazing features that make it easier than ever to embed reviews on your site:
- You get a simple 3-step guided flow that’ll take you through the process of creating, customizing, and embedding Facebook review feeds.
- In addition to Facebook, the plugin supports the biggest review platforms, including Yelp, Trustpilot, Tripadvisor, WordPress.org, and Google Reviews.
- Reviews Feed Pro is also lightweight so you can embed tons of reviews while making sure your site loads as fast as ever.
- To help you create review feeds with beautiful designs, you can quickly import a template and then use the visual customizer to design it with a few simple clicks.
- The plugin also lets you add filters or moderate your review feed so you can choose which reviews will show up on your Divi website.
All in all, Reviews Feed Pro is easily the best plugin if you want to add reviews to your Divi website – even if you’re new to WordPress.
Get your copy of Reviews Feed Pro here to start embedding your Divi Facebook review feeds.
How to Embed Your Facebook Reviews Feed in Divi
Ready to add Facebook reviews to your Divi site? Just follow the step-by-step guide below, and you can get started!
Step 1: Install and Activate the Reviews Feed Pro Plugin
Before you do anything else, grab your copy of Reviews Feed Pro here. Then, you can install and activate the plugin on your Divi WordPress site.
If you’re not sure how and want a quick refresher, check out this beginner’s guide on how to install WordPress plugins.
Step 2: Create Your Facebook Reviews Feed
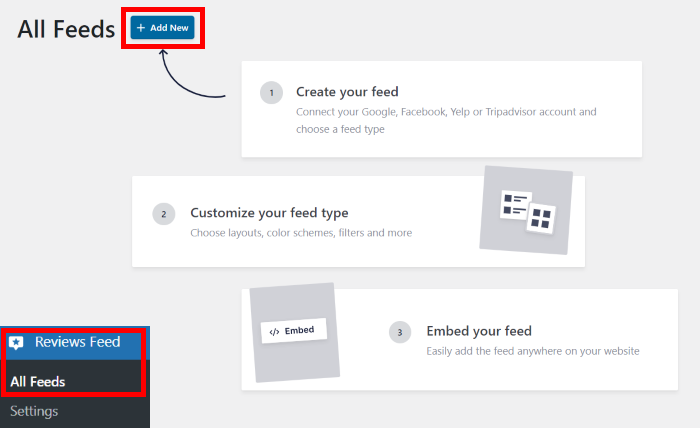
Now, you can follow the 3-step guided flow to start creating your new Facebook reviews feed.
From your WordPress dashboard, open the Reviews Feed » All Feeds menu and click on the Add New button.
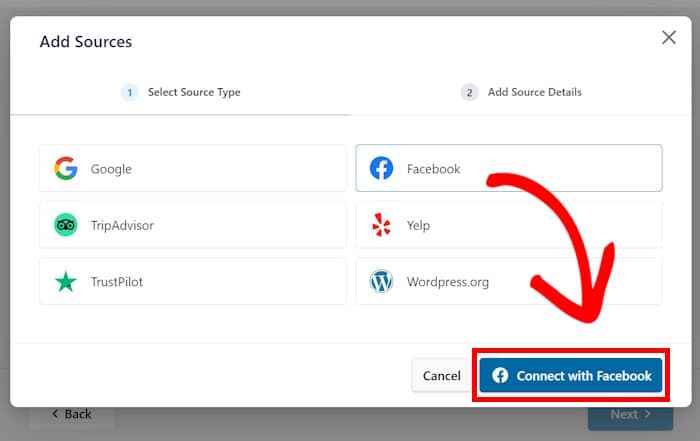
Next, Reviews Feed Pro asked me to pick the review platform that I wanted to connect. There are 6 options to pick from:
- Tripadvisor
- Trustpilot
- Yelp
- WordPress.org
For this tutorial, I’ll select the Facebook option and click on Connect with Facebook.
Step 3: Connect Your Facebook Page
From here, you can go ahead and connect your Facebook account. This lets the plugin fetch your Facebook reviews and display them in Divi.
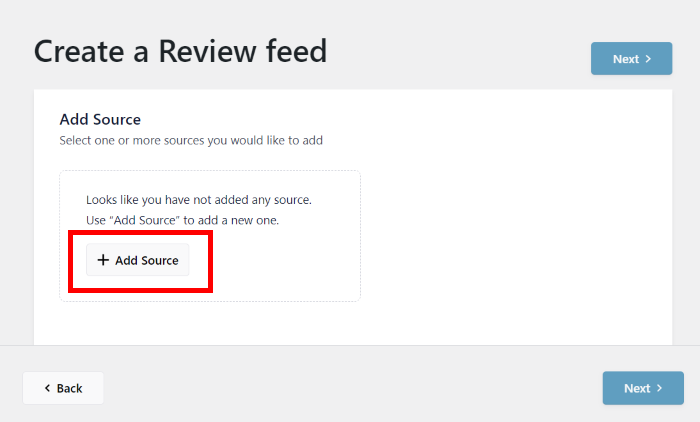
So, click on the Add Source button to get started.
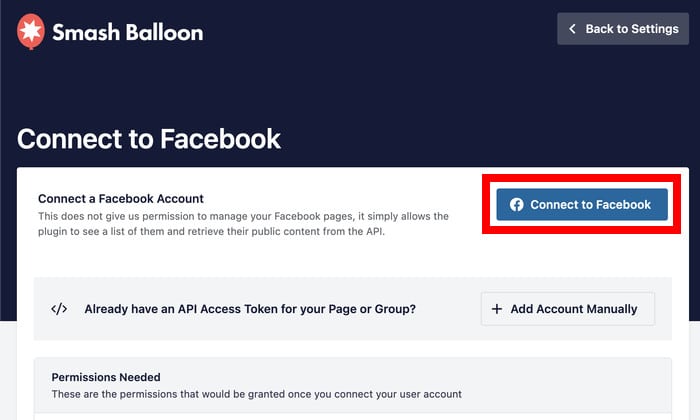
If you have a Facebook API, you can simply enter it here to connect your account.
Alternatively, you can click on the Connect to Facebook button instead.
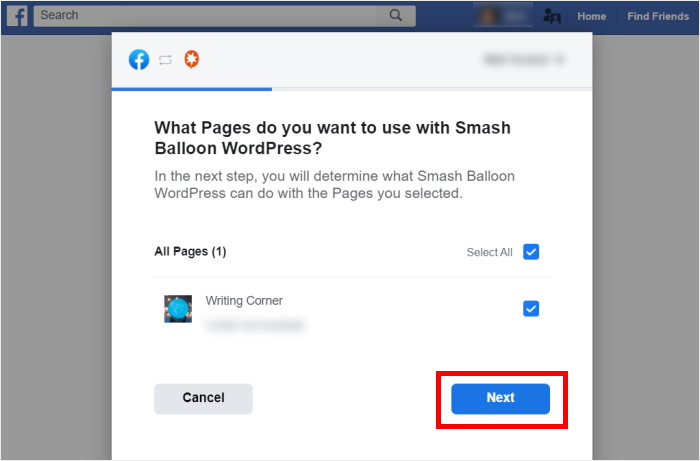
Doing that will redirect you to Facebook, where you can let Reviews Feed Pro know which page to connect to.
Just select the page on the popup and then click on the Next button.
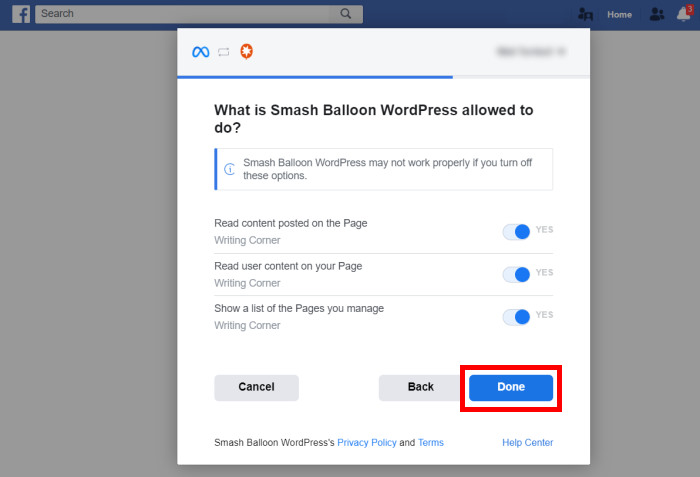
Now that you’ve selected a page, you can give read-only access to the plugin.
This means Reviews Feed Pro can only view your content and won’t be able to make any changes at all. So, the plugin is 100% safe.
To proceed, click on the Done button to confirm the access..
Now, the plugin will redirect you back to your website once again.
Select the page that you just connected and click on the Add Pages as Source button.
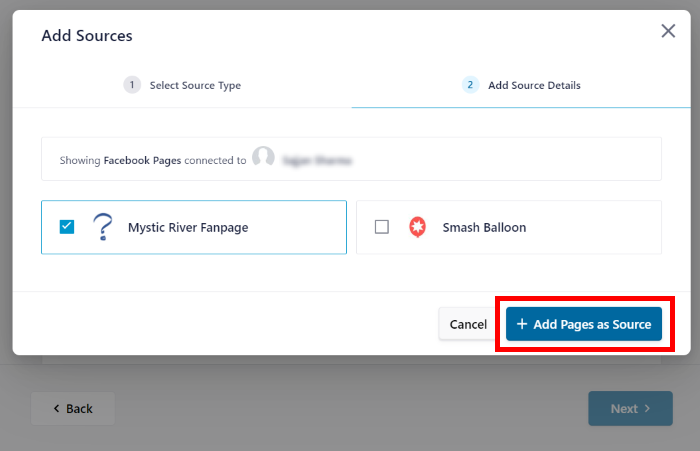
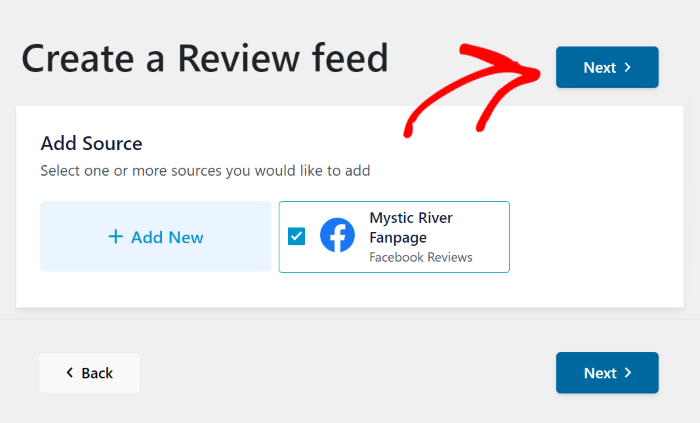
Since you’ve connected this page as a source, you can freely reuse it for any of your future review feeds without leaving your site.
Click on the Next button to finish connecting the source.
Step 4: Customize Your Facebook Review Feed
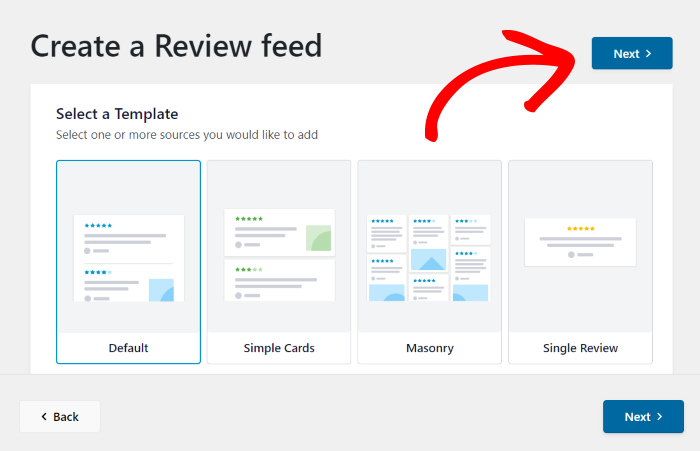
To help you quickly create a beautiful review feed with ease, Reviews Feed Pro lets you import pre-designed templates with beautiful designs.
Just select an option from the templates below:
- Default
- Simple cards
- Masonry
- Single review
- Showcase carousel
- Carousel
- Grid carousel
Once you select a template, click on the Next button.
You can now customize your Facebook feed using the live feed editor. Using the options on the left, you can change the layout, review elements, header, load more button, and much more.
Whenever you make any changes, you can use the live preview to see how the feed will look.
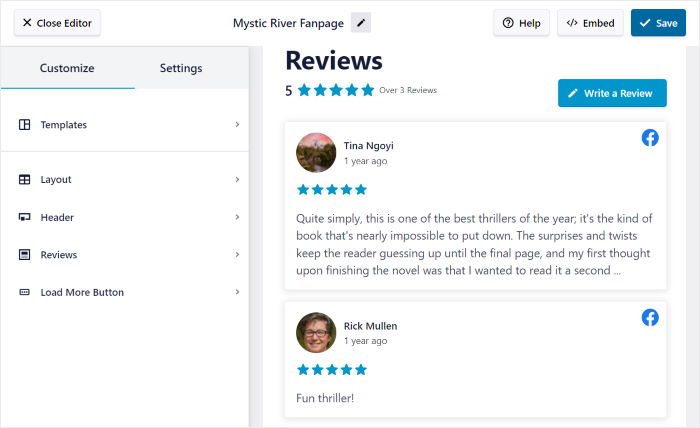
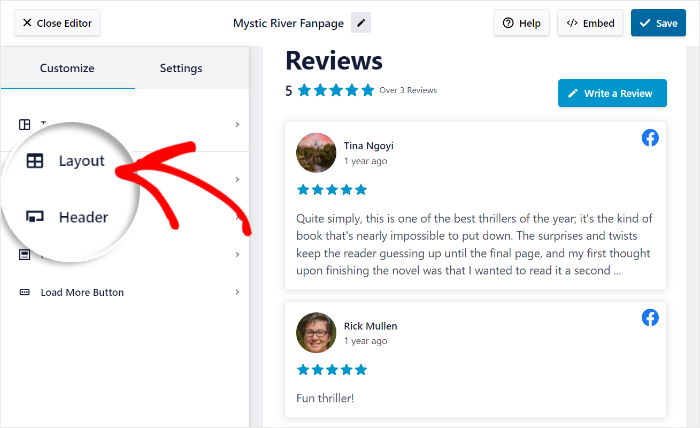
To start designing the review feed, I usually start by changing the layout.
Let’s go ahead and click on the Layout option from the left.
For your reviews feed, you can choose from 3 different layouts:
- List
- Masonry
- Carousel
Let’s take a look at these layouts in detail below:
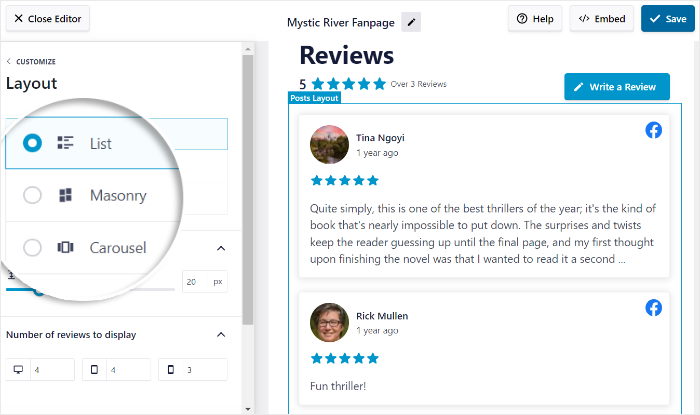
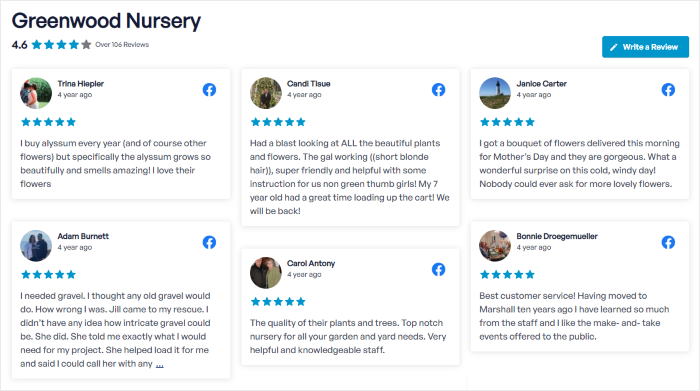
If you go for the list layout, all the Facebook reviews will take up more space on your site. This means each review can be clearly seen.
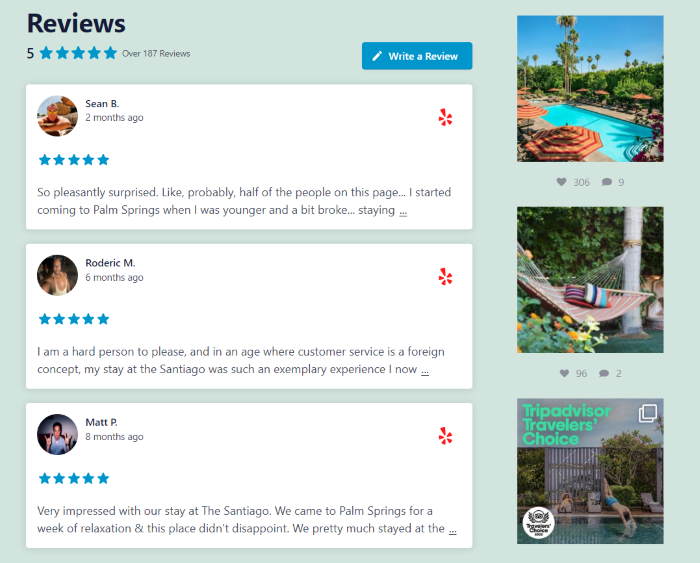
Next, we have the masonry layout that will place your reviews in rows and columns.
As a result, you can show tons of convincing reviews on your site at once.
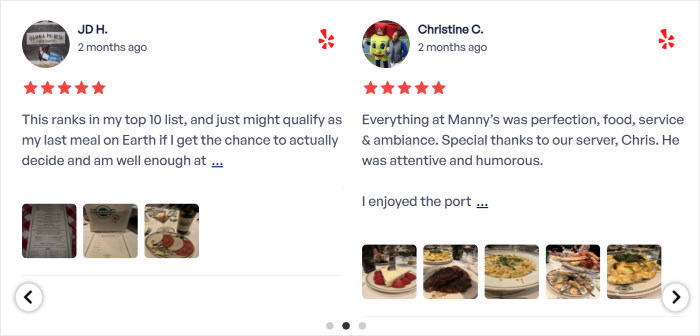
Finally, you have the carousel layout that’ll turn your reviews feed into a slideshow.
As a result, you can show your Facebook reviews in an interactive way.
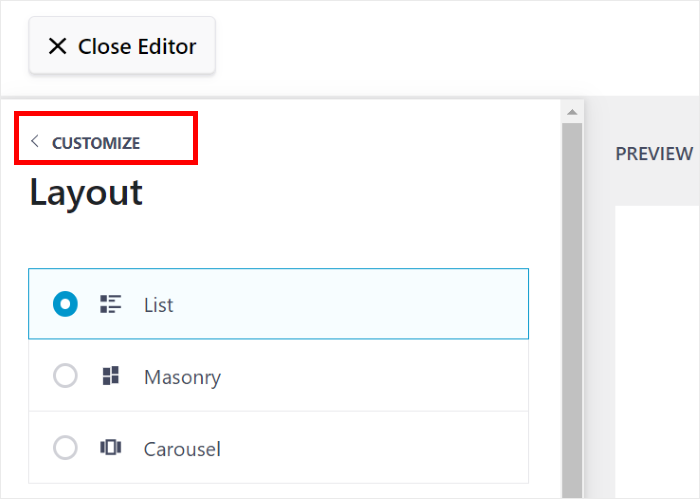
Once you set the layout click on the Save button to keep your changes.
Next, click on Customize to return to the main options of the live feed editor.
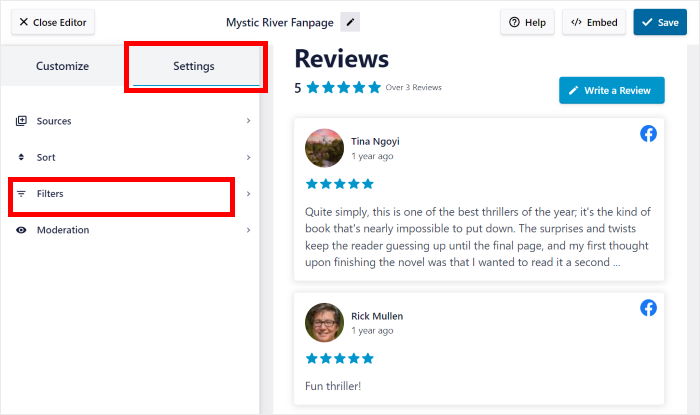
Next, let’s change the feed settings and control the reviews that show up on your Divi website.
First, click on the Settings tab and then select the Filters option.
Next, you can use the option on the left to select which star ratings to show on your Divi Facebook review feed.
Just check the star ratings that you want to show and uncheck the ones you want to hide.
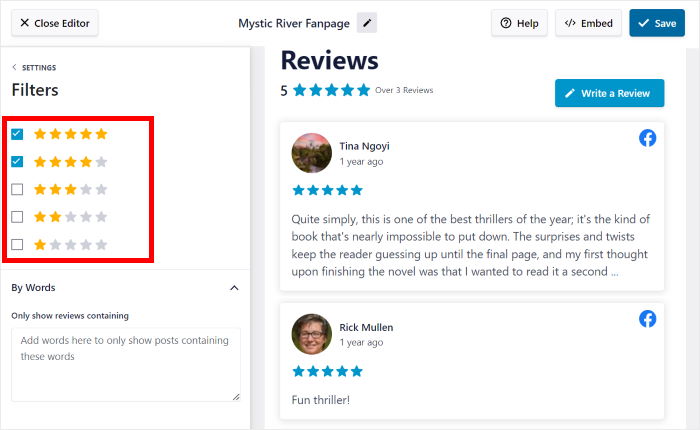
Just click on Save, and Reviews Feed Pro will update the feed according to your filters.
You can even add more filters to set up banned words, create a blocklist, manually select reviews to show, and much more.
Once you’re happy with your Facebook reviews feed, click on the Save button once more.
Step 5: Embed Your Facebook Review Feed
You can start adding the feed to your Divi WordPress website by clicking on the Embed button.
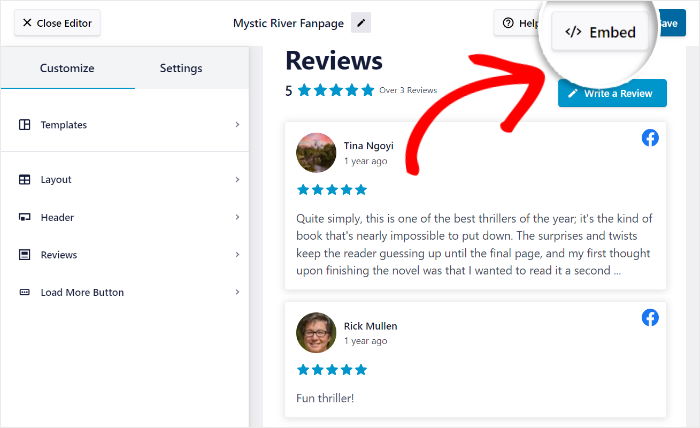
Doing that will open a popup with all the ways you can embed this Facebook reviews feed.
For now, you can click on the Copy button here.
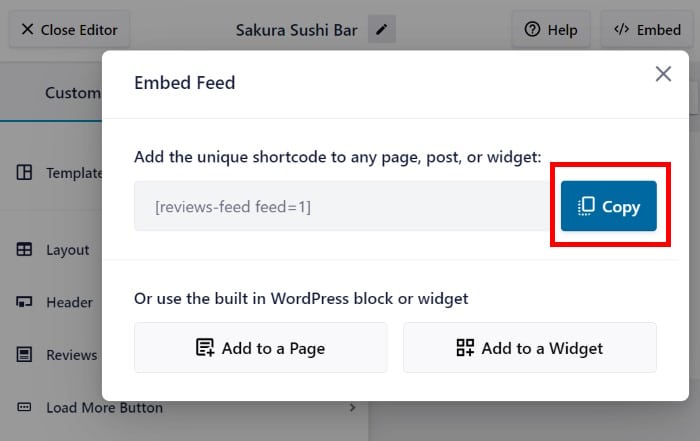
Now that you’ve copied the shortcode, it’s time to insert it into your website.
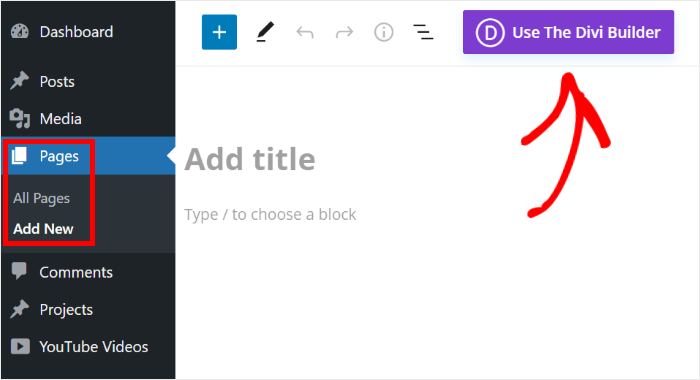
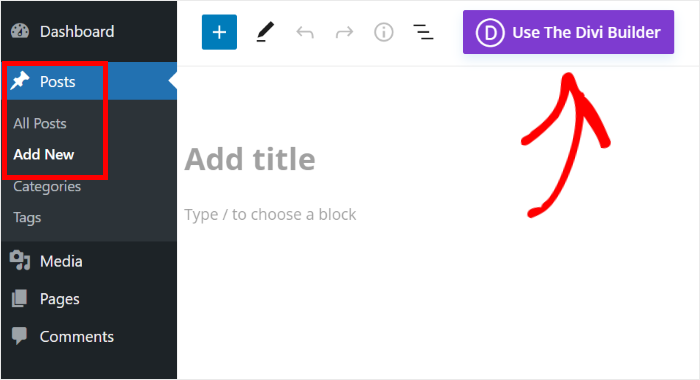
First, click on the Pages » Add New menu from your dashboard and click on the Use The Divi Builder button.
Want to use a Divi post instead? You can open the Posts » Add New menu from the dashboard instead.
Now, click on Use The Divi Builder button at the top of the WordPress editor.
Clicking on that will start the Divi builder, where you have 3 different options:
- Start Building: Start building your page from a blank template
- Browse Layouts: Copy a prebuilt layout
- Choose Page: Use an existing design that you created
Just select the option you prefer. We’ll walk you through the steps for each option below:
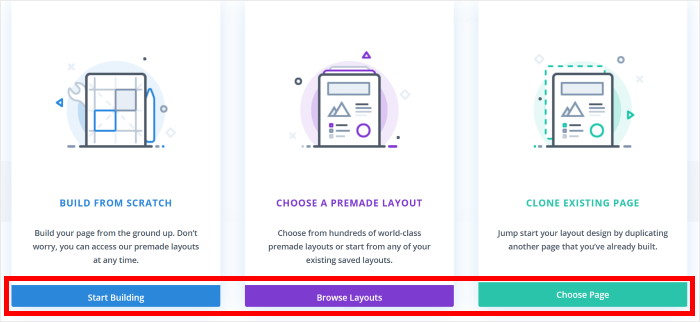
Went with the Start Building option?
If you do that, Divi will automatically send you the blank editor where you can immediately start embedding your reviews feed from earlier.
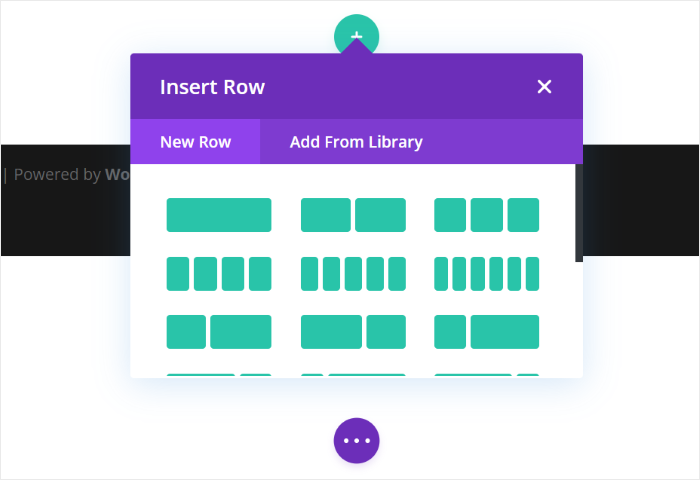
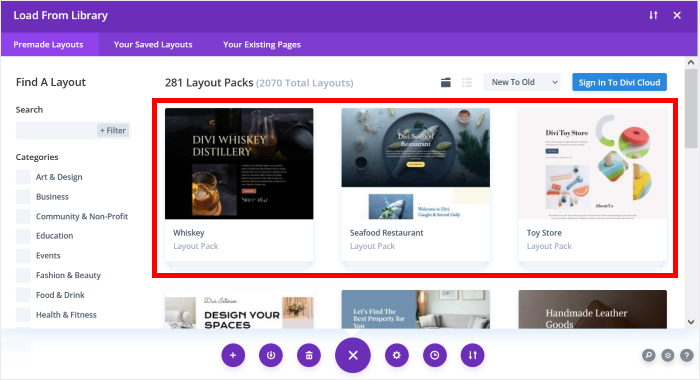
If you go with the Browse Layouts option, then Divi will show you all the predesigned layouts that you can copy.
Just select a layout on the popup that you want to use.
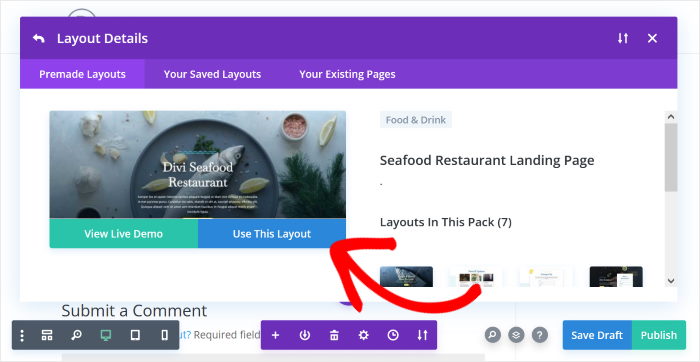
If you want a quick preview of this layout, you can click on the View Live Demo button here.
To import this layout for your new page, you can click on Use This Layout option instead.
Finally, you have the Choose Page option that will show you a list of pre-existing layouts that you can copy for your page instead.
So, just click on the option that you want to use.
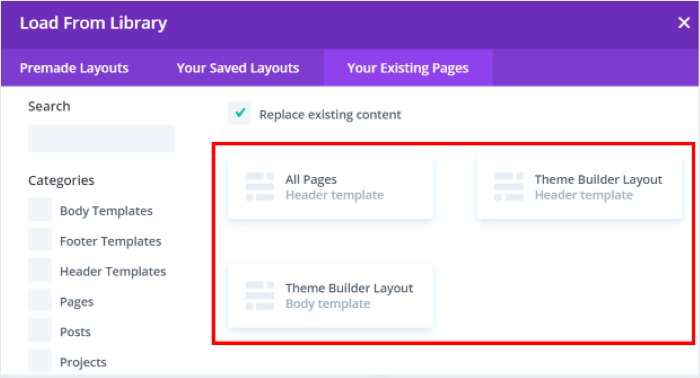
Now, you’ll be able to add content to your Divi page. But before you do that, let’s add a row where you can add the content.
First, click on the green plus icon (+) and then select a row design that you like.
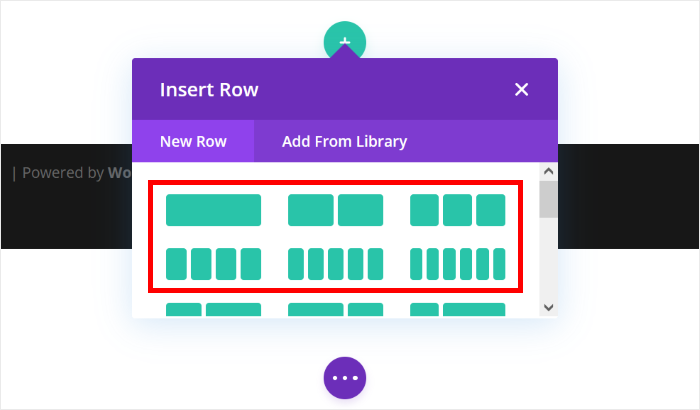
This row is basically space for your new Facebook reviews feed. To start embedding the feed, click on the black plus (+) icon on the row.
Then, use the search bar to look for the “code” module.
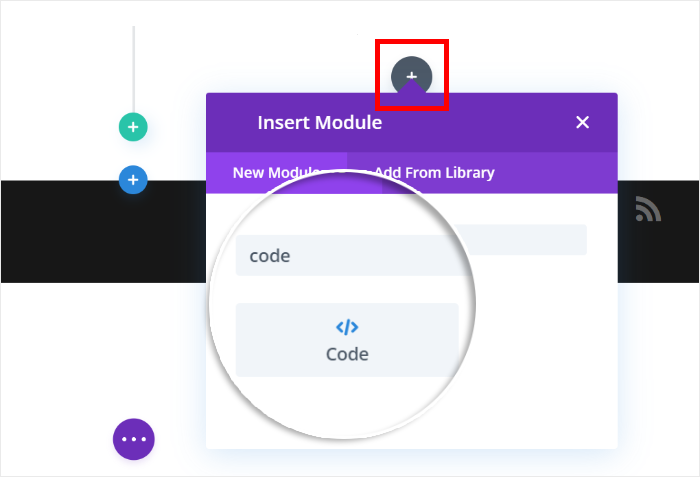
You’ll then see a popup with additional options for the newly inserted module.
For now, paste the shortcode into the Code field before clicking on the Checkmark icon below.
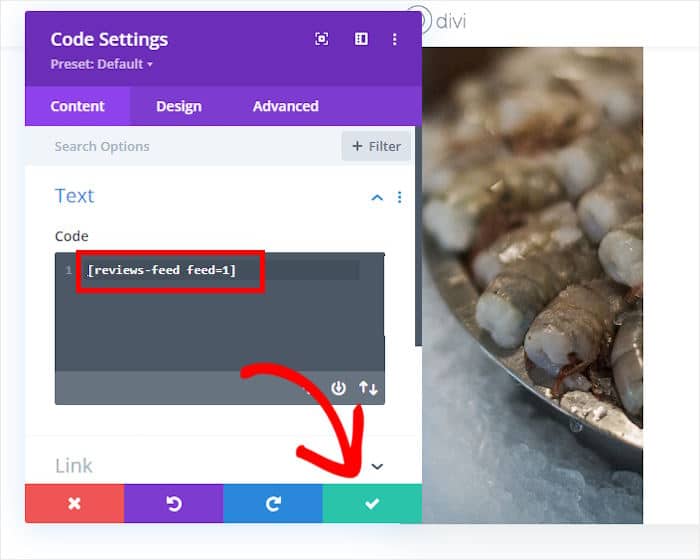
Finally, you can click on the Publish button. After you do that, your new Divi Facebook reviews feed will be online for your visitors to see.
In fact, you can open this Divi web page and see how the Facebook reviews feed will llook.
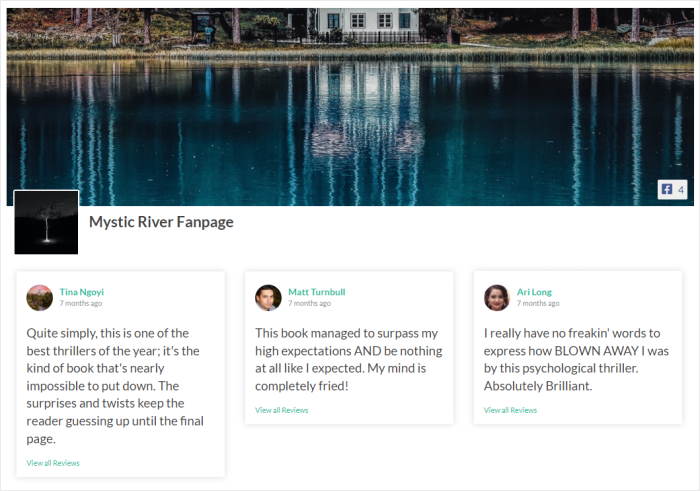
And that’s it.
As you can see, it’s super easy to add a Divi Facebook reviews feed to your site if you’re using the right tool. Just give Reviews Feed Pro a try and you can easily add reviews from trusted platforms on your Divi site.
You can then show convincing reviews on your website to convert people into customers, build trust in your brand, and grow your business.
Ready to embed Facebook reviews in Divi? Get the Reviews Feed Pro plugin today!
Want more ways to show reviews on your Divi site? Check out our article on how to embed Google review widgets in Divi.
And don’t forget to follow us on Twitter and Facebook to stay up-to-date on all the latest social media tips and tricks.
