Want to add a “Contact Us” form widget on your website?
In addition to interacting with your customers via social media, adding a contact form on your site is another easy way to connect with your target audience. With it, you can get feedback, provide support, collect information, answer questions, and much more.
Today, we’re going to show you the easiest way to add a contact us form widget to your website.
Before we get started, let’s see how using contact us forms can help your business.
Why Use a Contact Us Form Widget?
A contact us form widget gives your website visitors a simple way to reach out to you. That means you’ll have an easy time collecting useful feedback from your visitors.
With easier communication, you can build a relationship with your visitors and convert them into dedicated customers.
And that’s just the start! Here are a few more amazing ways you can use contact us form widgets:
- By gathering the email addresses of your visitors, you can even use contact us forms to grow your email list
- Your forms can automatically organize all the information you get from your customers, which saves you a ton of time and effort
- You can also use contact us forms to quickly answer questions and provide faster customer support
- Unlike emails, you can specify which type of information you need so you only get relevant details
- Your contact us form widgets can also block spam bots and fake entries to protect your website
As you can see, a contact us form can be a fantastic tool if you want to build a relationship with your customers, boost conversions, collect useful information, and grow your business.
Now, let’s take a look at the easiest way you can add contact us form widgets to your website.
Easiest Way to Embed Contact Us Form Widgets
To embed contact us forms on your website with ease, you can simply use a WordPress plugin – no need to create a form from scratch.
While there are a lot of great contact form plugins for WordPress, the best option that you can use is WPForms.
WPForms is a simple form builder that can help you add engaging contact forms to your WordPress website in just a few clicks.
To help you create high-converting forms, this plugin comes with helpful features such as:
- Drag and drop builder: You can use the visual builder to create your forms with a few simple clicks — no coding needed.
- Multi-page Forms: To encourage people to complete your forms, you can divide them into multiple smaller pages that are easier to fill.
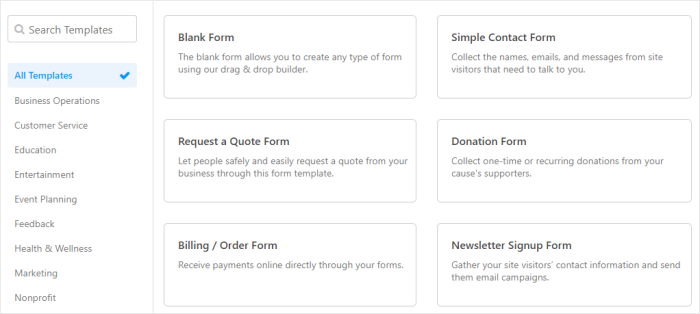
- Pre-Built Templates: Just pick from 400+ pre-built templates that are available, and your beautiful contact form will instantly be ready.
- Payment Options: You can also receive payment from your contact forms so visitors can easily order items or subscribe to your services.
- Smart Conditional Logic: To make short and engaging forms, you can hide or show options depending on the person’s previous answers.
With all these amazing features, WPForms has become the best contact form plugin for WordPress. In fact, over 5 million websites are using WPForms to convert visitors and promote their brands.
If you want to learn more, we have a full WPForms review that you can check out.
Now, let’s go ahead and see how you can use WPForms to embed a contact us form widget.
How to Add a Contact Us Form Widget to Your Website (Step-by-Step)
With that, let’s get started and check out the easiest way to embed contact us form widgets. Just follow the steps below:
Step 1: Download and Install the WPForms WordPress Plugin
To get started, go and grab your copy of WPForms here. You can then install and activate the plugin on your website.
If you want to learn how, you can simply check out our tutorial on how to install WordPress plugins.
Step 2: Create a Contact Us Form
You can now use your new plugin to create a contact us form for your website.
To do that, first, navigate to the WPForms » Add New menu from your WordPress dashboard.
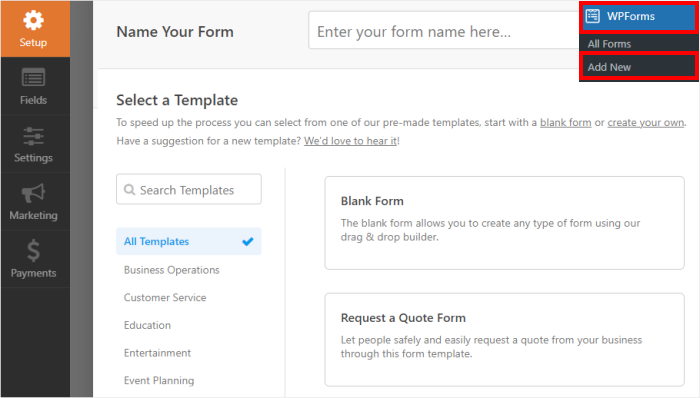
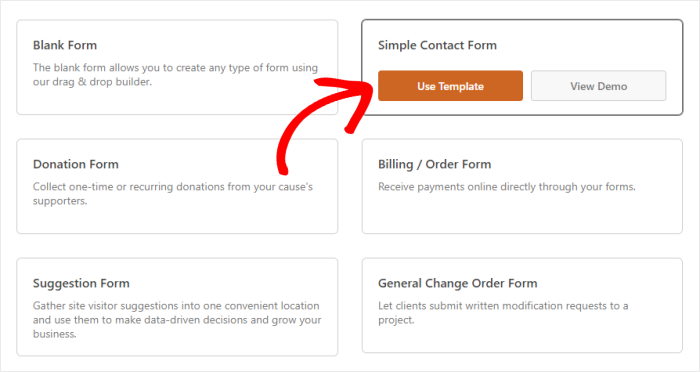
After that, you can choose a pre-built template to quickly create an engaging form of your choice.
Since we’re creating a contact us form widget, hover your mouse over Simple Contact Form and then click on Use Template.
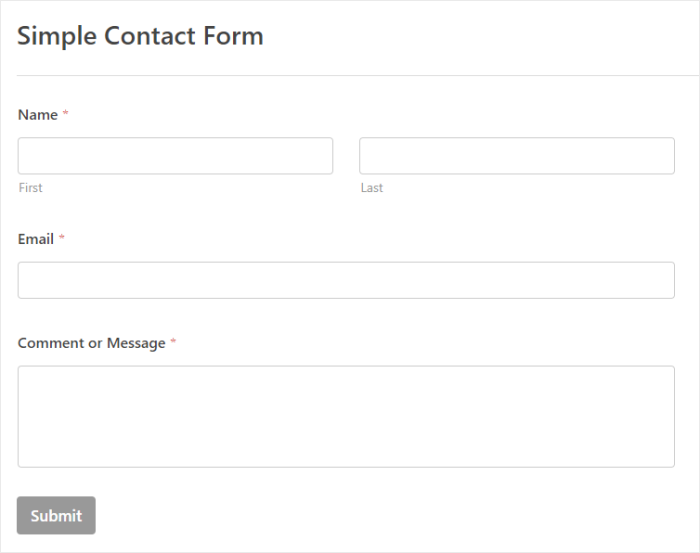
Just like that, you now have a simple contact us form on your website. By default, you get 3 different fields here to collect information:
- Name: Ask for people’s first and last names
- Email: Collect the email addresses of your visitors
- Comment or Message: Allow visitors to leave a message for you
After entering their details, your visitors can click on Submit to send you the information.
Step 3: Add New Fields to Your Form
With WPForms, you can add more fields and collect more types of information from your visitors.
To make it super easy for you to add new fields, you can use WPForm’s drag-and-drop form builder here.
On the left side of the editor, you can find all the custom fields that you can add. Towards the right, you can see your new contact us form and track any changes in real-time.
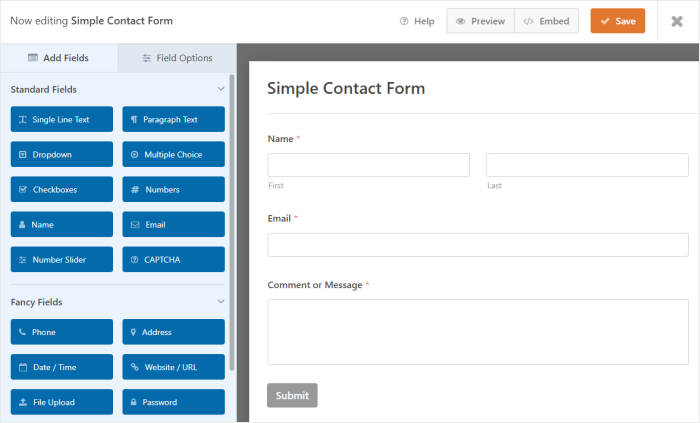
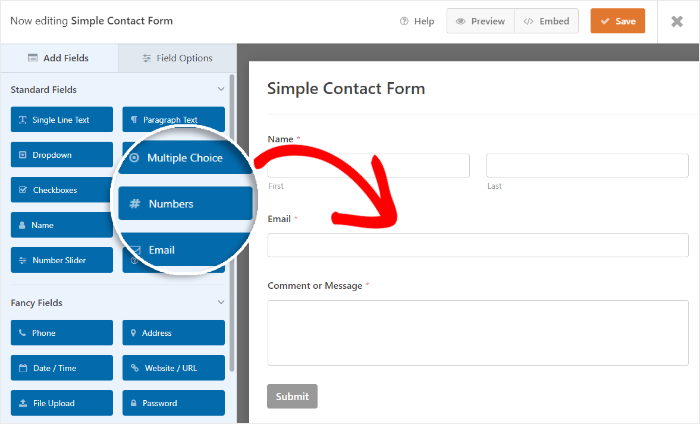
To add a field to your contact us form, drag the field from the left and drop it on the right.
For our example, we’re adding the Numbers field that can collect phone numbers.
Once you do that, you can see all the options for that field on the left panel. If you want to start editing an existing field, then just click on it, and you can find the field options on the left.
For our example, we can change the settings for our new Numbers field here.
To change the name of the field, you can edit the Label option.
If you want to give more information about the field, you can use the Description option. This can give your visitors a clear idea of what this field is about.
Want this field to be compulsory for anyone filling out the form? Then, you can turn on the Required option.
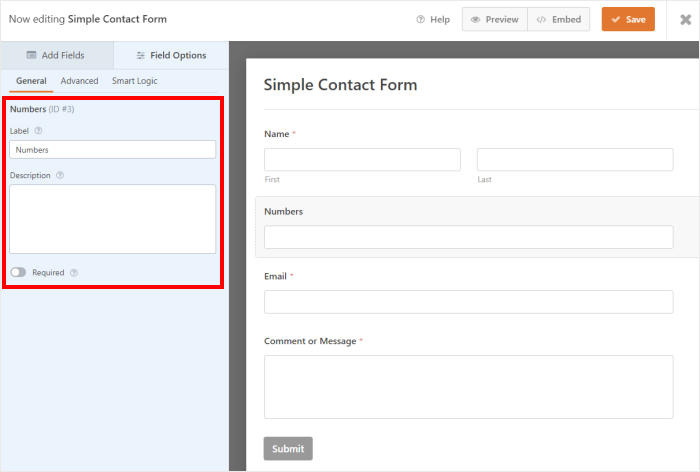
You can also find more options here depending on the type of field you’re editing.
After you’re happy with the field settings here, click the Advanced tab at the top to continue editing this field.
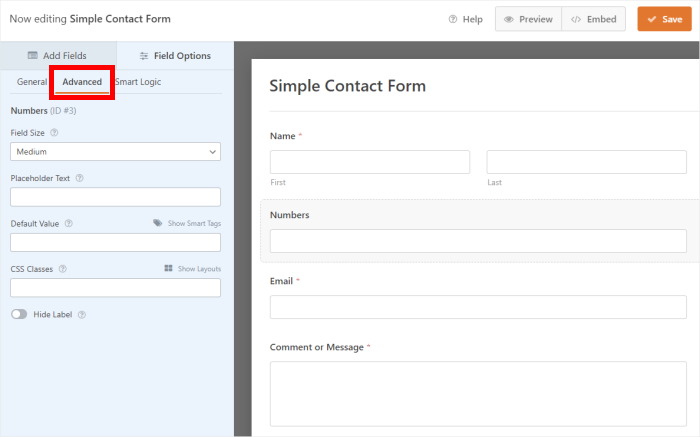
Under the advanced options, you can find more ways to customize your field:
- Field Size: Set how much space this field takes on the screen
- Placeholder Text: Show a piece of text on the field when it’s empty
- Default Value: Choose what the field will show if the person doesn’t fill it before submitting
- CSS Classes: Add Custom CSS to change the design of this field
- Hide Label: Show or hide the label above the field
After you’re done with the advanced settings, click on the Smart Logic tab at the top to proceed.
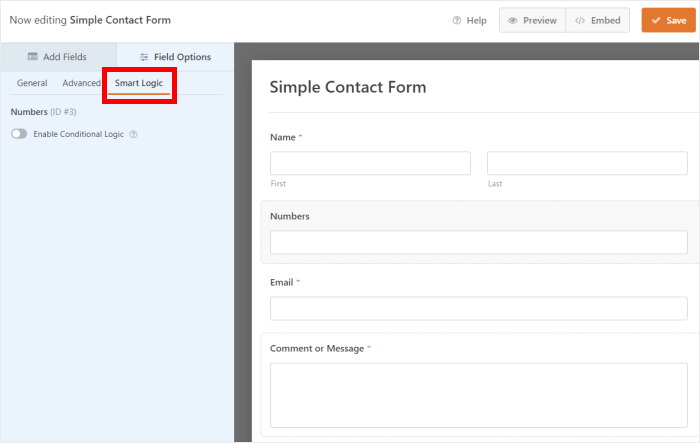
From here, you can turn on Conditional Logic for this field.
Using this option, you can choose to show or hide this field depending on how the visitors answer a previous question.
For example, you can ask your visitors if they live in the United States. If they answer yes, you can use conditional logic to show a field where they can choose their state.
Want to add more fields to your contact us form? Then, you can click on the Add Fields button at the top.
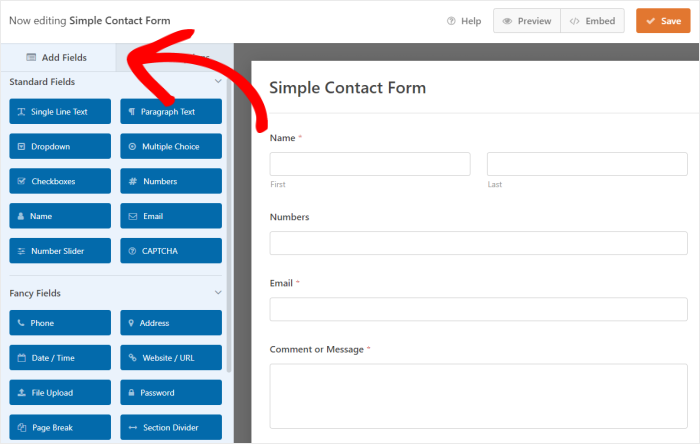
Just like that, you can add fields to collect emails, locations, passwords, dates, files, and much more. You can also add section dividers or page breaks to your form.
Once you’re happy with your contact us form, click on the Save button in the top right corner
Step 4: Change Your Form Settings
To change the settings for your contact us form, click on the Settings option on the left.
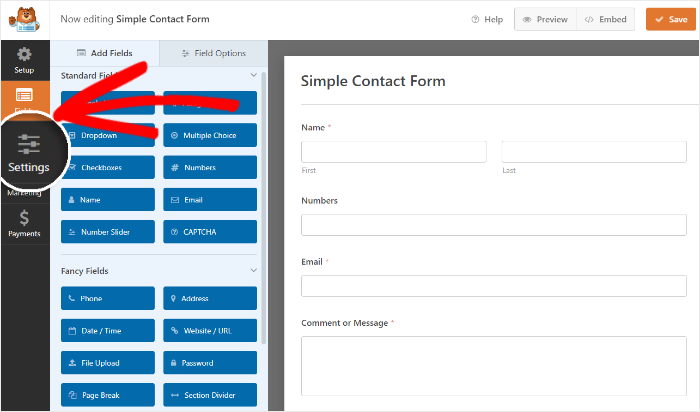
This will open the General Settings, where you can change these options:
- Form Name: Pick a name for your contact us form
- Form Description: Write a quick description of your new form
- Submit Button Text: Choose what the button at the end of the form says instead of “submit”
- Submit Button Processing Text: Add a small text that shows up on the submit button when someone clicks on it
- Enable anti-spam protection: Protect your contact us form widget from spam bots
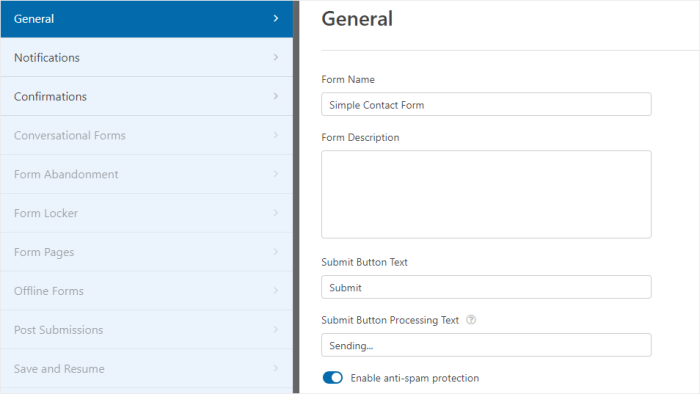
Once you’re happy with the settings, click on the Save button.
Next, click on the Notifications option on the left panel to continue.
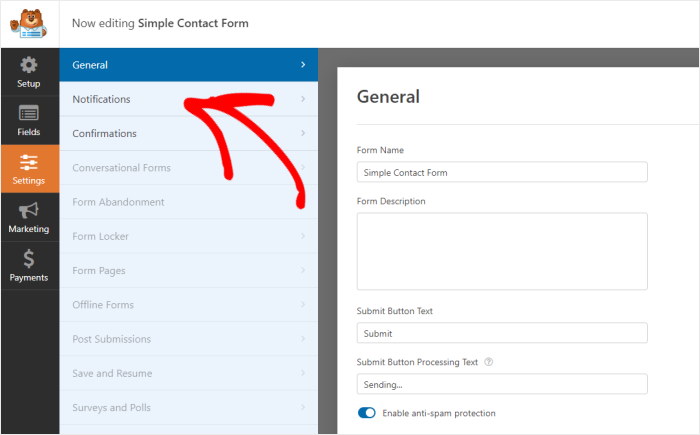
By default, WPForms will send you an email notification whenever someone fills up the form. Using the Enable Notifications option, you can choose to enable or disable these notifications.
You can then use the remaining options to set up your email notifications:
- Send to Email Address: Pick an email address to receive email notifications
- Email Subject Line: Choose the subject line for these emails
- From Name: Choose the name of the sender
- From Email: Pick an email address that sends these emails
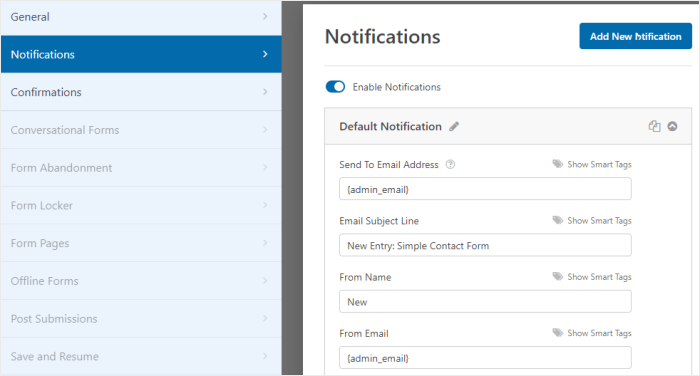
If you scroll down here, you can find the remaining WordPress contact form email settings:
- Reply-To Email Address: Choose which email will receive the replies to these notification emails.
- Email Message: Set the message of the notification emails. If you just want to see the information collected by the contact us form, you can leave it as it is.
- Enable Conditional Logic: Only receive email notifications when the visitor adds a specific answer to certain fields.
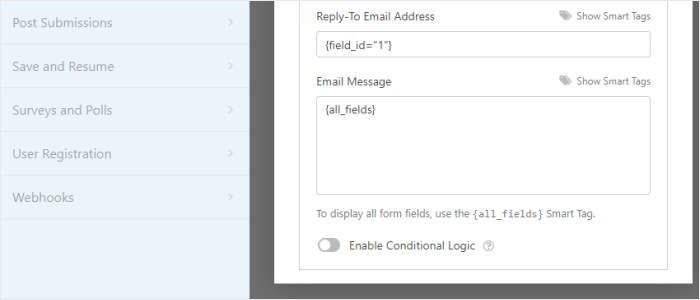
After you finish setting up the notification settings, click on the Save button once again.
Next, click on the Confirmations option to continue.
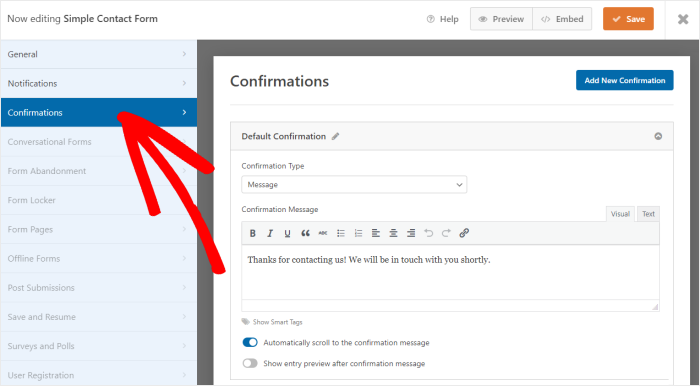
From the confirmation settings, you can create a message for visitors who filled out the form.
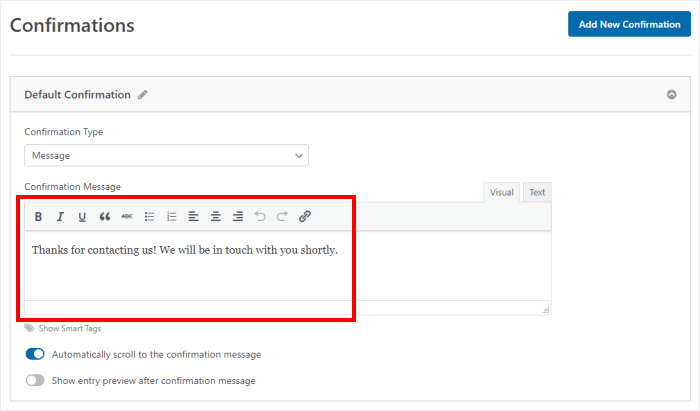
Under the Confirmation Message field, write your message and then click on the Save button.
Step 5: Embed the Contact Us Form Widget
Finally, it’s time to add the contact us form widget to your WordPress website. In fact, you have 2 ways to do that:
- Embed contact us form widget on a WordPress page
- Embed contact us form widget on the WordPress sidebar or footer
Let’s take a look at both methods below:
Embed Contact Us Form Widget on a WordPress Page
Using WPForms, you can embed a contact form widget free of any hassle, directly from the editor.
Just click on the Embed button at the top to get started.
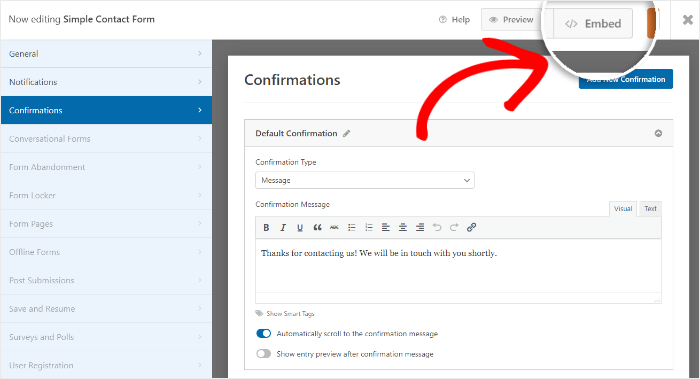
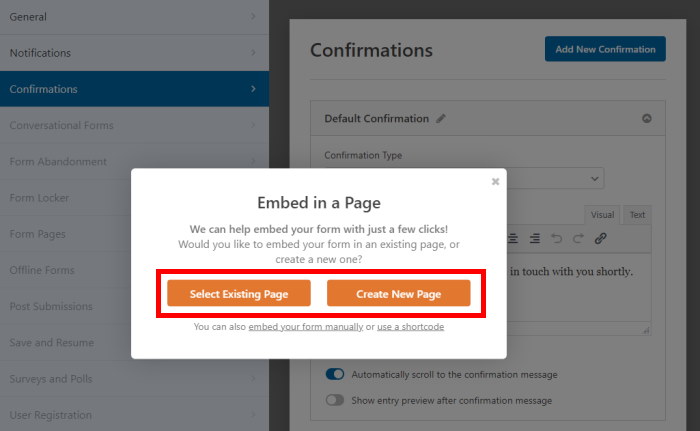
Next, you’ll see a popup that asks you to choose the location for your contact us form.
If you want to add the form to an existing WordPress page, click on the Select Existing Page button.
To embed your form widget on a new page instead, click on Create New Page.
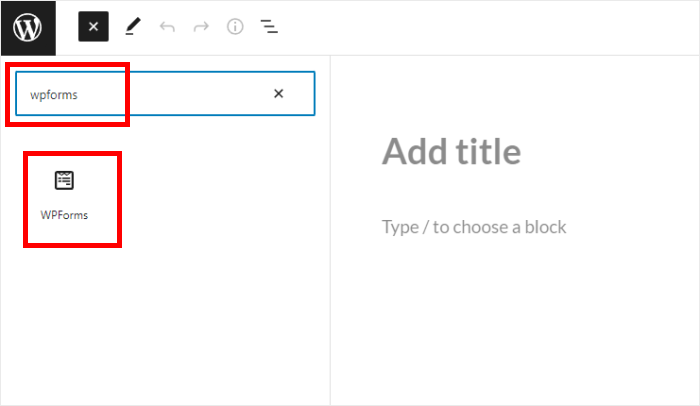
The plugin will then open the page in the WordPress editor so you can embed your widget. To do that, click on the small plus (+) icon to add a new content block.

Next, write “wpforms” into the search bar at the top. Once you do that, simply click on the WPForms widget from the options below.
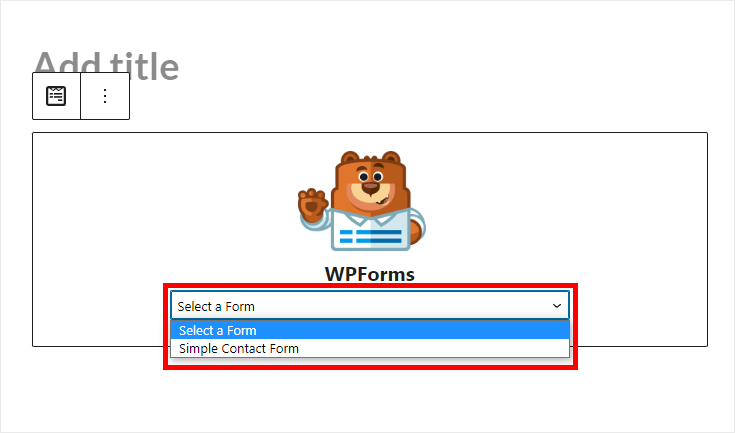
Doing that will embed the WPForms widget on your page. On the widget, use the dropdown menu and then select the contact us form you just created.
Remember to click on the Publish or Update button to confirm your changes.
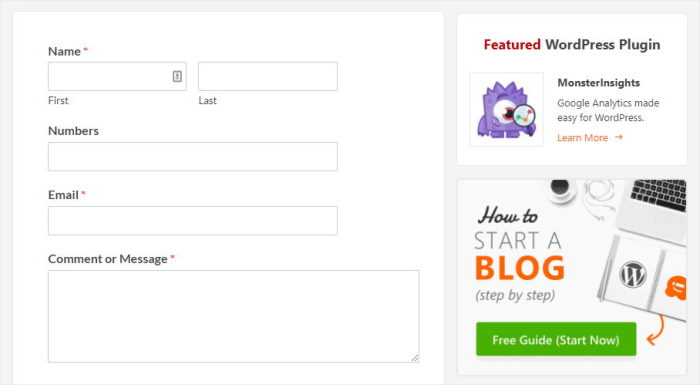
Just like that, you’ve added the form to your WordPress website. To see how it looks, you can go ahead and open your WordPress contact us page.
Embed the Contact Us Form Widget on the WordPress Sidebar or Footer
You can also show your new contact us form on the widget-ready areas of your website, like the sidebar or footer.
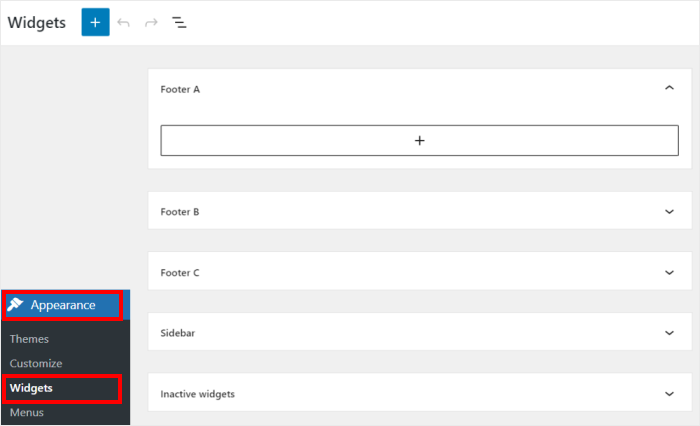
First, go to the Appearance » Widgets menu to open the widgets page of your website. From here, you can add, remove, and manage all of your WordPress widgets.
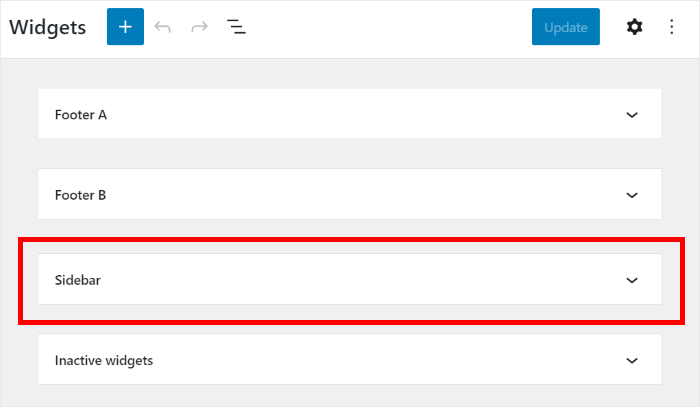
Next, you can choose between your sidebar or footer. To embed your contact us form on the sidebar, click on the Sidebar panel.
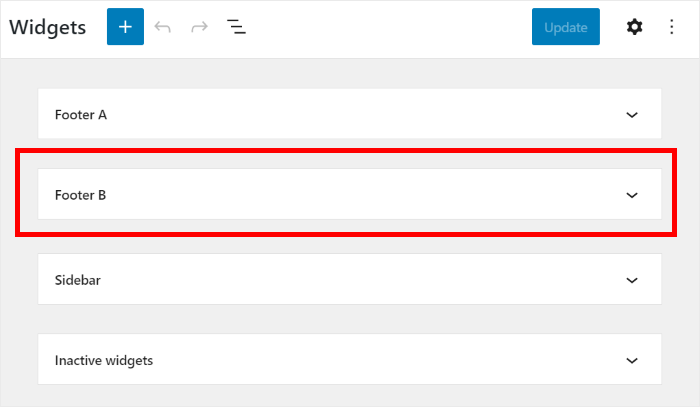
If you want to embed the form on your footer instead, then click on Footer.
We’ll go with the sidebar for our example.
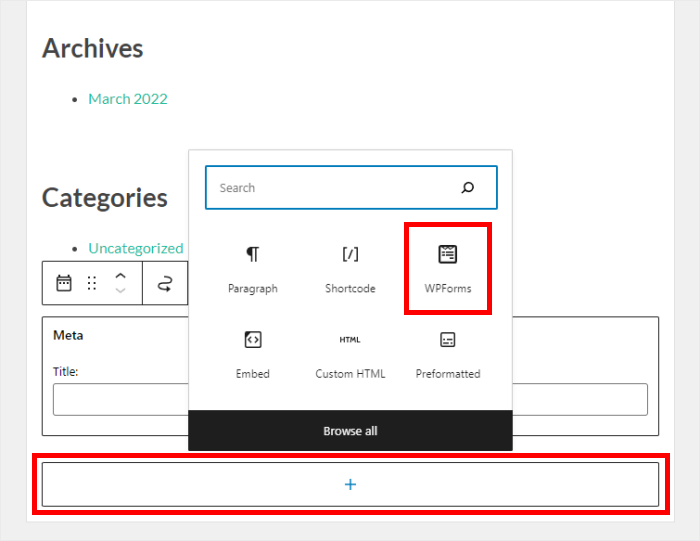
After that, click on the plus (+) icon to add a new widget, and then click on WPForms.
Now, you can use the WPForms widget to choose which contact form you want to embed.
Like before, use the dropdown menu to select your new contact us form.
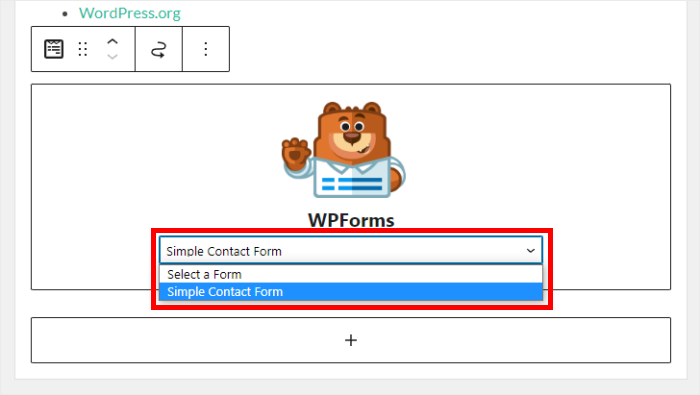
Click on the Update button to save your changes, and you’re done!
You now have a contact us form widget on your website. Go ahead and open your website and you can see how it looks.
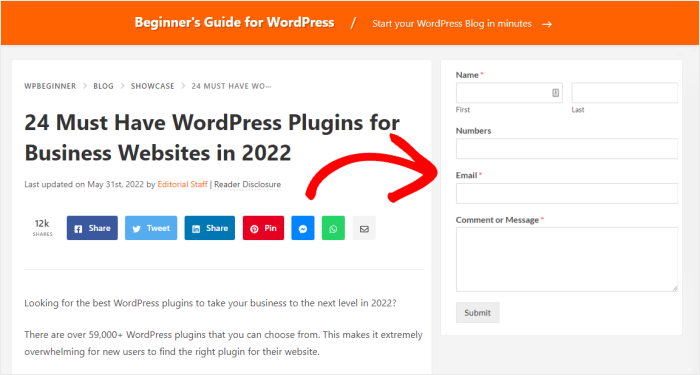
And that’s it!
We hope this showed you how to add a contact us form widget on your WordPress site. Using WPForms, you can do it in a few simple steps.
After this, you can easily reach your customers, generate leads, boost your conversions, and much more.
Ready to create engaging contact us forms? Get WPForms for your website.
If you want to create a beautiful website with ease, check out our list of the best page builder plugins.
Finally, if you enjoyed this article, connect with us on Twitter and Facebook for more helpful tutorials.
