Making tweets directly from your website can save a lot of time and effort.
But setting it up can be a hassle since you’ll need access to the Twitter/X API. And if you’re not used to dealing with code, it can be even more painful.
So, I’ll show you the simplest way of making Twitter/X posts from your WordPress site.
There’s no need to deal with complex codes or API – just set up the social scheduler tool, and you’re good to go.
How to Tweet Directly from WordPress (Step-by-Step)
All you have to do is follow the steps below, and you can start making tweets from your website. And the best part is that you won’t have to touch a single line of code.
Let’s get started:
Step 1: Create a ClickSocial Account
The first step is to pick a tool that can connect your WordPress website to Twitter.
While there are a bunch of options, I went with ClickSocial for a few reasons:
- You can draft posts for Twitter, Instagram, and Facebook from the same composer
- To reach people at the right time, you can schedule your posts in advance
- For a quick way of getting more traffic, you can link WordPress posts to your tweets
- It also has a post revival feature that lets you auto share older posts to Twitter
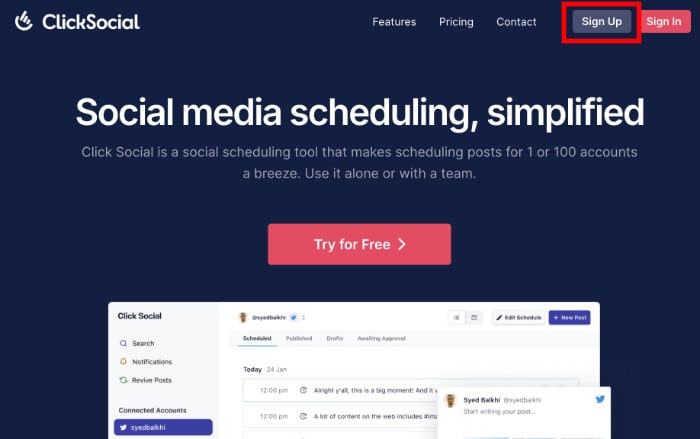
First, open the ClickSocial website and click on the Sign Up button at the top.
Now, you can return to your WordPress dashboard.
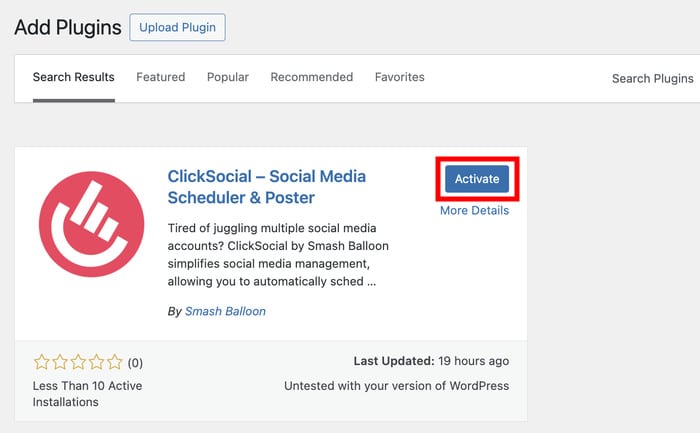
From there, open the Plugins » Add New Plugins menu and look for “ClickSocial” using the search bar.
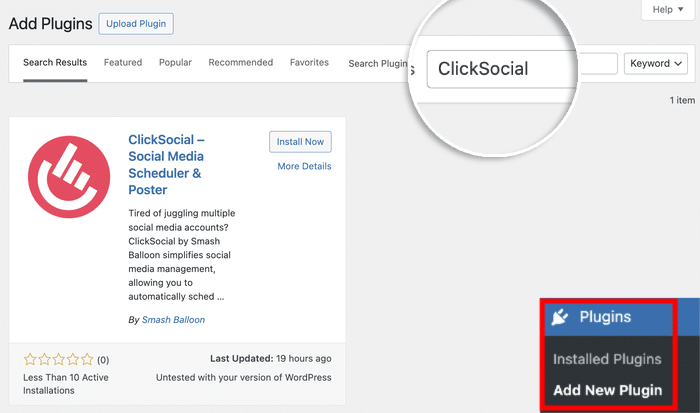
Doing that will show the ClickSocial plugin in the search results below.
You can now install the plugin with the Install Now button.
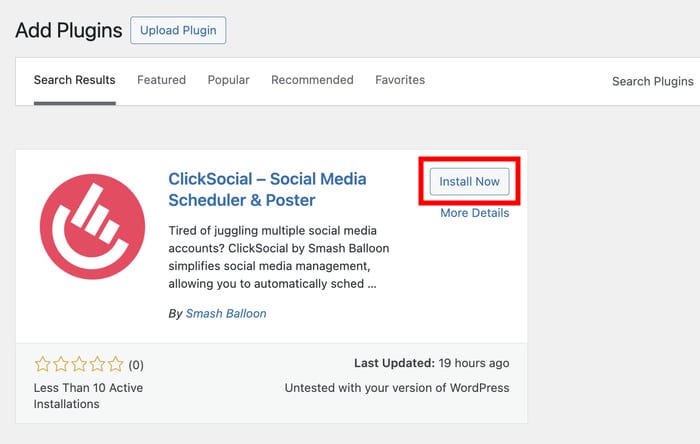
Just wait a few seconds for the plugin to finish installing.
Then you can Activate the plugin to finish this step.
Step 2: Connect Your Website to ClickSocial
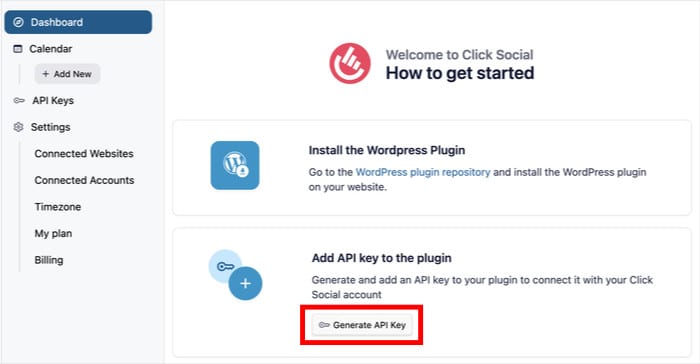
You can connect your website to ClickSocial with the help of a unique API key.
To create one, click on the Generate API Key button.
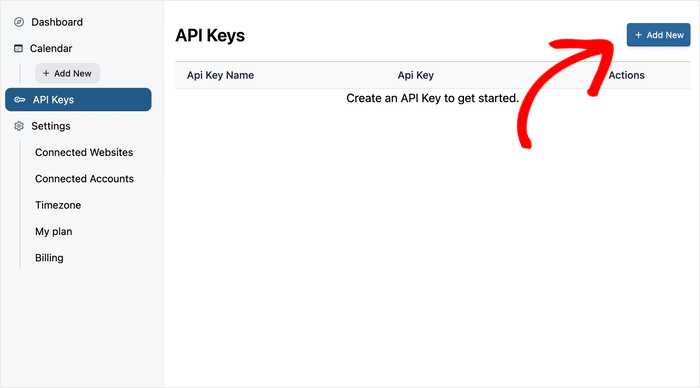
Once you connect different websites to ClickSocial, you’ll see them listed here.
For now, click on Add New to create a new key.
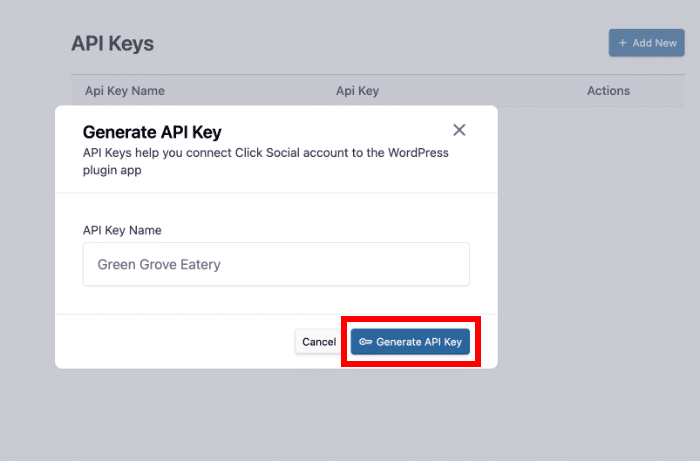
On the new popup, enter the name or label of your WordPress website.
After doing that, you can click on Generate API Key.
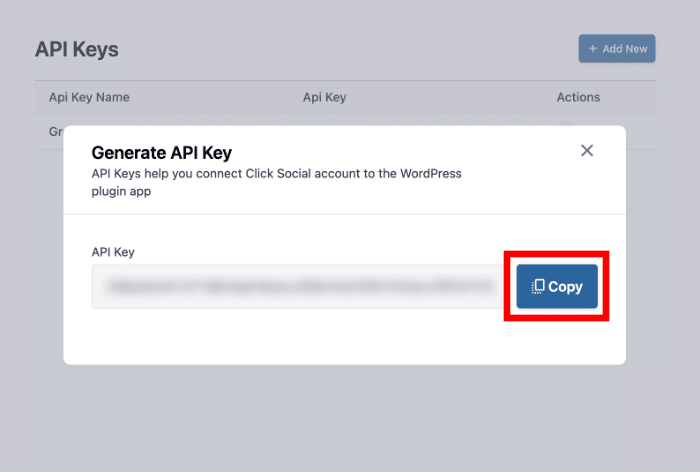
On the popup, you’ll be able to see your API key. Remember to keep it safe somewhere before you continue.
Copy this API key and return to WordPress now.
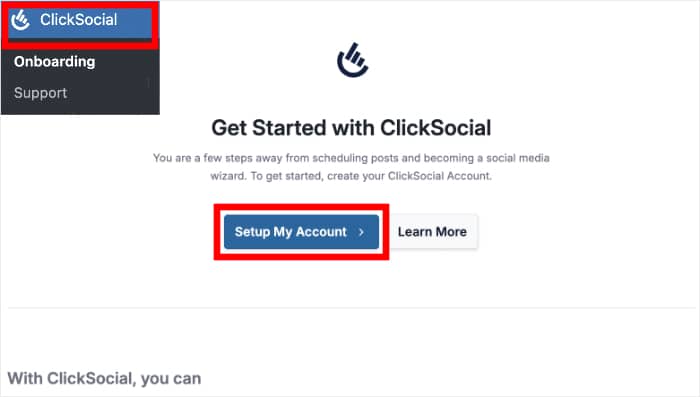
Now that you have your API key, return to your WordPress dashboard.
Open the ClickSocial menu on the dashboard and then click on Setup My Account.
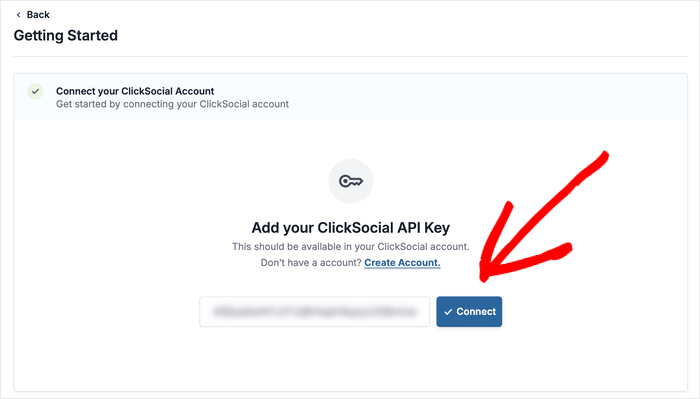
Now, you can find a field where you can enter your API key.
Just paste the key there to finish connecting your site to ClickSocial.
Step 3: Connect Your Twitter Account
Now, it’s time to connect to your Twitter account. The good news is that it’s a quick and easy process.
Click on the Add Account button here to get started.
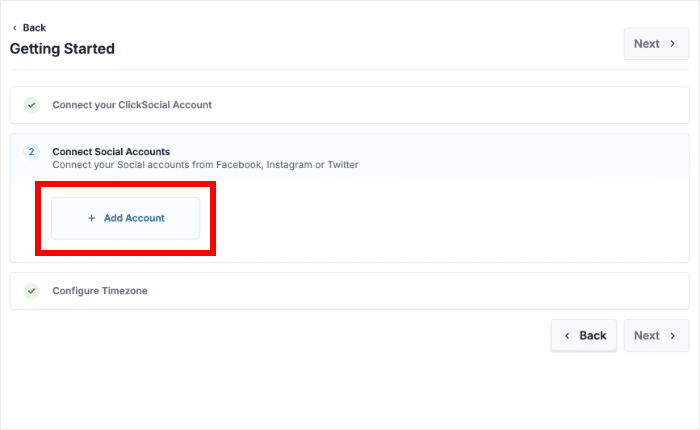
Now, you can see a popup where you can choose your social media platform:
- Twitter/X
This process is the same for all the other platforms. So, you can make Instagram and Facebook posts by following this guide.
For now, click on the Twitter option.
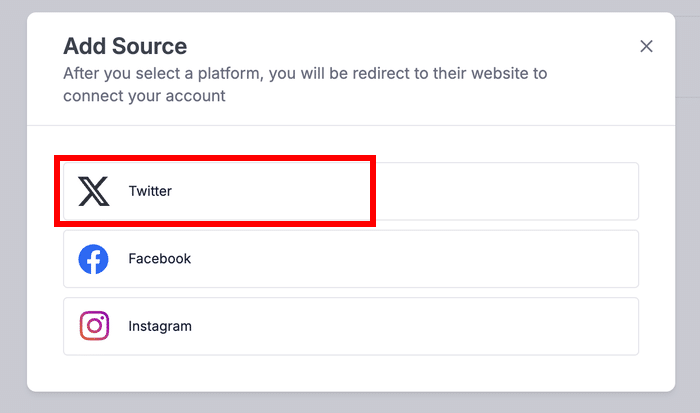
After you do that, ClickSocial will redirect you to Twitter.
Just click on Authorize app and you can start tweeting from your website.
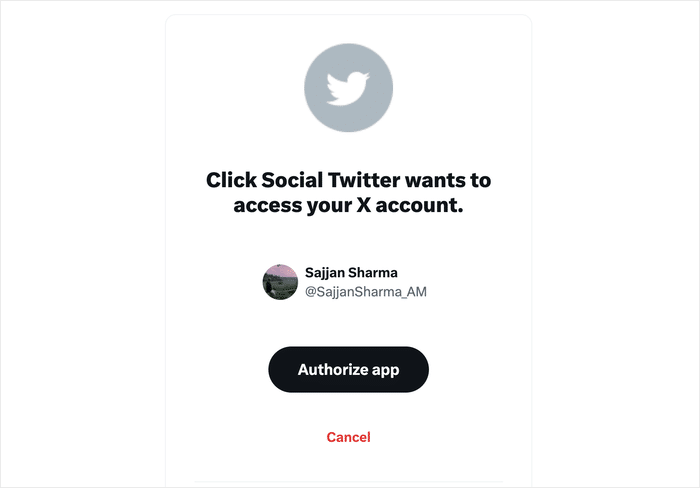
Now, you’ll back on your website and ready to make new tweets.
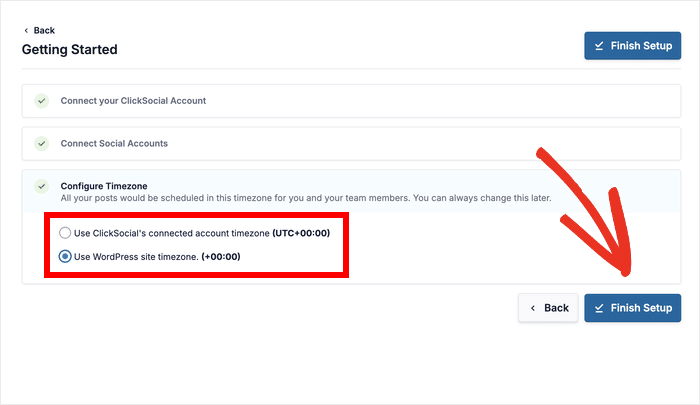
Before that, ClickSocial lets you pick between 2 timezone options:
- Use your Twitter account’s timezone
- Use your WordPress site timezone
After selecting the timezone, click on Finish Setup.
Step 4: Set Up Your Twitter Calendar
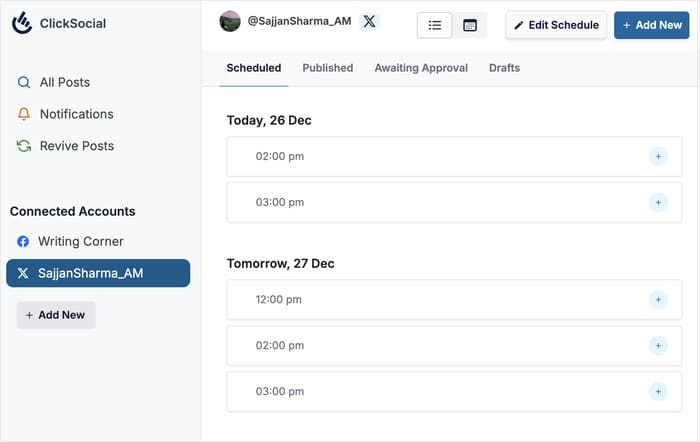
After you do that, ClickSocial will send you to the post calendar. You can check all the tweets you’ve scheduled and published from here.
You can also find your post drafts and tweets that are awaiting approval from someone on your team.
If you just want to make new tweets without scheduling them, you can go to step 5.
But if you want to schedule tweets in advance, you can set up a post schedule here.
First, click on the Edit Schedule button.
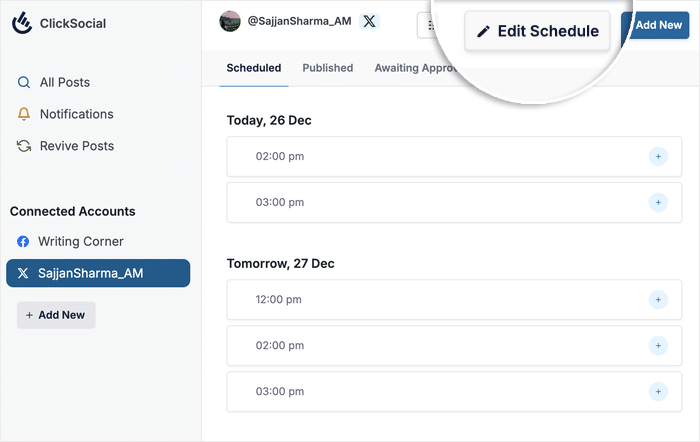
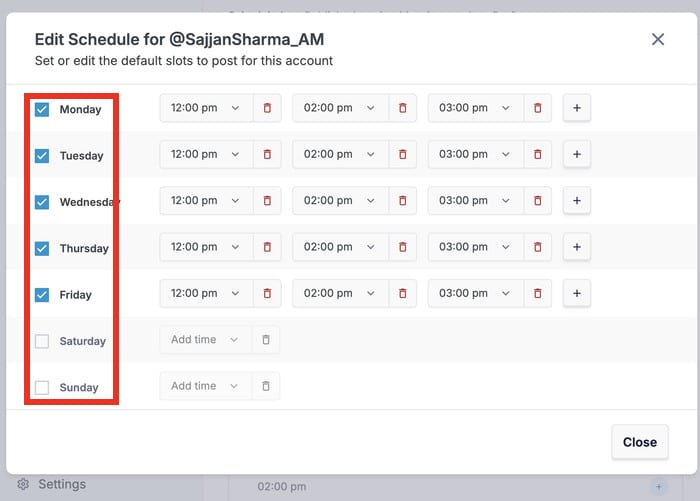
On the popup, you can set the days and time slots for the tweets you’d like to schedule.
Use the checkboxes on the left, to pick the days for your tweets.
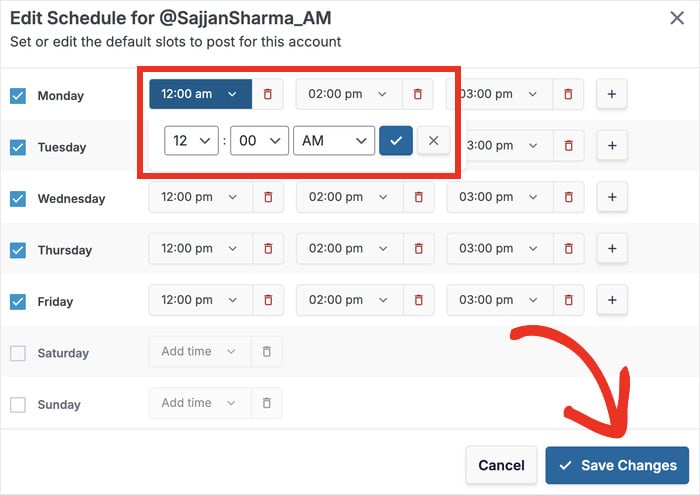
Now, you can edit the time slots for each day using the dropdown menu.
Feel free to add time slots using the plus (+) icon and remove them using the trash icon if you want.
Finally, click on the Save Changes button.
Step 5: Create Your Twitter Post
To start making a new tweet, click on the Add New button or the plus (+) icon on a time slot.
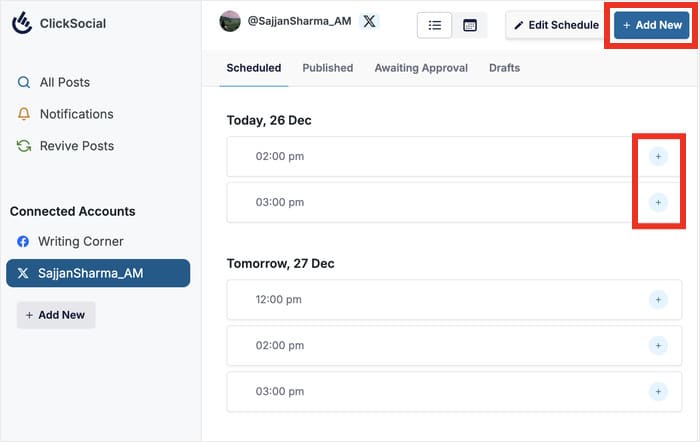
Doing that opens the post composer where you can make Twitter, Facebook, and Instagram posts.
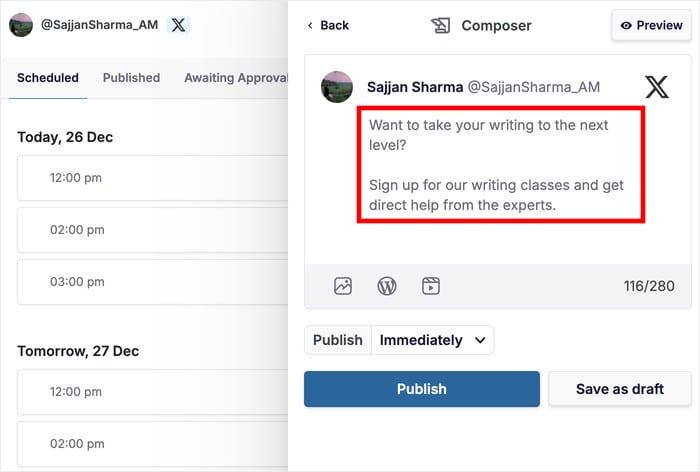
Enter the text of your post into the box here. To make your tweet more engaging, you can add related hashtags or even paste links.
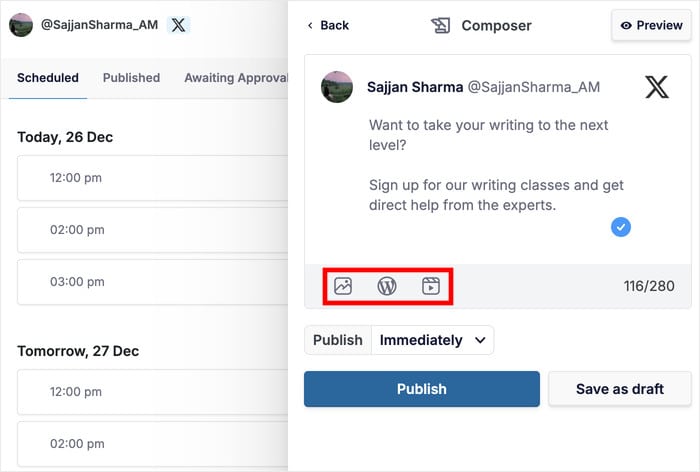
Next, you can use the icons below your text to add content to your tweet:
- Photo: Add a photo from your media gallery
- WordPress Post: Share a WordPress post
- Video: Pick a video from the media gallery
As an example, I’ll use the WordPress Icon to link a post to this tweet.
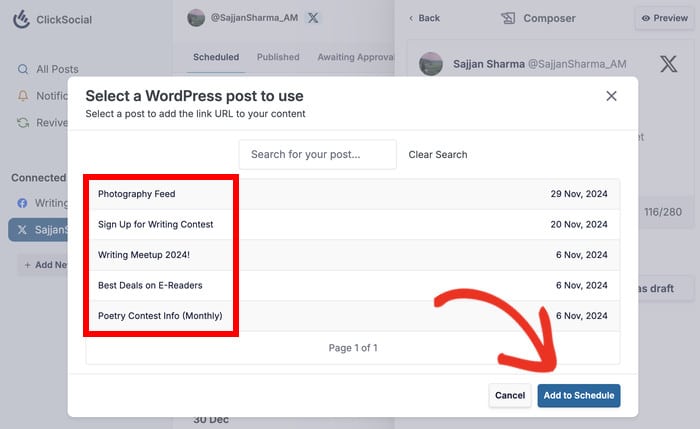
On the popup, you can see a list of your WordPress posts. You can also use the search bar if the list is too long.
Once you find the post you want to share, select it and click on Add to Schedule.
As you can see, it’s pretty easy to make social media posts directly from your WordPress website.
You can also use the Preview button to check how the post will look for your Twitter followers.
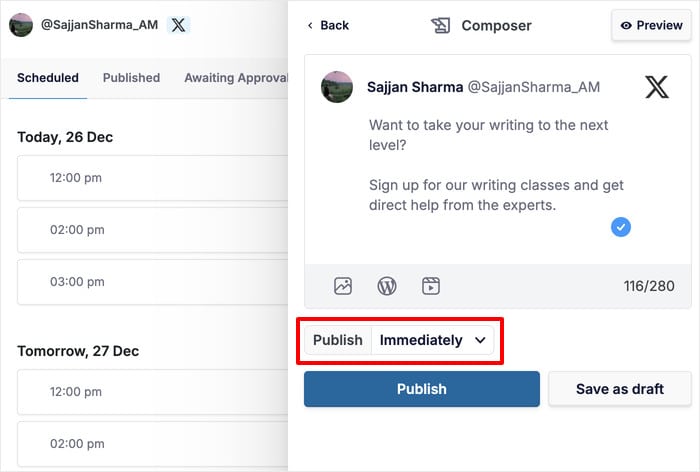
Once you’re happy with the tweet, you can go ahead and publish it right here.
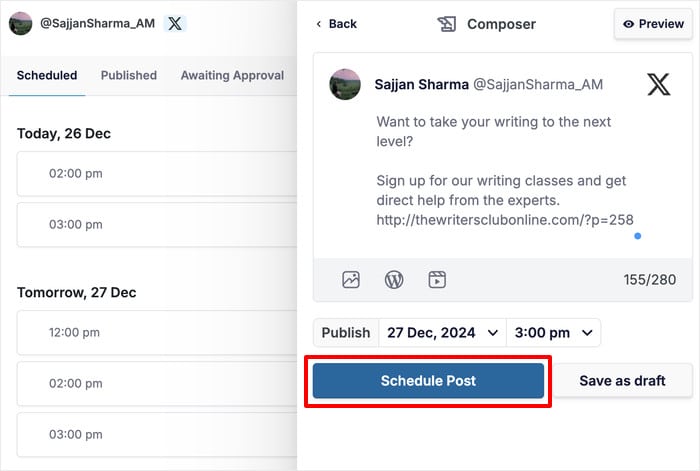
But if you want to schedule it, click on the dropdown menu below the media icons.
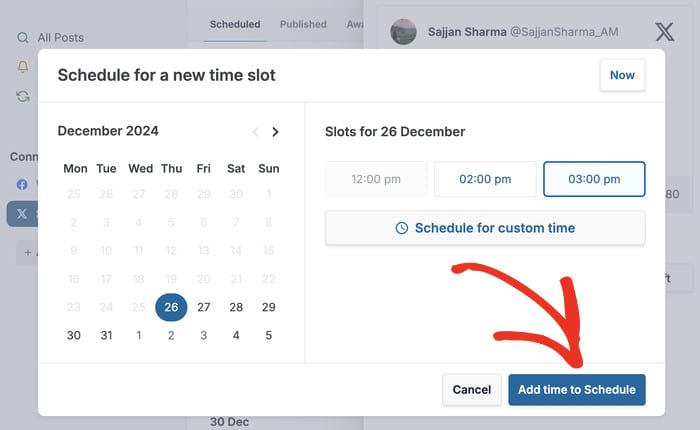
Now, you can use the calendar on the popup to select the day when you want to make this tweet.
After doing that, select a time slot on the right.
You can also click on Schedule for custom time to manually choose when this tweet will go online.
Once you pick the day and time, click on the Add time to Schedule button.
Finally, you can click on Schedule Post and your tweet will automatically be posted at your chosen time.
It’s pretty easy, and you can directly make posts for other social media platforms by following this method.
As you can see, ClickSocial can make the whole process quick and easy. You can tweet when your followers are likely to be online for maximum engagement.
Plus, you can auto share old WordPress posts to social media and drive traffic to your website. It’s also a great way to keep a flow of engaging content for your followers.
If you want to try it out, you can get started with ClickSocial today.
Want more ways to supercharge your Twitter growth? Check out our guide on embedding Twitter feeds to WordPress.
More Social Media Marketing Tutorials and Guides
- How to Auto Post from WordPress to Social Media for Easy Engagement
- Best Social Media Analytics Tools for Online Growth (Expert Picks)
- How to Add Customer Testimonials to Your WordPress
- TikTok is Your Secret Weapon: Best TikTok Ideas for Small Businesses
- Top Ways to Make Money on Twitter With Ease (Expert’s Pick)


