Are your scheduled Twitter/X posts not working properly?
After hearing this complaint from a lot of you folks, I’ve put together this simple guide that’ll show you how to fix it.
Just follow these easy steps, and you’ll be able to schedule your tweets once more.
Let’s get started!
Why You Schedule Your Twitter Posts?
- If you schedule your tweets when your followers are online, you’ll have an easy time getting engagement.
- You can prepare marketing tweets for busy times like sales and holidays and schedule them beforehand to save time.
- When you’re working with a team, you can have others look at your scheduled Twitter posts and make sure they’re ready to go online.
- In case a tweet performs well, you can schedule it for much later to get more engagement.
What to Do If Your Twitter Scheduled Posts Are Not Working
Now, you can go through these steps to fix your scheduled Twitter posts. If one method doesn’t work, just move on to the next step.
Let’s take a look:
Step 1: Confirm that You’re Subscribed to X Pro
In the past, you could use TweetDeck to schedule your tweets for free. Unfortunately, TweetDeck was rebranded to X Pro and changed into a paid service.
So, you’ll need X Pro if you want to schedule your tweets.

Just open the X Pro page on your web browser, and you can check if your subscription is still active.
In case you’re already subscribed or don’t want to pay for X Pro, you can move on to the next step.
Step 2: Switch to a Web Browser
If you’re using the Twitter/X mobile app or phone browser, you won’t be able to schedule your posts in advance.
Fortunately, the fix is pretty simple. Just open https://www.x.com/ on your web browser.
From there, you can try to draft and scheduling your tweet once more.
If your problem is still not resolved, it’s time to try step 3 instead.
Step 3: Test Your Internet Connection
A slow or shaky internet connection can mess up your ability to schedule your Twitter posts.
Want to check if your internet is the issue? You can use websites like the Google Speedtest to see how fast it’s working.
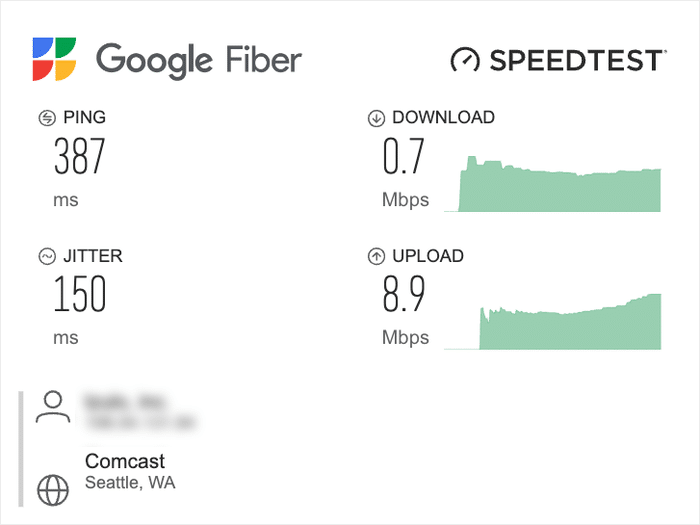
To fix your Internet speed issues, you can try the following:
- Give your internet router a quick restart.
- Check your LAN cable if you’re using a wired connection.
- Moving your device closer to the router if you’re on Wi-Fi.
- If these don’t work, you can try reaching out to your ISP
If your internet seems okay, but you still can’t schedule your tweets, you can try the next thing.
Step 4: Check if the Twitter Website is Down
Sometimes, Twitter might be having its own problems that stop your scheduled content from going online.
If your scheduled tweets aren’t working, it’s a good idea to use tools like Downdetector to check on Twitter.
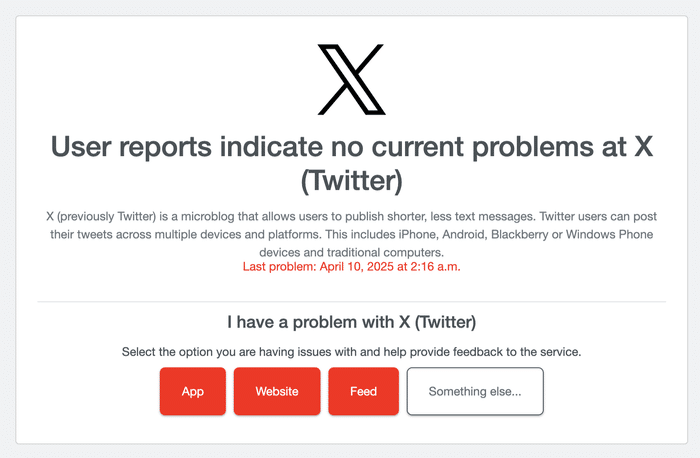
In case Twitter is indeed down or having problems, the best thing to do is wait until it’s working again and then see if your scheduled post has gone live.
But if Twitter is working fine, it’s time to try the final step.
Step 5: Use a Twitter Scheduling Tool
Finally, it’s time for a surefire way of fixing your scheduled Twitter content in case none of these steps worked.
You can use a Twitter scheduling tool that can handle everything for you.
Out of all the options out there, the most consistent and dependable social scheduler is ClickSocial.
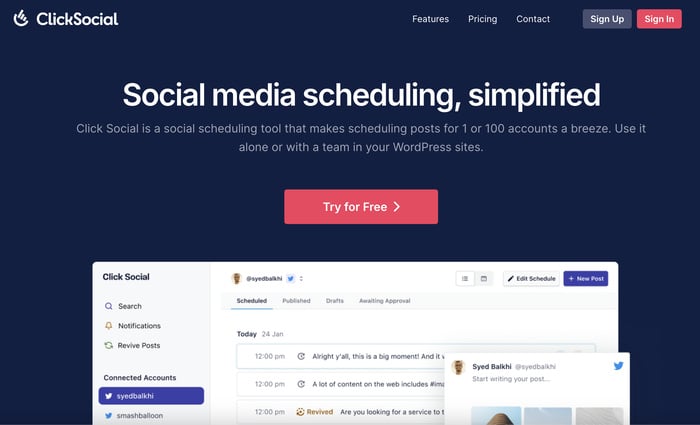
In just a few simple clicks, you’ll be able to draft and schedule your tweets for any time you like.
The best part? You can even do this directly from your website.
This means you can manage everything from a single place instead of having one more website to keep track of.
On top of that, ClickSocial has a bunch of handy features that can help you out:
- On top of Twitter, you can also schedule content for Facebook and Instagram from the same place.
- You can add photos and videos from your media library to draft engaging tweets with ease.
- Using the post revival feature, you can set up ClickSocial to automatically share older posts from your site to Twitter
- You can add different roles for different people, so members of your team can help draft posts, approve tweets, and provide feedback.
- There’s a convenient post calendar which can help you keep track of your scheduled and published tweets.
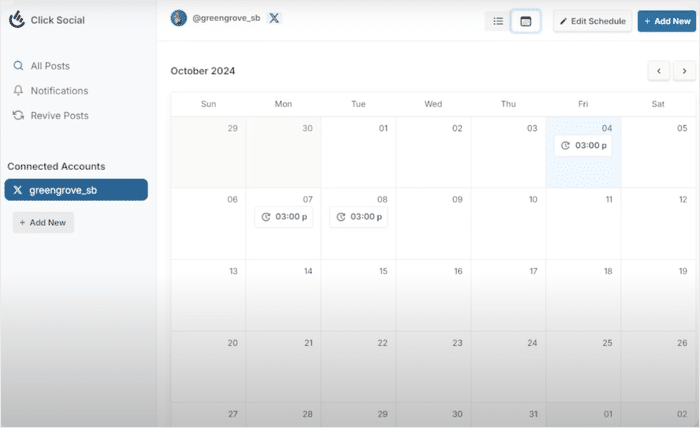
There are a lot more features that you can check out for yourself. All in all, it’s a great tool for anyone looking for an easy Twitter scheduling social.
To get started, you can sign up for ClickSocial here.
Expert Tip: For more details, you can check out this step-by-step guide on how to schedule your Twitter posts.
How to Schedule Your Twitter Posts (Easiest Way)
Want to see how easy it can be to schedule your Twitter content with the right tool?
Let’s take a look:
Step 1: Create a ClickSocial Account
To get started, open the ClickSocial website and Sign Up using the button at the top.
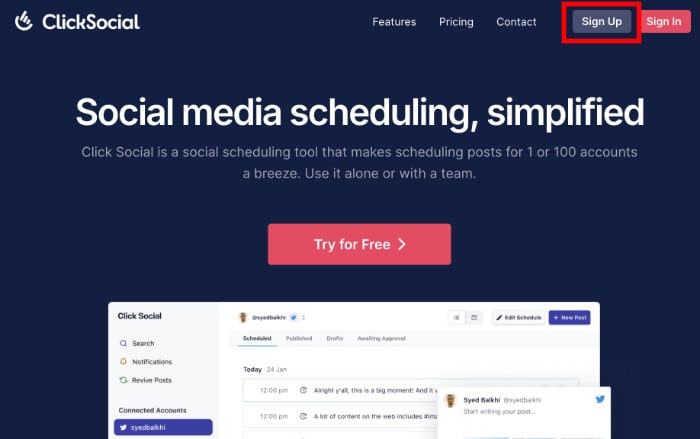
Once your account is ready, return to your site’s dashboard and open the Plugins » Add New Plugins menu.
Now, you can use the search bar at the top to search for the “ClickSocial” plugin.
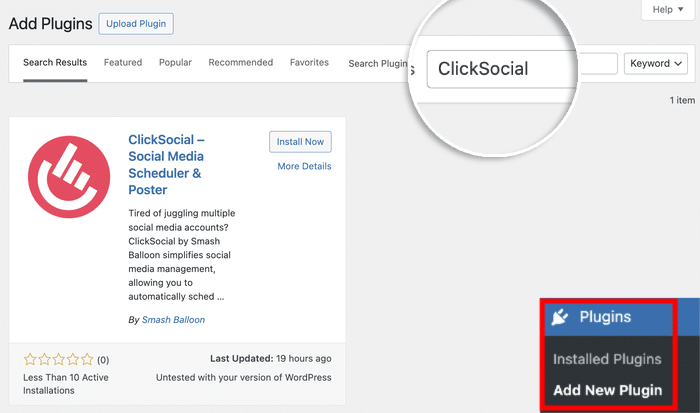
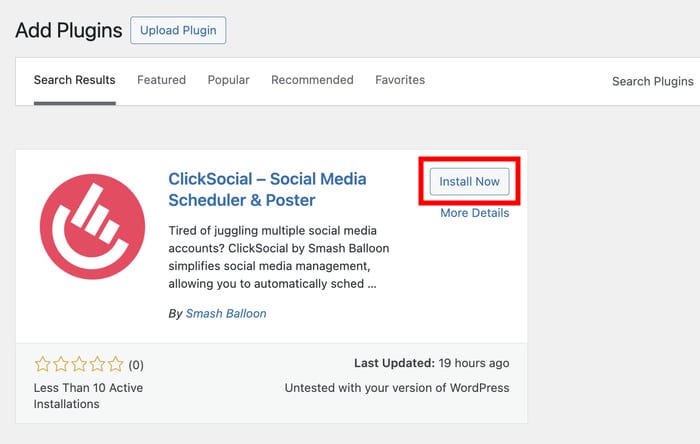
Once you see the plugin in the search results below, go ahead and click on Install Now.
Wait a few seconds for the plugin to install and then Activate it.
Step 2: Connect Your Website to ClickSocial
Go back to your ClickSocial dashboard and click on the Generate API Key button on the left.
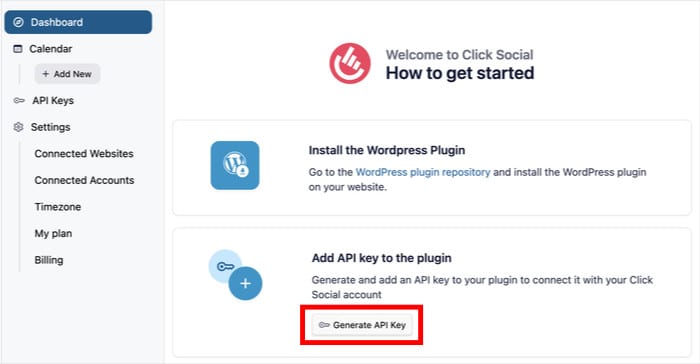
This page will show you a list of API keys that you’ve created. Each key is unique and lets you connect to a single website.
First, click on the Add New button.
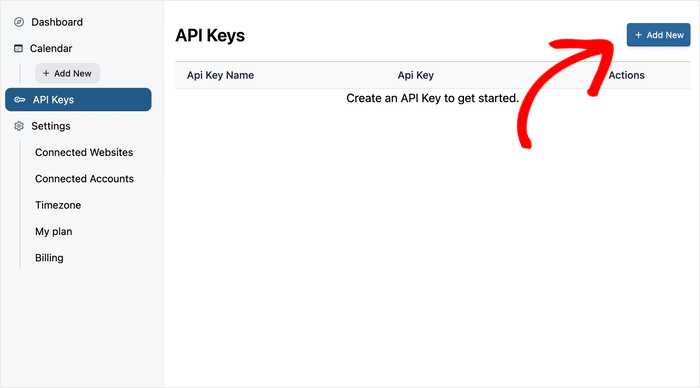
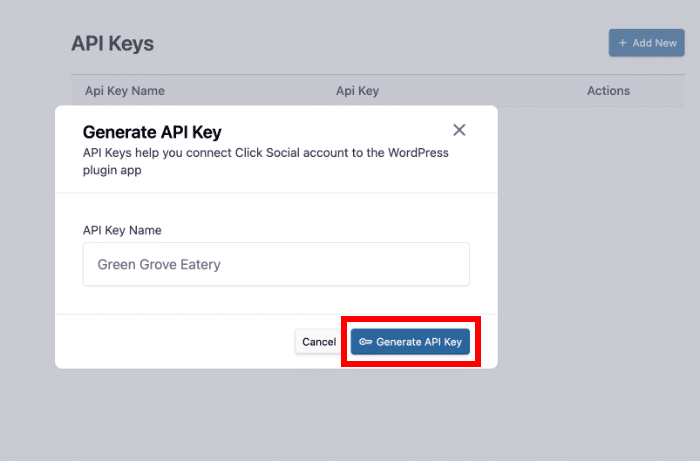
On the popup, you can enter a name for your website.
Then click on the Generate API Key button.
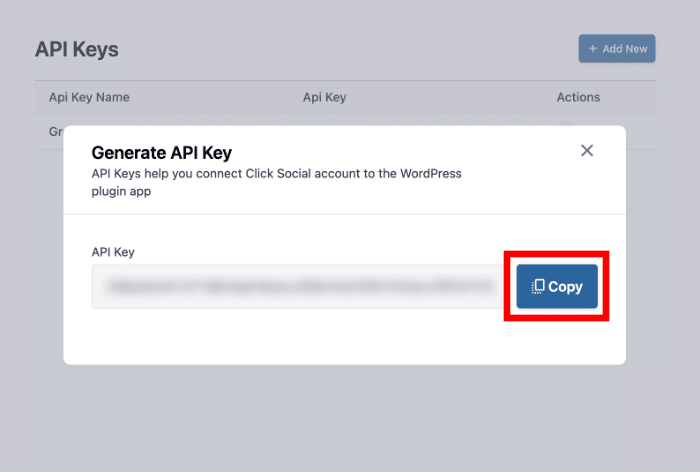
With that, you’ll have an API Key generated specifically for your website. Remember to save this key and keep it safe somewhere.
To proceed, click on Copy and return to your website.
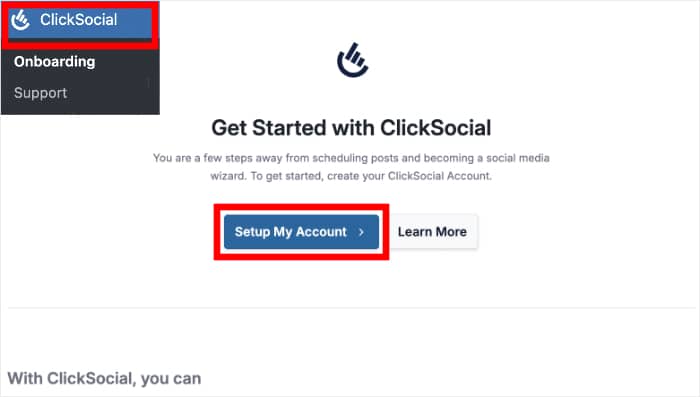
From your dashboard, click on the new ClickSocial menu on the sidebar.
On the new page, click on Setup My Account.
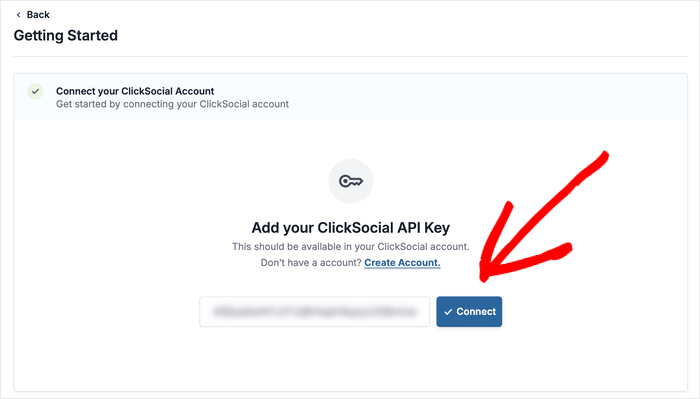
To connect your site to ClickSocial, paste the API key here and click on Connect.
Step 3: Connect Your Twitter Account
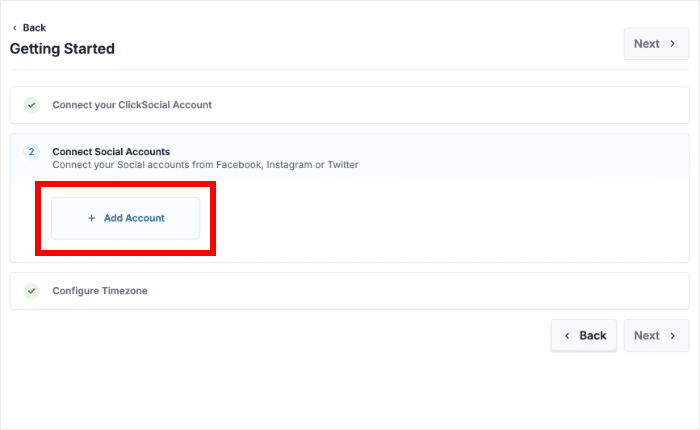
To start connecting Twitter with your website, first, click on the Add Account button.
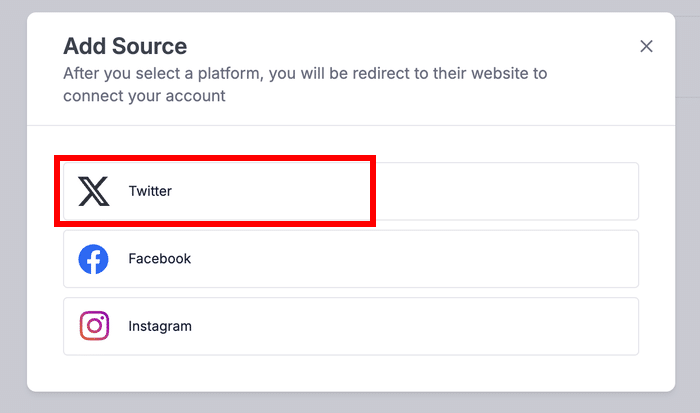
On the popup, you can pick the social media platform that you want to pick:
- Twitter/X
The good news is that the process is the same with each platform.
For now, select the Twitter option on the popup.
After you do that, the plugin will redirect you to Twitter.
Here, you can click on Authorize app to finish connecting the account.
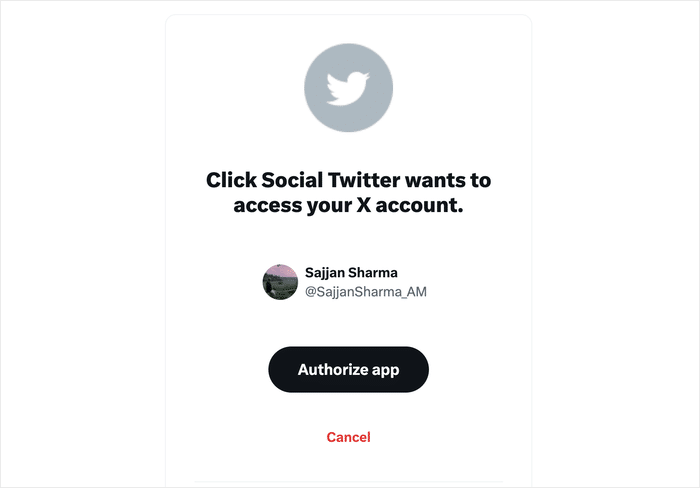
You’ll be back on your website after that. Before you continue, you can choose between your website’s time zone and your Twitter time zone.
Select the time zone and click on Finish Setup.
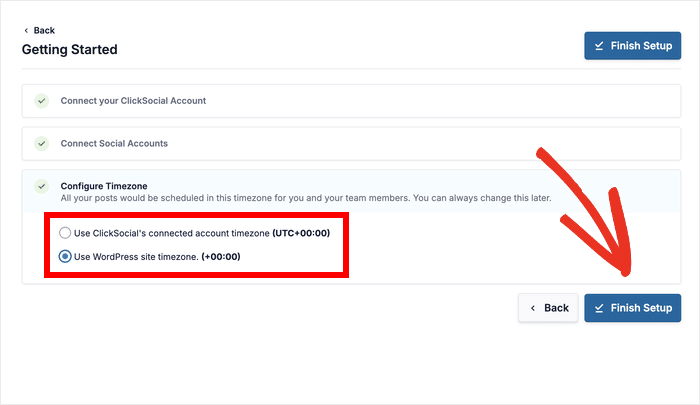
Step 4: Set Up Your Twitter Calendar
Next, you can see your post calendar. Here, you can find your scheduled tweets, published tweets, and drafts.
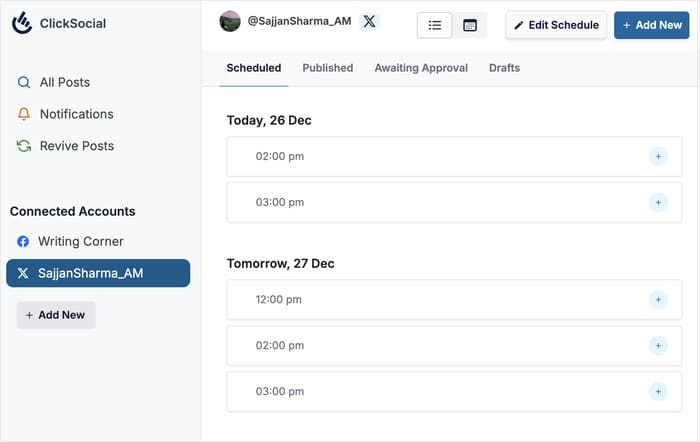
First, let’s create a schedule for the Twitter content you’ll create.
Start by clicking on Edit Schedule.
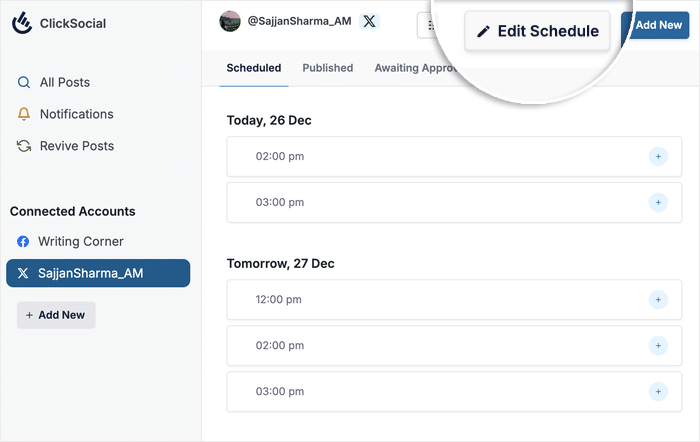
On the popup, use the checkboxes on the left to select the days when you want to make new tweets.
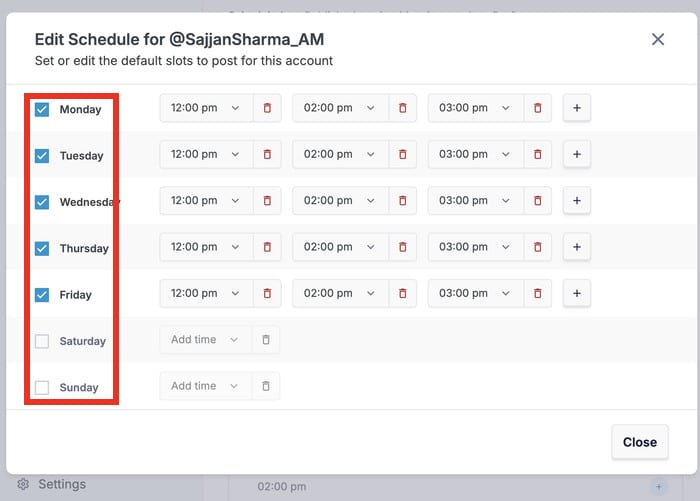
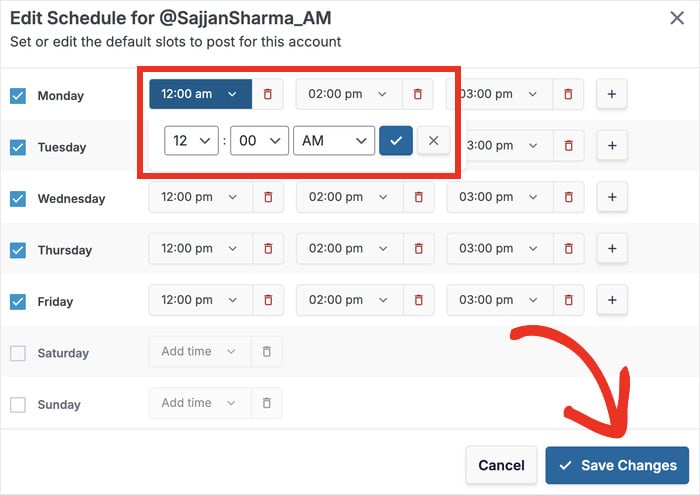
For each day, use the dropdown menu if you would like to change the time slots.
You can also add new slots using the plus (+) icon and remove slots by clicking on the red trash icon.
Step 5: Schedule Your Twitter Post
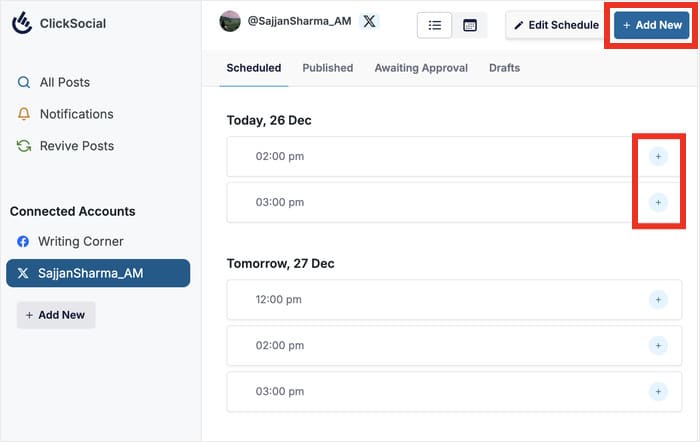
To start drafting your tweet, click on the plus icon (+) on a time slot or use the Add New button.
Now, you can freely enter the text of your Twitter post on the composer.
Feel free to add any hashtags or links you want to include.
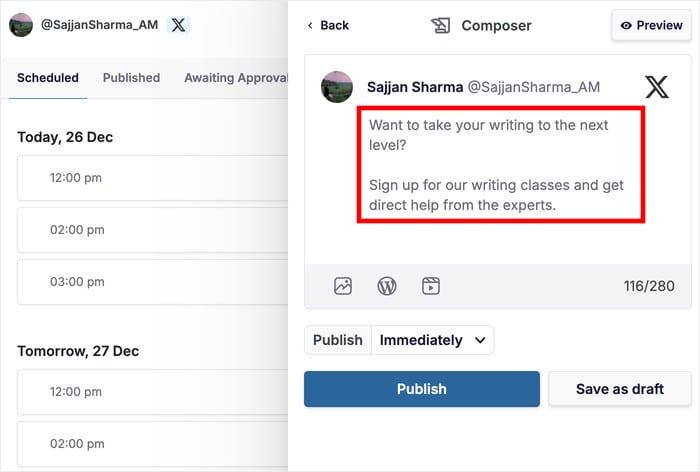
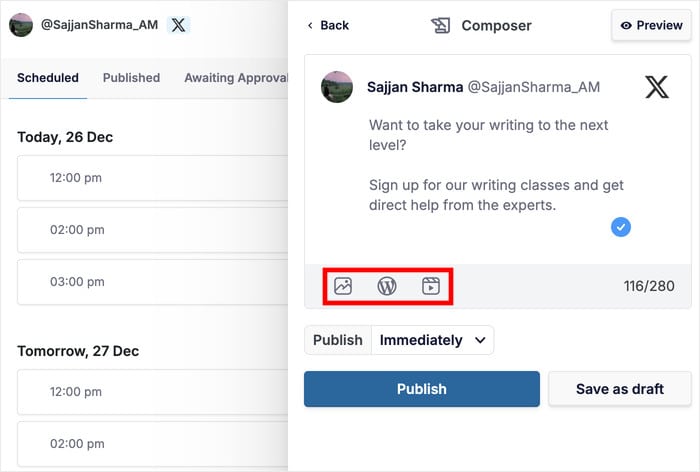
Next, you can use the buttons below the text to choose the type of content you want to add:
- Photo
- WordPress Post
- Video
For example, I’ll use the WordPress Icon to add a WordPress post to this tweet.
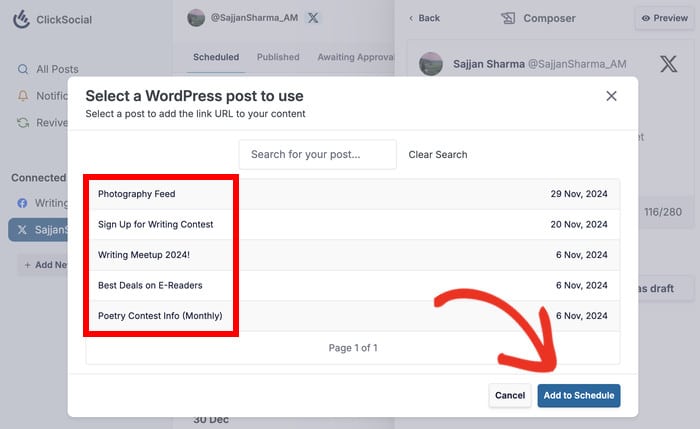
On the popup, select the WordPress post you intend to link and click on Add to Schedule.
Just like that, you can add engaging photos and videos to a tweet.
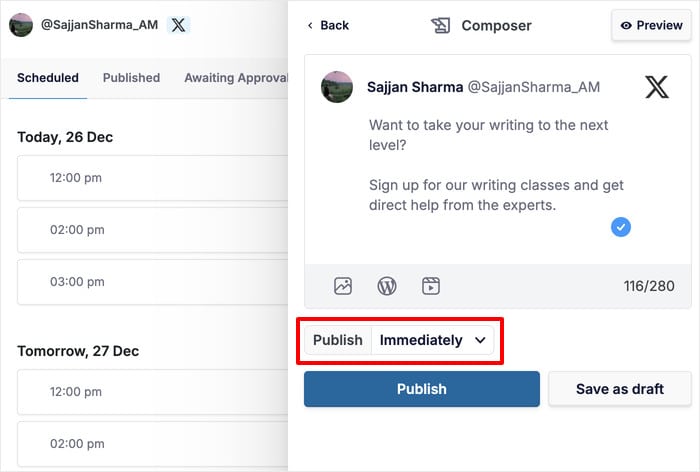
Finally, use the dropdown menu below to select the time slot for this post.
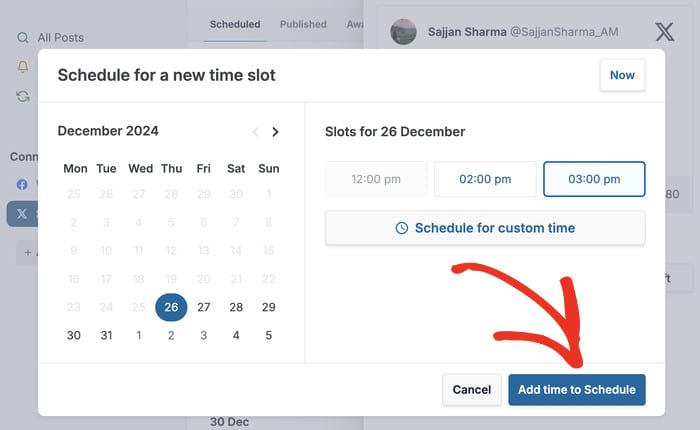
Use the calendar to pick the day and select the time slot on the right.
You can also manually pick a time by clicking on Schedule for custom time.
Finally, click on the Add time to Schedule once you’re happy with the time.
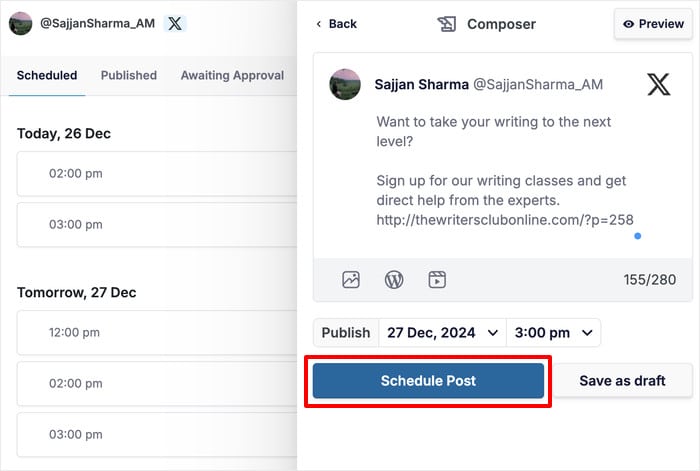
Finally, hit the Schedule Post button, and you can let the plugin handle the rest.
As you can see, it’s a great fix if your scheduled Twitter posts aren’t working normally.
And there you go!
Just try out these steps and you can start scheduling Twitter content once again. Plus, these are all simple fixes that take very little time.
For a consistent and trustworthy way of scheduling content, using a tool like ClickSocial can be the best option. Just like that, you can draft and schedule posts from the comfort of your website.
Ready to schedule your Twitter content? Get your copy of ClickSocial here.
If you want to get more out of social media, check out this guide with the best ways of making money on Twitter.
More Social Media Marketing Tips and Guides
- Best Social Media Analytics Tools for Online Growth (Expert Picks)
- How to Auto Repost Your Old WordPress Articles to Facebook
- TikTok is Your Secret Weapon: Best TikTok Ideas for Small Businesses
- How to Embed Multiple TikTok Videos at Once (Zero Coding Method)
