Social Wall
 Feed Analytics


How to create a review feed with Reviews Feed Pro, choosing Facebook, Google, TripAdvisor or Yelp as your source.
Would you like to show your Google, Yelp, or other customer reviews on your WordPress site?
In this guide, we’ll walk you through creating your first reviews feed, from adding a review source to choosing a template and saving your feed. All you need is Reviews Feed and the business you’d like to show reviews for.
Before you get started, make sure the free version or the paid version of Reviews Feed is installed and activated on your WordPress site.
- Choosing a Review Source
- Adding Your First Source
- Choosing a Template
- Customizing and Saving Your Feed
- Embedding Your Feed
- Frequently Asked Questions
Choosing a Review Source
Every feed shows reviews from one or more sources, such as your business on Google or Yelp. Which sources you can use depends on your license level.
| Source | License level | What Reviews Feed asks for |
|---|---|---|
| Free and paid versions | Your business’s Google Place ID | |
| Yelp | Free and paid versions | The URL of your business’s Yelp page |
| Plus or higher | A connection to your Facebook account | |
| Trustpilot | Plus or higher | The URL of your Trustpilot review page |
| WooCommerce | Plus or higher | A product from your store, with WooCommerce active on your site |
| Easy Digital Downloads | Plus or higher | A download from your store, with Easy Digital Downloads and its EDD Reviews extension active on your site |
| AliExpress | Plus or higher | The URL of an AliExpress product |
| TripAdvisor | Elite | The URL of your TripAdvisor page, plus an optional TripAdvisor API key |
| WordPress.org | Elite | The URL of a WordPress.org plugin or theme page |
| Airbnb | Elite | The URL of your Airbnb listing |
| Booking.com | Elite | The URL of your Booking.com hotel page |
Google and Yelp work without an API key. Reviews Feed fetches their reviews for you. To learn what to expect from these sources, see our guide on using Google and Yelp reviews without an API key.
In the paid version, Reviews Feed updates these reviews once a week because of Google’s and Yelp’s API pricing. You can add up to two Google sources and five Yelp sources this way. If you’d like your reviews to update more often or need more sources, you can add your own key.
See our guides on creating a Google API key and creating a Yelp API key. Once you have a key, the Manage API Keys section of our settings reference shows where it goes.
Next, we’ll look at how adding a source works in the free version.
Using the Free Version
In the free version, you can add one Google or Yelp source without an API key. Before you add it, Reviews Feed asks you to verify your email address.
Reviews Feed then fetches the latest ten reviews from that source. To fetch more reviews or fetch them again, you’ll need your own API key or a paid license level.
Note: If you try to add a second source in the free version, Reviews Feed offers to add an API key or upgrade your plan.
Next, we’ll add your first source.
Adding Your First Source
To get started, we’ll create a new feed and give it a source.
From your WordPress admin sidebar, go to Reviews Feed » All Feeds.
At the top of the All Feeds page, click Add New.
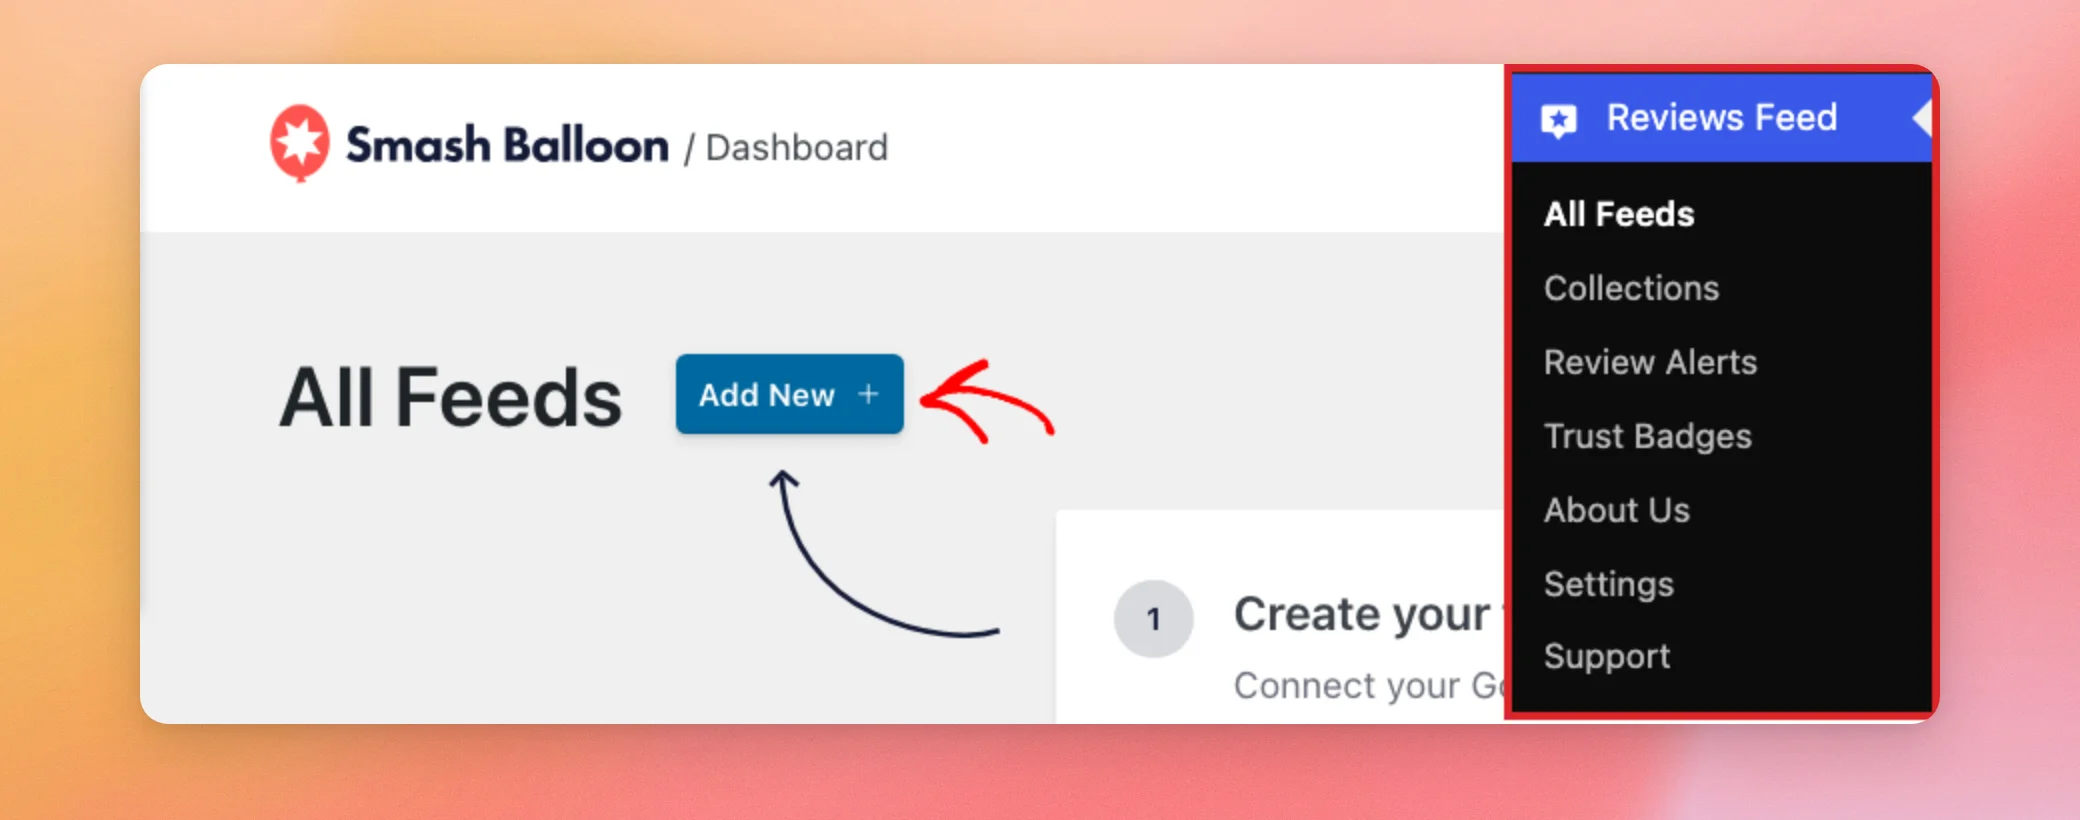
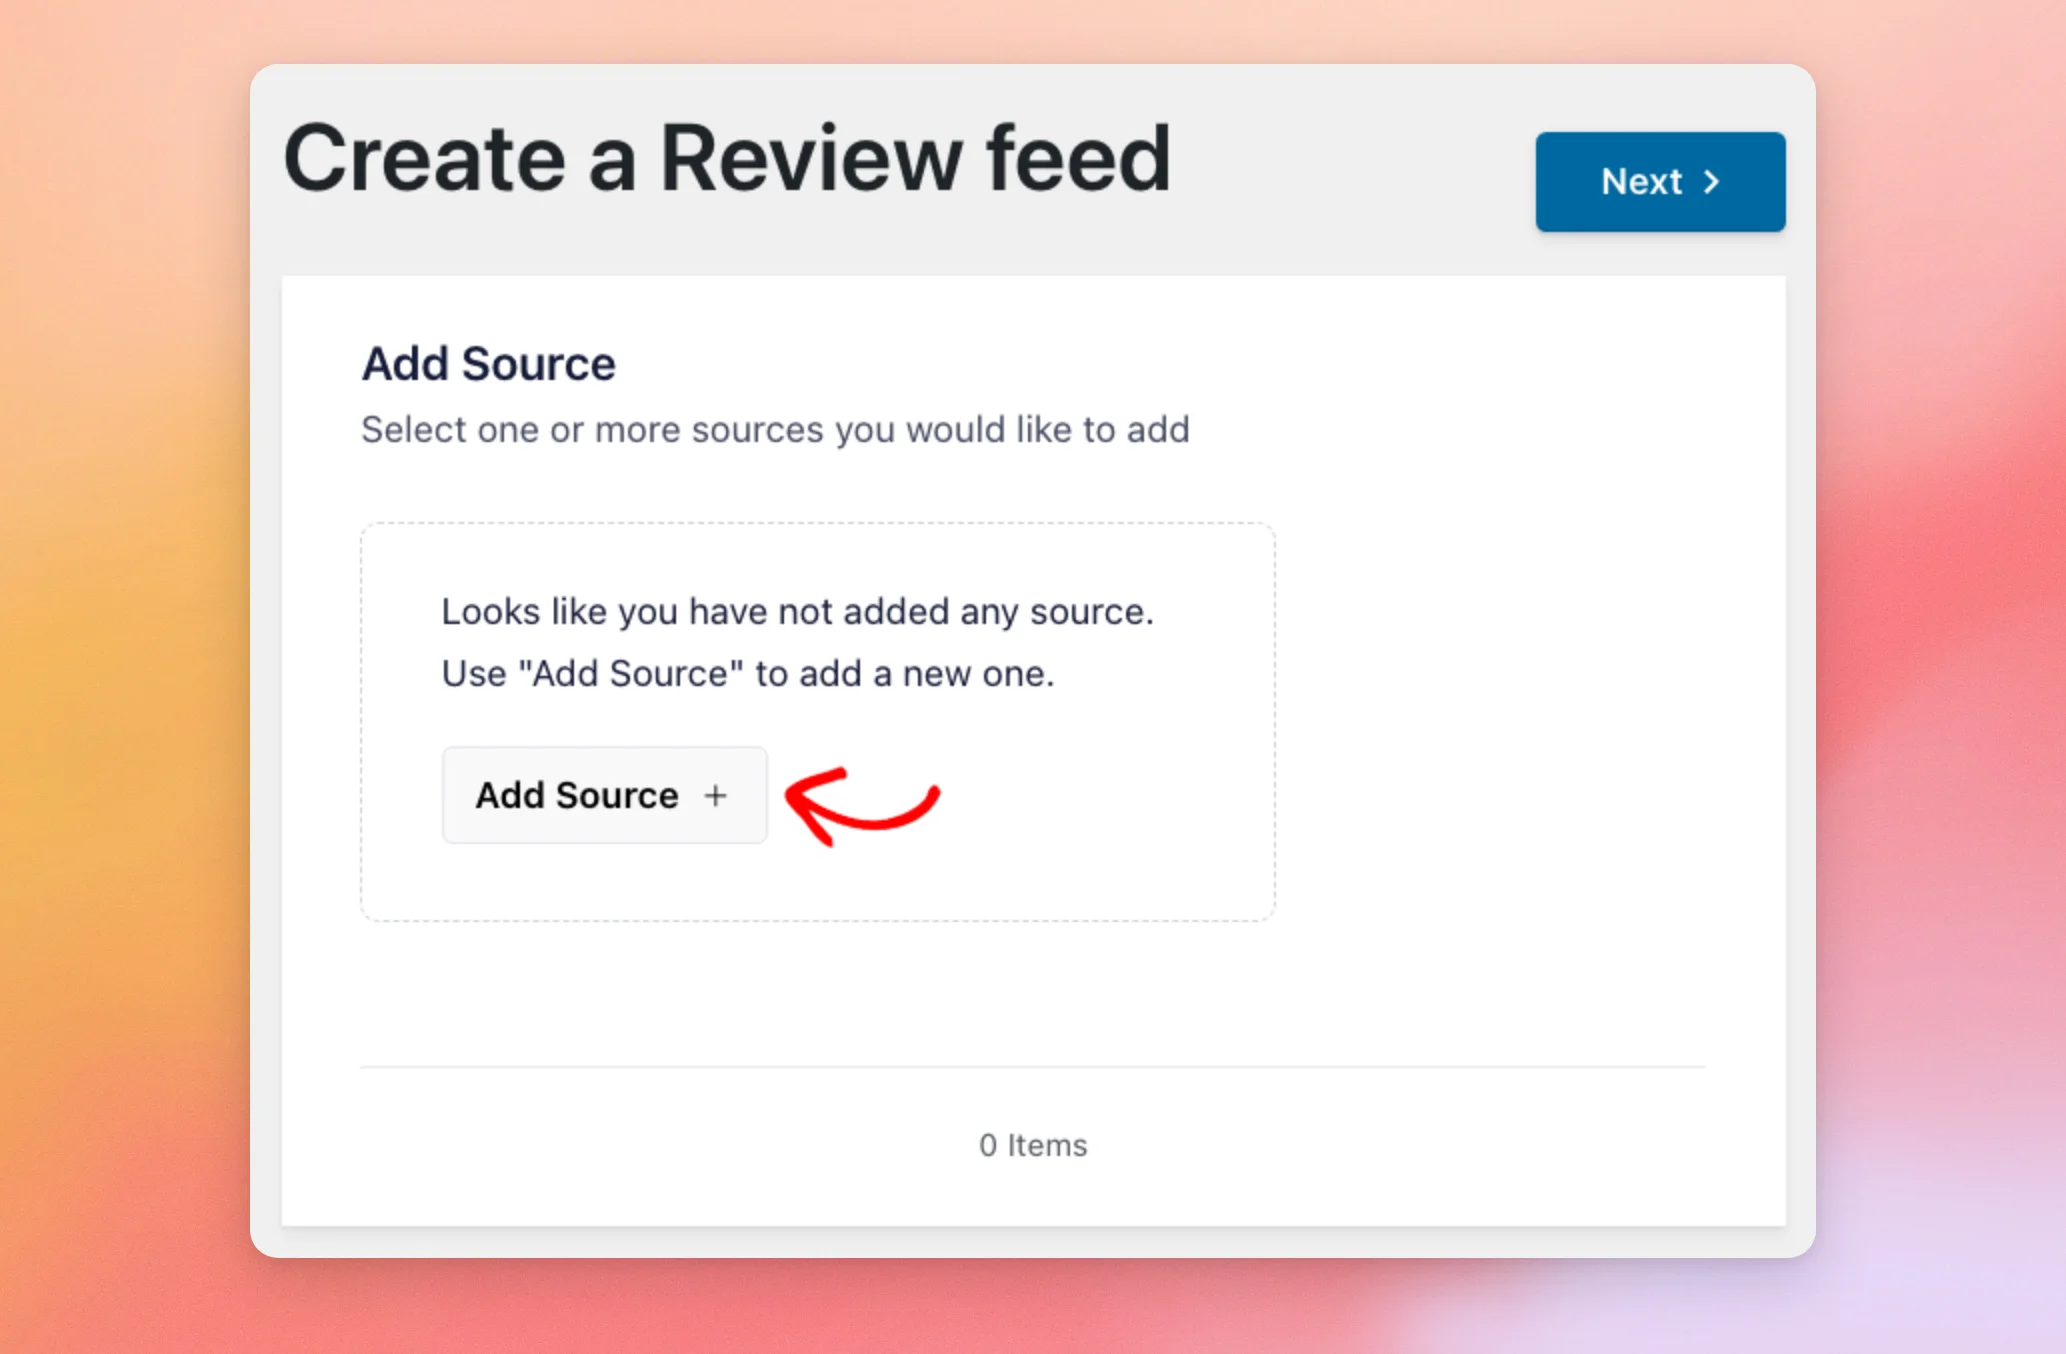
This opens the Create a Review feed screen. Its first step is where you choose the sources your feed shows.
Since you haven’t added a source yet, click Add Source.
The Add Sources window opens with a tile for each review source. Sources that come with a higher plan show as upgrade tiles.
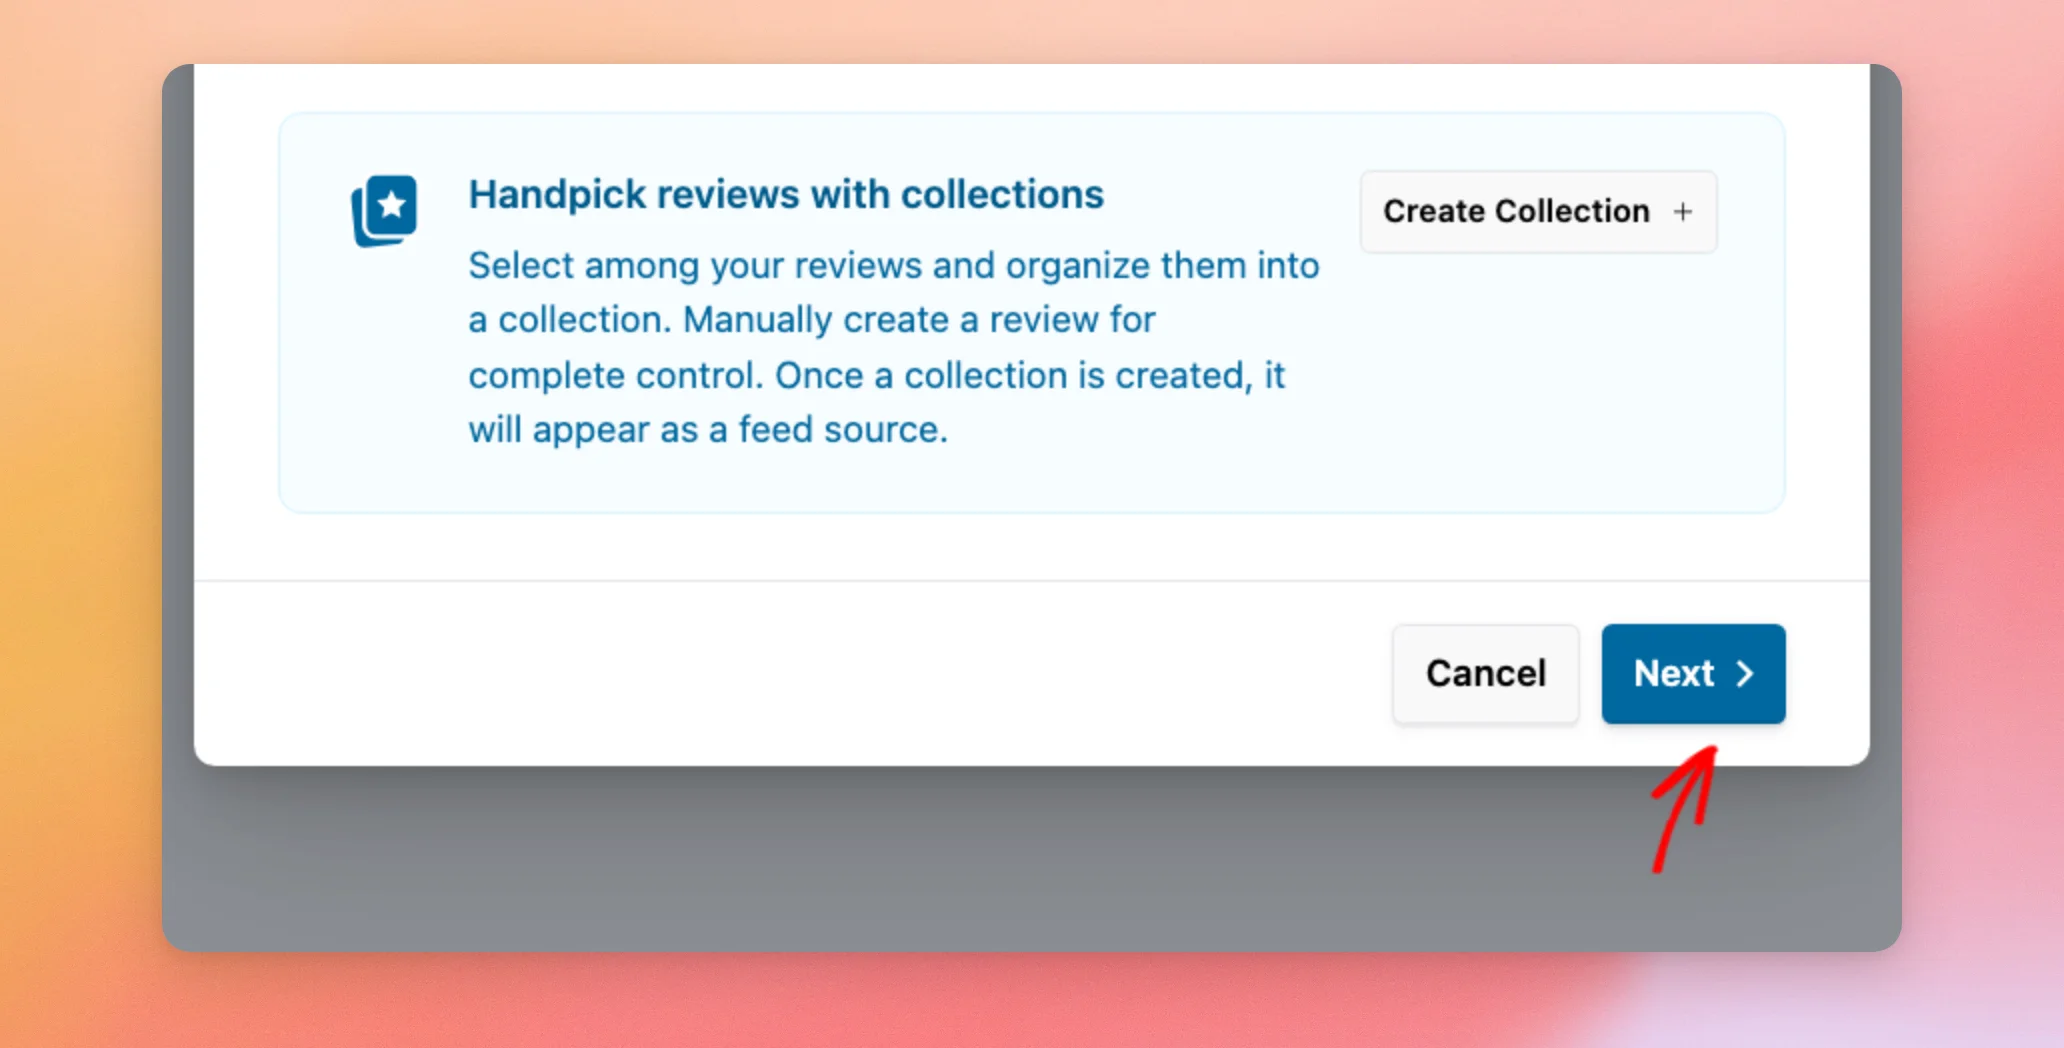
Below the tiles, the window also lets you handpick reviews with collections. A collection you create appears as a source you can select.
For this example, click the Google tile.
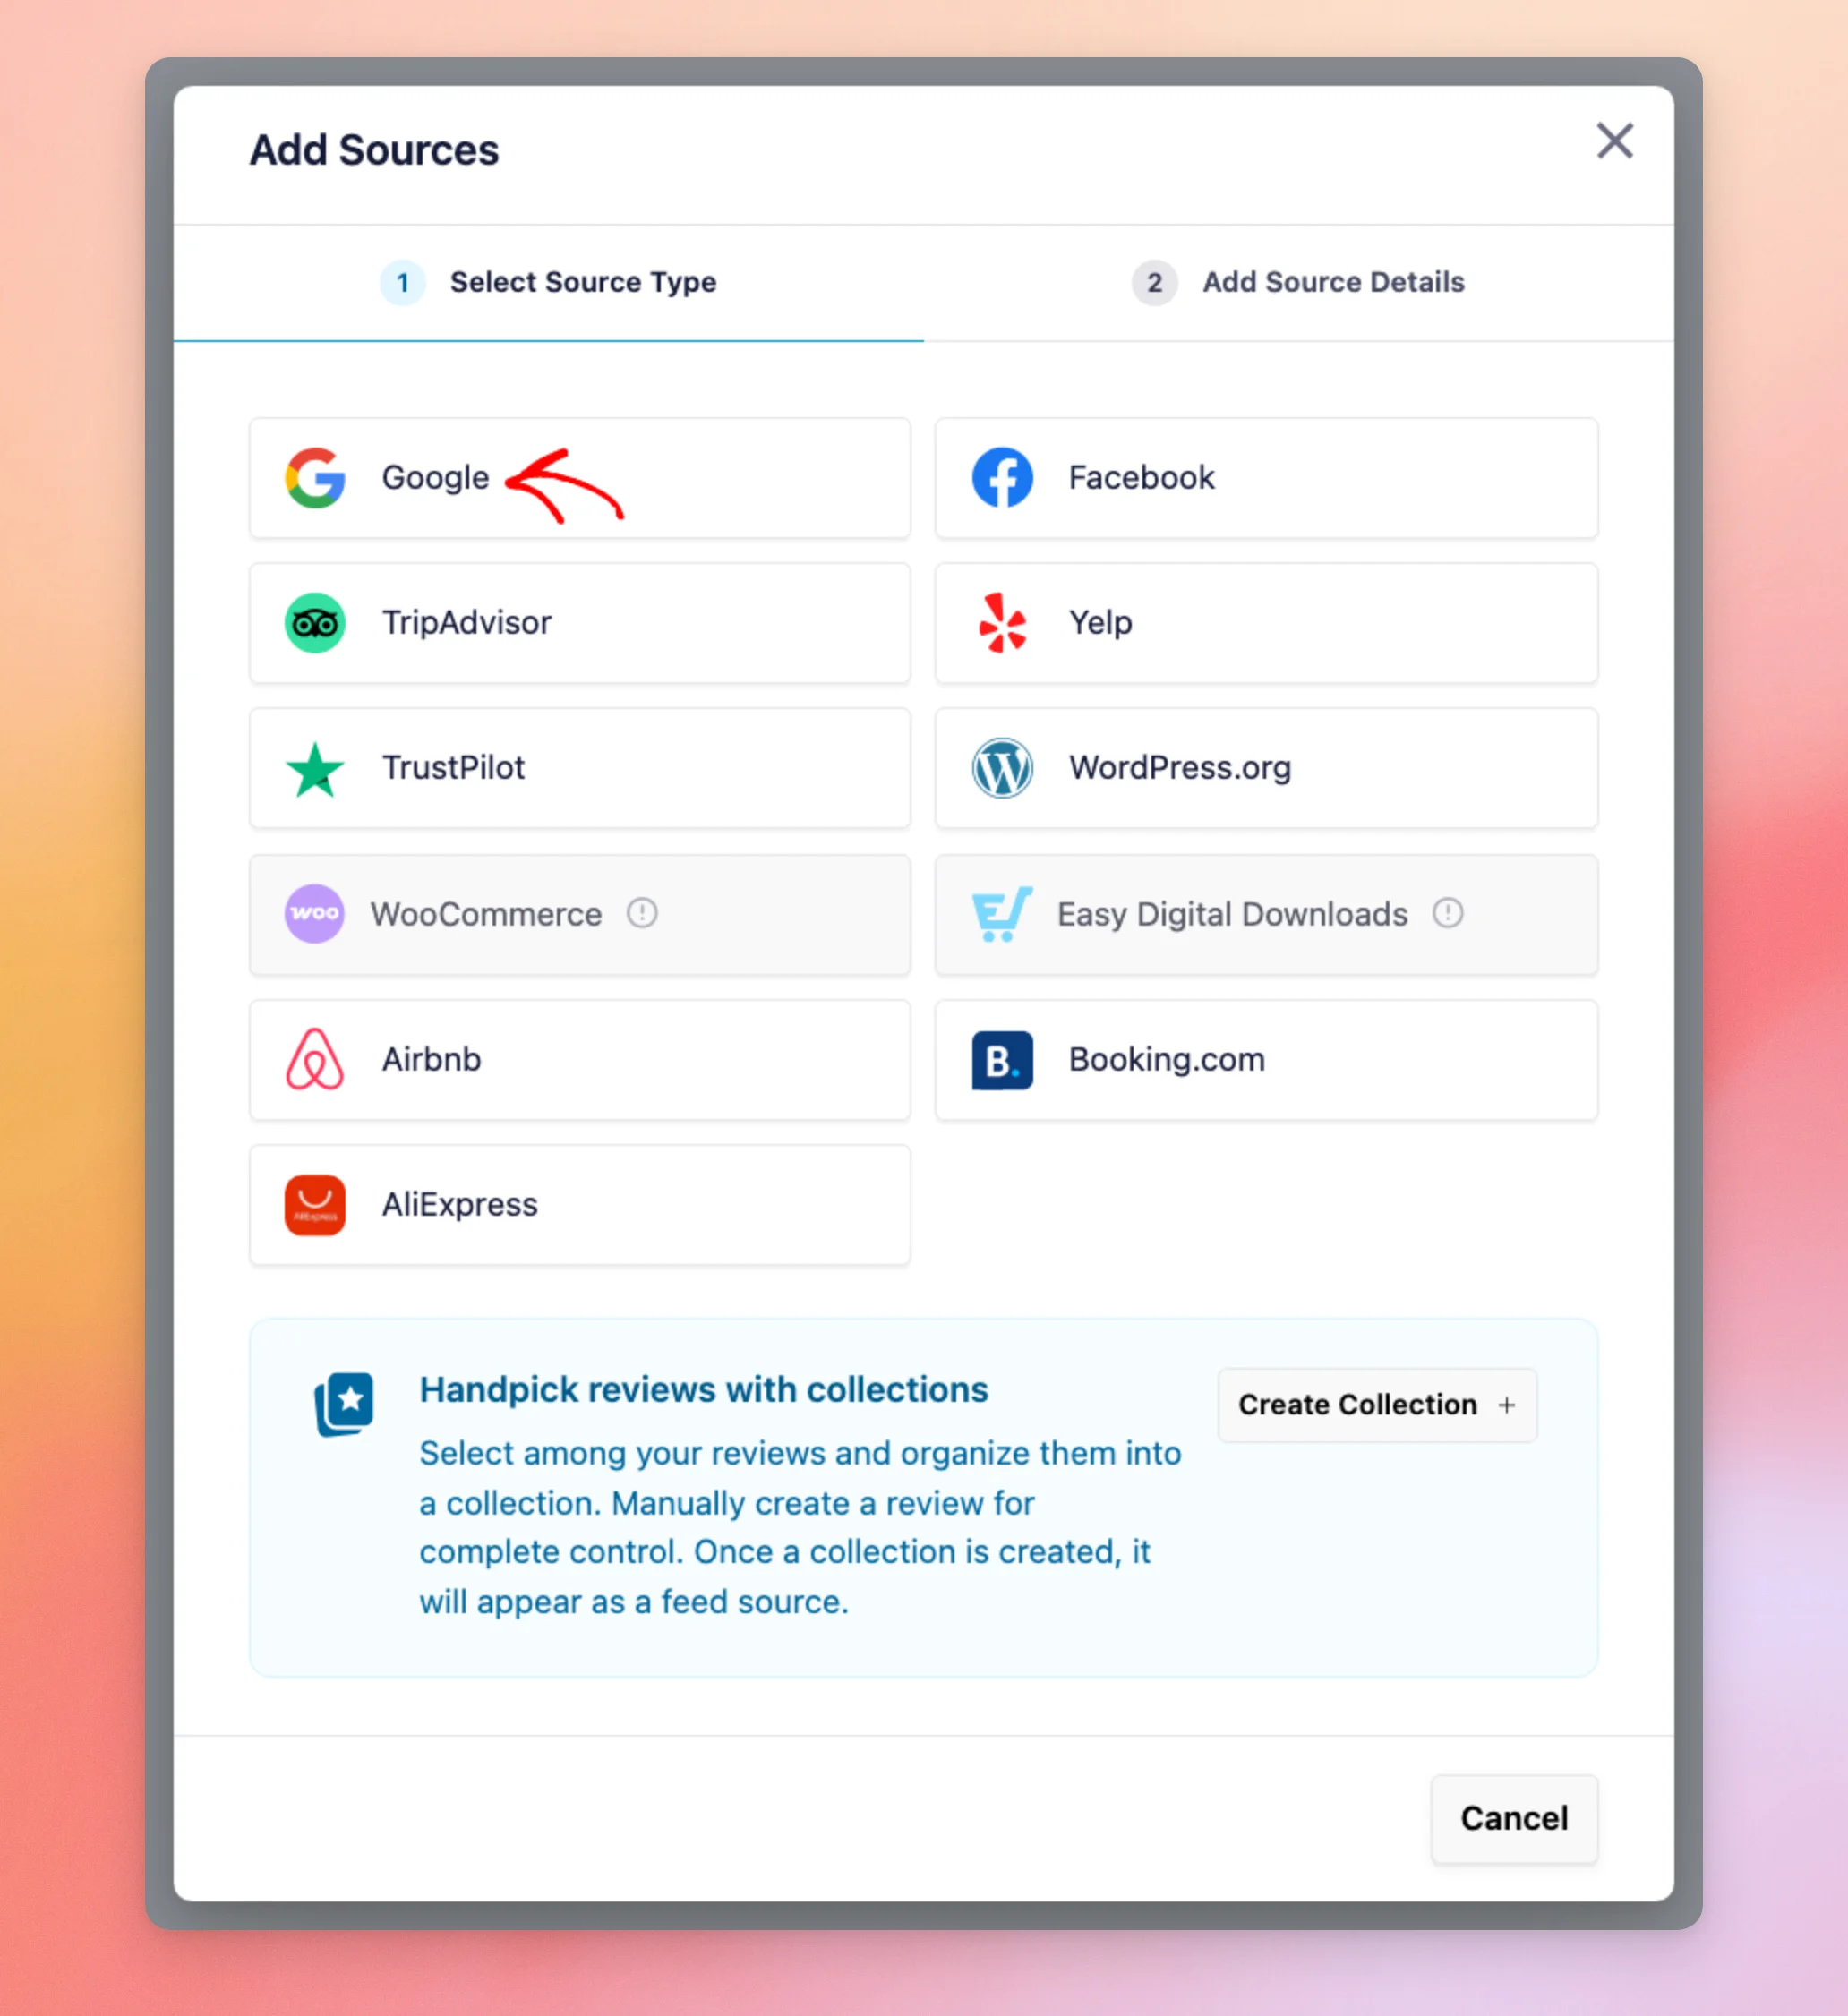
Note: The WooCommerce and Easy Digital Downloads tiles show as unavailable until their plugins are active on your site. Easy Digital Downloads also needs its EDD Reviews extension.
Once you’ve chosen a tile, click Next at the bottom of the window.
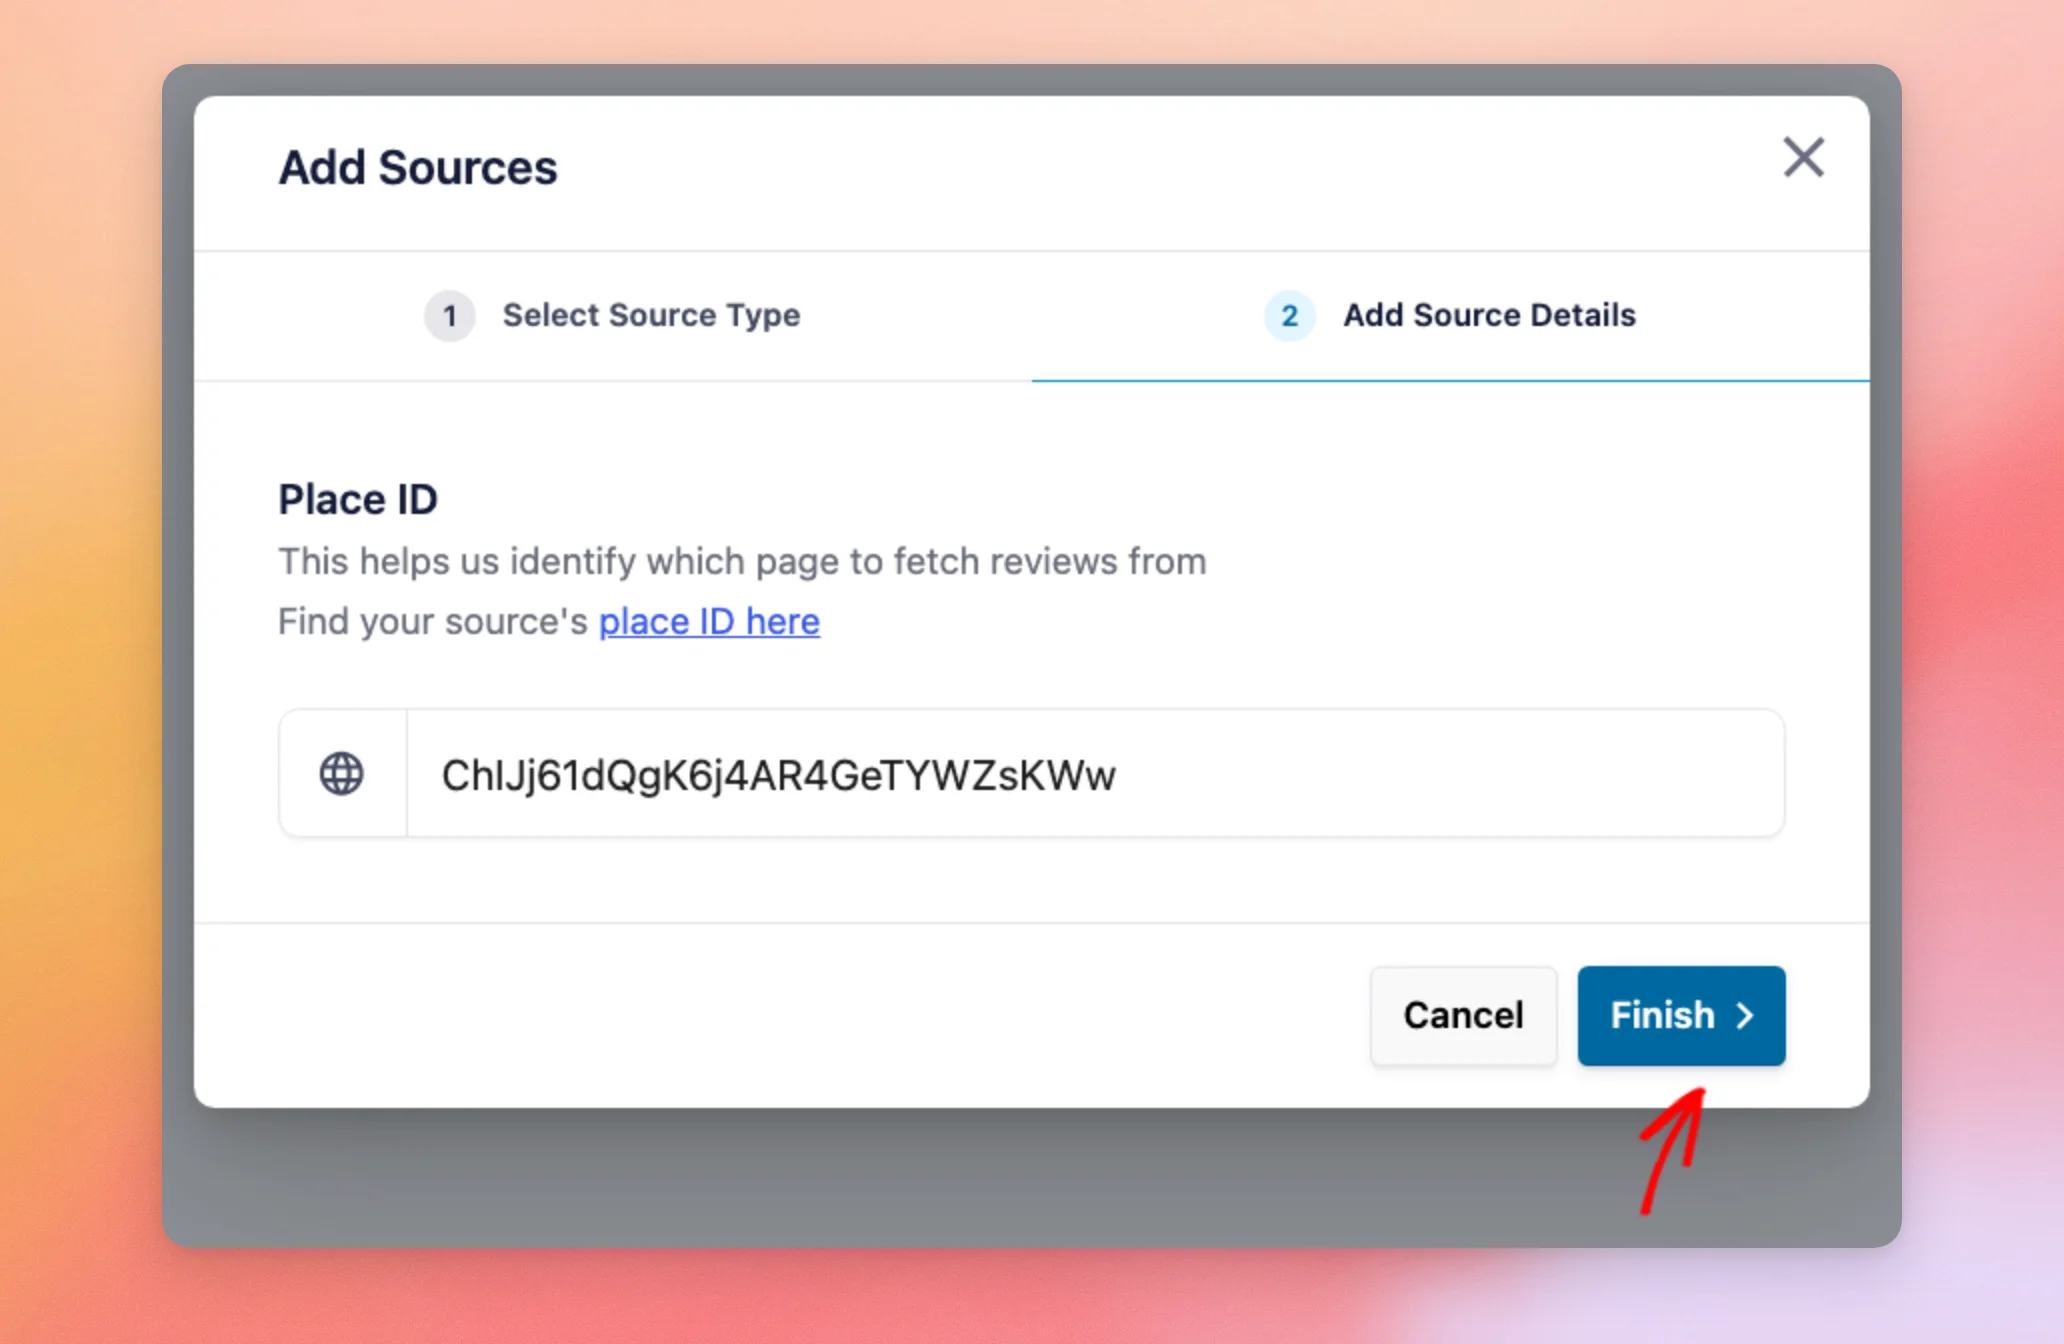
On the Add Source Details step, Reviews Feed asks which business to show reviews for. For Google, that’s your business’s Place ID, the code Google uses for each place on Google Maps. To find yours, see our guide on getting your Google Place ID.
For a Yelp source, this field is called Page URL instead. It takes the URL of your business’s page on Yelp.
Once you have your Place ID, paste it into the Place ID field. When you’re done, click Finish.
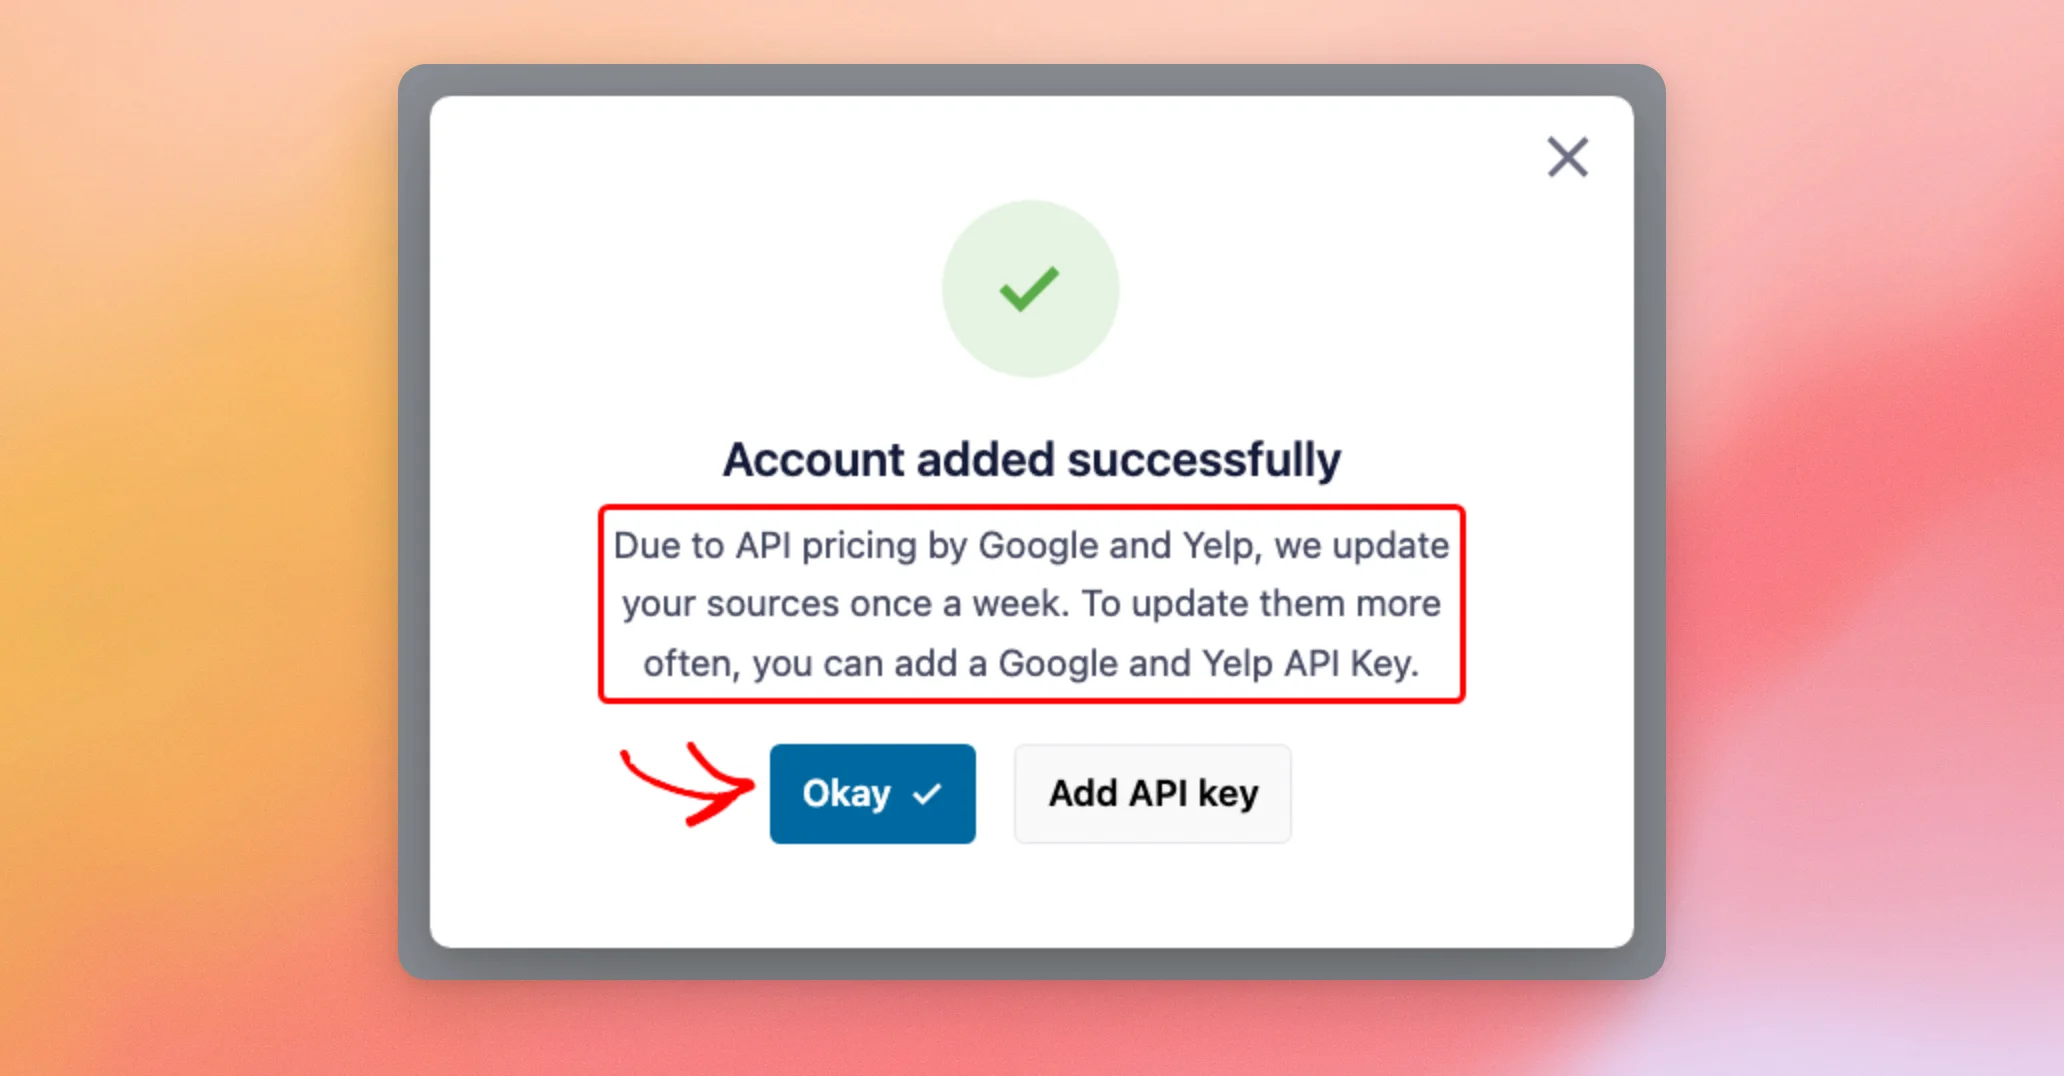
Reviews Feed adds your source and confirms it in a new window. In the paid version, the window notes that sources added without an API key update once a week, with a button to add a key. In the free version, it notes that Reviews Feed fetches the latest ten reviews.
To go back to your feed, click Okay.
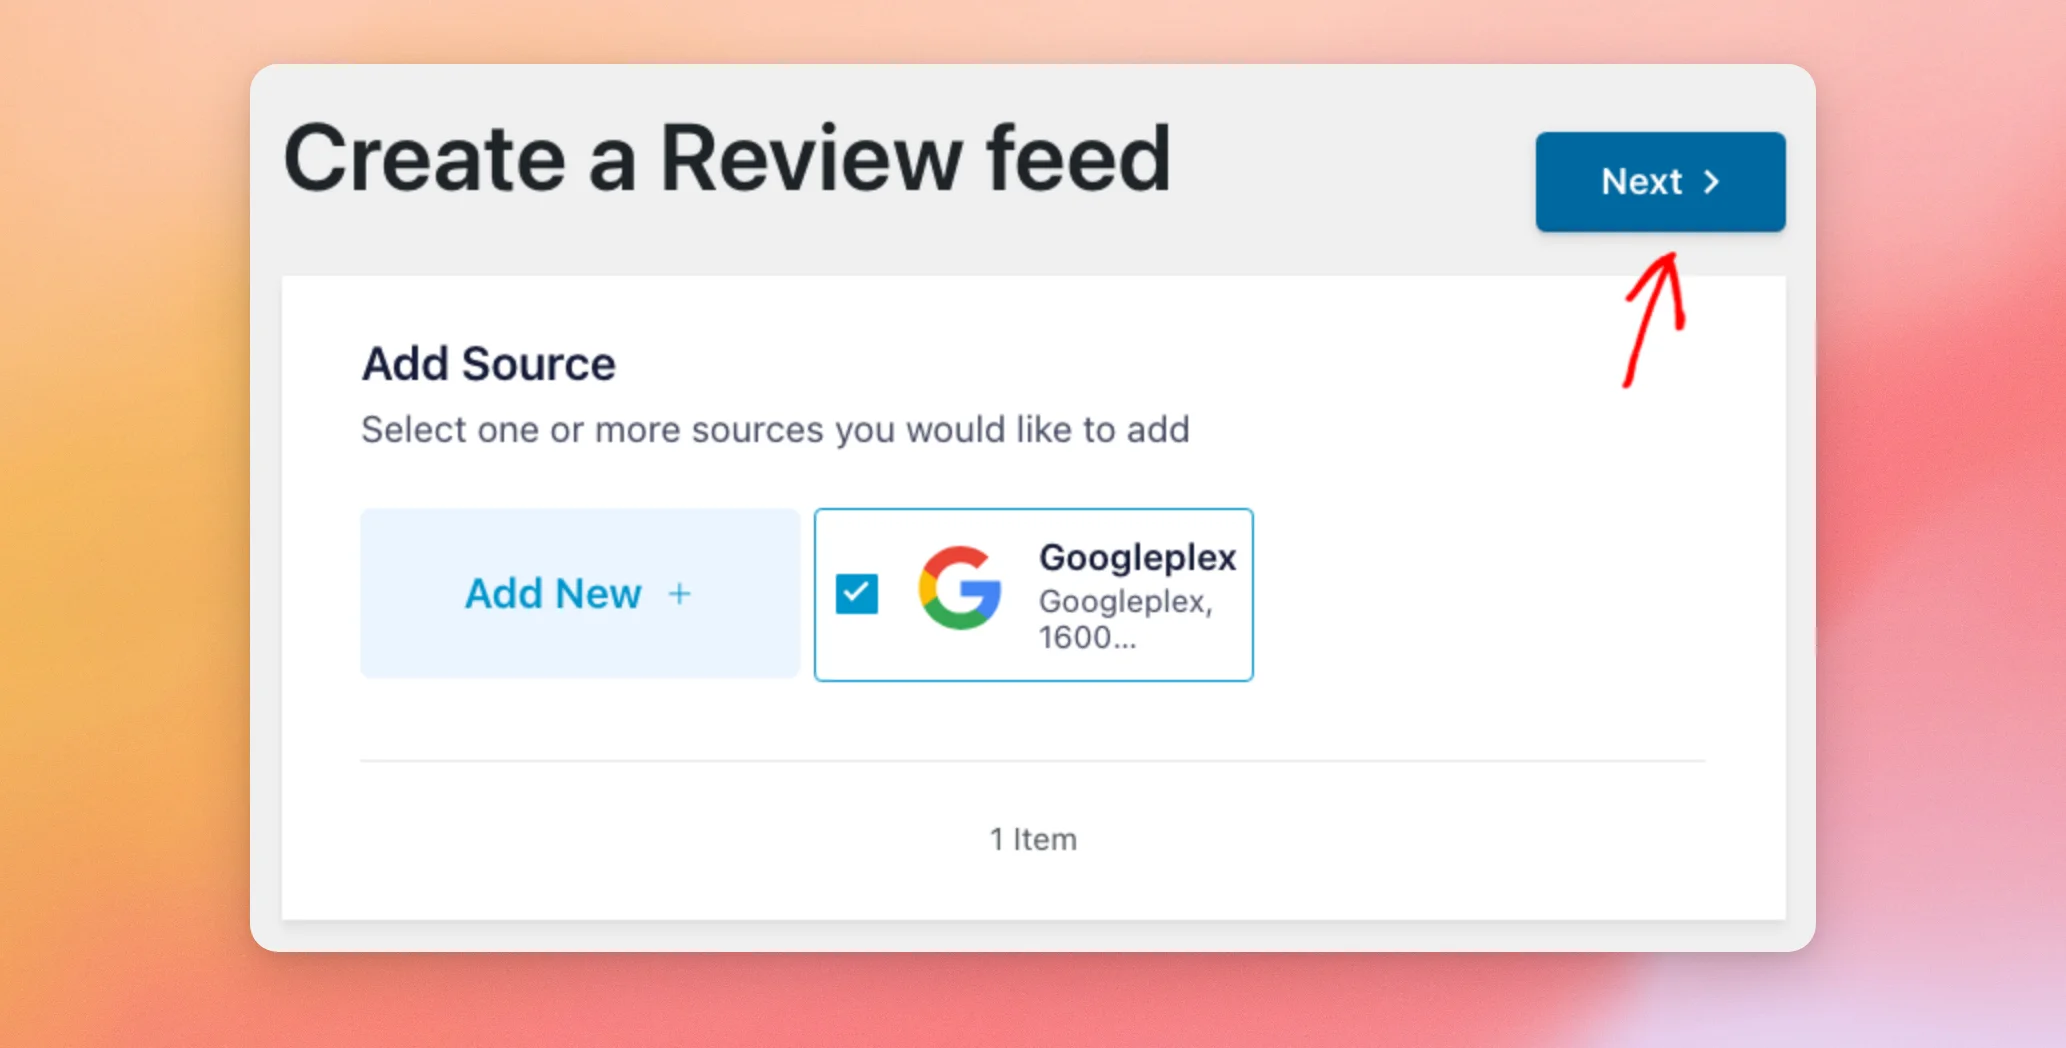
Your new source now shows on the Add Source step. Make sure it’s selected. A feed can show more than one source, so you can add and select others here too.
When your sources are selected, click Next at the top of the screen.
Your feed now has its first review source. Next, we’ll choose a template.
Choosing a Template
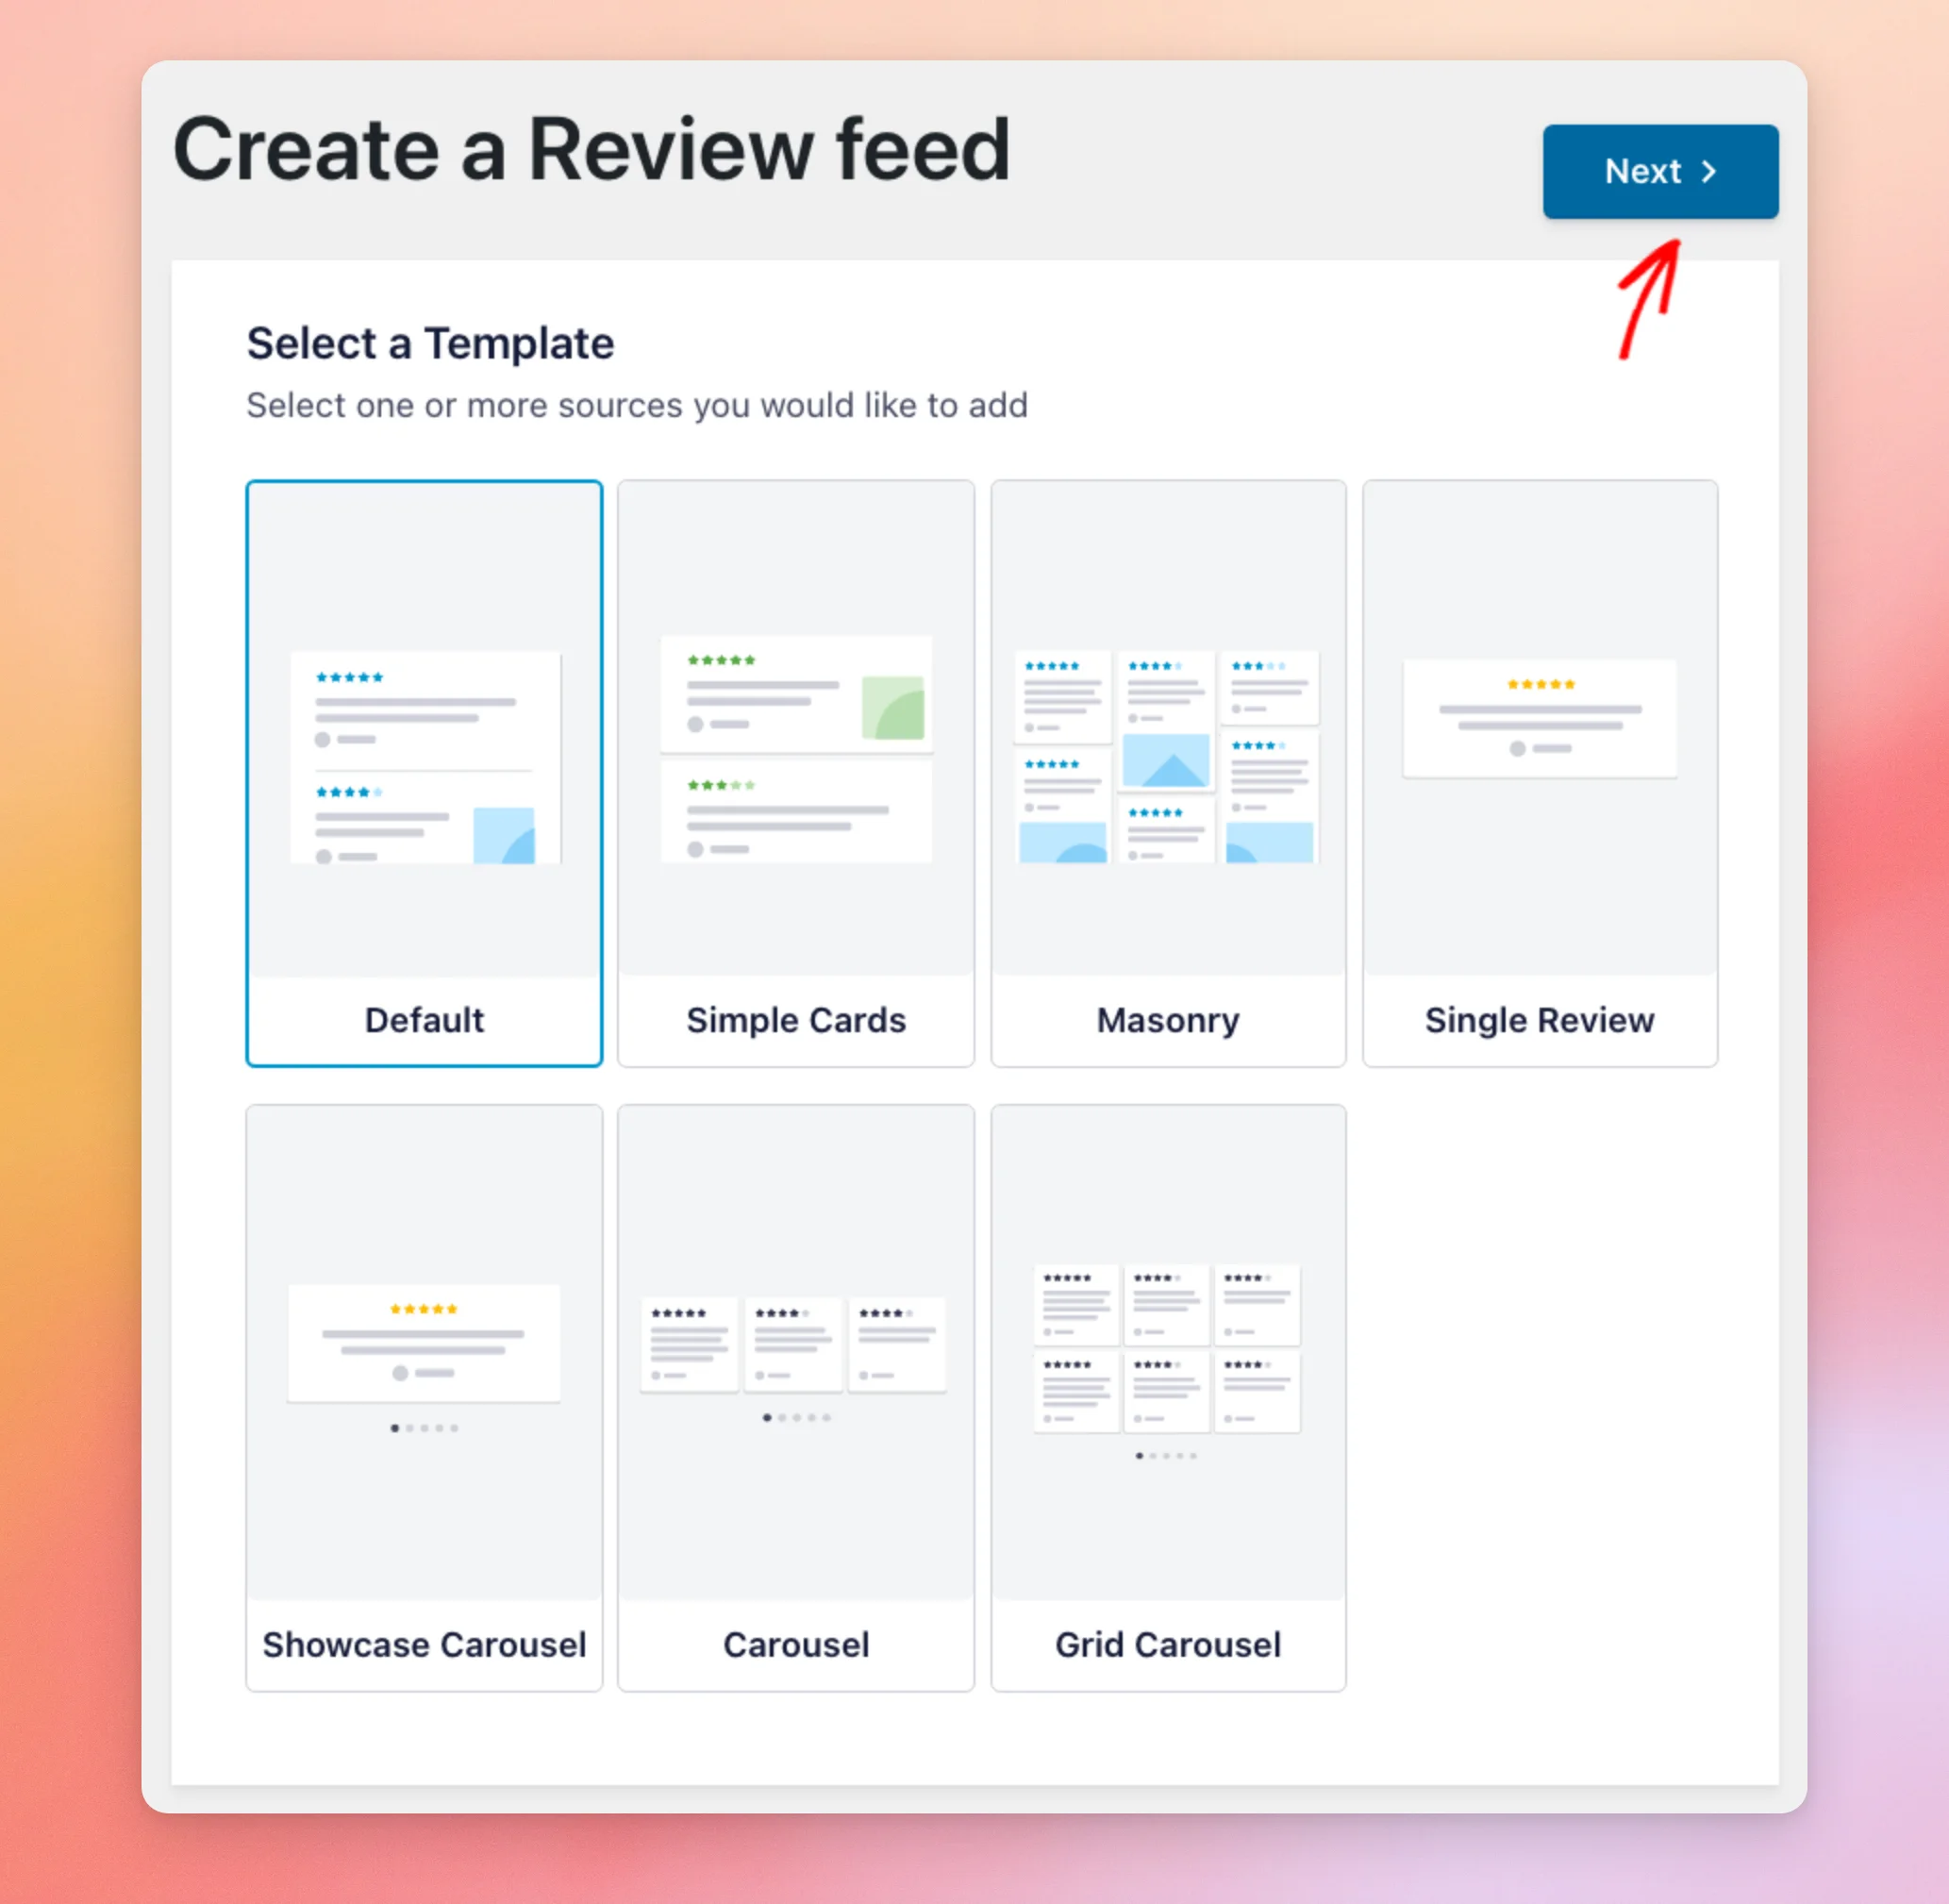
A template sets the layout for your reviews. Reviews Feed offers seven templates: Default, Simple Cards, Masonry, Single Review, Showcase Carousel, Carousel, and Grid Carousel.
The paid version includes all seven. The free version includes Default. The other templates show as upgrades.
Default is selected to start with. If you’re not sure which to pick, keep Default.
You can change it later in the feed editor. Because a new template can replace customizations you’ve made, it’s easiest to choose one now.
Once you’ve picked a template, click Next.
Your feed now has a layout to start from. Next, we’ll customize and save your feed.
Customizing and Saving Your Feed
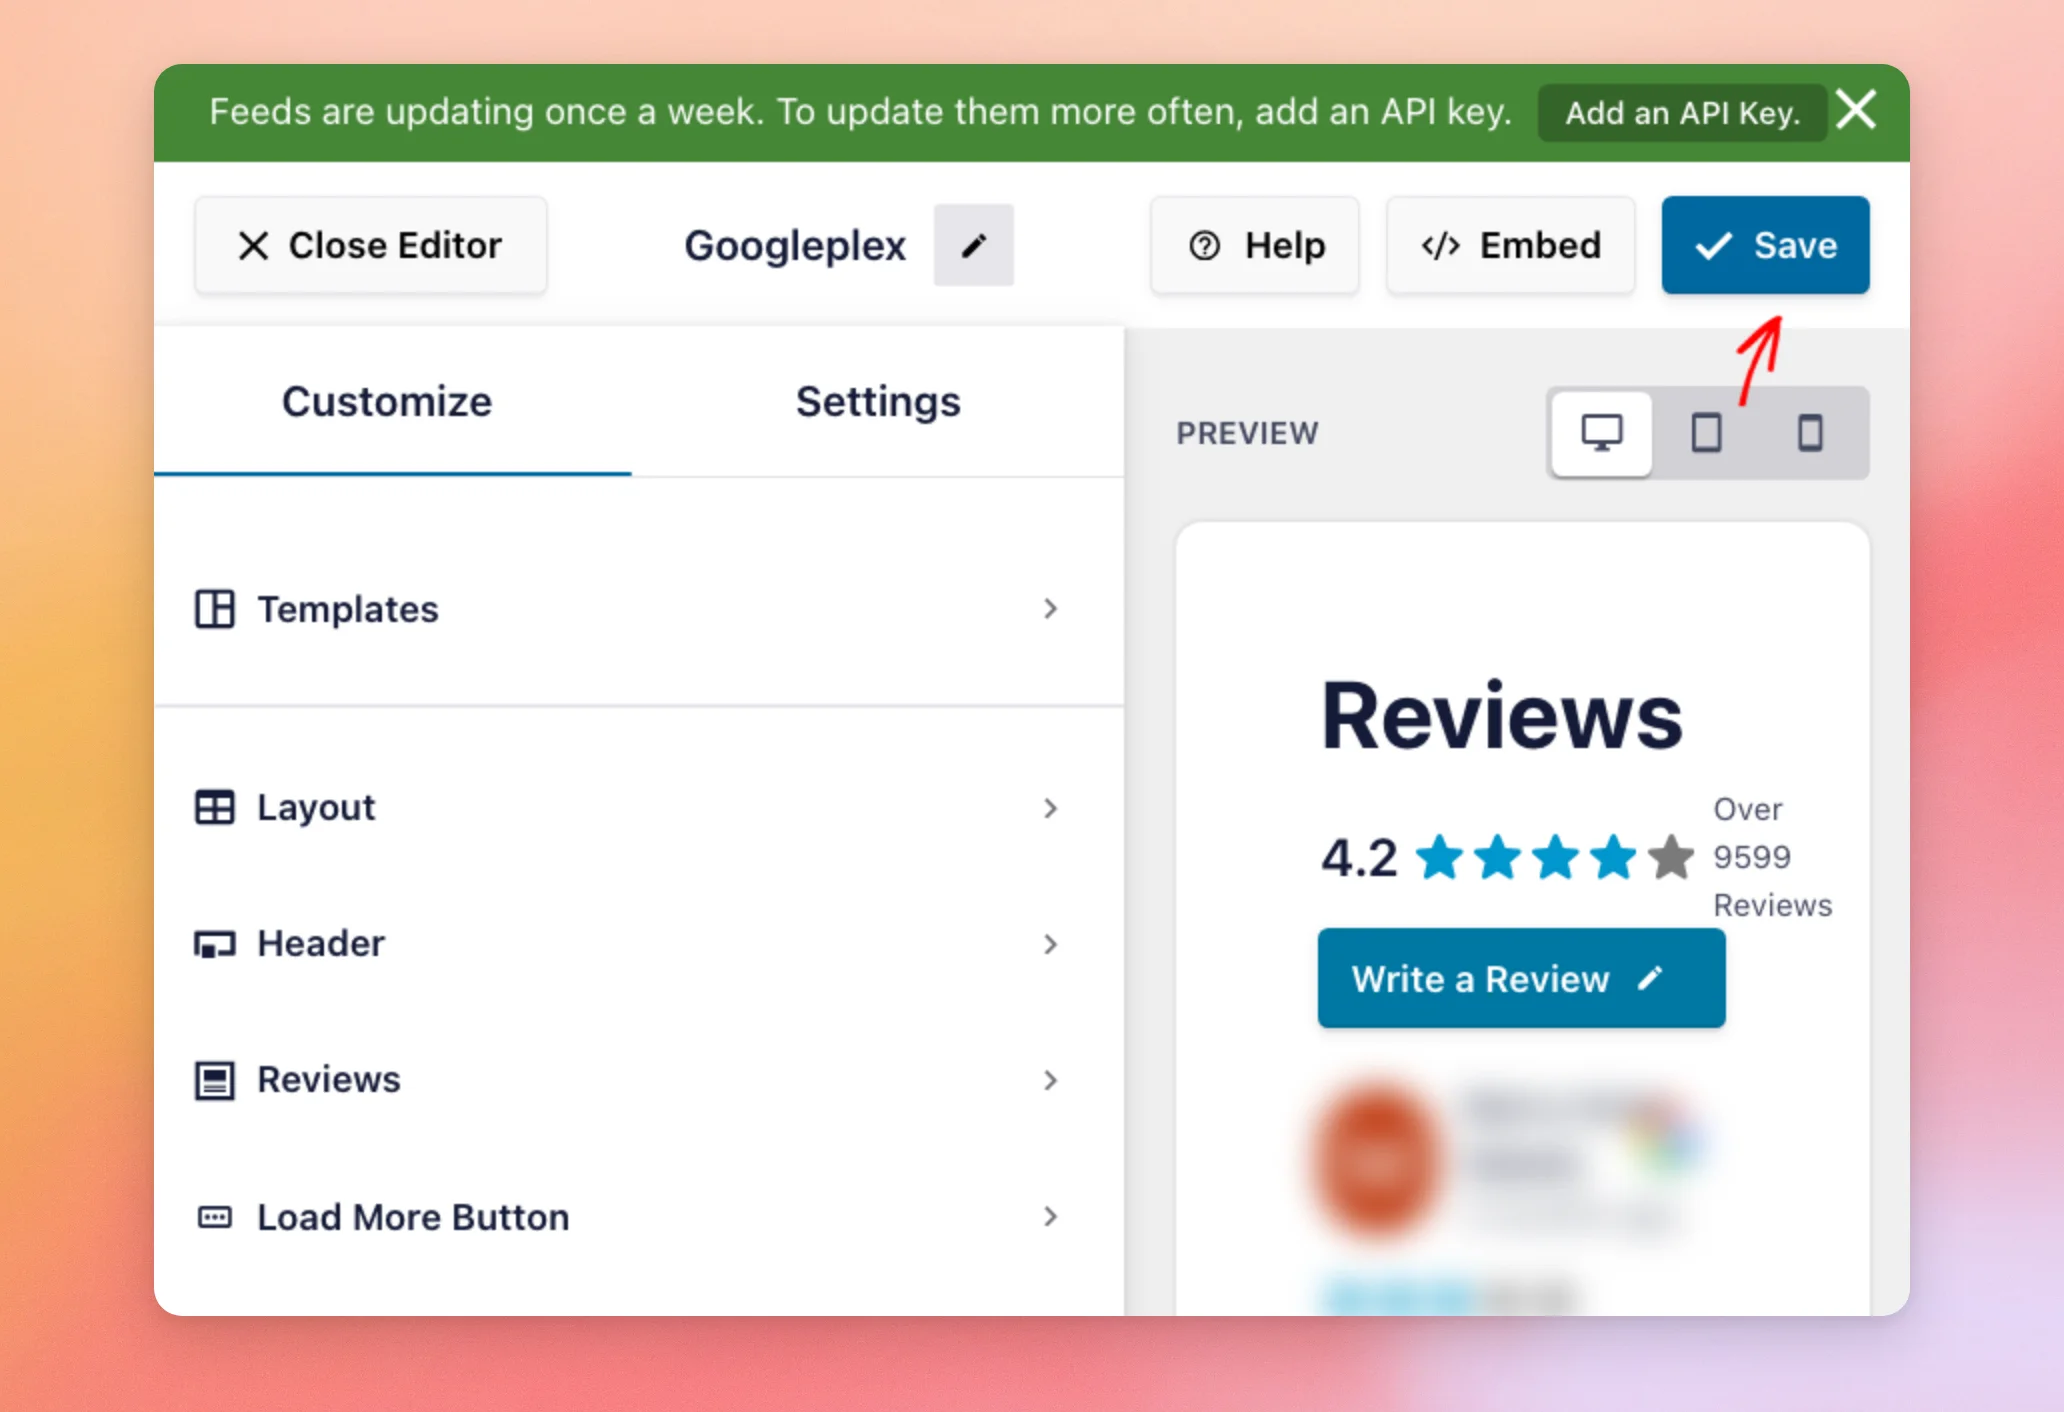
Reviews Feed creates your feed and opens it in the feed editor. Your feed is named after its source. The preview on the right shows how it looks.
In the paid version, a notice at the top of the editor reminds you that sources without an API key update once a week. It also has a button to add a key whenever you’re ready.
While you’re in the editor, use the Customize tab to change your feed’s template, layout, header, reviews, and Load More button. Our guide on customizing the look of your reviews feed walks you through each section.
When you’re happy with how your feed looks, click Save.
Your feed is now saved with your template and any changes you made. Next, we’ll look at how to display it.
Embedding Your Feed
Your feed is ready to add to your site. You can add it with the Reviews Feed block in the block editor or with its shortcode.
To copy your feed’s shortcode or add it to a page, click Embed at the top of the feed editor.
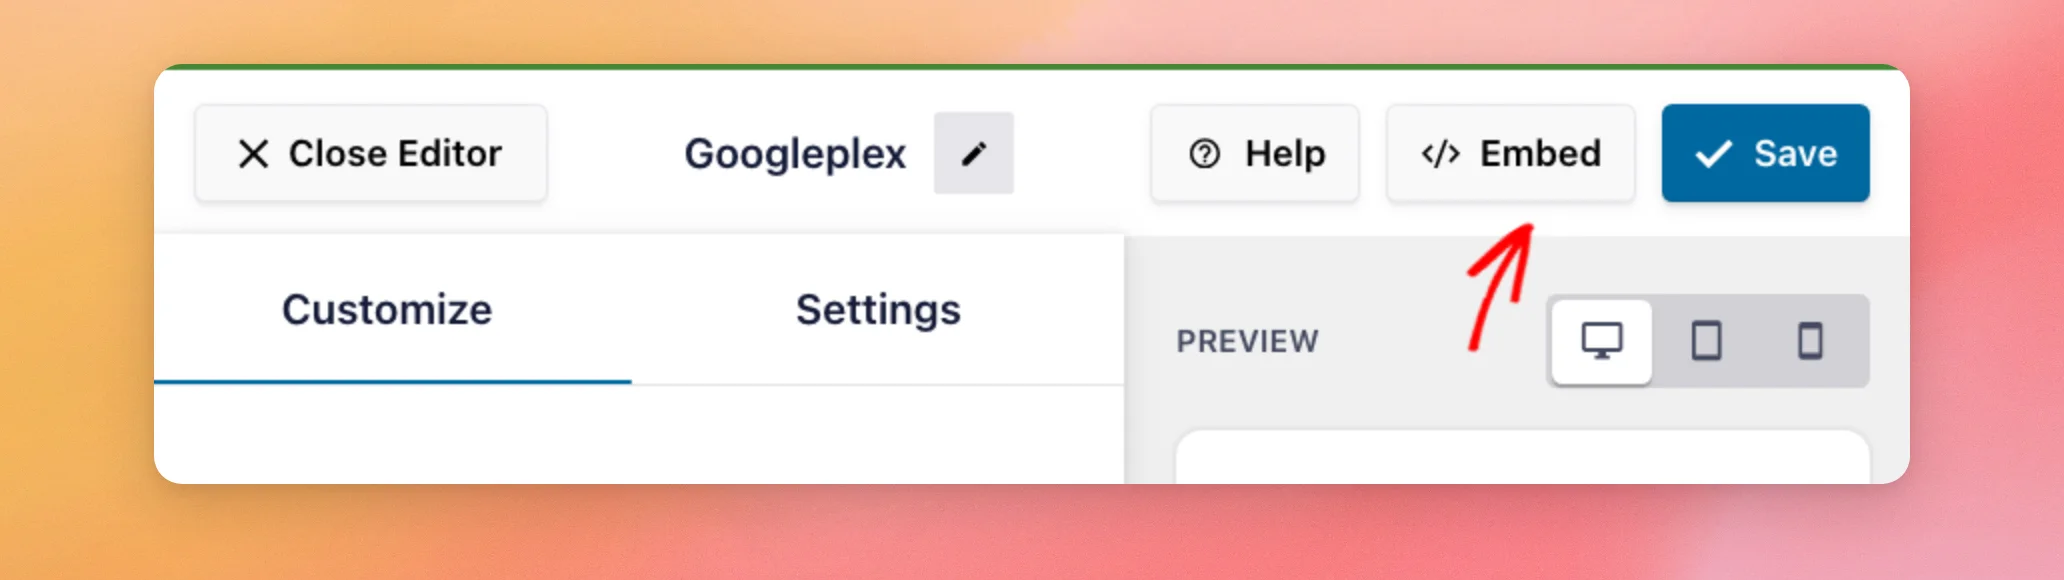
The Embed Feed window opens with your feed’s shortcode and a Copy button. In this window, it looks like [reviews-feed feed="1"]. The number is your feed’s ID.
The window also has a Post or a Page option that adds your feed to a page for you.
If you’re new to shortcodes, see How to Add a Shortcode in WordPress for a step-by-step guide.
For every way to show your feed, see our guide on displaying your reviews feed.
That’s it! You’ve added a review source, picked a template, and saved your first reviews feed.
Next, would you like to choose which reviews your feed shows?
See our guide on filtering reviews by rating, keyword, or source.
Frequently Asked Questions
Below, we’ve answered some of the most common questions about creating a reviews feed.
Do I need an API key to create a feed?
No. Every source can be added without an API key. When you choose TripAdvisor, Reviews Feed asks for a key first, and you can click Skip. Without a key, you can add up to three TripAdvisor sources, and their reviews refresh once a week. To get a key, see our guide to creating a TripAdvisor API key.
How often do my Google and Yelp reviews update?
In the paid version, Google and Yelp sources added without an API key update once a week. To update them more often, add your own Google API key or Yelp API key.
In the free version, Reviews Feed fetches the latest ten reviews from your source once. To fetch them again, add an API key or upgrade to a paid license level.
What happens when I reach the source limit?
Reviews Feed shows a window that explains the limit. In the paid version, you can add up to two Google and five Yelp sources without a key. In the free version, the limit is one source. In both versions, the window offers to add an API key. The free version’s window also offers to upgrade your plan.
Why can’t I select some of the source tiles?
WooCommerce and Easy Digital Downloads show reviews from your own store. The WooCommerce tile stays unavailable until WooCommerce is active on your site. The Easy Digital Downloads tile needs Easy Digital Downloads and its EDD Reviews extension. Other tiles show as upgrades when they come with a higher plan.
Can I change my feed’s template later?
Yes. With your feed open in the feed editor, choose Templates on the Customize tab. A Change button there lets you pick another template. Changing the template can replace customizations you’ve already made. It’s best to pick your template before you customize.