Social Wall
 Feed Analytics


Review Alerts show real customer reviews as a small animated popup on any page, pulling from the reviews already in your plugin.
Would you like to build trust with visitors by showing your reviews in a small popup while they browse your site?
Review Alerts show your reviews in a popup at the bottom corner of your pages. The popup can show your overall star rating or cycle through your reviews one at a time. When visitors click it, they can see more of your reviews.
In this guide, we’ll walk you through creating a Review Alert and customizing how it looks. We’ll also choose which reviews it shows, pick where it appears, and publish it.
Requirements: Review Alerts require a Plus license level or higher.
Before you get started, make sure Reviews Feed is installed and activated on your WordPress site.
Review Alerts use the review sources you’ve already connected in Reviews Feed, such as your Google reviews or a collection of reviews you’ve picked. You can also connect a new source while you create your Review Alert.
- Creating a Review Alert
- Customizing Your Review Alert
- Choosing Which Reviews Appear
- Choosing Where Your Review Alert Appears
- Publishing Your Review Alert
- Seeing Your Review Alert on Your Site
- Frequently Asked Questions
Creating a Review Alert
To get started, we’ll add a new Review Alert and choose the sources it shows reviews from.
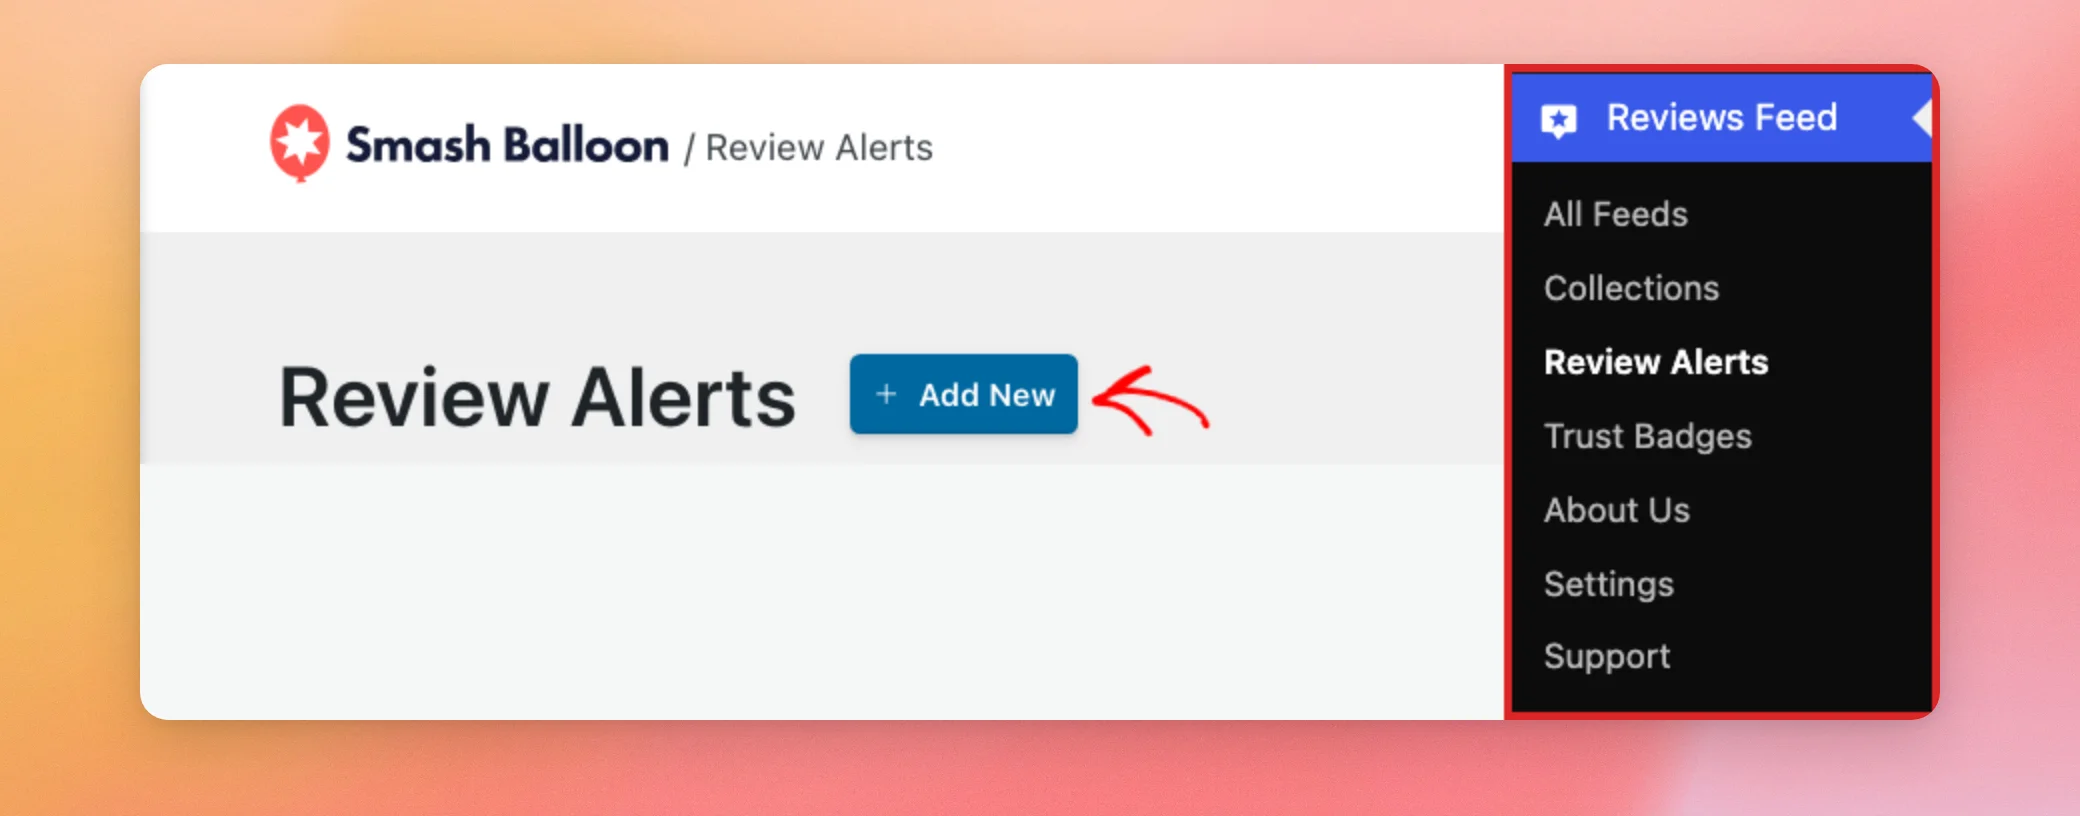
From your WordPress admin sidebar, go to Reviews Feed » Review Alerts. Then, click Add New.
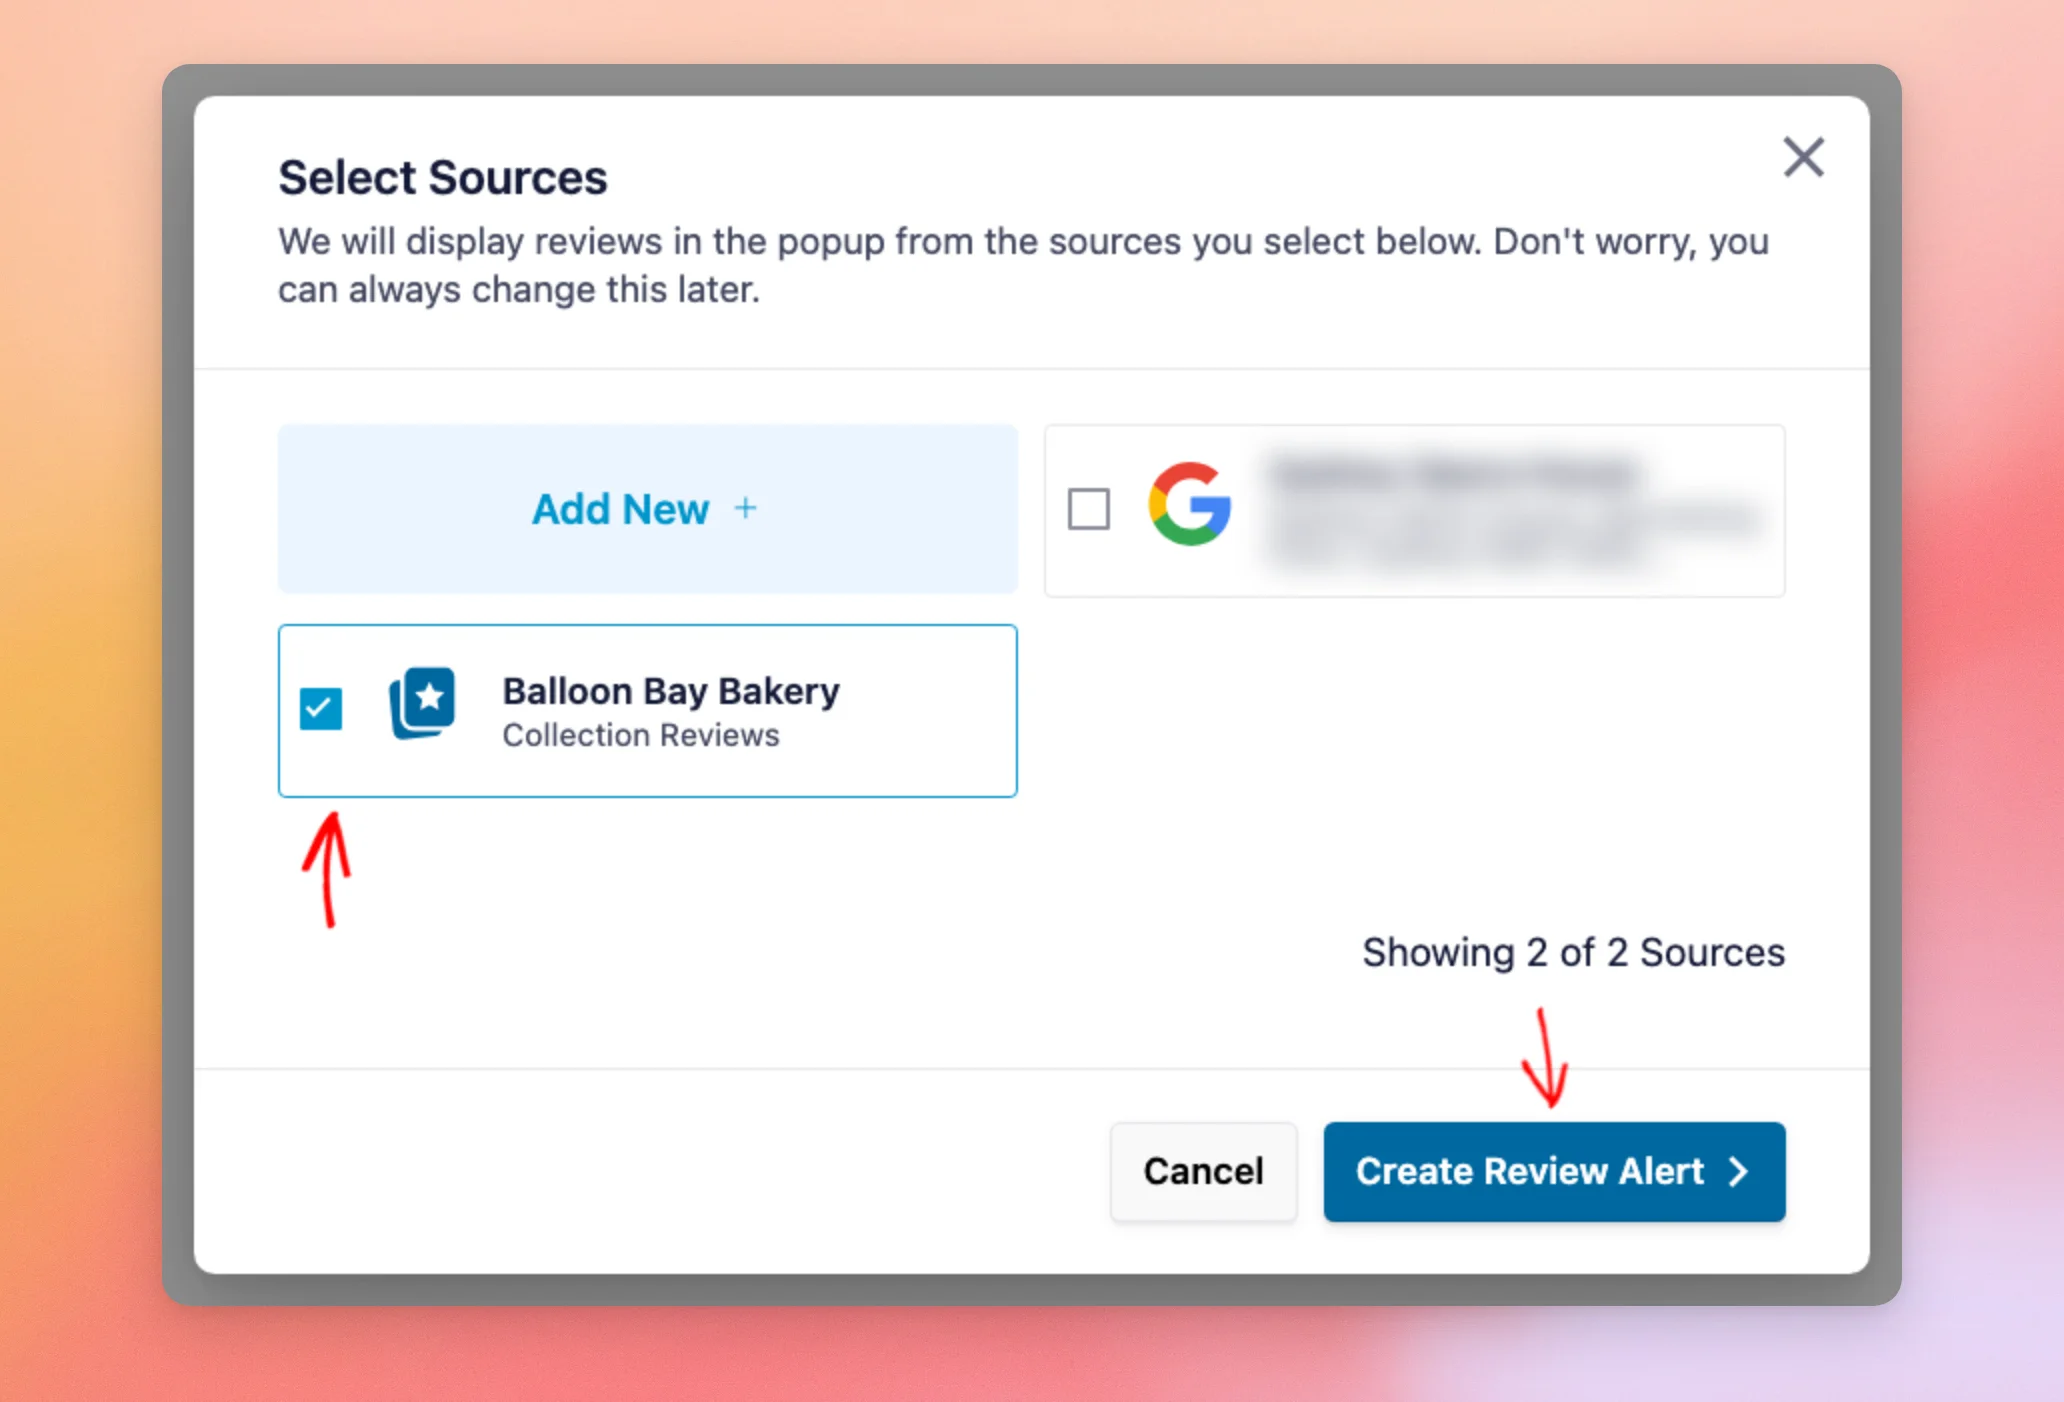
A Select Sources window opens. It lists the review sources you’ve connected in Reviews Feed, including your collections.
Next, check each source you’d like your popup to show reviews from. Then, click Create Review Alert.
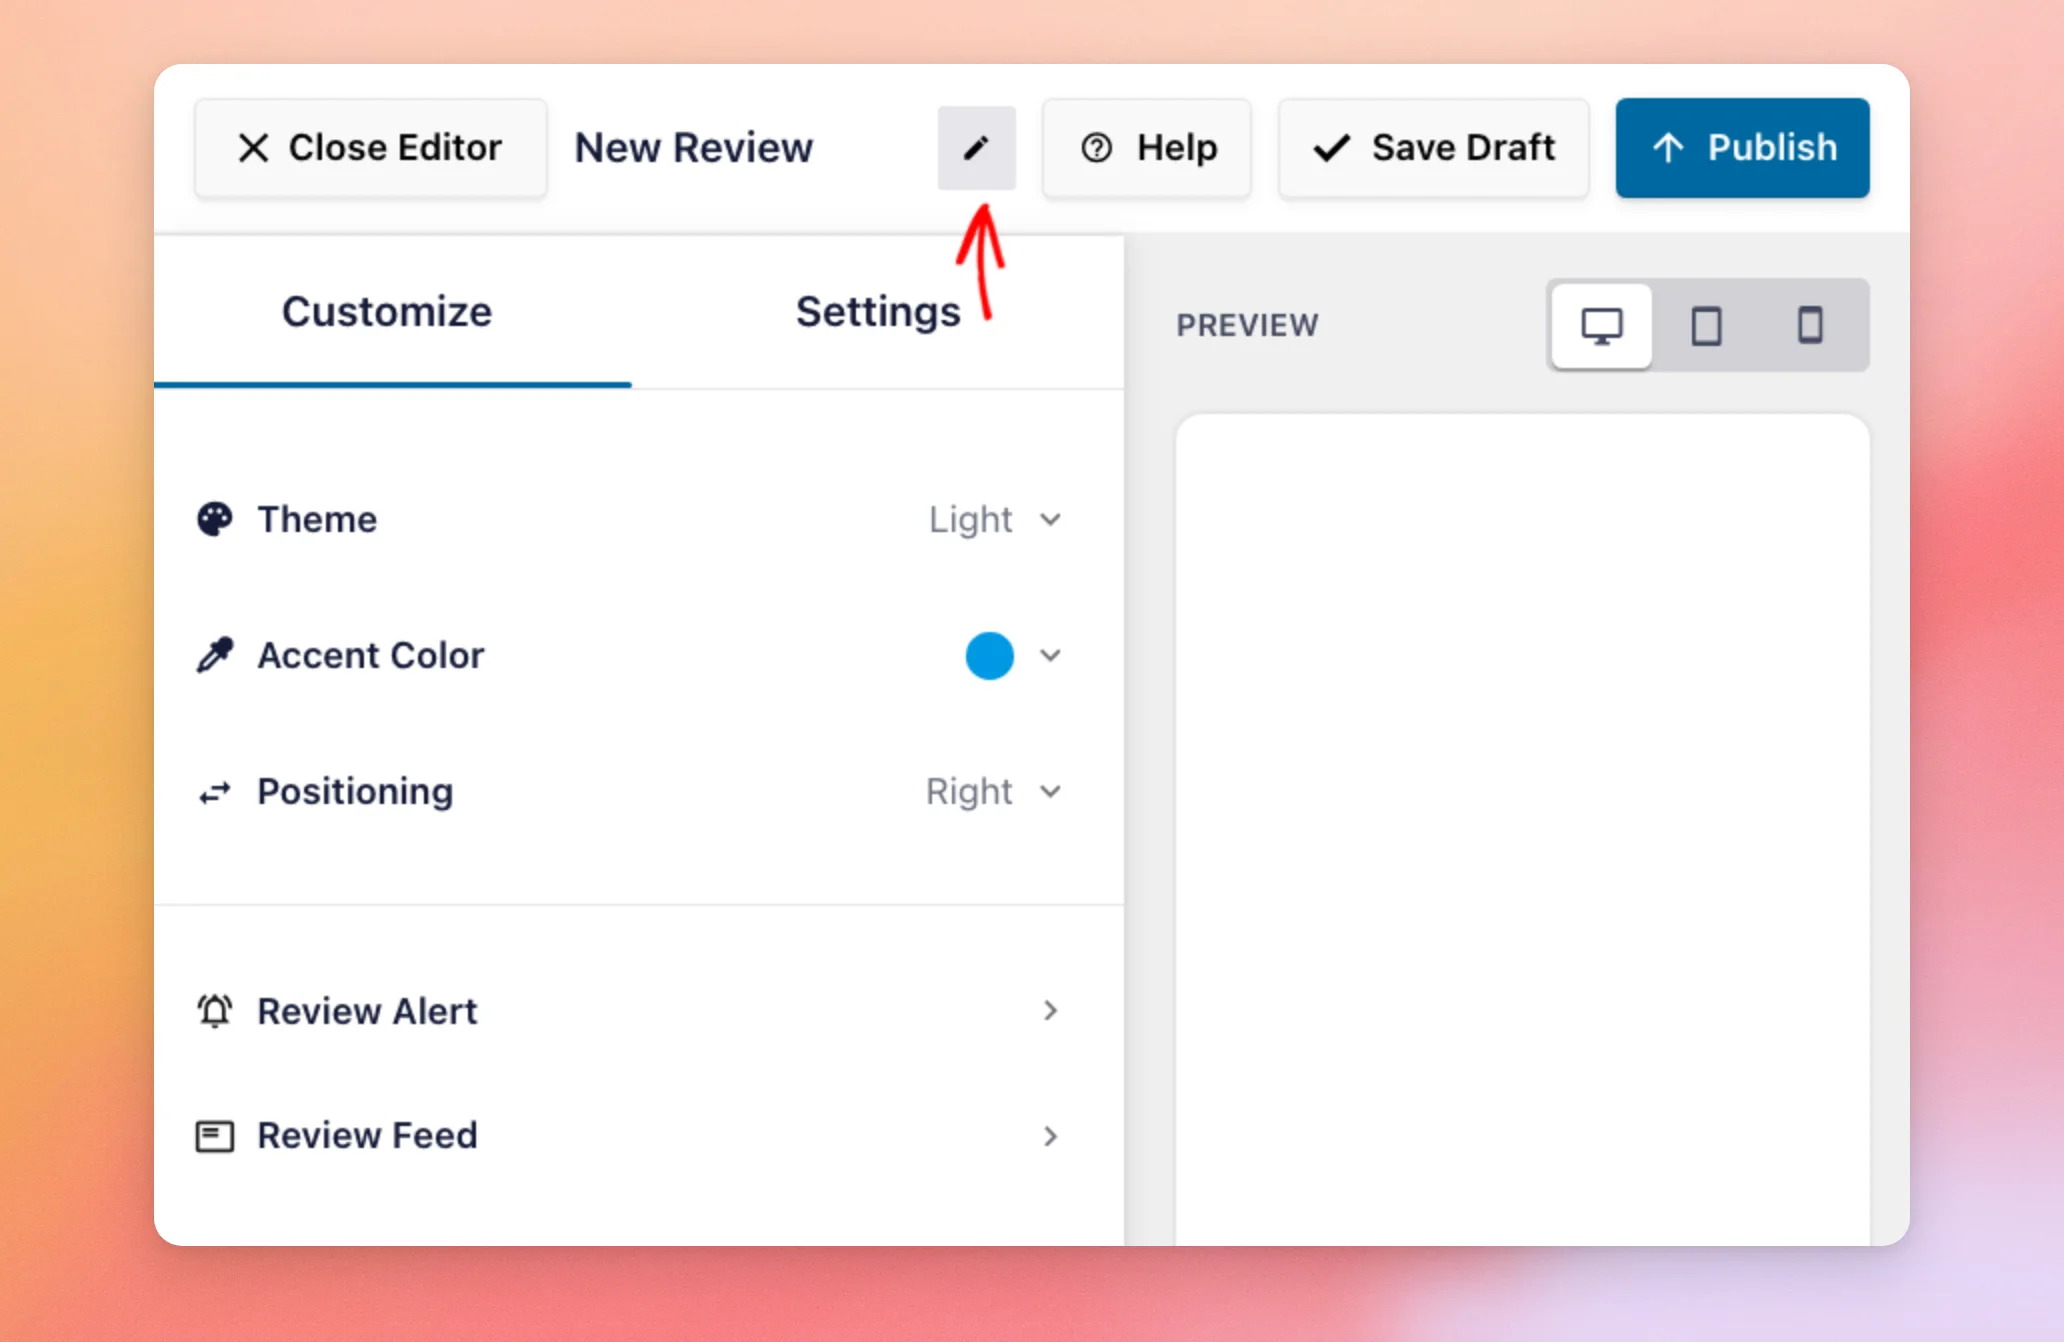
Your new Review Alert opens in the editor with the name New Review Alert. Since you can create more than one Review Alert, a clear name helps you find it later. To rename it, click the pencil icon next to its name at the top of the editor.
In the name field, type the new name. Then, click the check mark next to it.
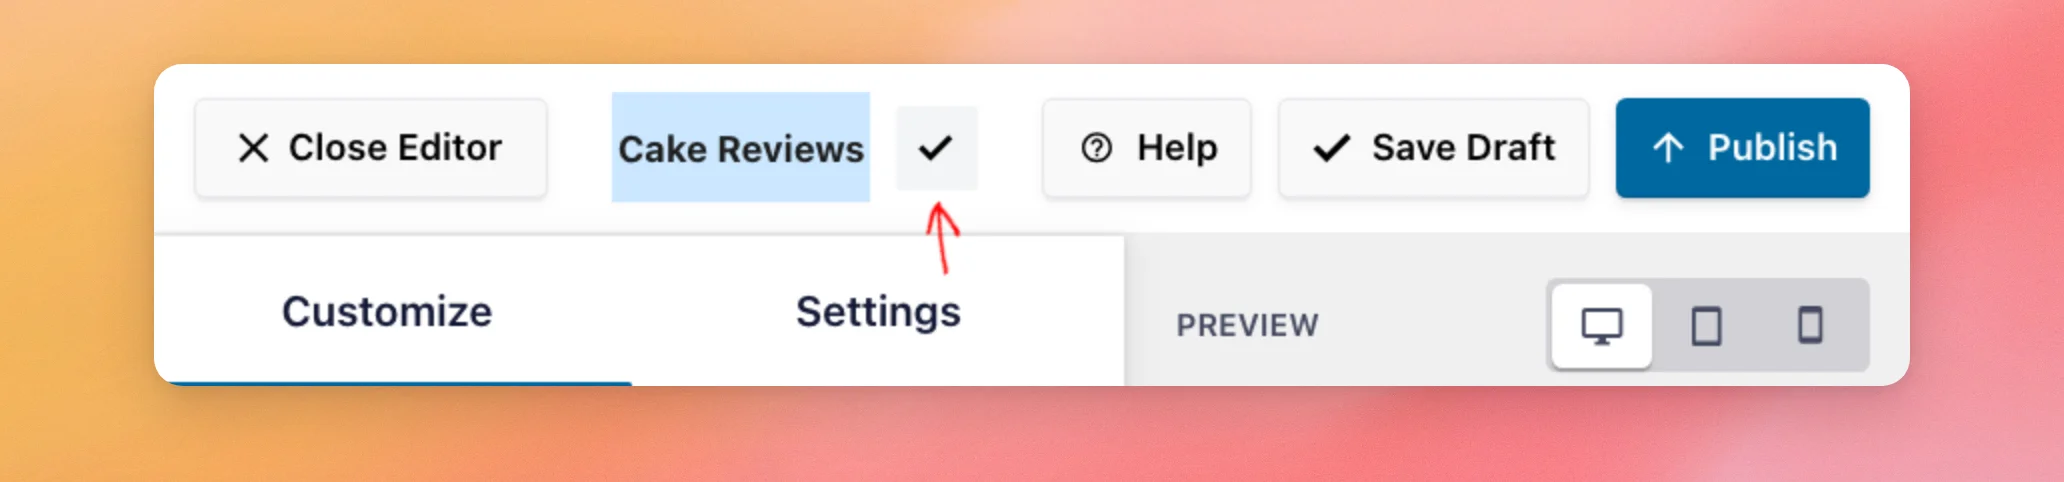
The editor has two tabs. The Customize tab controls how your popup looks. The Settings tab controls which reviews it shows and where it appears.
As you make changes, the preview on the right updates. The preview can be empty at first because the popup shows in it about three seconds after the editor loads.
Customizing Your Review Alert
The Customize tab opens first. Its top three settings are Theme, Accent Color, and Positioning.
Choosing a Theme, Color, and Position
To pick the popup’s style, click Theme. There are four themes: Light (selected by default), Dark, Minimal, and Minimal Dark. Next, choose the theme you’d like to use.
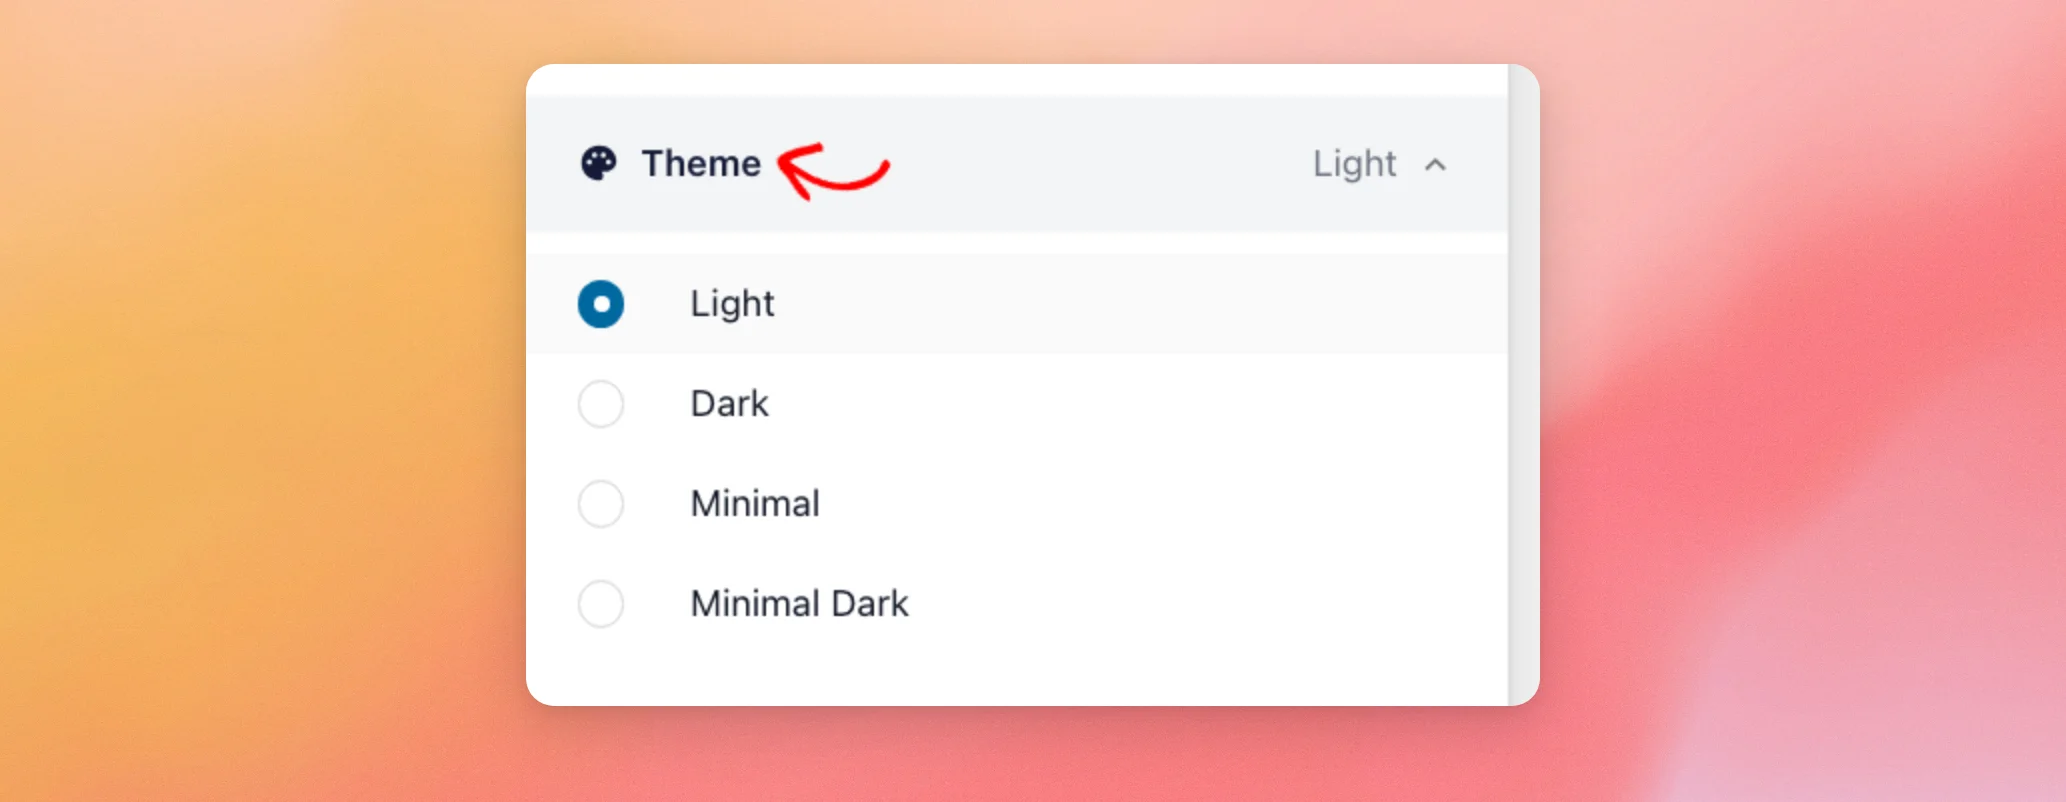
If you’re not sure which theme to use, keep Light. The preview updates as you pick a theme. You can try each one before you decide.
Next, click Accent Color. Under Choose from Presets, click one of the eight preset colors.
To use your own color instead, drag the Add your own slider. You can also type a color code in the HEX field.
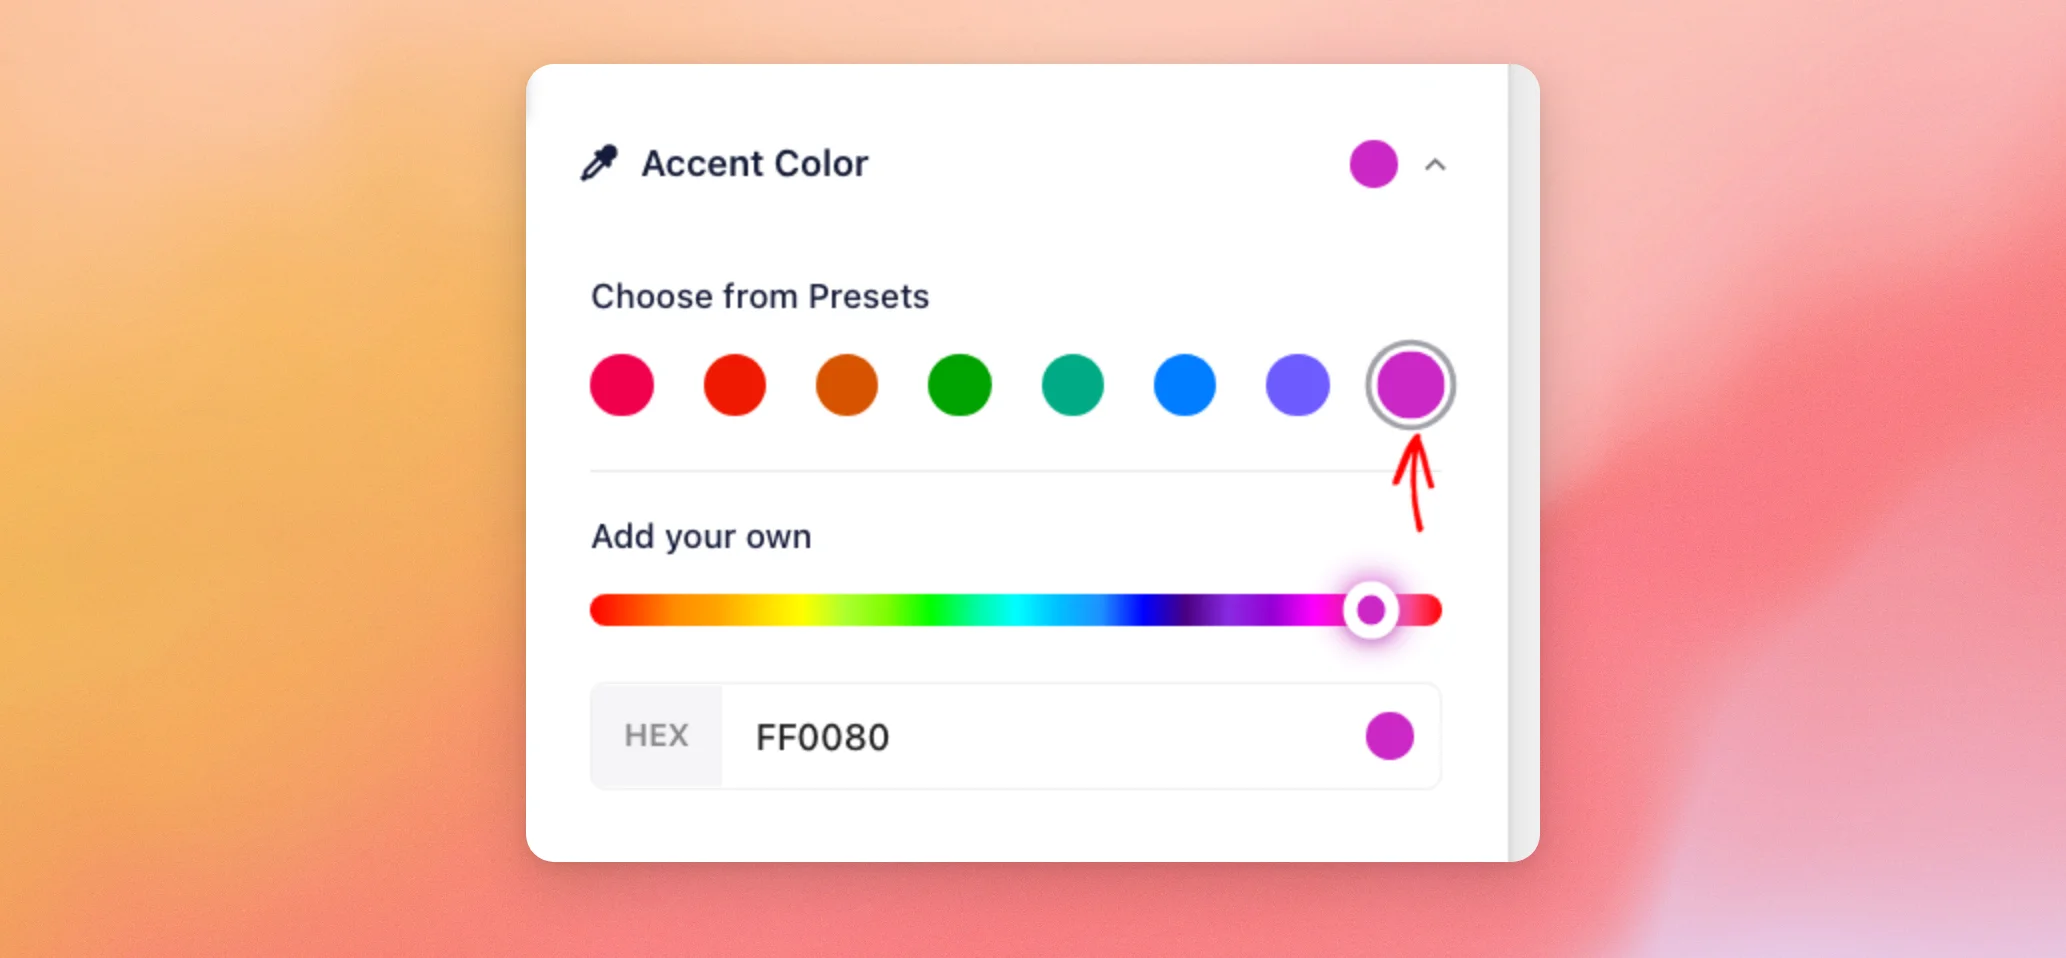
When you type a color code in the HEX field, your popup uses that exact color, including white and grays. This lets it match your brand’s colors. The presets and the slider use a shade from the plugin’s built-in color range instead.
The Positioning setting picks the side of the page your popup shows on. It’s set to Right by default. If something else on your site already sits in the bottom right corner, choose Left.
Setting Up the Popup
Next, we’ll choose what your popup shows.
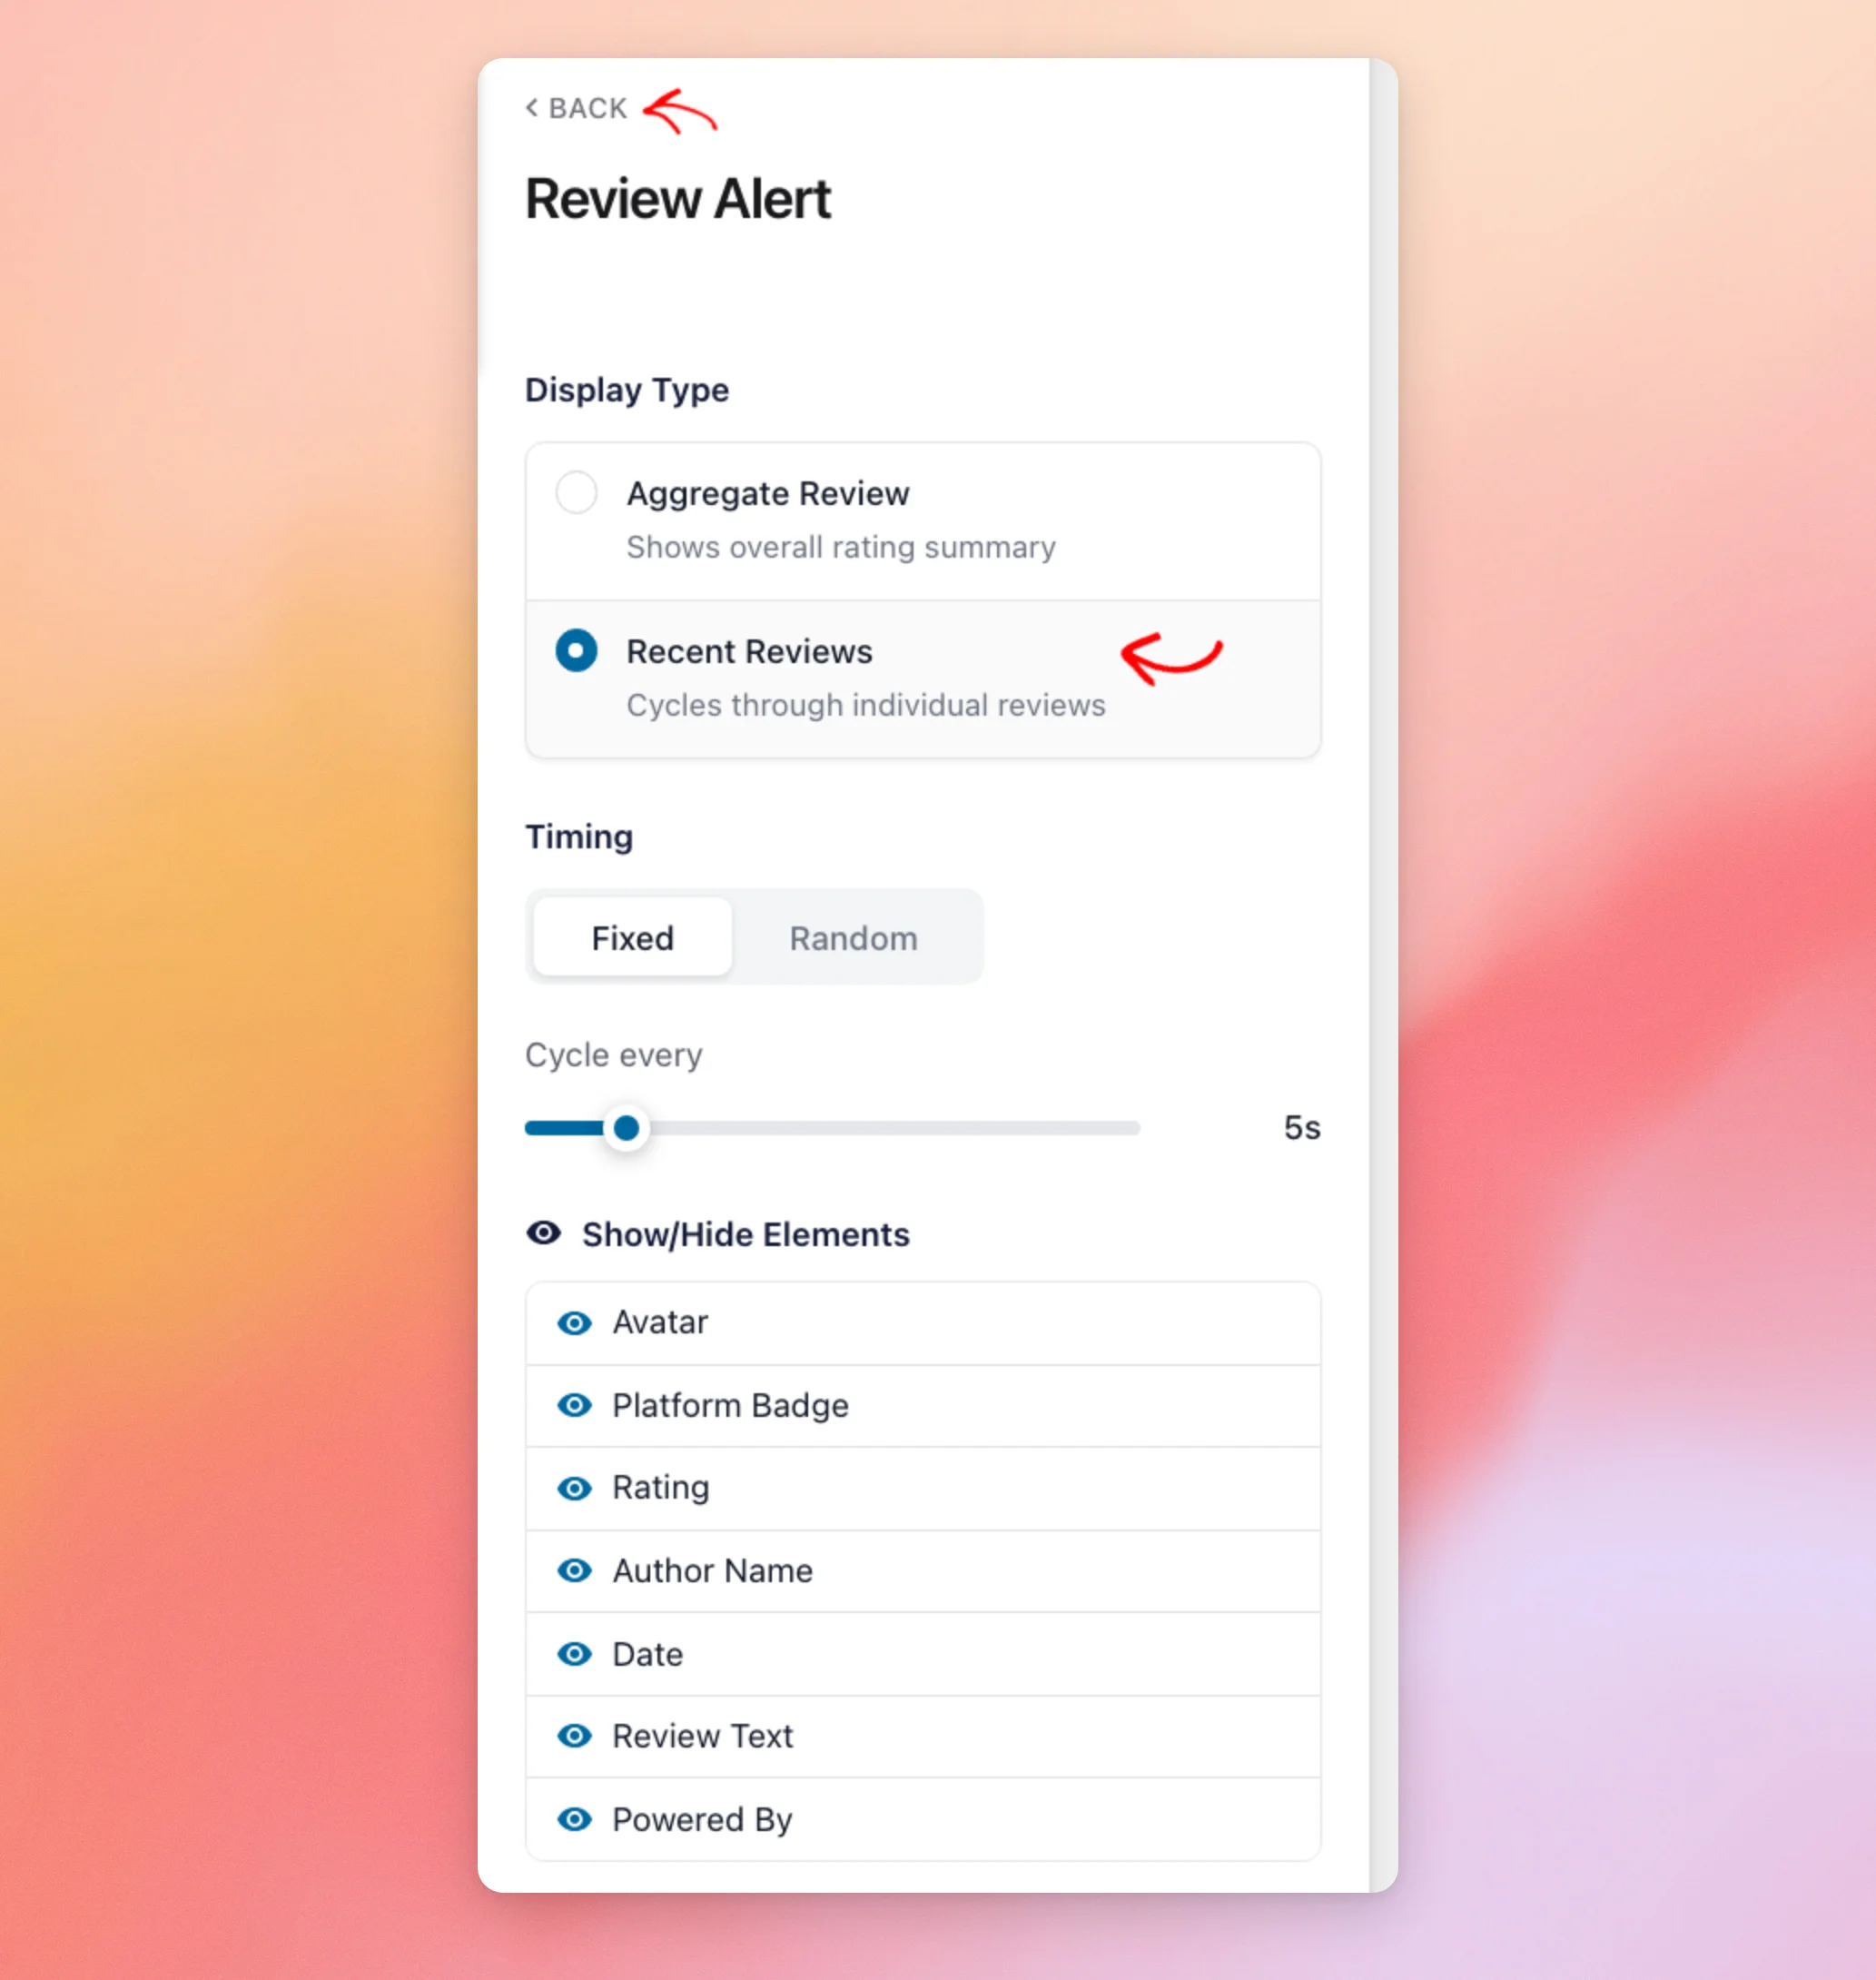
Below the first three settings, click Review Alert.
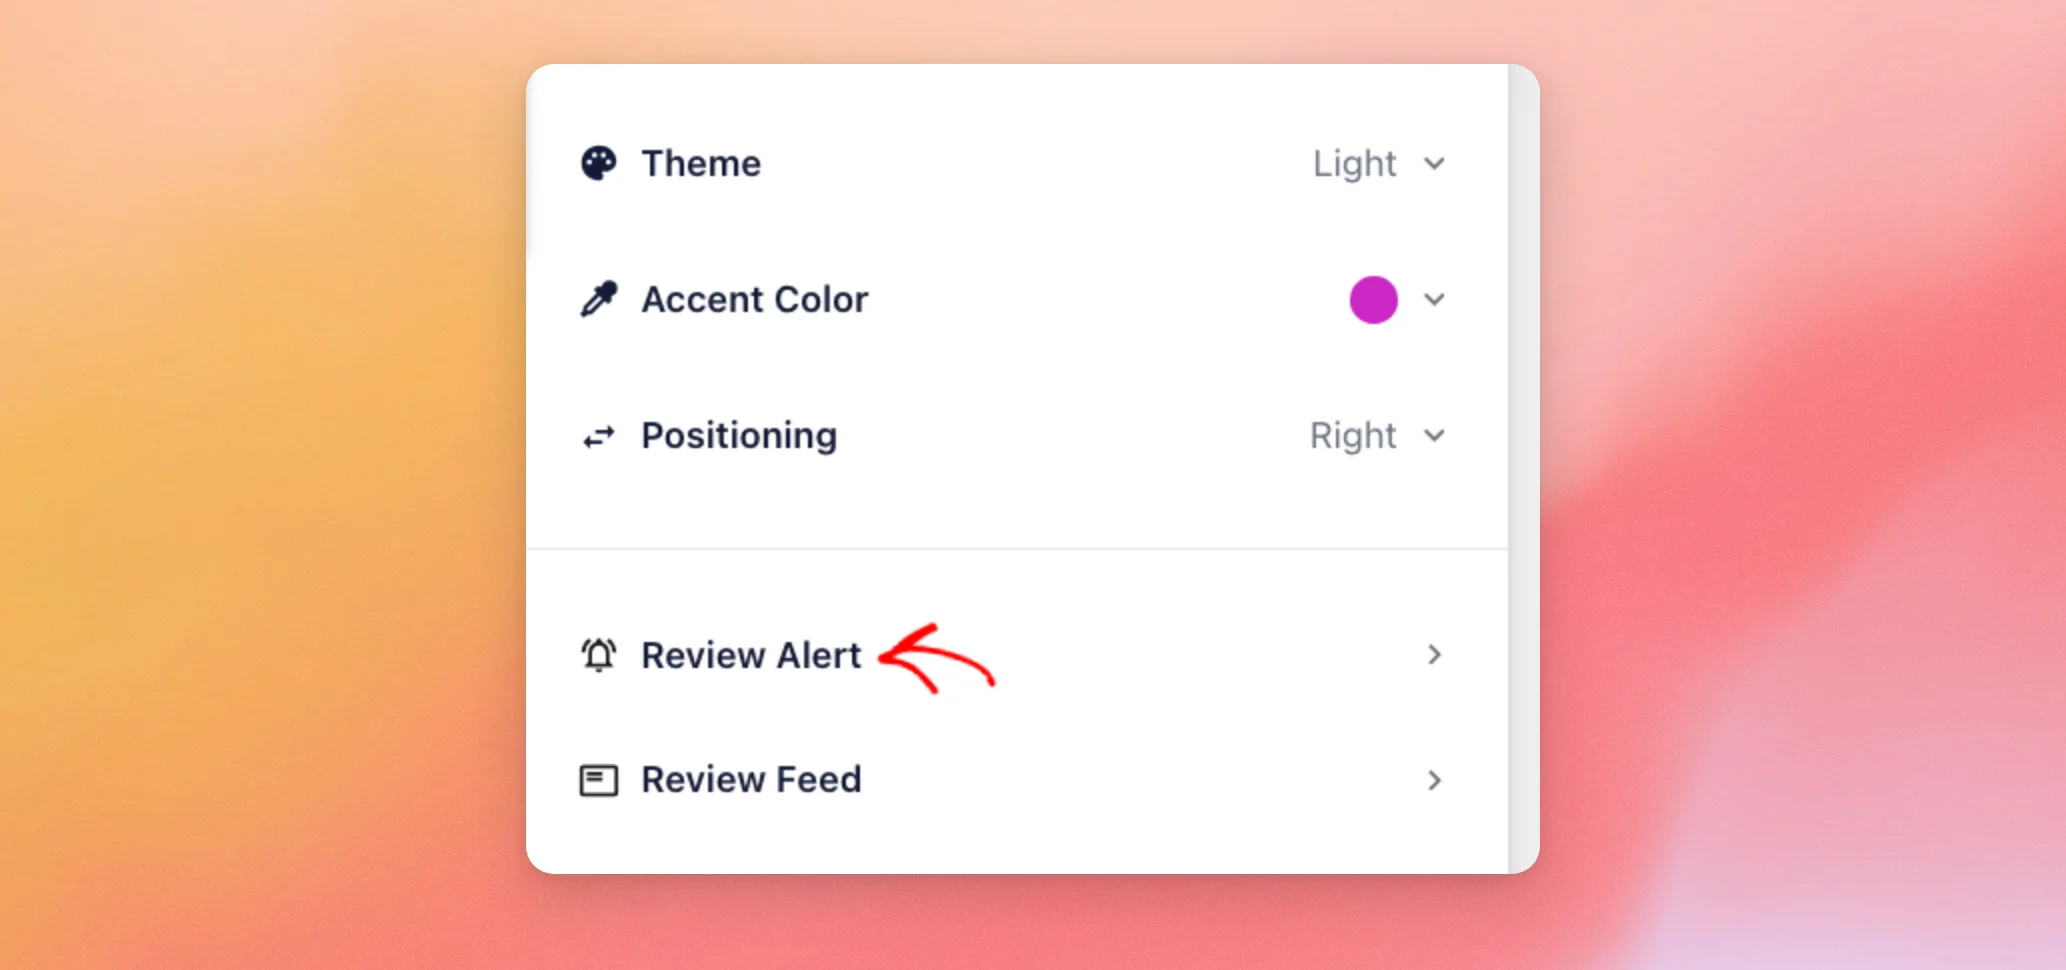
Under Display Type, choose how your popup shows your reviews:
- Aggregate Review: The popup shows your overall star rating and your total number of reviews.
- Recent Reviews: The popup cycles through your reviews one at a time, with each reviewer’s name, rating, and review text.
Timing sets how long each review shows before the next one. With Fixed, every review shows for the same time, set with the Cycle every slider. It’s five seconds by default.
With Random, the time changes from one review to the next, within a range you set with its slider.
Under Show/Hide Elements, each part of the popup has an eye icon that shows or hides it, such as the date or the avatar. The list changes with the display type you choose.
When you’re done, click Back at the top of the sidebar.
Next, we’ll set up the Review Feed that opens from your popup.
Setting Up the Review Feed
When visitors click the View All link in your popup, a larger window opens with a list of your reviews. This is the Review Feed. It has a heading at the top and can have a button, such as a link to your booking or order page.
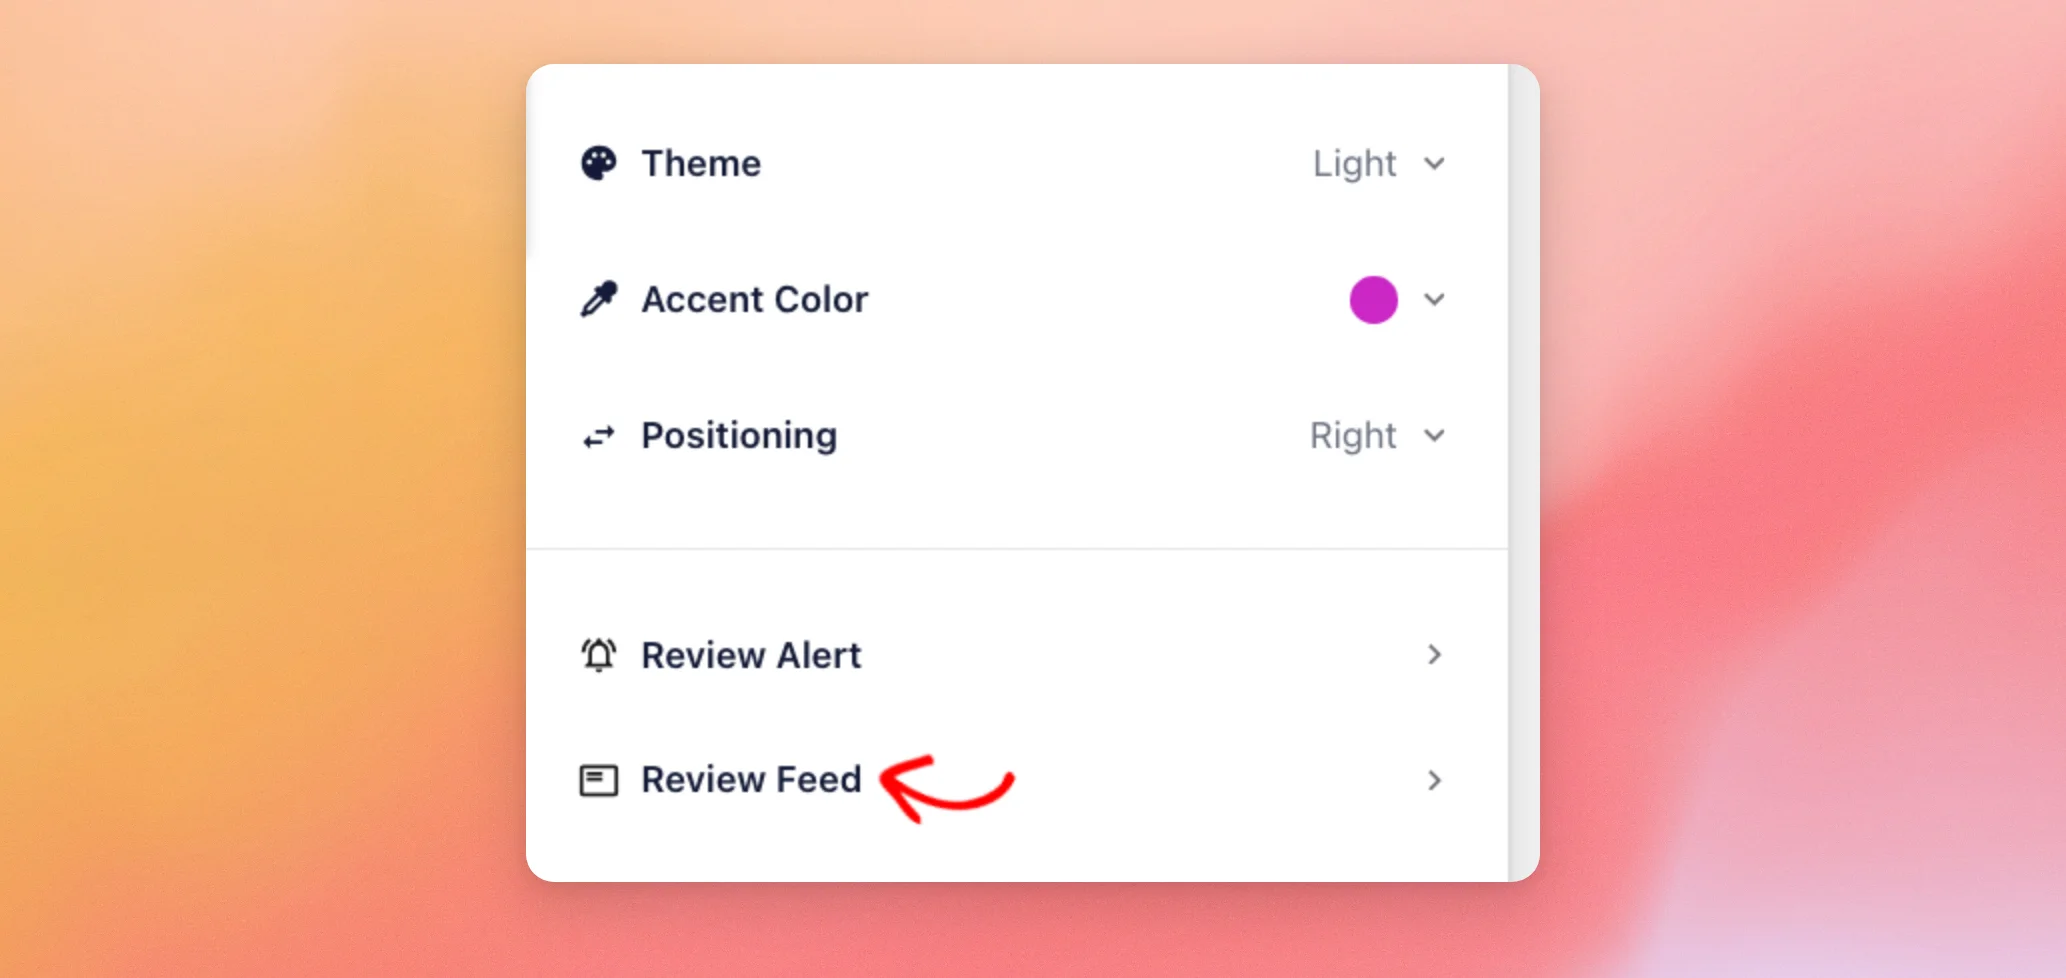
To set it up, click Review Feed.
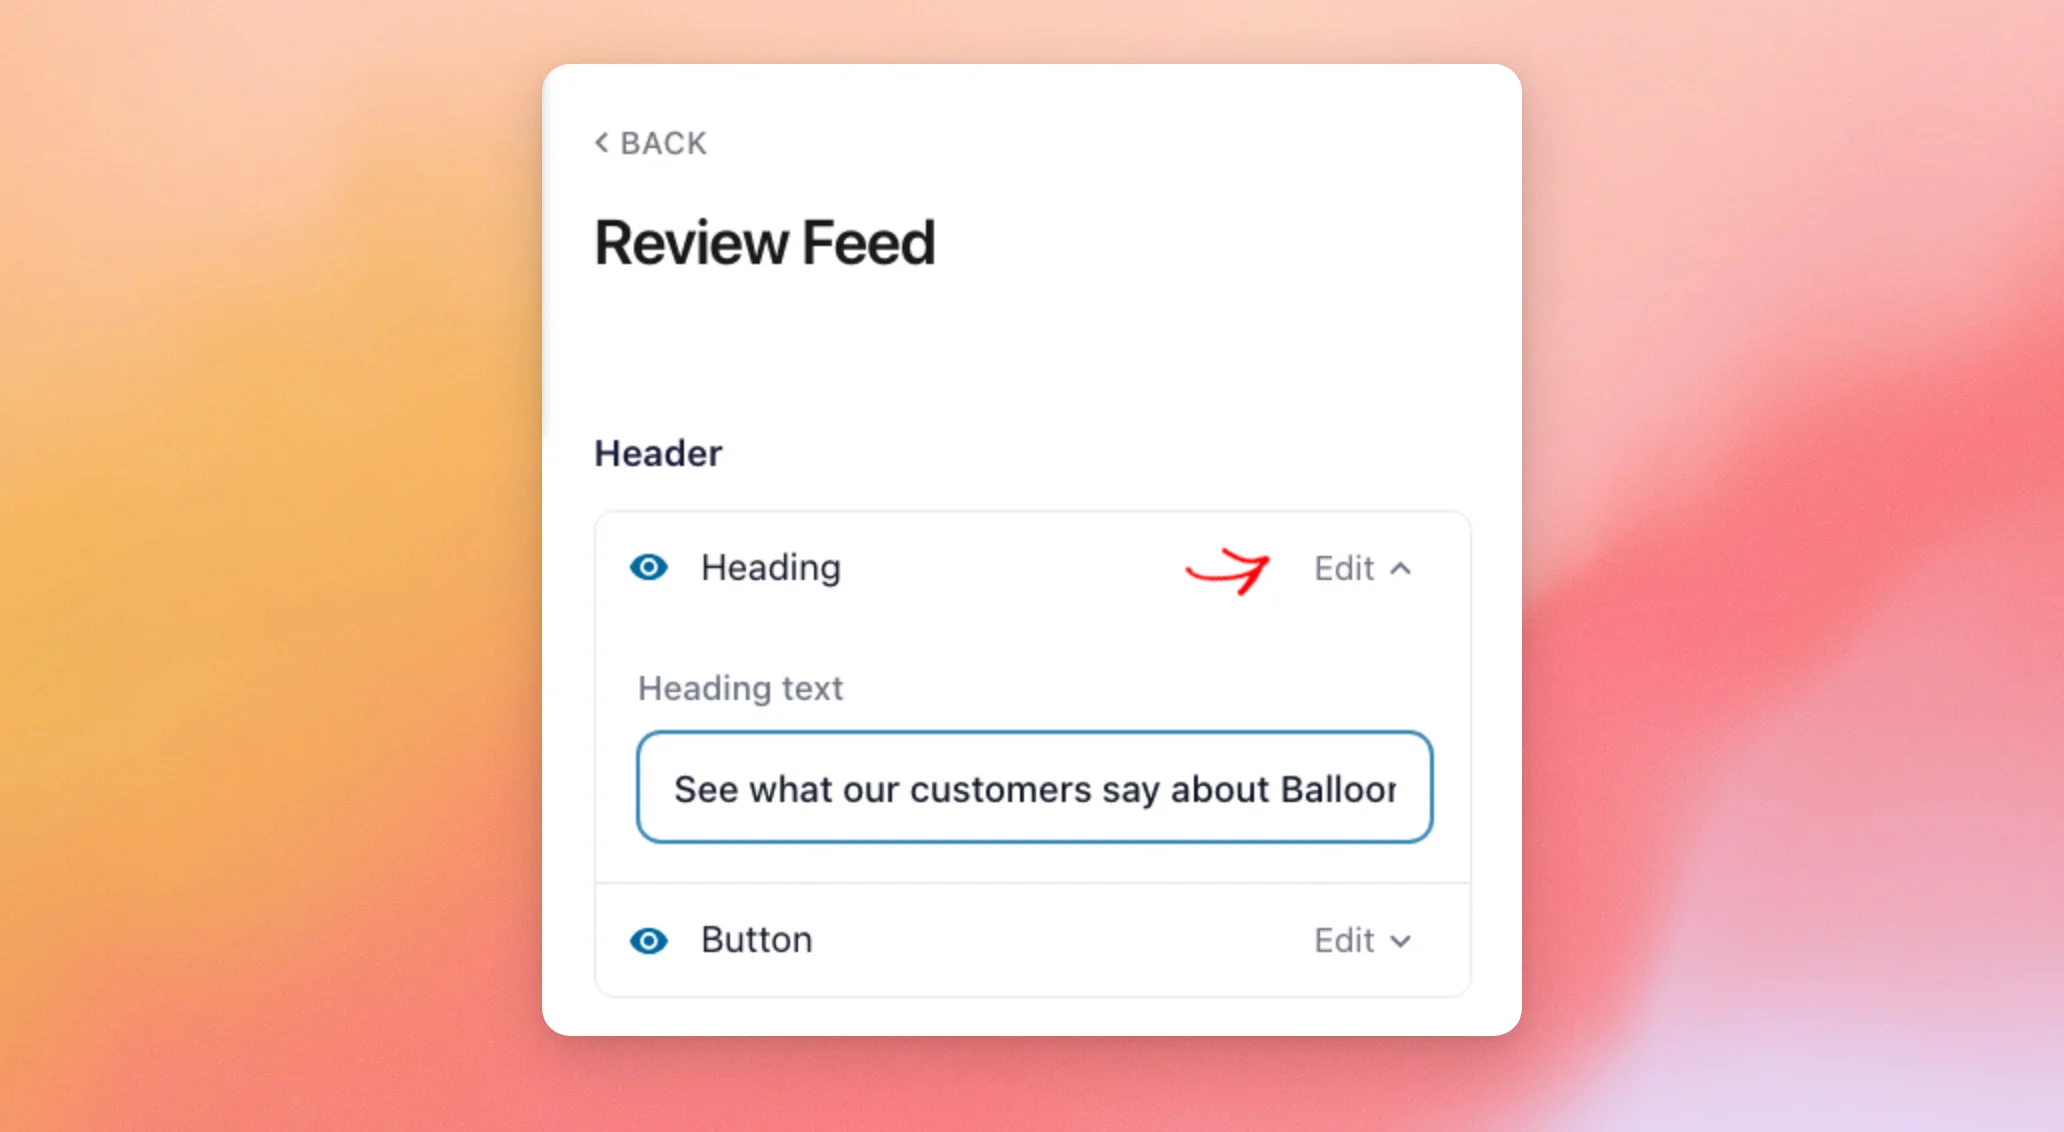
Under Header, click Edit next to Heading. Then, type your heading in the Heading text field.
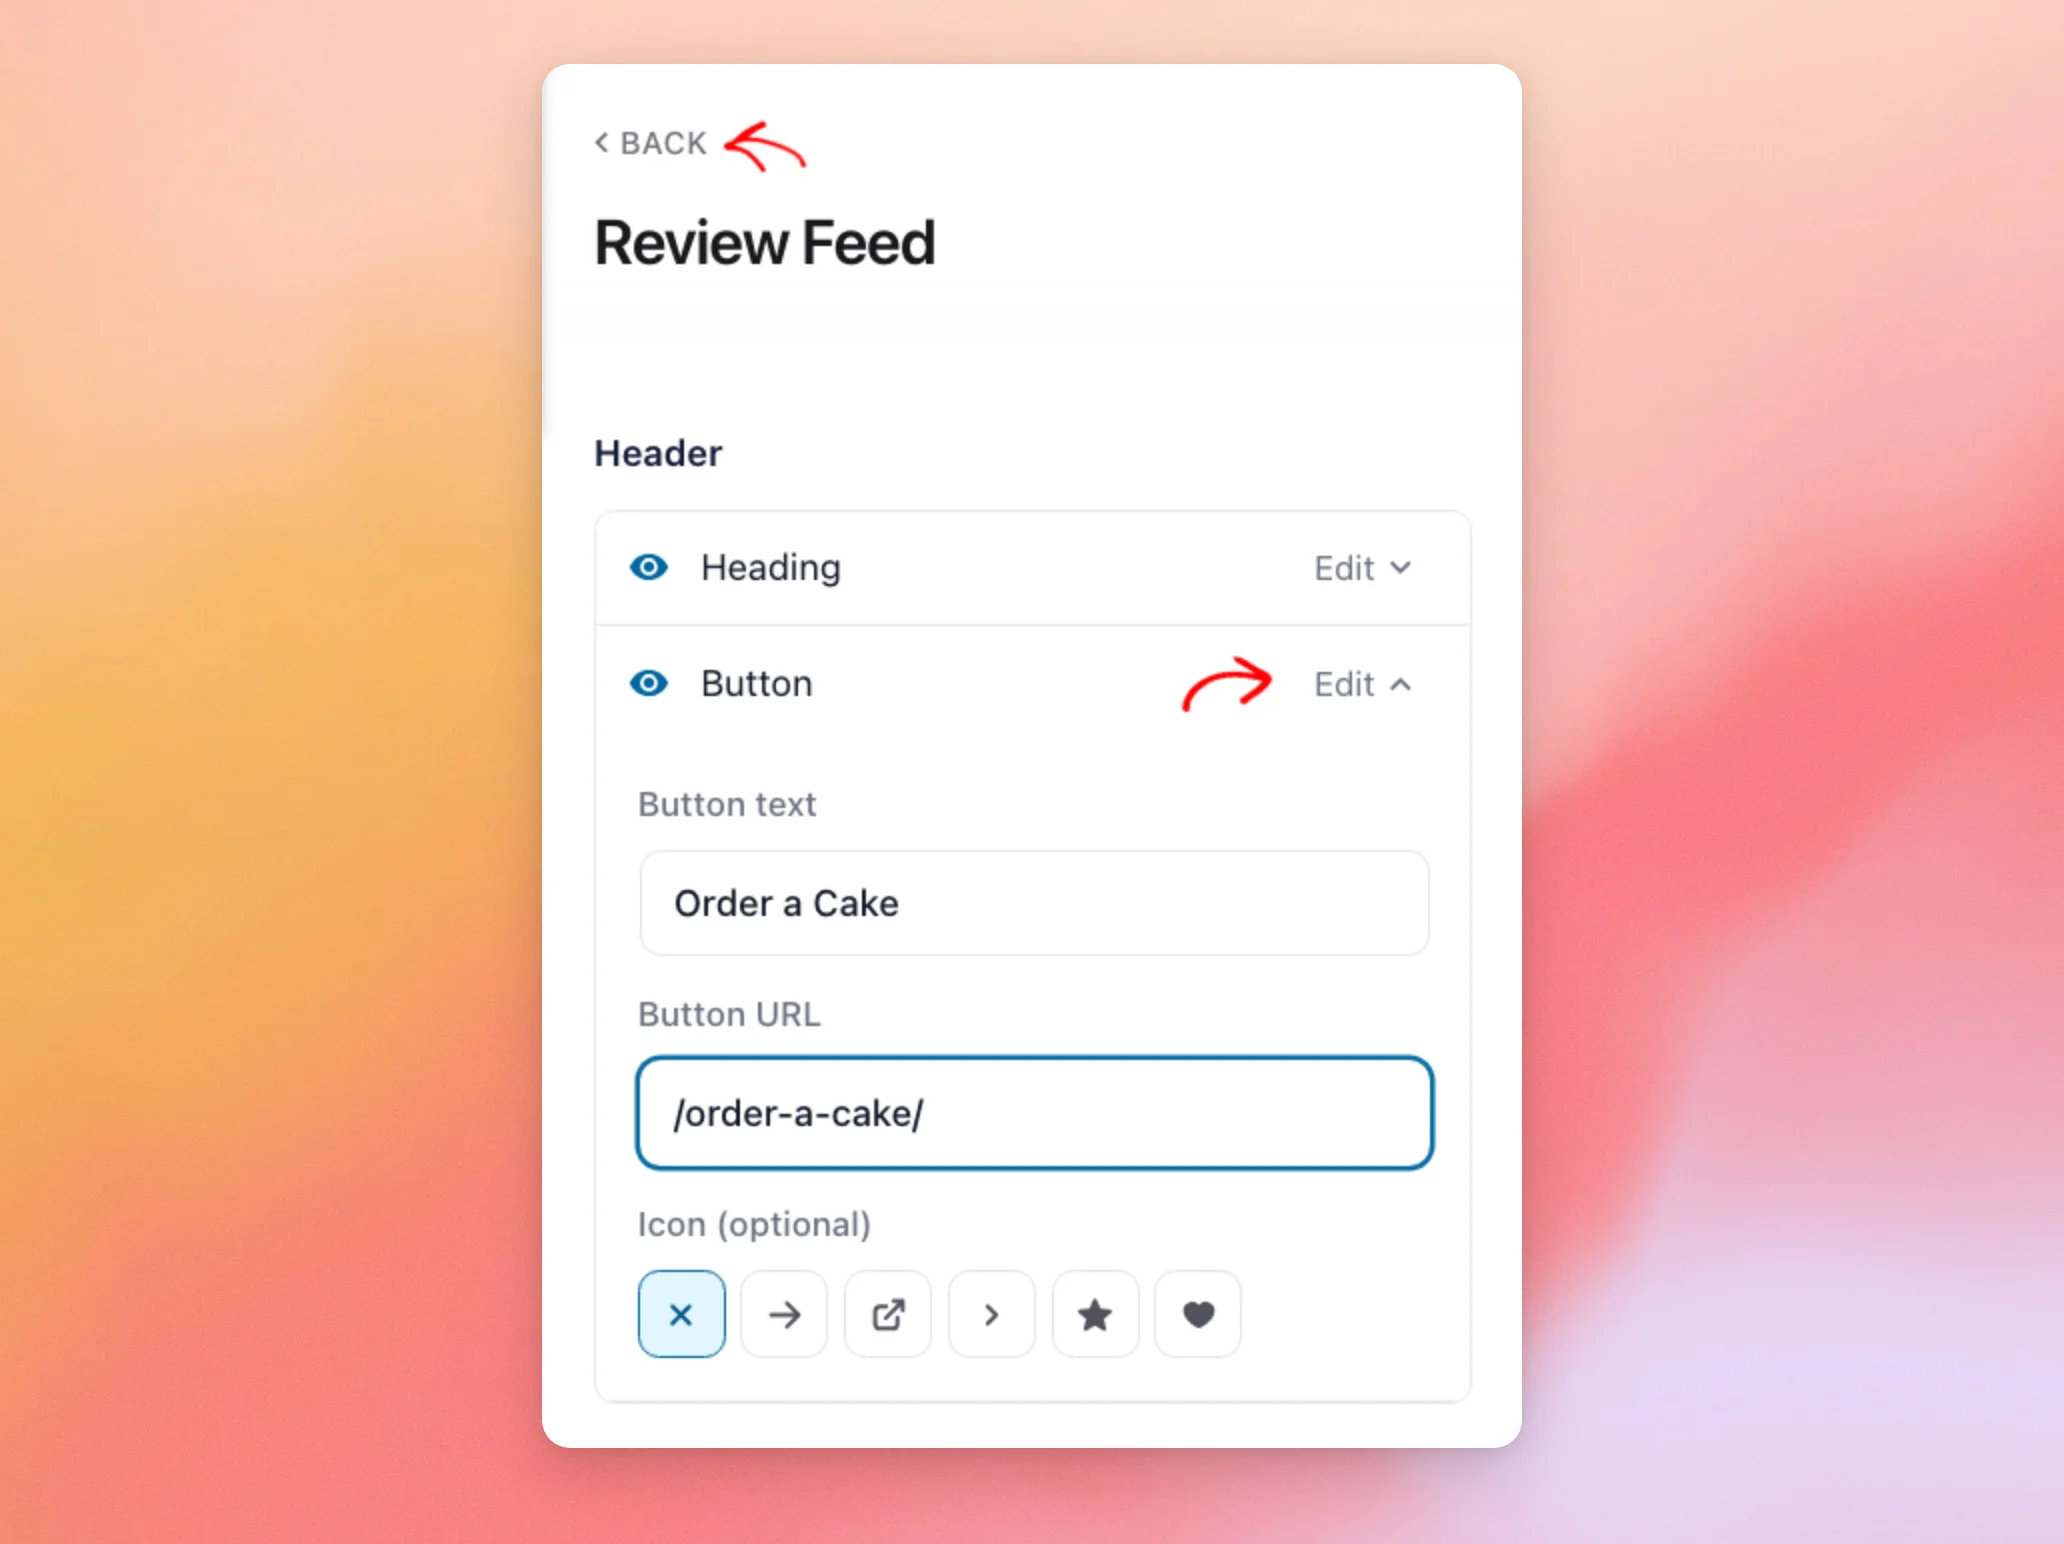
Next, click Edit next to Button. Then, add the button’s label in Button text, the page it links to in Button URL, and an icon if you’d like. When you’re done, click Back.
Below the Header, the Review Cards list lets you show or hide each part of the reviews in the Review Feed. The parts are Stars, Title, Content, Author, and Date. Each one has an eye icon, like the ones in Show/Hide Elements.
Choosing Which Reviews Appear
Next, we’ll choose which reviews your popup shows.
At the top of the sidebar, click the Settings tab.
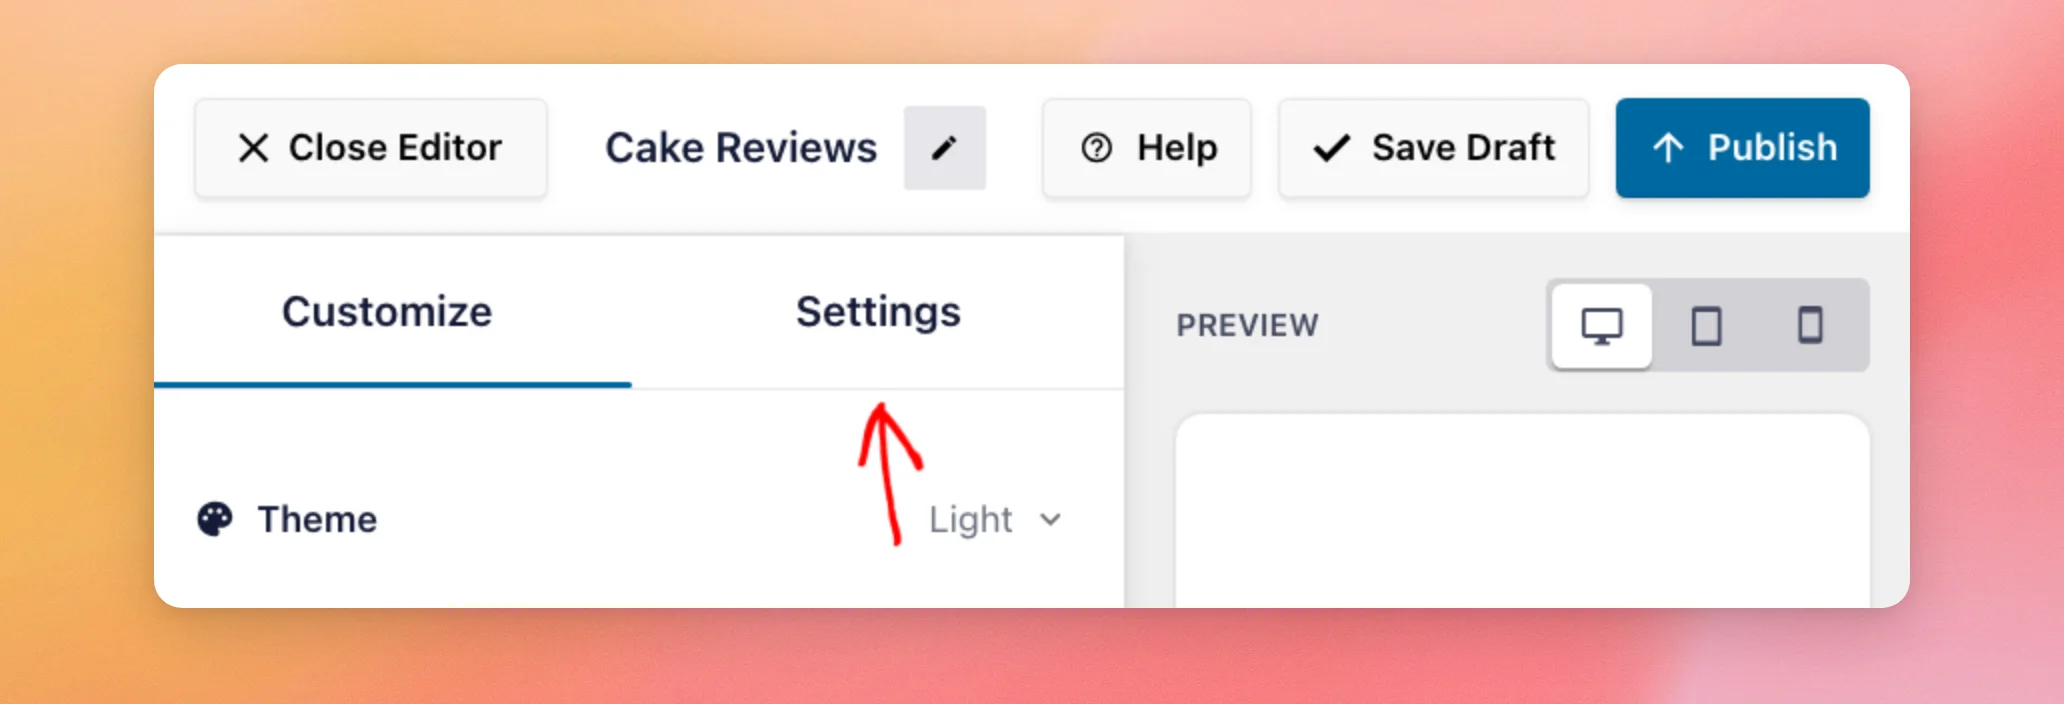
The Settings tab has three sections: Sources, Filter, and Visibility. In Sources, you can change the sources you picked when you created your Review Alert.
Next, click Filter.
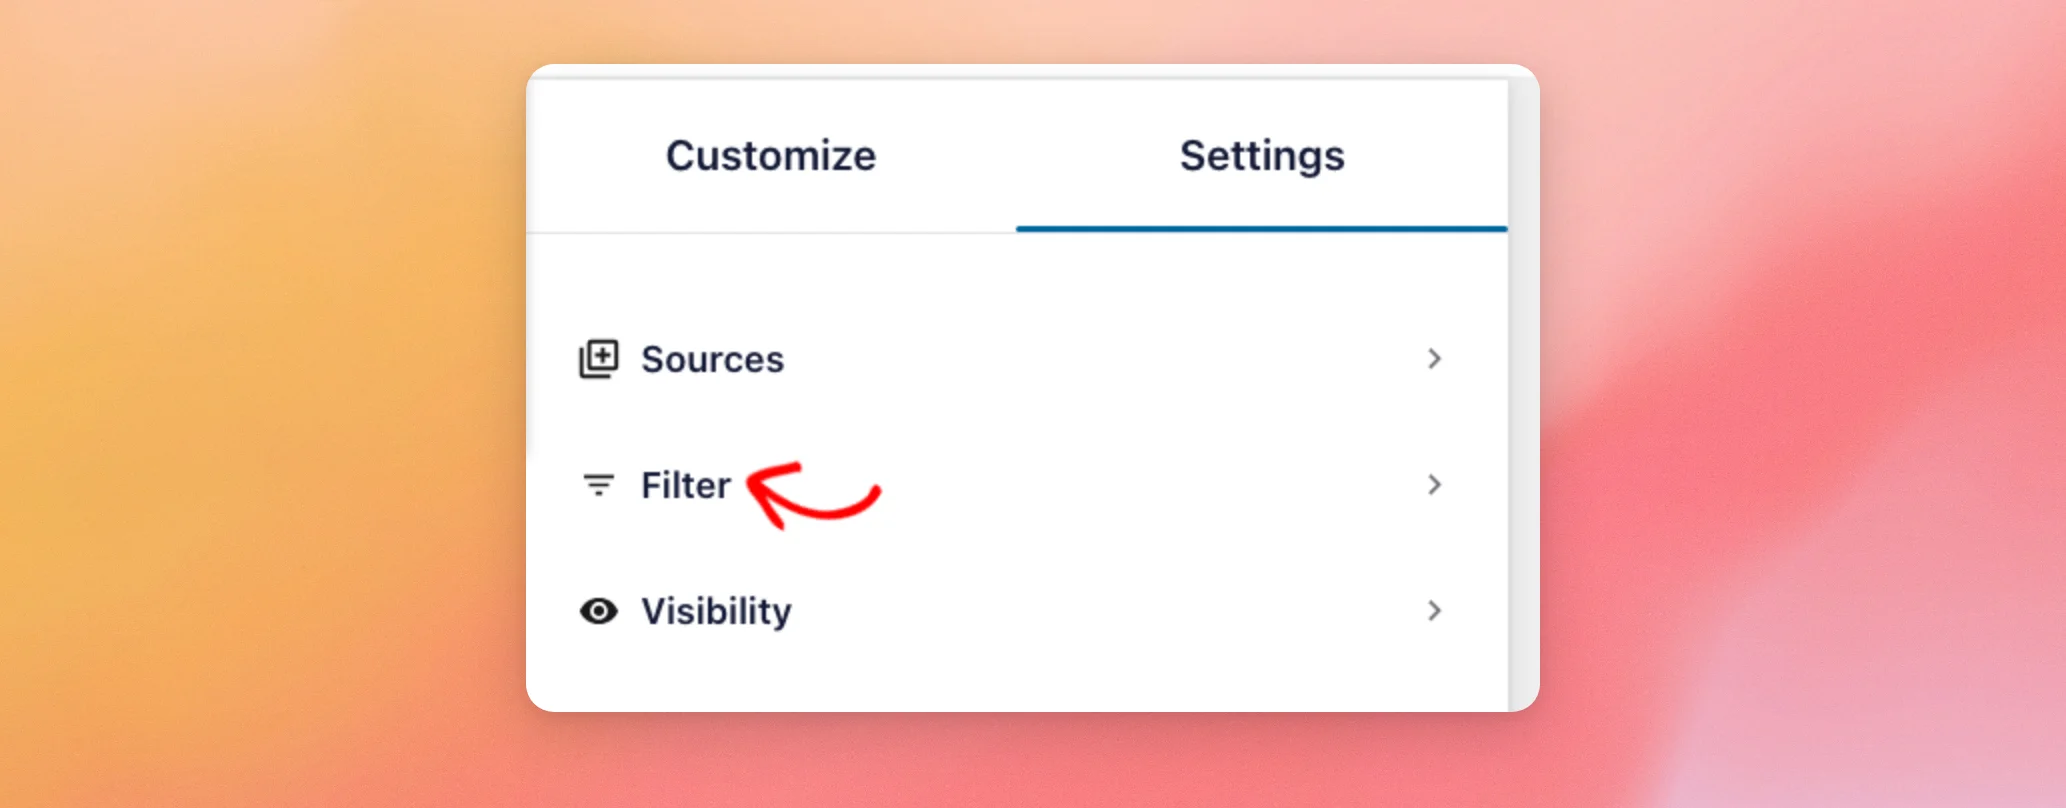
The Filters section has these options:
- Rating and Length: Choose the lowest star rating your popup shows. You can also check Only show reviews with 50+ characters to leave out very short reviews.
- By Source: Choose which of your Review Alert’s sources to show reviews from.
- Sort by Date: Show your newest reviews first or your oldest reviews first.
- By Words: Show only the reviews that contain certain words, or hide the reviews that contain them. Separate your words with commas.
For example, to show only your best reviews, click the fourth star under Rating and Length. Your popup then shows only reviews with four stars or more. The box at the top shows how many of your reviews your popup will show.
When you’re done, click Back at the top of the sidebar.
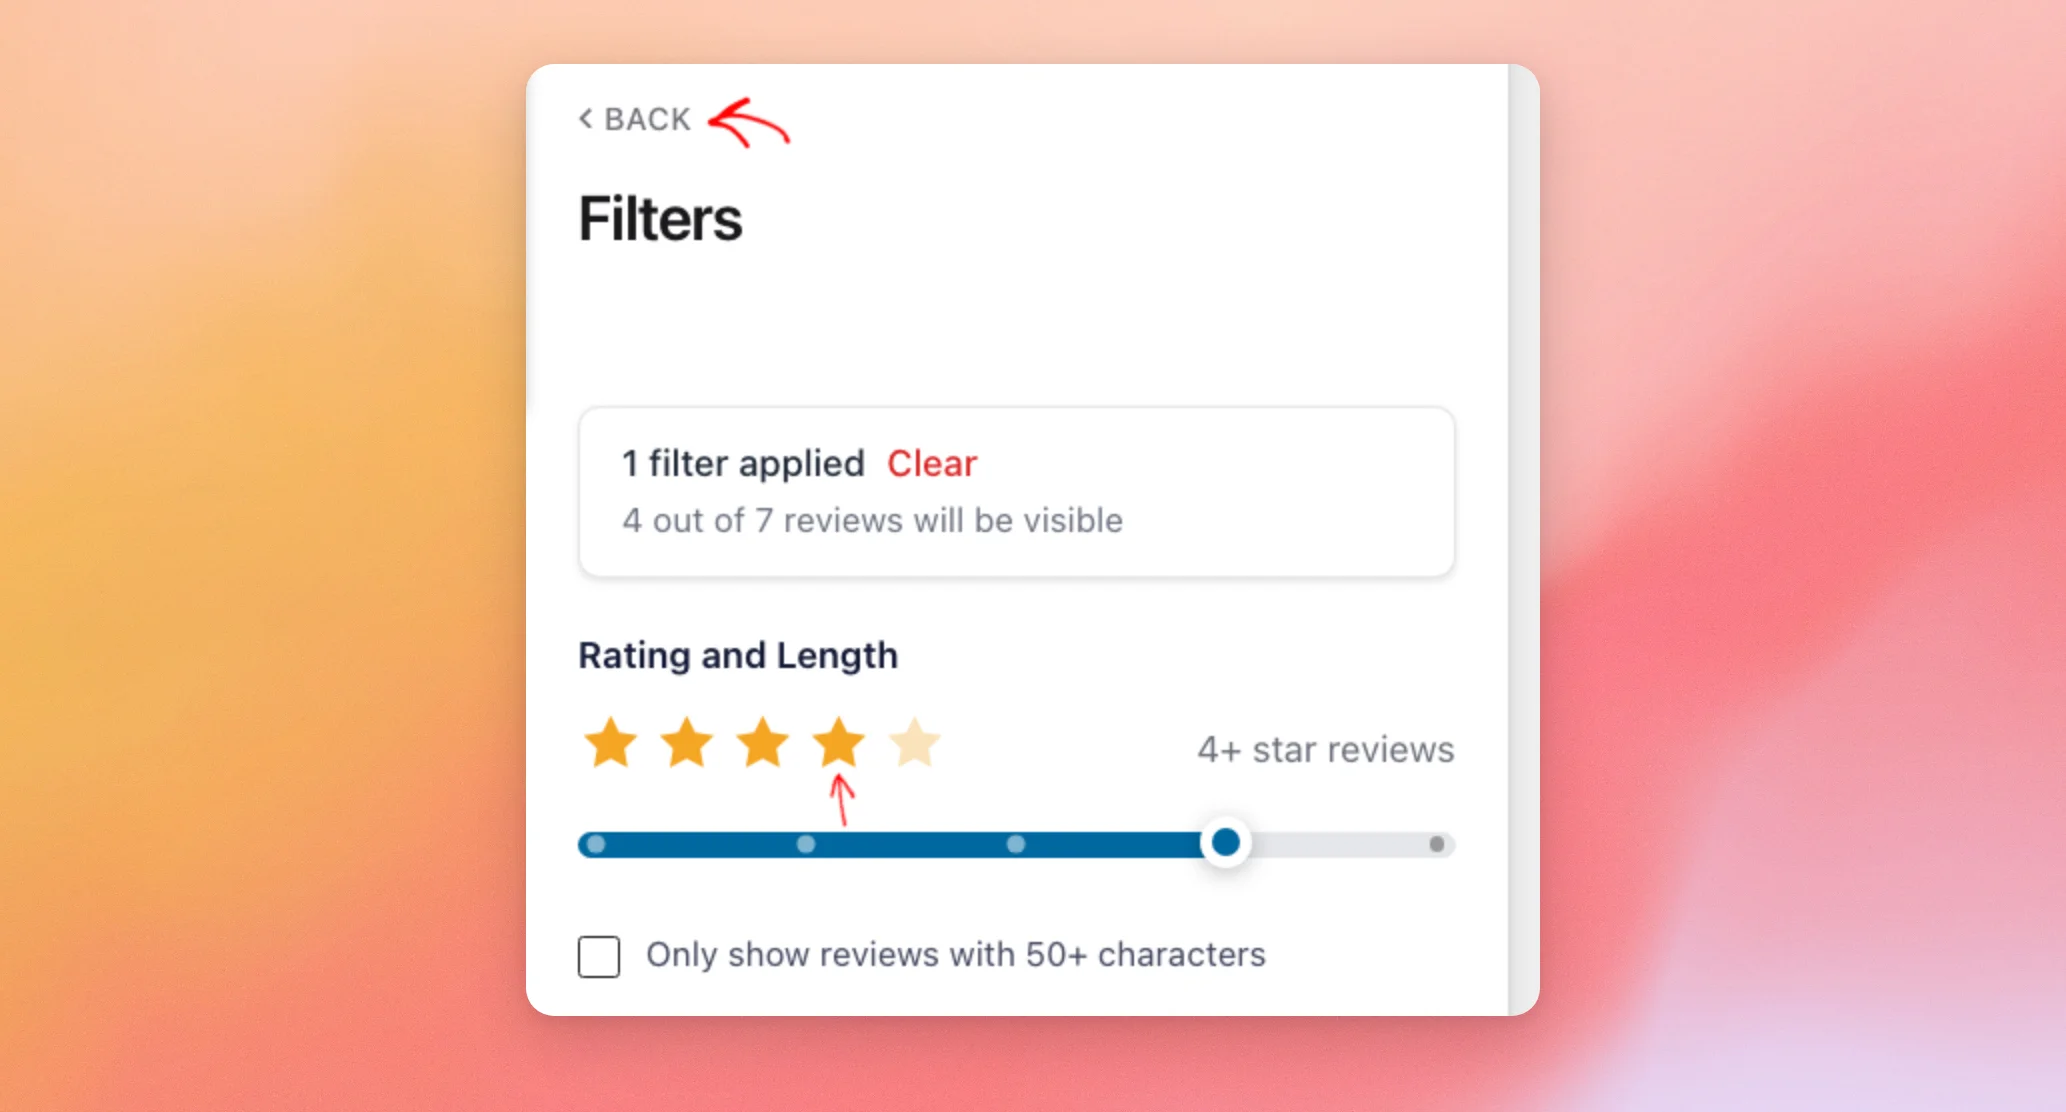
Your filters are now set.
Choosing Where Your Review Alert Appears
Next, we’ll choose the pages your popup shows on.
In the Settings tab, click Visibility.
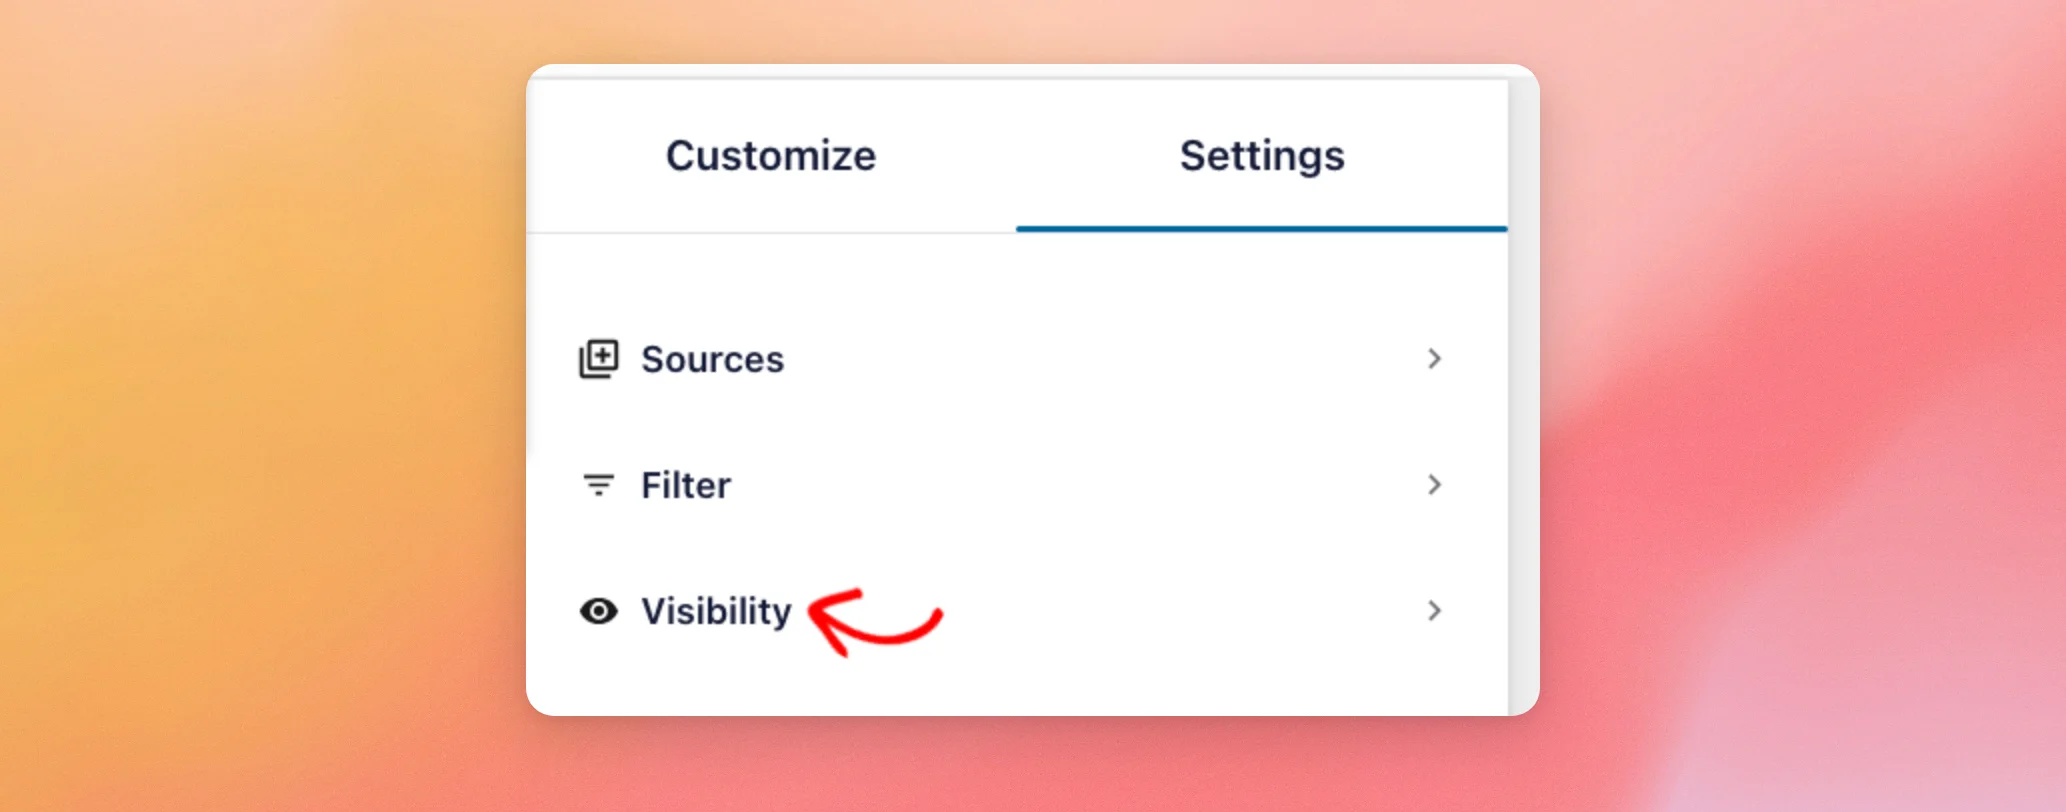
Under Display on, there are two options:
- All pages: Your popup shows on every page of your site. The list below then becomes Excluded pages, where you add any pages you’d like your popup to skip.
- Specific pages: Your popup shows only on the pages you add to the list below.
New Review Alerts start with Specific pages selected and no pages in the list. Before you publish, add at least one page. If you’d like your popup to show everywhere, use All pages.
To add a page, click + Pages. Then, click the page you’d like to add. You can also search for a page by its name, or pick your homepage.
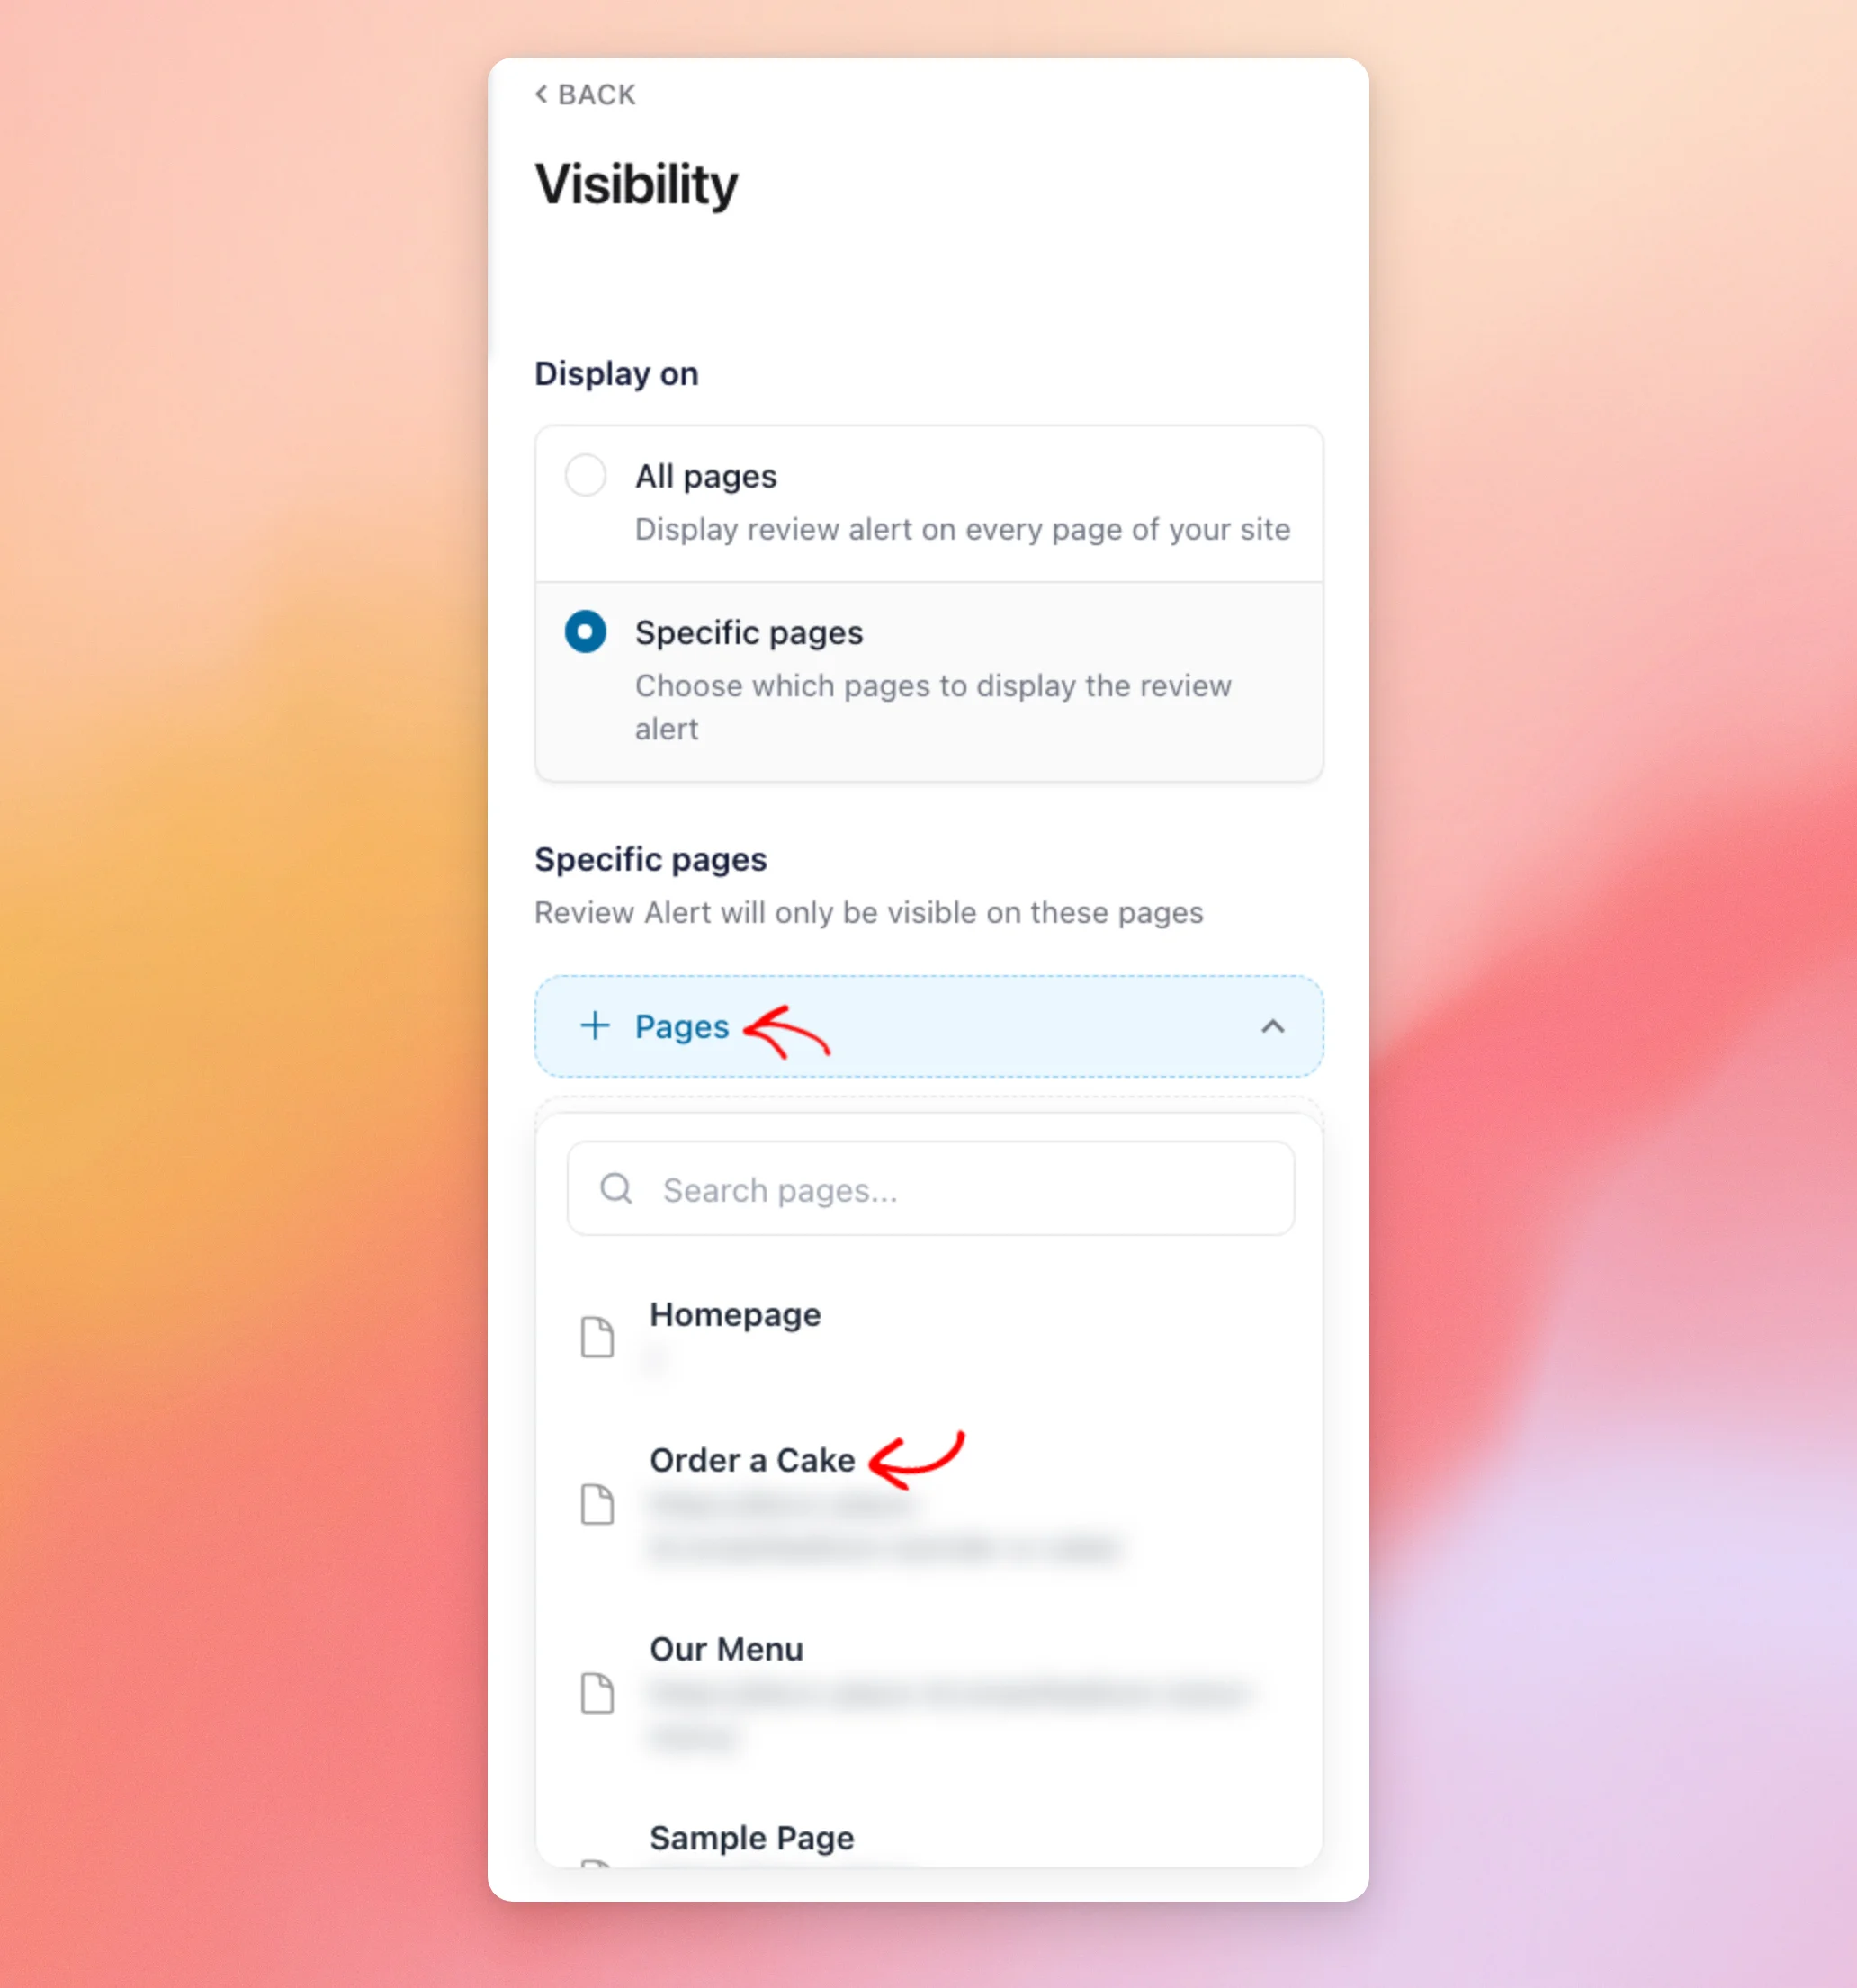
Below Pages, you can also add whole categories with + Categories, or every page of a post type with + Custom Post Types.
Publishing Your Review Alert
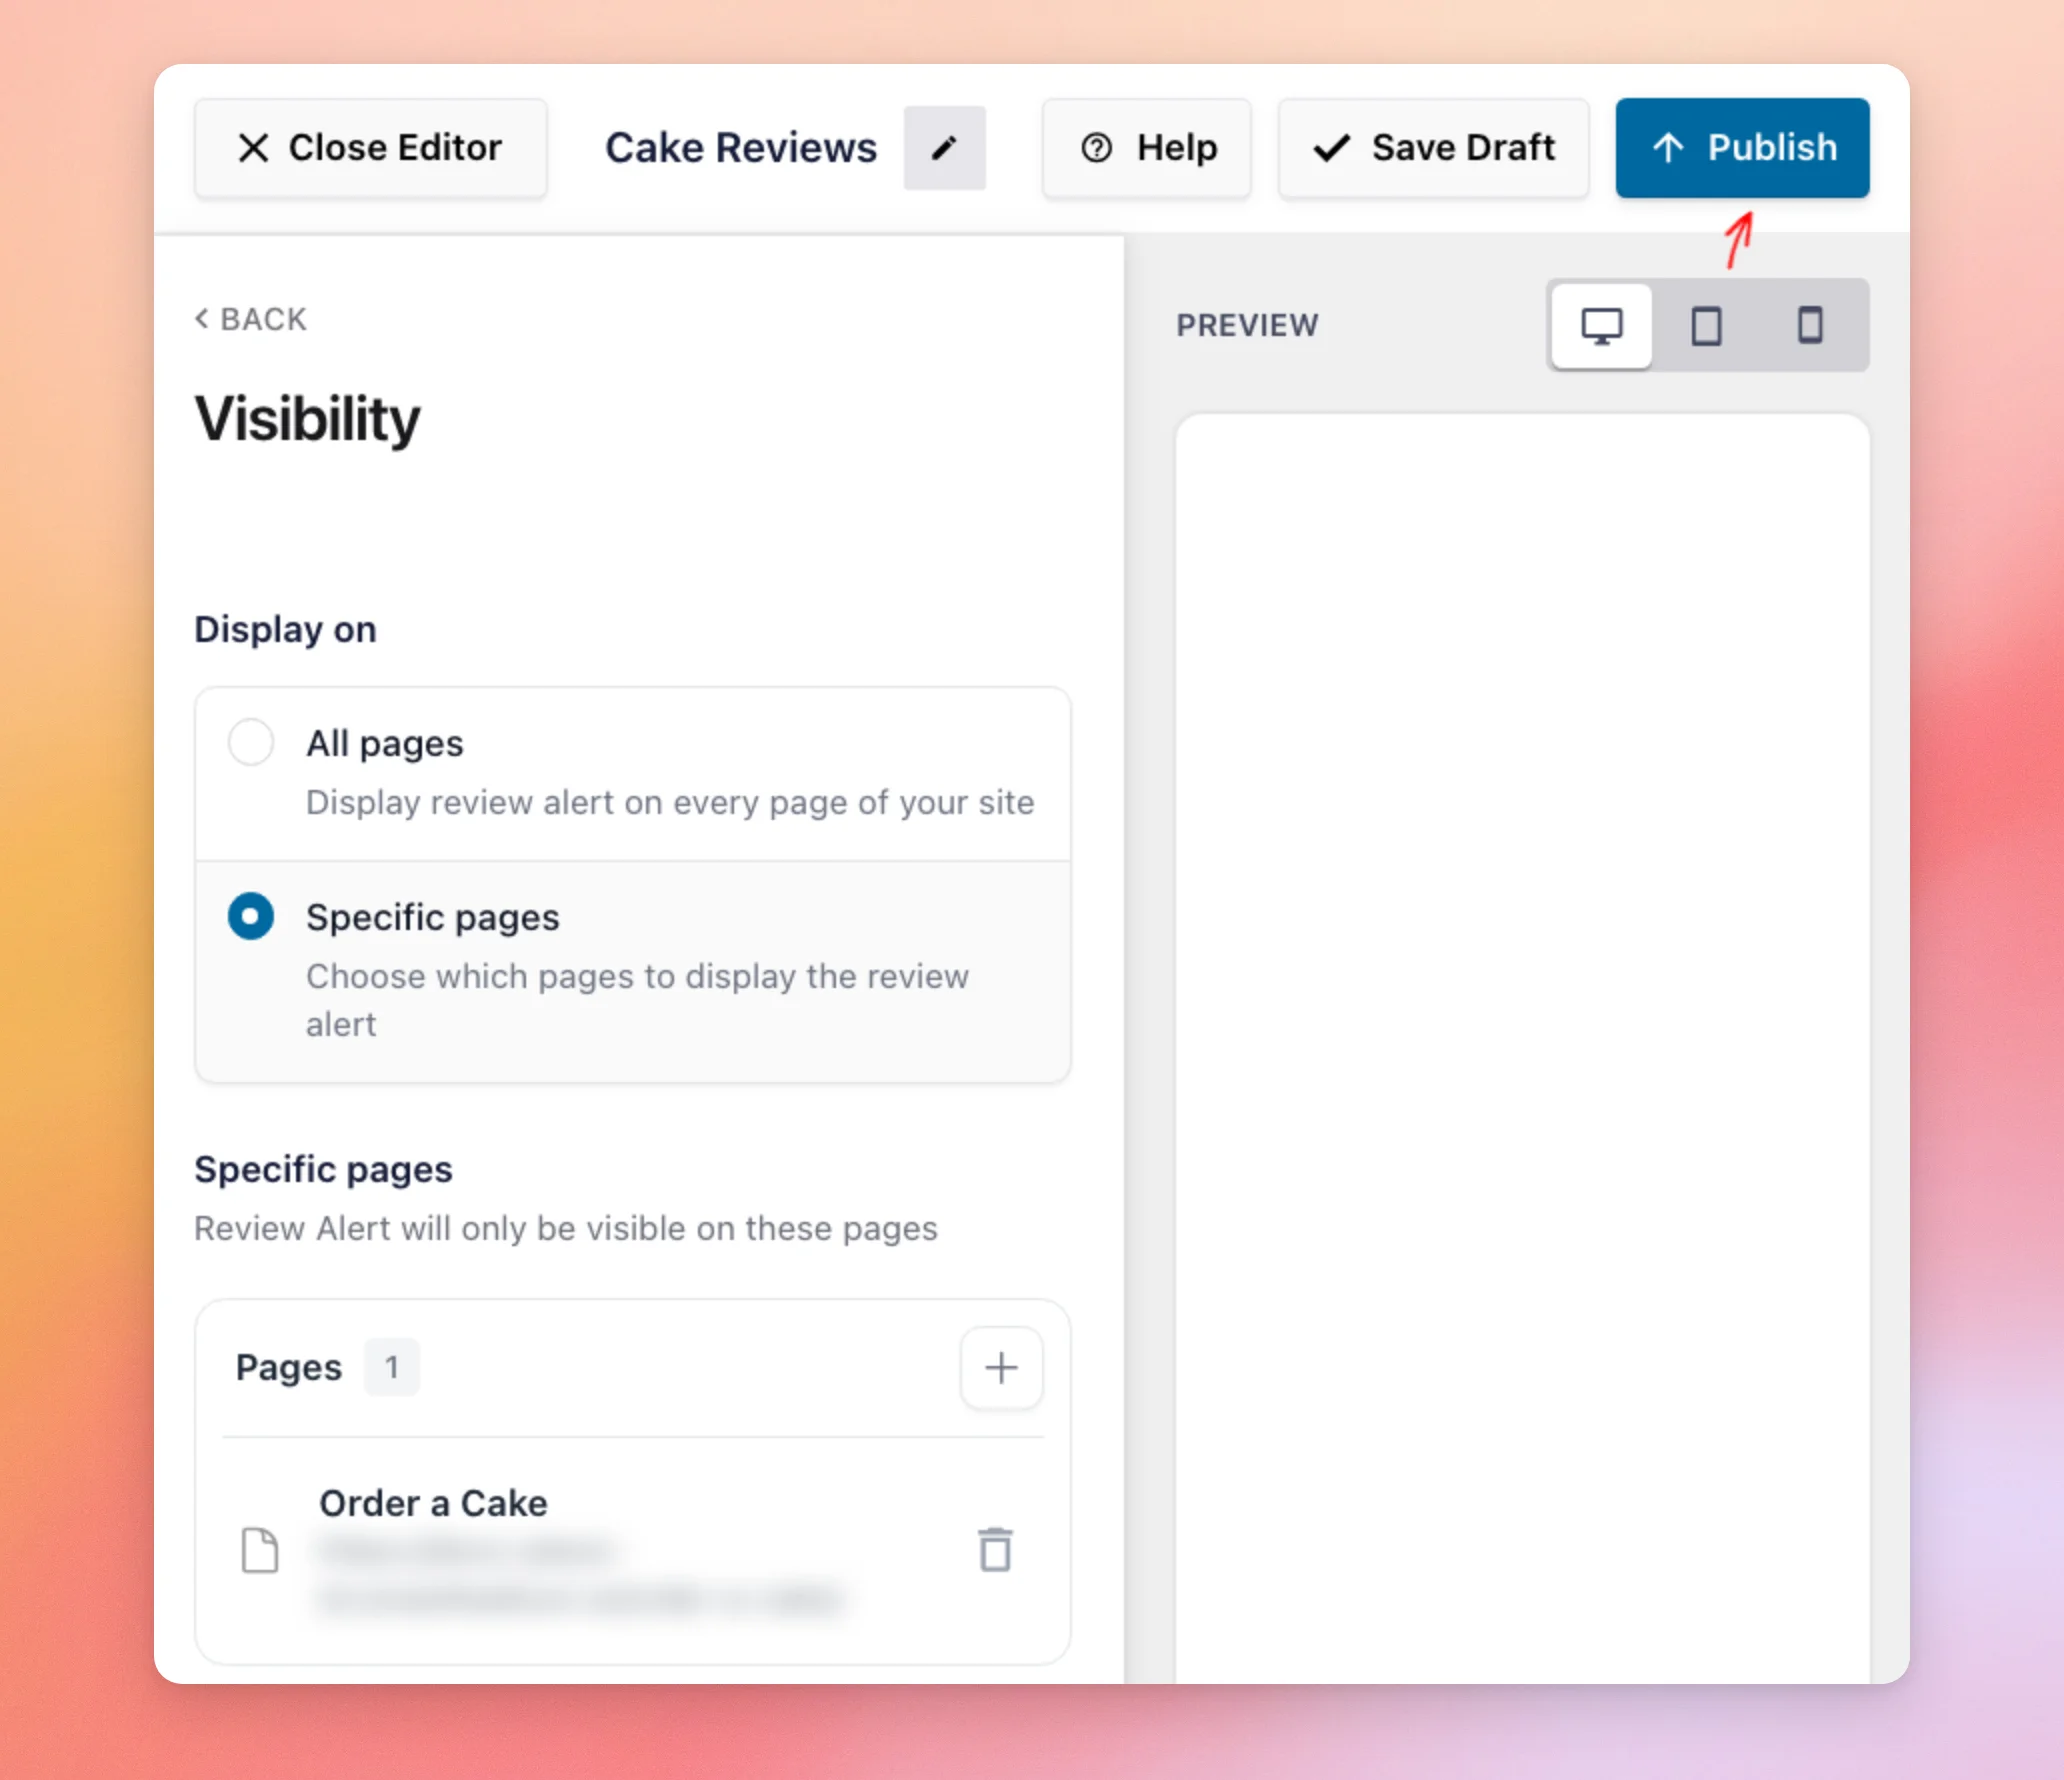
The page you added now shows in the Specific pages list. Until you publish your Review Alert, it stays a draft. The Save Draft button saves your changes without showing the popup on your site.
When you’re ready for visitors to see it, click Publish at the top of the editor.
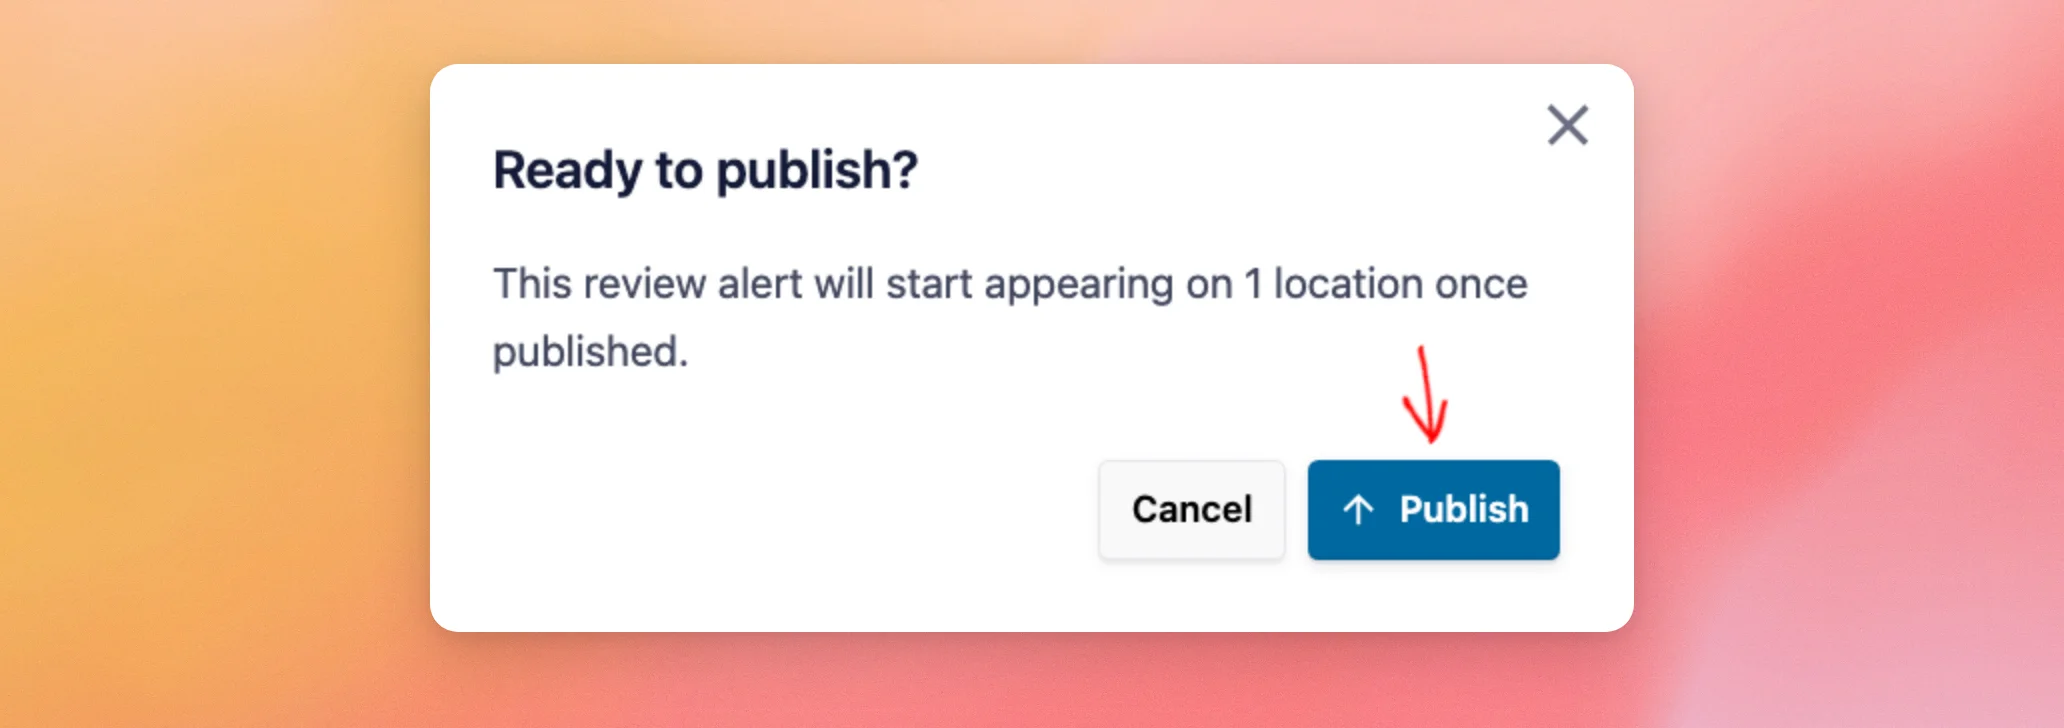
A Ready to publish? window opens and shows how many locations your popup will appear on. Next, click Publish to confirm.
Your Review Alert is now live. At the top of the editor, a Save button replaces Save Draft for any later changes. A Revert to Draft button takes the popup off your site.
Seeing Your Review Alert on Your Site
To see your Review Alert, visit one of the pages you chose. After a few seconds, the popup shows in the bottom corner of the page.
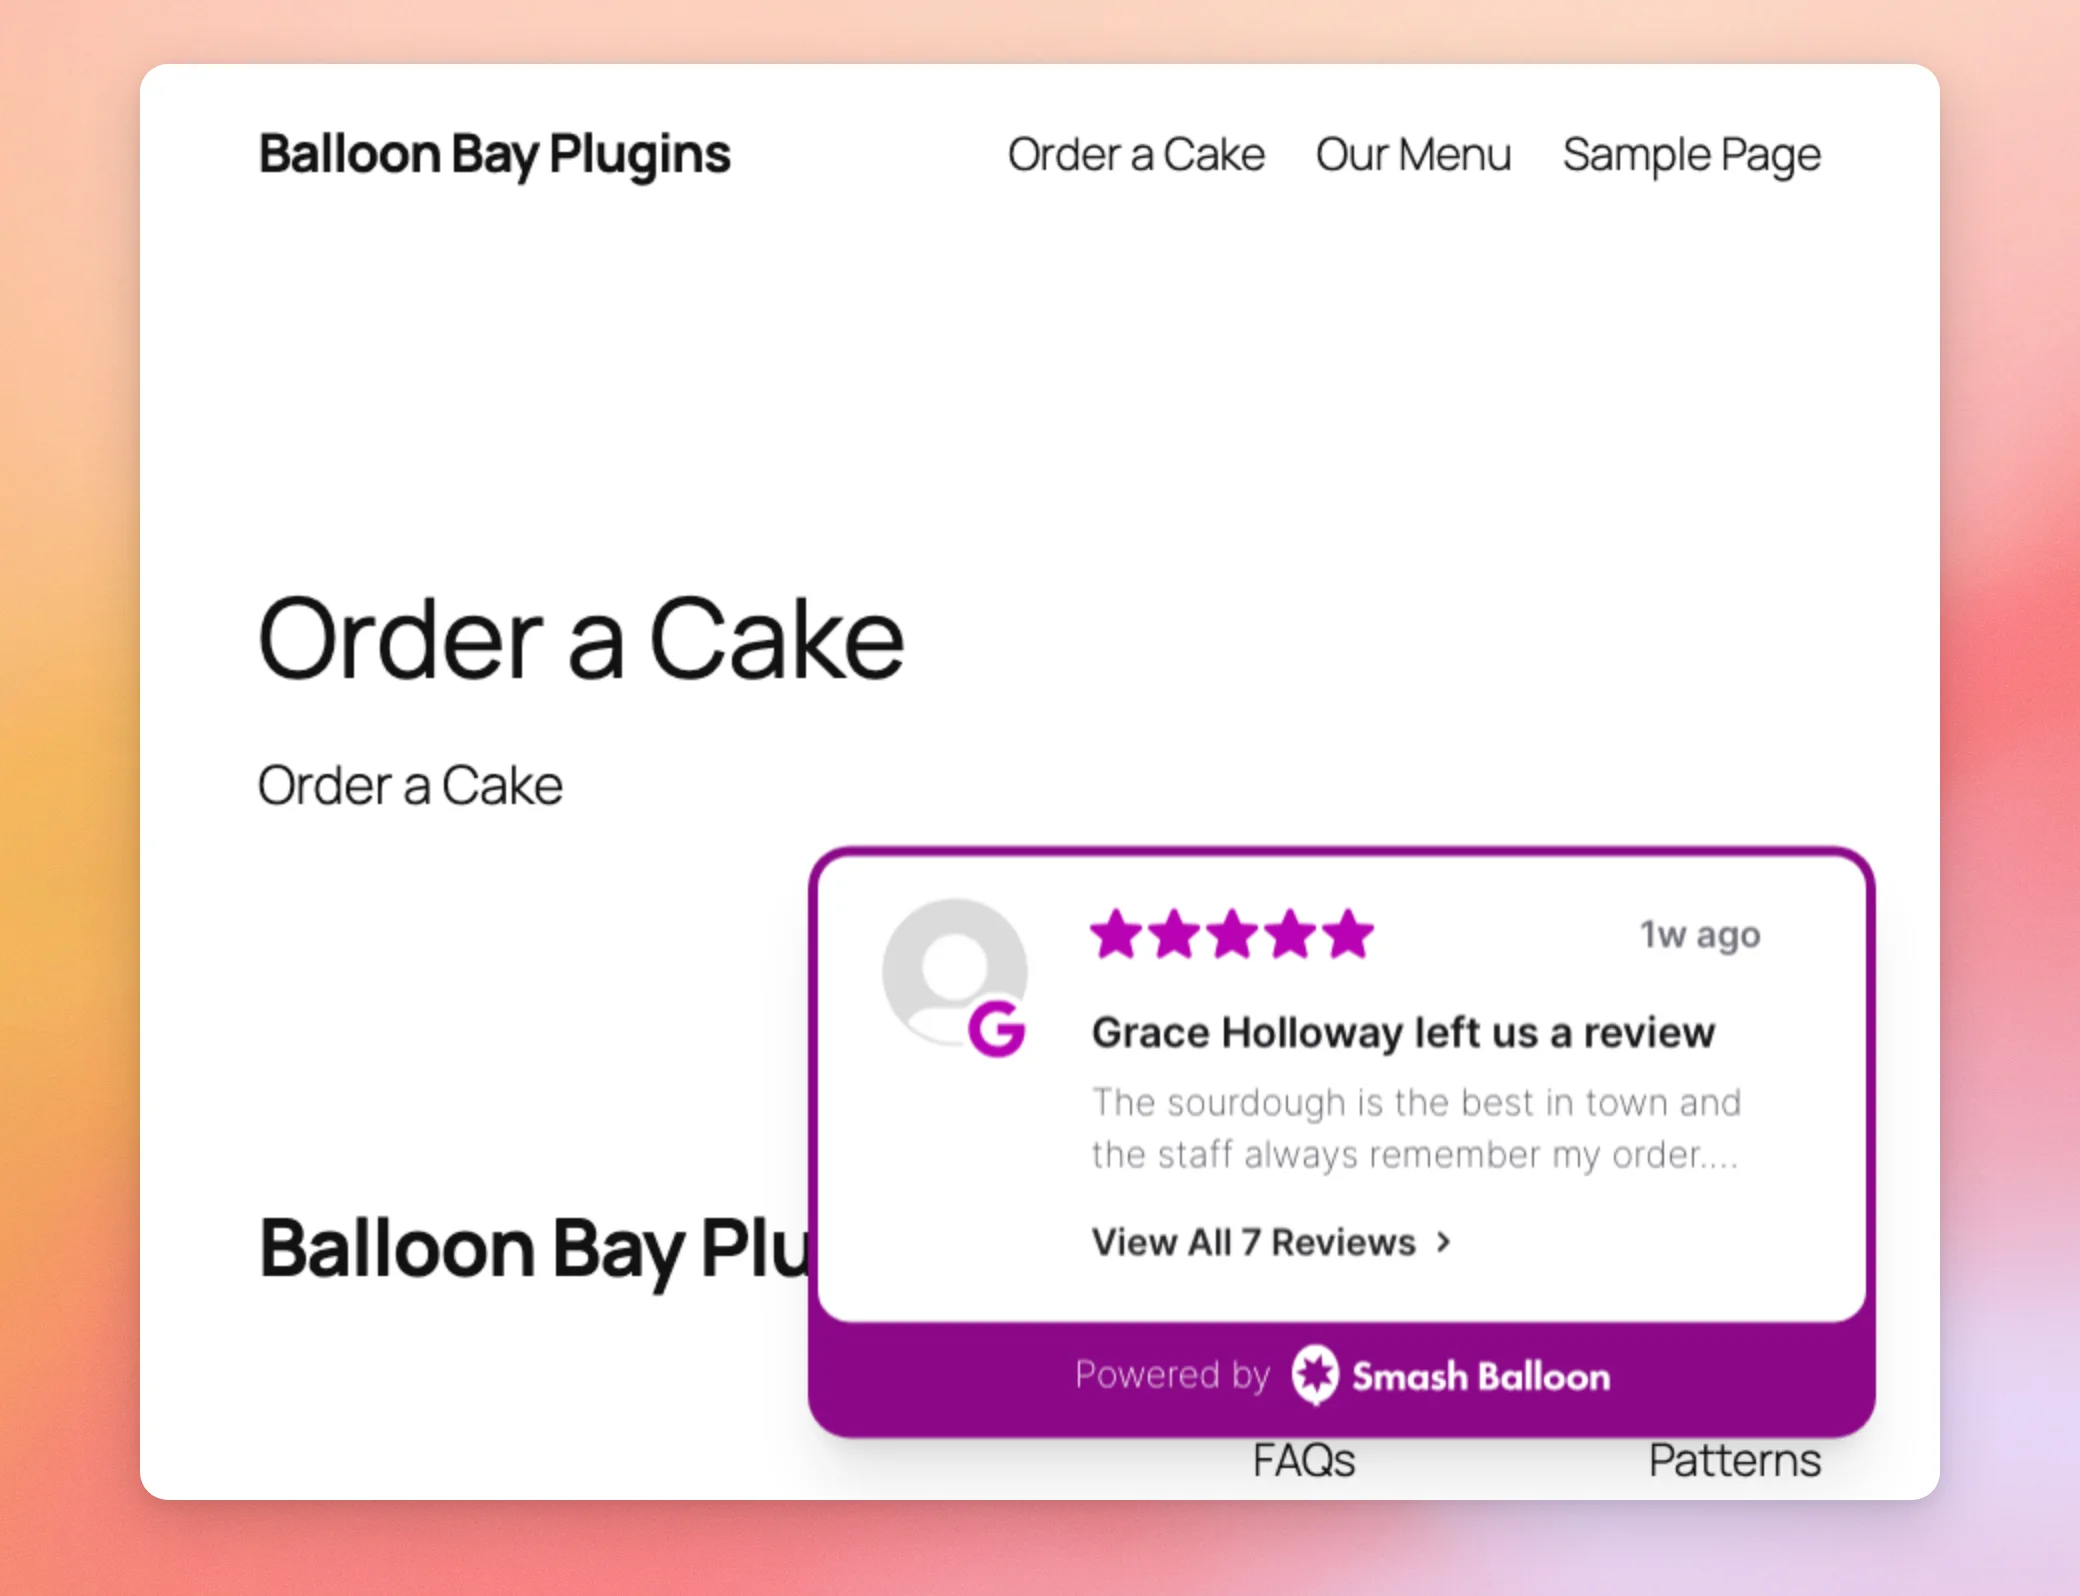
The View All link shows your total number of reviews. When visitors click it, the Review Feed opens with your heading, your button, and a list of your reviews.
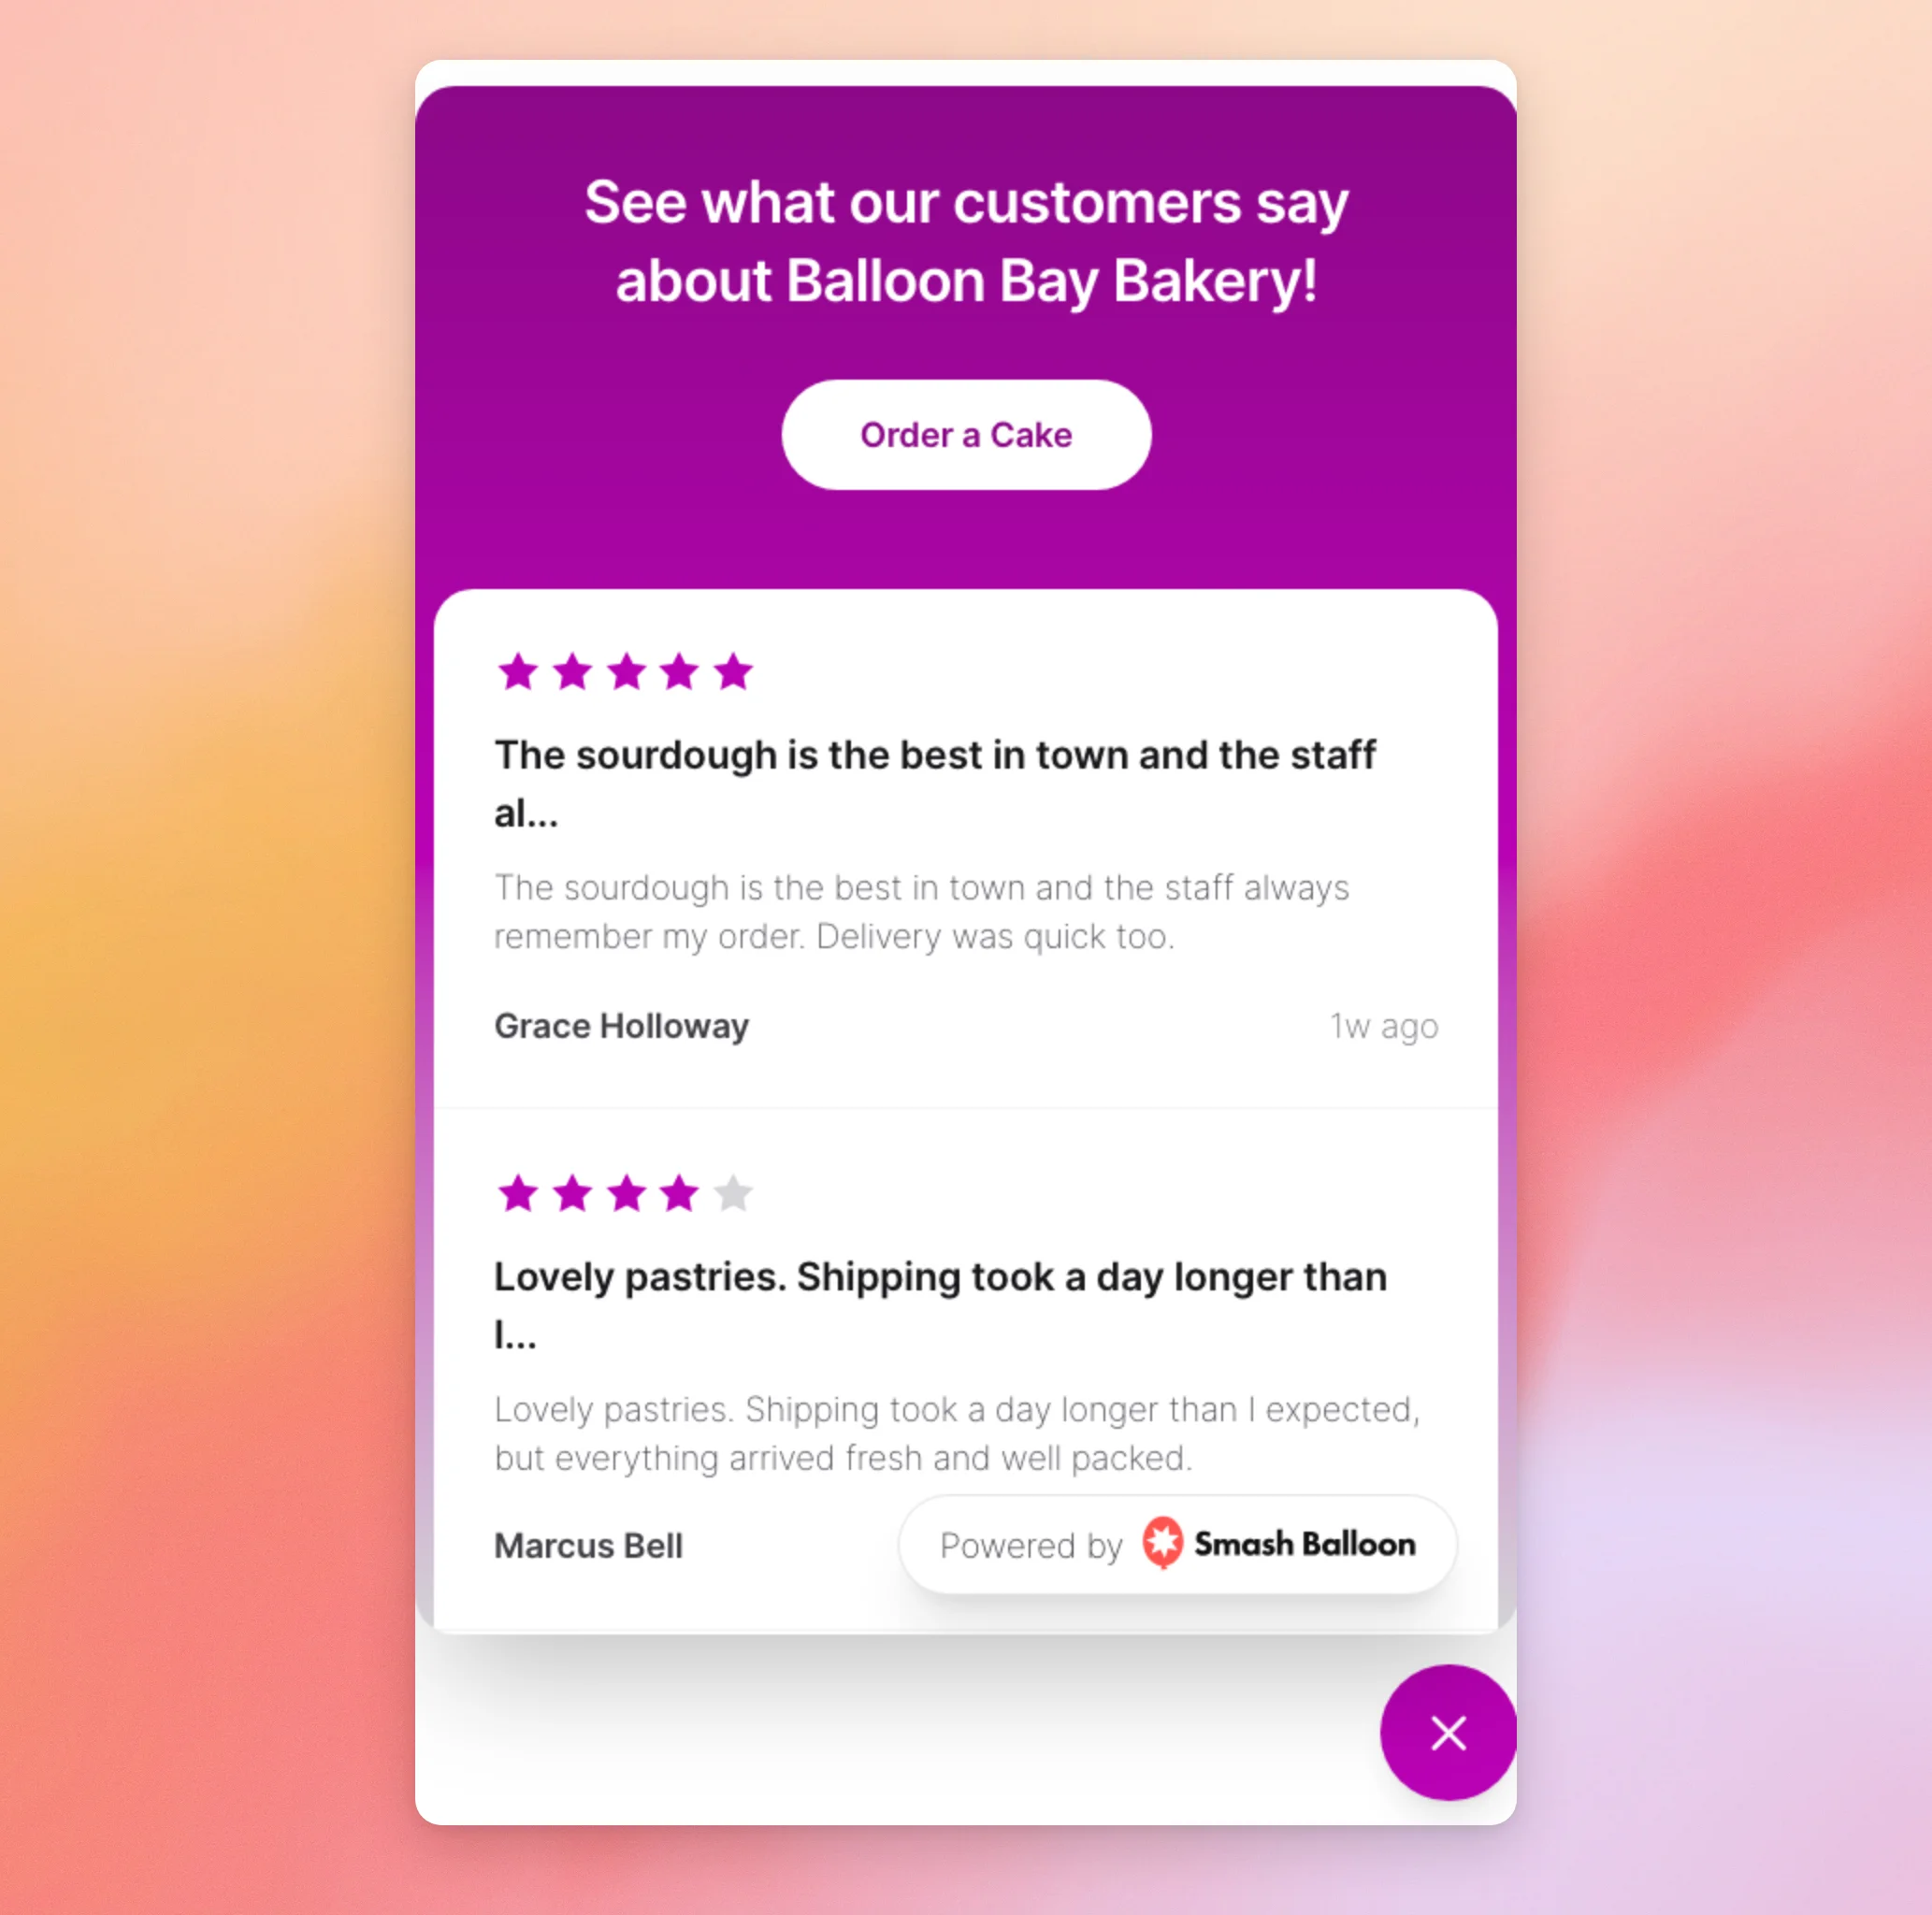
That’s it! Your Review Alert is now live and shows your reviews in a popup on the pages you chose.
Next, would you like your popup to show only the reviews you pick by hand? See our guide on using collections. To show your overall star rating in a small badge on your site, see our guide on creating a Trust Badge.
Frequently Asked Questions
Below, we’ve answered some of the most common questions about Review Alerts.
Can I use Review Alerts with a Basic license?
No. Review Alerts require a Plus license level or higher. To compare license levels, see our guide on Reviews Feed licenses.
Do I need to connect my review sources again?
No. When you create a Review Alert, the Select Sources window lists the sources you’ve already connected in Reviews Feed. You can also connect a new source from that window.
You can change your sources later in the Sources section of the Settings tab.
Can I show different Review Alerts on different pages?
Yes. Create a Review Alert for each group of pages and choose its pages in the Visibility section. Each page shows one Review Alert at a time.
When more than one Review Alert matches a page, the one set to Specific pages shows instead of one set to All pages. If both use the same option, the newest Review Alert shows.
Can I show my Review Alert on every page except a few?
Yes. When Display on is set to All pages in the Visibility section, the list below it becomes Excluded pages. Your popup skips every page you add there.
To learn more about both options, see Choosing Where Your Review Alert Appears above.
Can I remove the Powered by Smash Balloon label?
Yes. Powered By is one of the parts you can hide with its eye icon under Show/Hide Elements. The Review Alert section of the Customize tab lists these parts.
The Review Feed section has its own Powered By option under Branding. This means you can hide the label in the popup, in the Review Feed, or in both.
How do I stop showing a Review Alert?
Once a Review Alert is published, its editor has a Revert to Draft button at the top. Reverting takes the popup off your site.
Your Review Alert keeps all of its settings. You can publish it again later.
Why can’t I see my Review Alert on my site?
First, confirm that your Review Alert is published, because a draft doesn’t show on your site. Next, check the Visibility section.
With Display on set to Specific pages, the page you’re viewing needs to be in the list. With Display on set to All pages, that page can’t be in the Excluded pages list.
The popup also shows about three seconds after a page loads. If you closed it earlier, it stays closed while you keep browsing your site and shows again on your next visit.
What happens when one of my visitors closes the popup?
The popup stays closed while that visitor keeps browsing your site. It shows again on their next visit.
Do filters delete any of my reviews?
No. Filters only change which reviews your popup shows. Your reviews stay in your sources.
If you change a filter later, the reviews it hid can show again.