Social Wall
 Feed Analytics


Would you like to show your Instagram posts in their own shapes, or make your best posts stand out by showing them bigger?
Instagram Feed Pro has four feed layouts. Masonry shows each post in its own proportions, so tall and wide photos keep their shape. Highlight shows some posts at twice the width and height of the others, picked by a pattern, by post ID, or by hashtag.
This guide shows you how to switch a feed to Masonry or Highlight and set up each one.
Before you get started, make sure Instagram Feed Pro is installed and activated on your WordPress site.
Requirements: The Carousel, Masonry, and Highlight layouts need Instagram Feed Pro with an active license. They work with any license level.
Here is what we will cover.
- Choosing a Feed Layout
- Using the Masonry Layout
- Using the Highlight Layout
- Saving Your Changes
- Frequently Asked Questions
Choosing a Feed Layout
Each feed has its own layout, so you can use a different one for each feed on your site. You choose it in the feed editor. To open the layout settings, follow these steps.
- In your WordPress dashboard, go to Instagram Feed » All Feeds and click the name of the feed you want to change.
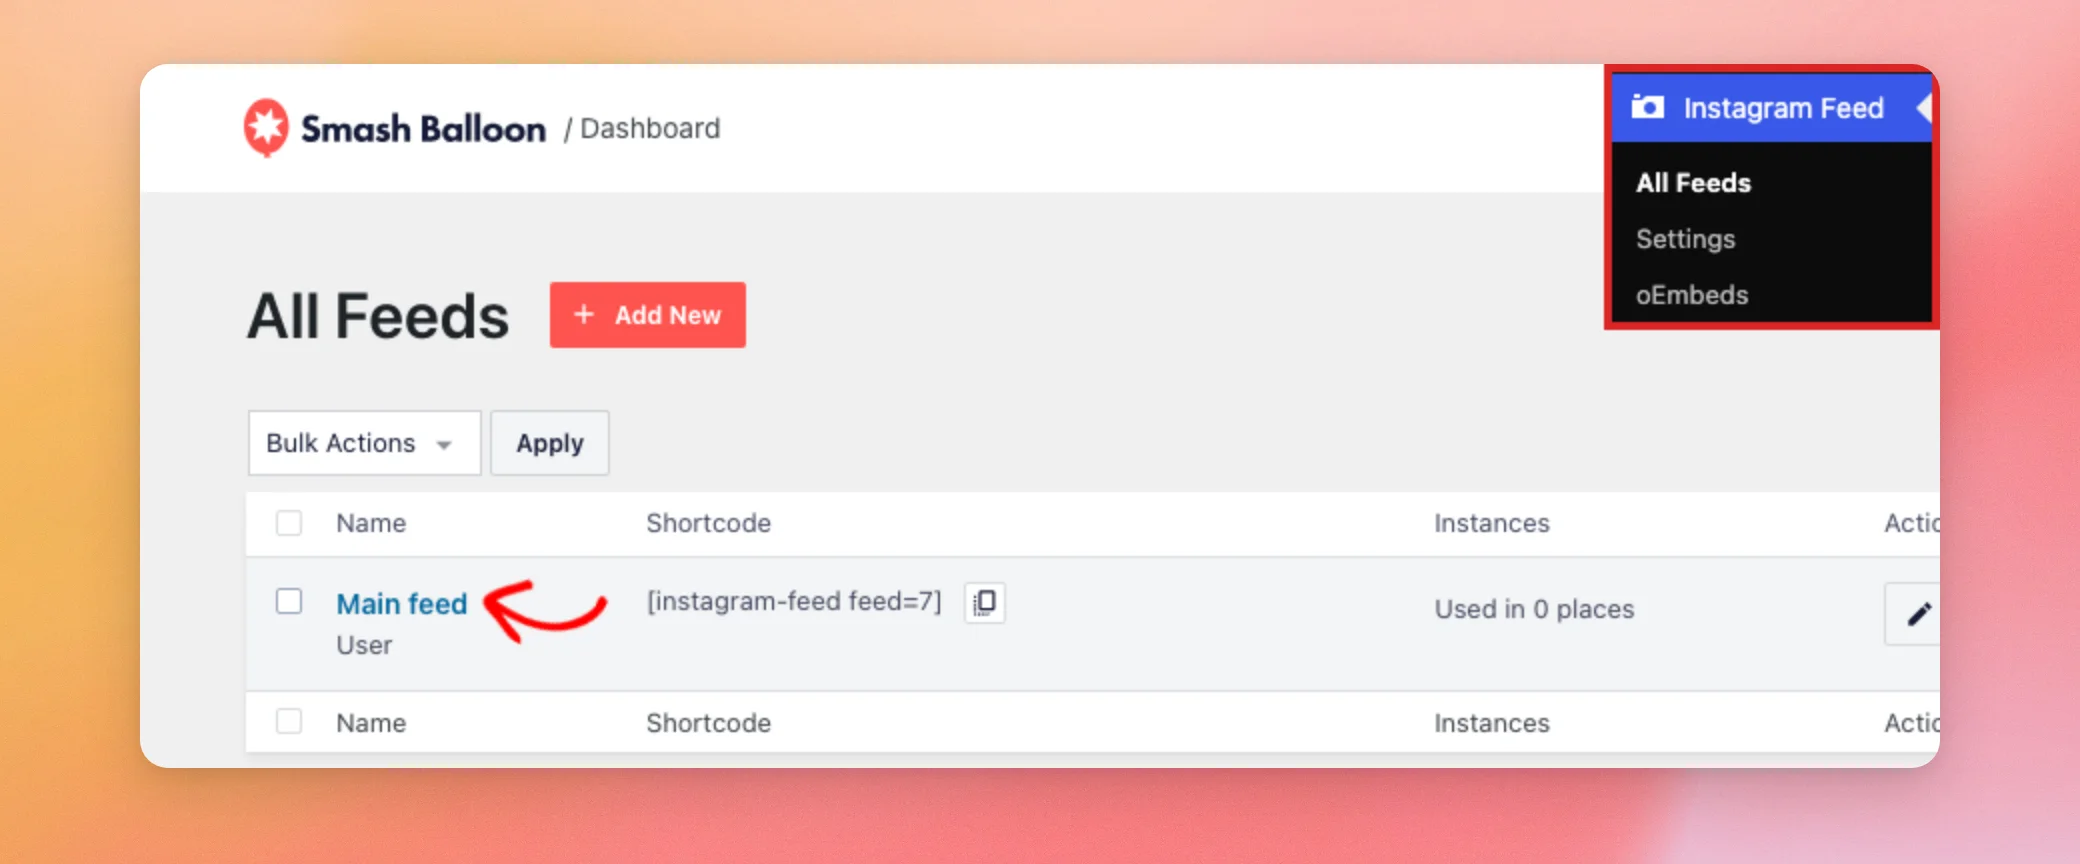
- The feed editor opens on the Customize tab. Next, click Feed Layout.
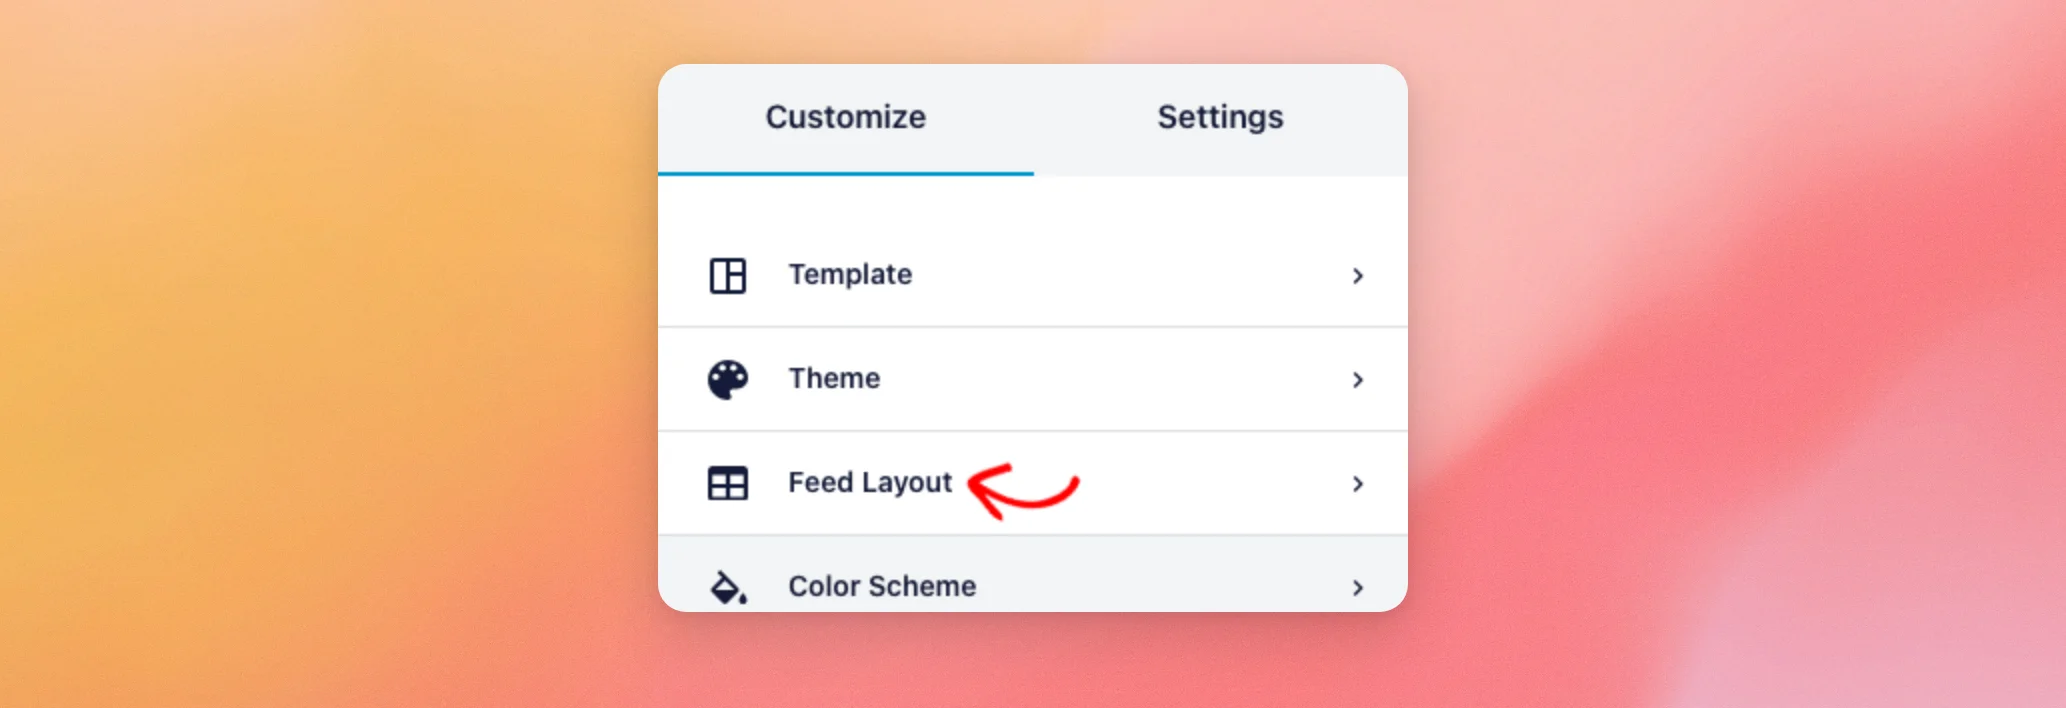
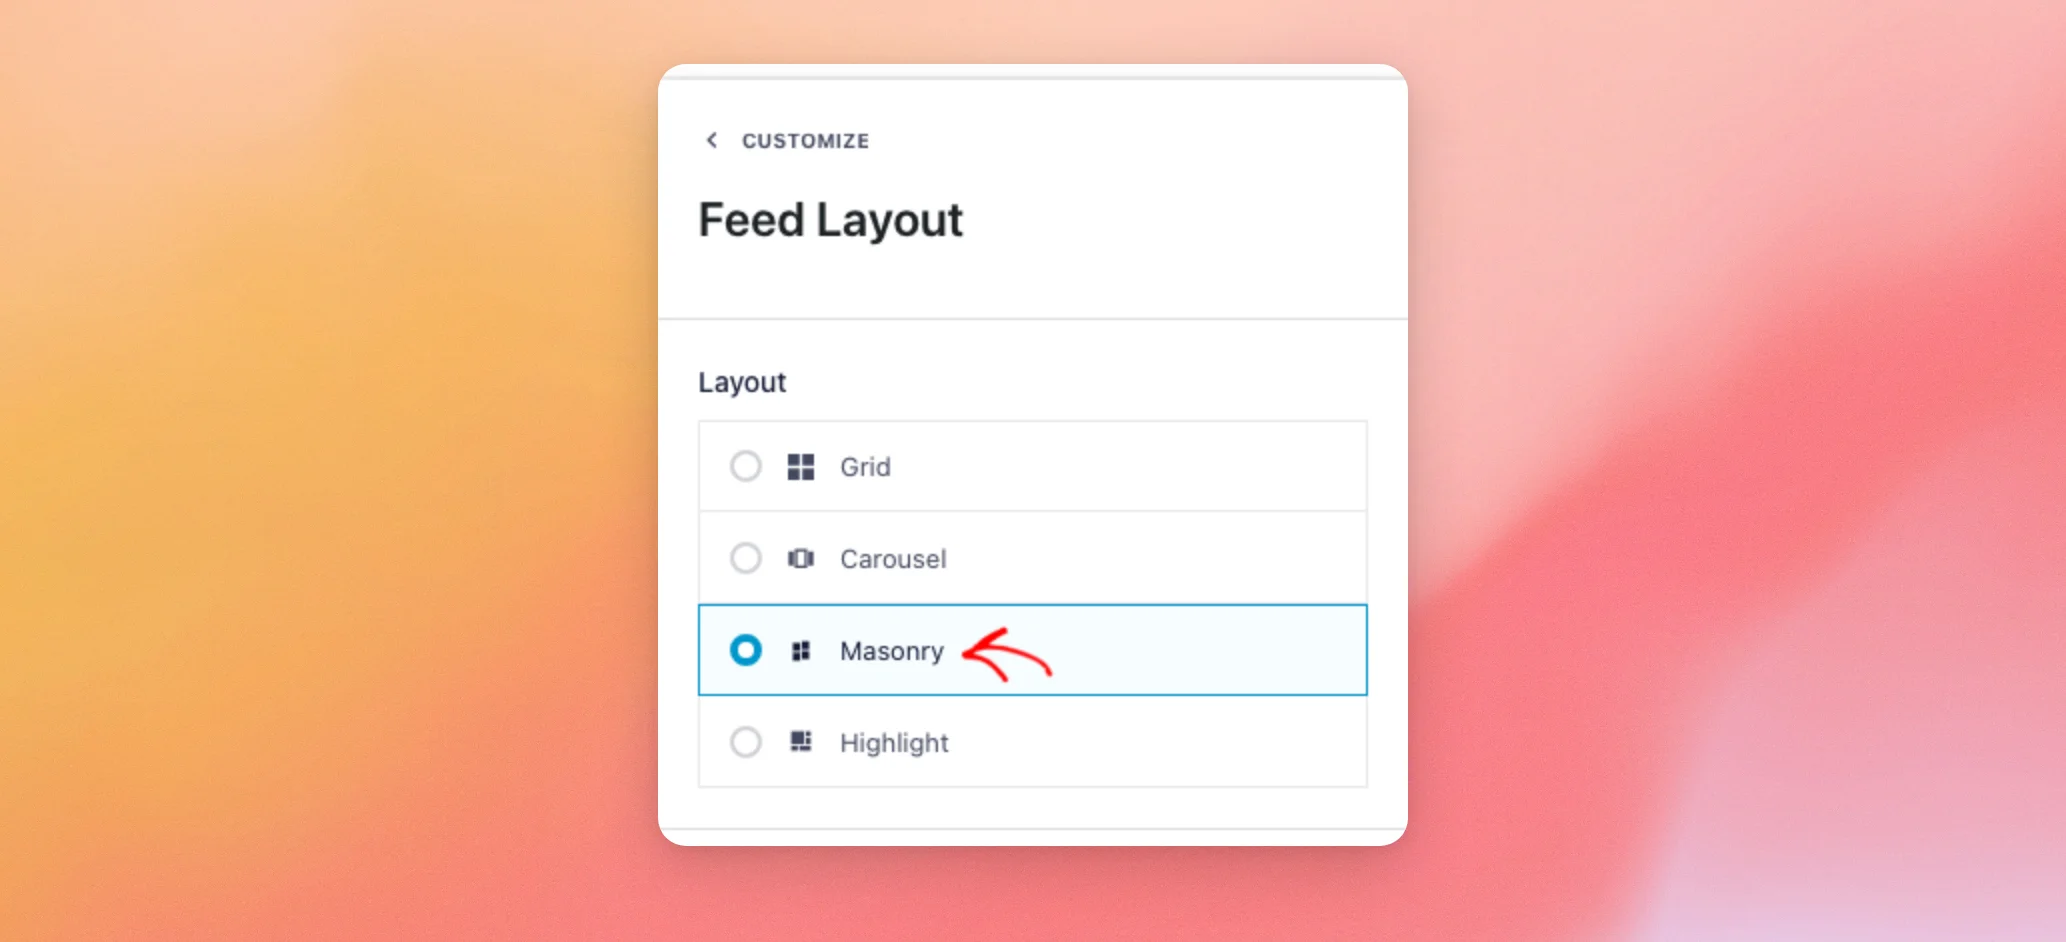
Under Layout, you’ll see four options.
- Grid shows posts in rows, all the same size.
- Carousel shows posts in a slider that visitors can move through. To set it up, see how to create an Instagram carousel.
- Masonry shows posts in columns, each in its own proportions.
- Highlight shows posts as squares and makes some of them bigger.
When you pick a layout, the preview on the right updates to show it. Your site doesn’t change until you save the feed.
Using the Masonry Layout
Masonry places your posts in columns and shows each photo in its own shape. Portrait photos show taller and landscape photos show shorter, so no photo is cropped to fit a square. This works well for a feed that mixes photos of different shapes.
To switch your feed to Masonry, follow these steps.
- In the Feed Layout section, click Masonry.
- Next, scroll down to Columns. Then, use the Desktop dropdown to choose how many columns to show on computers. Fewer columns make each post wider. The Tablet and Mobile dropdowns do the same for smaller screens.

The preview shows your posts in Masonry. Each column fills with posts of different heights.
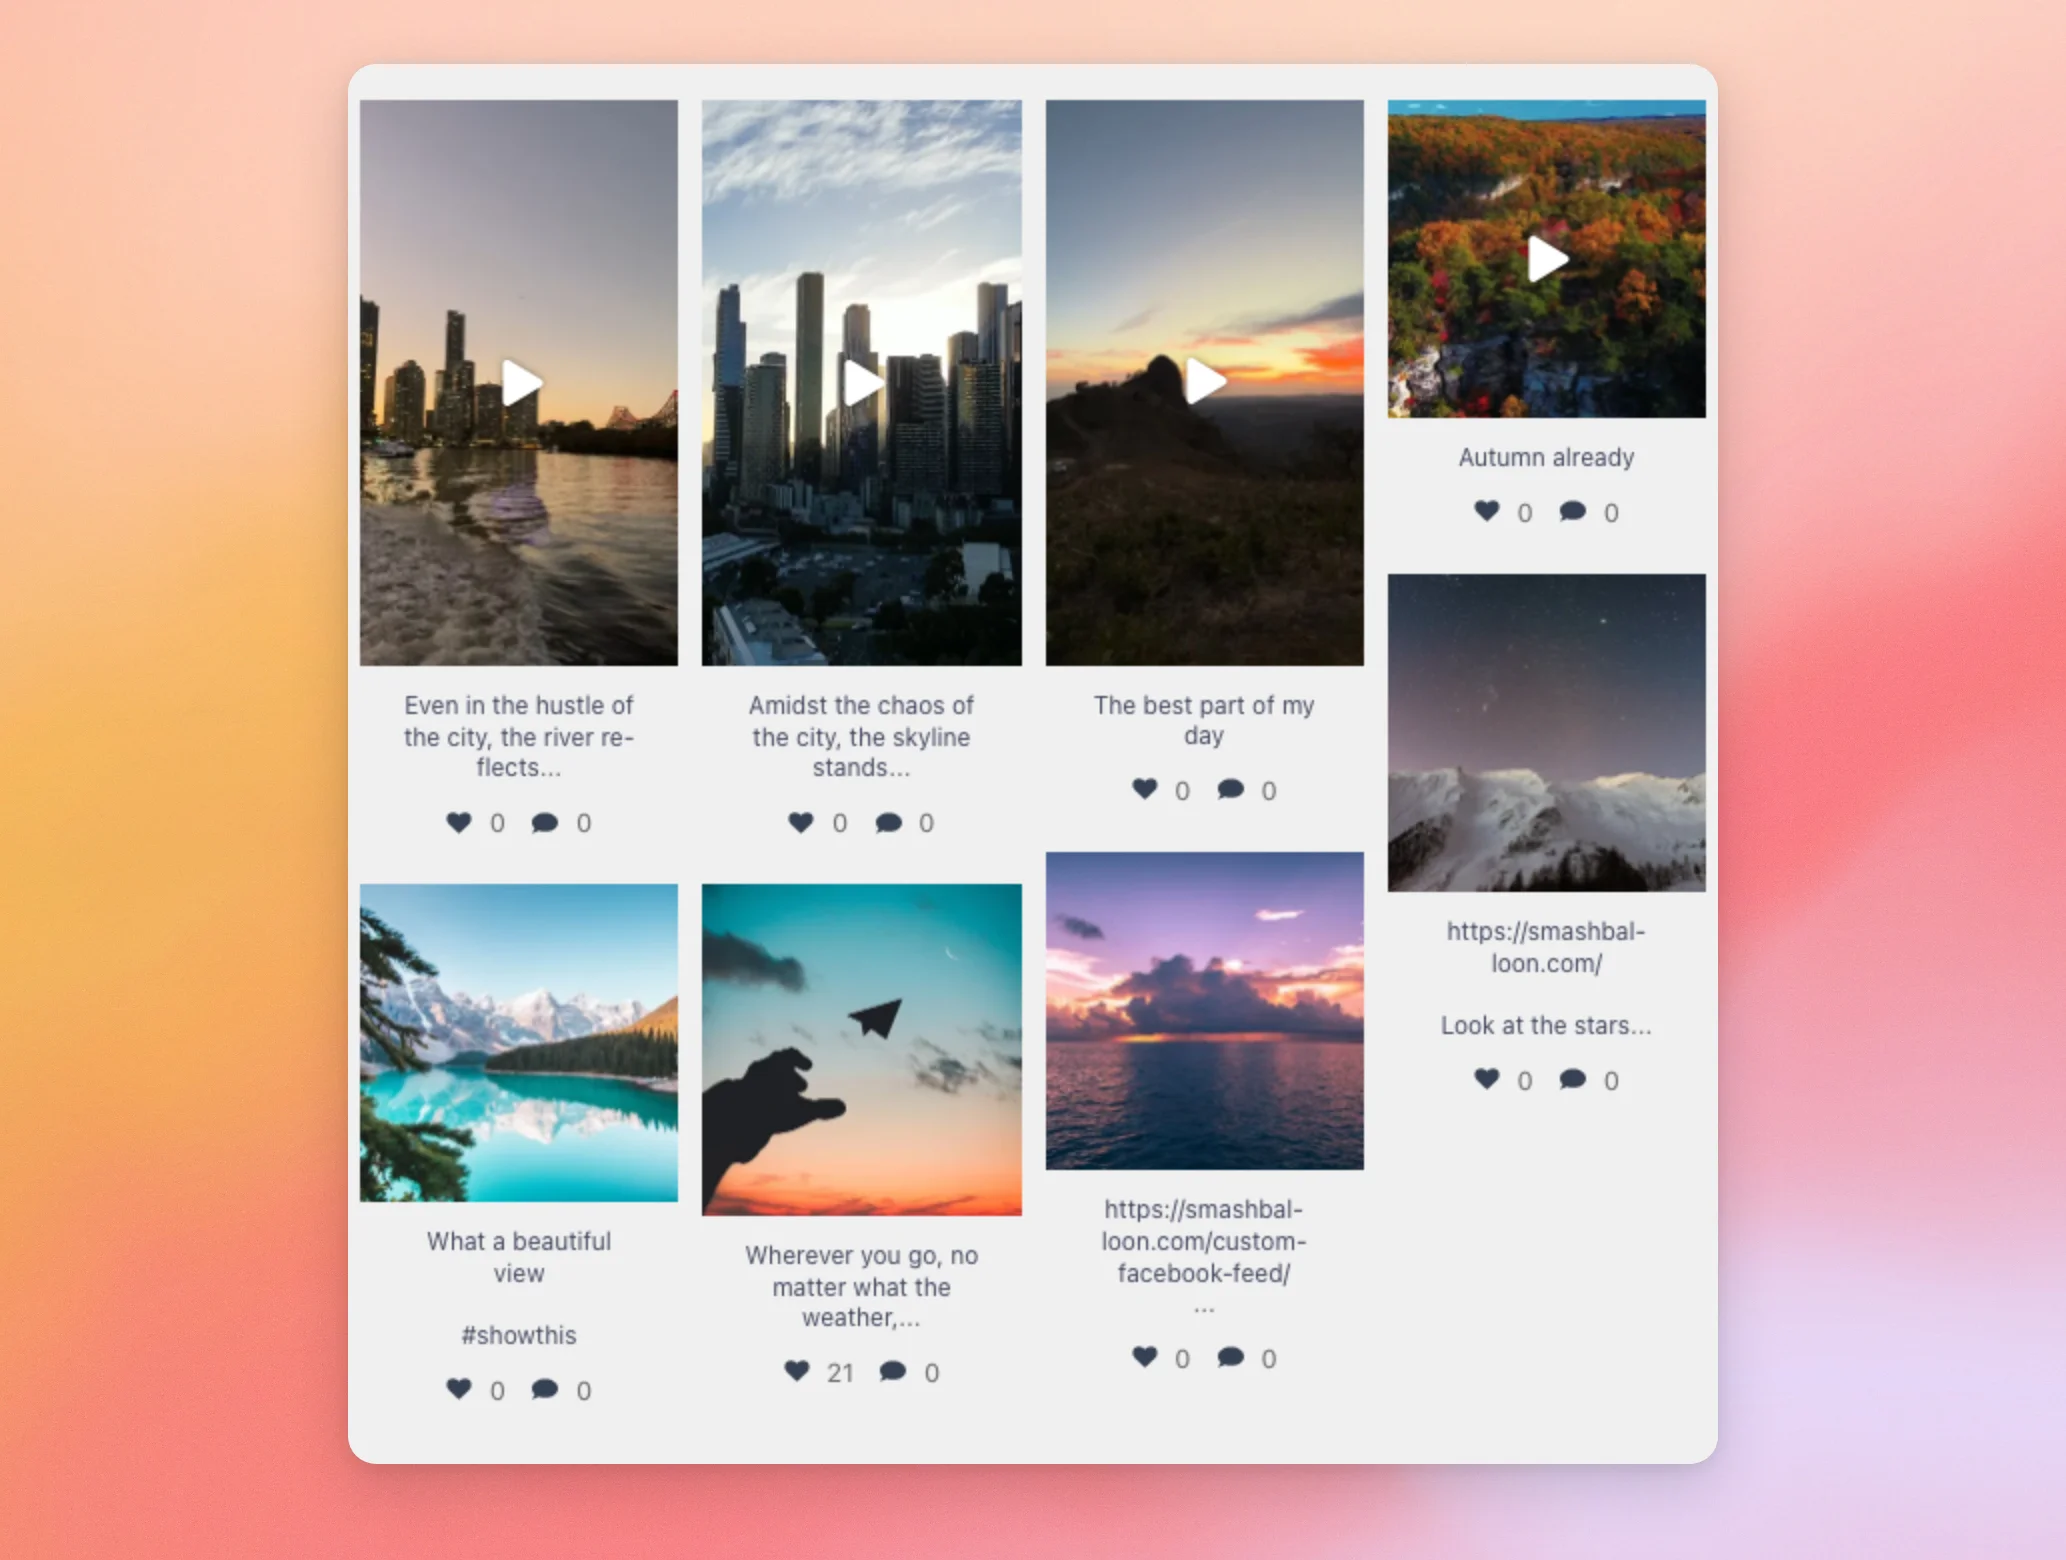
Masonry uses the same Padding, Number of Posts, and Columns settings as the other layouts in the Feed Layout section. Since each post keeps its own shape, the Aspect Ratio setting doesn’t change Masonry posts.
Next, we’ll show you how to set up the Highlight layout.
Using the Highlight Layout
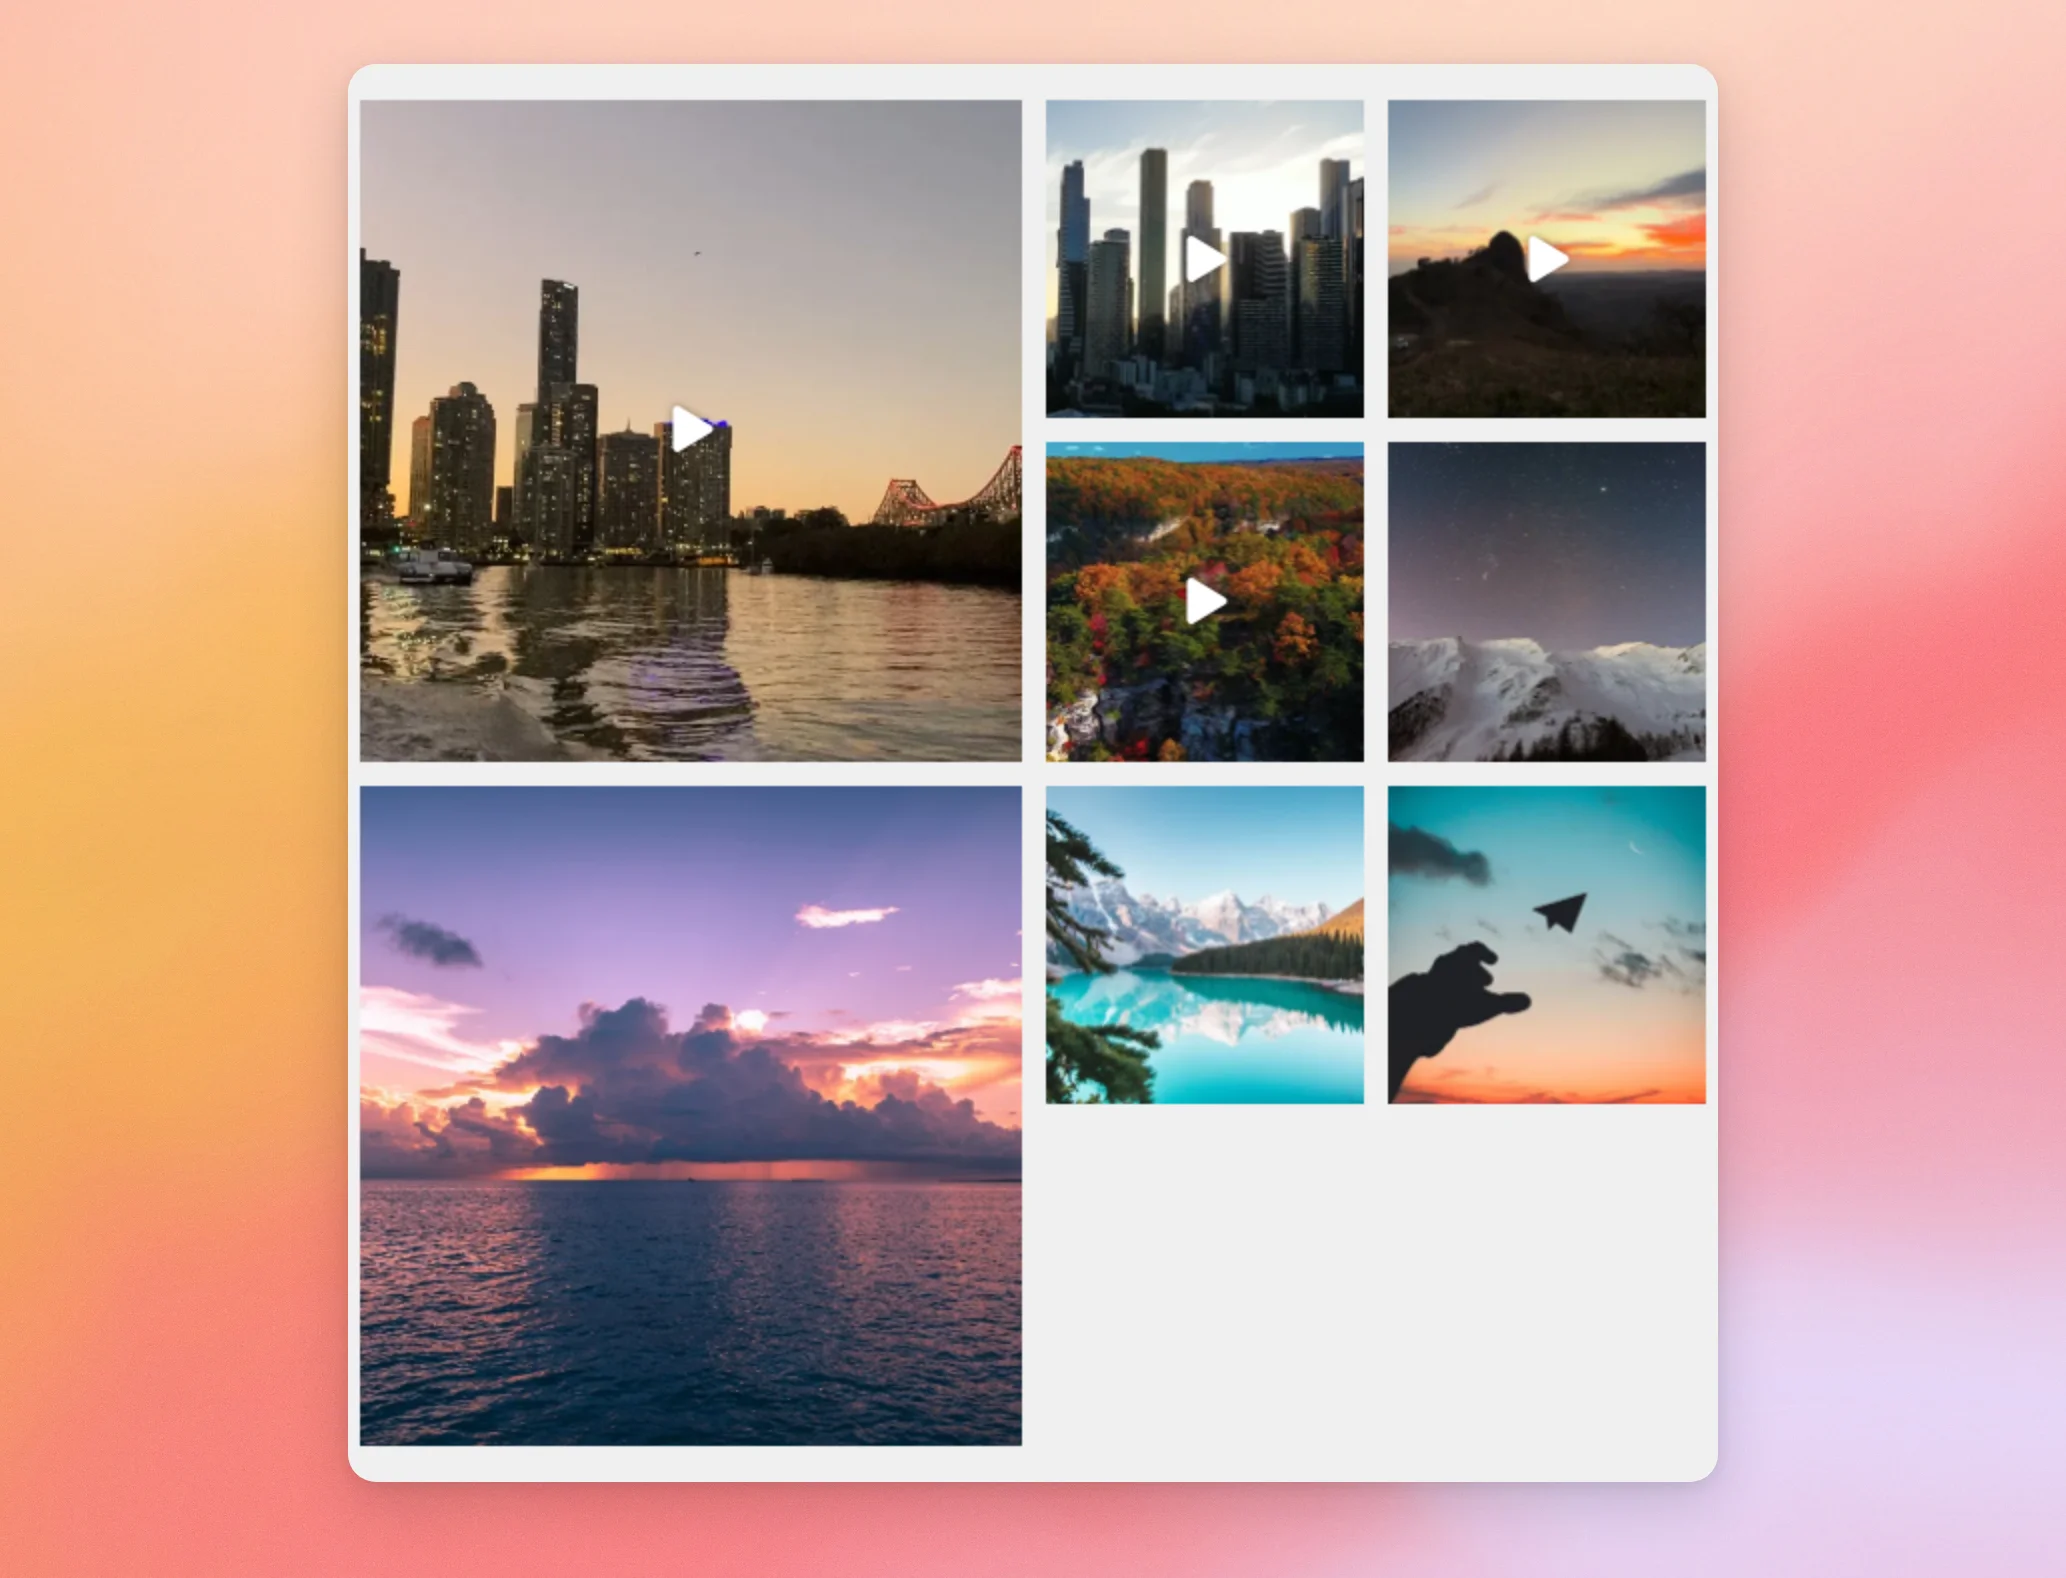
Highlight shows your posts as squares and makes some of them bigger, so the posts you choose stand out. A highlighted post is two columns wide and two rows tall. In Highlight, each post shows just its image. The caption and the likes and comments counts below it are hidden.
To switch your feed to Highlight, click Highlight in the Feed Layout section. The Highlight Settings then appear below the layout options.
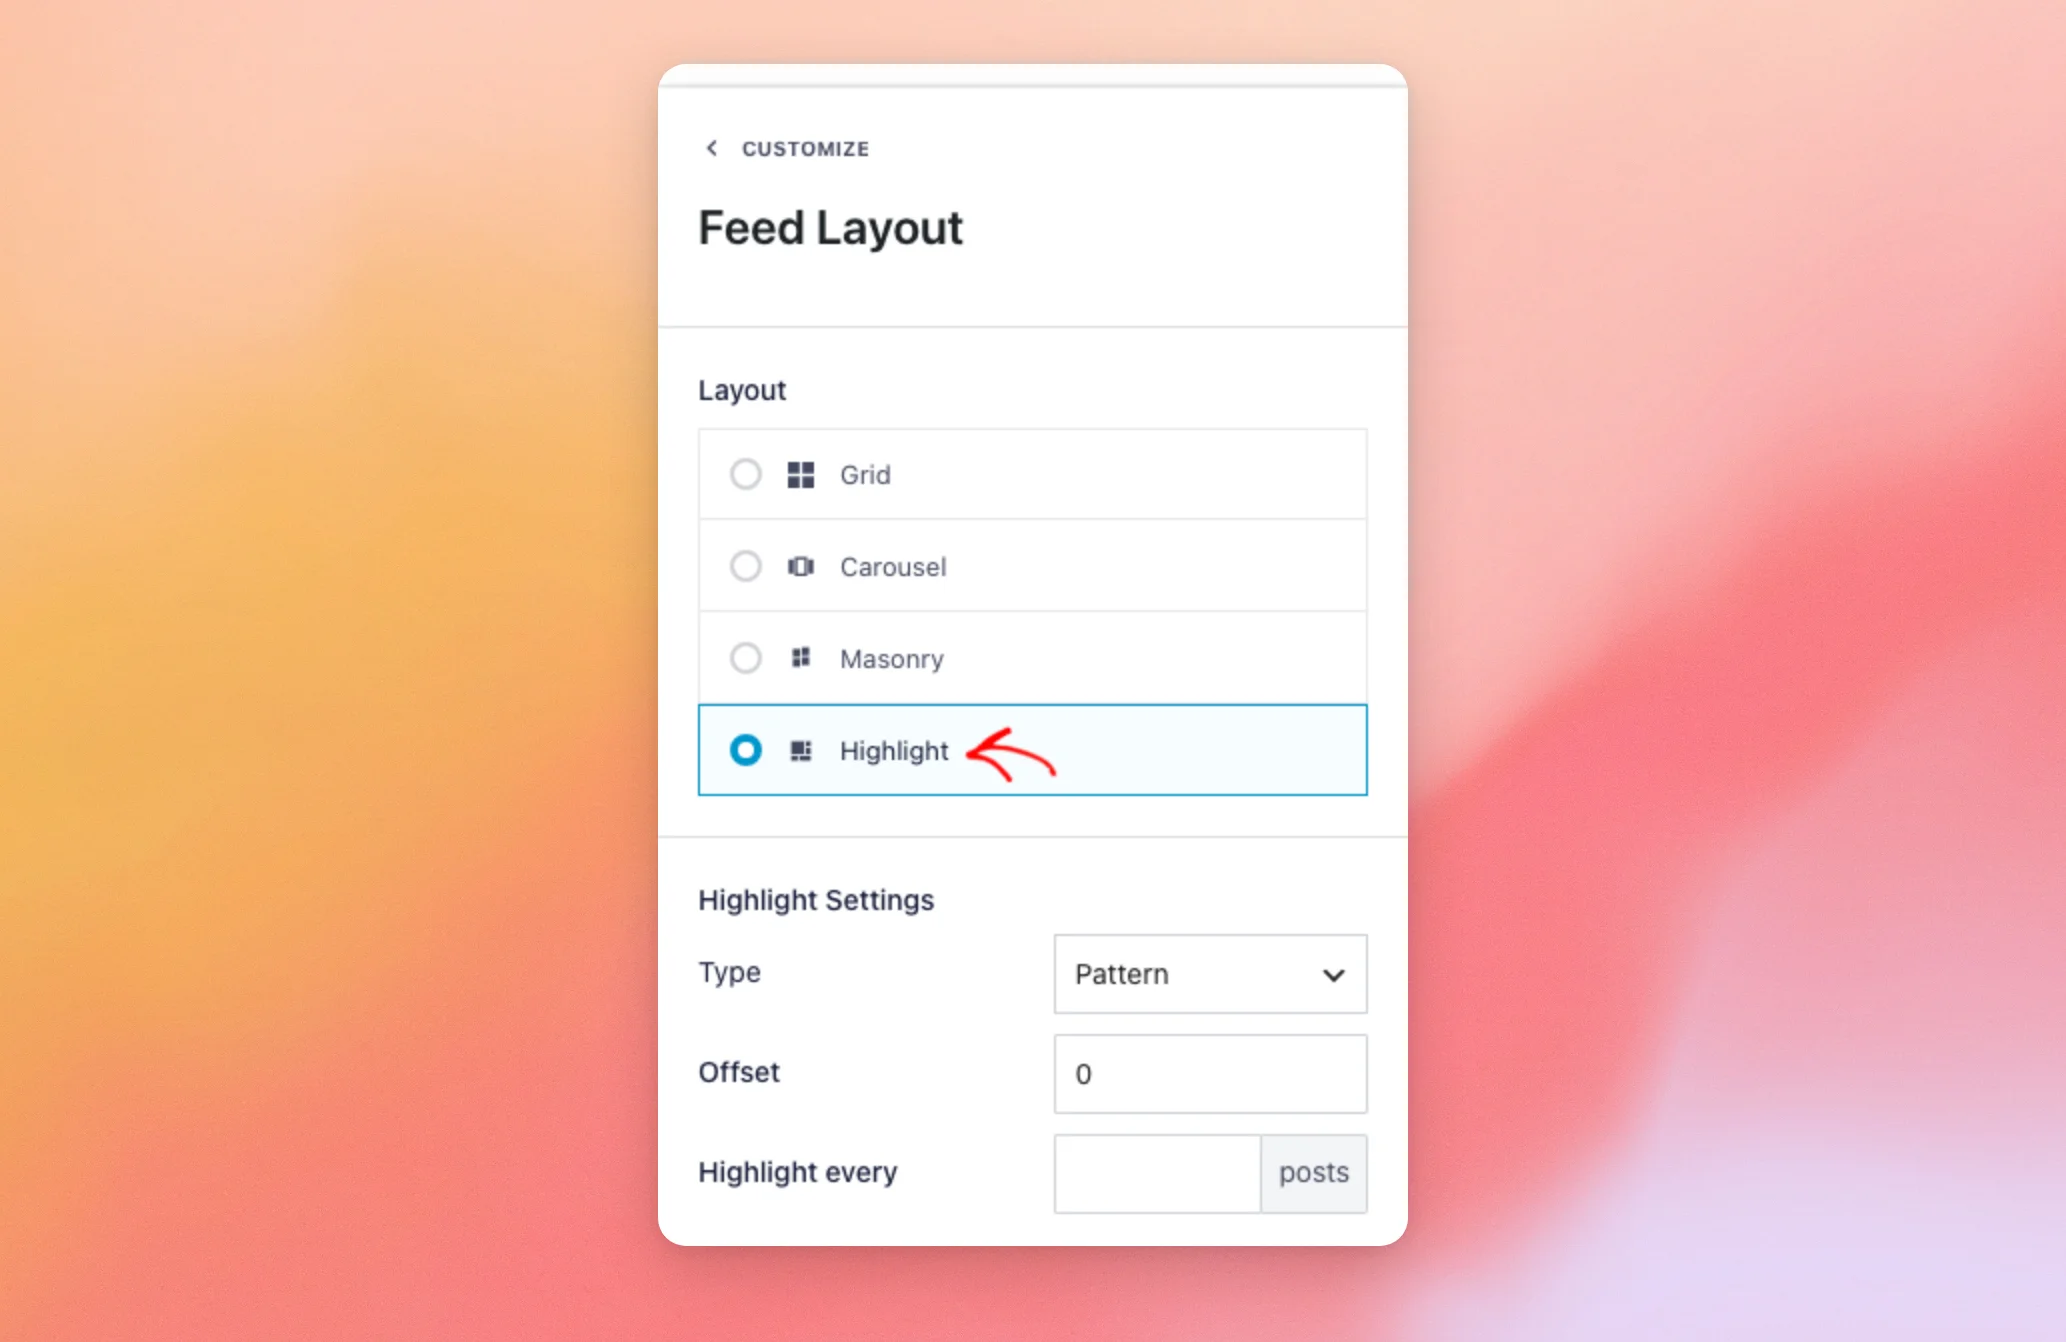
Use the Type setting to choose which posts are highlighted. You can highlight posts in a pattern, by post ID, or by hashtag. We’ll cover each one below.
Highlighting Posts in a Pattern
Pattern is the Type a new feed starts with. It highlights posts at regular steps through your feed, so you don’t need to pick each post. To set the pattern, follow these steps.
- With Type set to Pattern, enter the position of the first post to highlight in Offset. Offset counts from 0, so 0 is your first post and 1 is your second post. Then, enter a number in Highlight every to highlight more posts after that one.

Highlight every counts from the start of your feed, not from the Offset post. For example, with Offset 0 and Highlight every 5, your first, sixth, and 11th posts are highlighted. With Offset 2 and Highlight every 5, your third, sixth, and 11th posts are highlighted. If Highlight every is empty, only the Offset post is highlighted.
The preview shows the highlighted posts at a larger size.
Highlighting Posts by Post ID
The Post ID type highlights only the posts you pick. To set it up, follow these steps.
- In the Type dropdown, choose Post ID. Then, enter the IDs of the posts you want to highlight in the Highlight posts with these IDs box. Separate them with commas.
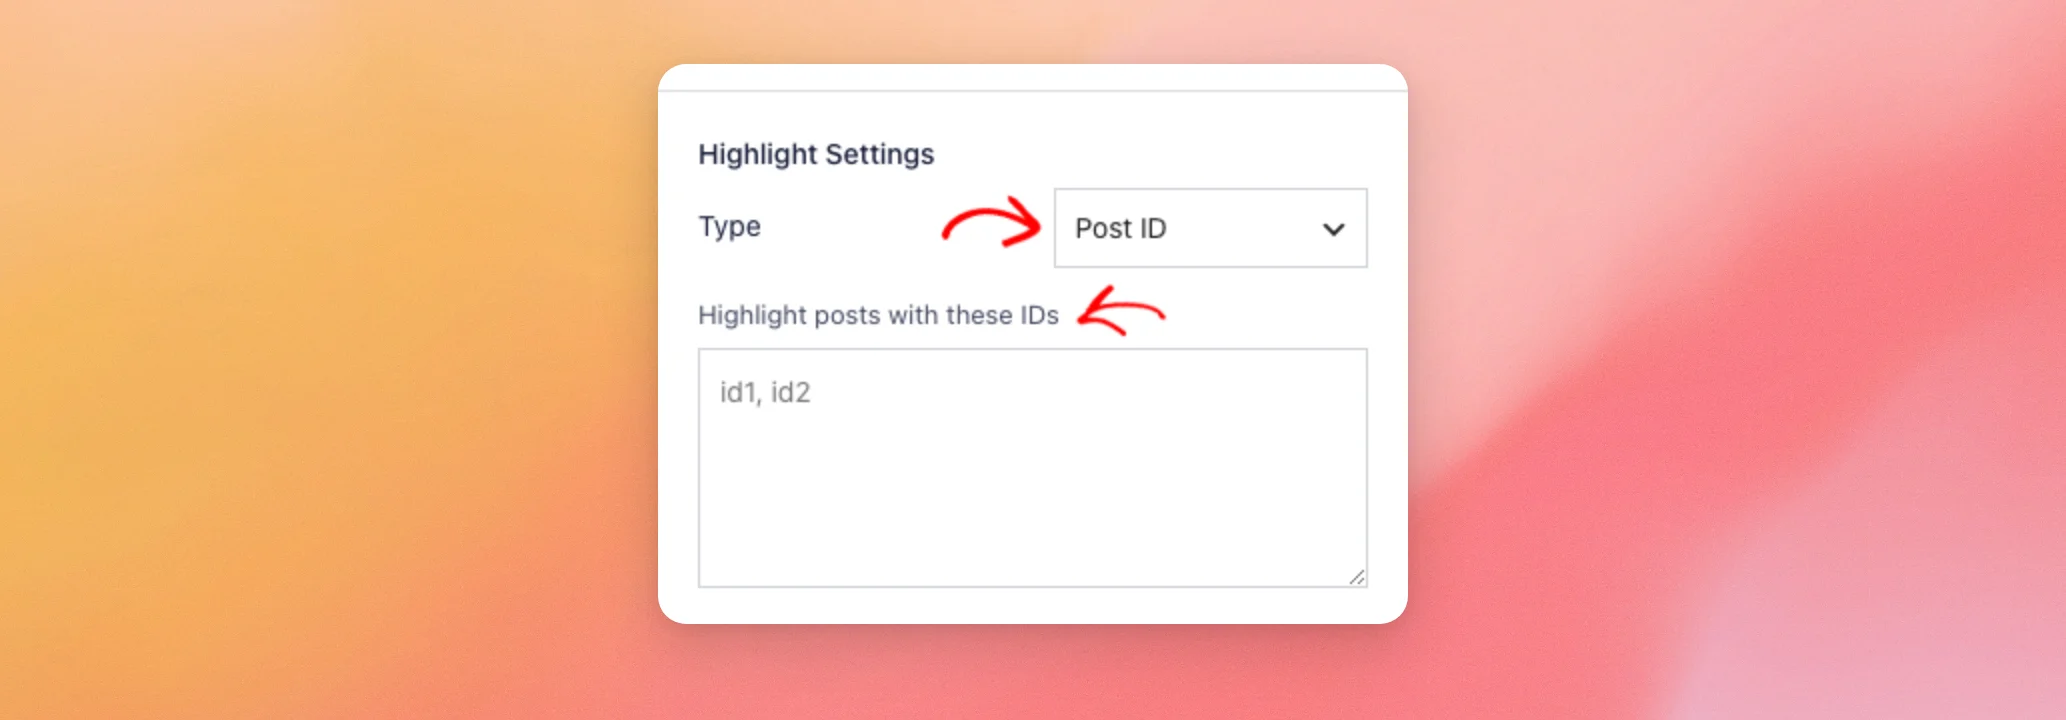
You can find a post’s ID from your feed’s lightbox when you’re logged in as an administrator.
To learn where to find it, see how to find a post’s ID.
Highlighting Posts by Hashtag
The Hashtag type highlights every post whose caption has a hashtag you pick. To set it up, follow these steps.
- In the Type dropdown, choose Hashtag. Then, enter the hashtags in the Highlight posts with these hashtags box. Separate them with commas. You can type them with or without the # sign.
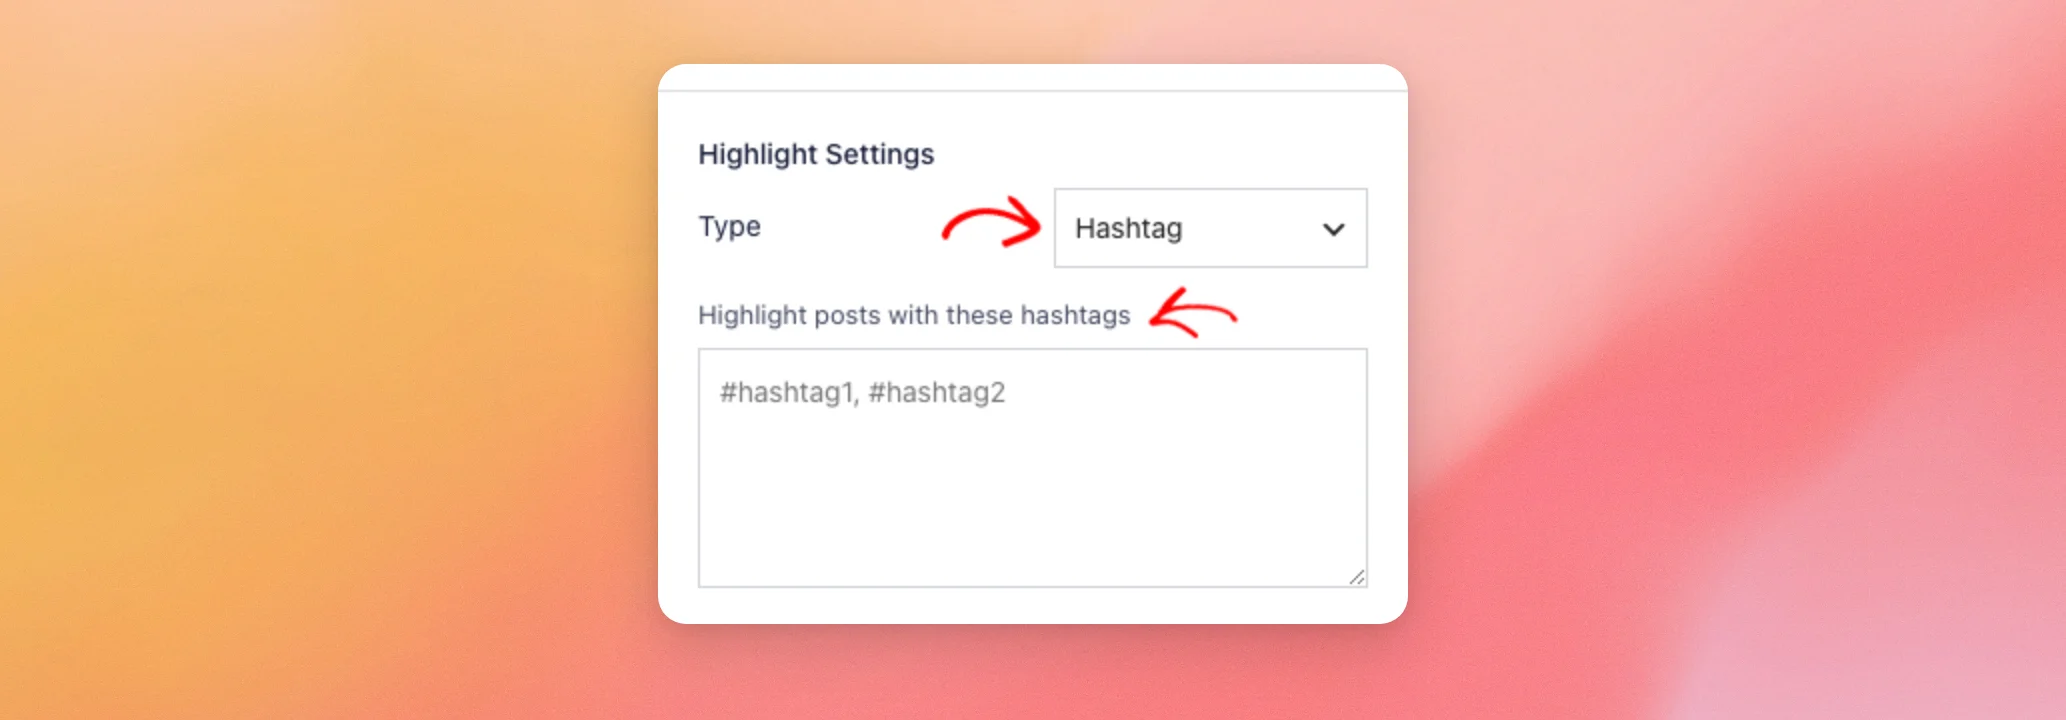
Uppercase and lowercase letters don’t matter, but the whole hashtag has to match. For example, summer highlights posts with #summer or #Summer, but not posts with #summertime.
Saving Your Changes
When you’re done, click Save at the top of the feed editor.
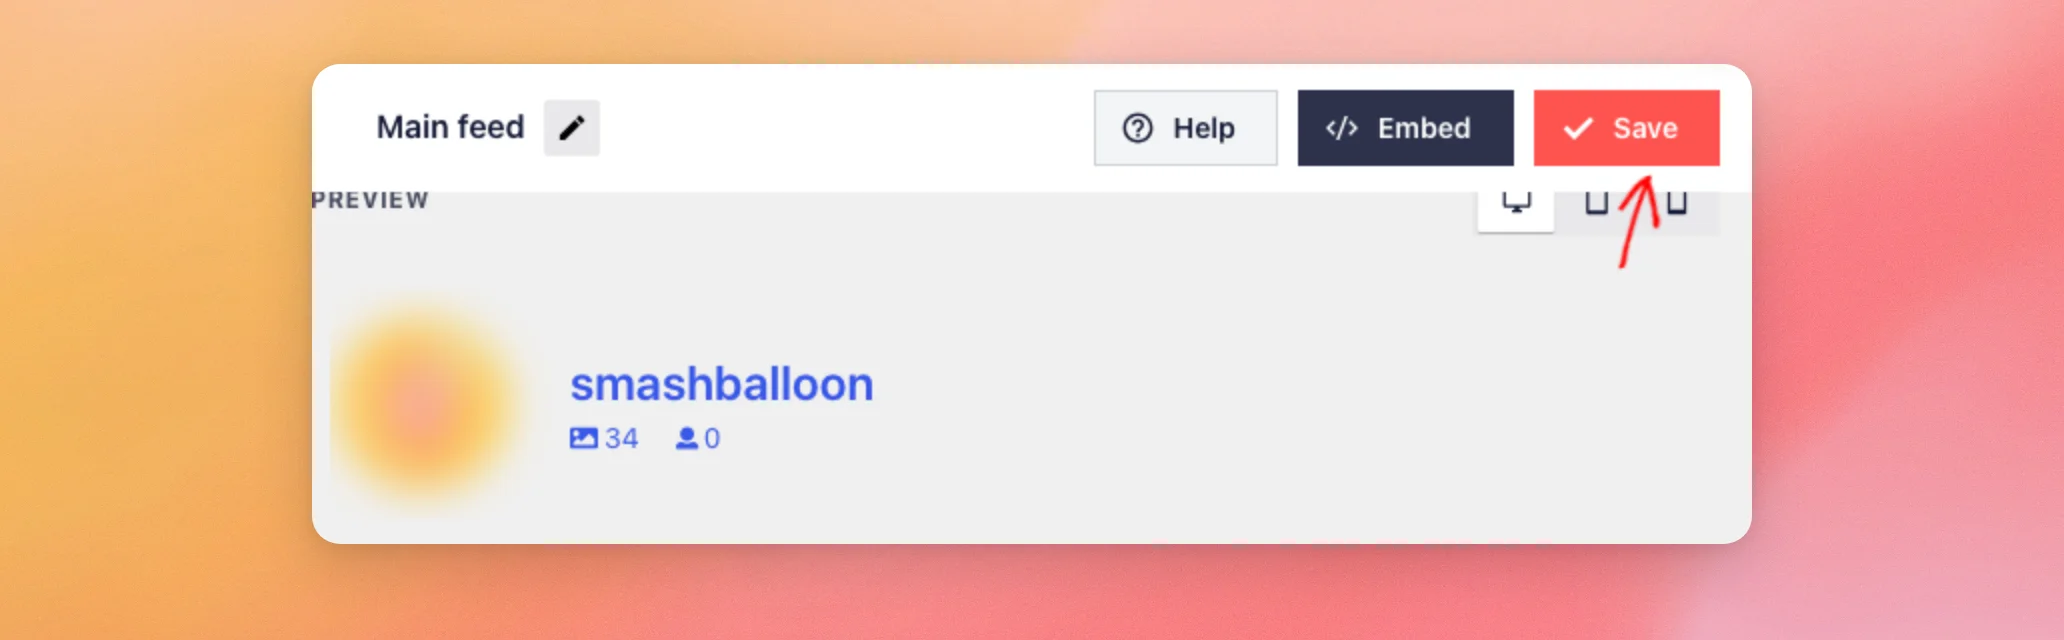
That’s it! Your feed now uses the Masonry or Highlight layout on every page where it appears.
Next, would you like to show your posts in a slider instead? See how to set up the Carousel layout.
Frequently Asked Questions
Below, we’ve answered some of the most common questions about the Masonry and Highlight layouts.
Why are all my posts the same size in Highlight on my phone?
When the feed shows one column, Highlight shows every post at the same size. On screens 480 pixels wide or smaller, the feed uses the Mobile setting under Columns. If Mobile is set to 1, choose two or more to show highlighted posts bigger on phones.
Which Columns setting applies on each screen size?
For Masonry and Highlight, Mobile applies to screens 480 pixels wide or smaller, and Tablet to screens 481 to 640 pixels wide. Desktop applies to wider screens.
Does Aspect Ratio change Masonry or Highlight posts?
No. Masonry shows each post in its own shape, and Highlight always shows posts as squares.