Social Wall
 Feed Analytics


Would you like your reviews feed to match the look of the rest of your website?
In this guide, we’ll walk you through the Customize tab of the feed editor, one section at a time. You’ll change your feed’s template, layout, header, reviews, Load More button, and colors, and see each change in the preview before you save it.
Requirements: Some options in this guide need a paid version of Reviews Feed:
- Every template except Default
- The Carousel layout
- The Average Review Rating in the header
- The Load More button
- Changing the order of review elements
- Showing more than ten reviews on desktops
- Separate review counts and columns for tablets and phones
Before you get started, make sure Reviews Feed is installed and activated on your WordPress site.
You’ll also need a feed. If you don’t have one yet, see our guide on creating a reviews feed. This guide picks up where its Customizing and Saving Your Feed step leaves off.
- Changing Your Feed’s Template
- Choosing a Layout
- Customizing the Header
- Customizing Your Reviews
- Customizing the Load More Button
- Saving Your Changes
- Frequently Asked Questions
Changing Your Feed’s Template
To get started, we need to open the feed editor, where every change in this guide happens.
From your WordPress admin sidebar, go to Reviews Feed » All Feeds. Then, click the name of the feed you’d like to customize.
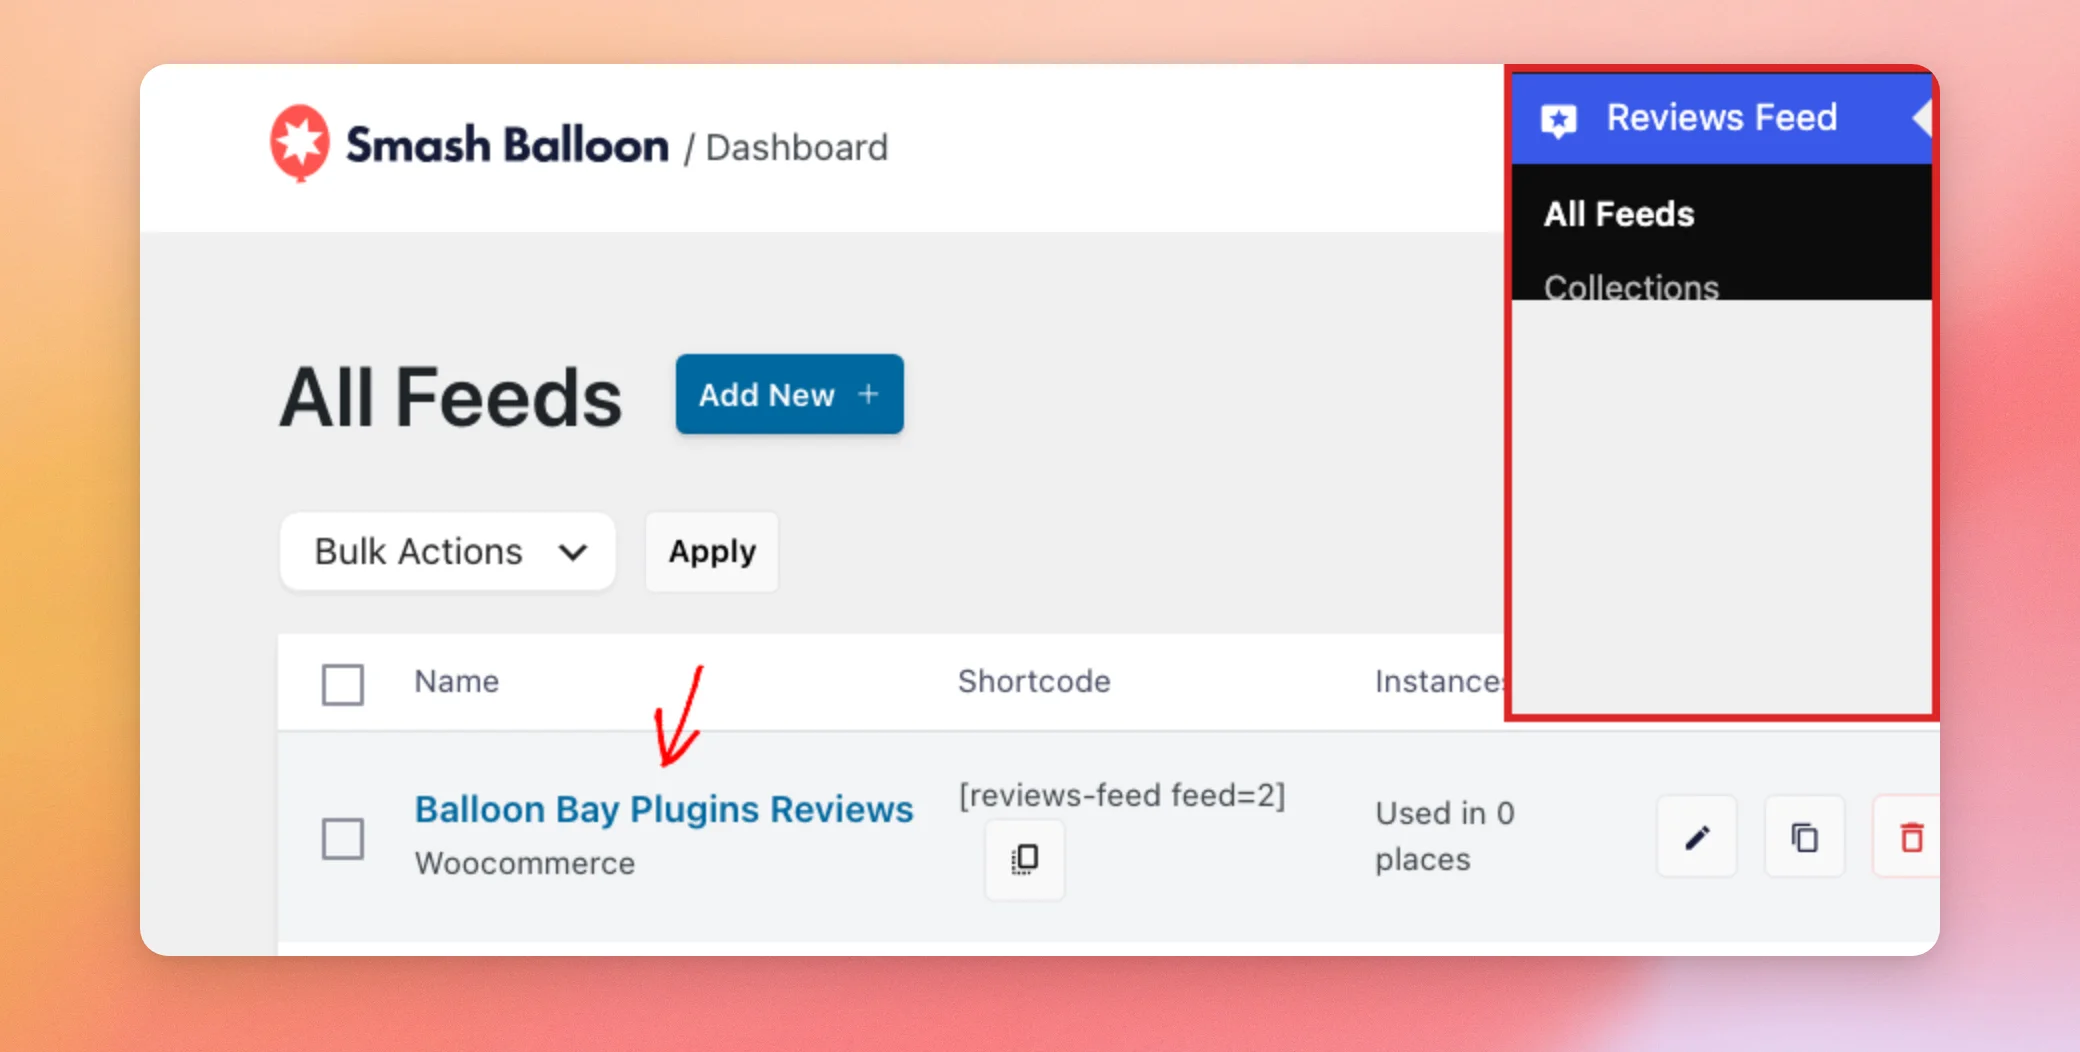
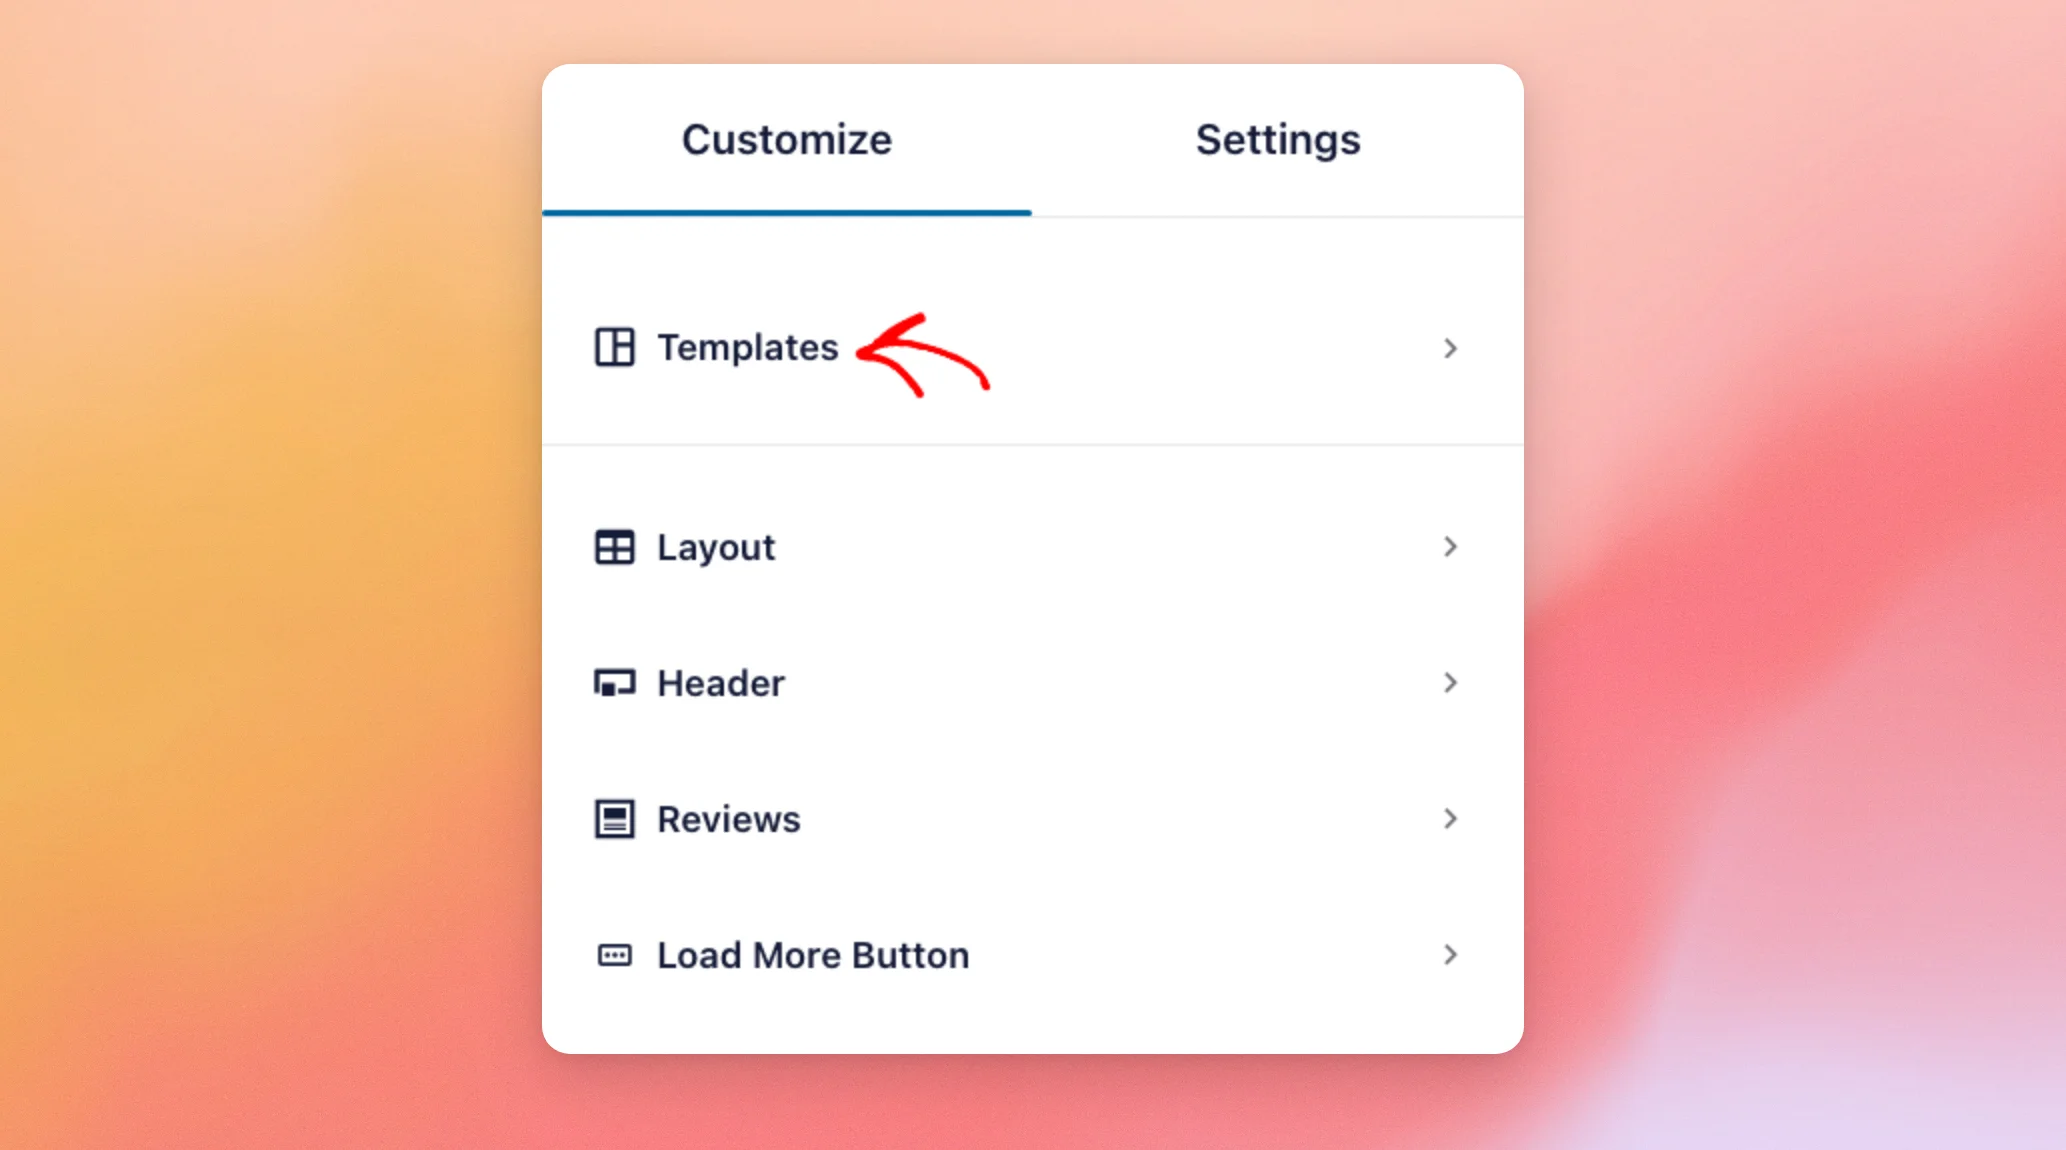
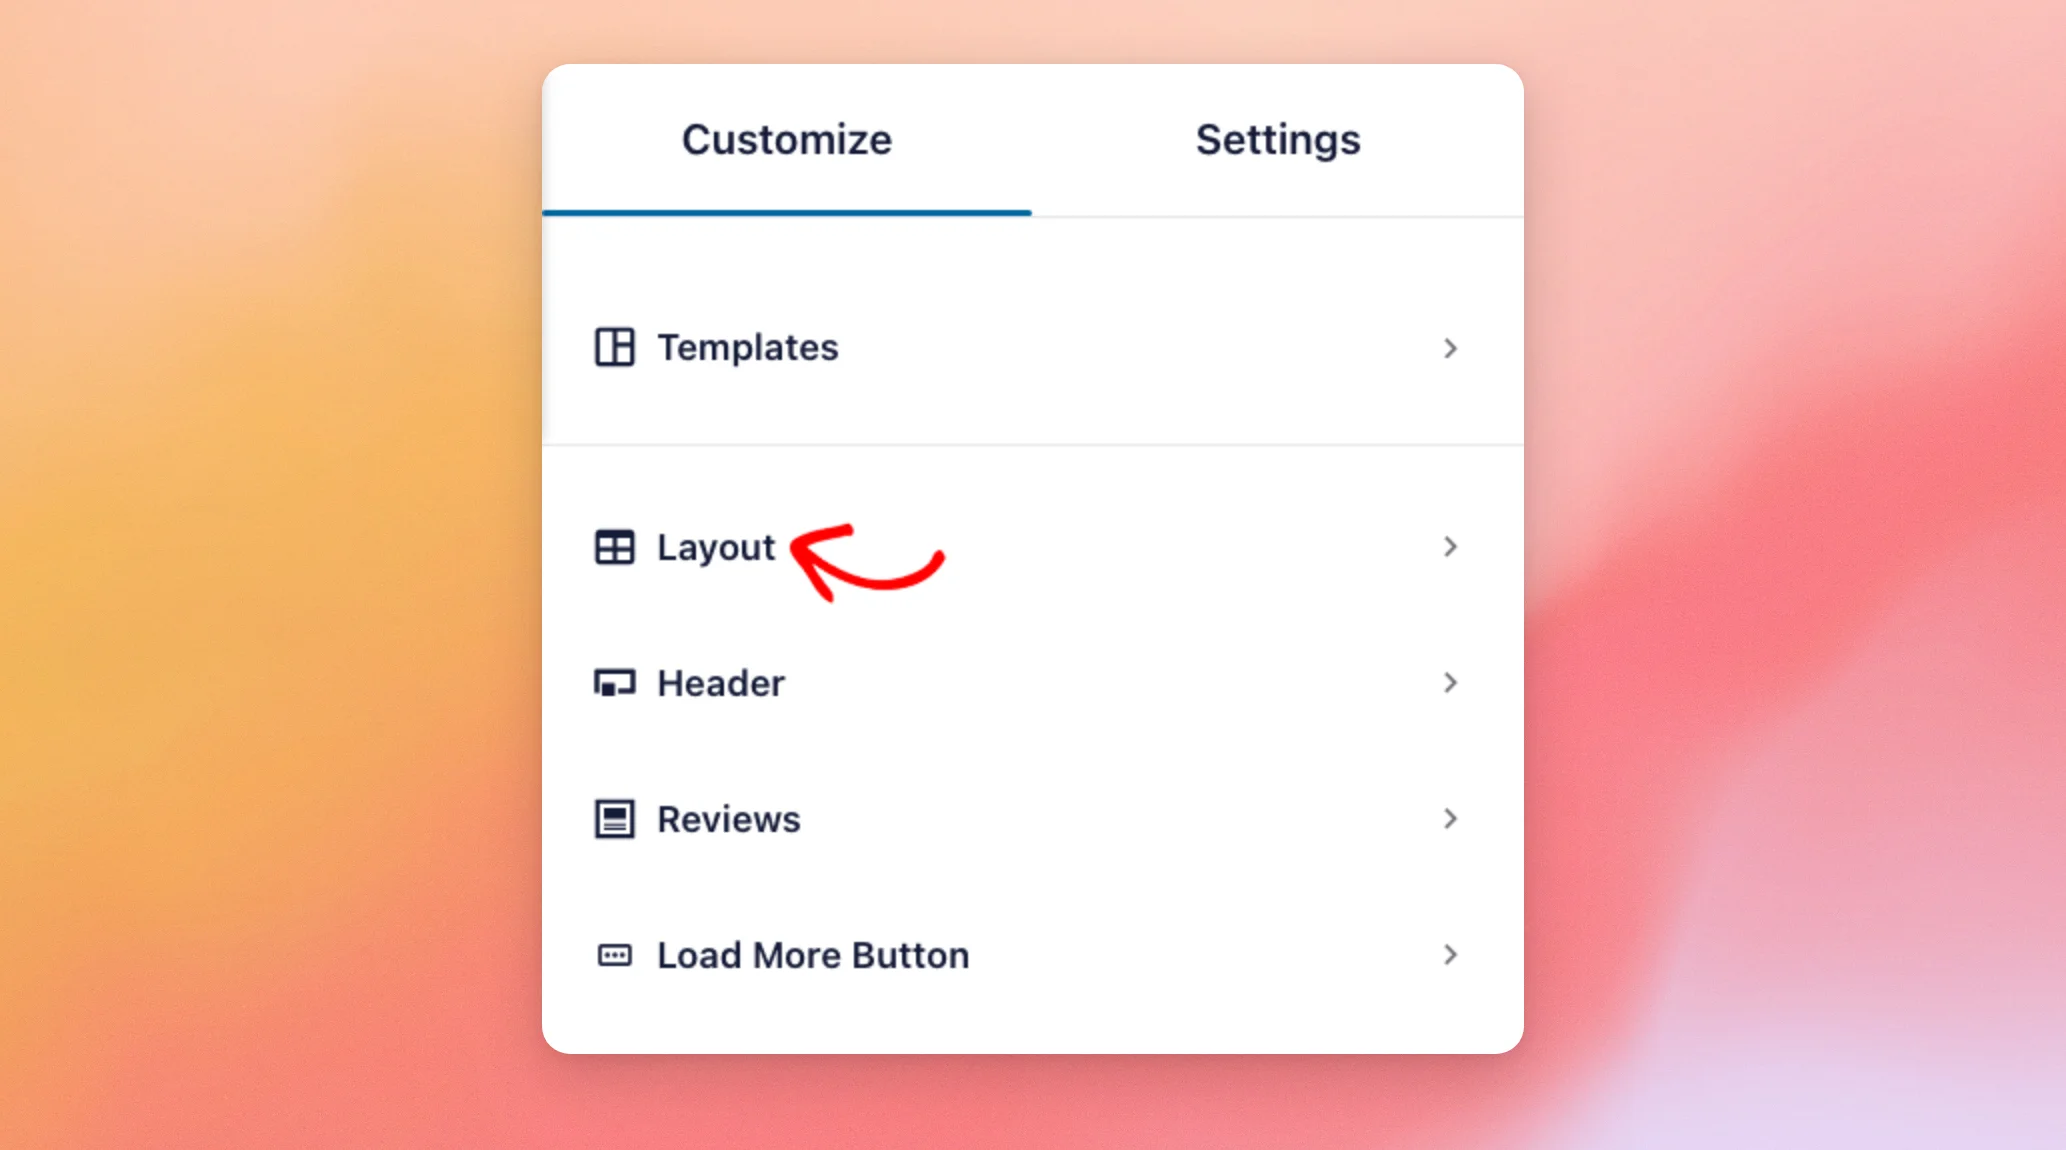
Your feed opens in the feed editor, on the Customize tab. The tab has five sections, in this order: Templates, Layout, Header, Reviews, and Load More Button.
The preview on the right updates as you make changes. That way, you can see each one before you save it.
We’ll start with your feed’s template. Next, click Templates.
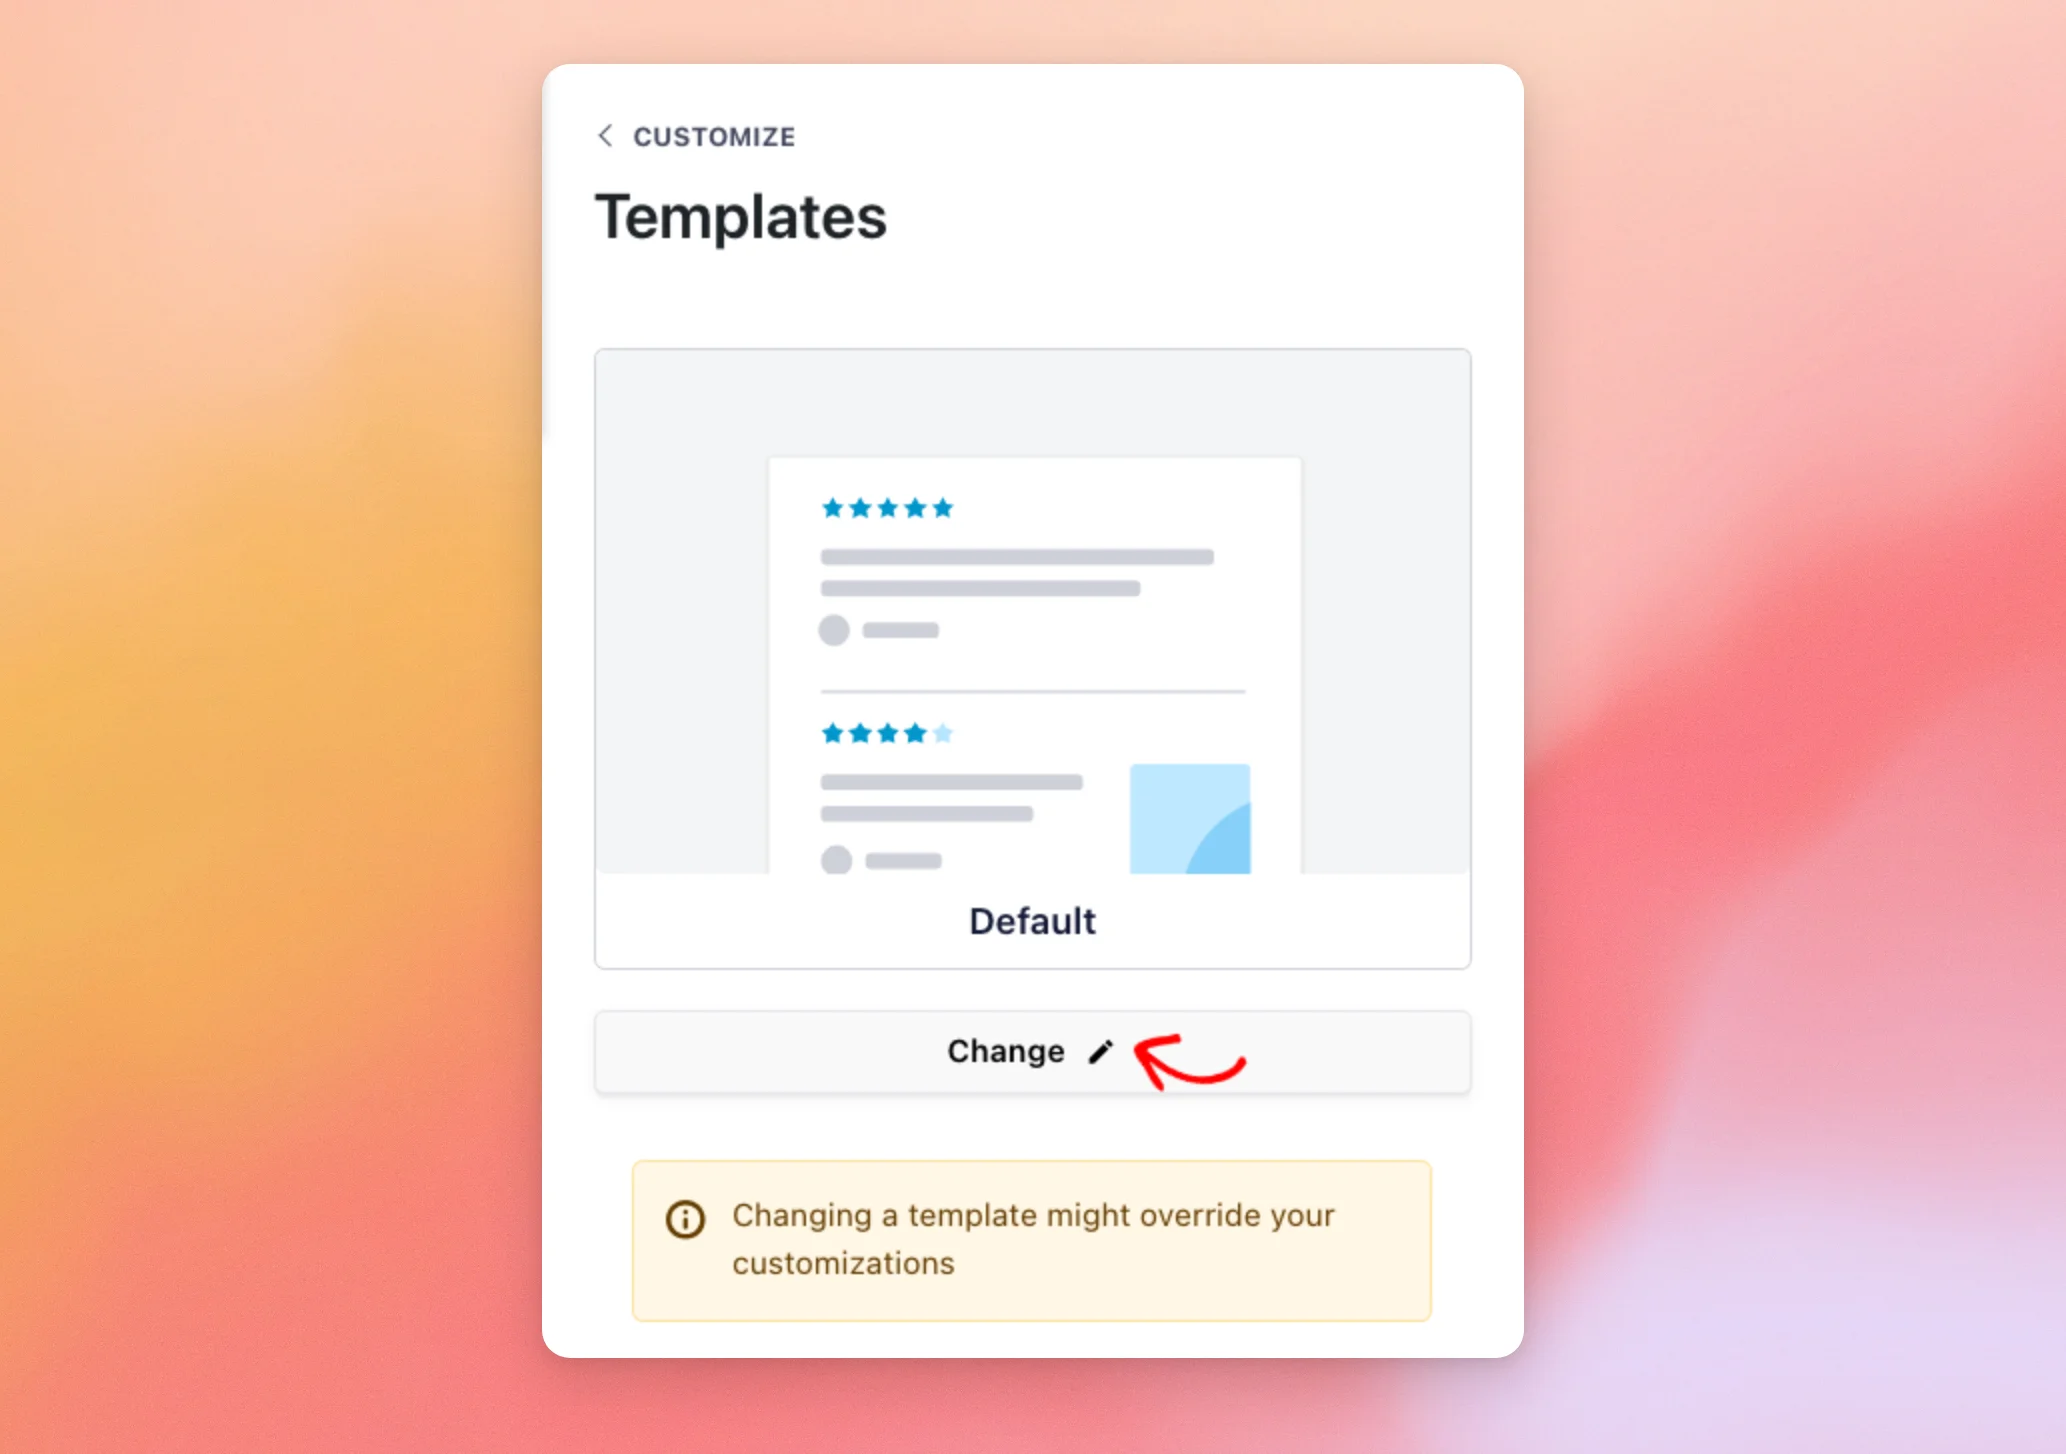
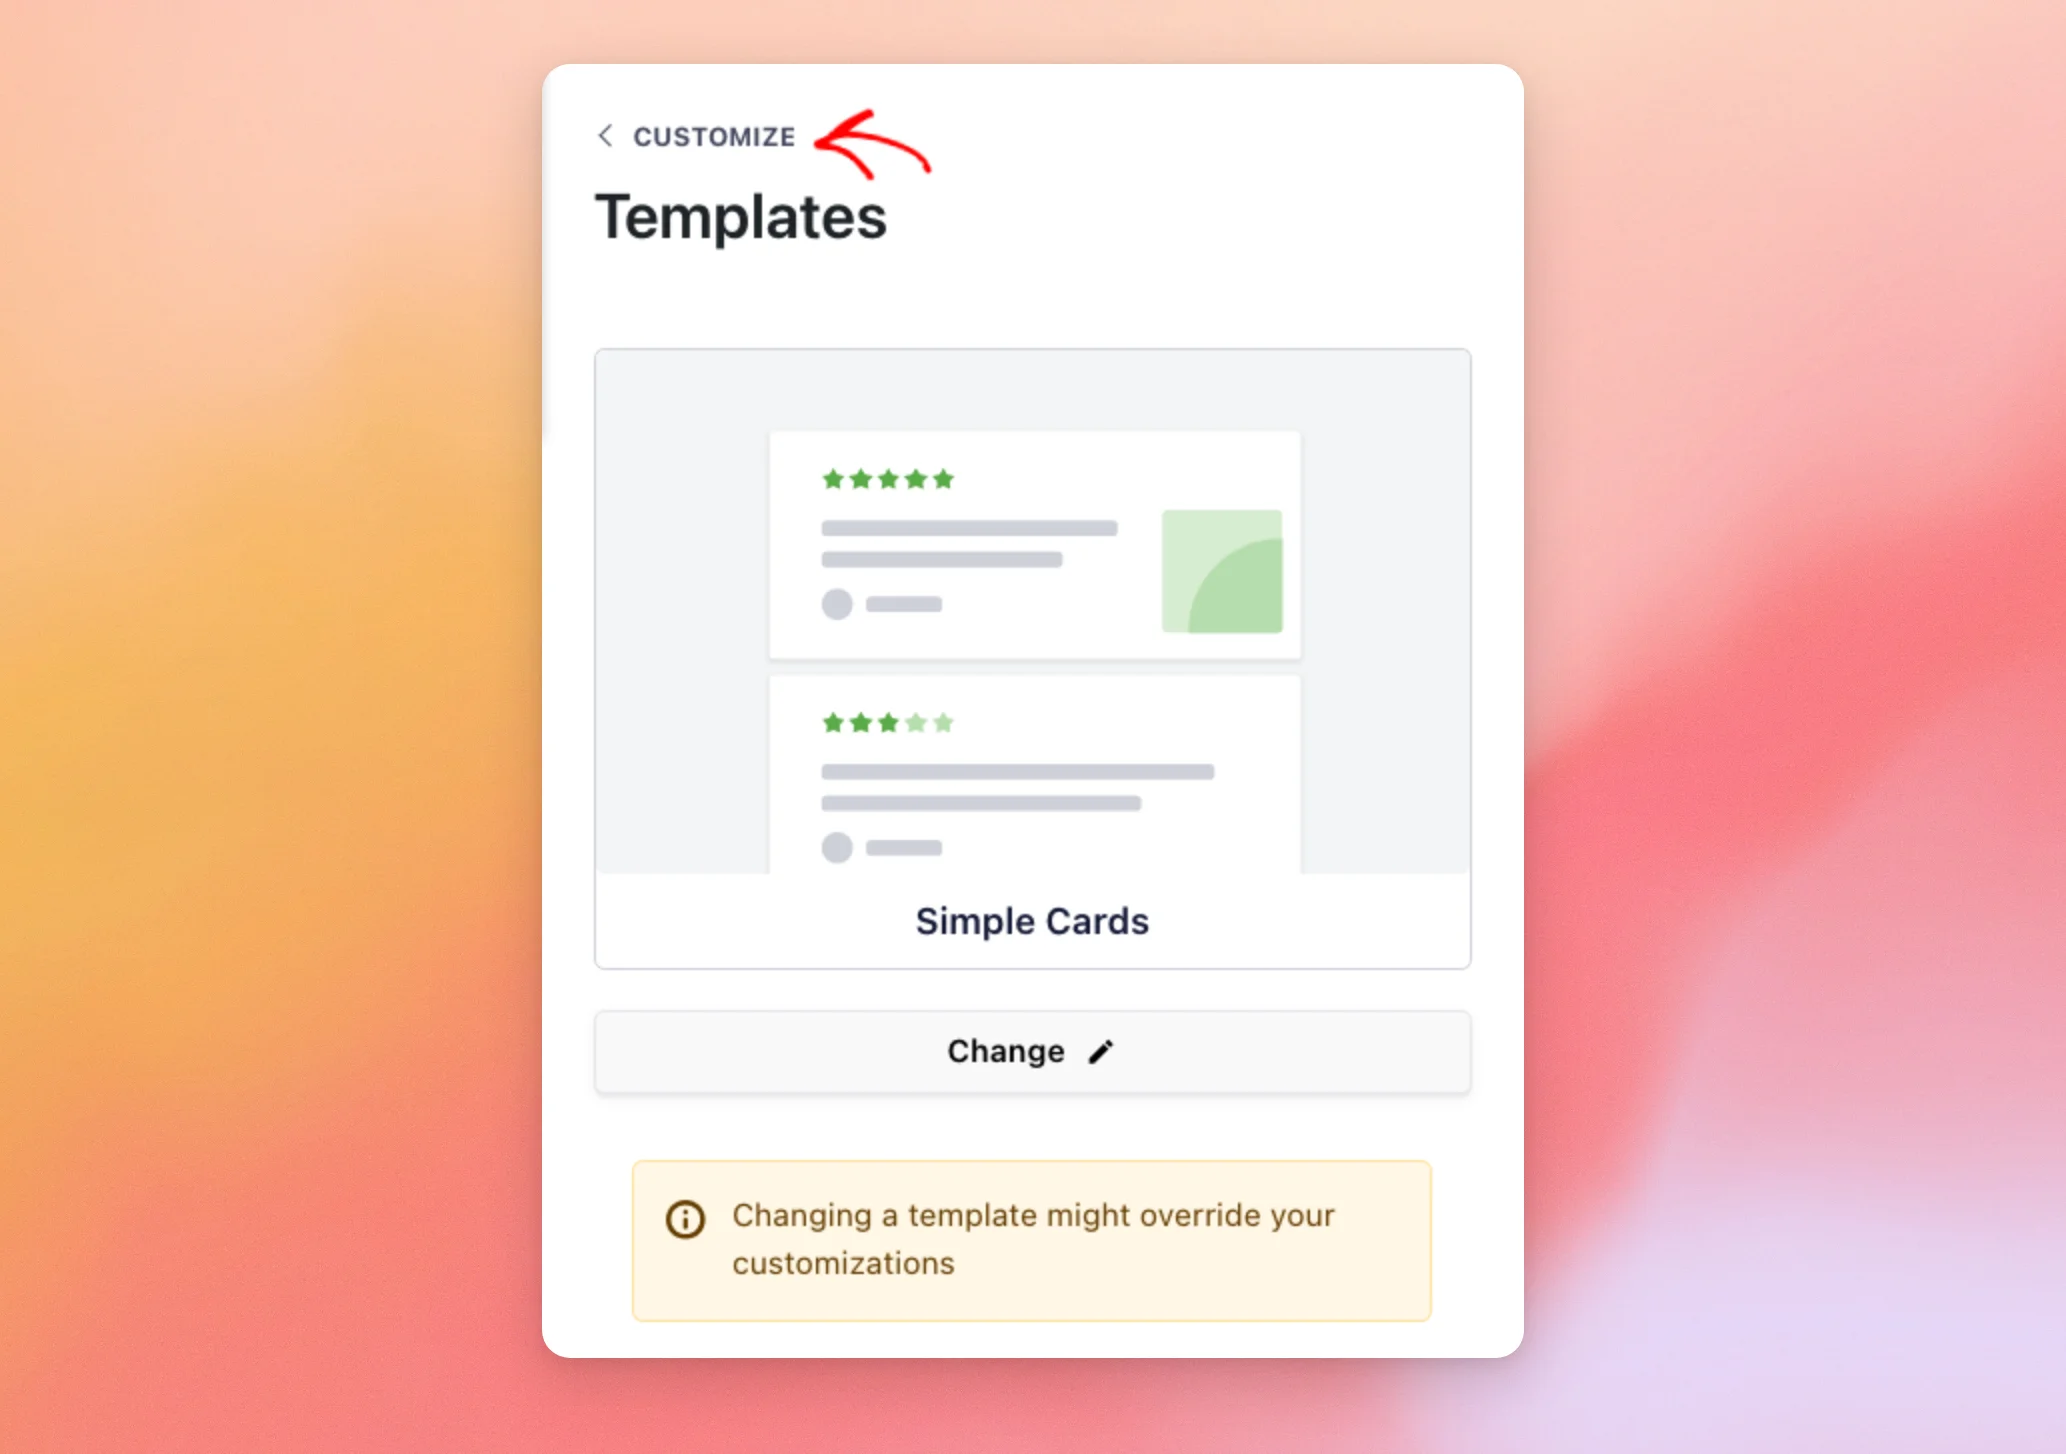
A template is a ready-made starting point for your feed’s look. The Templates section shows the template your feed uses now.
To pick a different one, click Change.
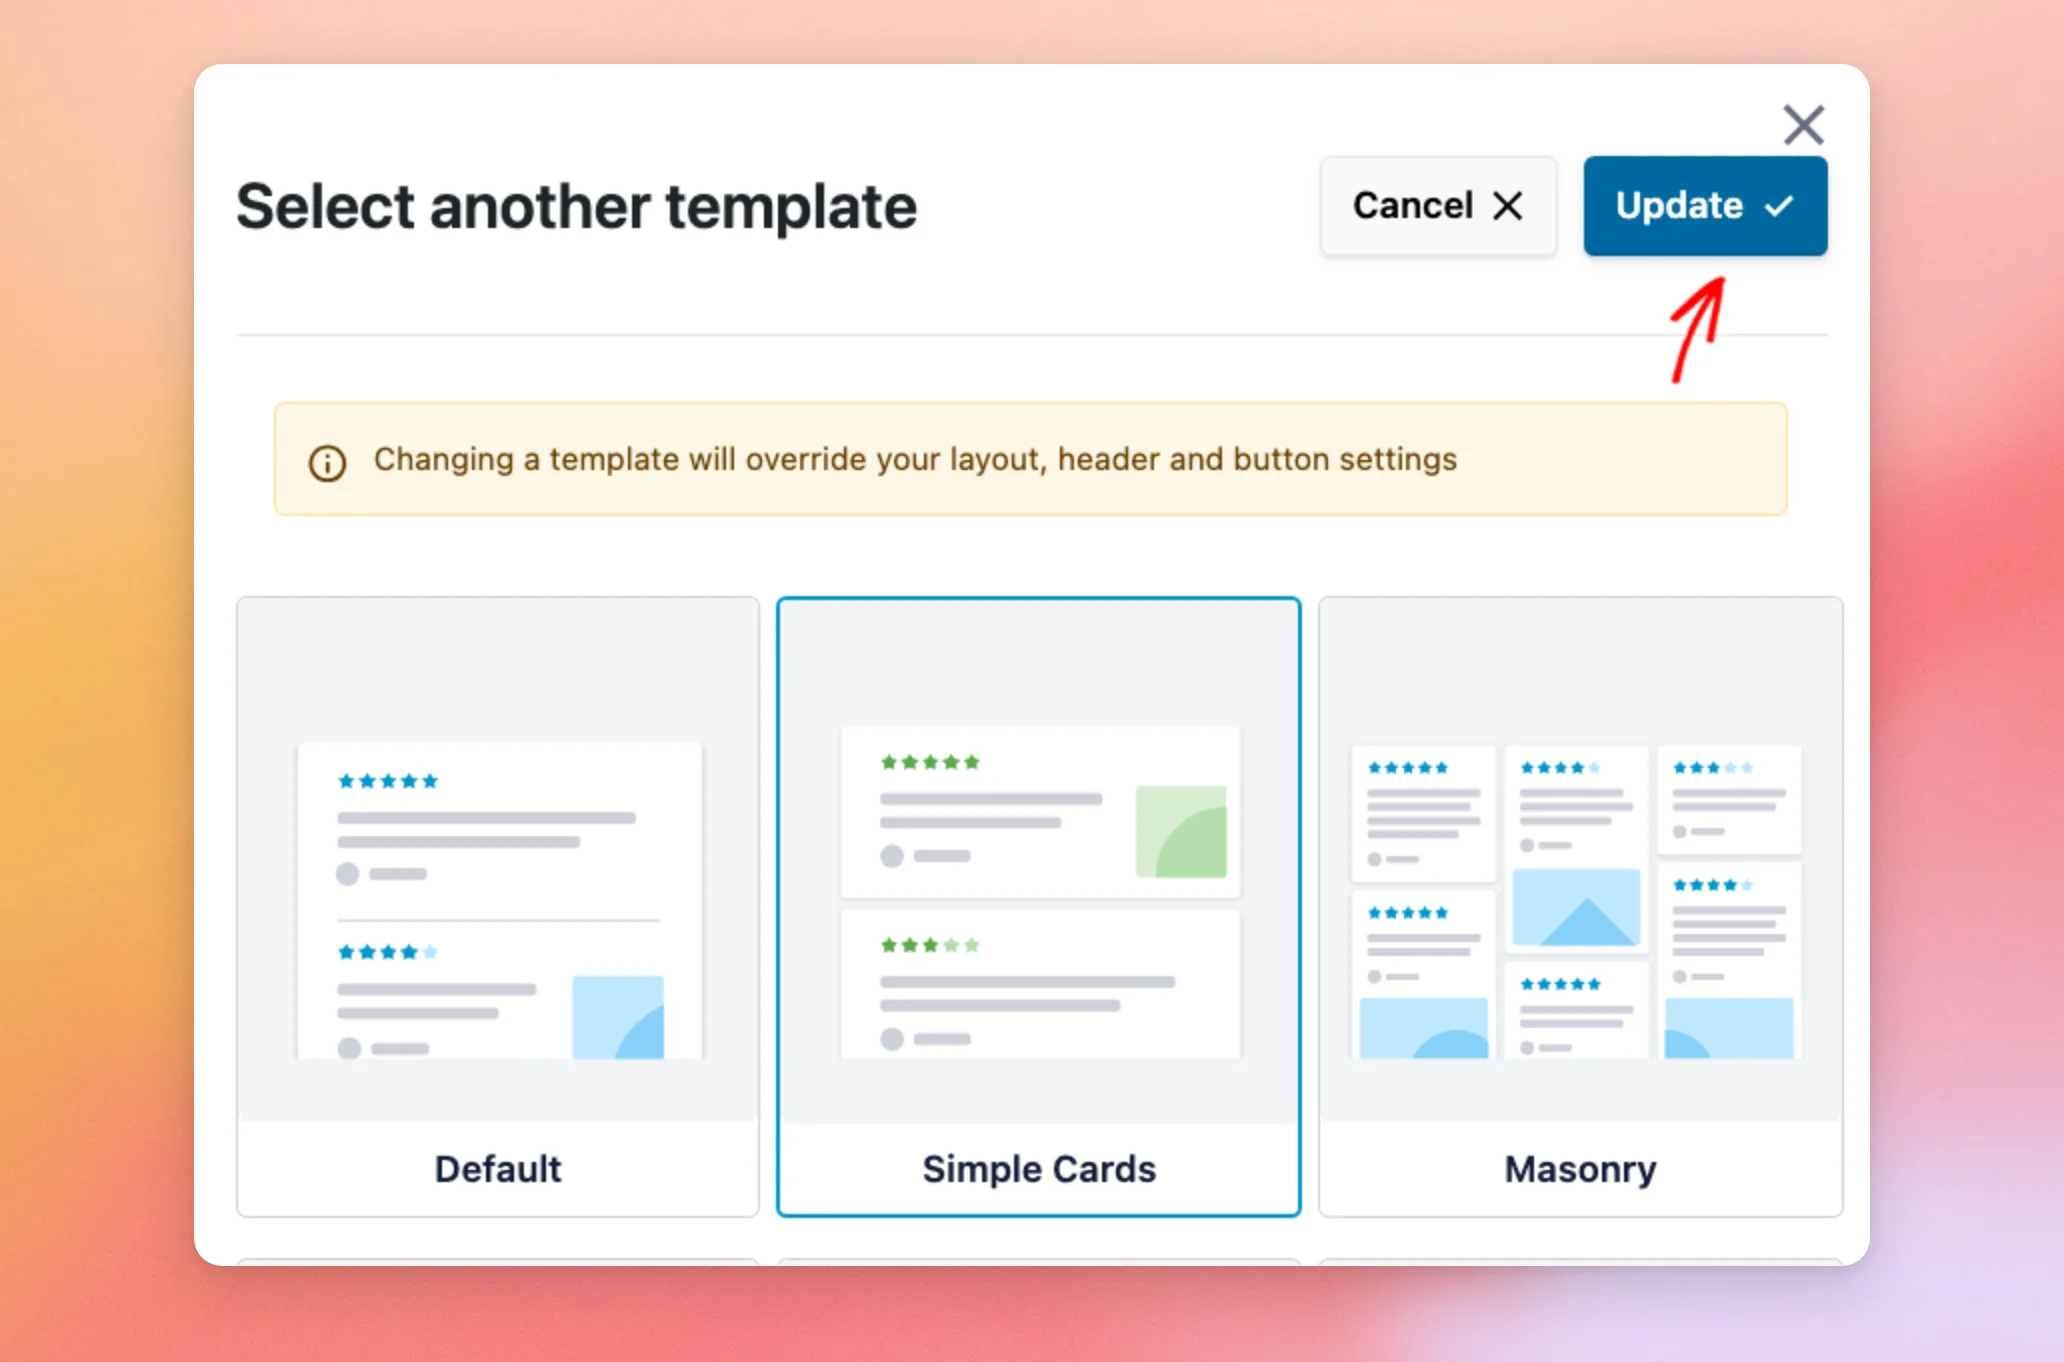
The Select another template window opens with seven templates: Default, Simple Cards, Masonry, Single Review, Showcase Carousel, Carousel, and Grid Carousel.
A new template replaces your layout, header, and button settings with its own. That’s why it’s best to choose your template before you customize anything else.
From the list, click the template you’d like, such as Simple Cards. Then, click Update.
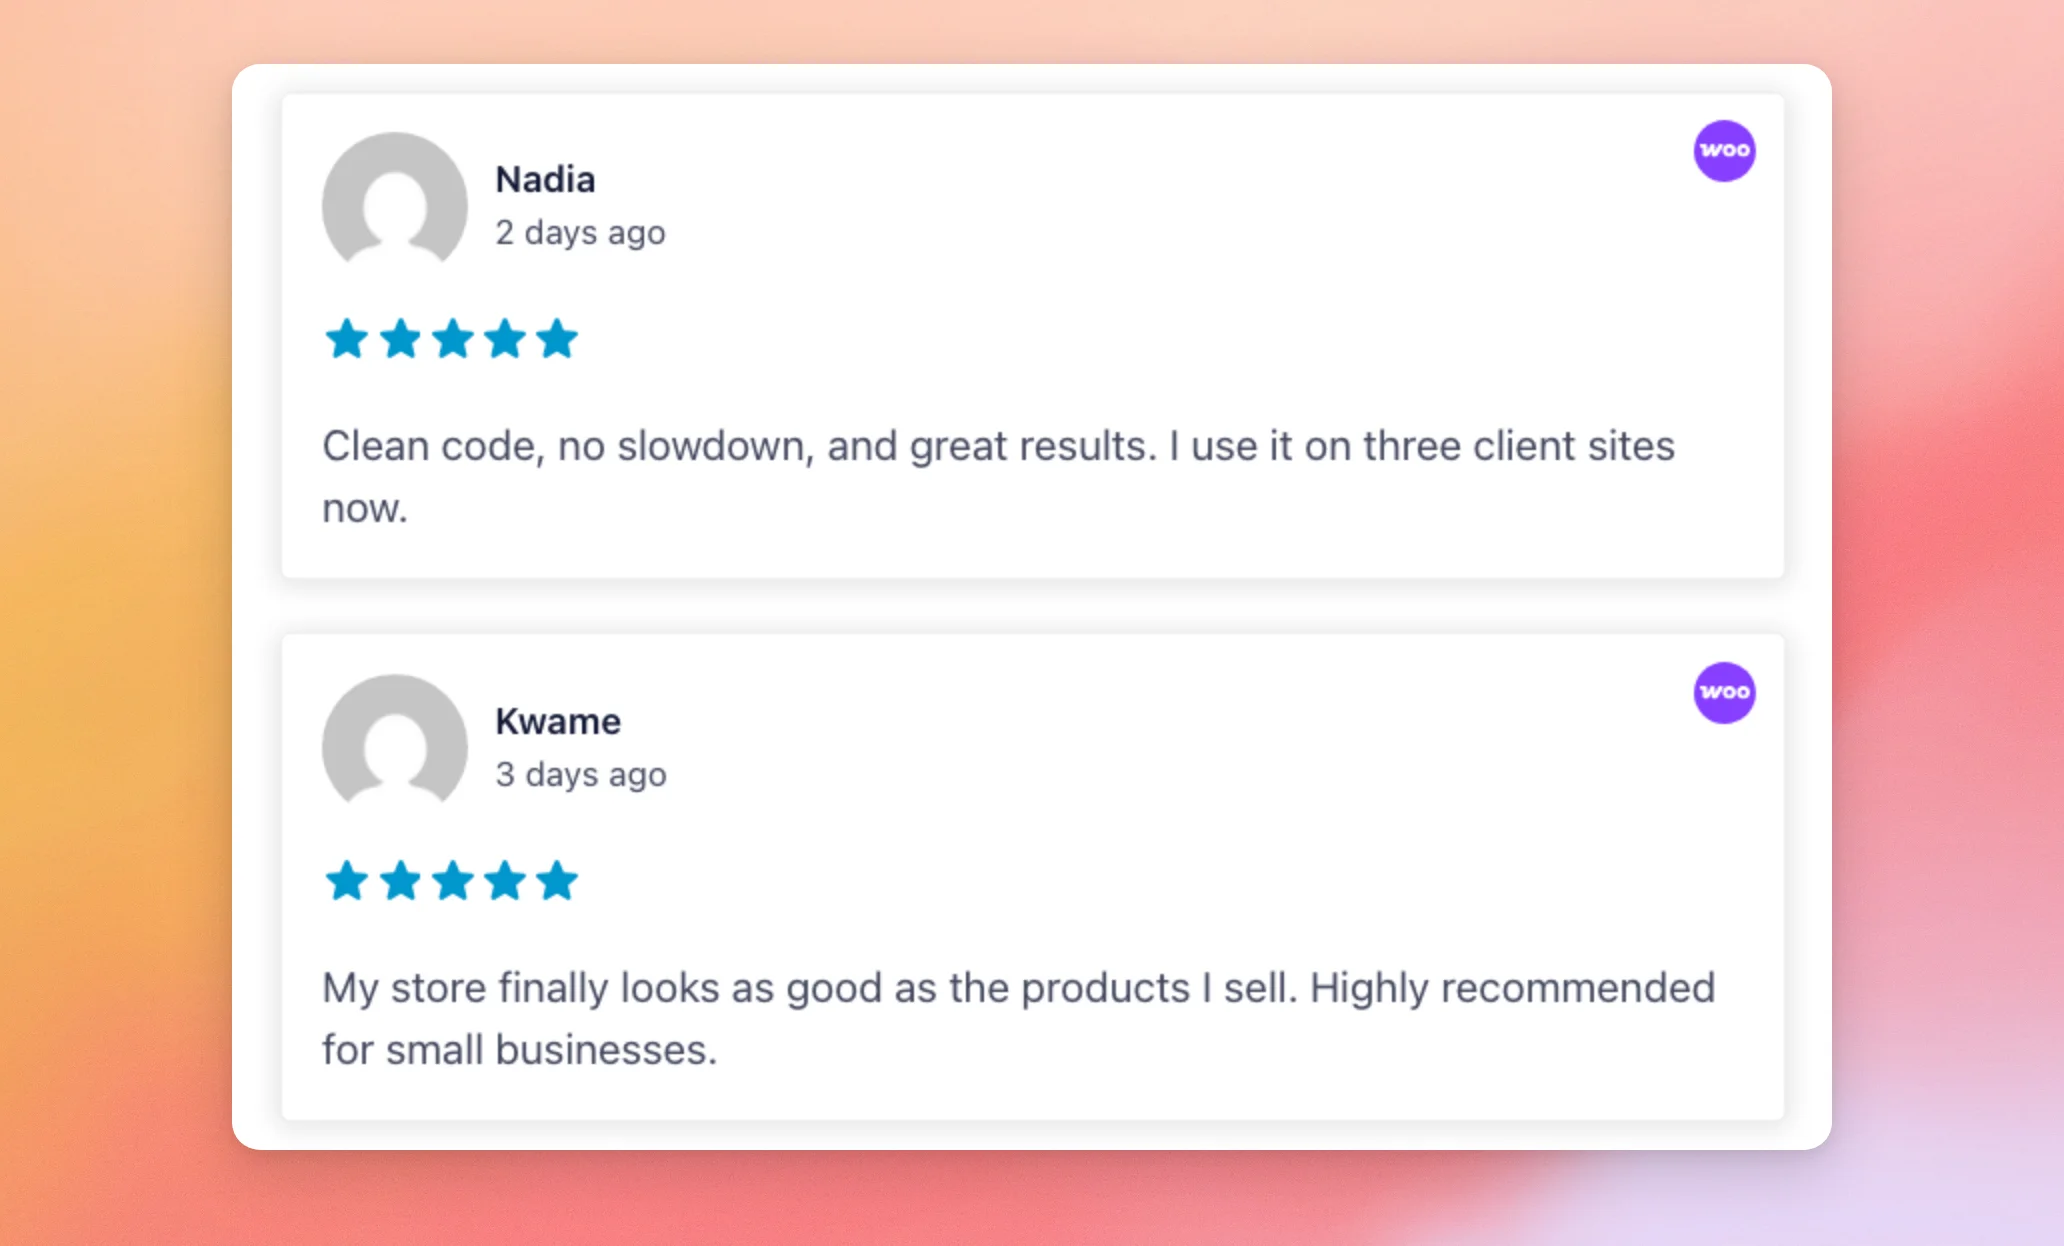
The preview now shows your feed with the new template. With Simple Cards, for example, each review sits on its own card.
To go back to the list of sections, click Customize at the top of the sidebar.
Your template is set. Next, we’ll fine-tune how your reviews are arranged.
Choosing a Layout
The layout sets how your reviews are arranged on the page.
From the Customize tab’s list of sections, click Layout.
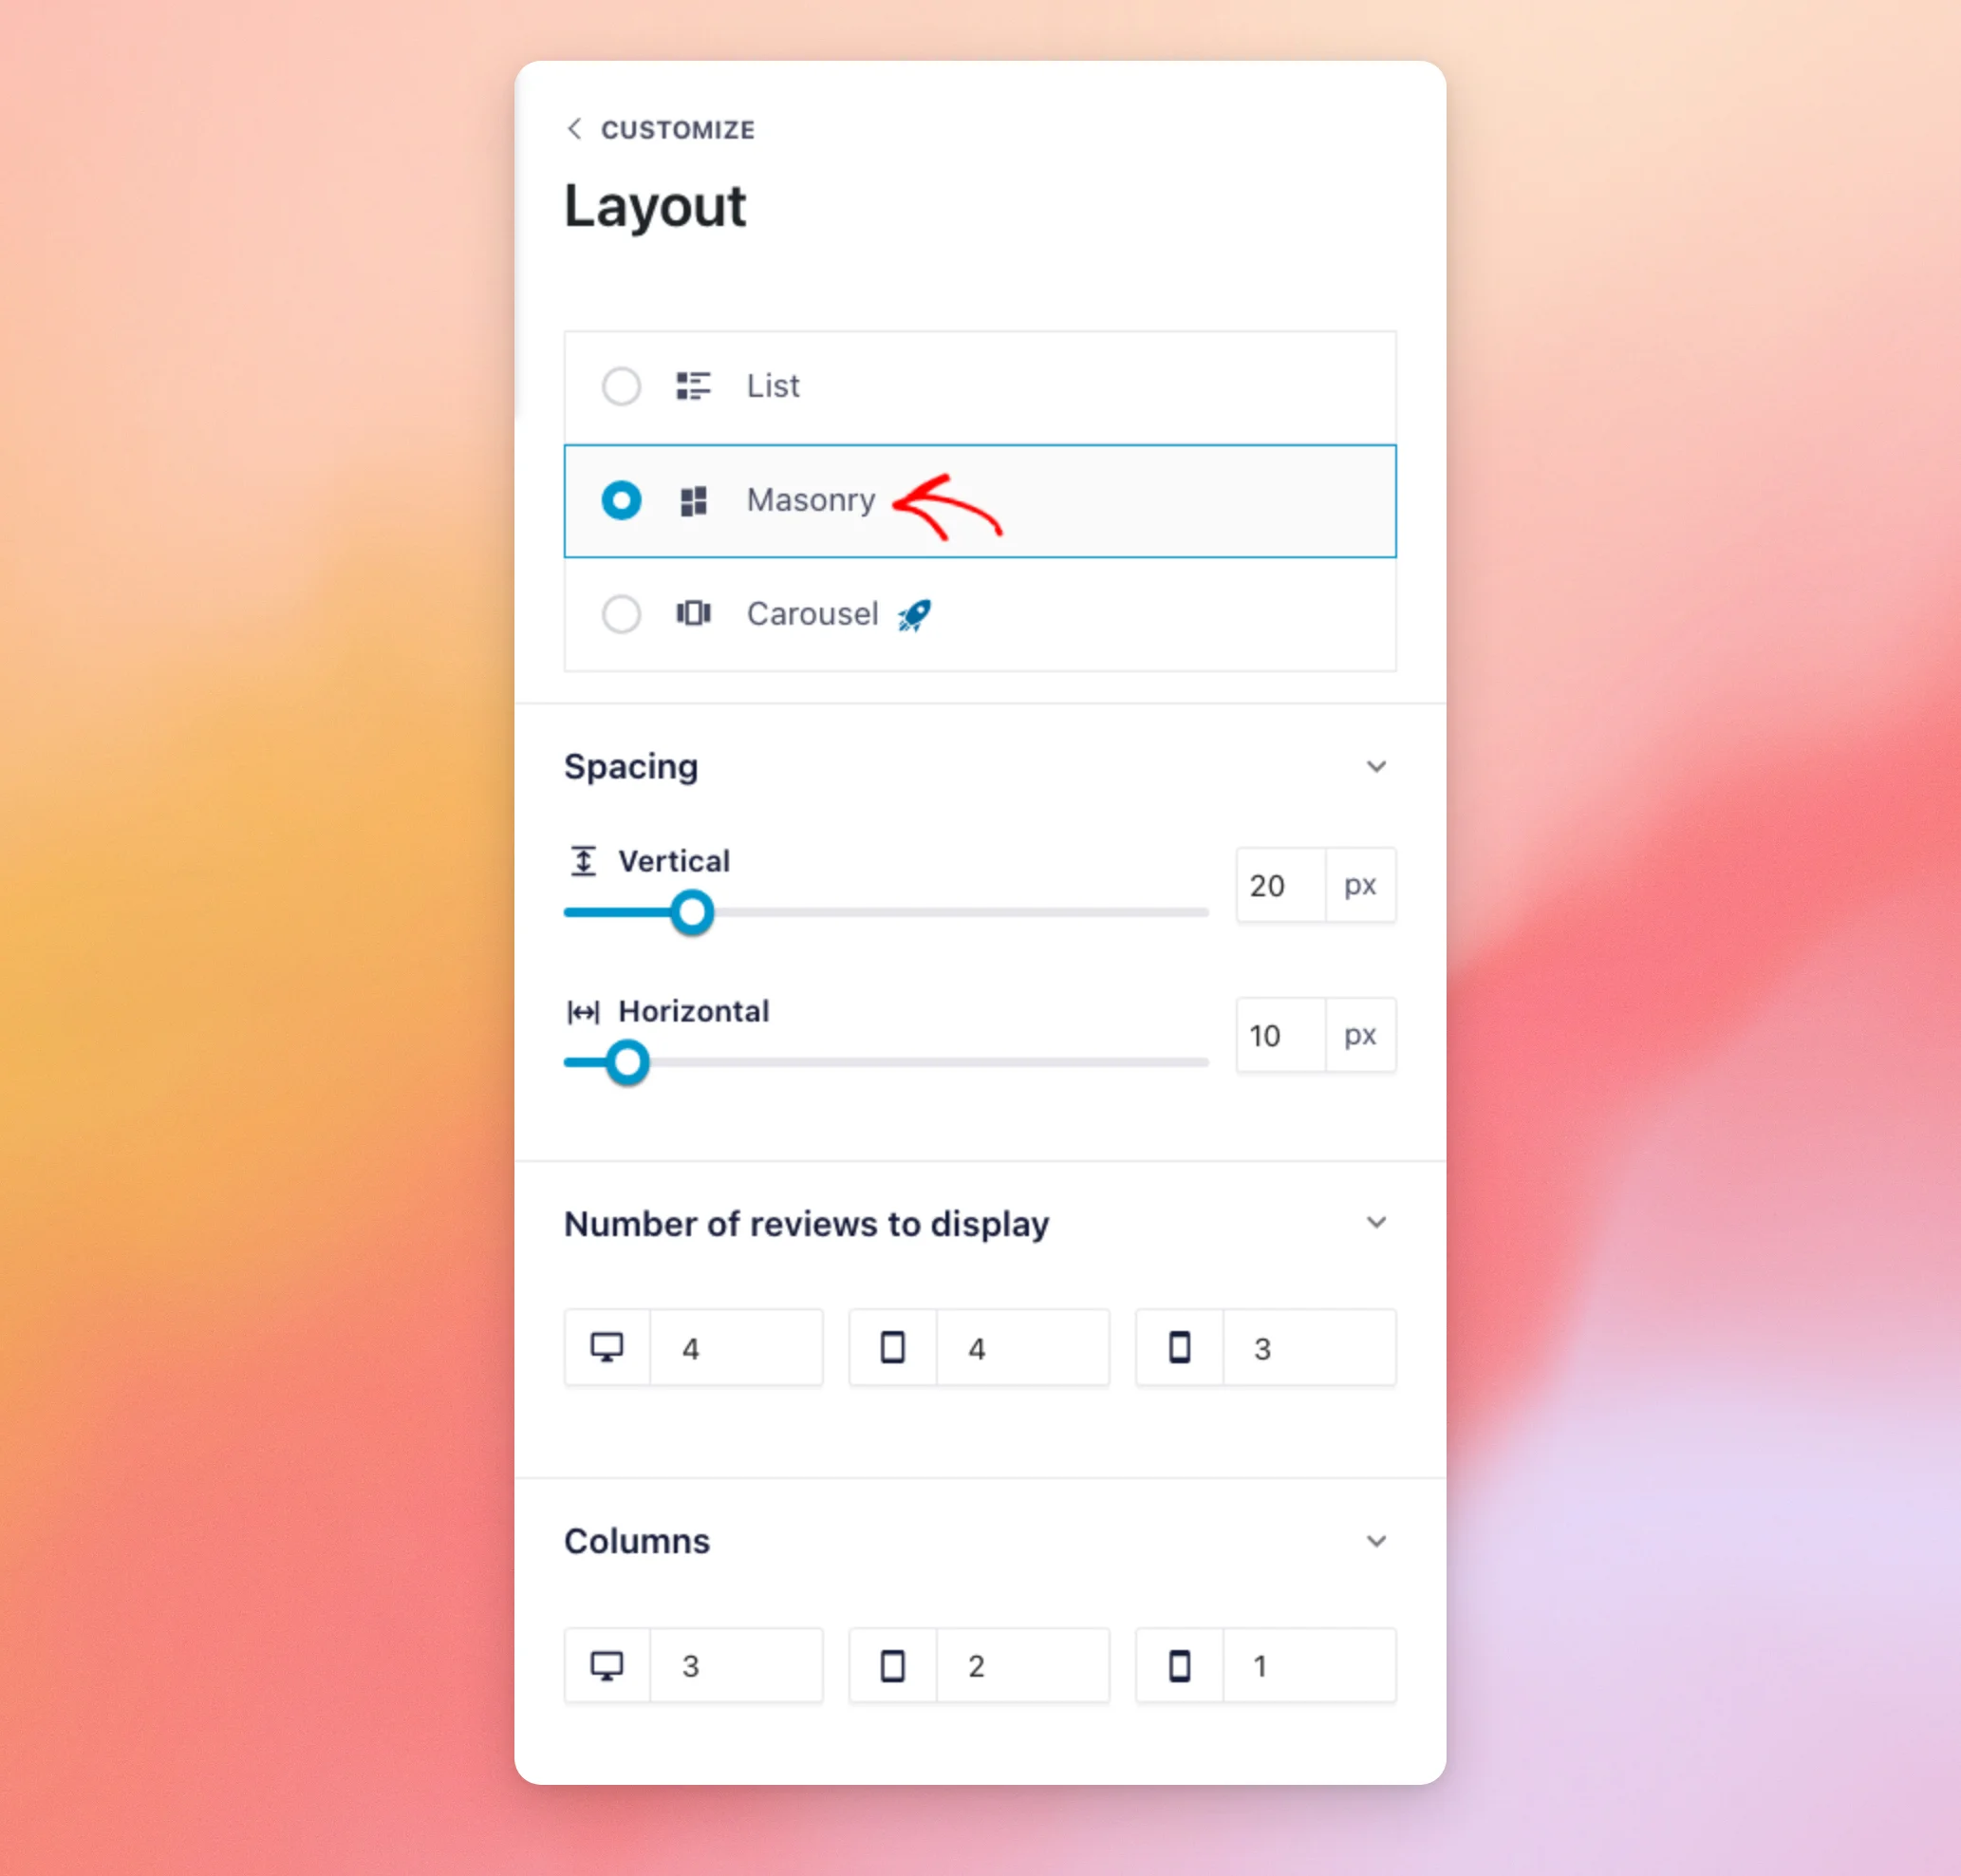
At the top of the Layout section, you can choose one of three layouts:
- List: Shows your reviews one below the other, in a single column.
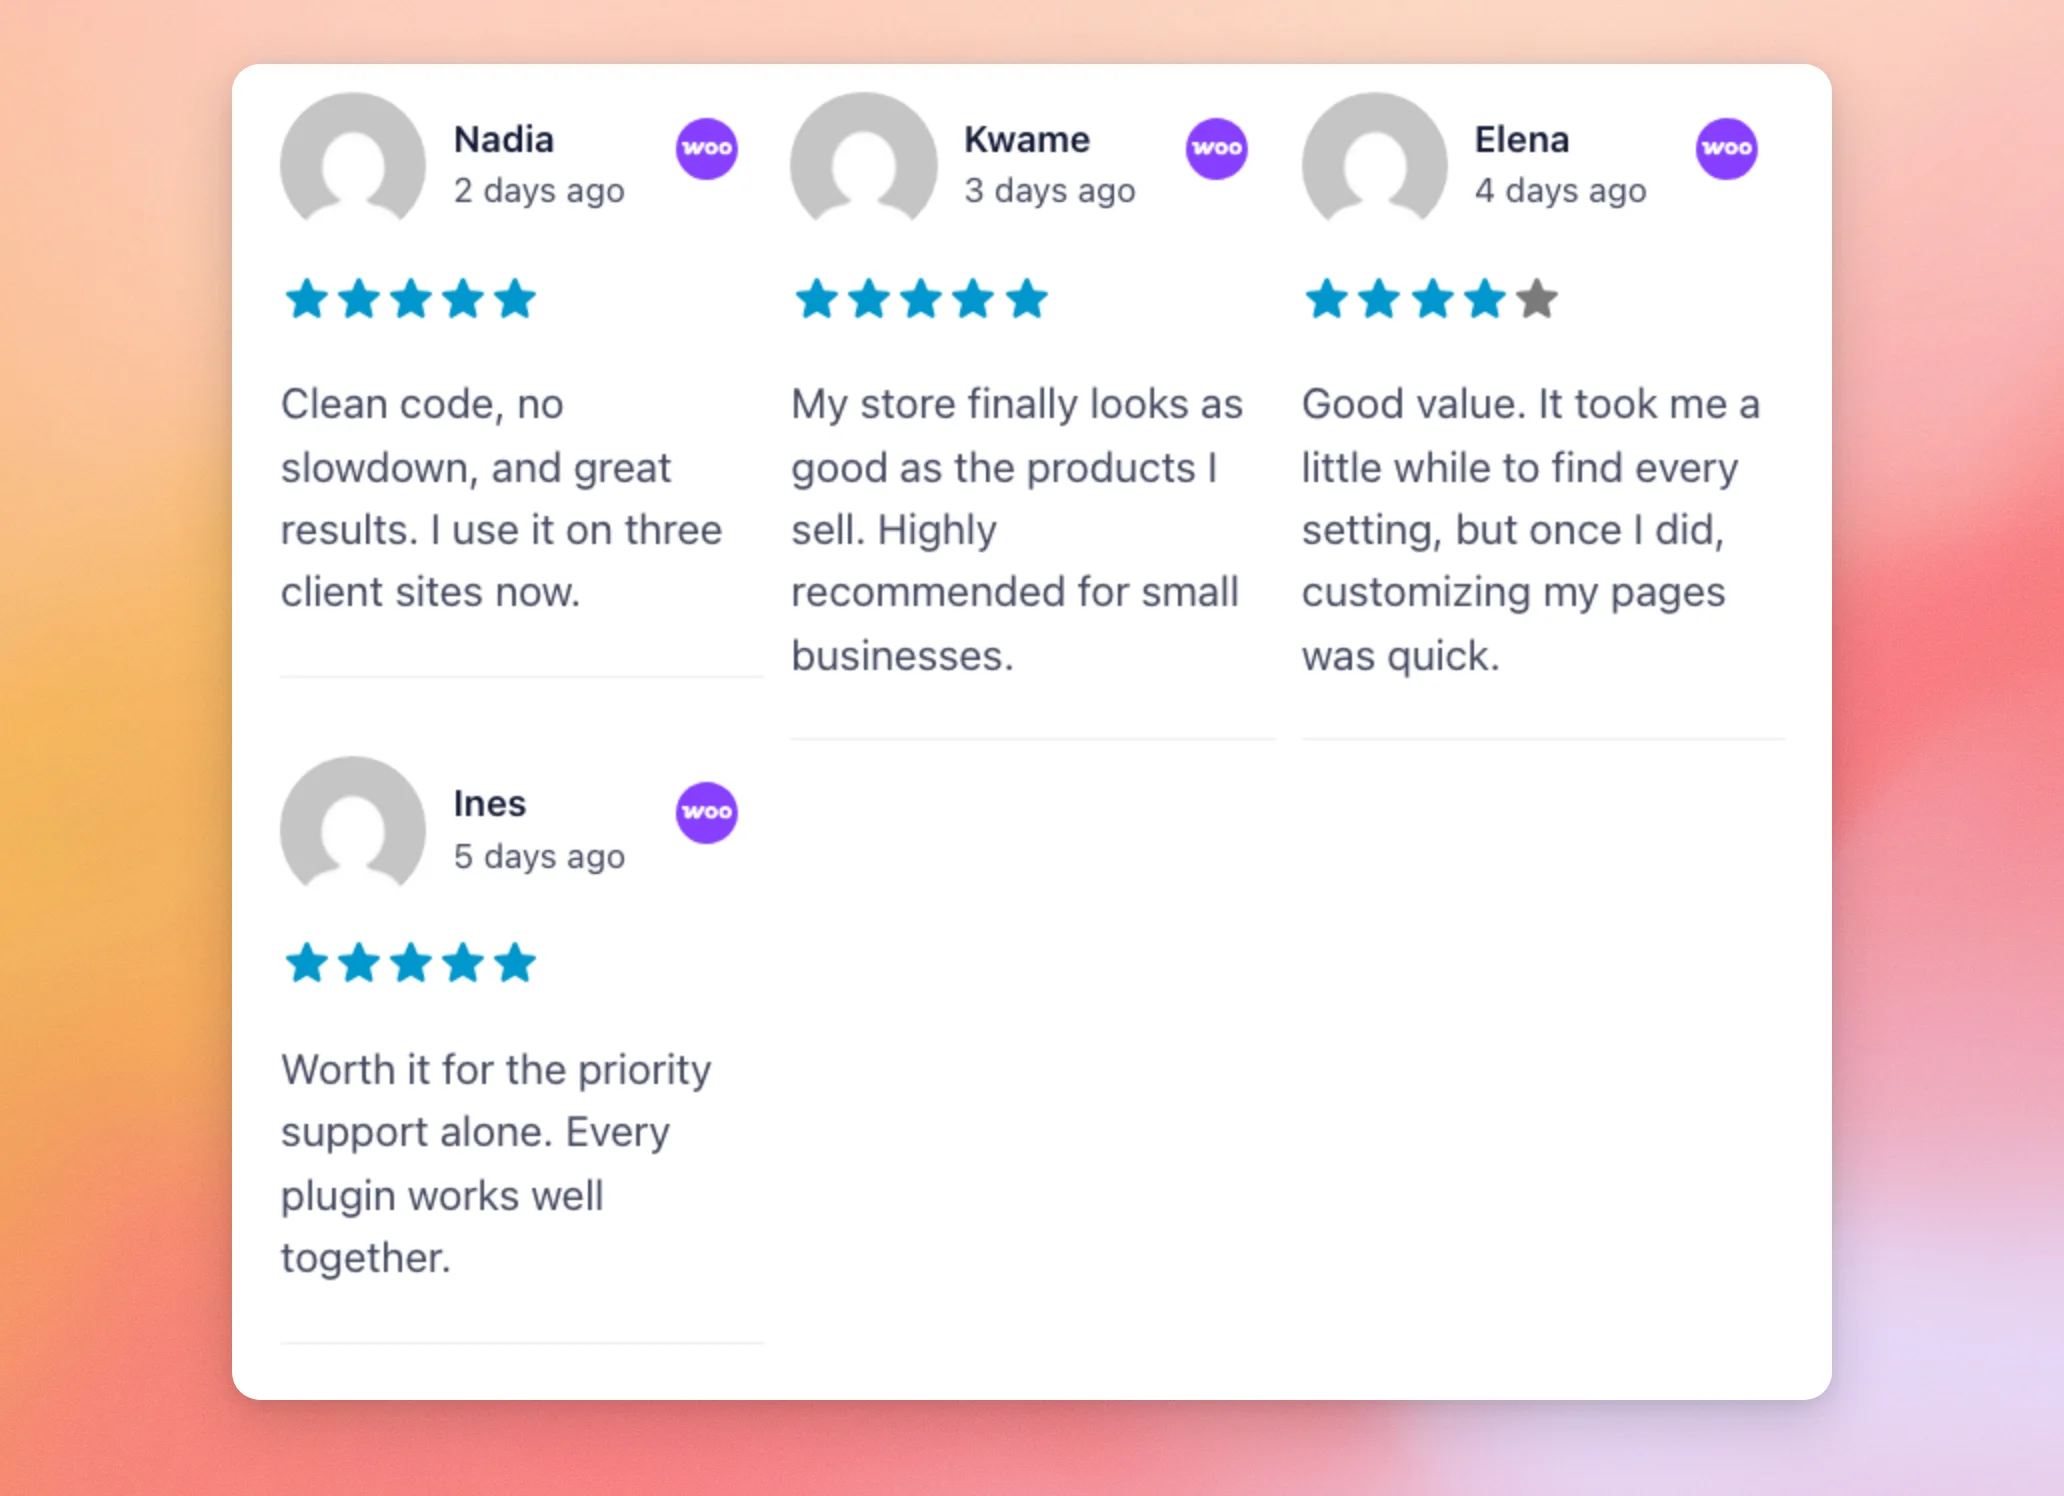
- Masonry: Shows your reviews in columns, with each review only as tall as its text.
- Carousel: Shows your reviews in a slider that visitors can move through.
Below the layouts, every layout has a few more options:
- Spacing: How far apart your reviews sit, in pixels.
- Number of reviews to display: How many reviews your feed shows at first, with a separate number for desktops, tablets, and phones.
- Content Length: The most characters of each review’s text your feed shows. Longer reviews are cut off with “…”. A higher number shows more of each review.
Masonry and Carousel each add options of their own. We’ll start with Masonry.
Using the Masonry Layout
To show your reviews in columns, click Masonry. The Spacing option now has a Horizontal field for the space between columns.
A Columns option also appears, where you choose how many columns your feed shows on desktops, tablets, and phones.
In the preview, your reviews now sit side by side in columns.
If you’d rather show your reviews in a slider, we’ll look at the Carousel layout next.
Using the Carousel Layout
To show your reviews in a slider, click Carousel.
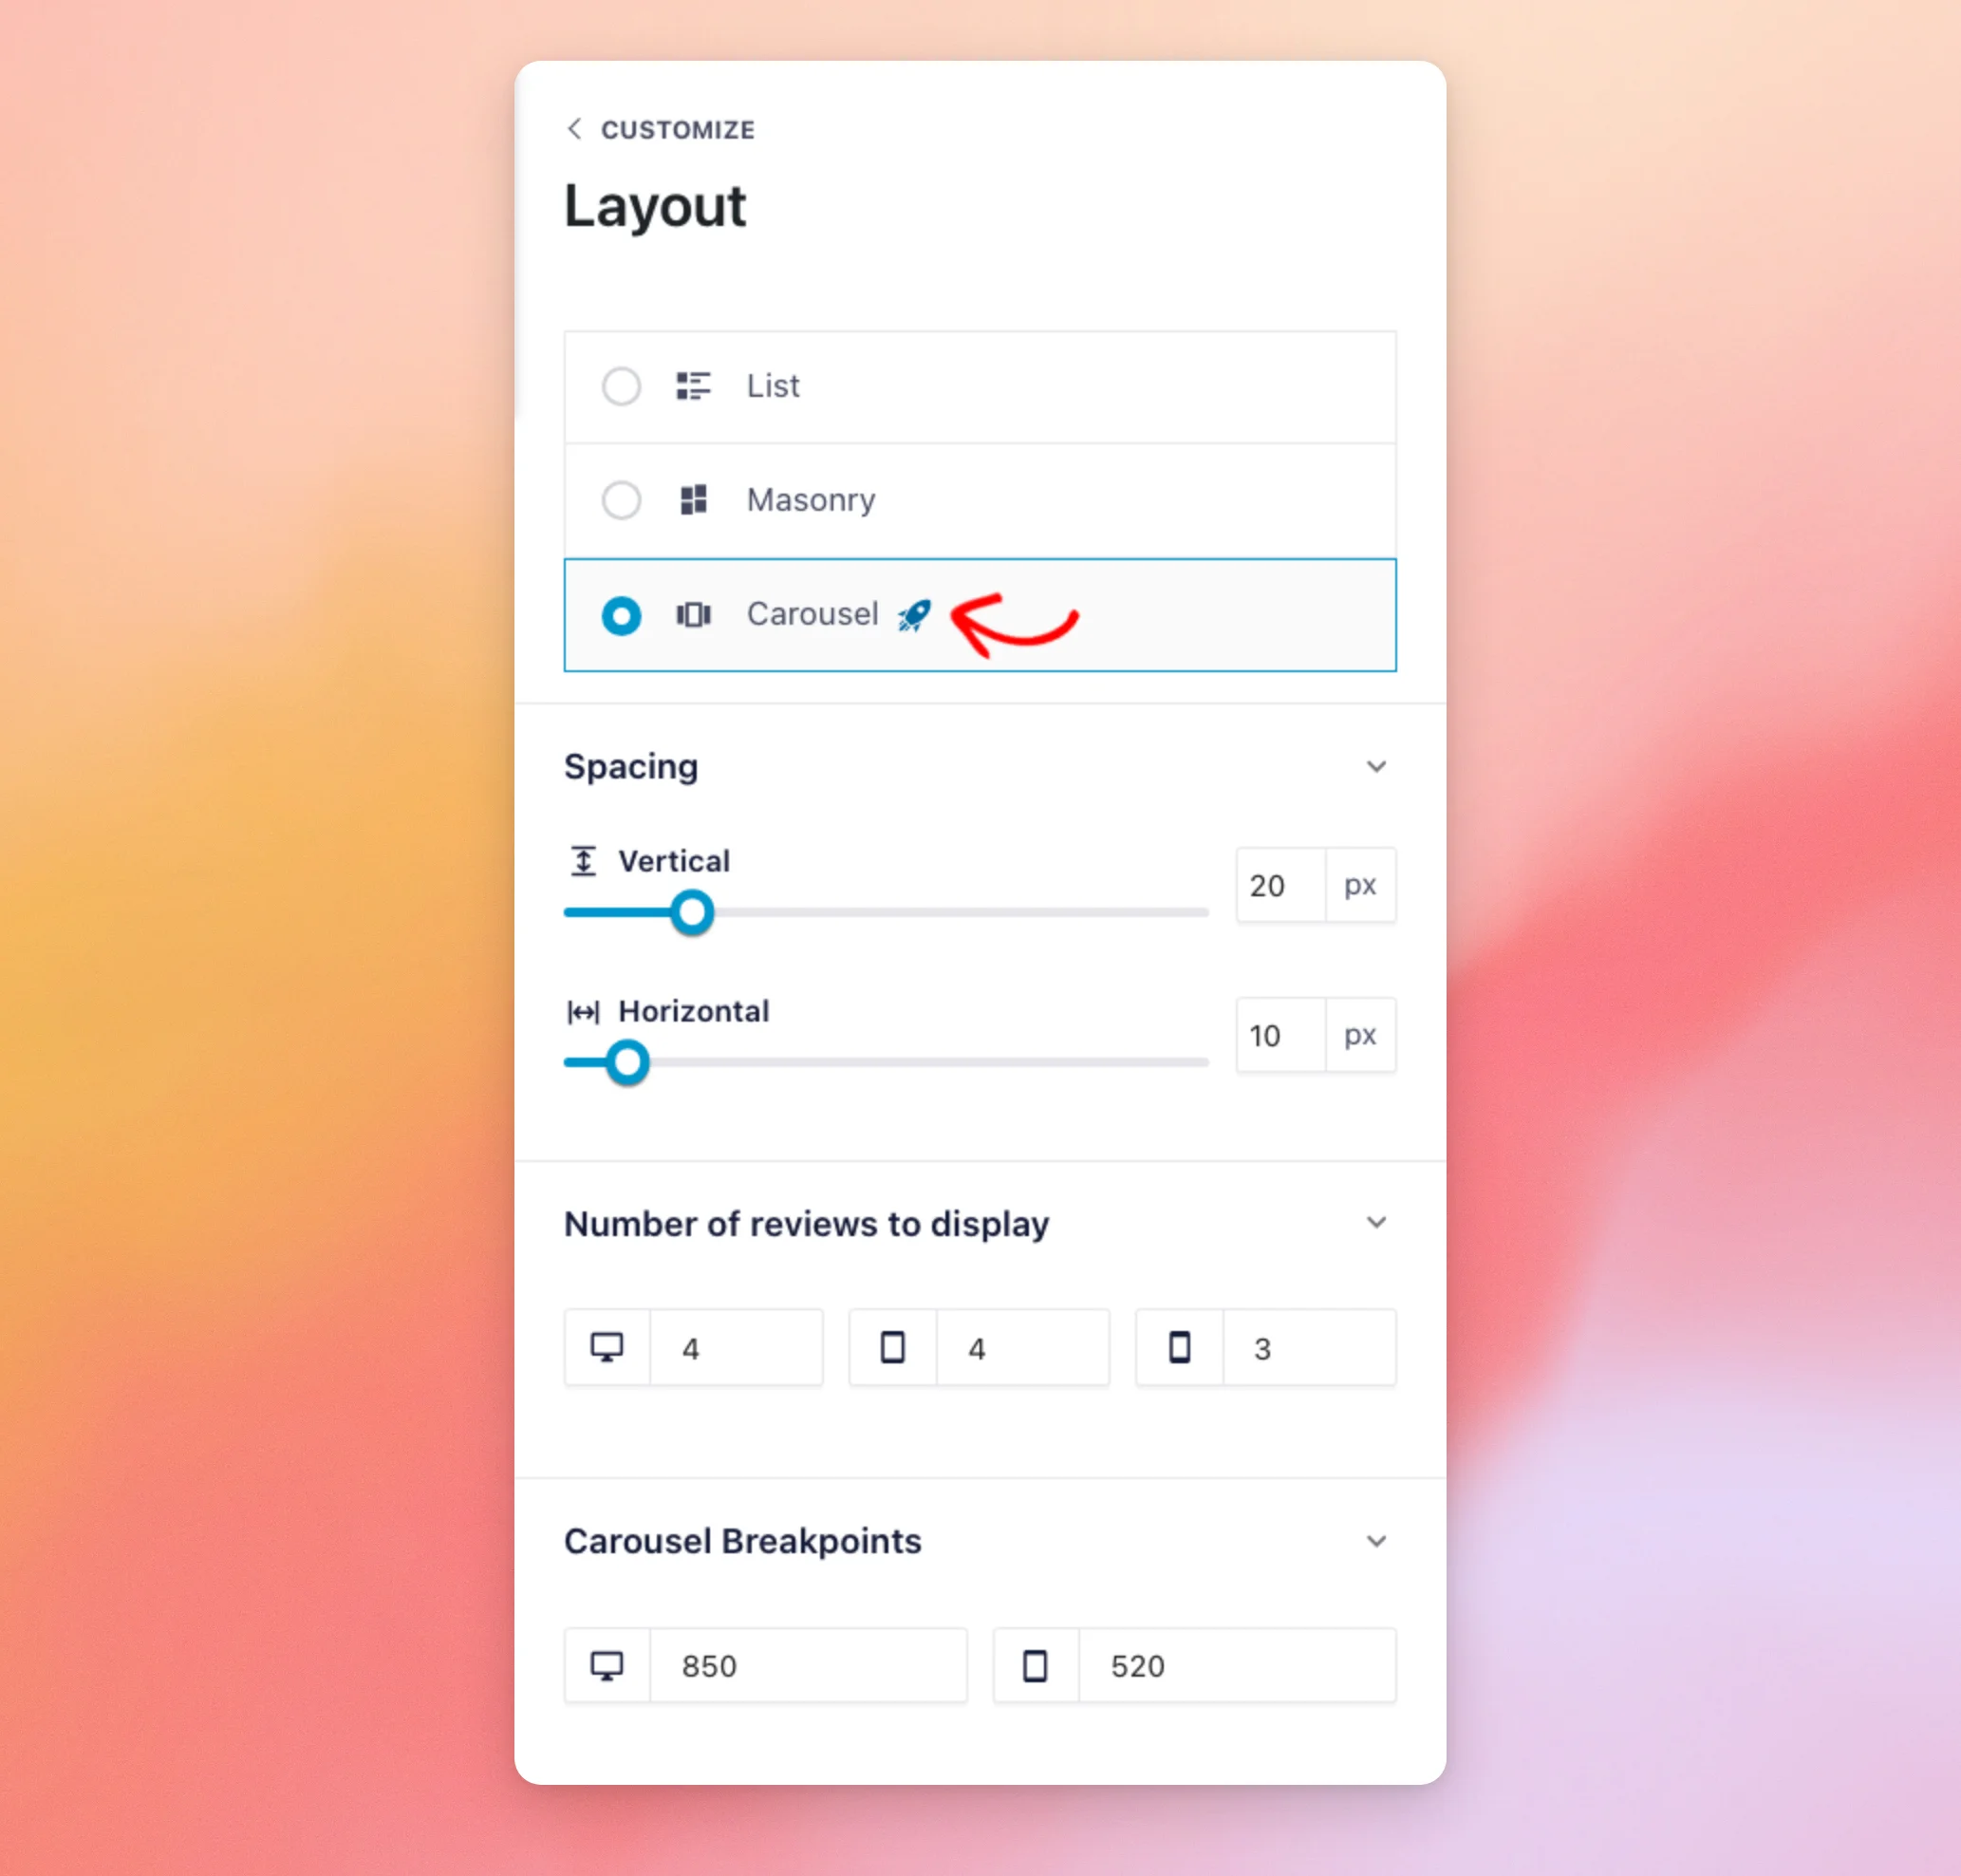
The Carousel layout adds three groups of options:
- Carousel Breakpoints: The screen widths, in pixels, that decide which columns your carousel uses. Below the desktop width, the desktop columns stop applying. Below the tablet width, the tablet columns stop.
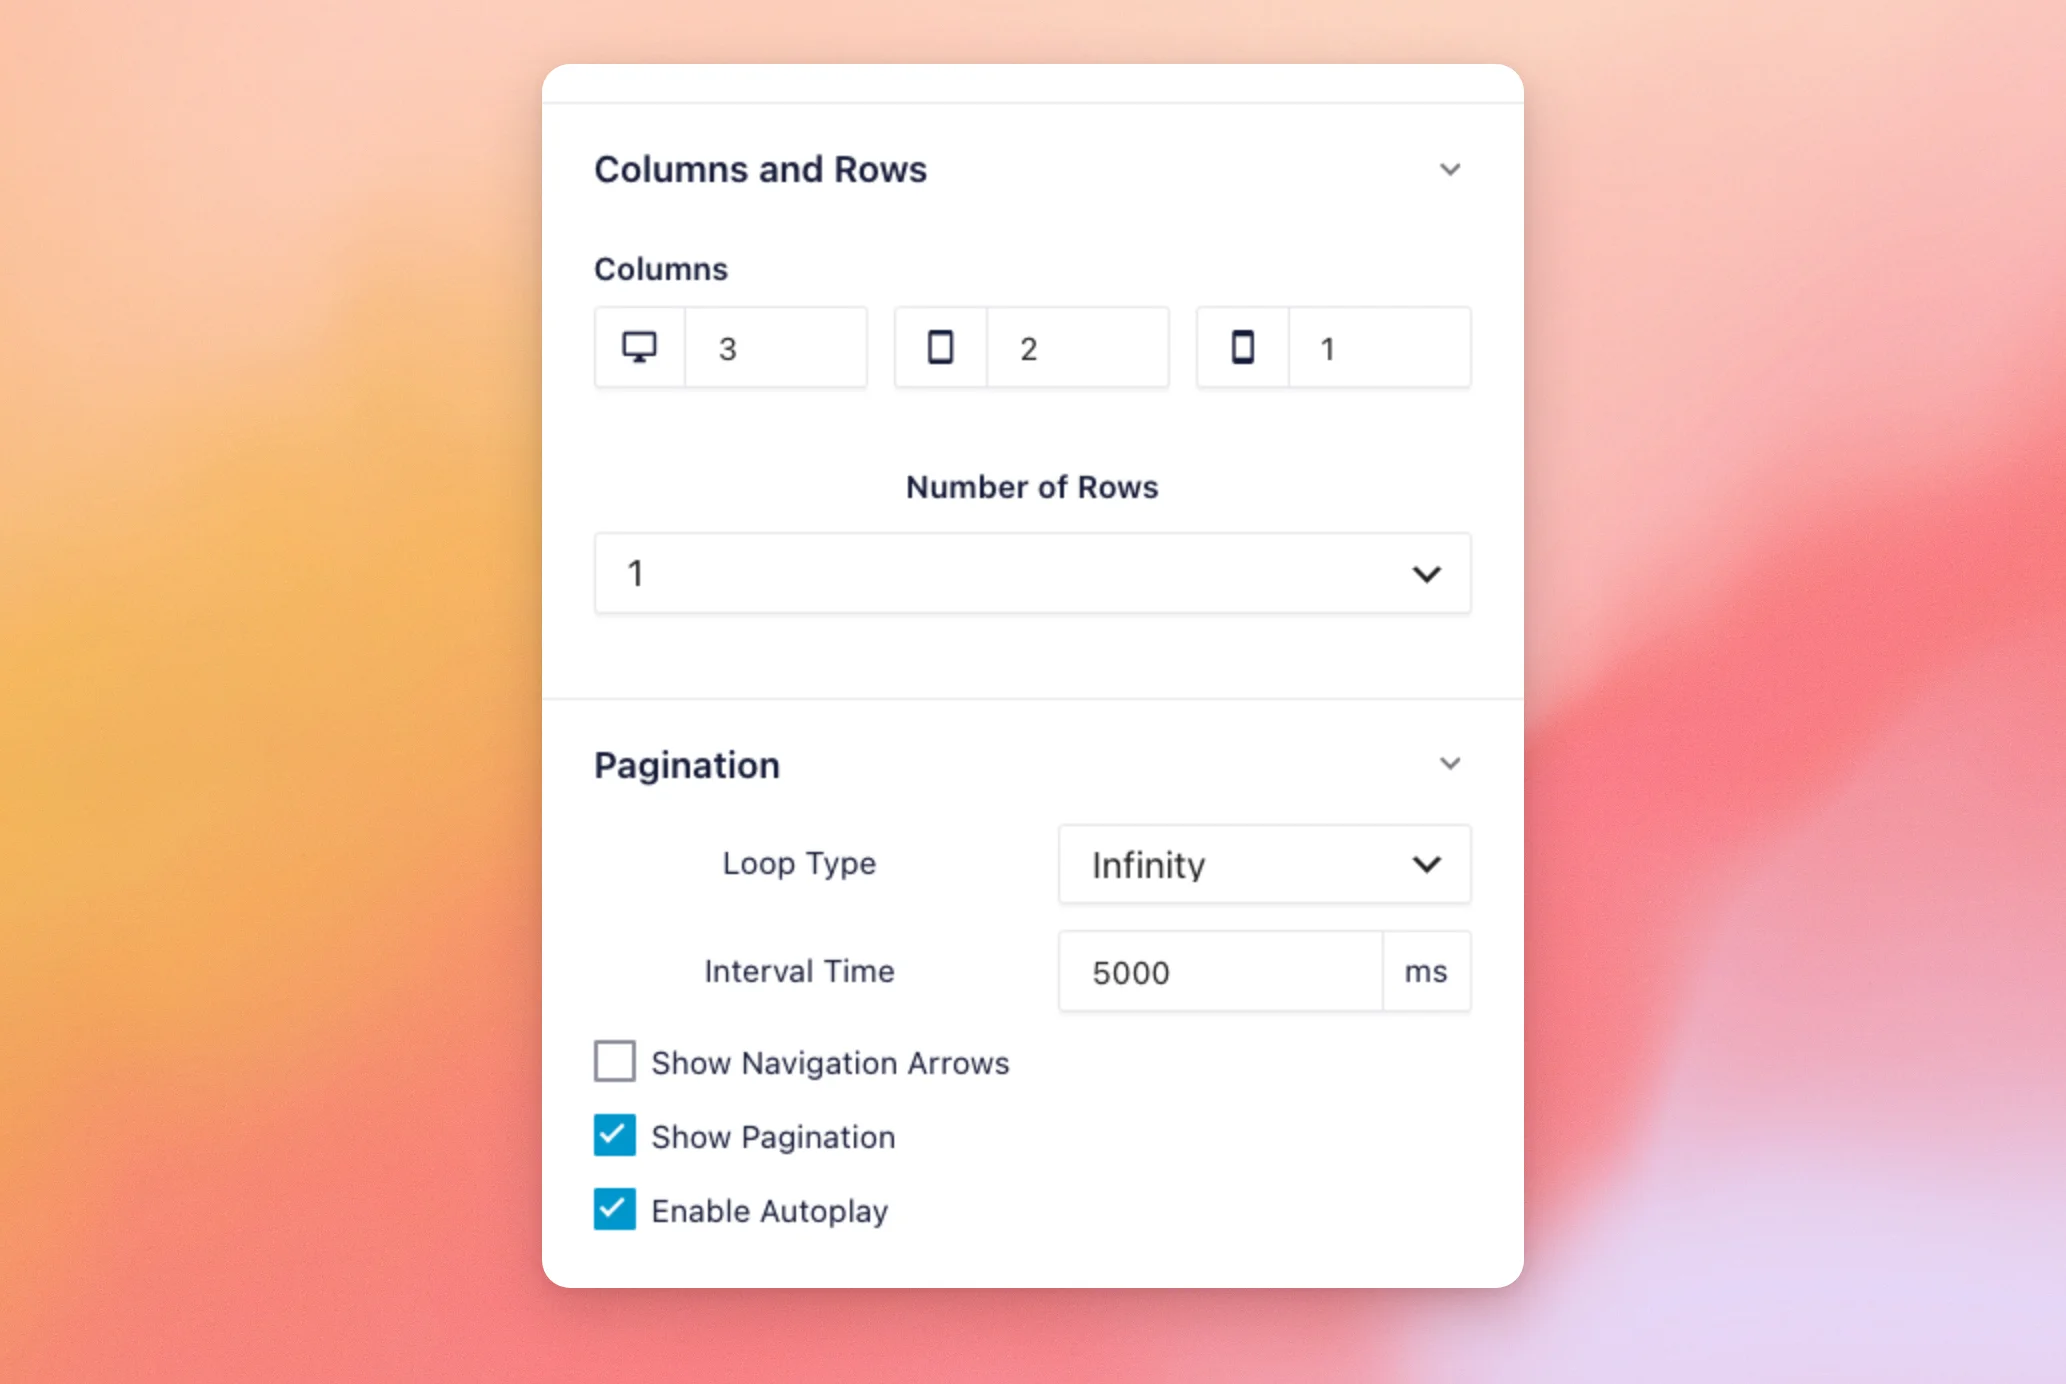
- Columns and Rows: How many reviews show side by side on desktops, tablets, and phones, and how many rows of reviews each slide has.
- Pagination: How the slider moves. Loop Type sets what happens after the last slide. Interval Time sets how long each slide shows, in milliseconds. The checkboxes below show or hide the navigation arrows and the dots, and turn autoplay on or off.
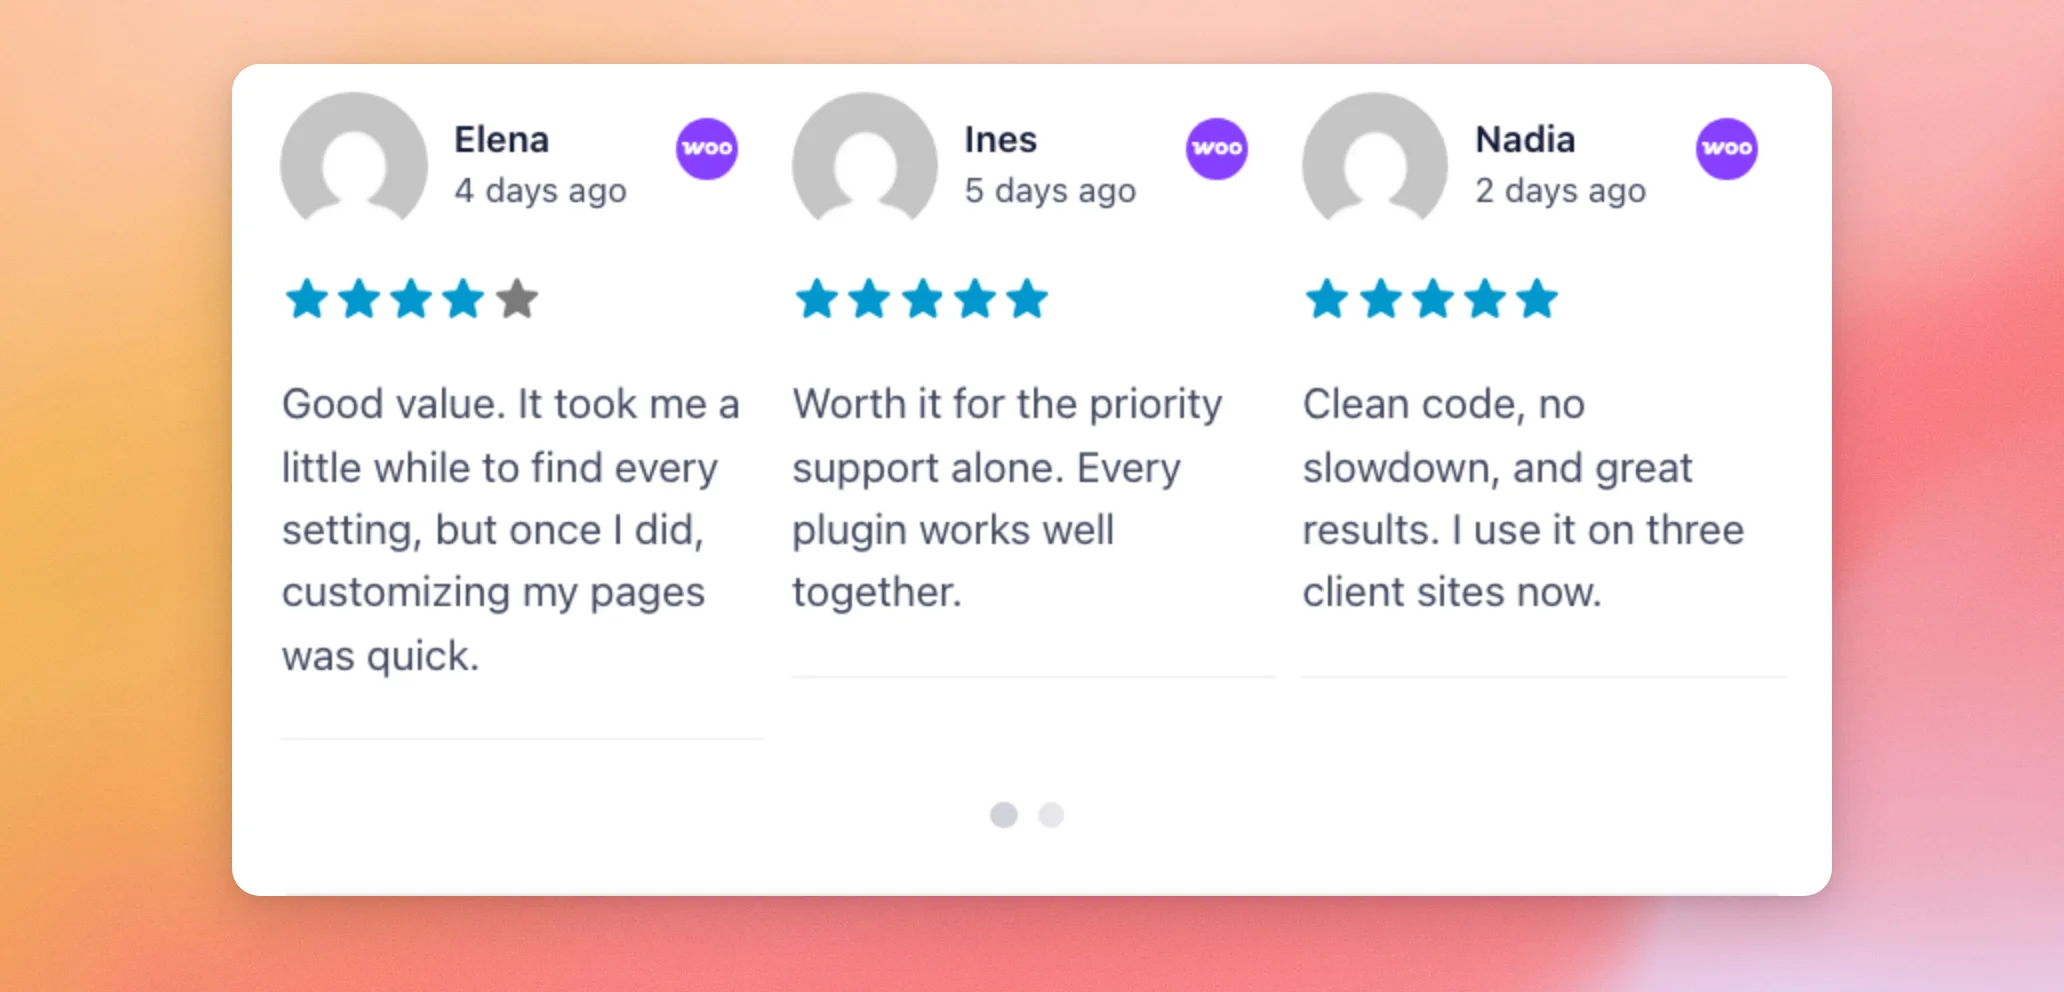
The preview shows your reviews as a carousel, with dots below it for moving between slides.
With your layout in place, we’ll customize the header above your reviews.
Customizing the Header
The header sits above your reviews.
Next, go back to the Customize tab’s list of sections. Then, click Header.
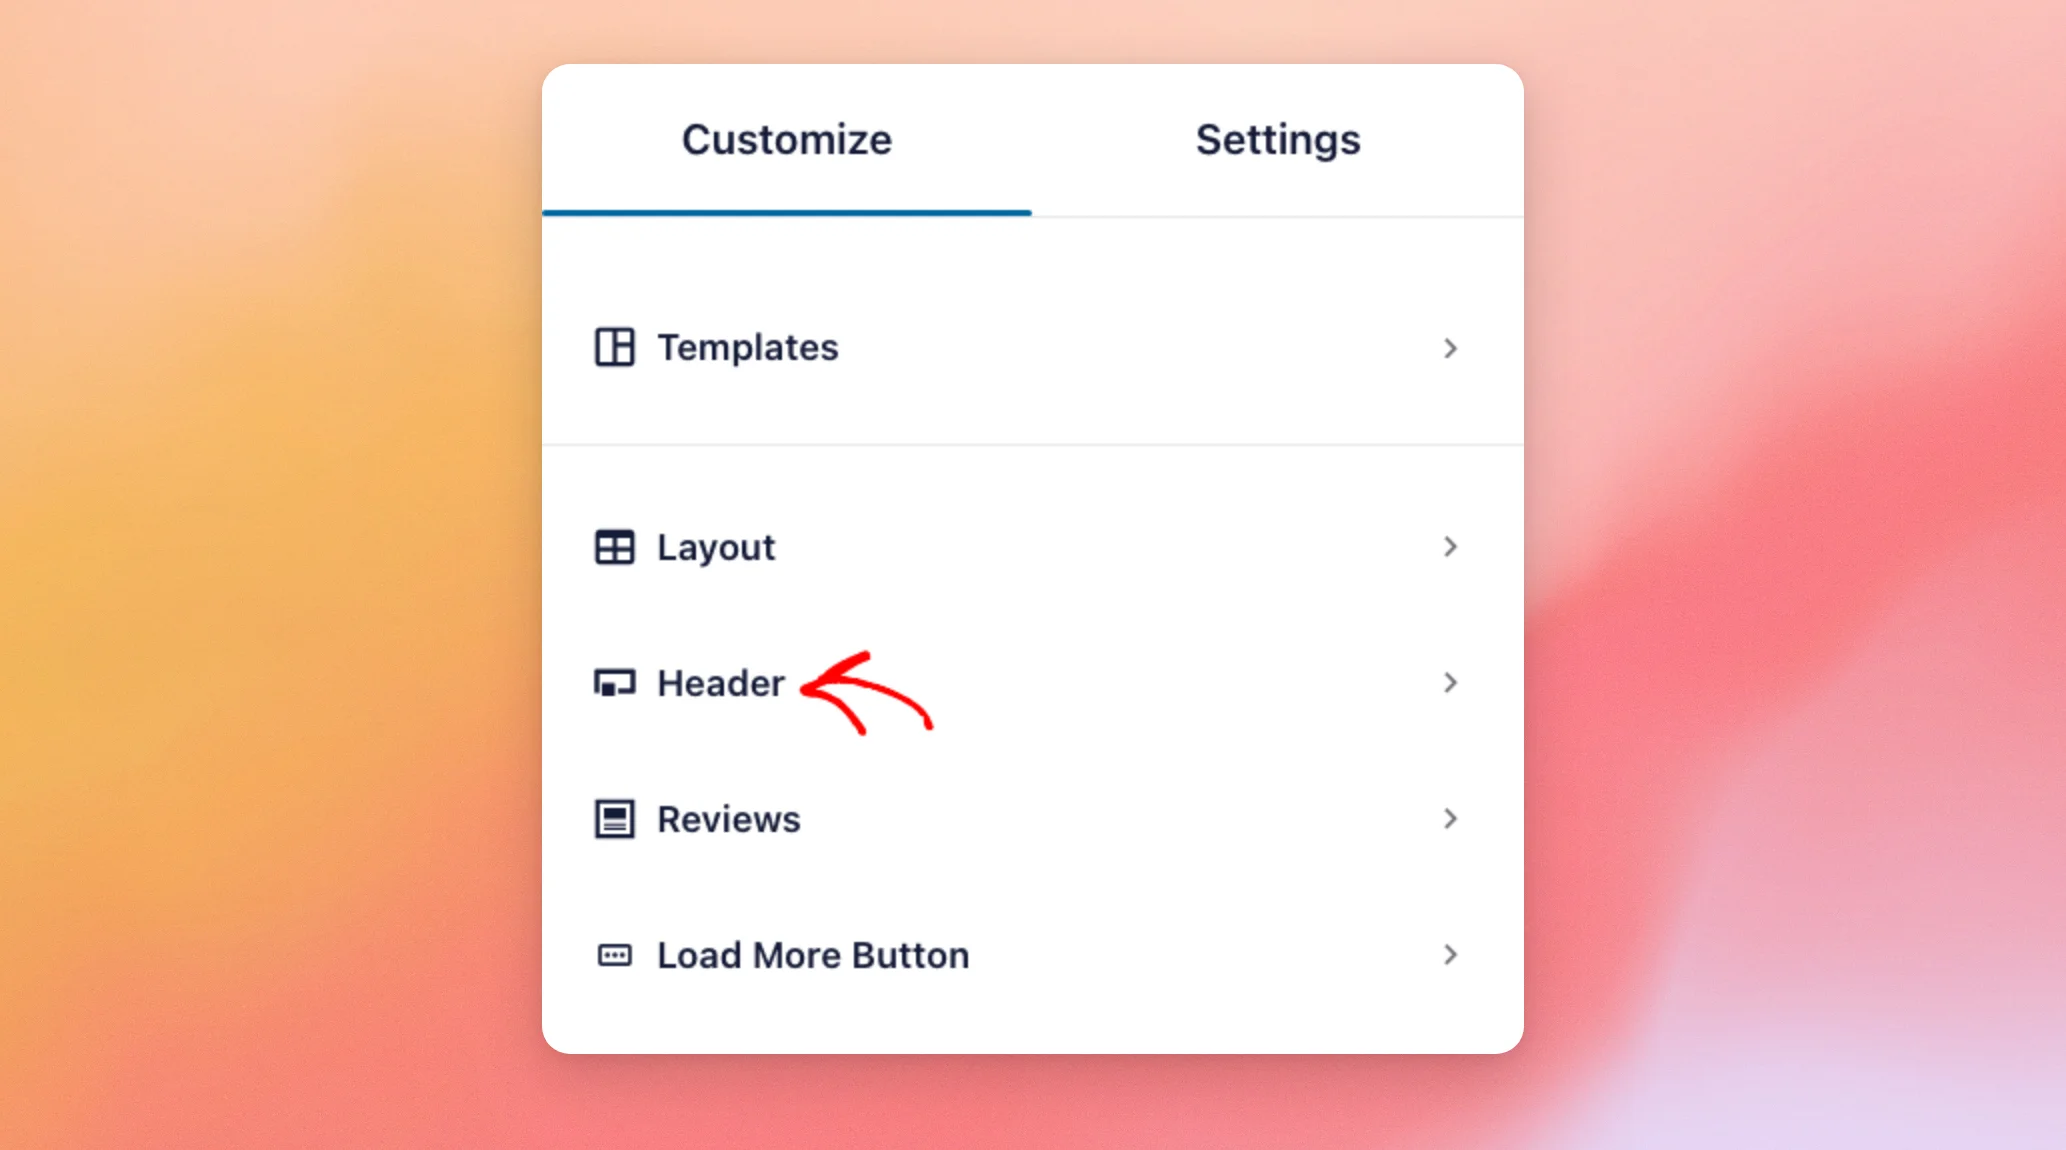
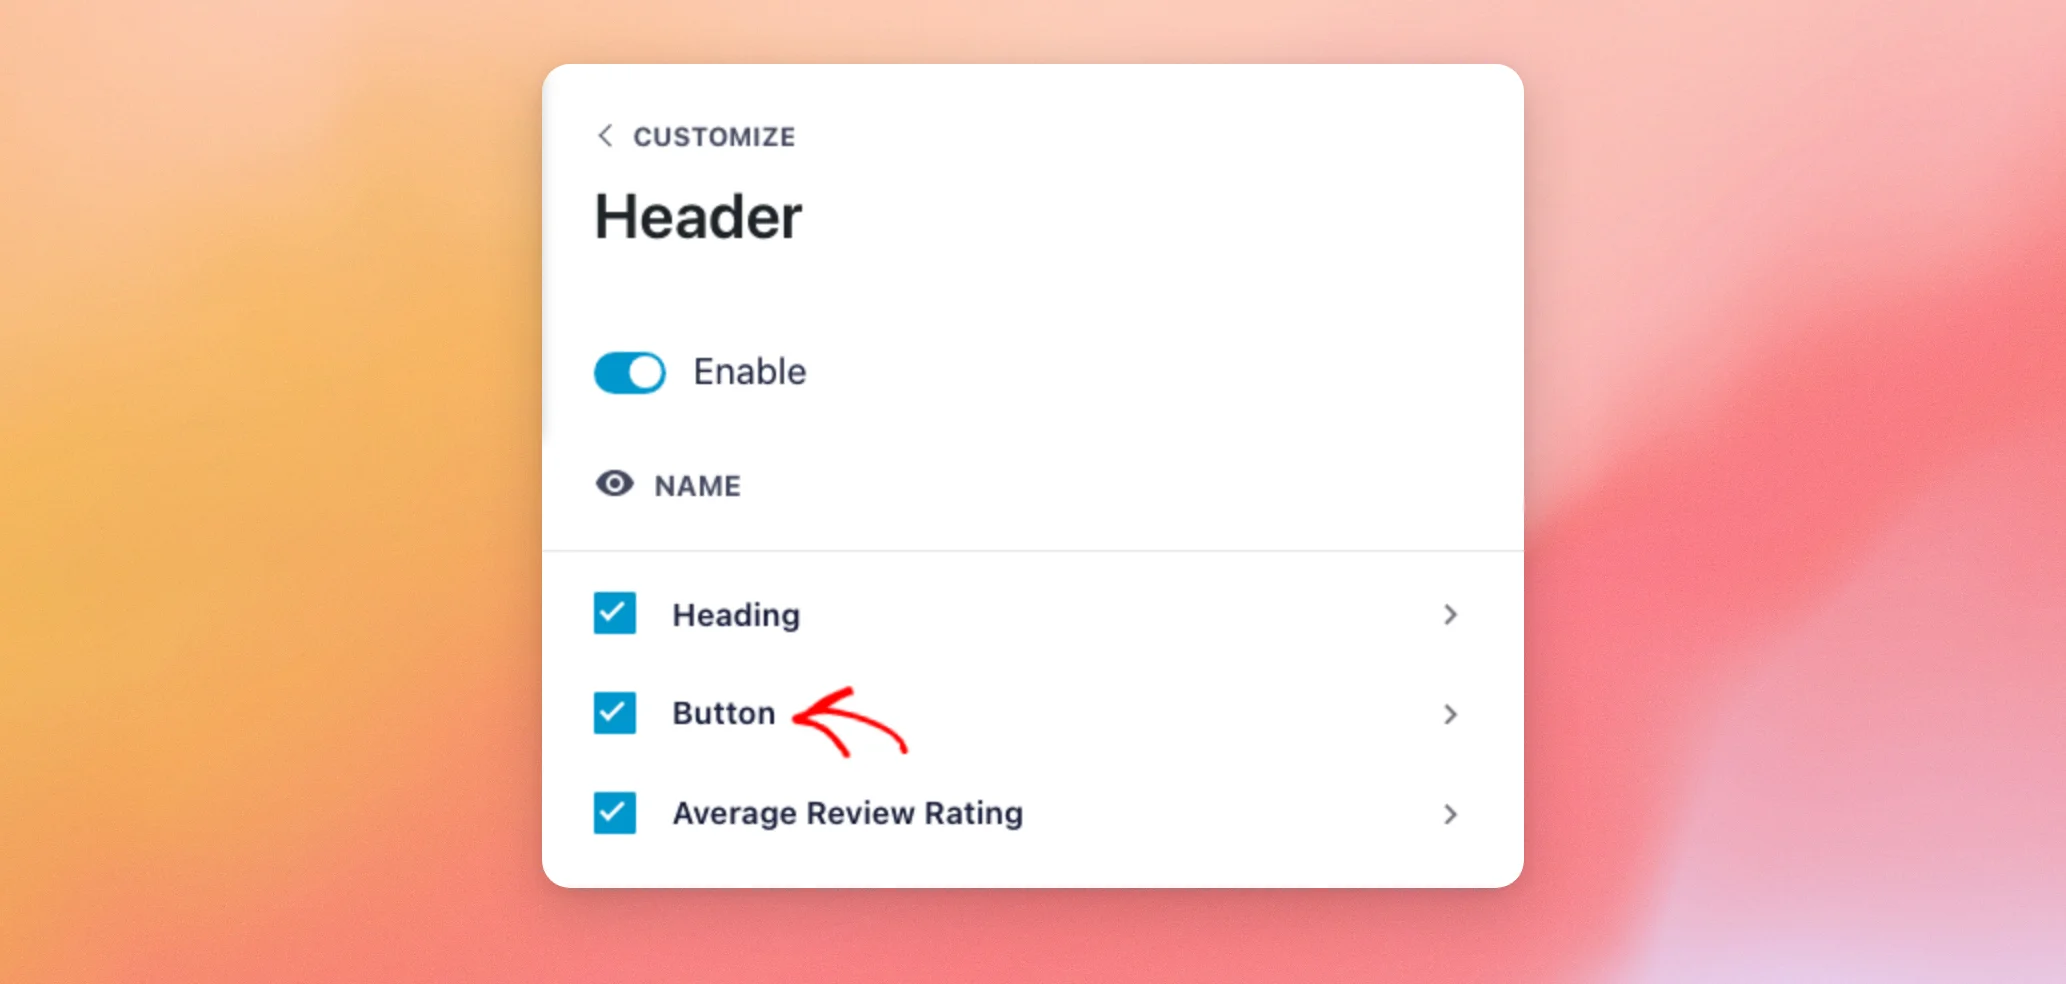
The Header section has an Enable switch that shows or hides the whole header. Below it, the header has three elements:
- Heading: The title above your feed.
- Button: A button that invites visitors to leave a review.
- Average Review Rating: One overall score for your feed, shown with stars and the number of reviews behind it.
The box next to each element shows or hides it in your header. Clicking an element’s name opens its options.
We’ll start with the heading.
Changing the Heading
To change your feed’s title, click Heading.
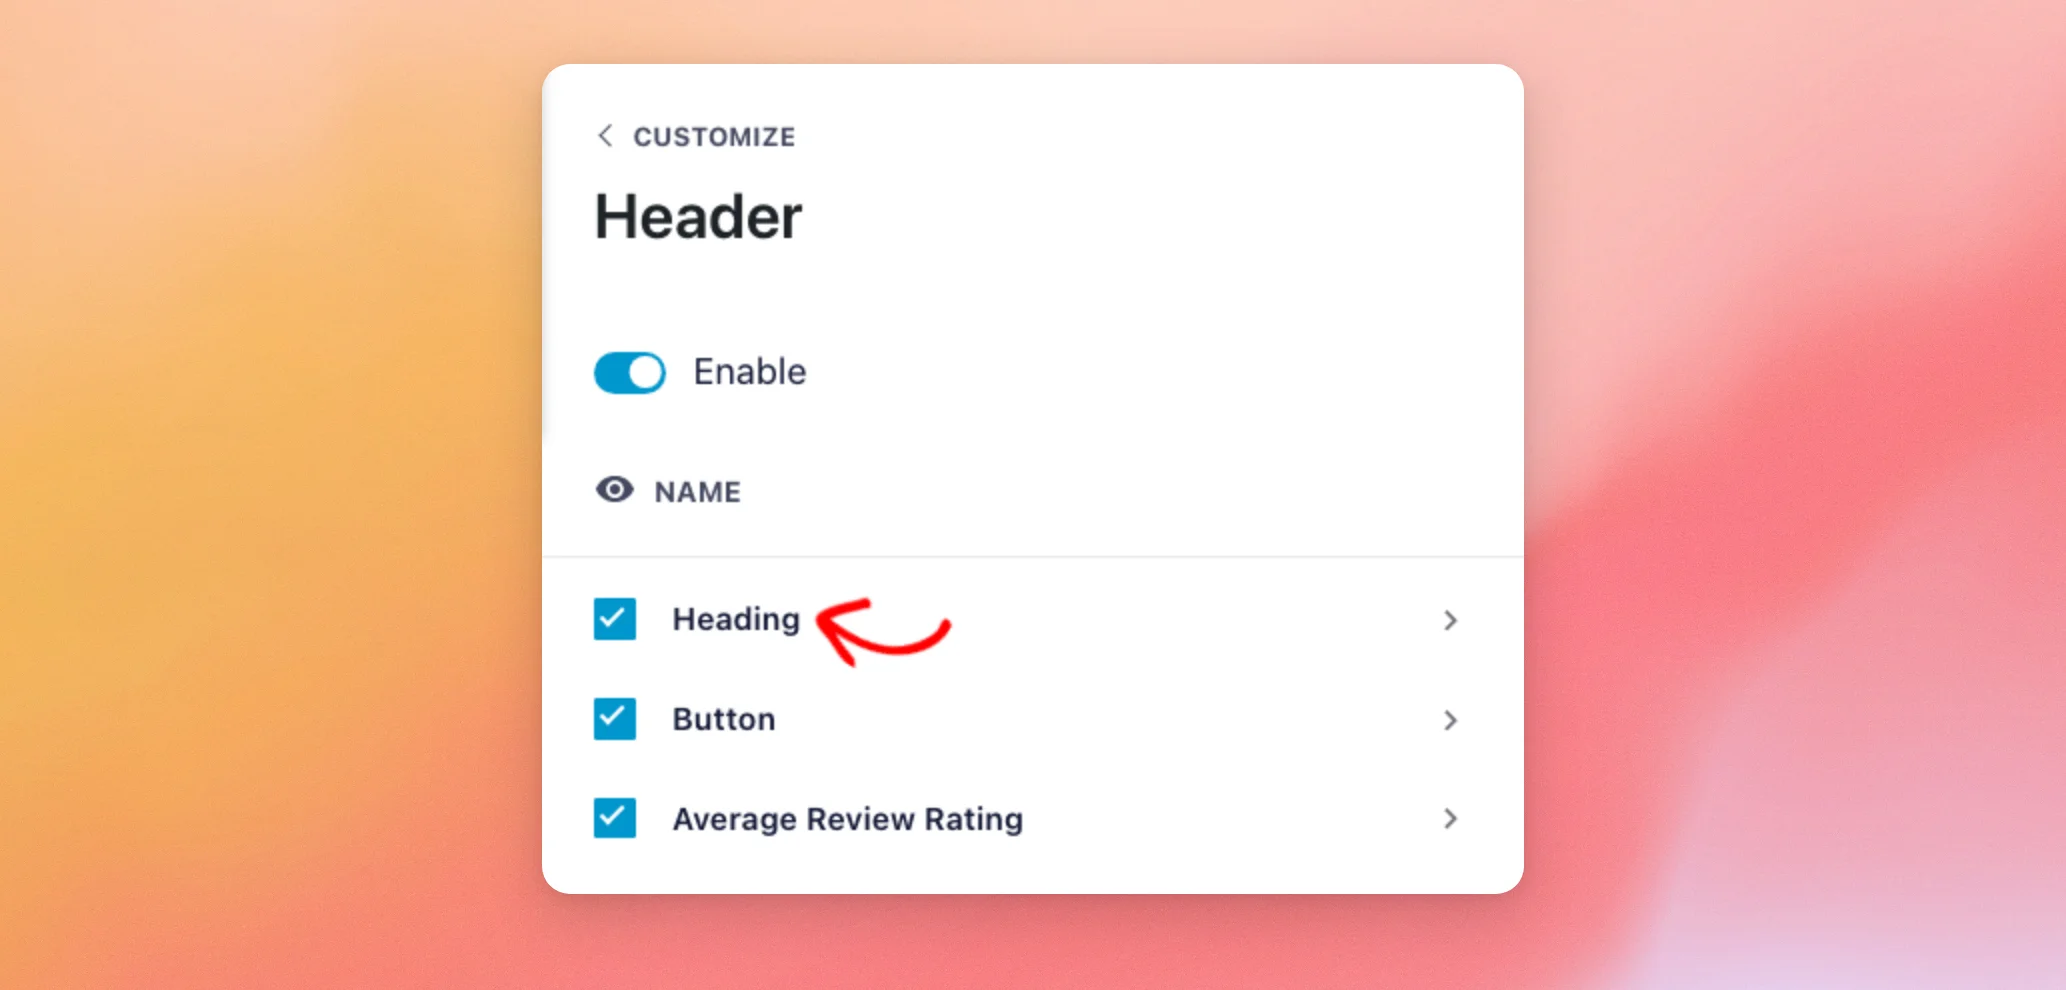
By default, the heading says Reviews.
To change it, type the heading you’d like in the Content field, such as What Our Customers Say. The preview shows your new heading right away.
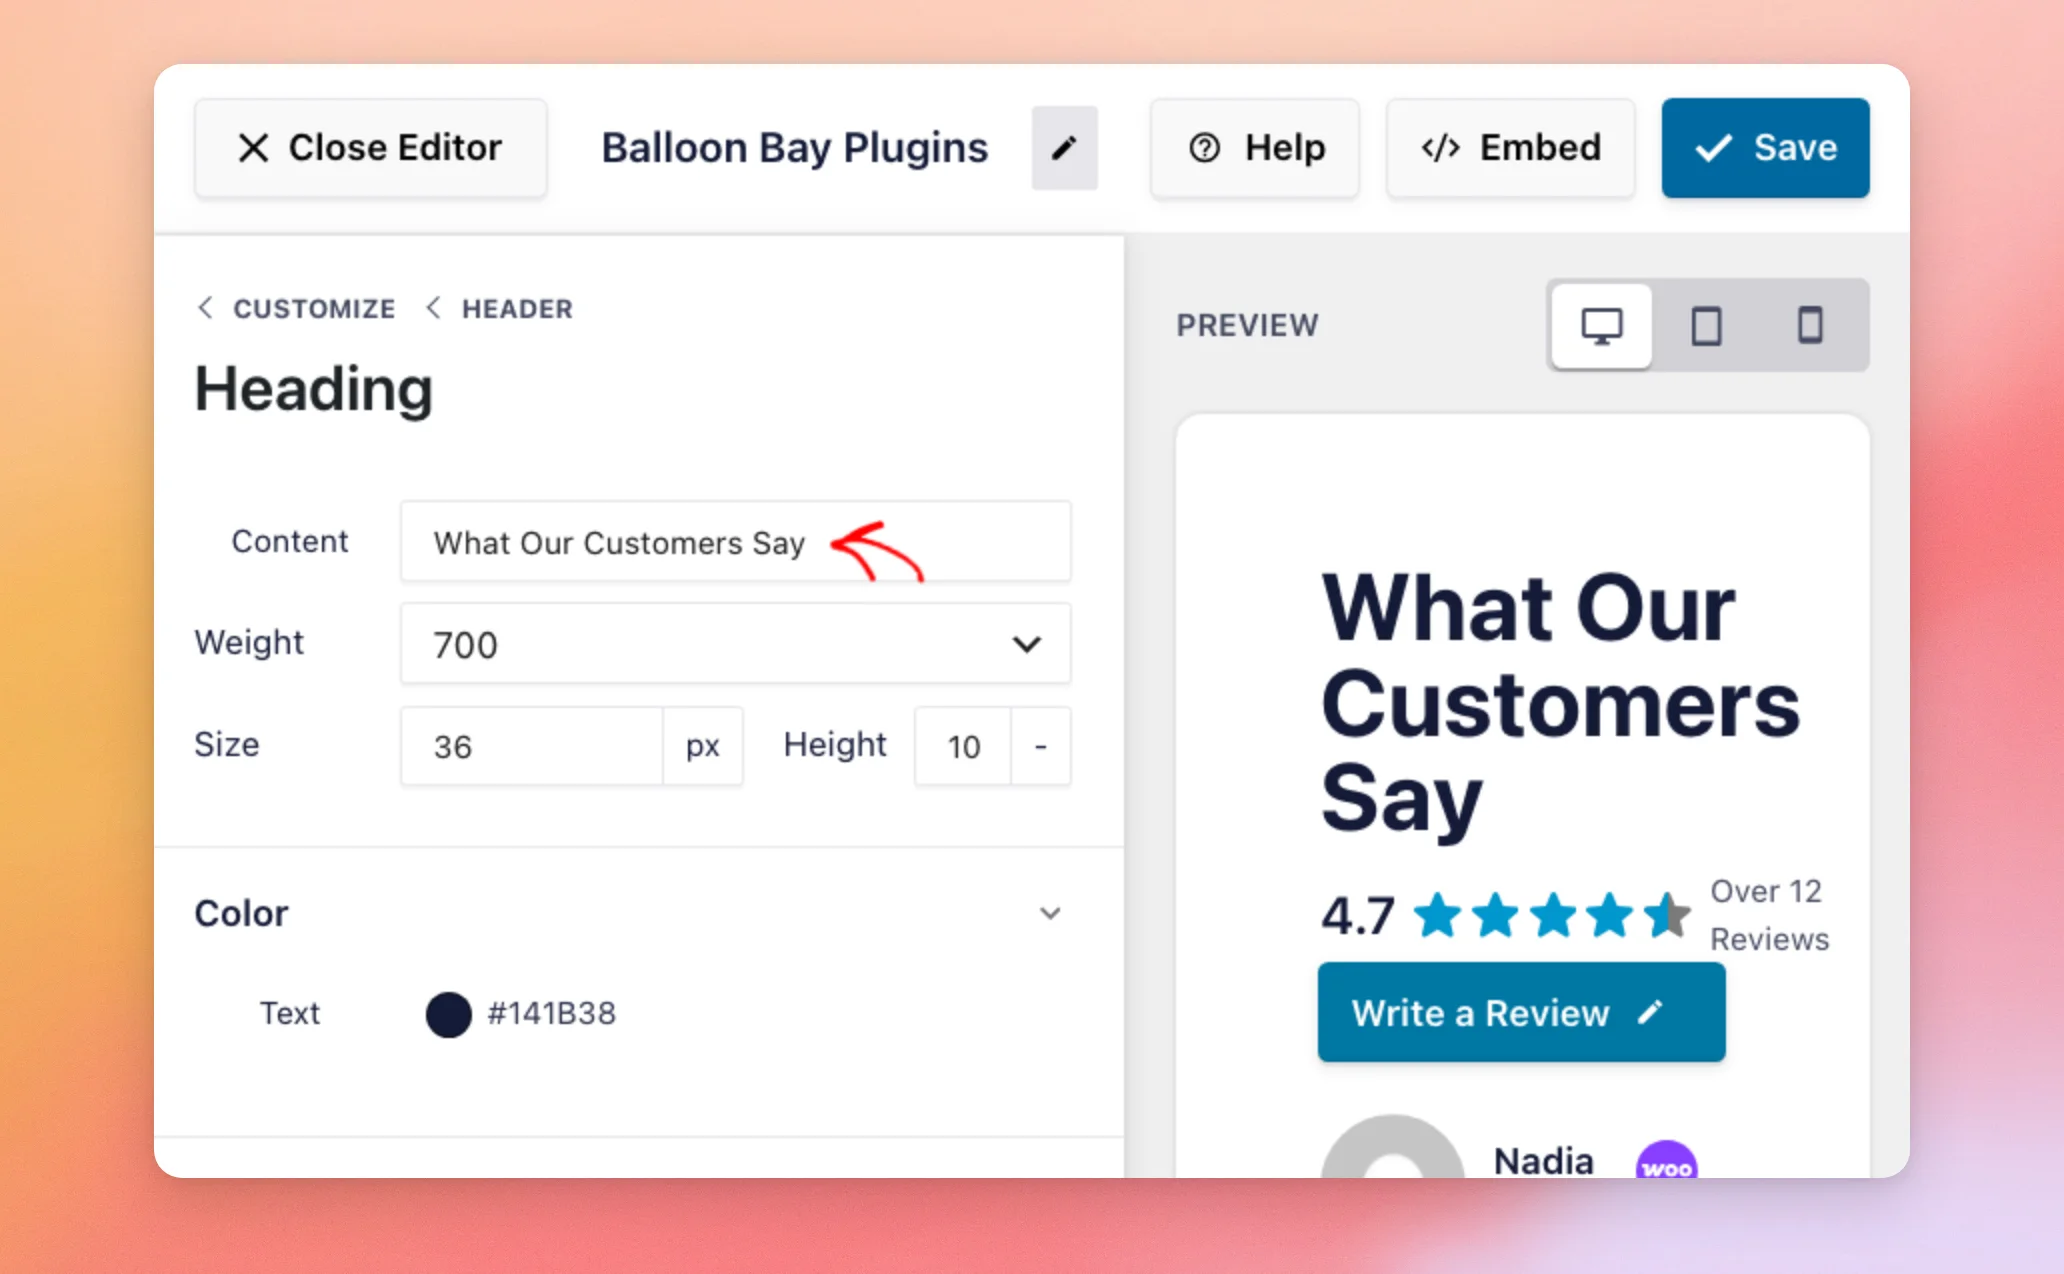
Below the Content field, you can also change the heading’s font weight, size, and line height.
Colors are set inside each section, next to the element they change.
To change the heading’s color, click the color box next to Text under Color. In the color picker, choose a color. You can also type its hex code in the Hex field and press Enter.
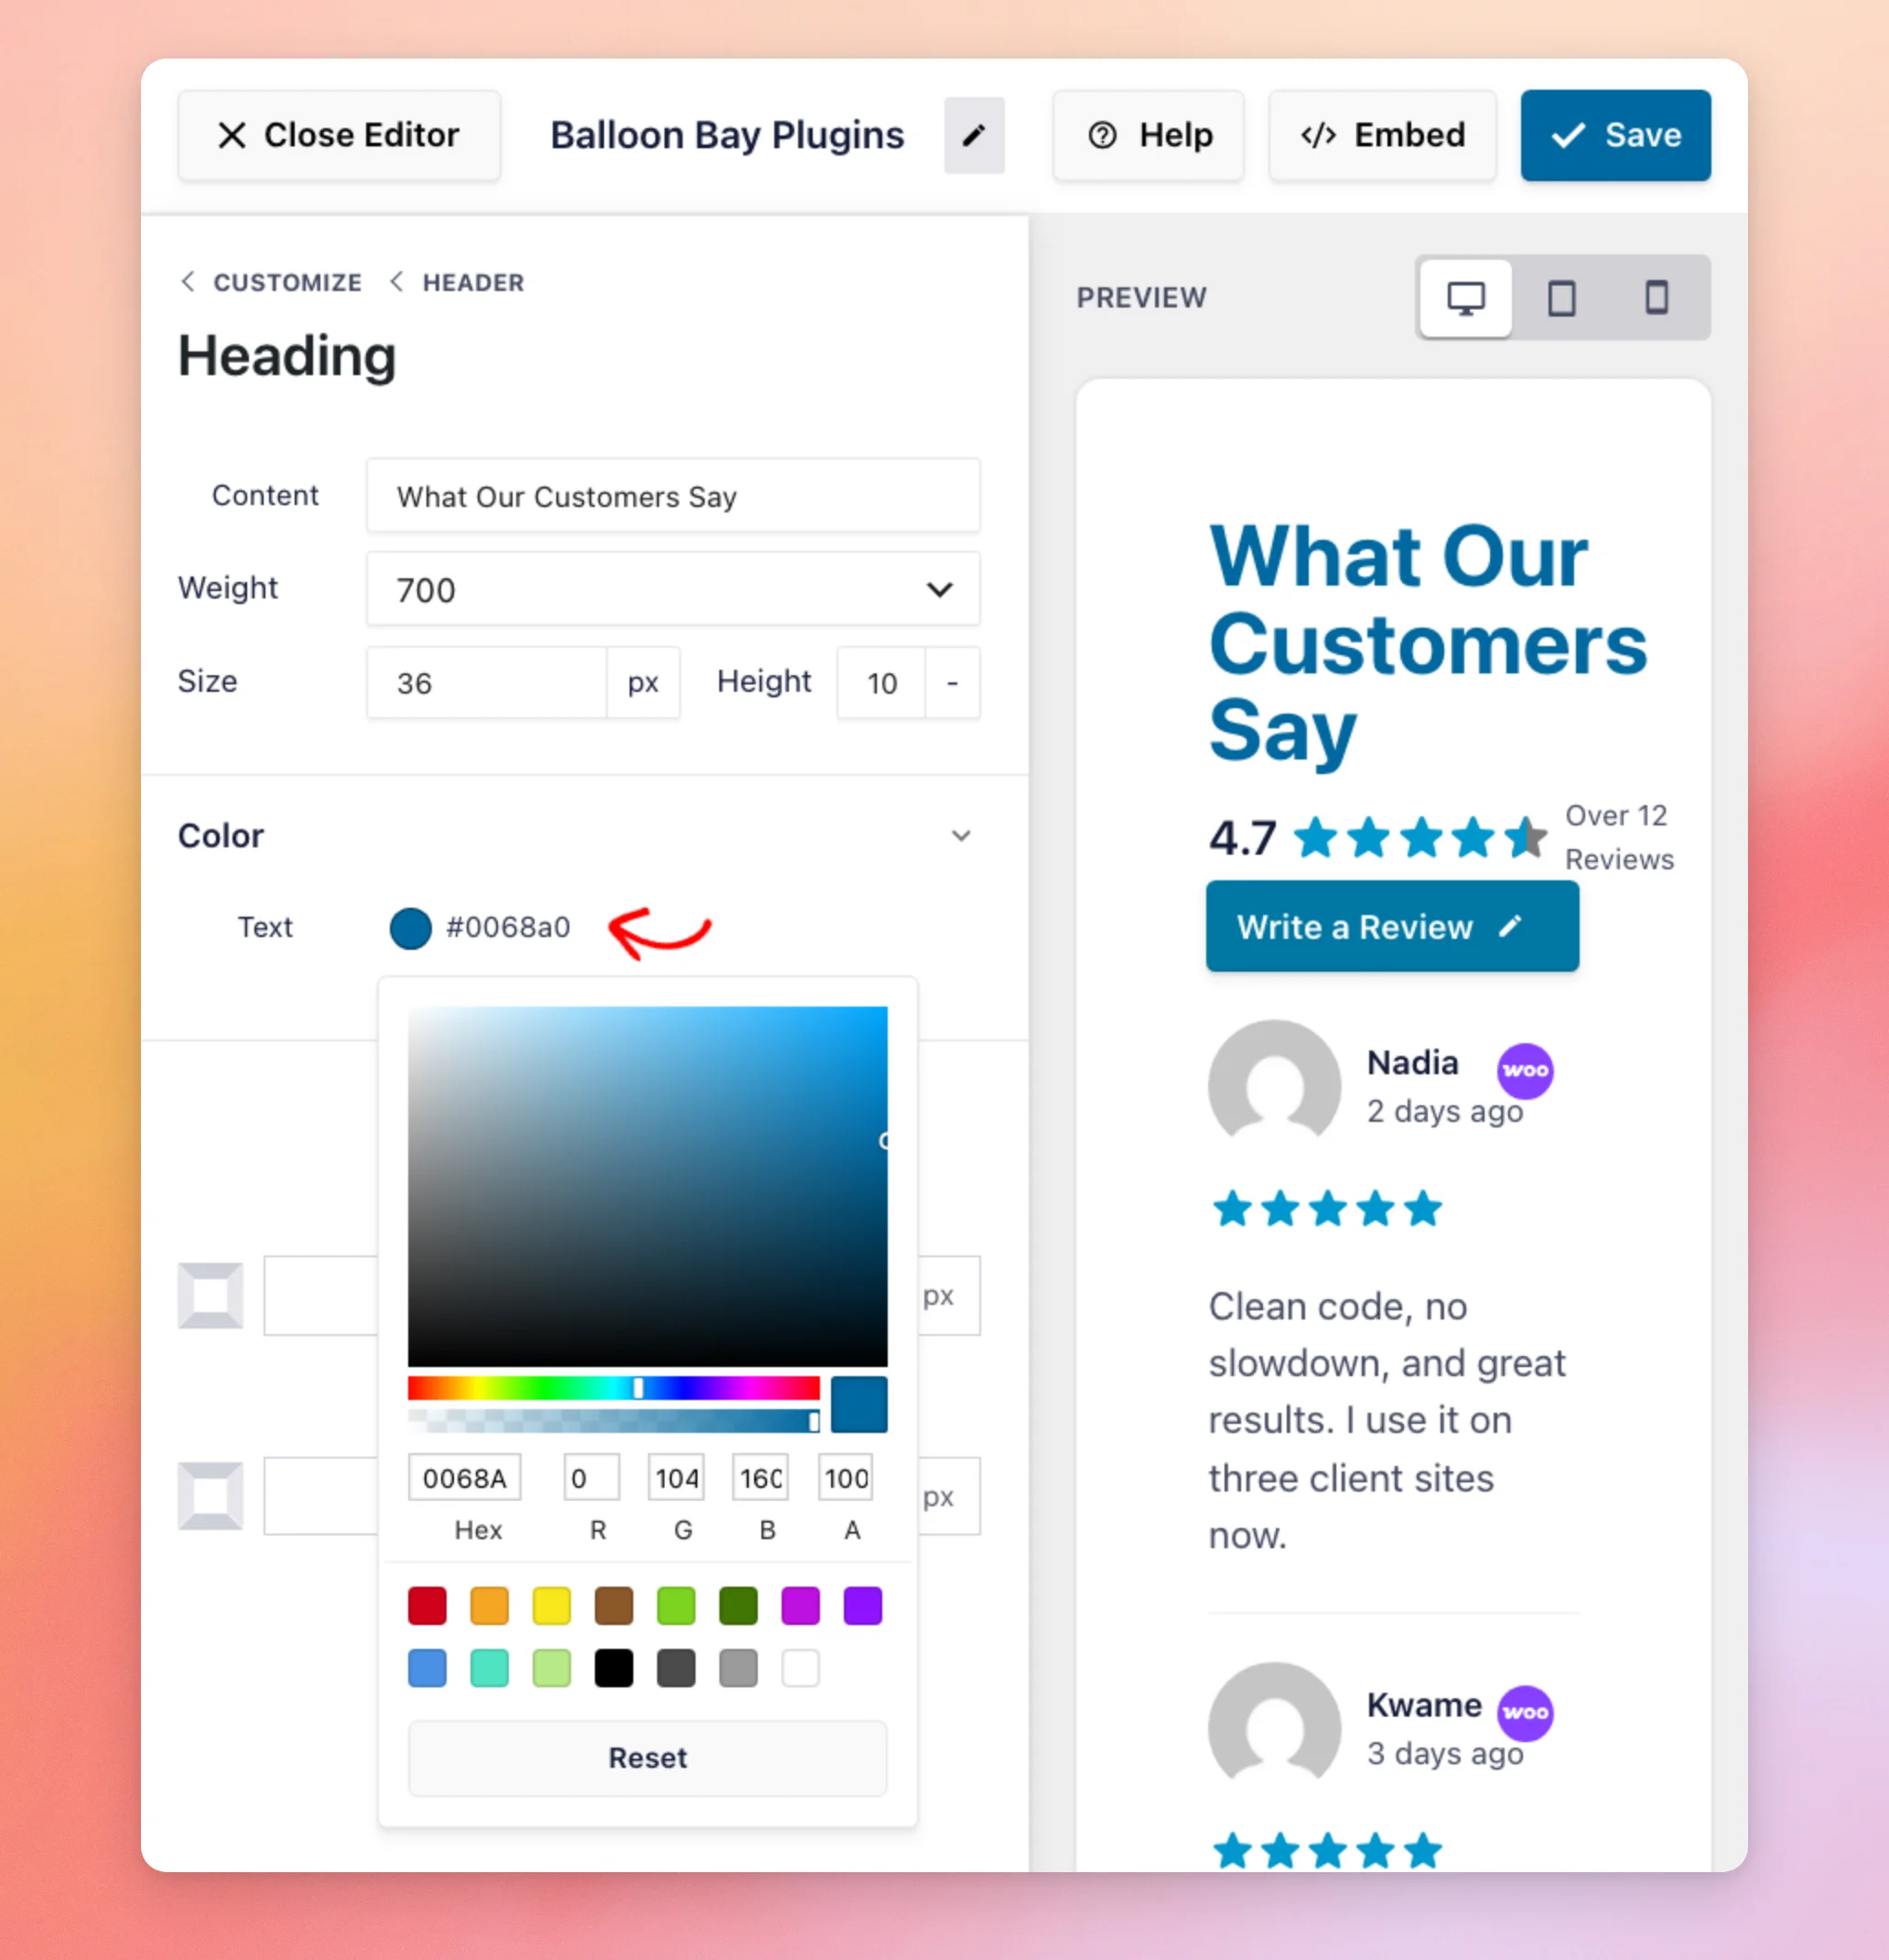
The Reset button at the bottom of the color picker clears the color you chose.
Your heading is set. Next, we’ll set up the header button.
Setting Up the Header Button
The button in your header invites visitors to leave a review.
To set it up, go back to the Header section using the Header link at the top of the sidebar. Then, click Button.
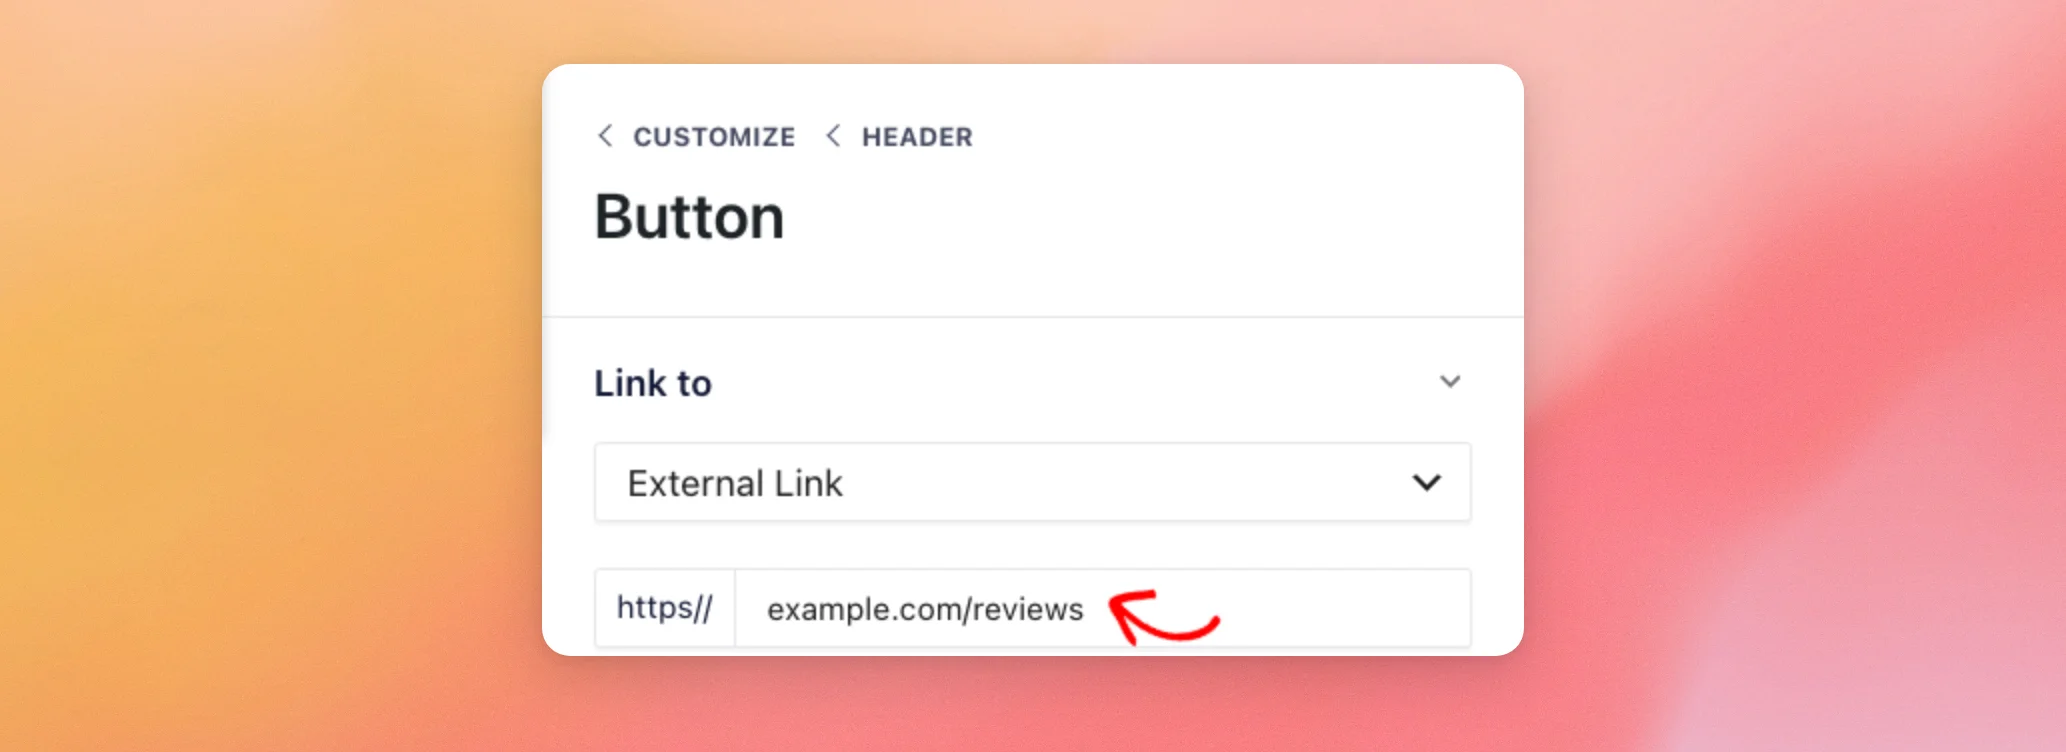
By default, the button links to the place where visitors can leave a review for your feed’s first source.
To send visitors somewhere else, choose External Link from the Link to dropdown. Then, enter the web address in the field below it. You can type the address with or without https:// at the start.
The Button options also set the button’s font and its colors, including the text and background colors visitors see when they hover over it.
Your header is ready. Next, we’ll look at how each review appears.
Customizing Your Reviews
The Reviews section changes how every review in your feed looks.
Next, go back to the Customize tab’s list of sections. Then, click Reviews.
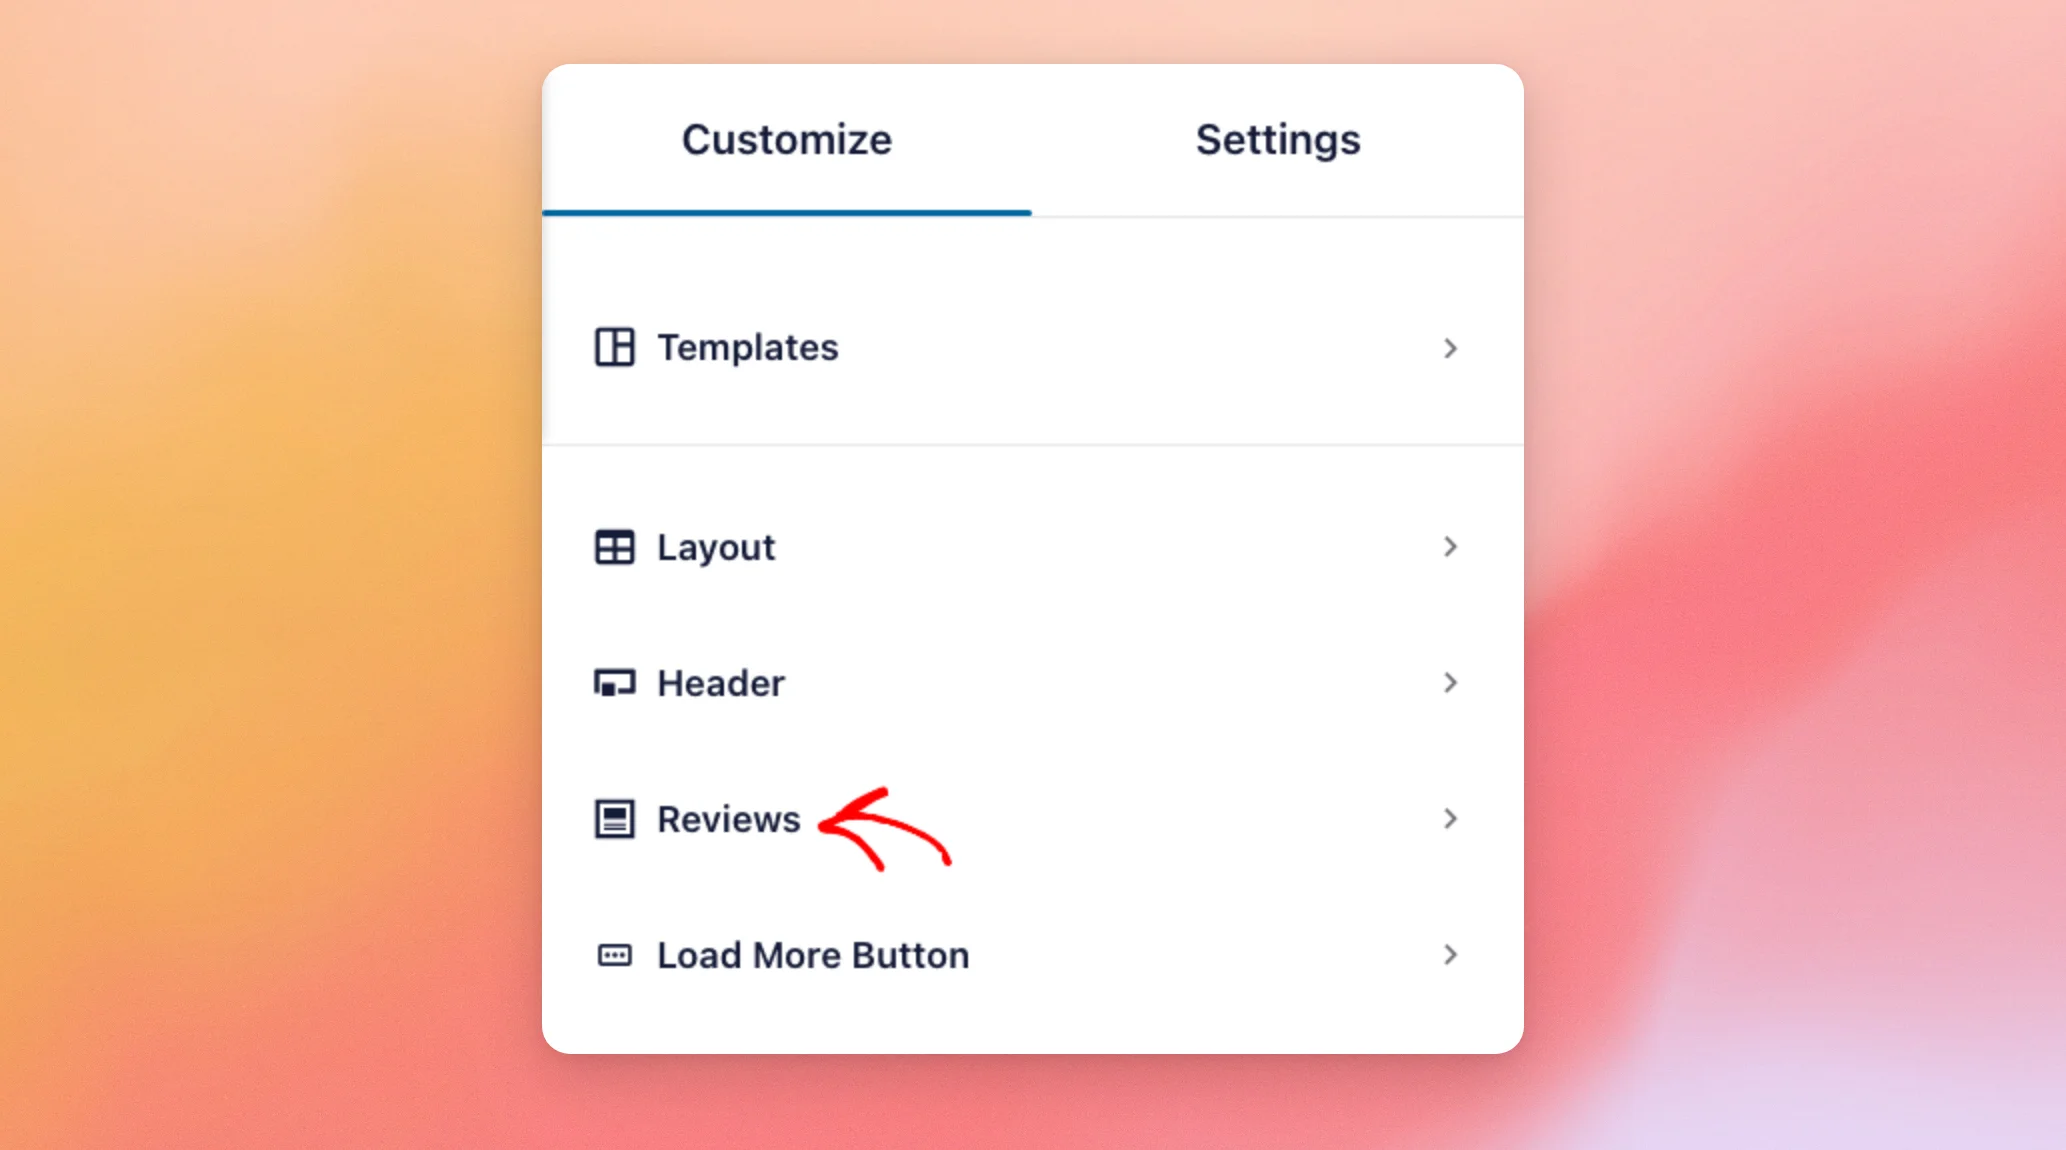
The Reviews section lists Post Style and Edit Individual Elements. We’ll start with the post style.
Choosing a Post Style
The post style sets the frame around each review.
To choose a style, click Post Style.
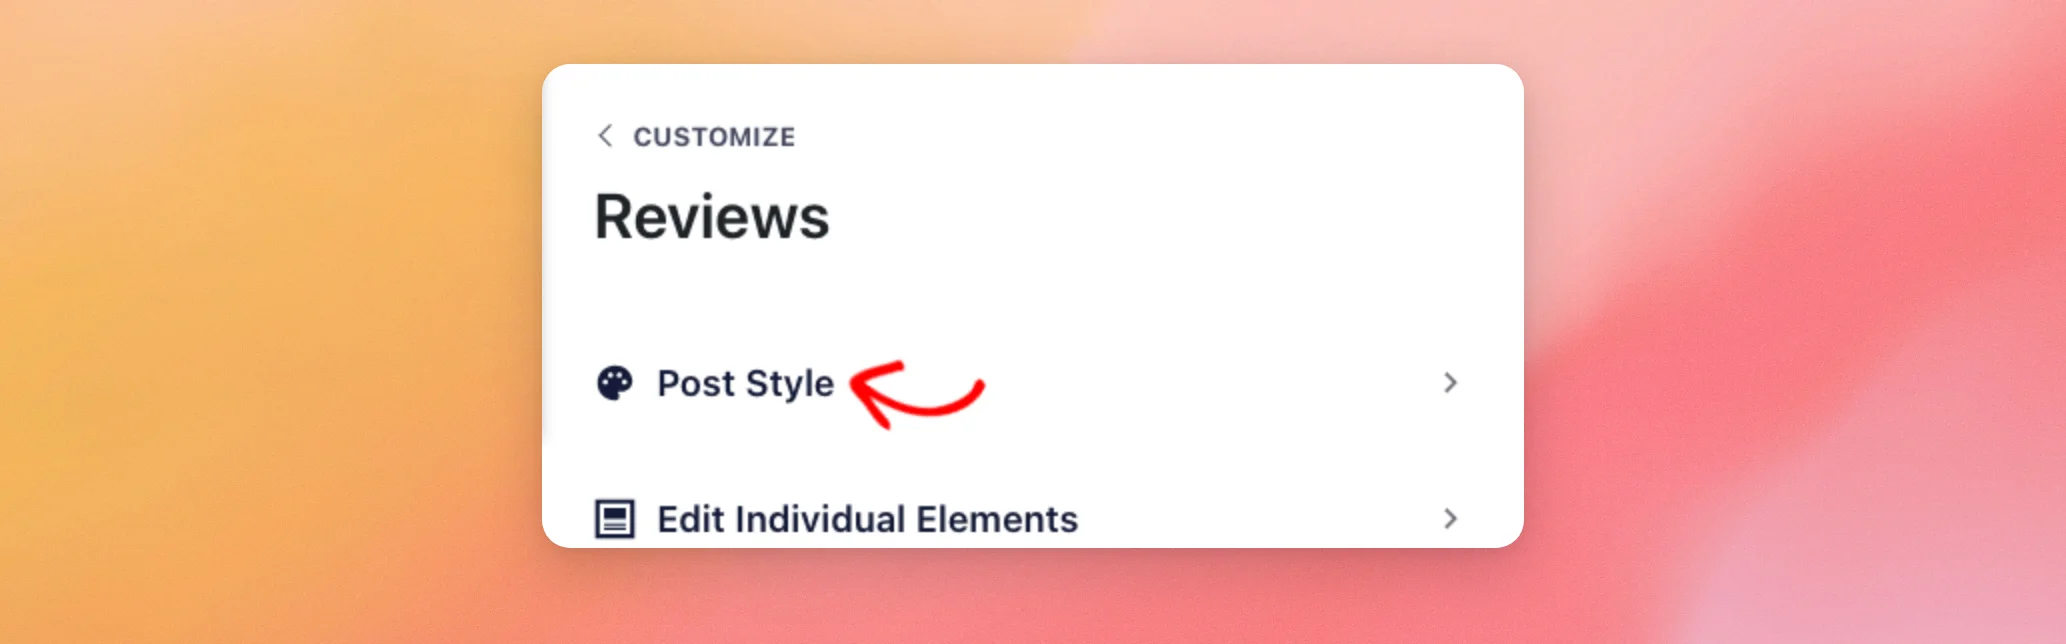
There are two post styles. Boxed puts each review in a box. Regular, the default, separates your reviews with a thin line.
To put your reviews in boxes, click Boxed.
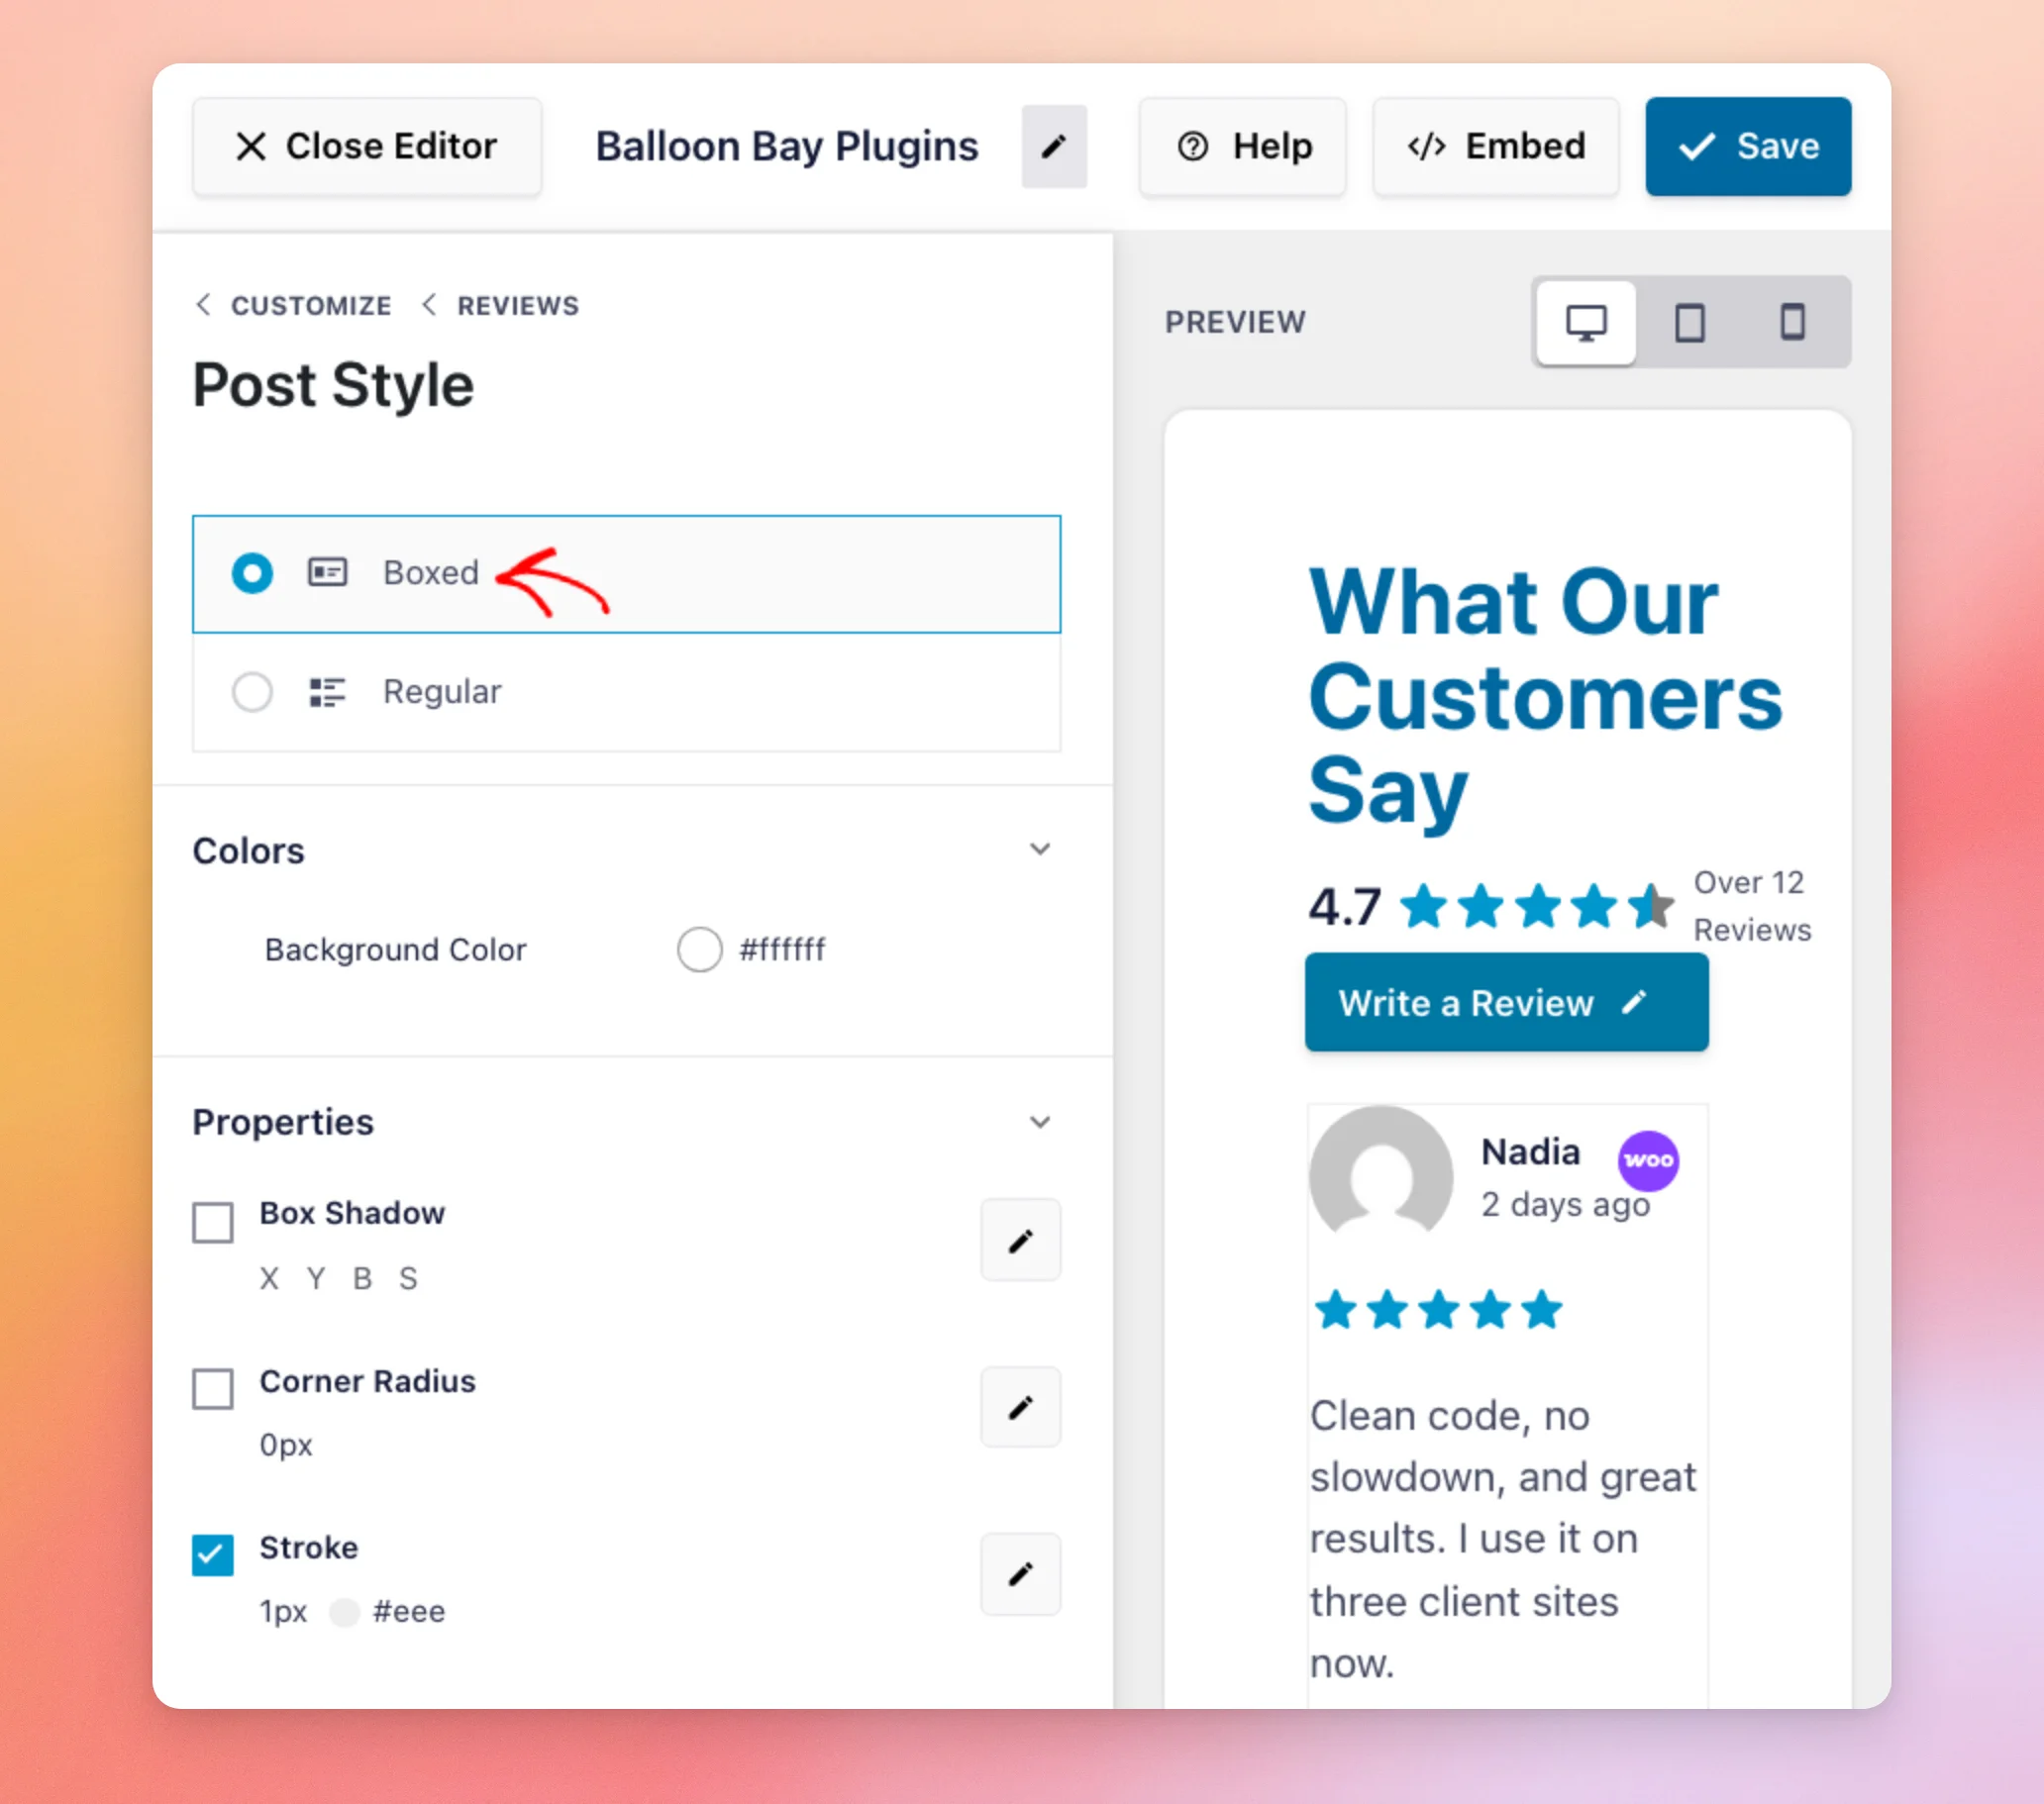
The Boxed style also adds these settings:
- Background Color: The color behind each review.
- Box Shadow: A shadow around each box.
- Corner Radius: How rounded the corners of each box are.
Both styles have a Stroke setting for the line’s thickness and color.
Your post style is set. Next, we’ll choose which parts of each review show.
Showing or Hiding Review Elements
Each review is made of four elements:
- Author and Date: The reviewer’s name and photo, and when the review was posted.
- Rating: The stars the reviewer gave.
- Review Paragraph: The words the reviewer wrote.
- Images or Videos: Anything the reviewer attached to their review, such as a photo.
To choose which ones show, go back to the Reviews section using the Reviews link at the top of the sidebar. Then, click Edit Individual Elements.
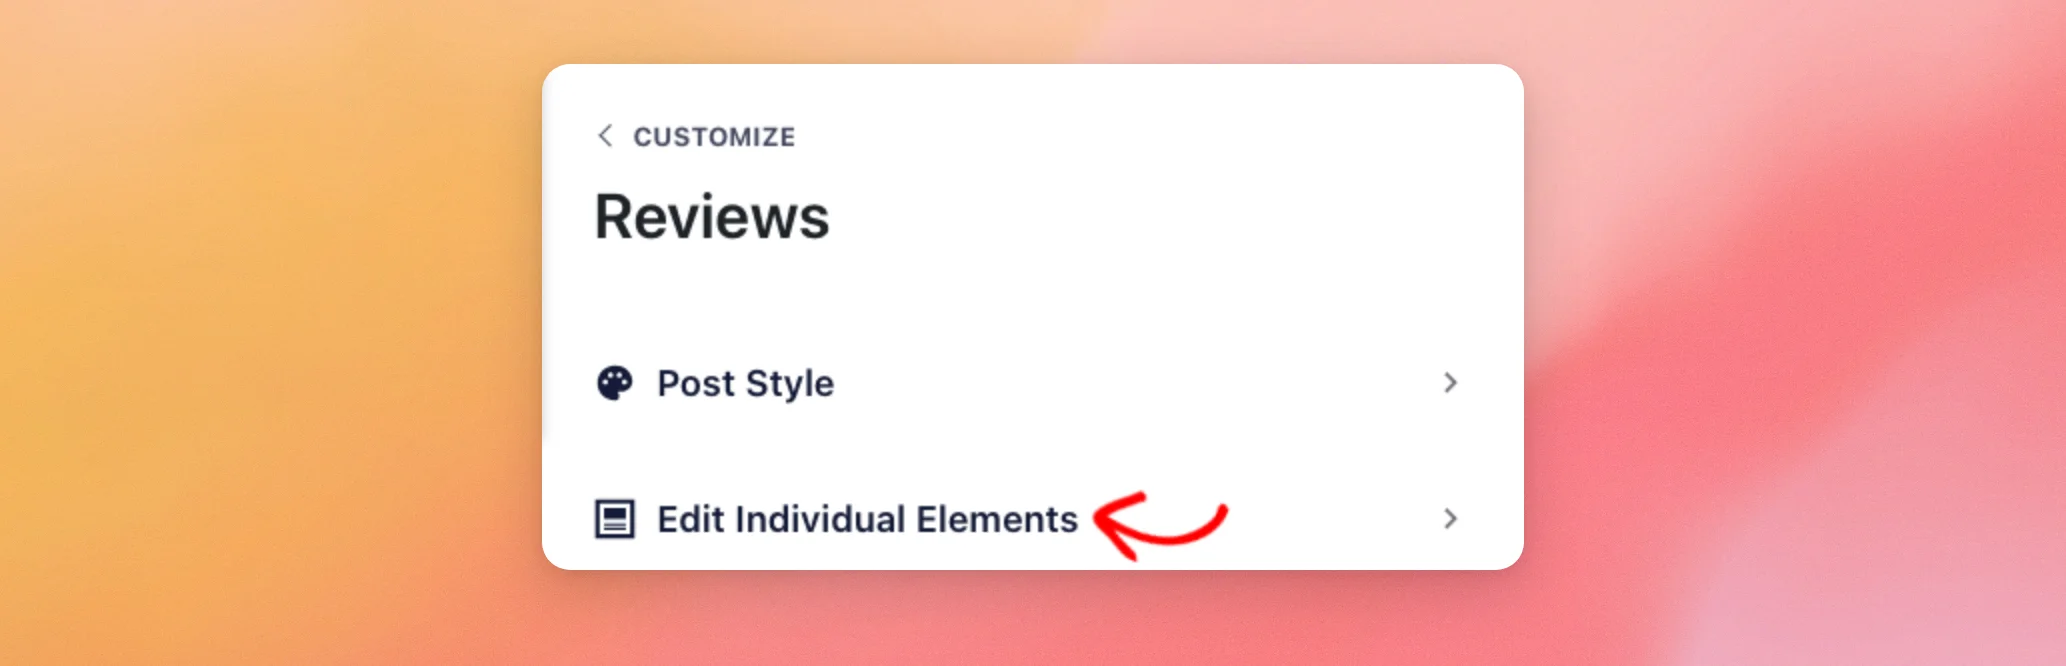
To hide an element from every review in your feed, uncheck its box.
To change the order of the elements, hover over an element. Then, drag the handle that appears on the right side of its row up or down.
To choose which of the reviewer’s details show, click Author and Date.
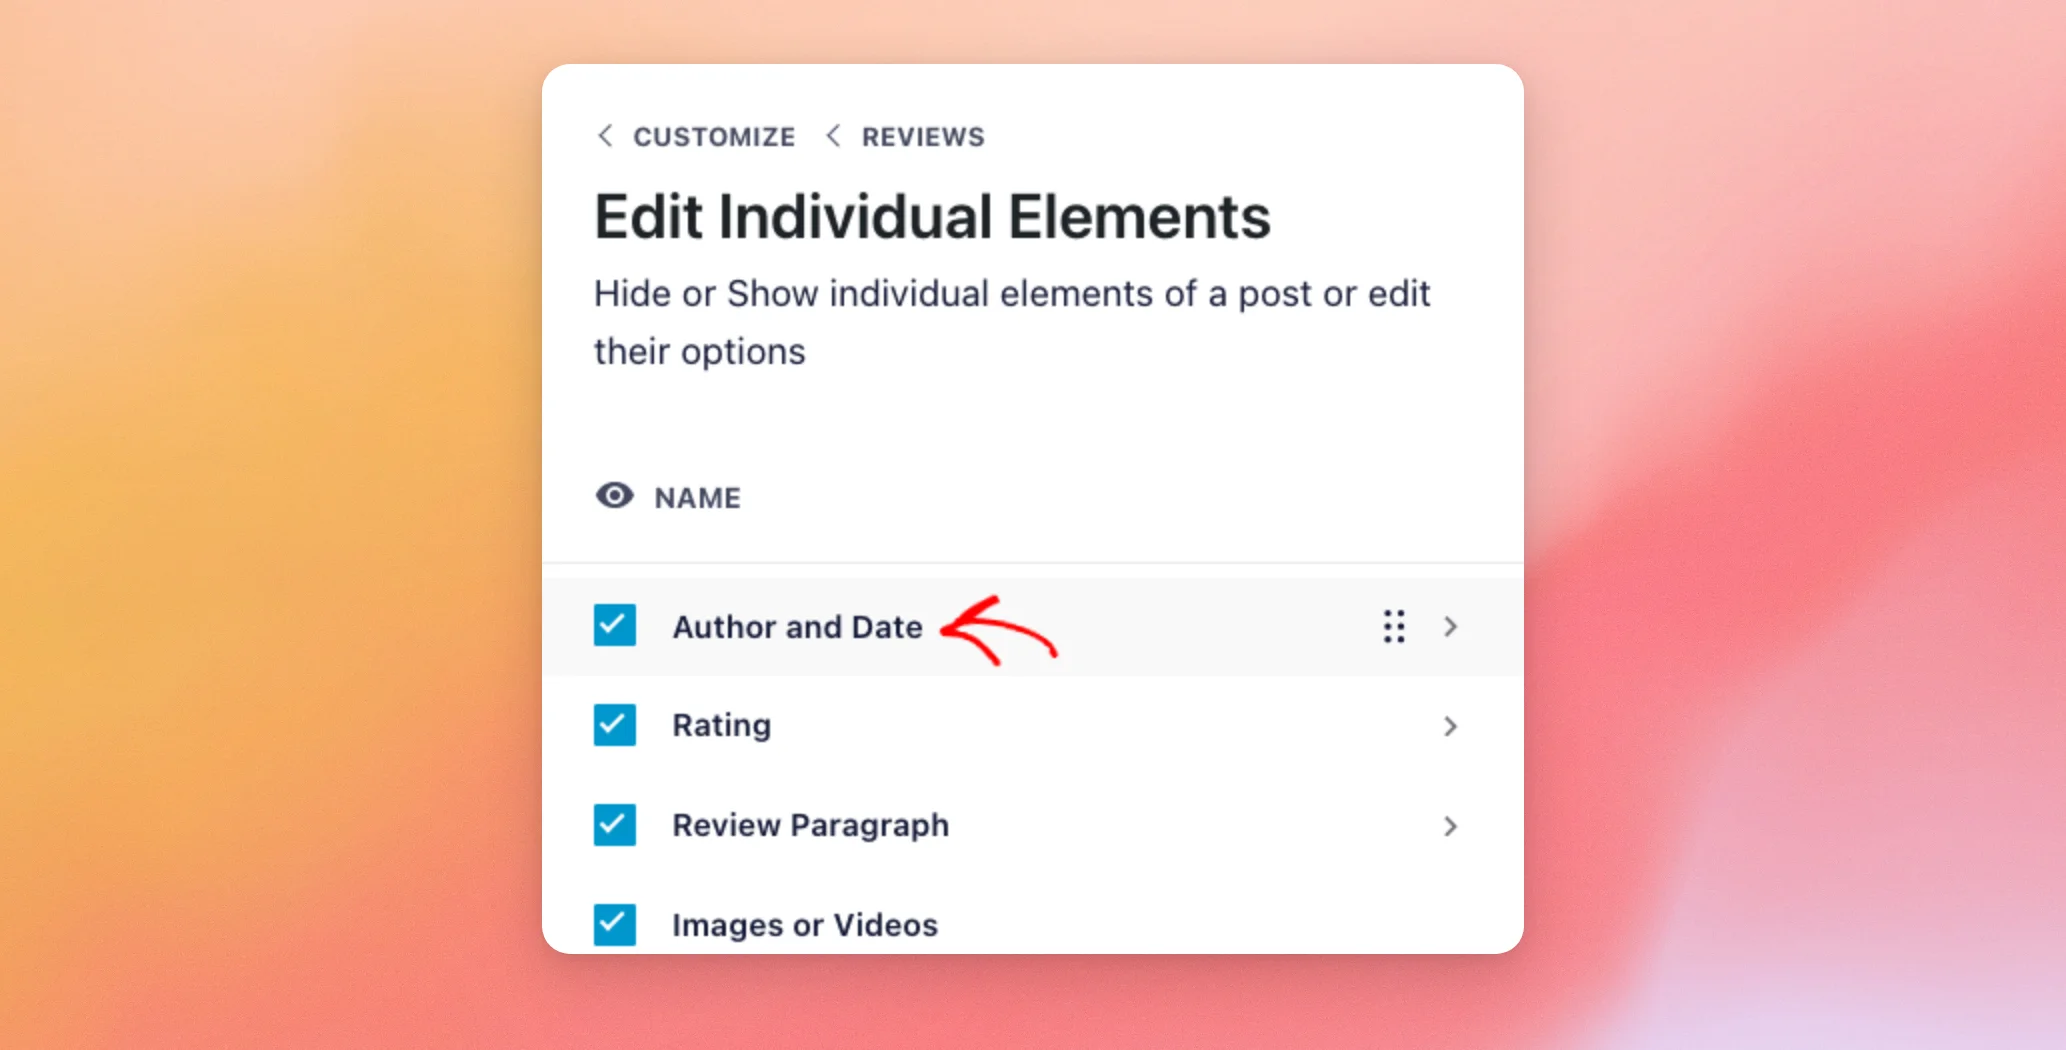
Author and Date has three parts: Author Name, Author Image, and Date. For example, to hide the reviewers’ photos, uncheck Author Image. The photos disappear from the preview.
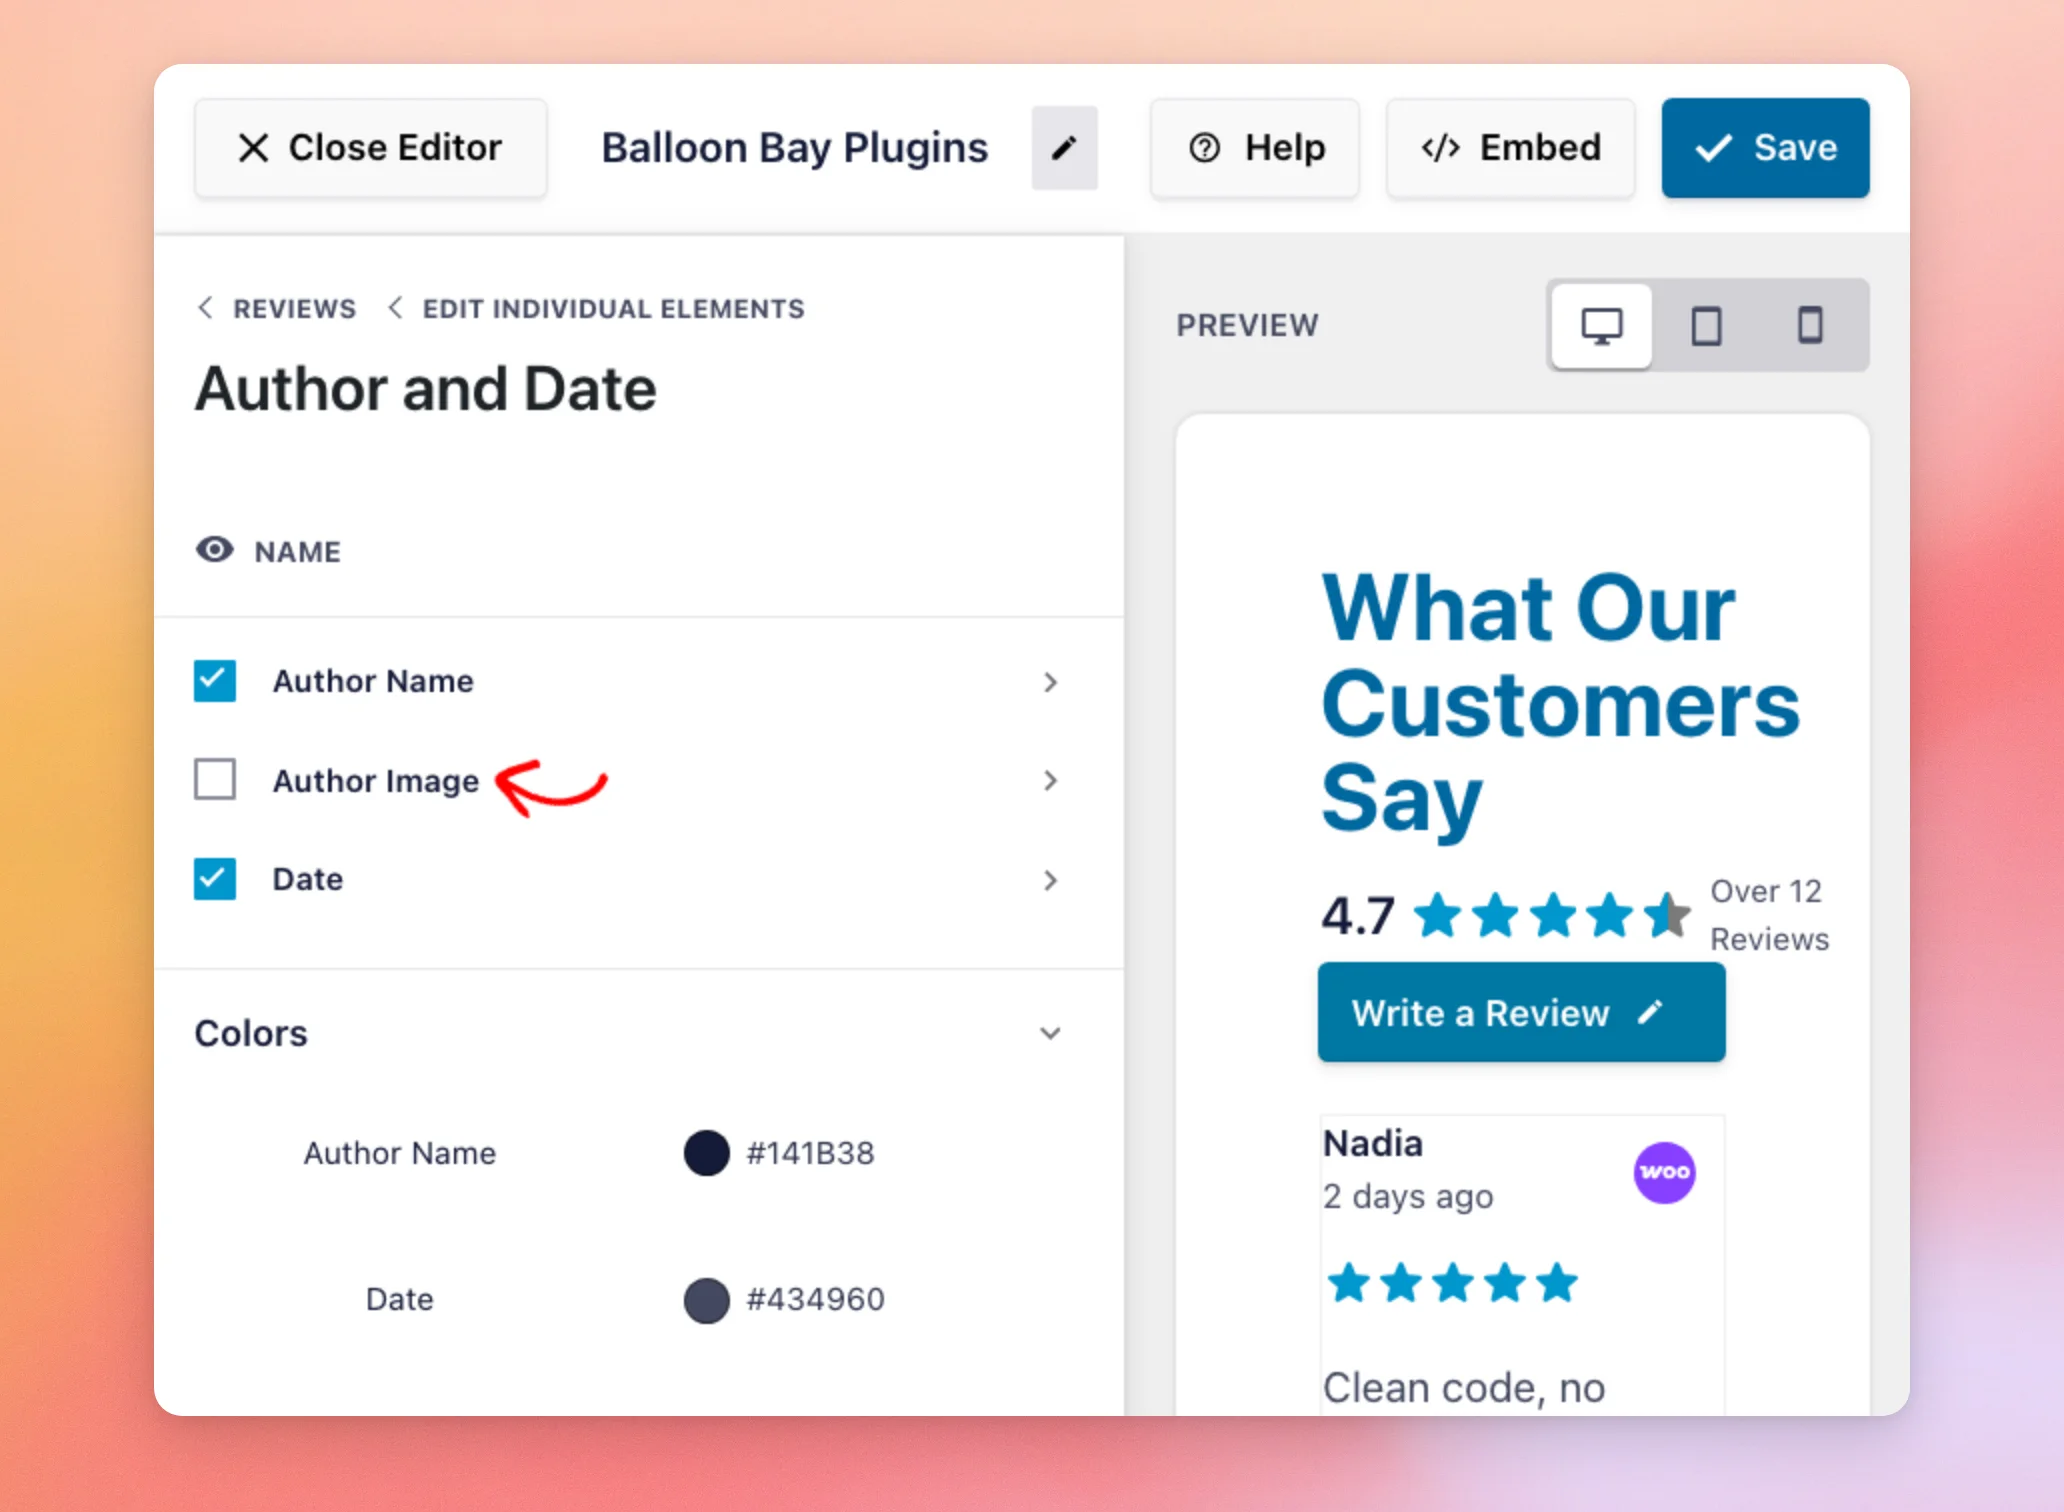
The Colors group lets you pick one color for the author’s name and another for the date.
Your reviews are set. Next, we’ll customize the Load More button below them.
Customizing the Load More Button
The Load More button sits below your reviews and shows more of them when visitors click it.
Next, go back to the Customize tab’s list of sections. Then, click Load More Button.
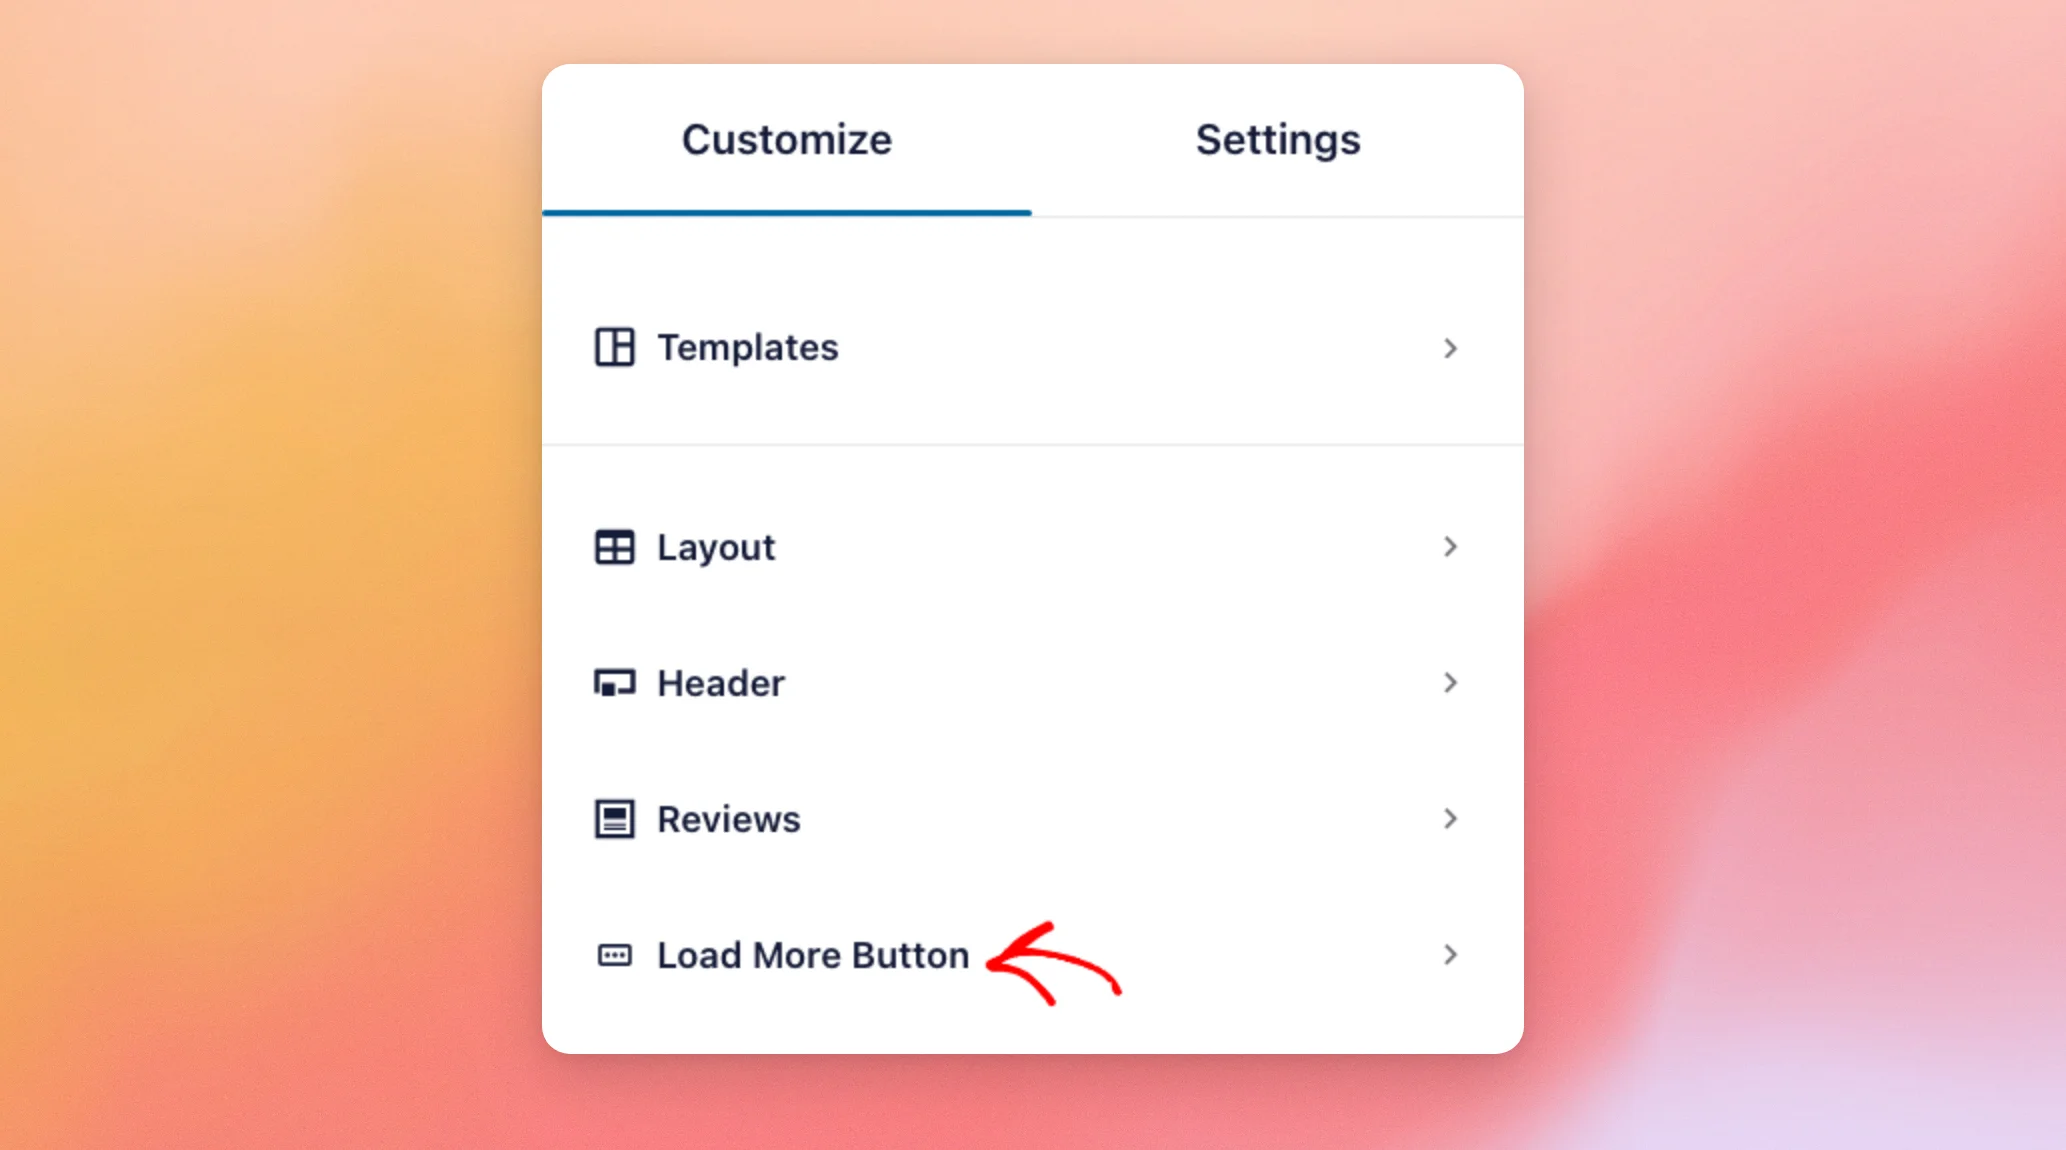
The Enable switch shows or hides the button.
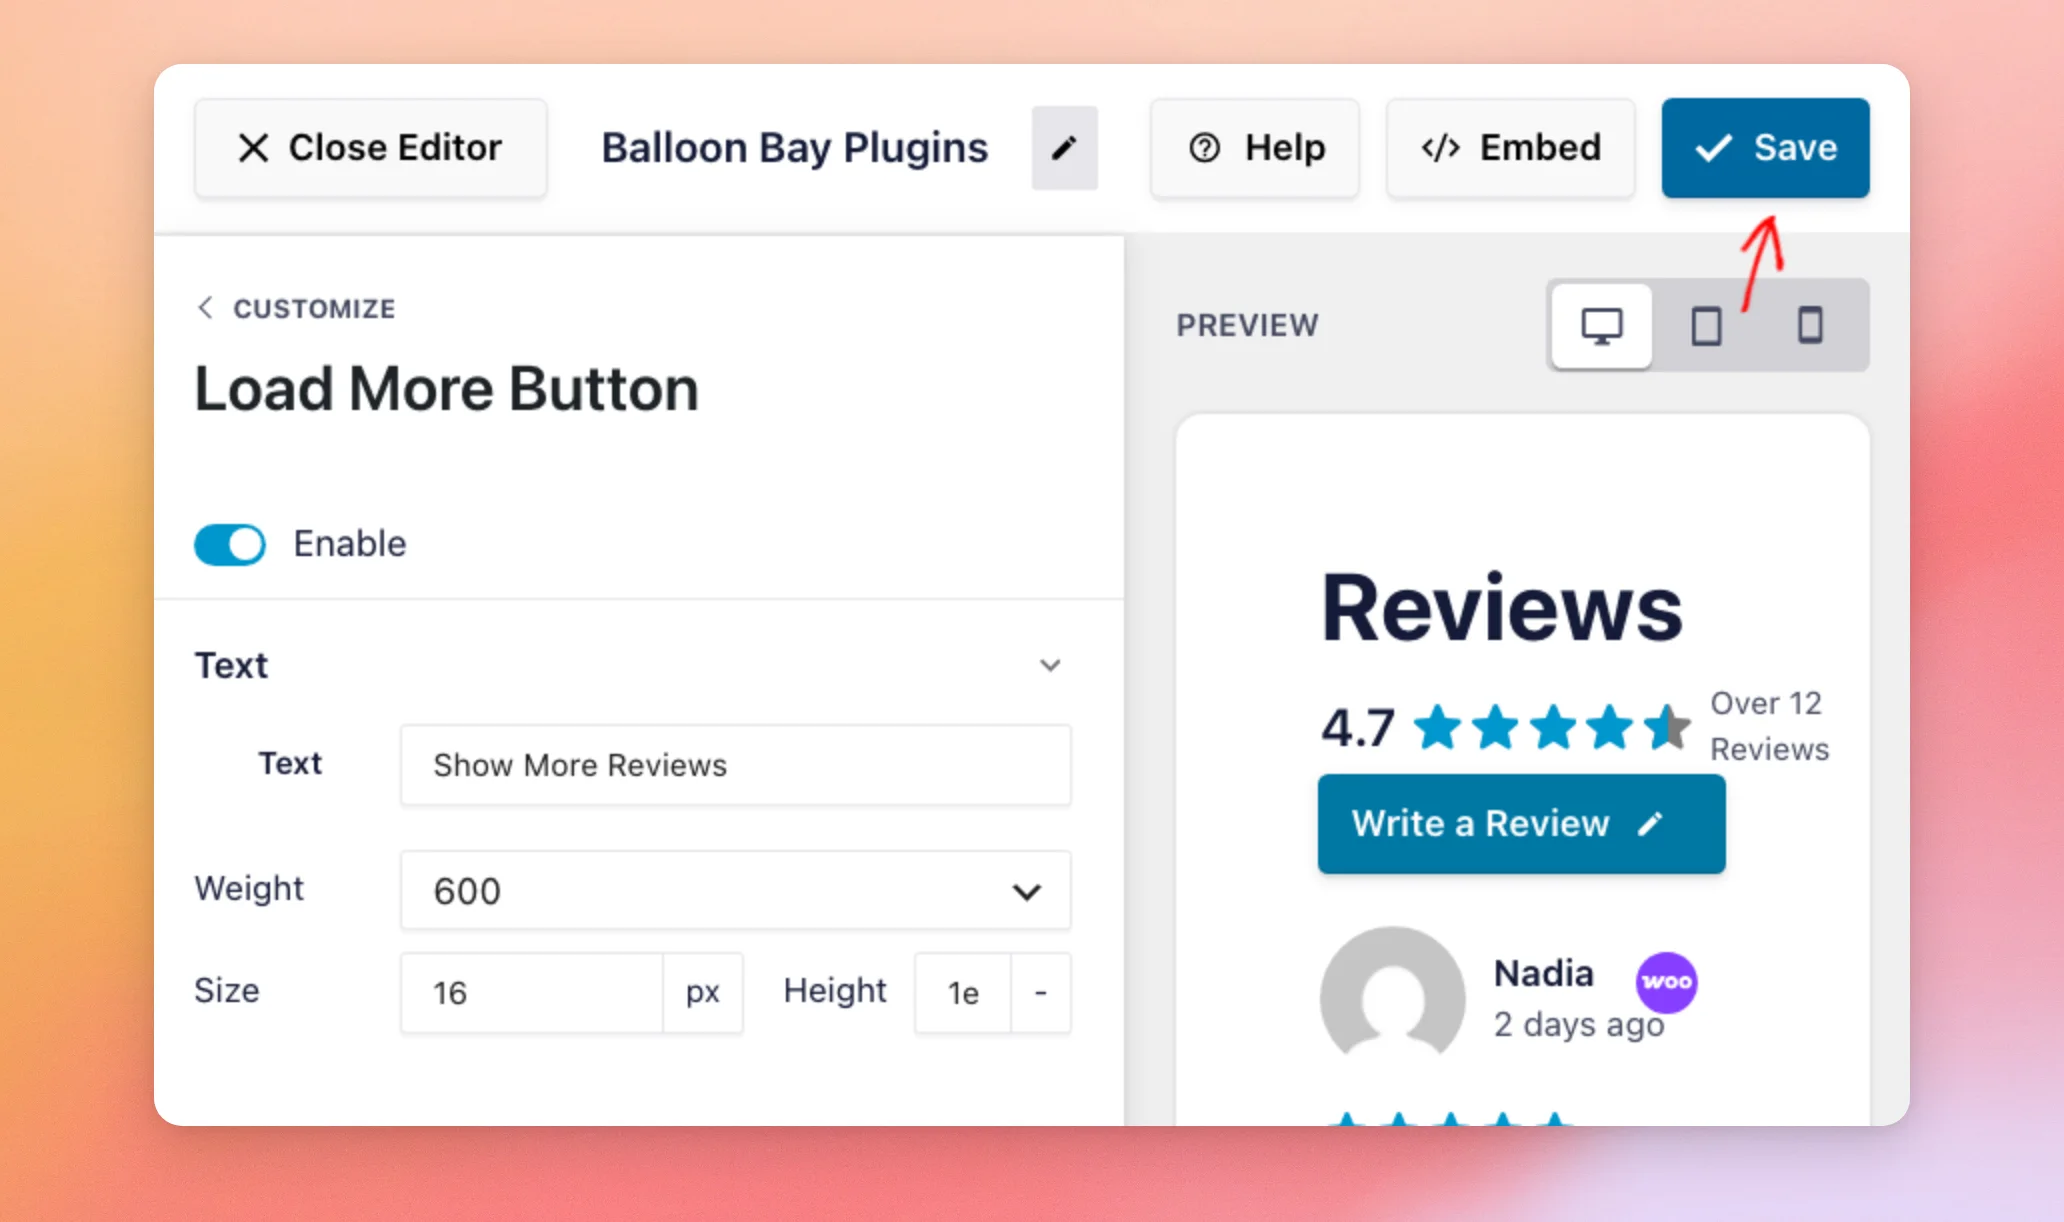
To change what the button says, type your own words in the Text field, such as Show More Reviews.
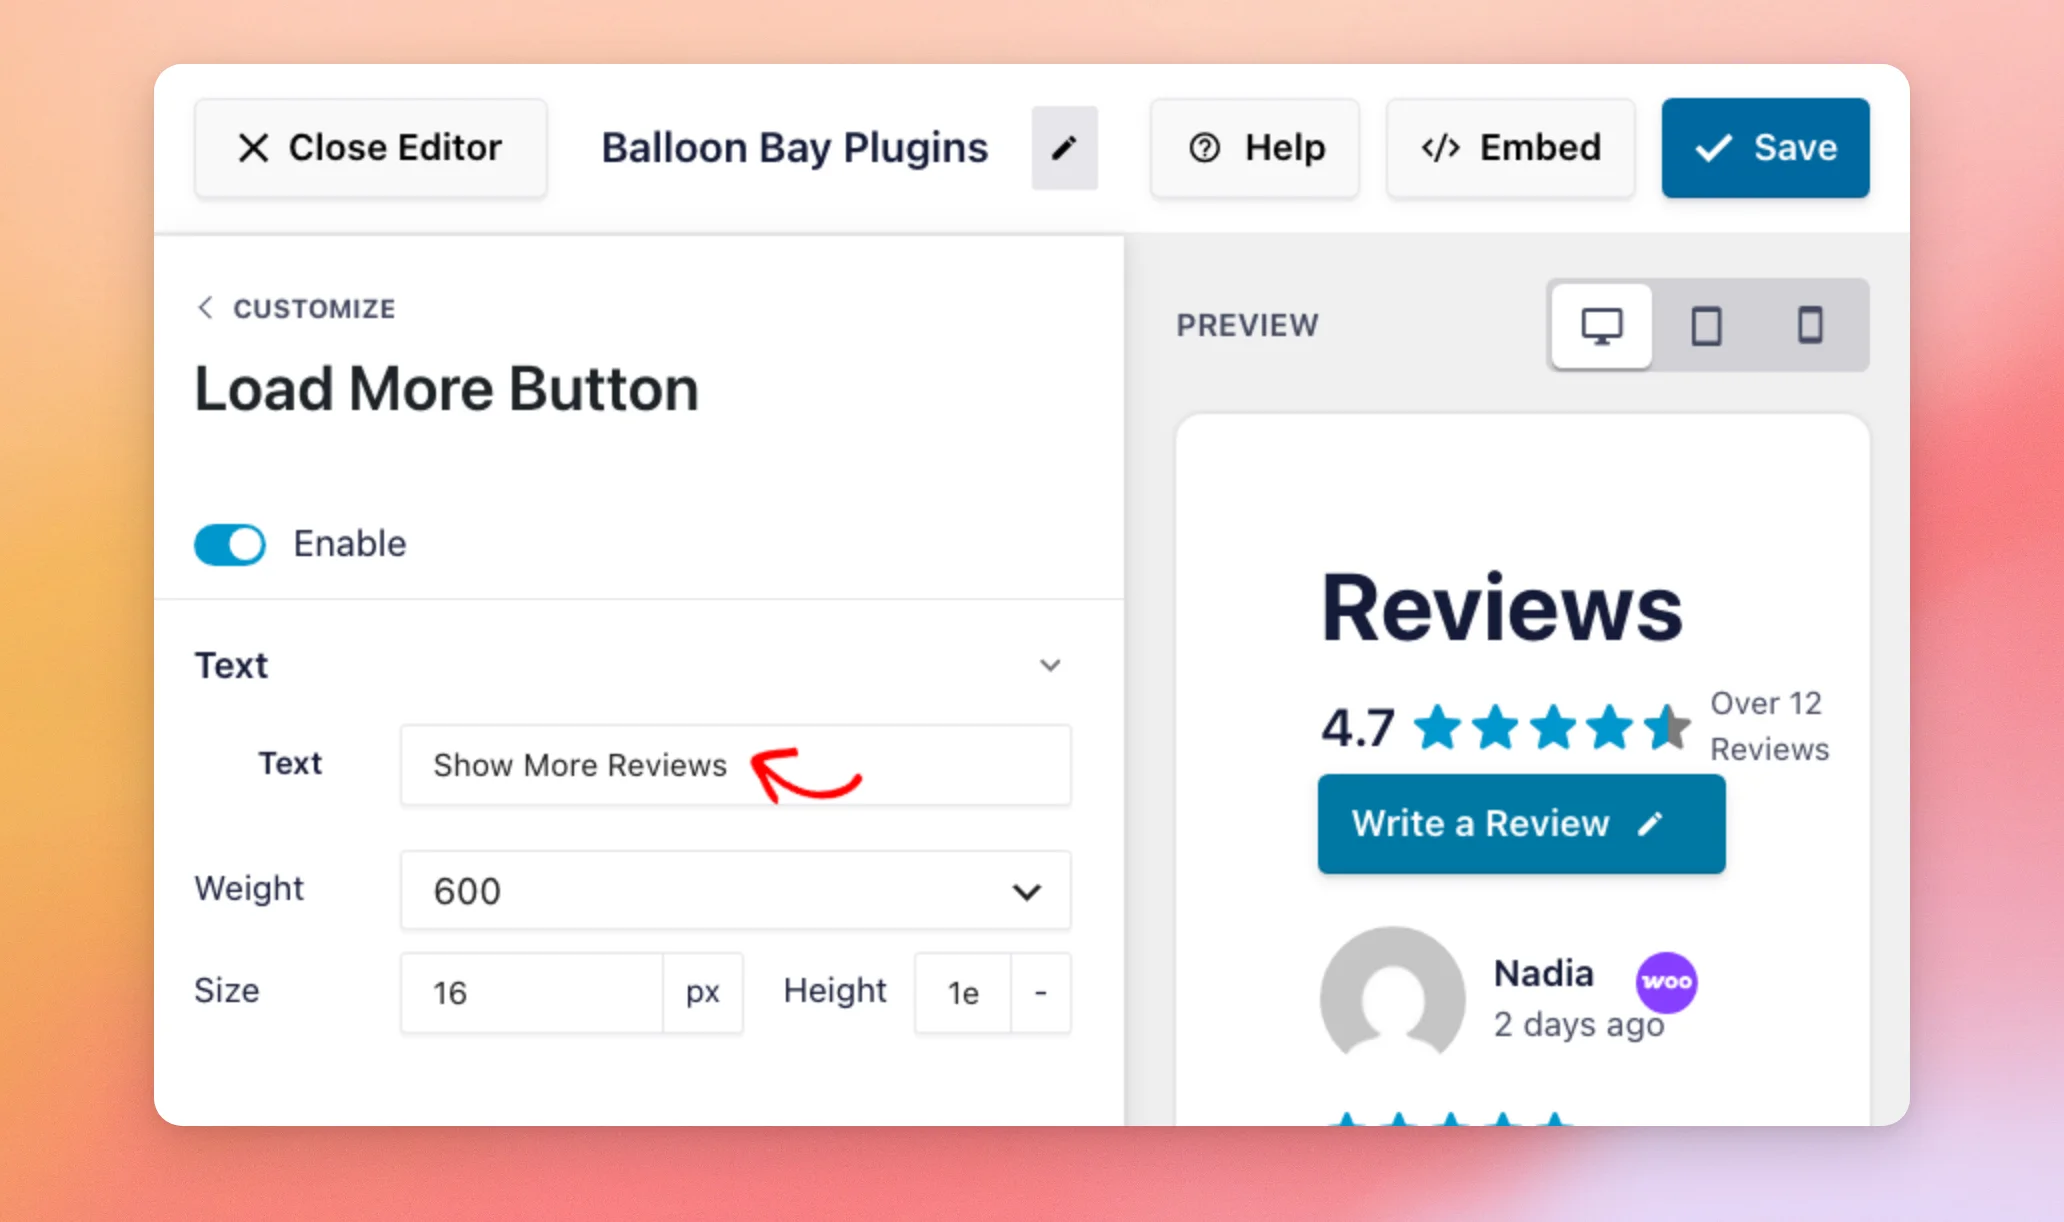
Below the Text field, you can change the button’s font and its text and background colors. You can also change the colors visitors see when they hover over it and the space around it.
The preview shows the new text on the button below your reviews.
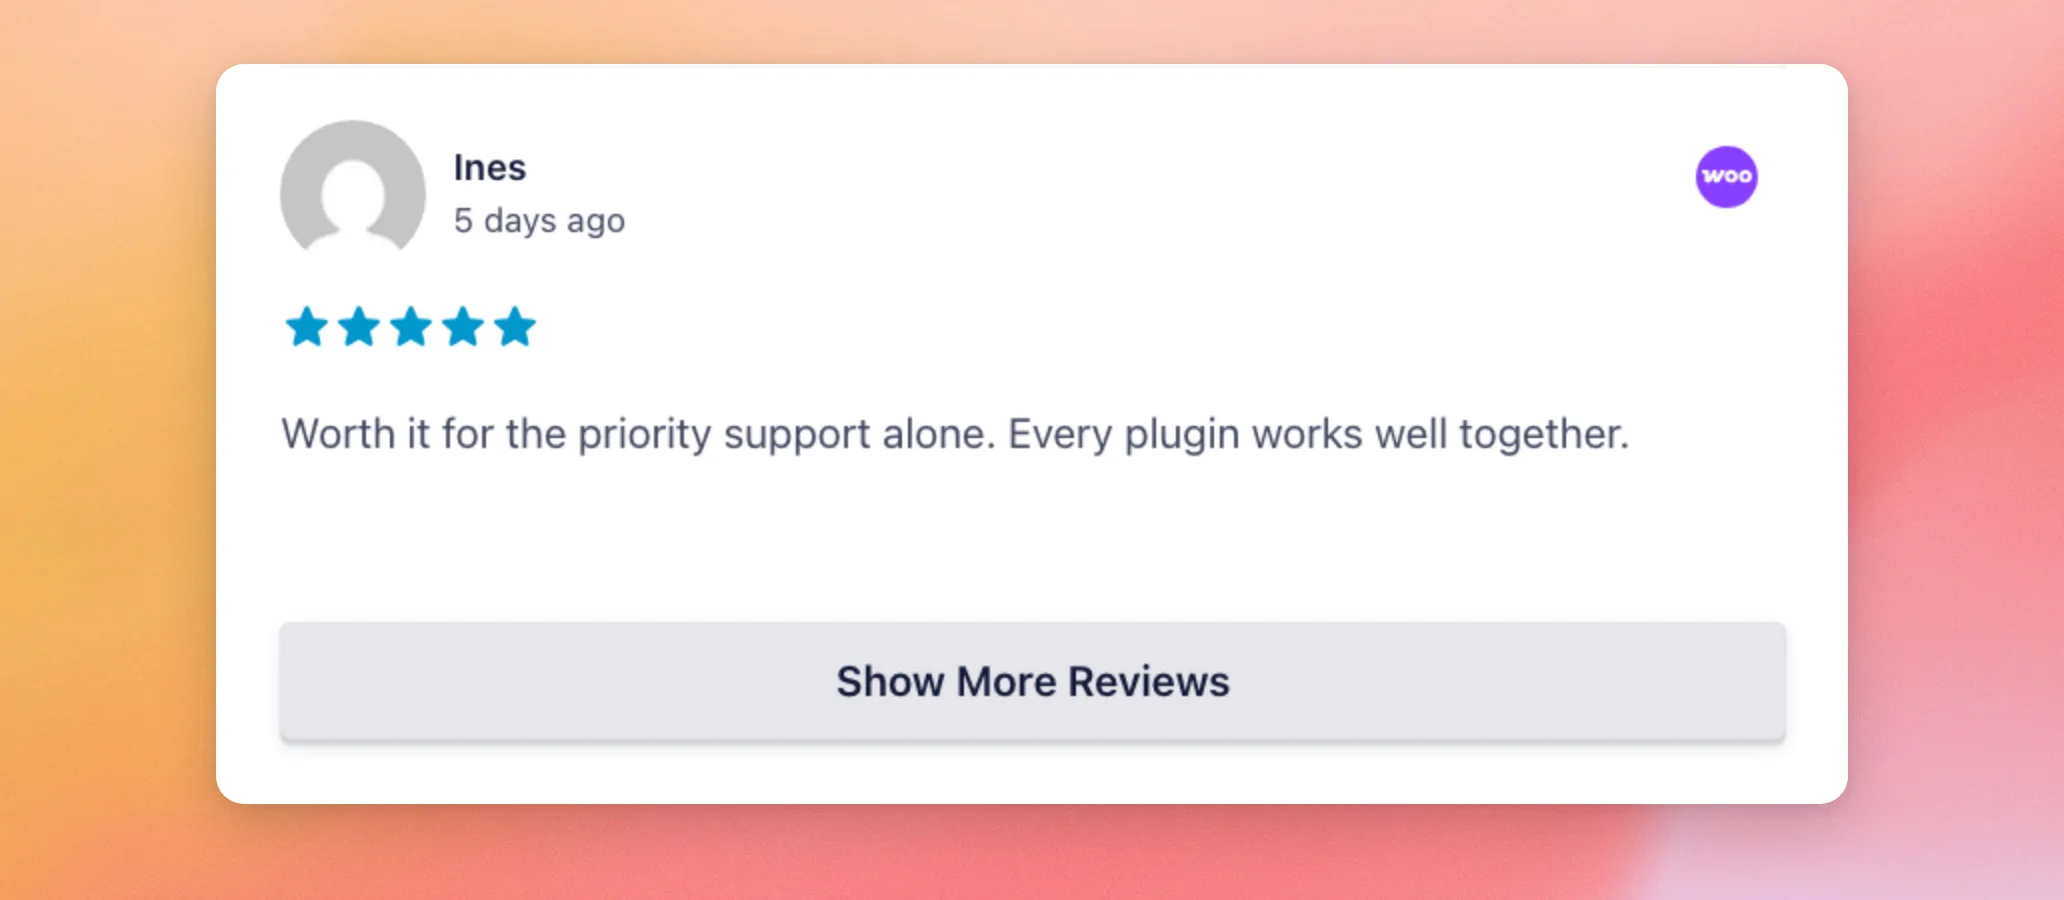
Your Load More button is ready. Next, we’ll save everything you’ve changed.
Saving Your Changes
Your changes show in the preview right away. Your feed on your site doesn’t change until you save.
When you’re happy with how your feed looks, click Save at the top of the feed editor.
That’s it! Your reviews feed now has the look you chose. To show your feed on a page, see our guide on displaying your reviews feed.
Frequently Asked Questions
Below, we’ve answered some of the most common questions about customizing the look of your reviews feed.
Will changing my template undo my other changes?
It can. A new template replaces your layout, header, and button settings with its own. To keep your work, choose your template before you customize anything else.
Are my changes live as soon as I make them?
No. The preview shows each change right away. Your feed on your site keeps its old look until you click Save.
If you leave the feed editor without saving, your changes aren’t kept.
Can I show a different number of reviews on phones?
Yes. In the Layout section, Number of reviews to display has separate fields for desktops, tablets, and phones. The Masonry and Carousel layouts also have separate columns for each.
How do I change the text on the header button?
The button’s text is set for all your feeds at once. To change it, go to Reviews Feed » Settings. Then, open the Language & Translation tab and change it in the Custom Text/Translate section.
For the steps, see our guide on changing the language in Reviews Feed. The Button options in the Customize tab set where the button links and how it looks.
How do I hide the whole header?
In the Header section, turn off the Enable switch. To hide only part of it, uncheck the box next to Heading, Button, or Average Review Rating instead.
Can I hide the dates on my reviews?
Yes. In the Reviews section, click Edit Individual Elements. Then, click Author and Date and uncheck Date to hide it from every review.
How do I choose which reviews my feed shows?
The Customize tab changes how your feed looks. To choose which reviews it shows, use the feed editor’s Settings tab.
For the steps, see our guides on filtering your reviews and moderating your reviews feed.