Social Wall
 Feed Analytics


Where the filter settings live for a YouTube feed, and how each feed can be filtered differently from the others.
Would you like to control which YouTube videos show in your feed, by word, hashtag, or video ID?
In this guide, we’ll walk you through the Filters and Moderation settings in the YouTube Feed editor.
Requirements: Filters and Moderation needs the elite license level. Older Personal, Business, and Developer licenses include it too. See the feature comparison for every license level.
Before you get started, make sure YouTube Feed is installed and activated on your WordPress site. You also need at least 1 feed created.
Here is what we will cover:
- Opening Filters and Moderation
- Showing Only Videos with Certain Words
- Hiding Videos with Certain Words
- Hiding Specific Videos
- Saving Your Filters
- Hiding Private Videos
- Frequently Asked Questions
Opening Filters and Moderation
To get started, we’ll open the filter settings of a feed.
Each feed has its own filters. This means every feed on your site can show a different set of videos.
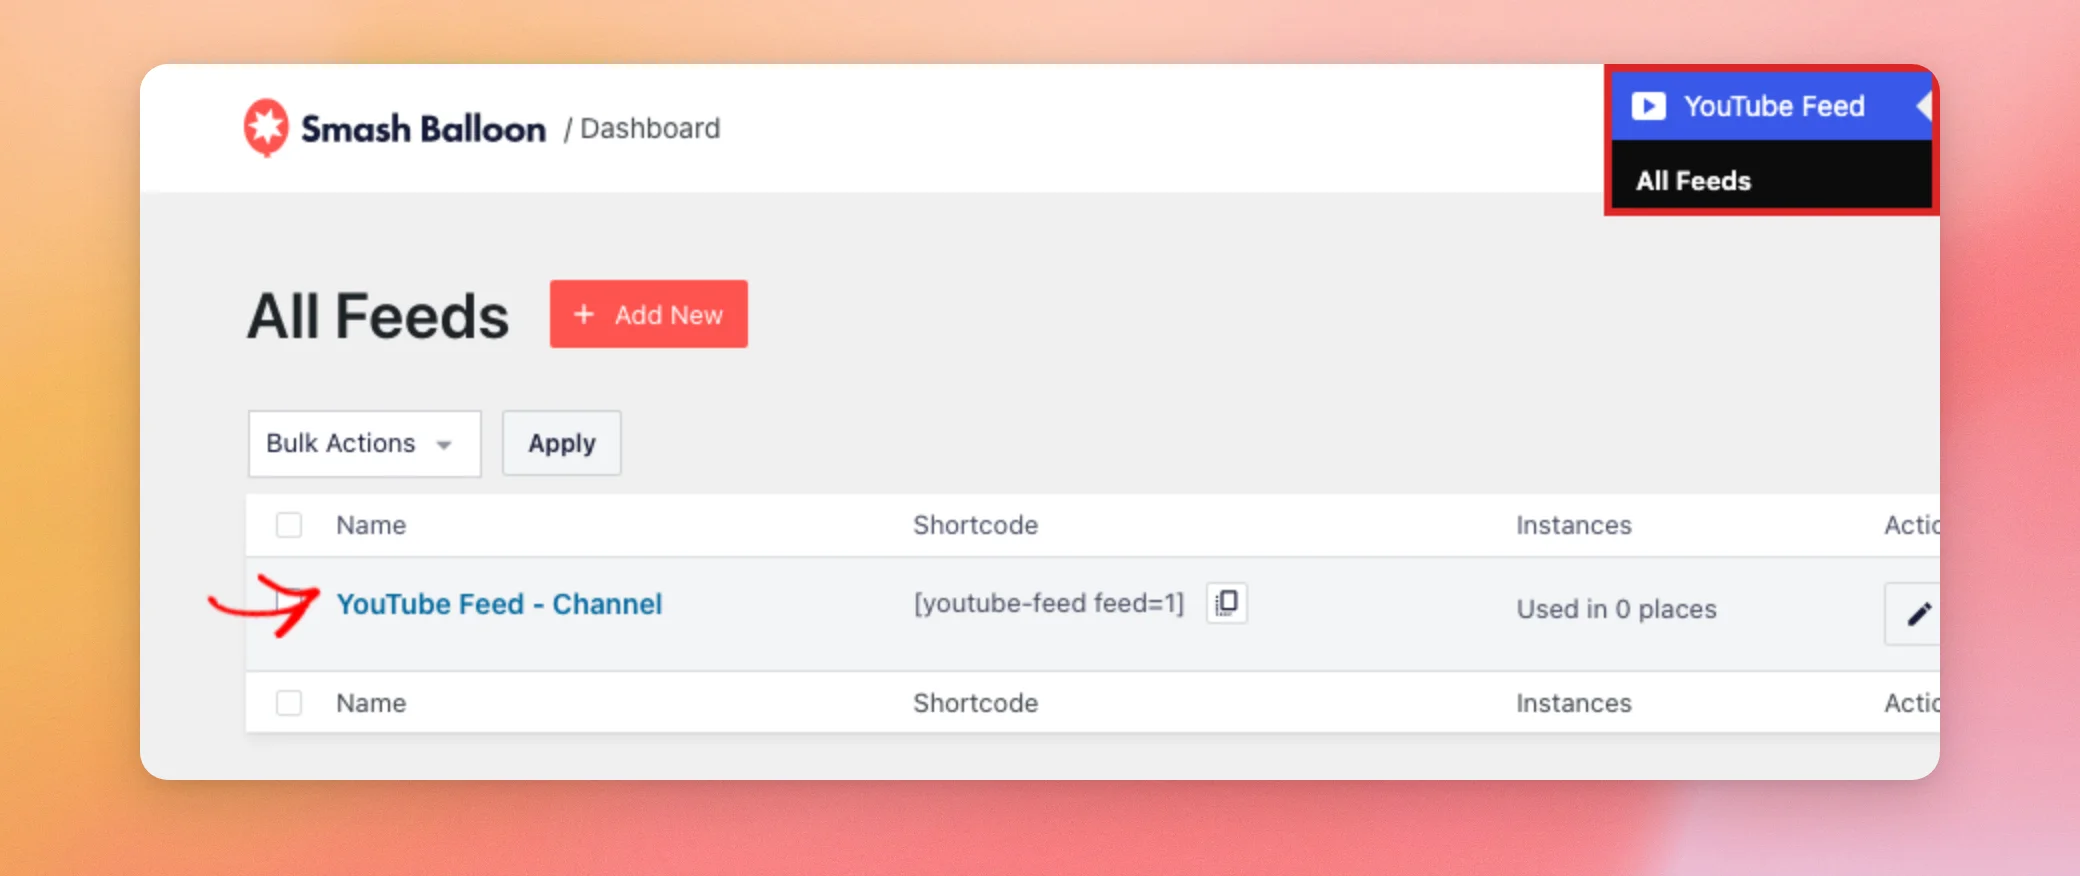
First, go to YouTube Feed » All Feeds in your WordPress dashboard. Then click the name of the feed you want to filter.
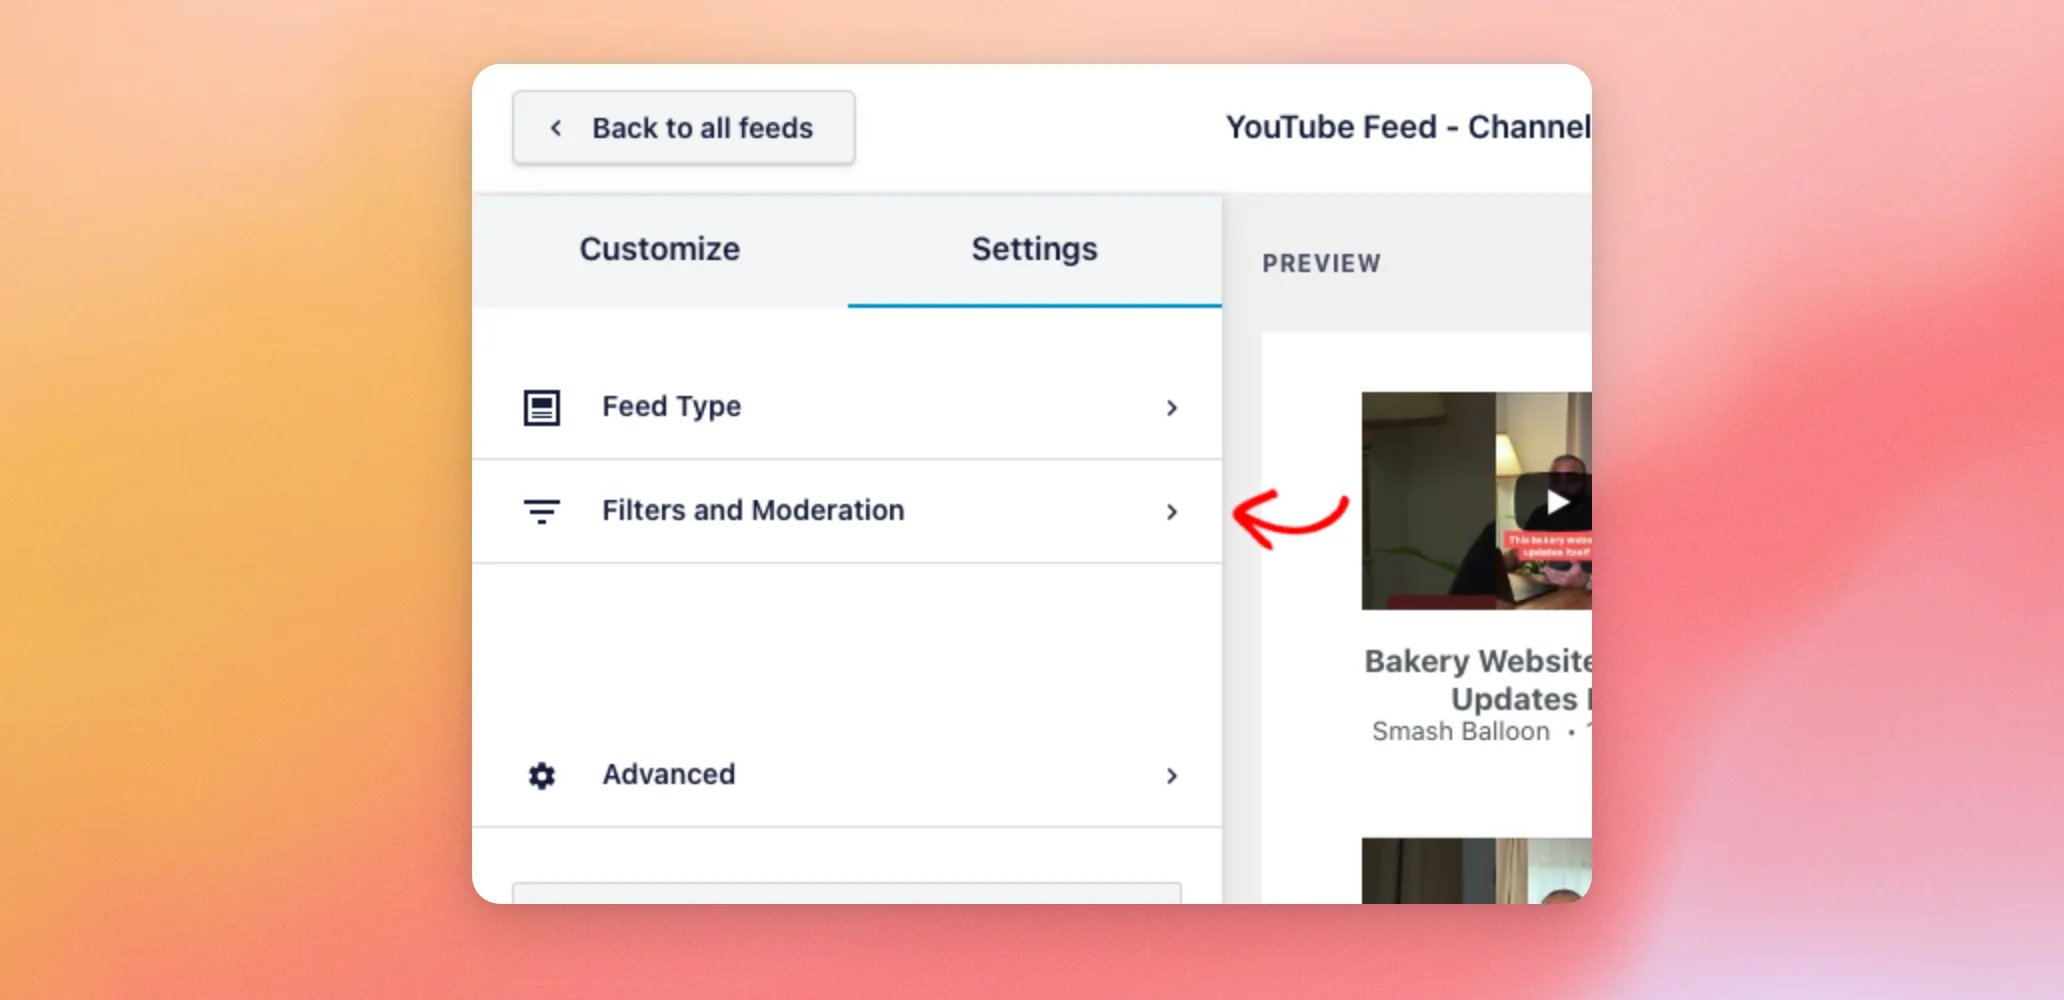
The feed editor opens. At the top of the left panel, click the Settings tab. Then click Filters and Moderation.
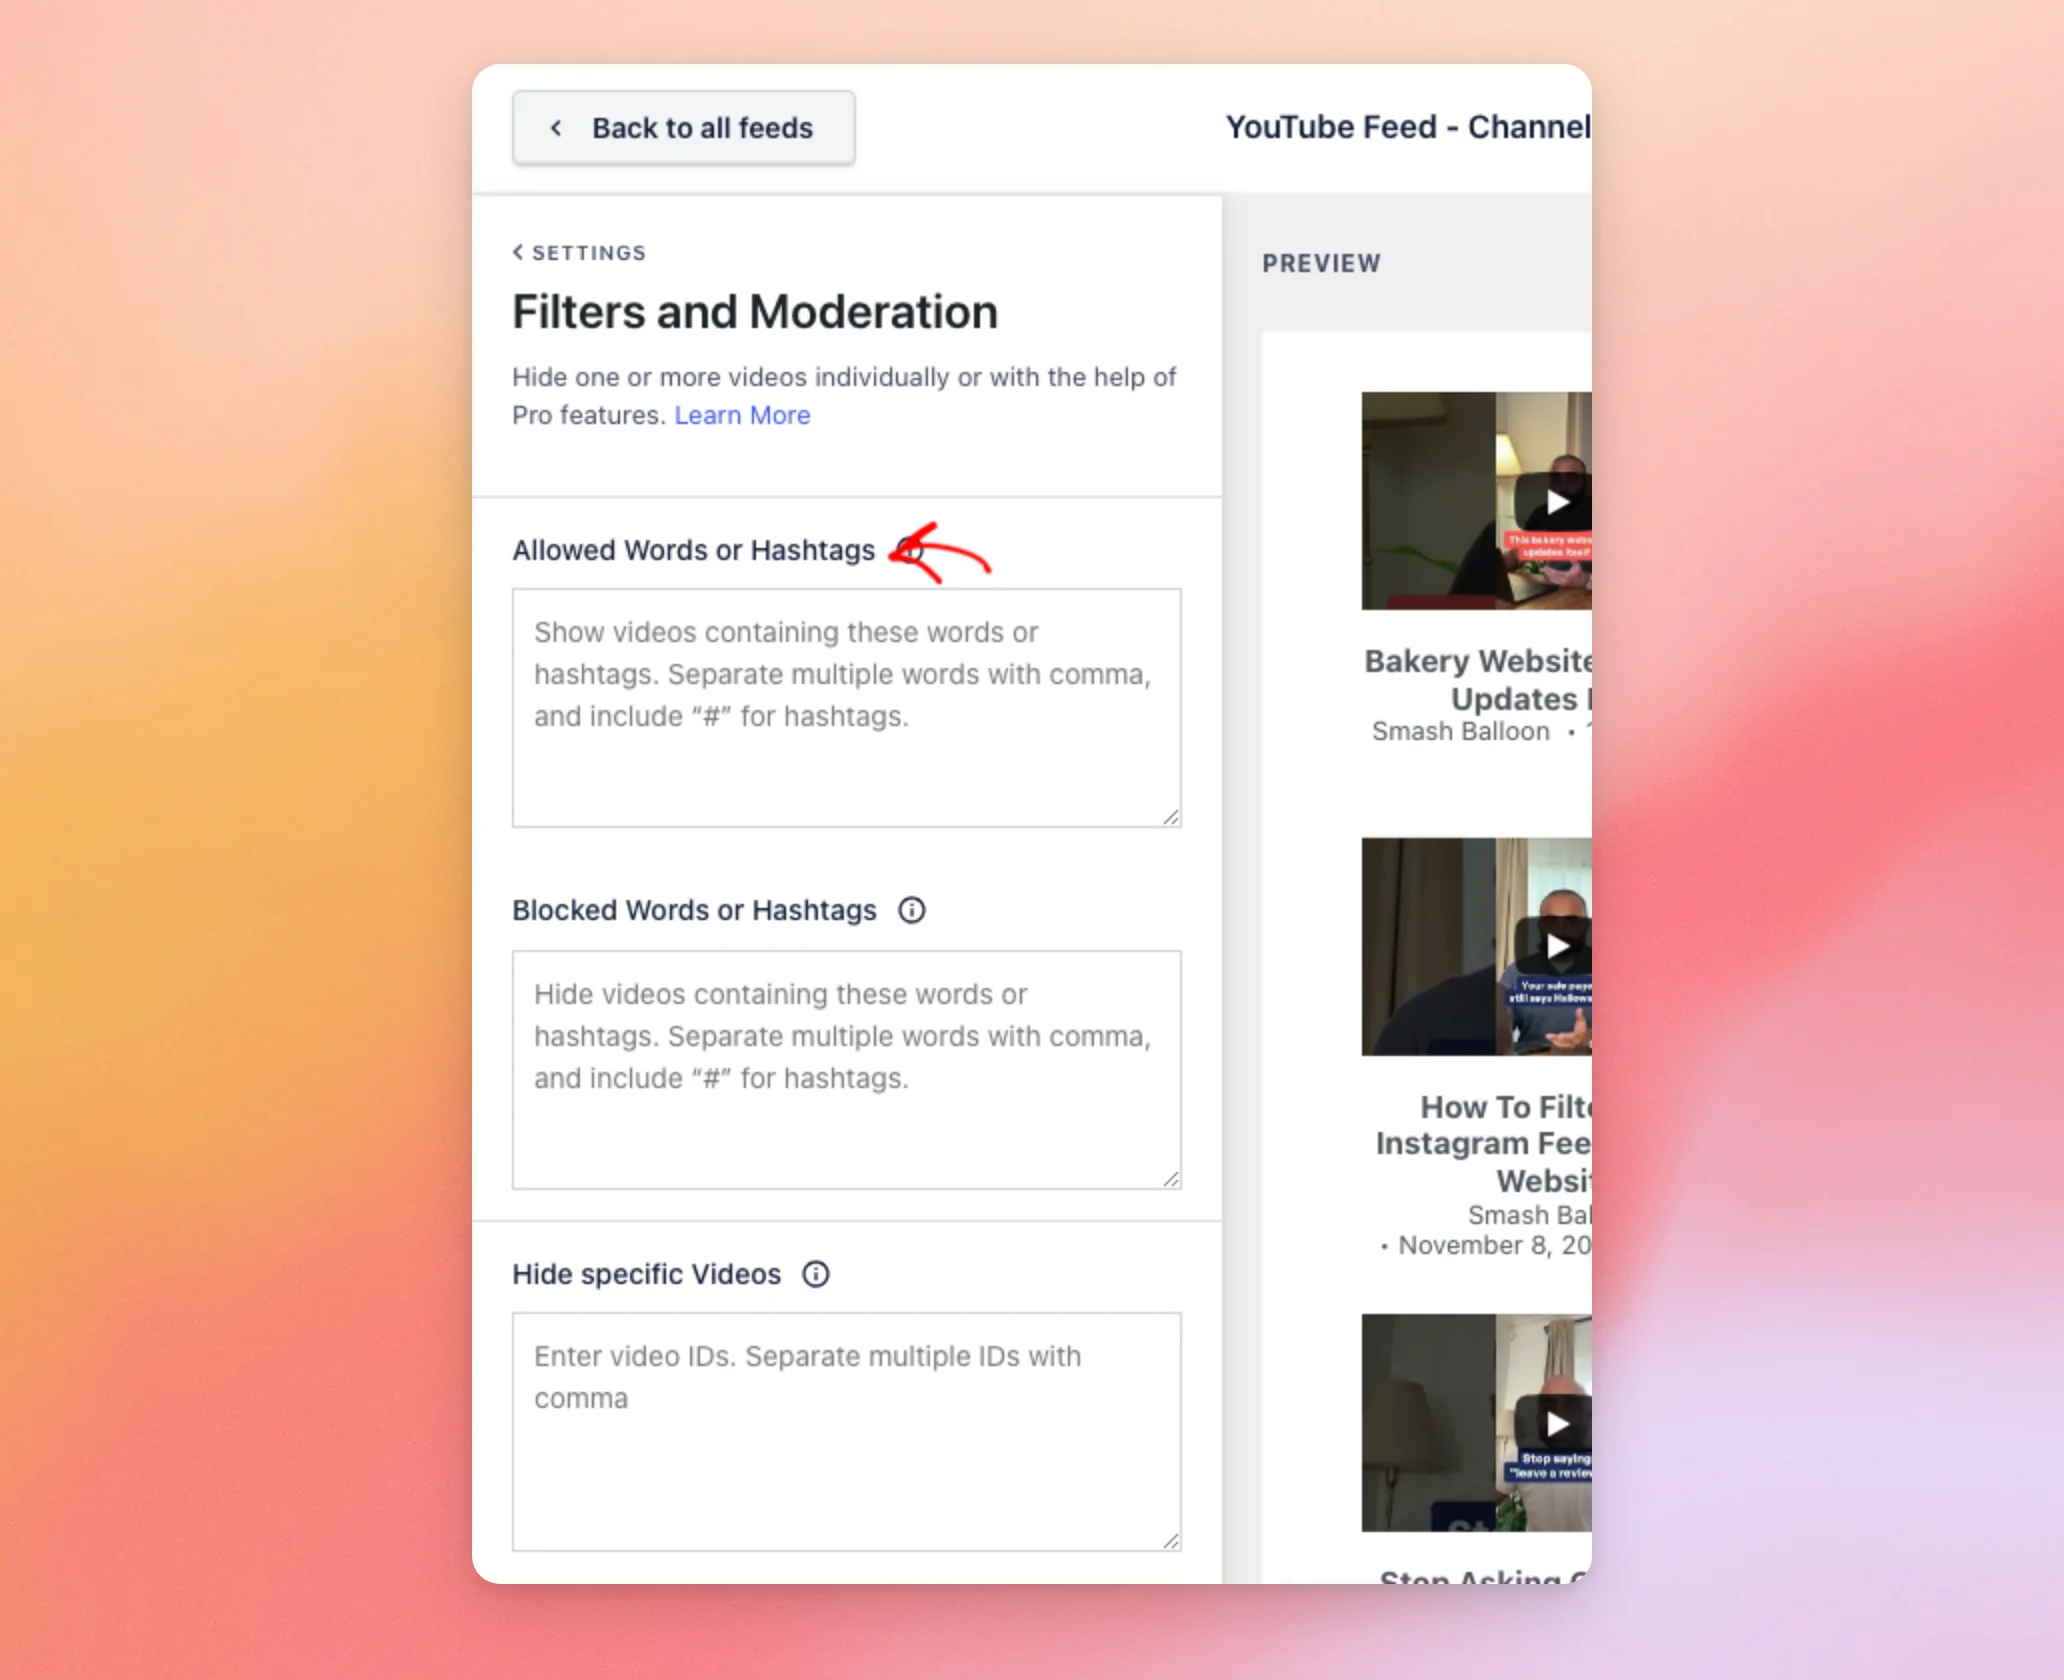
The section has 3 fields:
- Allowed Words or Hashtags: shows only the videos that contain these words.
- Blocked Words or Hashtags: hides the videos that contain these words.
- Hide specific Videos: hides videos by their video ID.
To choose a field, think about what you want to keep.
Allowed Words or Hashtags fits when you want only the videos about 1 topic. Blocked Words or Hashtags fits when you want most of your videos and only need to remove a topic. Hide specific Videos fits when you want to remove 1 or 2 videos that no word can single out.
All 3 fields start empty, so the filters hide nothing until you add a word or a video ID.
Now that you know the 3 fields, you are ready to use them, starting with allowed words.
Showing Only Videos with Certain Words
To show only some of your videos, type words into Allowed Words or Hashtags. Then separate several words with commas. To use a hashtag, include the # sign.
The plugin checks the title and the description of each video. It matches whole words. The case does not matter. For example, photo does not match a video that only says “photos”.
After you type a word and click outside the field, the preview on the right shows your feed with the filter applied. In our example, we typed tagged. The preview then shows only the videos that mention it.
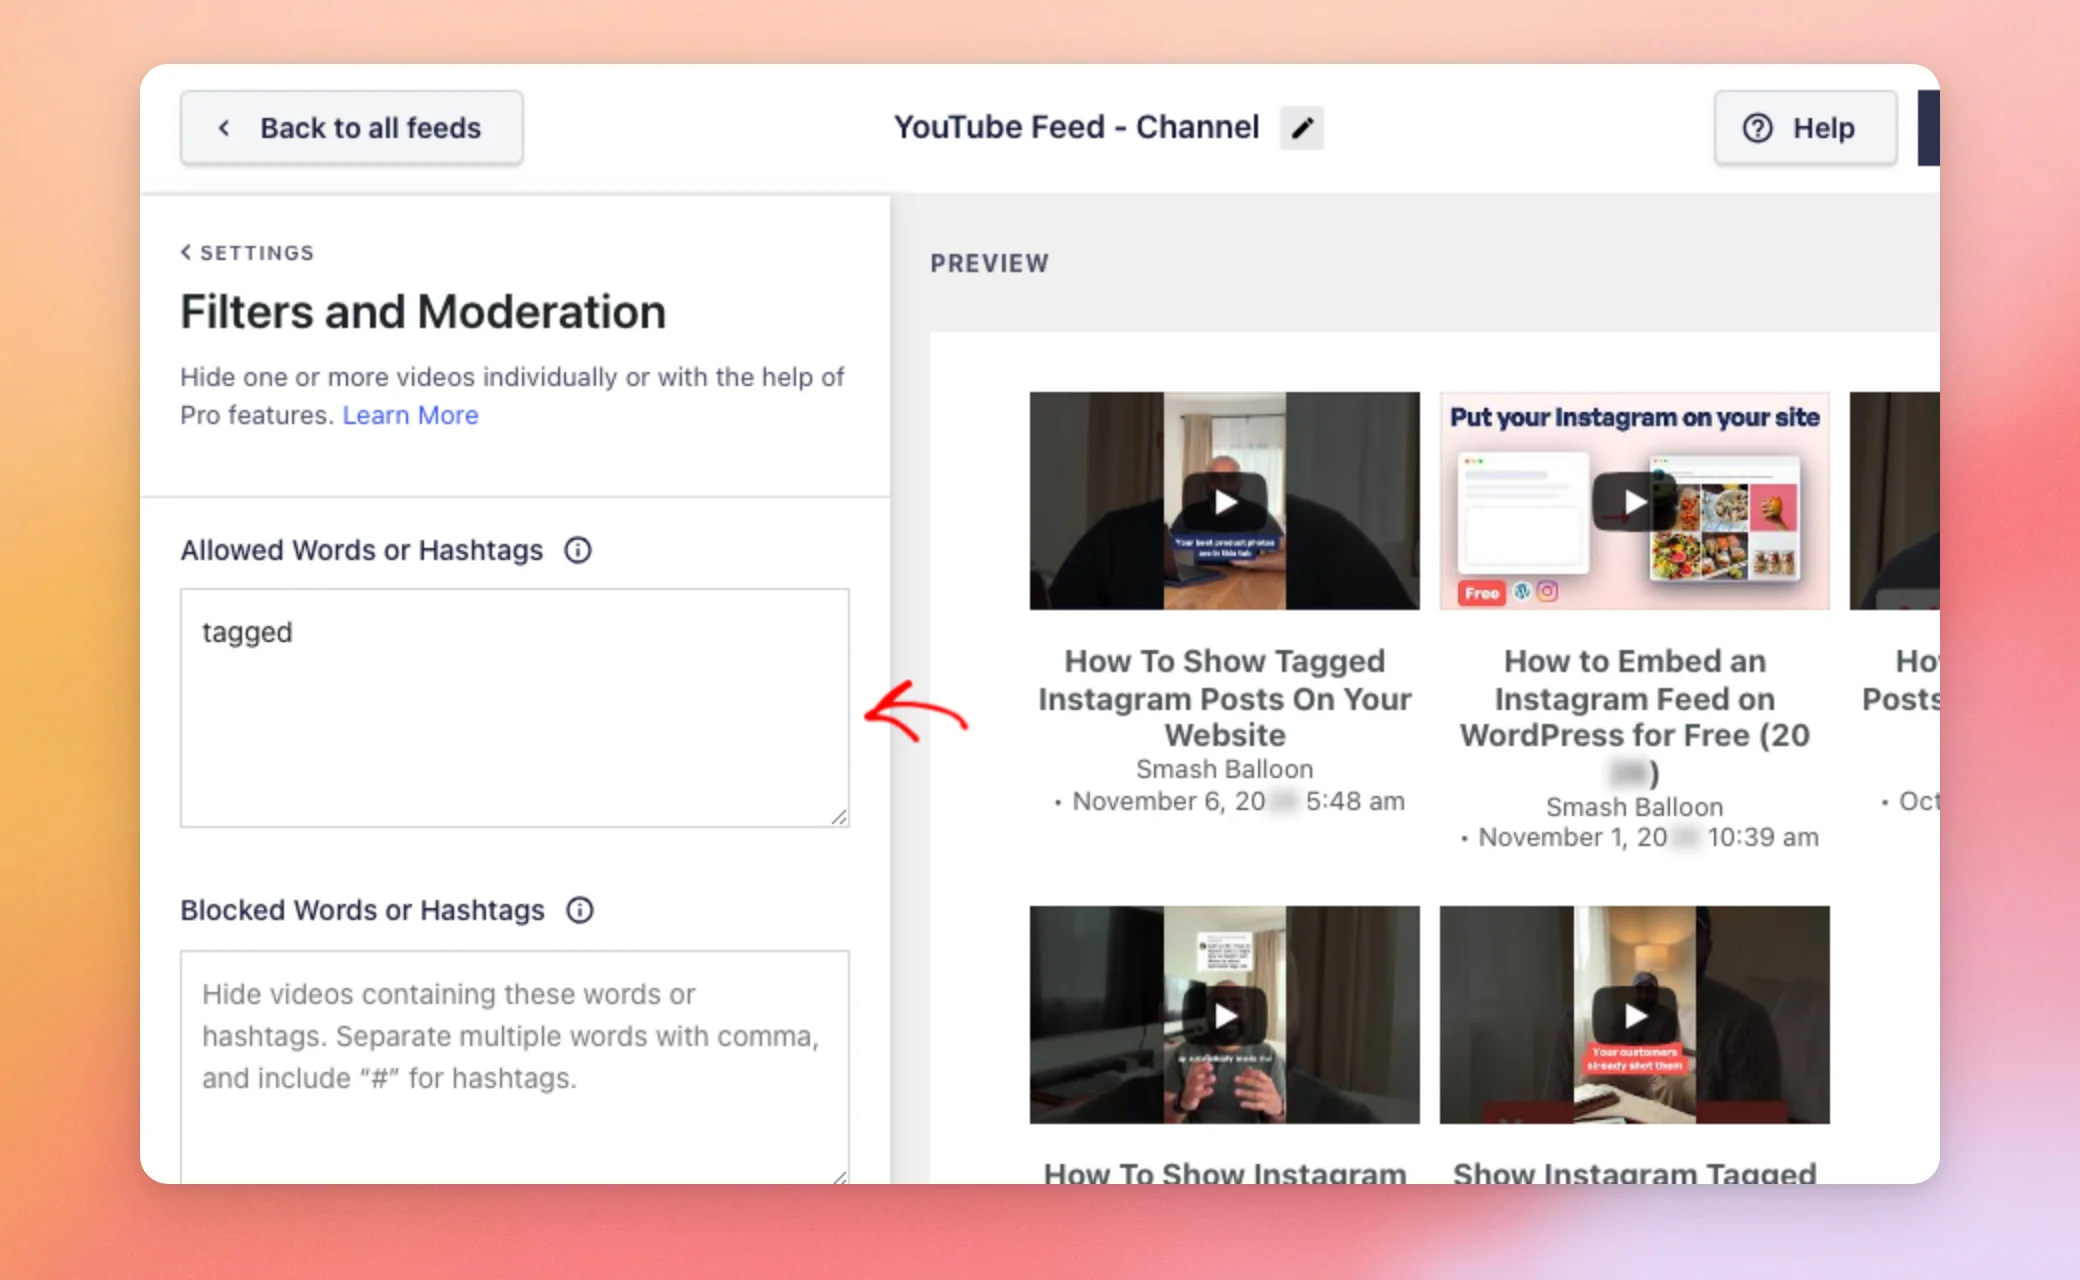
Allowed words are now set. Next, you can also hide videos by word.
Hiding Videos with Certain Words
To hide some of your videos, type words into Blocked Words or Hashtags. As with allowed words, separate words with commas and include # for hashtags.
In our example, we typed reviews. The videos that mention it no longer show in the preview.
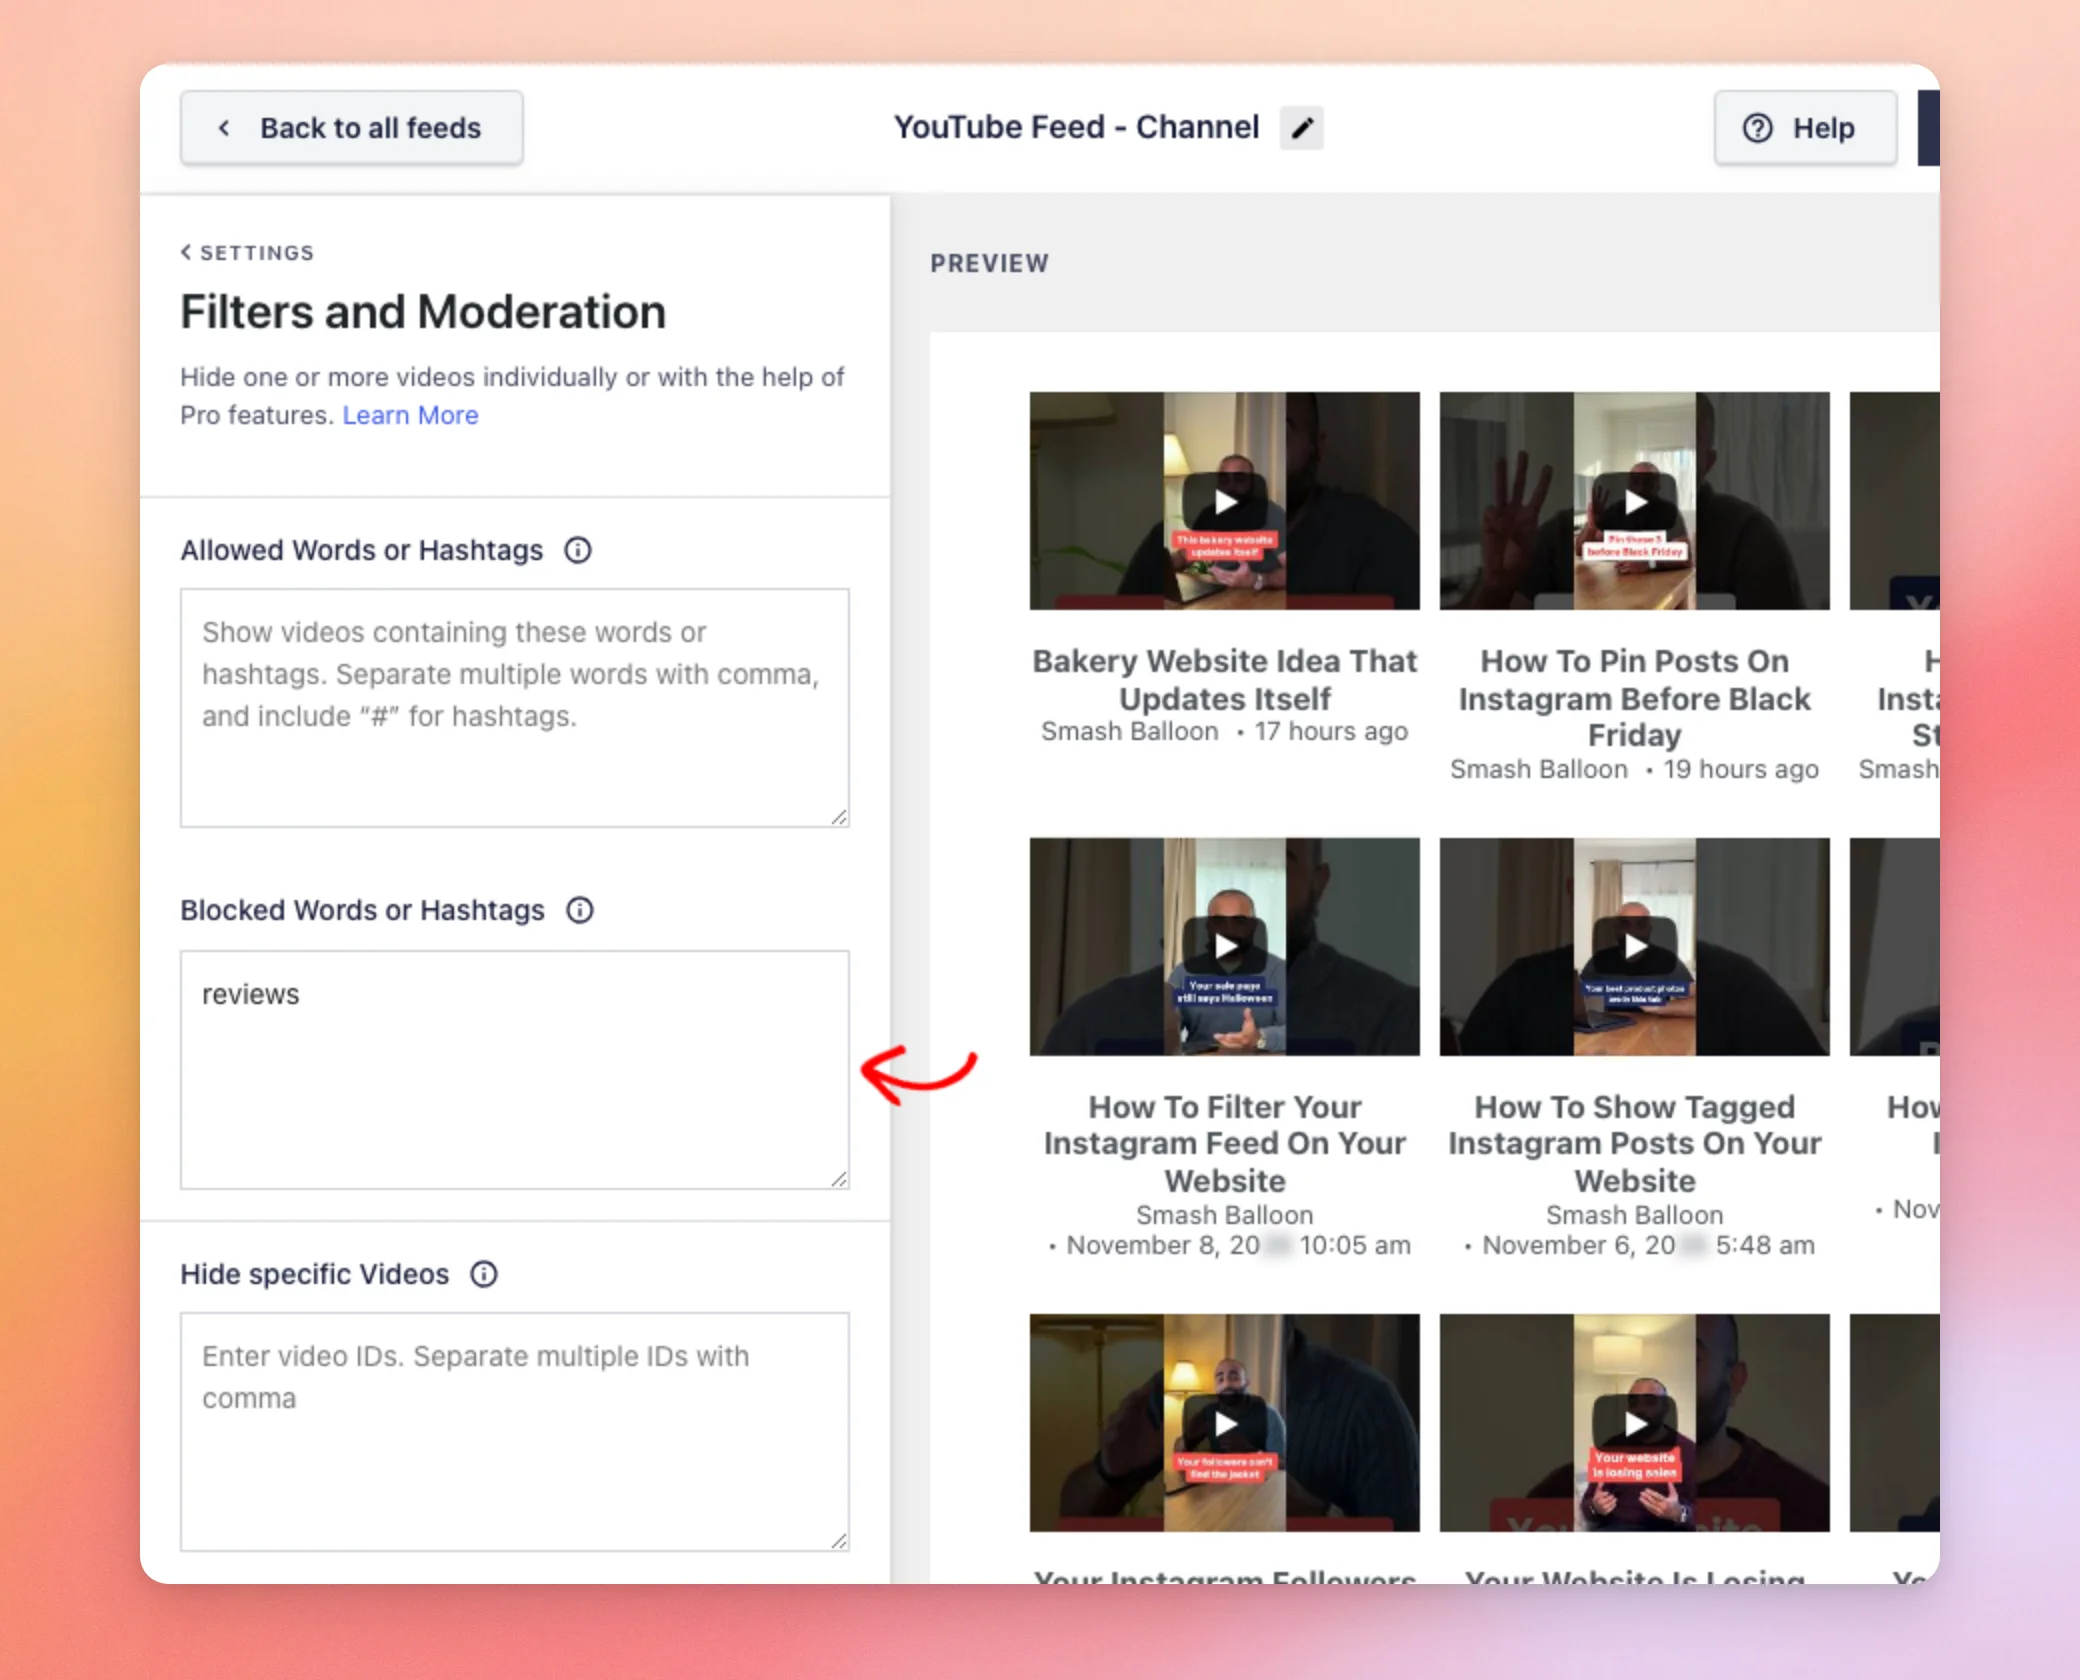
You can use both fields together. If a video has an allowed word and a blocked word, the plugin hides it.
Blocked words are set. Next, you can hide single videos by their ID.
Hiding Specific Videos
To hide single videos, use Hide specific Videos. Each YouTube video has a unique ID. You can find it in the address of the video on YouTube, after watch?v=. For example, in https://www.youtube.com/watch?v=ZoUKROmIAmM, the ID is ZoUKROmIAmM.
Next, paste the ID into the field. To hide more than 1 video, separate the IDs with commas.
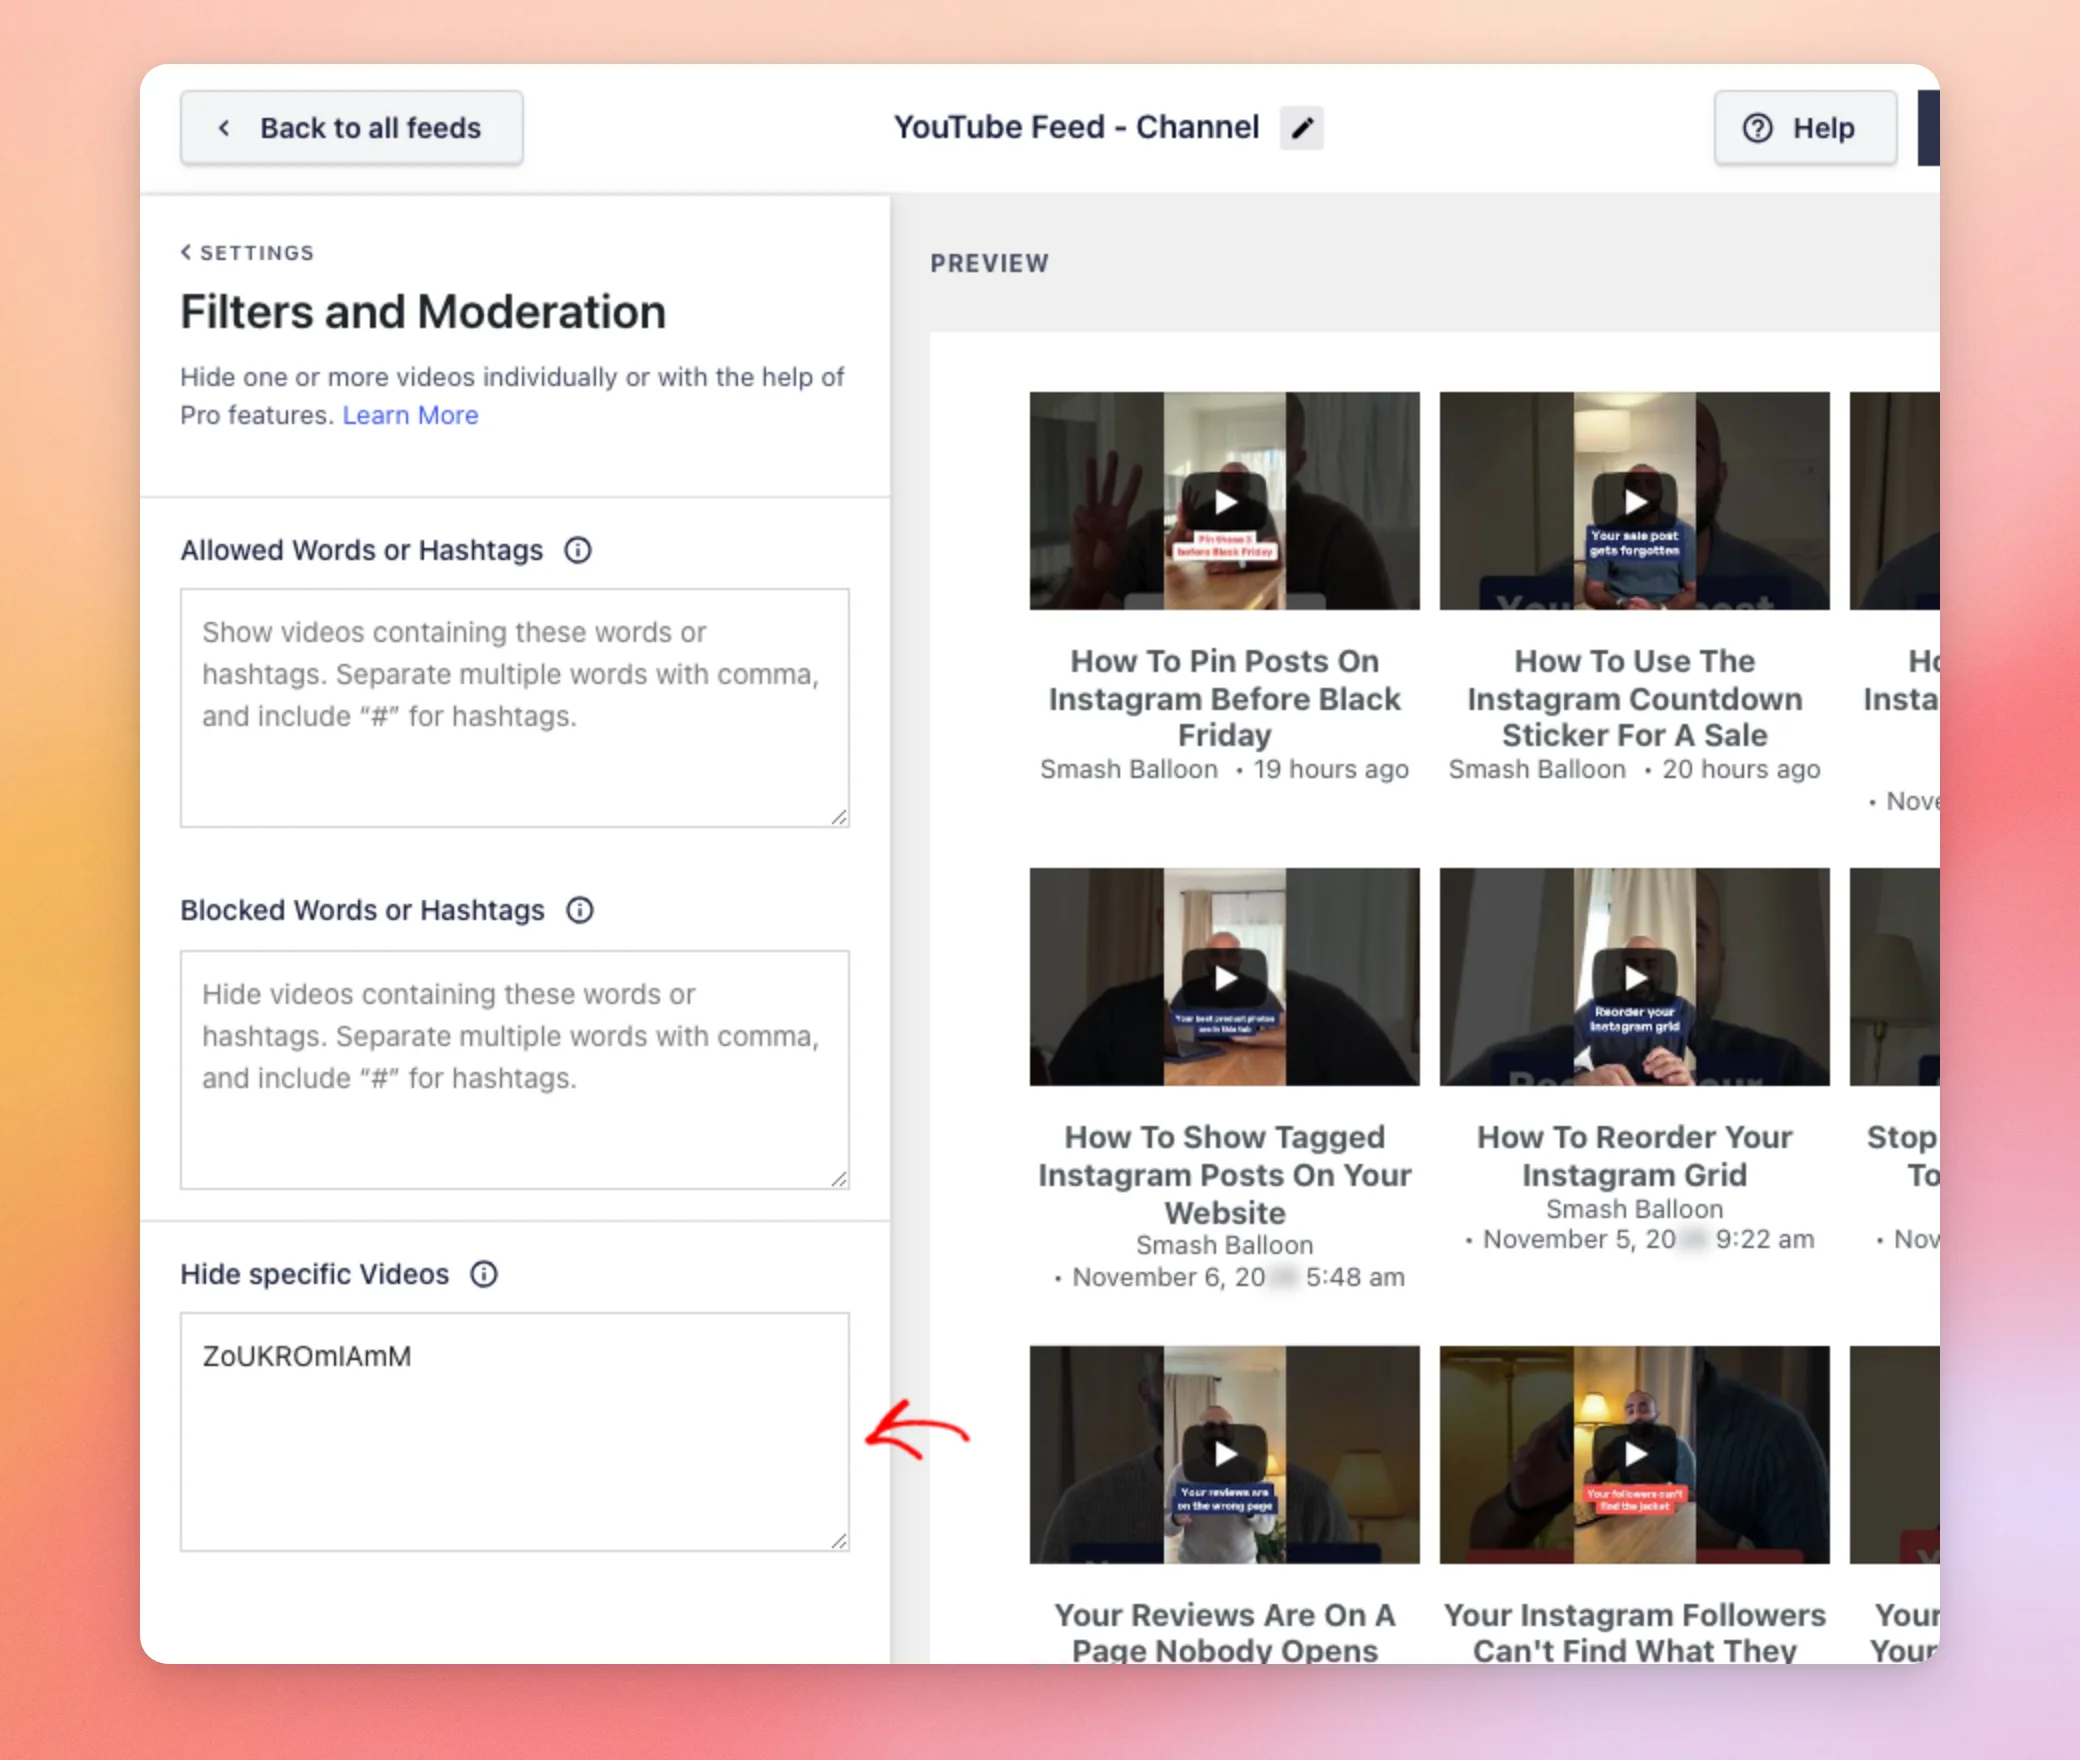
The hidden video leaves the preview. In our test, the feed filled the empty space with another video from the channel.
Once the preview looks right, you are ready to save your filters.
Saving Your Filters
The preview shows what your filters do before you commit to them. When you are happy with the result, click Save at the top right of the editor.
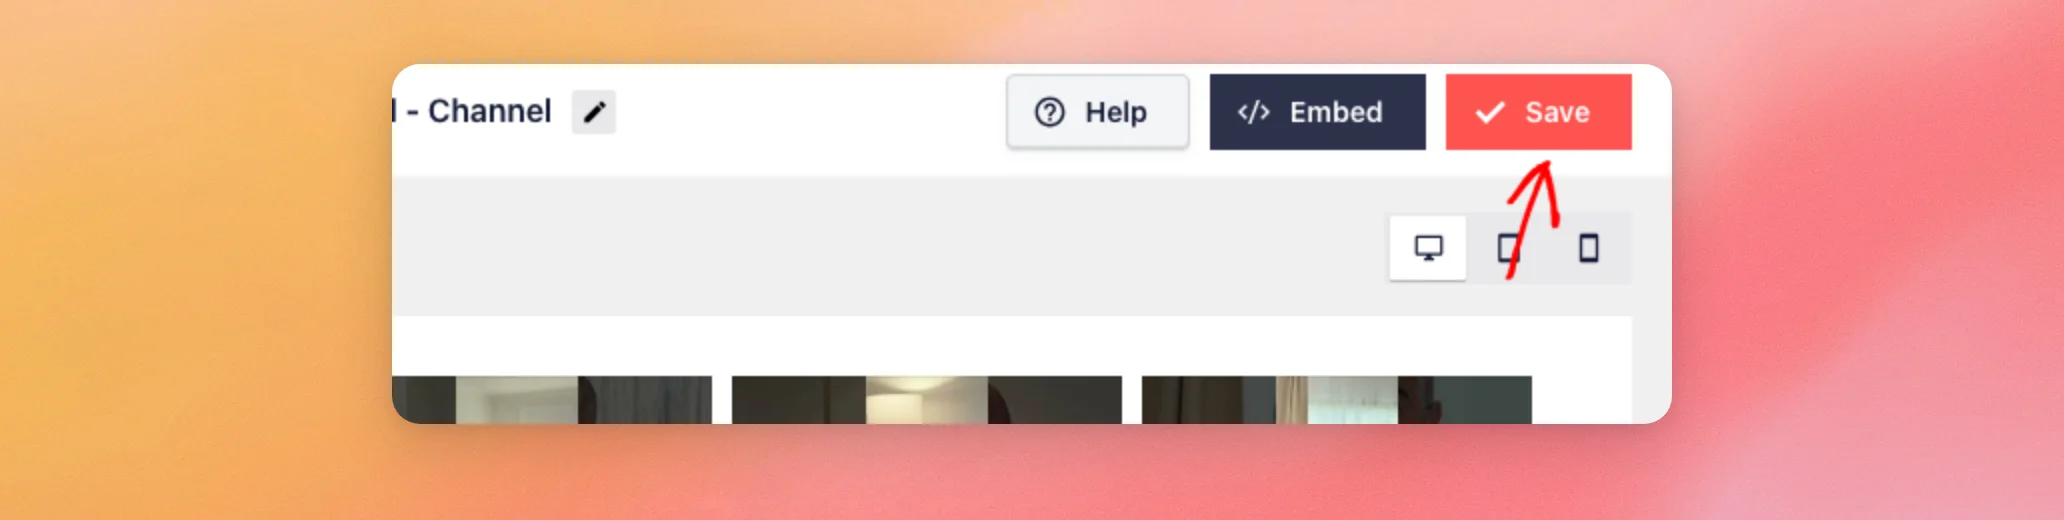
Your filters are now saved with that feed.
Hiding Private Videos
If private videos show up in your feed, type PRIVATE into Blocked Words or Hashtags and save. The plugin hides every video with that word in its title or description. This includes a normal video that happens to use the word. After you save, check your feed to see whether the private videos are gone.
To learn why private videos can appear, see the unlisted or private videos section of our error reference.
That’s it! You now know how to show or hide YouTube videos in your feed with Filters and Moderation. Next, see how to display more than 1 YouTube feed on your site, each with its own filters.
Frequently Asked Questions
Below, we’ve answered some of the most common questions about filtering and moderating YouTube videos.
Do my filters apply to all of my feeds?
No. Each feed keeps its own filters. To filter another feed, open it as shown in Opening Filters and Moderation and set its filters there.
Does the filter check the video title only?
No. It checks both the title and the description, so a word that appears only in the description still counts. See Showing Only Videos with Certain Words above for how words are matched.
What happens if a video matches an allowed word and a blocked word?
The plugin hides it. In our test, we allowed tagged and then blocked photos. The preview went from 5 videos to 2.
Why does my feed still show the same number of videos after I hide one by ID?
In our test, the feed filled the empty spots with other videos from the channel. We hid 2 videos by ID. The preview still showed 9. Word filters can leave fewer videos. With the allowed word tagged, the preview went from 9 videos to 5.