Social Wall
 Feed Analytics


Feeds not updating on schedule usually means WP Cron is not running. How to check it and force cron jobs to run on your server.
Would you like to keep your feeds updating even when CRON jobs on your server do not run reliably?
CRON jobs are like scheduled tasks for your website. They automatically perform specific actions at set times, such as updating content or fetching new feeds. If you are not seeing feed updates as expected, it could be due to a CRON job not running correctly or at the right frequency.
We describe some issues with CRON jobs in this documentation. If you have contacted your host or investigated the CRON jobs and you still have issues like the ones below, this workaround can help.
- Your host has disabled WP_CRON and cannot or does not allow it to be activated.
- You are experiencing conflicts with other plugins that you cannot remove or replace on your site.
- CRON jobs work on a separate schedule you cannot control (not with “user visits”).
In these cases, you can test the following workaround to keep your plugin feeds updating as expected.
Here is what we will cover.
Forcing CRON Jobs to Run With UptimeRobot
To get started, we will set up a monitor that visits your wp-cron.php file on a regular schedule.
- First, check whether the wp-cron.php file is accessible. To do this, go to your website and add /wp-cron.php to the URL, for example www.example.com/wp-cron.php. If the page is blank and does not show an error (404 or similar), the file is accessible.
- Next, go to https://uptimerobot.com/. UptimeRobot is a third-party website with no affiliation with Smash Balloon. Log in or register a new account. Once logged in, you will see the dashboard.
- Next, click + Add New Monitor.
- In the New Monitor window, select the HTTP(s) Monitor Type.
- In the Friendly Name field, enter your personal name for this monitor. This can be anything you can easily identify later.
- In the URL field, add the URL of your website with /wp-cron.php appended, for example https://www.example.com/wp-cron.php.
- Then set the Monitoring Interval to the interval you wish to use. With a free account, this has to be over five minutes. We suggest 30 minutes or more to avoid unnecessary load on your website.
- You can leave everything else as is, or add your email in the Select “Alert Contacts To Notify” section. This alerts you if UptimeRobot is unable to reach your website, sending you notifications when your website is down.
- At the bottom of the window, click Create Monitor.

UptimeRobot will then consistently check the wp-cron.php page. This triggers a CRON event, which leads to our plugin updating the feeds. If the feeds do not update right away, you may still need to adjust your website or host caching to clear more often.
The additional benefit of using this service is you can get data on the uptime and response time of your website, and be sent a notification quickly when the website is down or not accessible.
Here is an example of the website statistics on UptimeRobot.

With the monitor running, your scheduled tasks now run on a regular schedule. Next, here is how Facebook Feed uses them.
How Often Facebook Feed Updates Its Cache
The workaround above keeps WordPress running its scheduled tasks. Custom Facebook Feed uses one of them to refresh the saved copy of your feed. You choose how often it runs.
To find the setting, follow these steps.
- First, go to Facebook Feed » Settings in your WordPress dashboard.
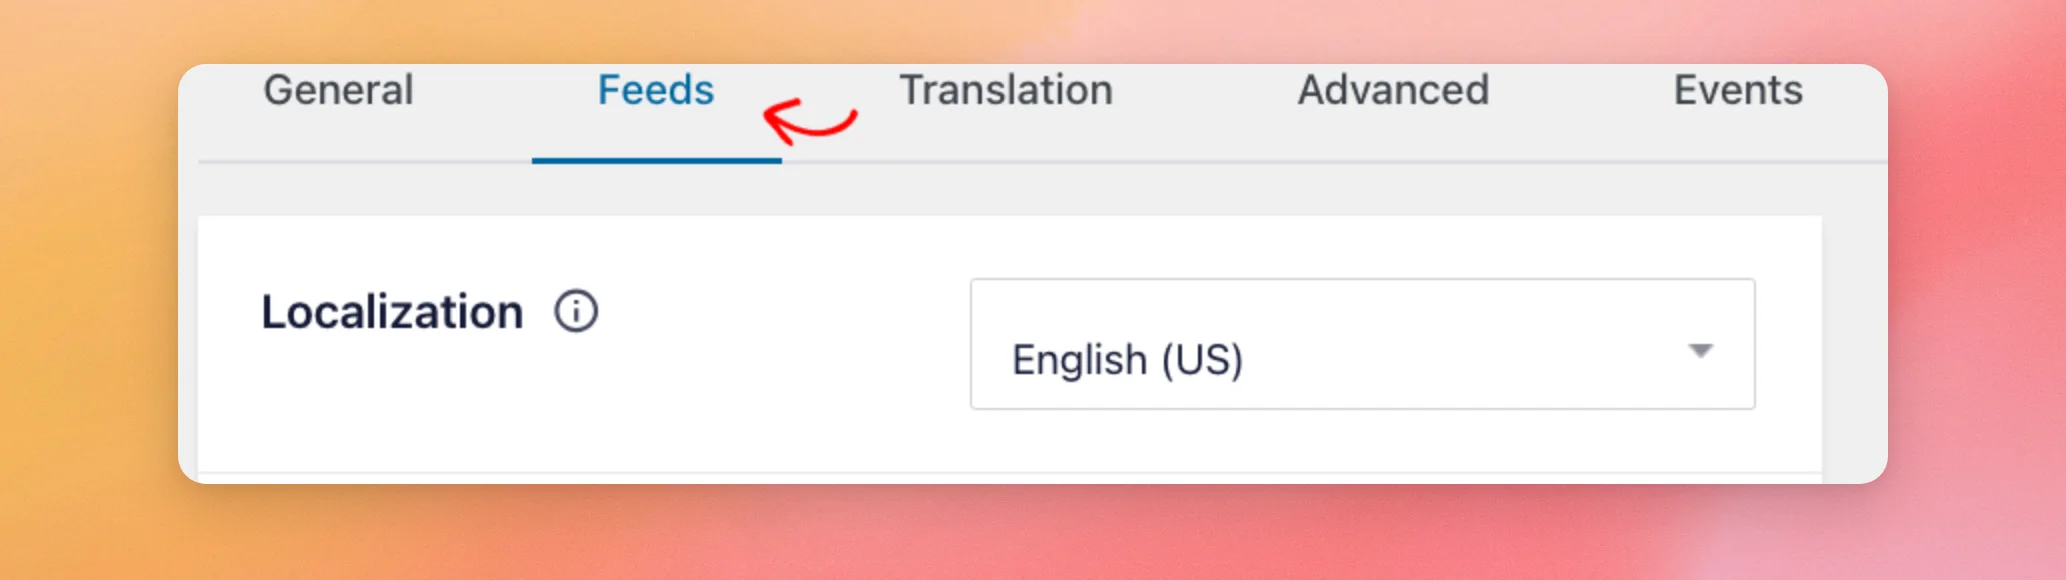
- Next, click the Feeds tab and find the Caching box.
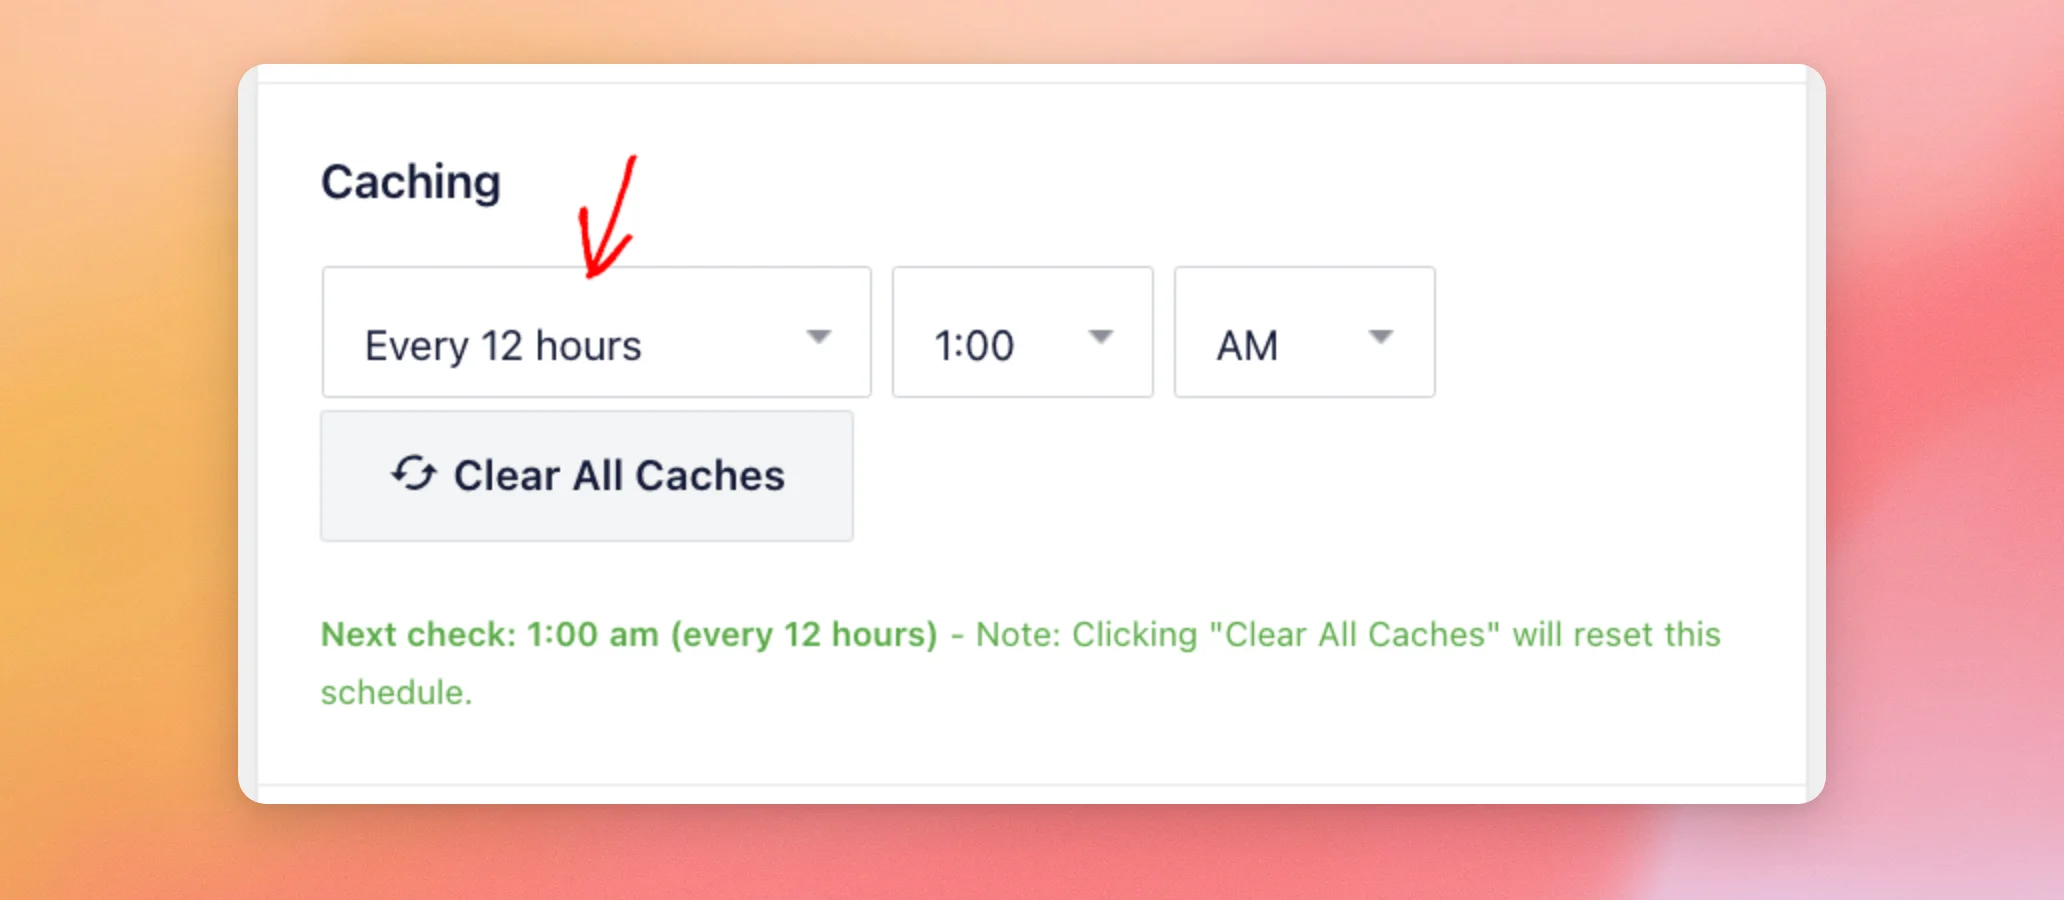
- In Custom Facebook Feed Pro, the Caching update interval dropdown offers Every 30 minutes, Every hour, Every 12 hours and Every 24 hours. The default is Every 12 hours. For Every 12 hours and Every 24 hours, an hour and an AM or PM menu appear beside it. Under these menus, a “Next check” line shows when the next update is due.
- In the free version of Custom Facebook Feed, the Caching box shows a number and a unit (Minutes, Hours or Days) instead. The default is one hour. Updating in the background is part of Custom Facebook Feed Pro.
The schedule is set when you click Save Changes on the Settings page. It starts over when you click Clear All Caches in the Caching box. Both also clear the saved copy of your feeds.
In the free version, since 4.13.0, your feeds follow the number and unit you set instead of checking for new posts only once every seven days. Since version 4.14.0, an admin notice and the weekly email report also warn you about stale feeds. They appear when a feed has been showing an old saved copy of your posts. To learn more, read our guide on getting alerts when your Facebook feed stops updating.
That’s it! Your UptimeRobot monitor now checks your wp-cron.php page at the interval you set, so your feeds can keep updating. To look into other reasons a feed may update slowly, see My Feed Updates Slowly or Not at All.