Social Wall
 Feed Analytics


Would you like to change how your YouTube feed looks without touching any code?
The feed editor’s Customize tab controls the header, the video cards, the hover state, the Load More button and the Subscribe button. This guide walks through each section and what its settings do.
Before you get started, make sure you have created a feed. Some settings need a paid license. For a full list of what each license level includes, see our Free and paid features guide.
Here is what we will cover:
- Opening the Customize Tab
- Header
- Videos
- Load More Button
- Subscribe Button
- Saving Your Changes
- Frequently Asked Questions
Opening the Customize Tab
To get started, we’ll open the feed you want to change in the feed editor.
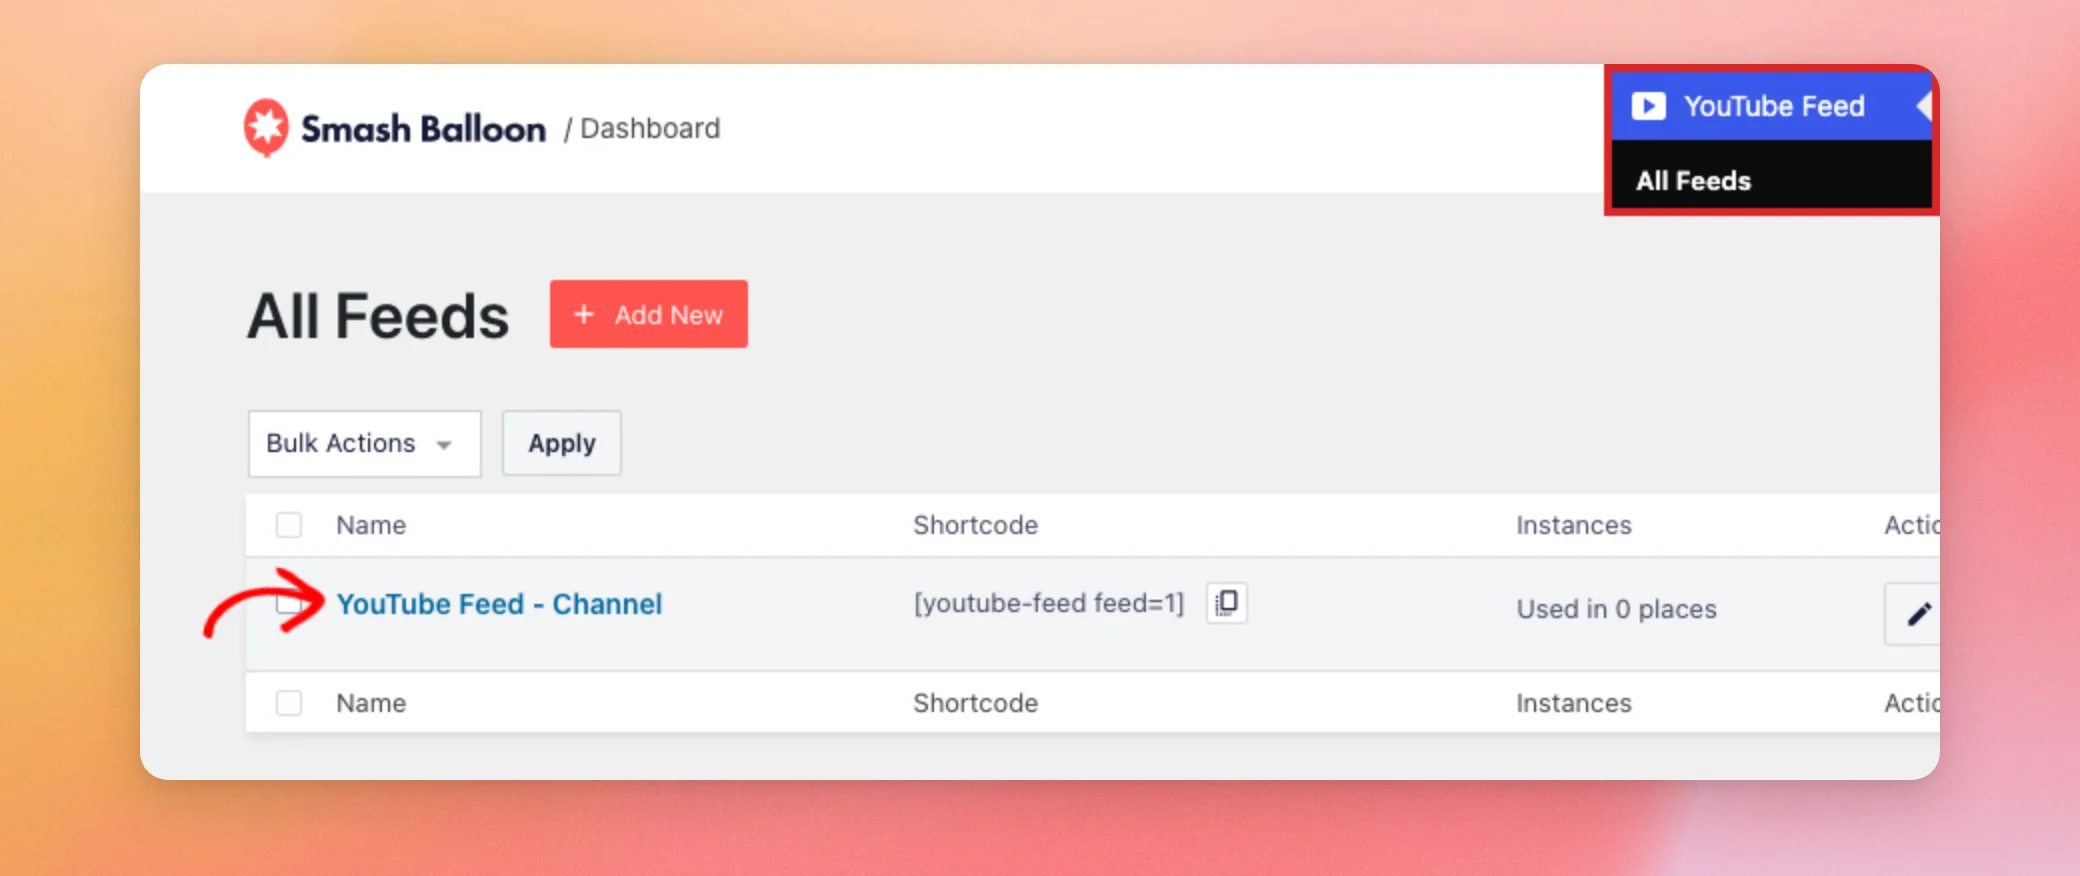
To do this, go to YouTube Feed » All Feeds in your WordPress dashboard and click the name of the feed you want to change.
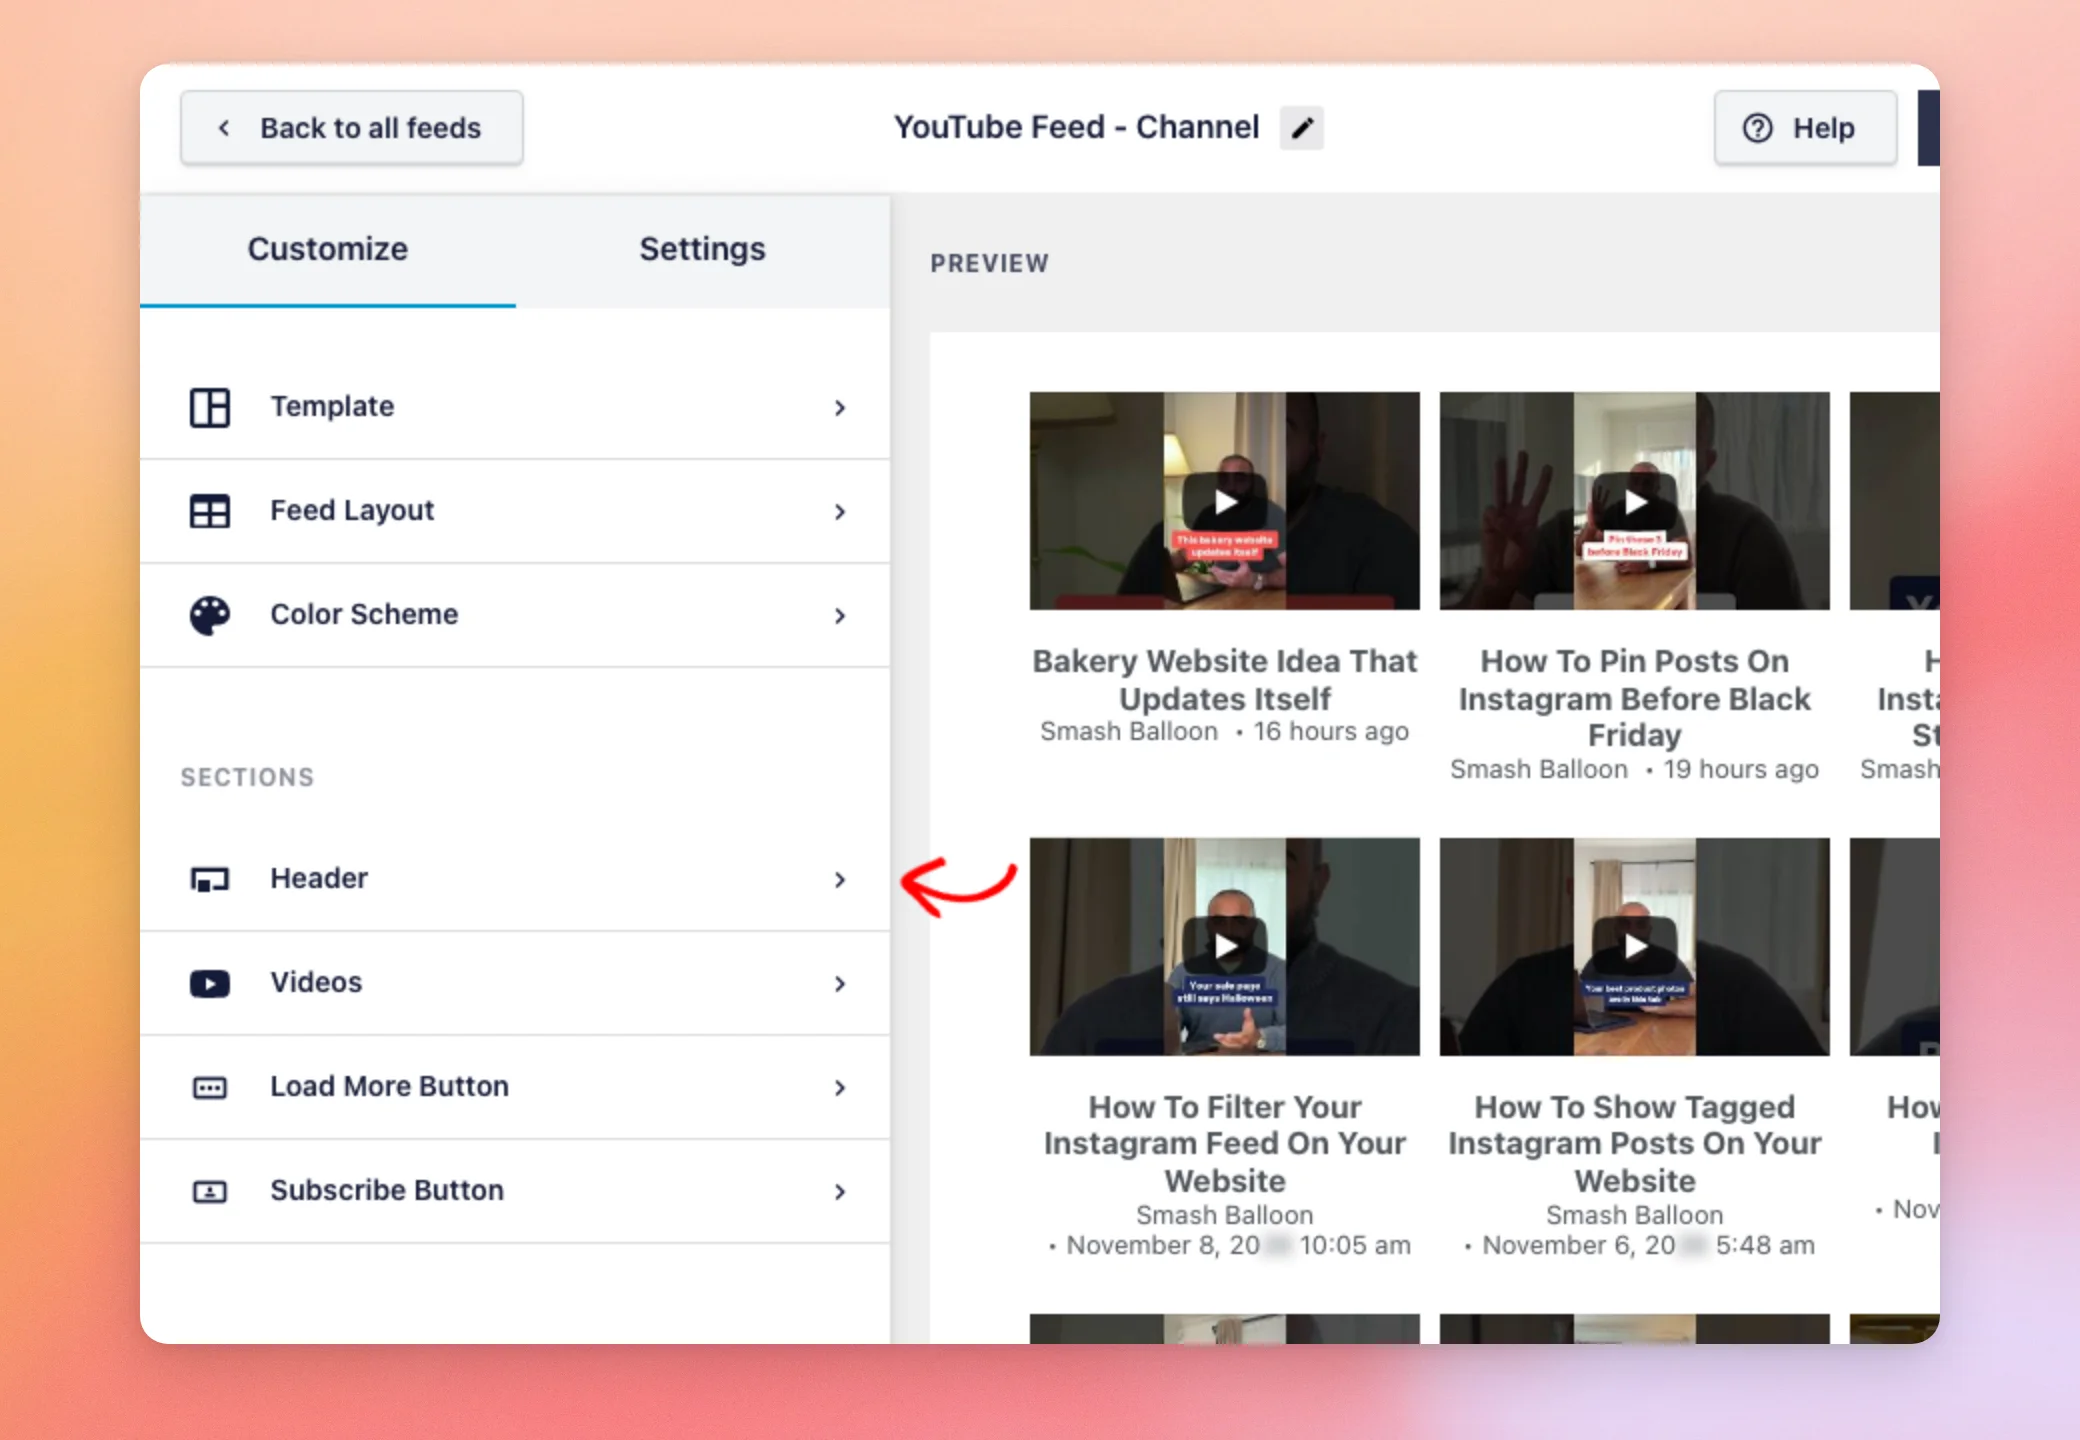
The editor opens on the Customize tab, with a live preview on the right. Each change you make shows in the preview straight away.
At the top of the tab are Template, Feed Layout and Color Scheme. These pick the overall look of the feed. They are not covered here.
Under Sections you will find Header, Videos, Load More Button and Subscribe Button. To open a section, click it. To return, use the back link at the top of the panel.
Now that you know your way around, start with the header.
Header
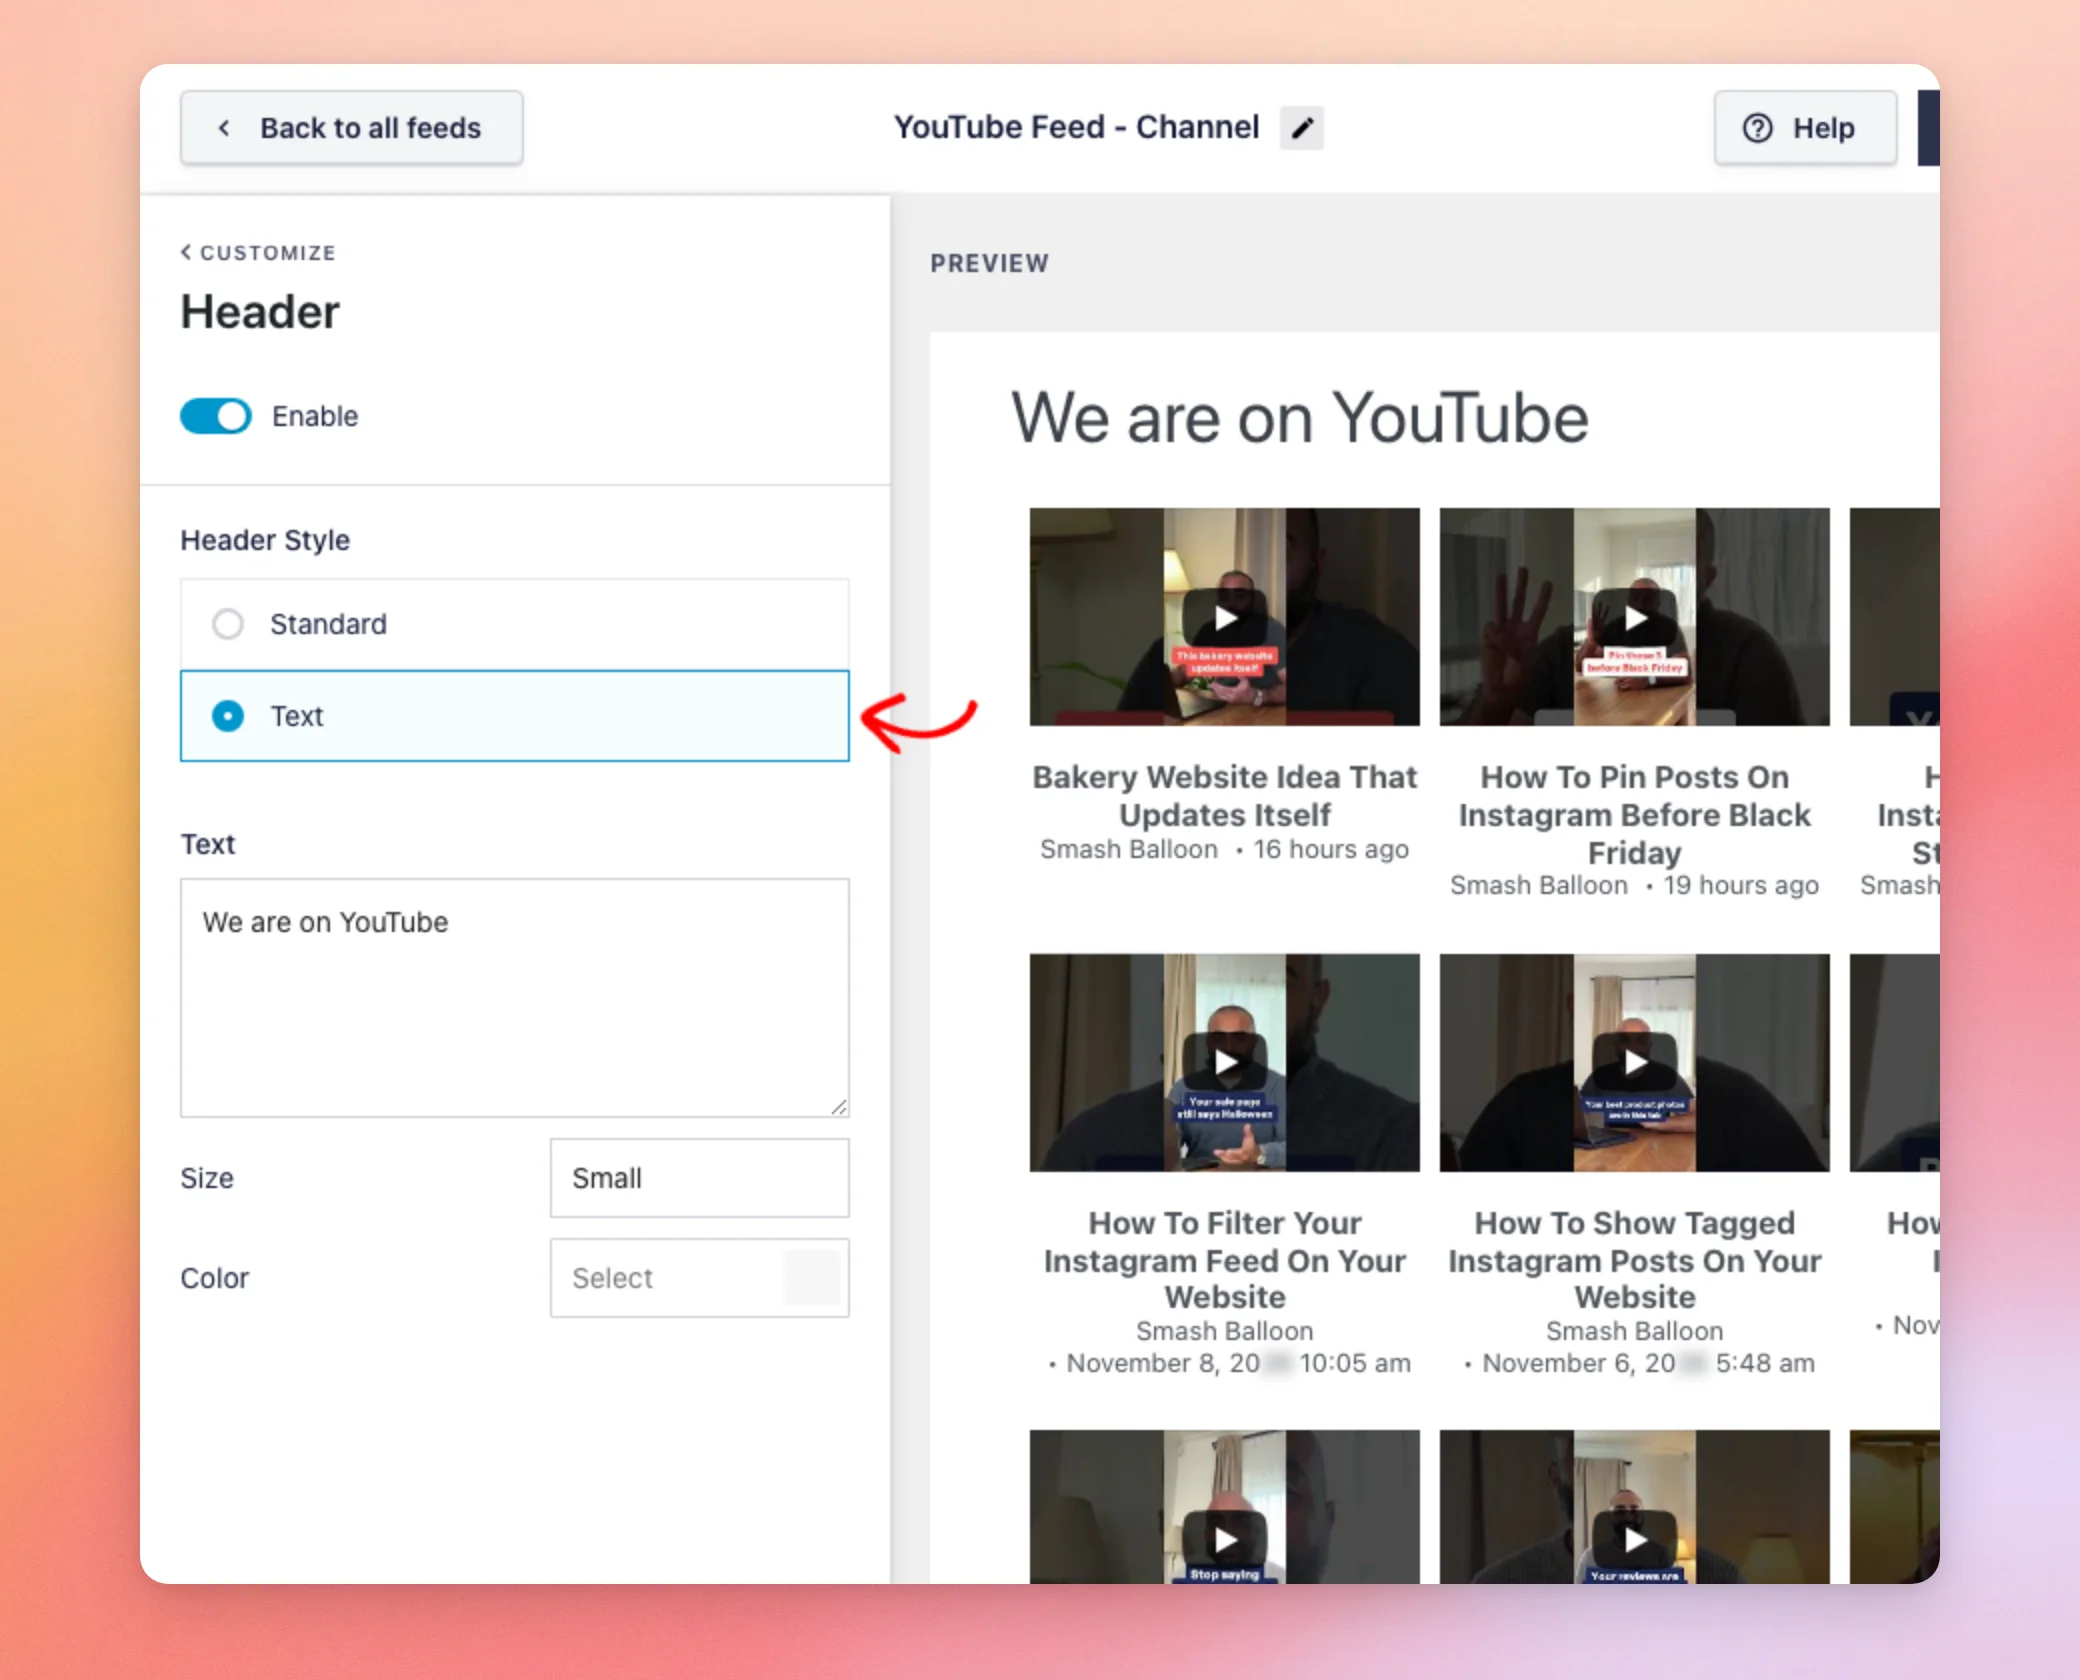
The header sits above your videos. To set it up, click Header. Then switch on Enable to show it. Switch it off to hide it. The preview updates right away.
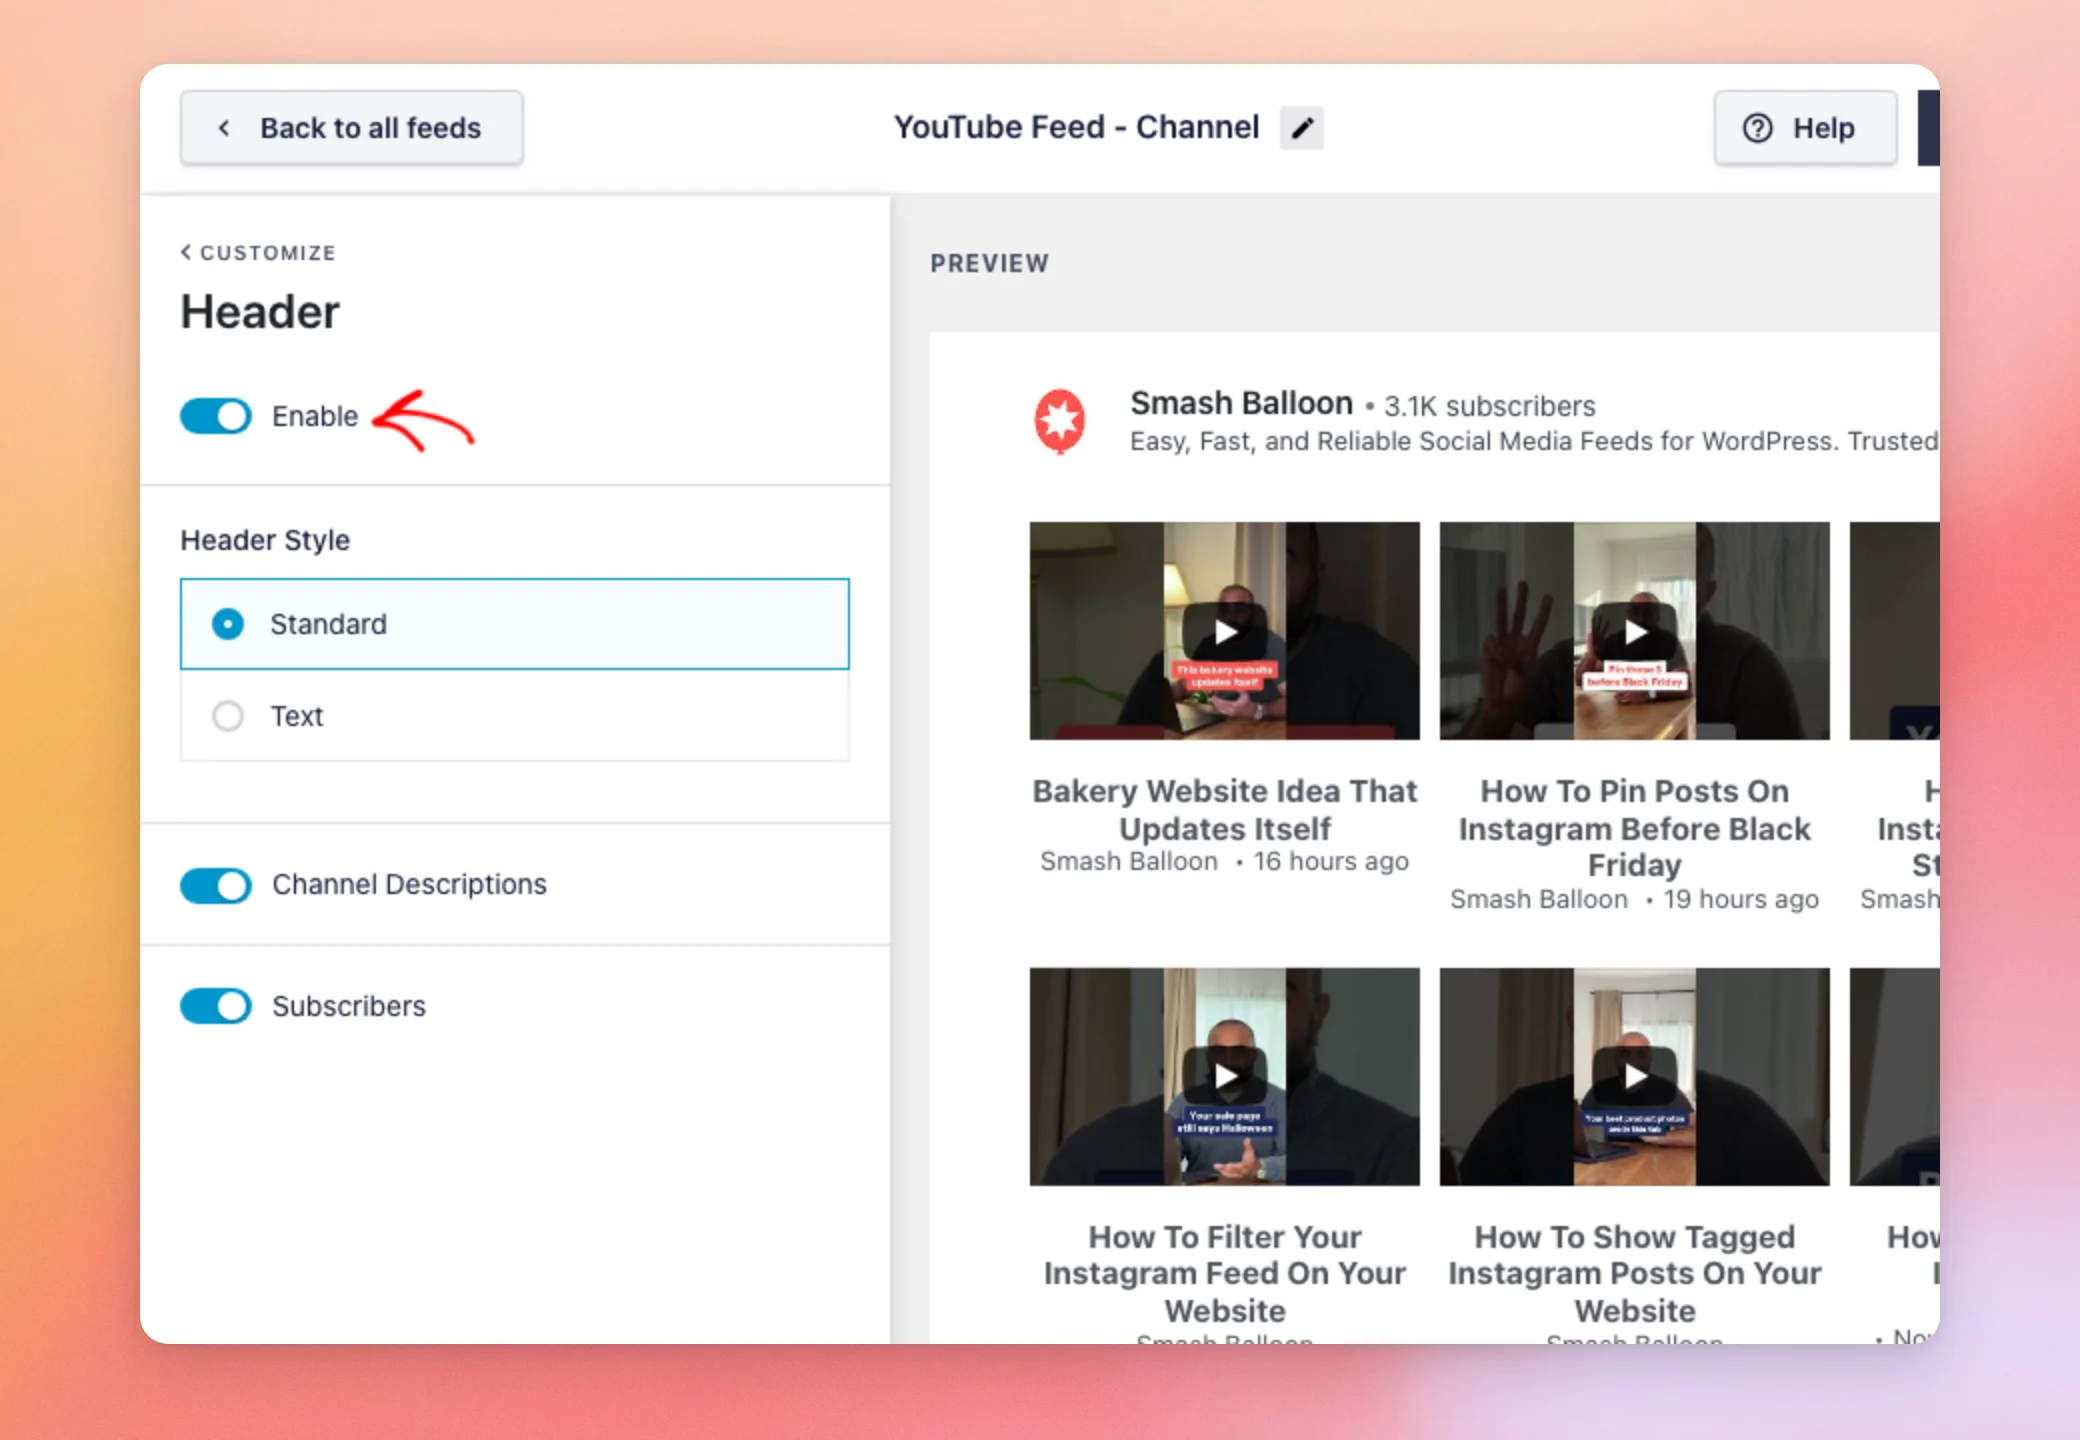
Once the header is on, choose a Header Style:
- Standard shows the channel header. For Channel feeds you can also turn the Channel Descriptions and Subscribers options on or off.
- Text shows a line of your own text instead. To set it, type it in the Text box. Then choose a Size (Small, Medium or Large) and a Color.
With the header set, you are ready to style the videos themselves.
Videos
The Videos section controls how each video looks.
To open it, click Videos.
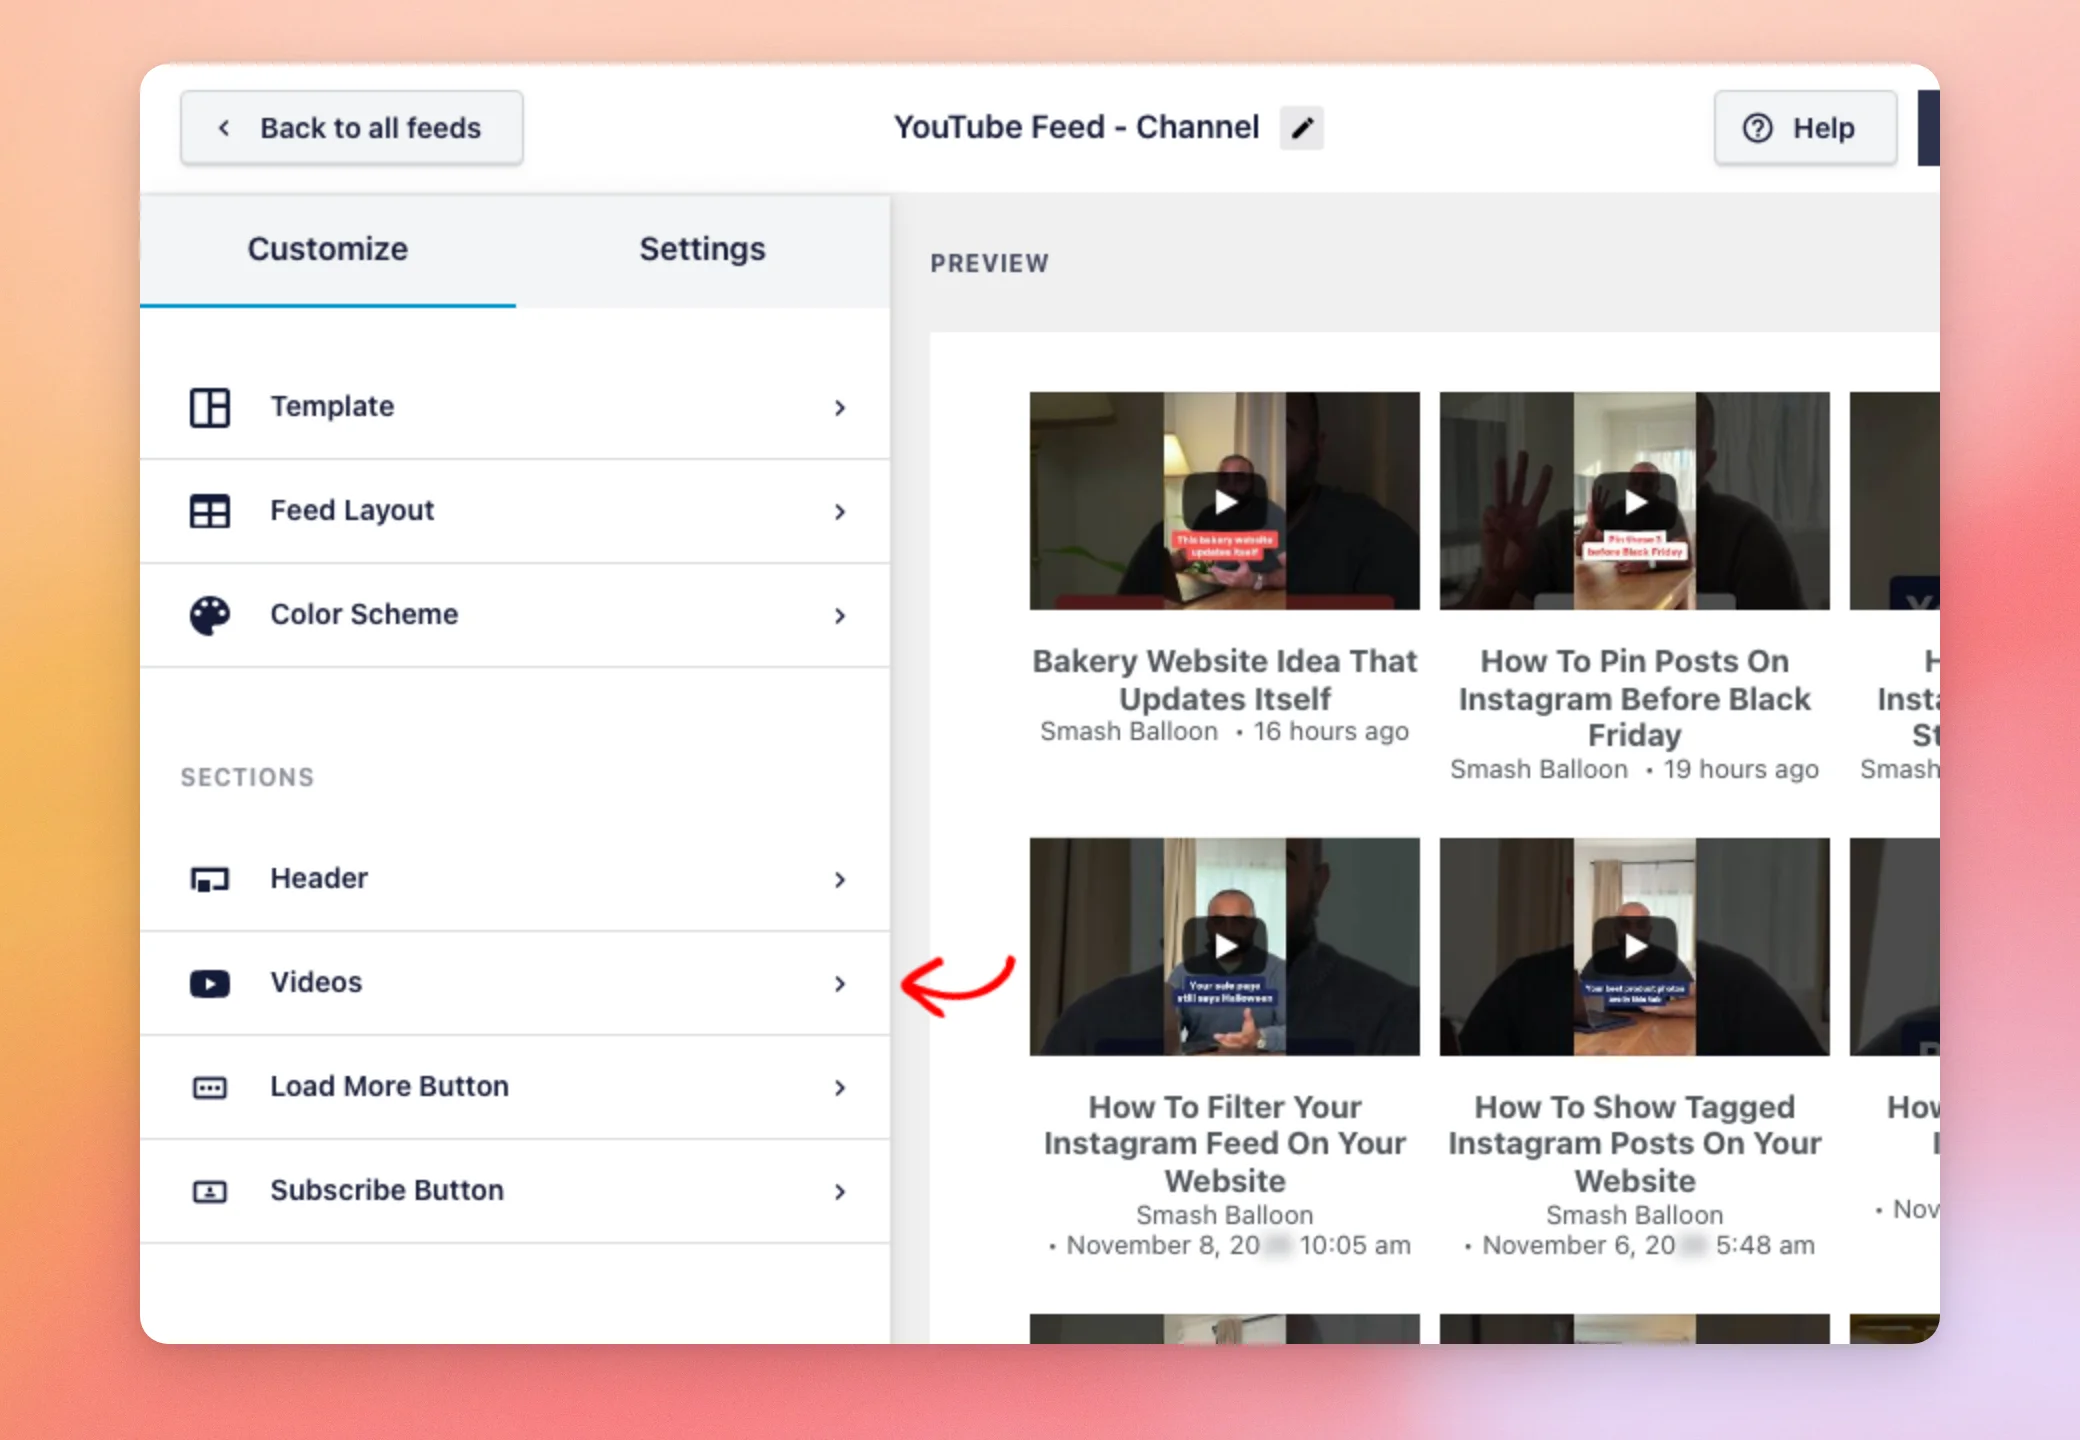
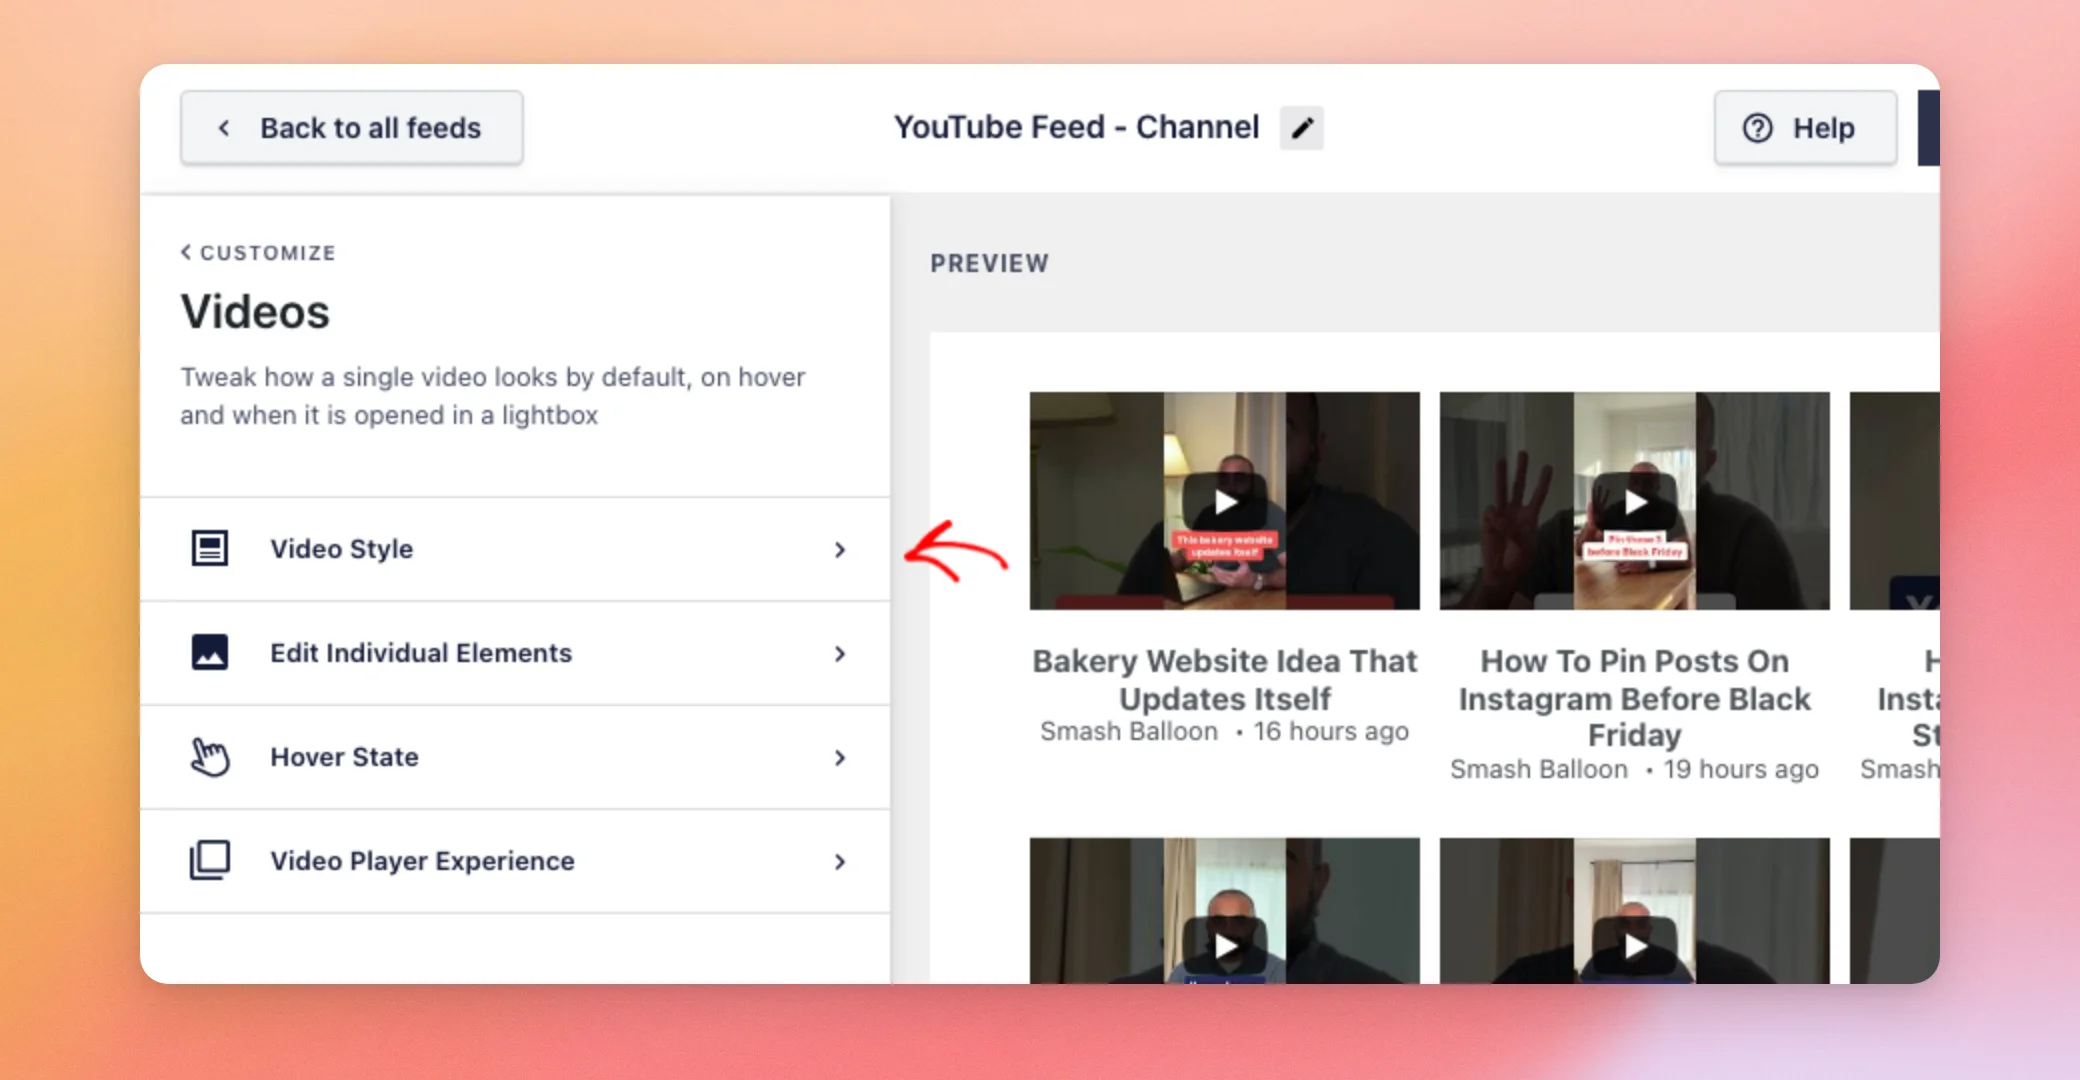
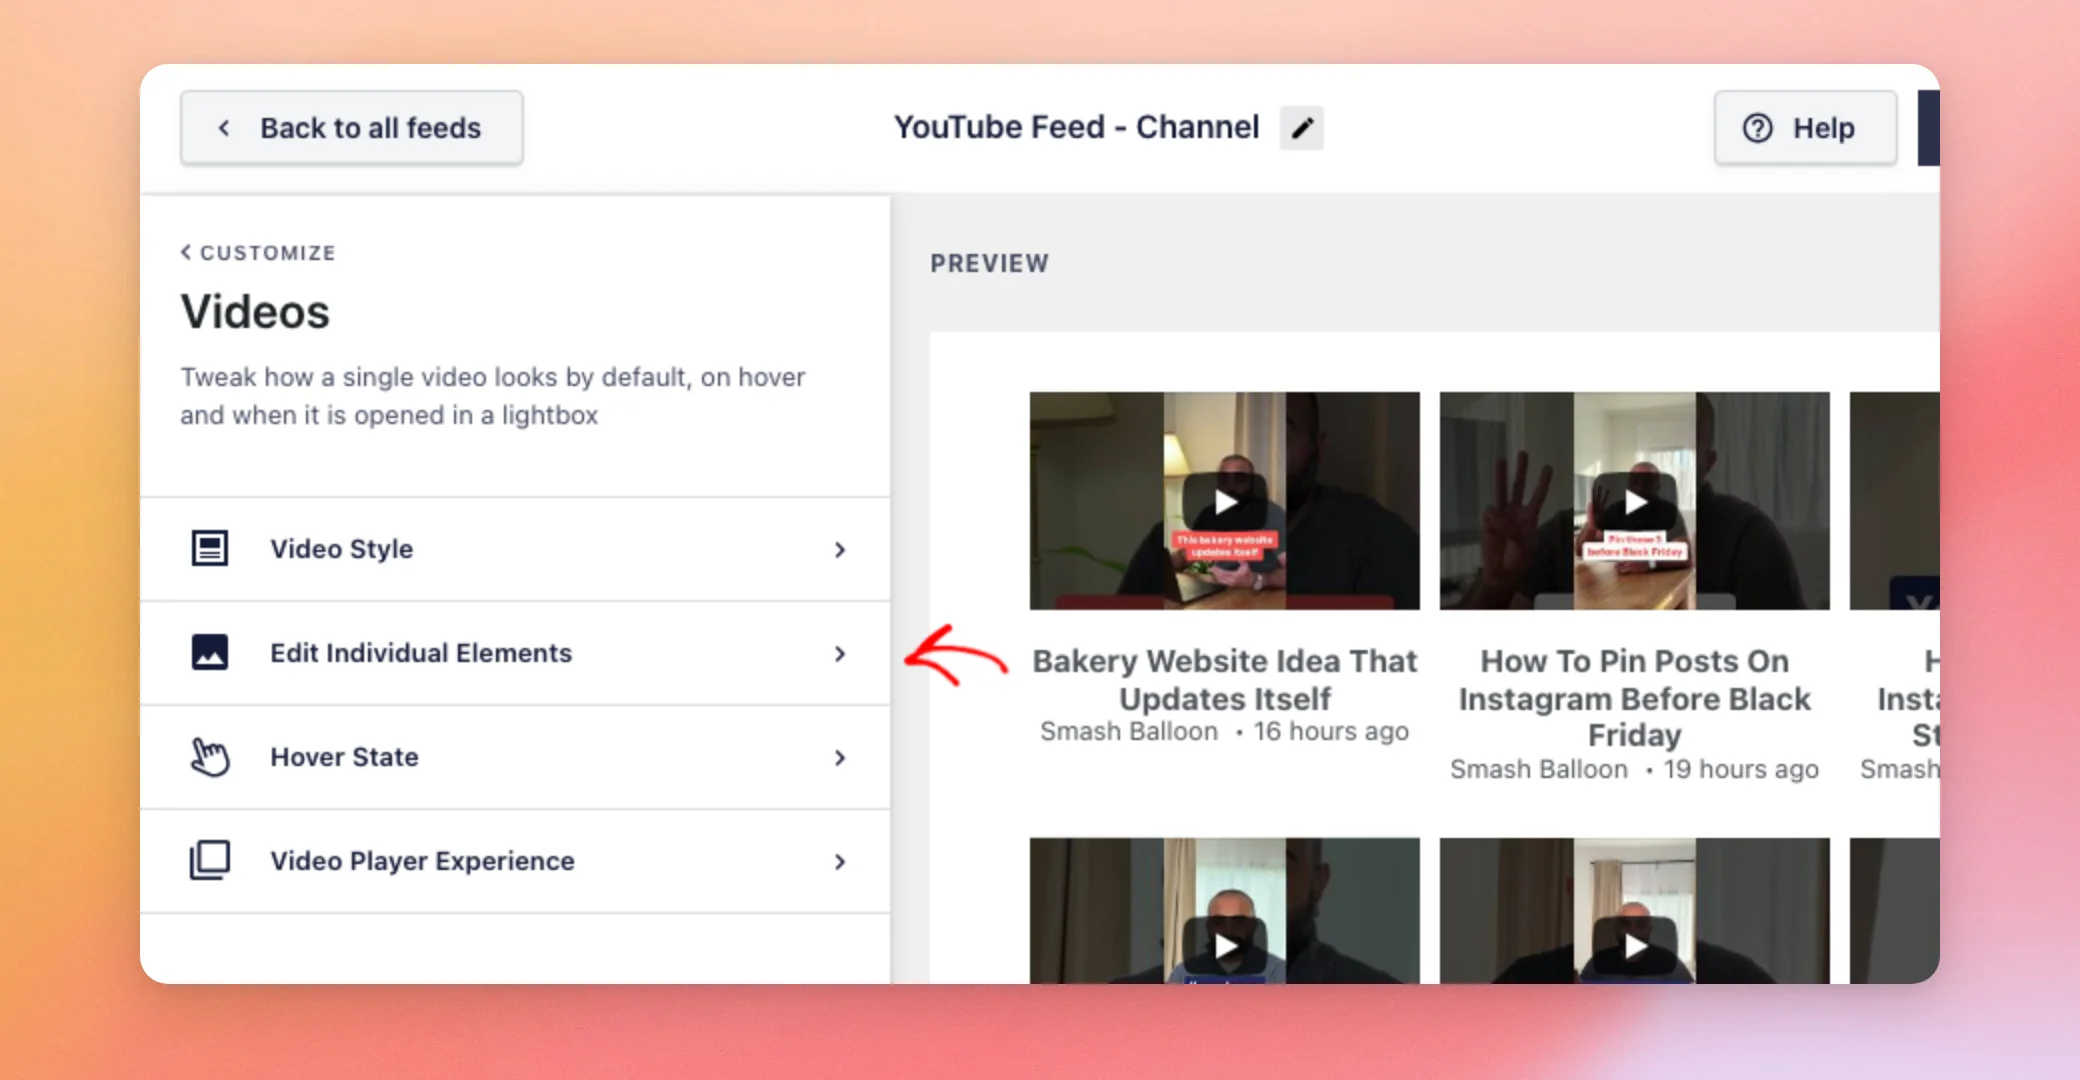
It has 4 parts: Video Style, Edit Individual Elements, Hover State and Video Player Experience.
Video Style
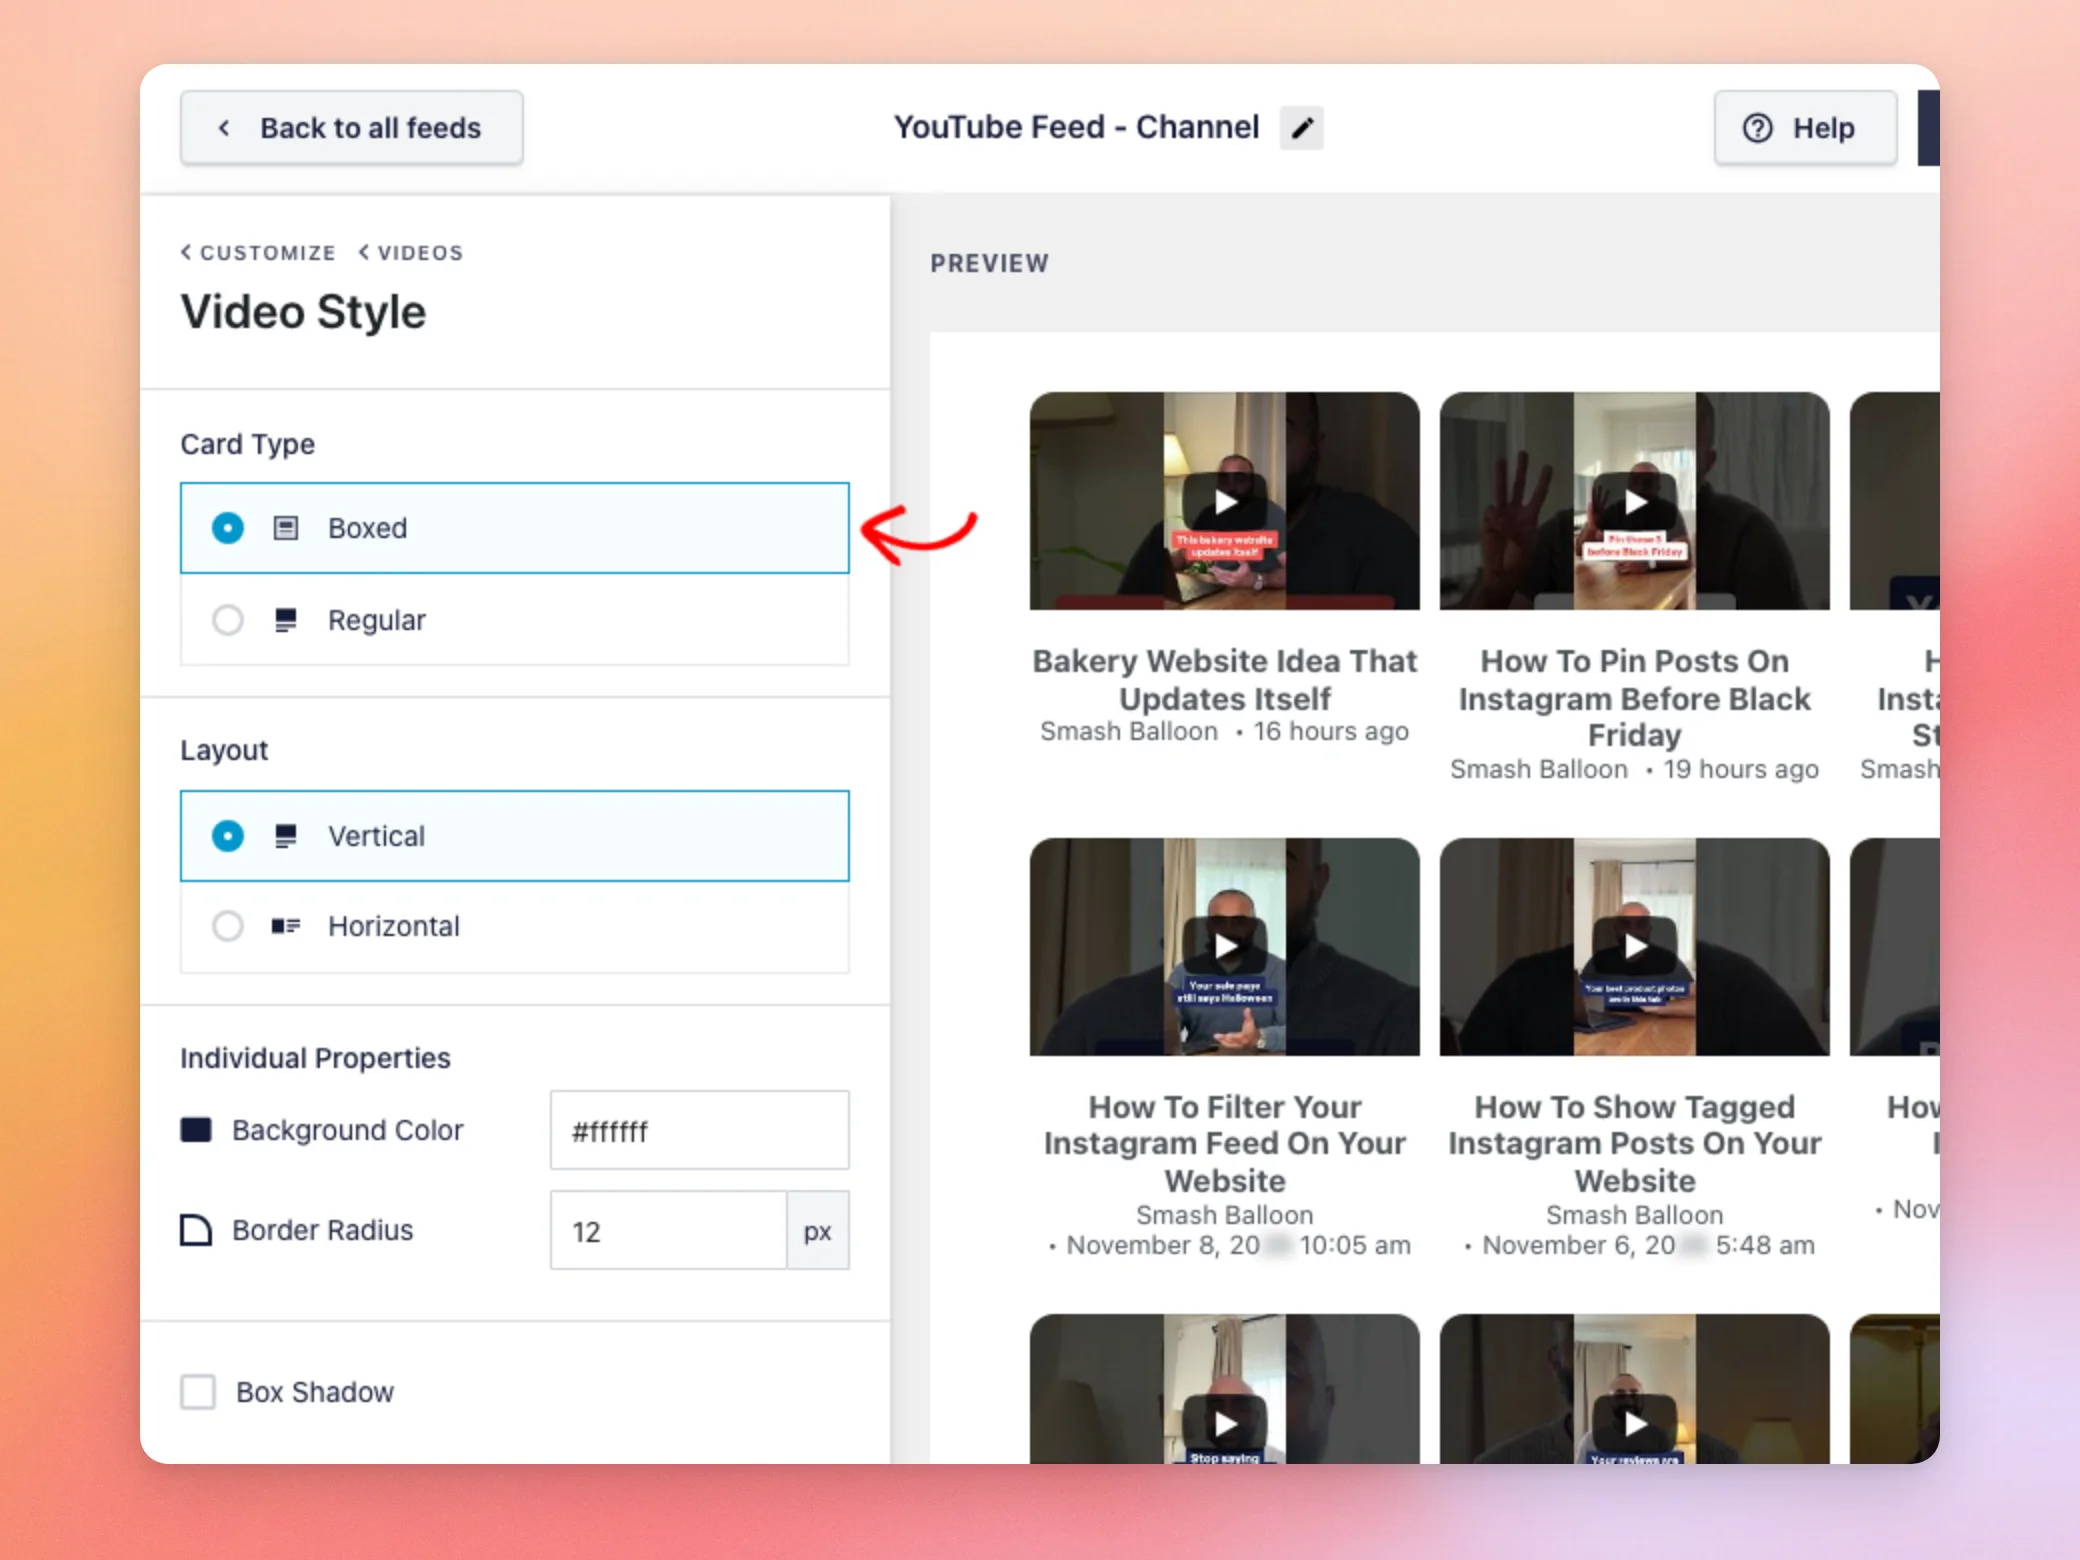
Next, click Video Style to change the card around each video.
- Card Type: Boxed or Regular.
- Layout: Vertical or Horizontal.
- For Boxed cards, Individual Properties let you set the Background Color and Border Radius, and tick Box Shadow.
Edit Individual Elements
Next, click Edit Individual Elements to choose what shows on each video.
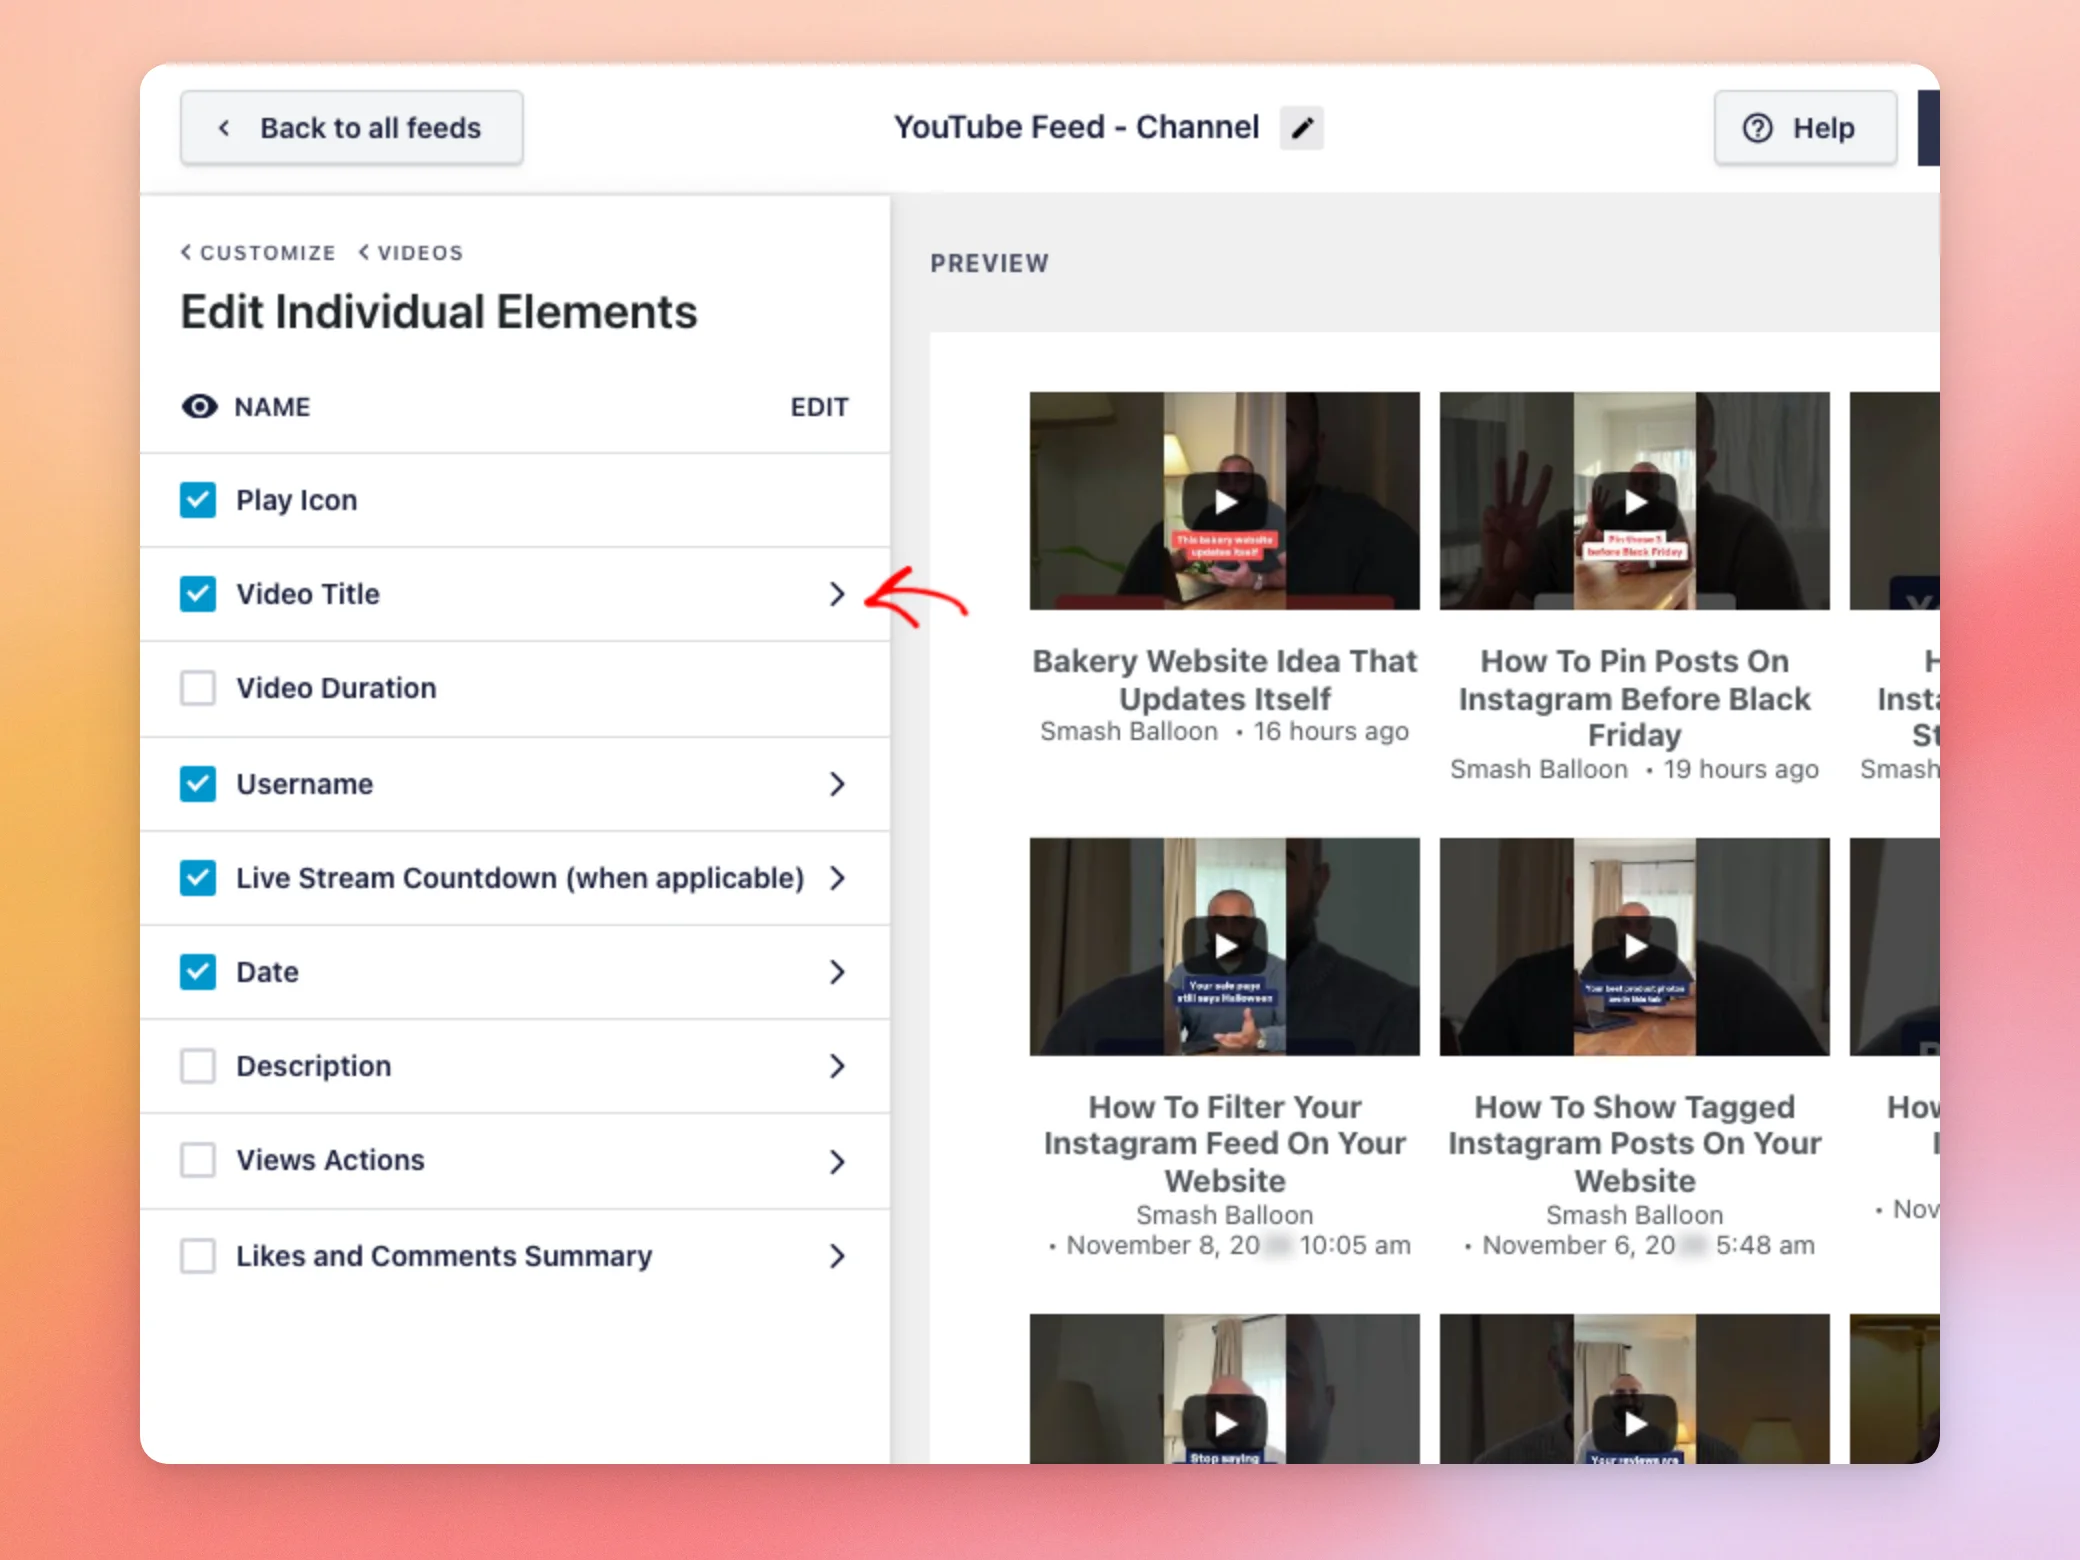
To show an element, tick it. To hide it, untick it. The elements are Play Icon, Video Title, Video Duration, Username, Live Stream Countdown, Date, Description, Views Actions, and Likes and Comments Summary.
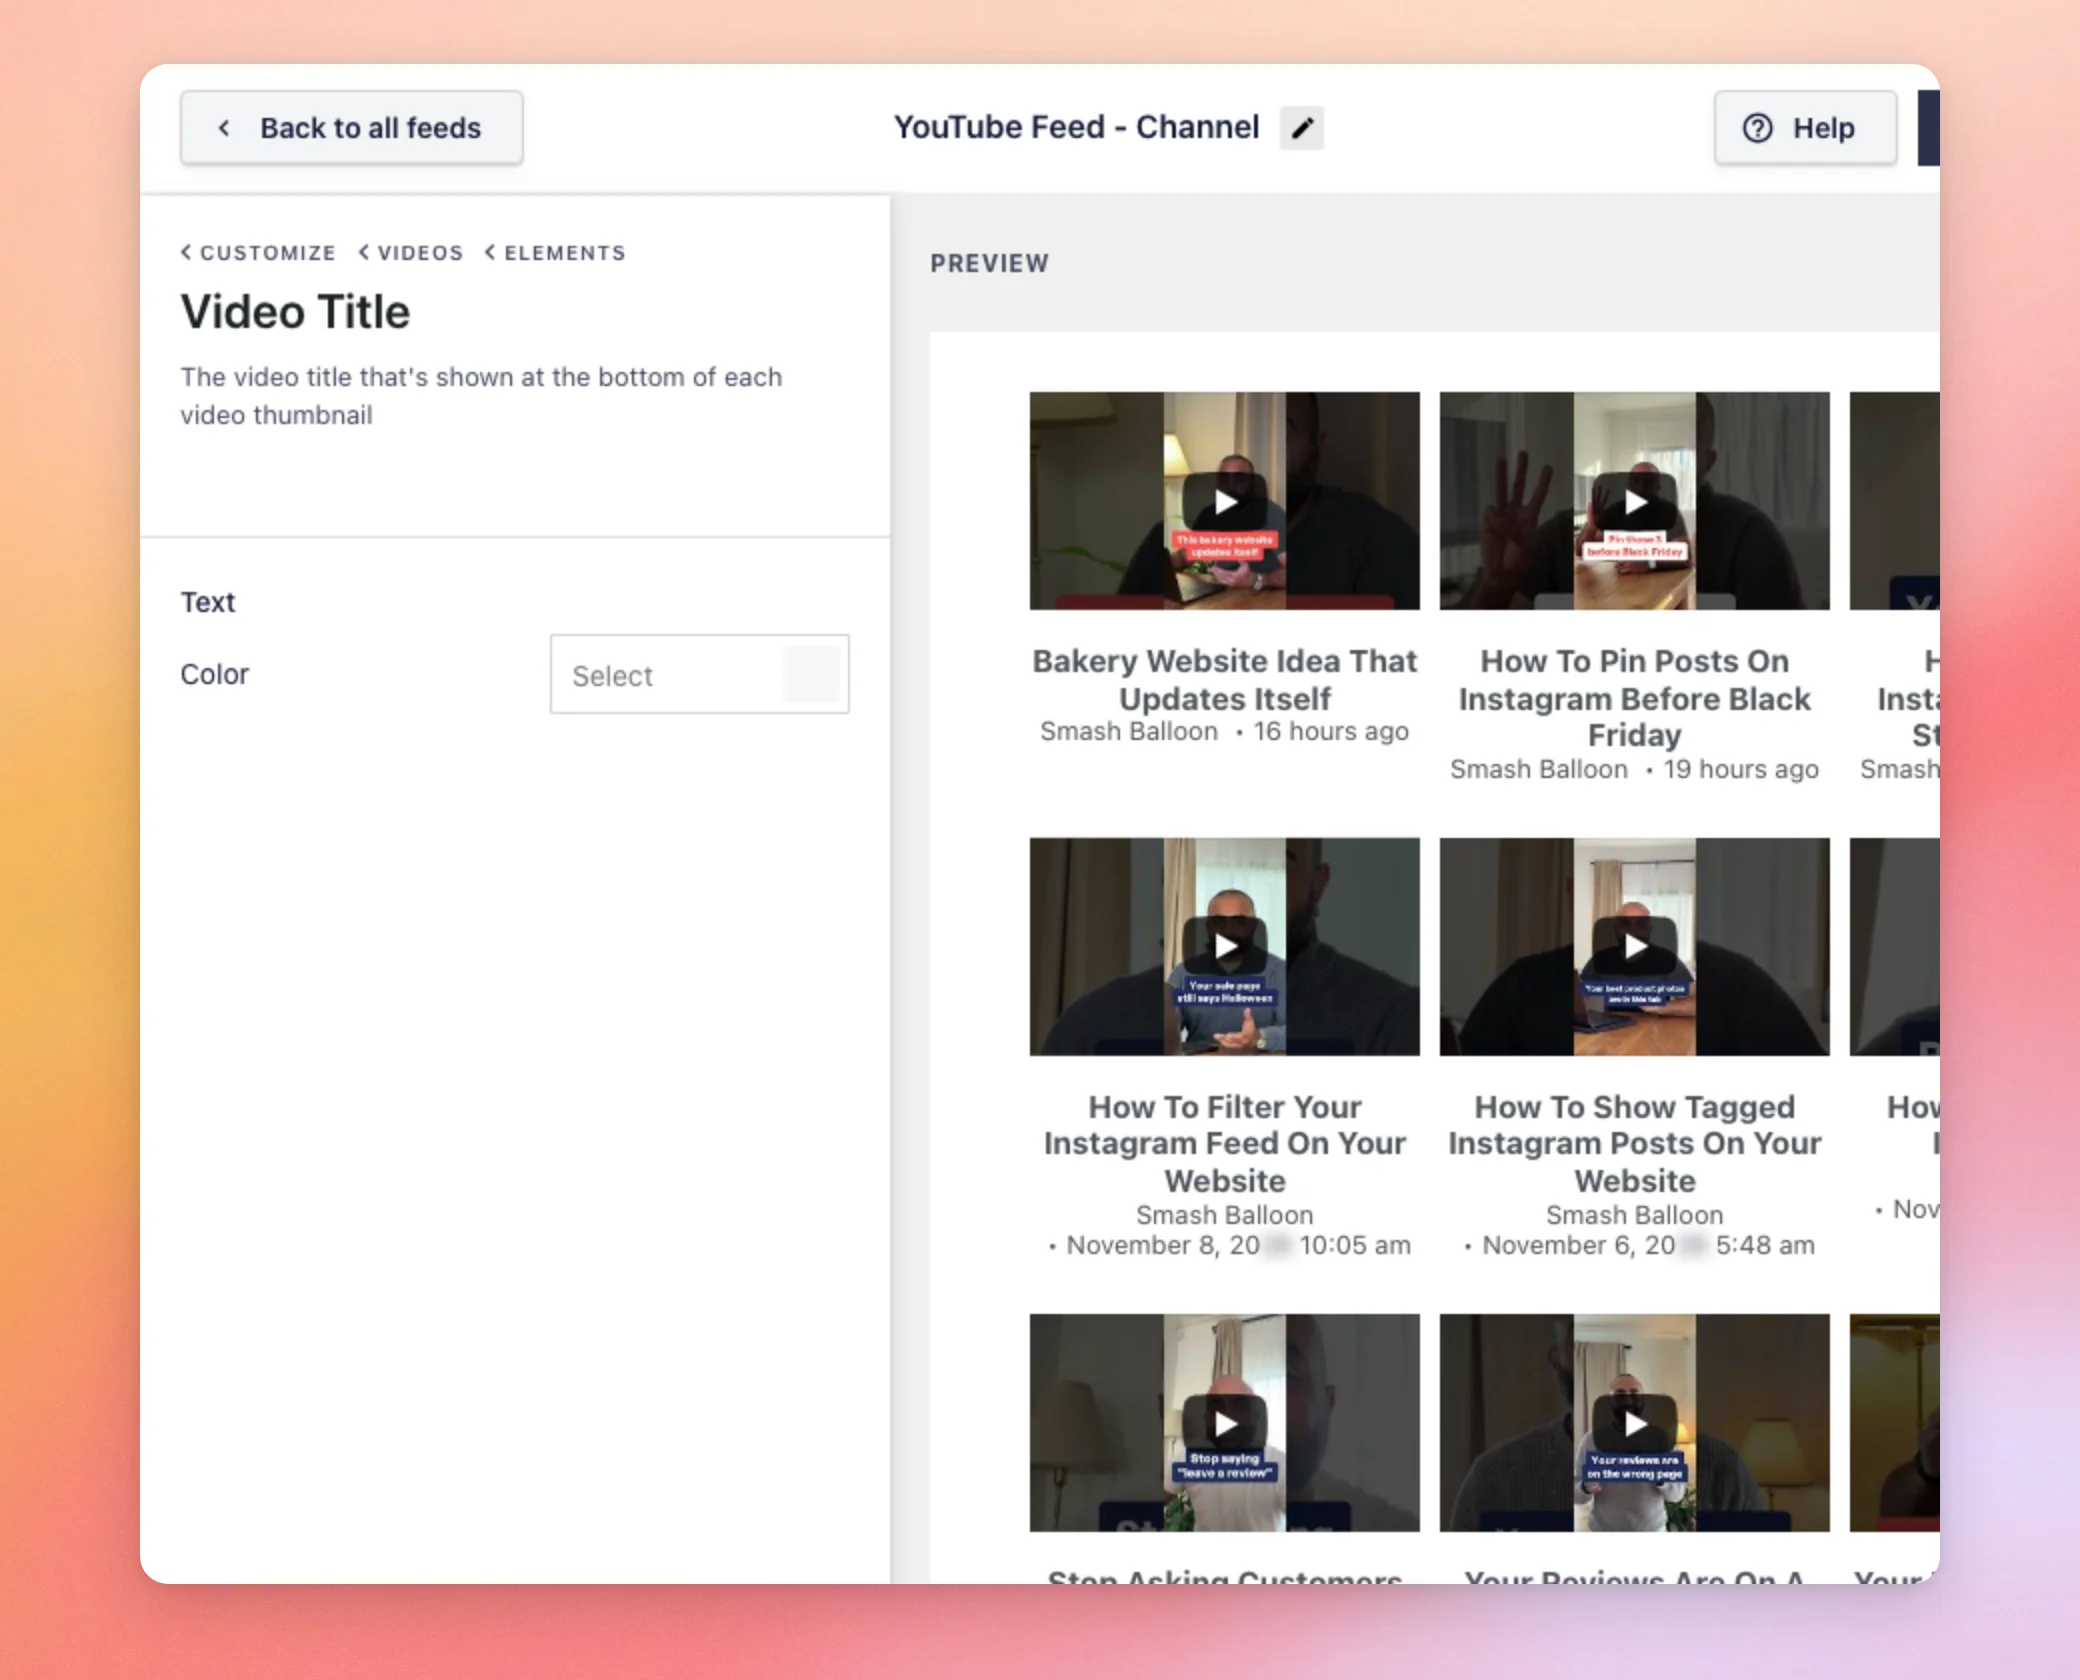
To style an element, click the arrow next to it. For example, click the arrow next to Video Title to change its color.
The arrow opens that element’s own settings, such as the Color control for the Video Title.
Showing the Video Title and the other elements beyond the Play Icon needs a paid license. Views Actions and Likes and Comments Summary also need an API key.
Hover State
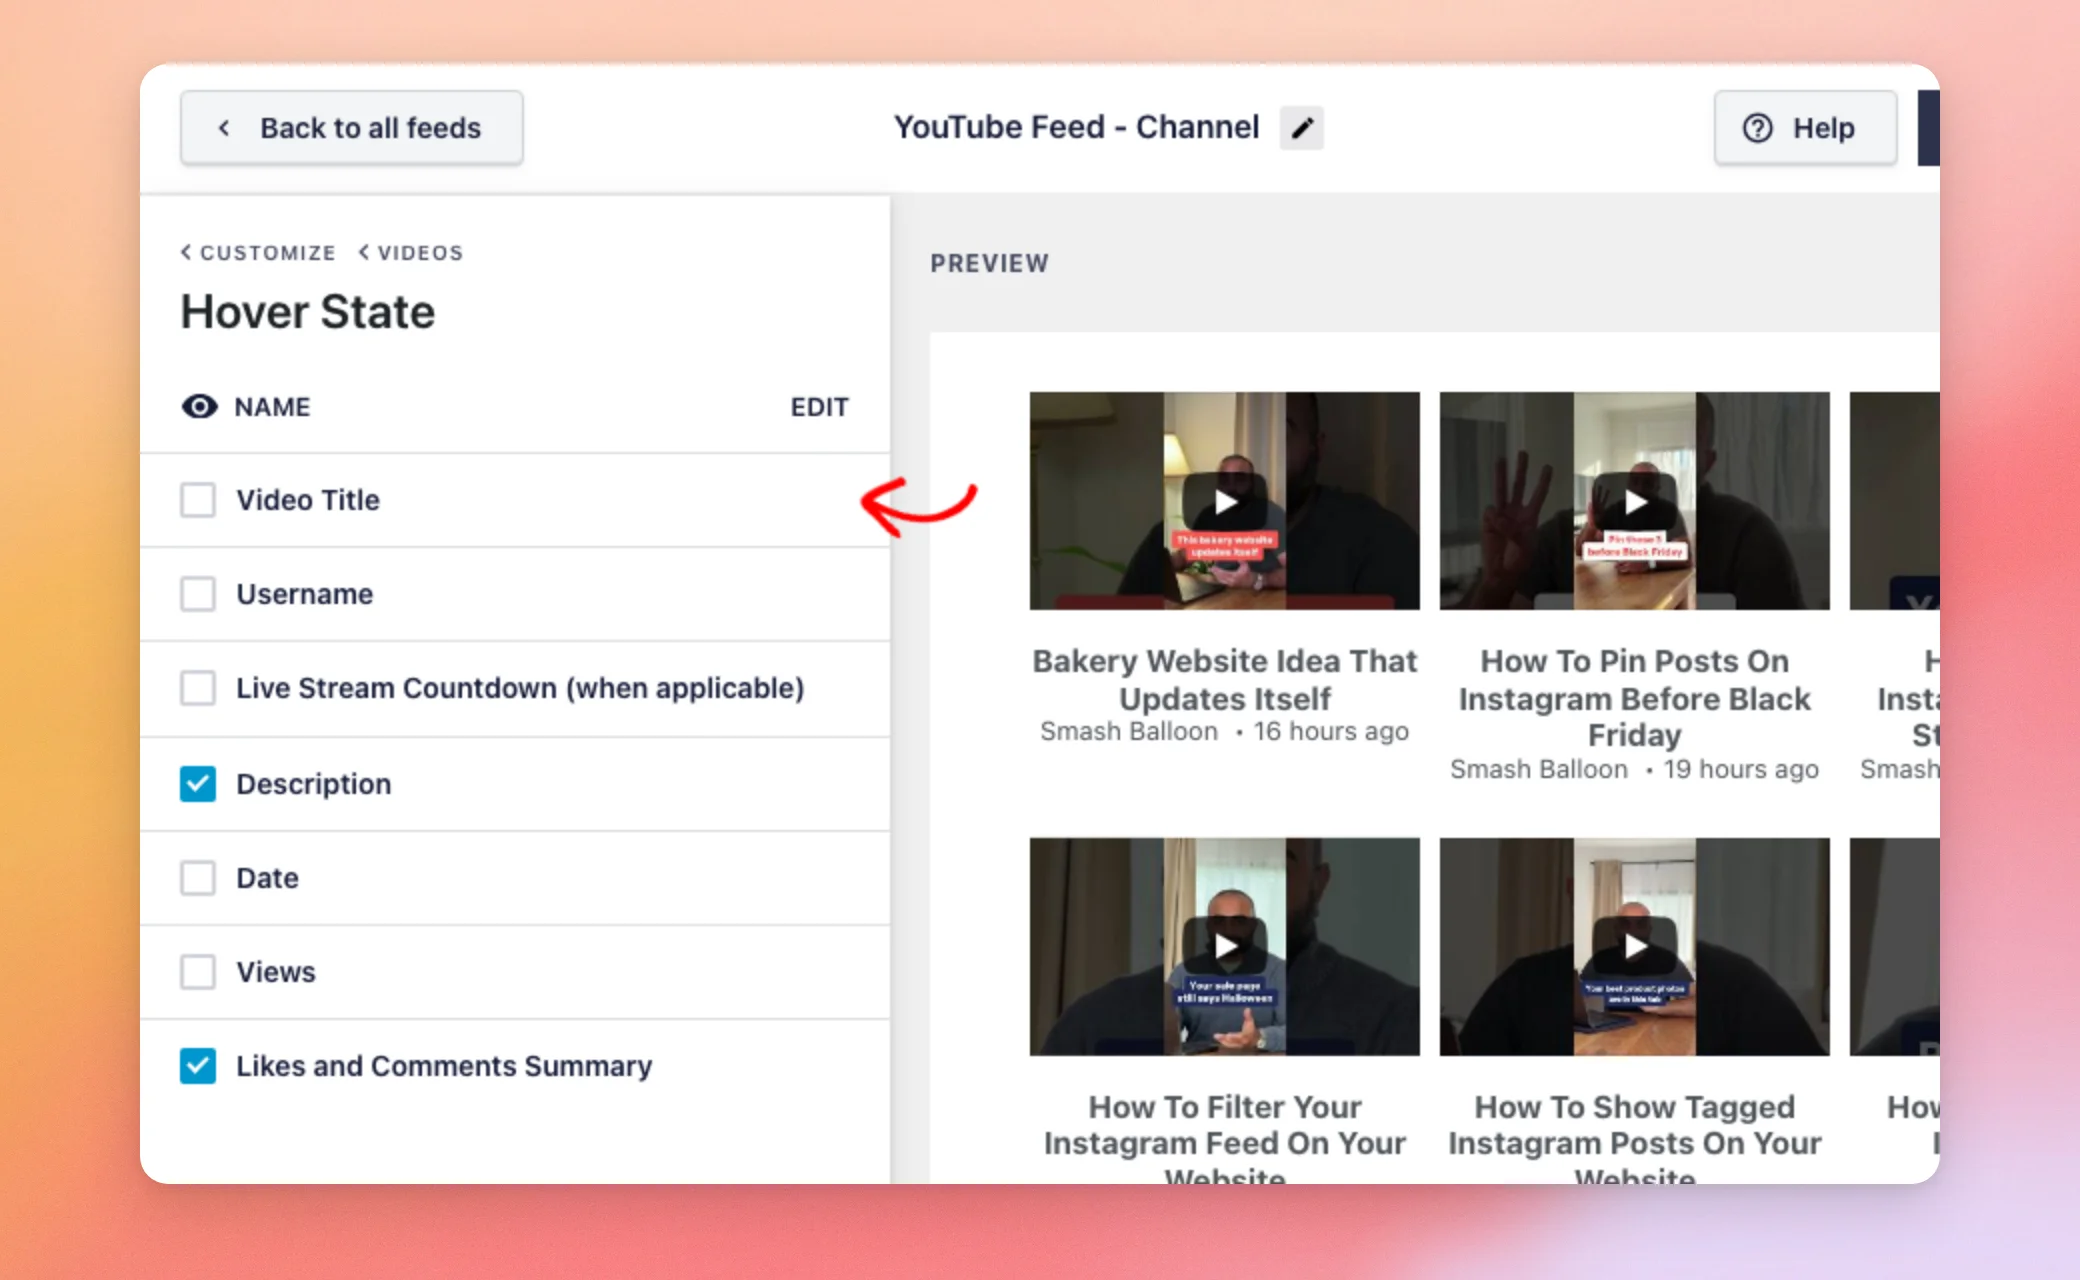
Next, click Hover State to choose what appears when a visitor moves the mouse over a video.
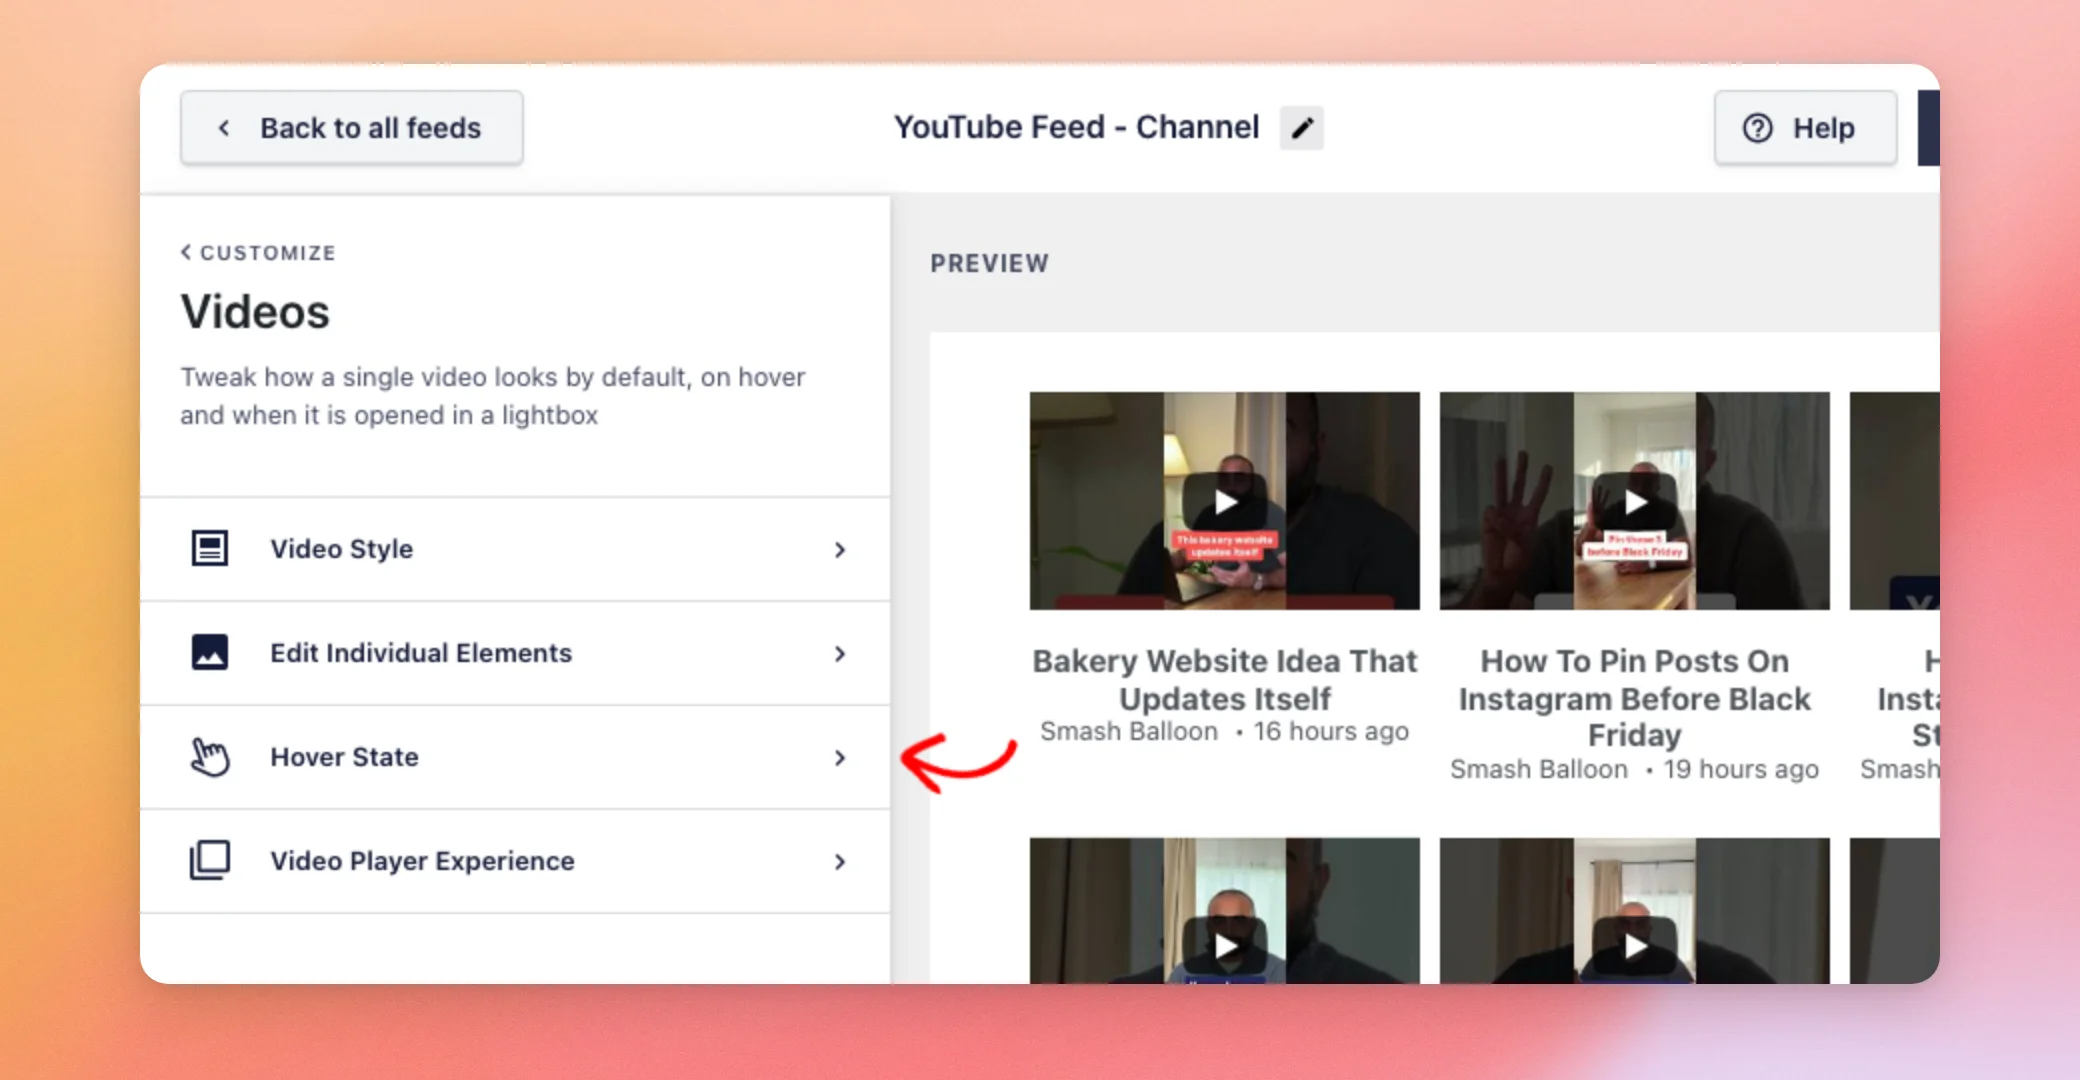
Then tick the elements you want: Video Title, Username, Live Stream Countdown, Description, Date, Views, and Likes and Comments Summary.
Video Player Experience
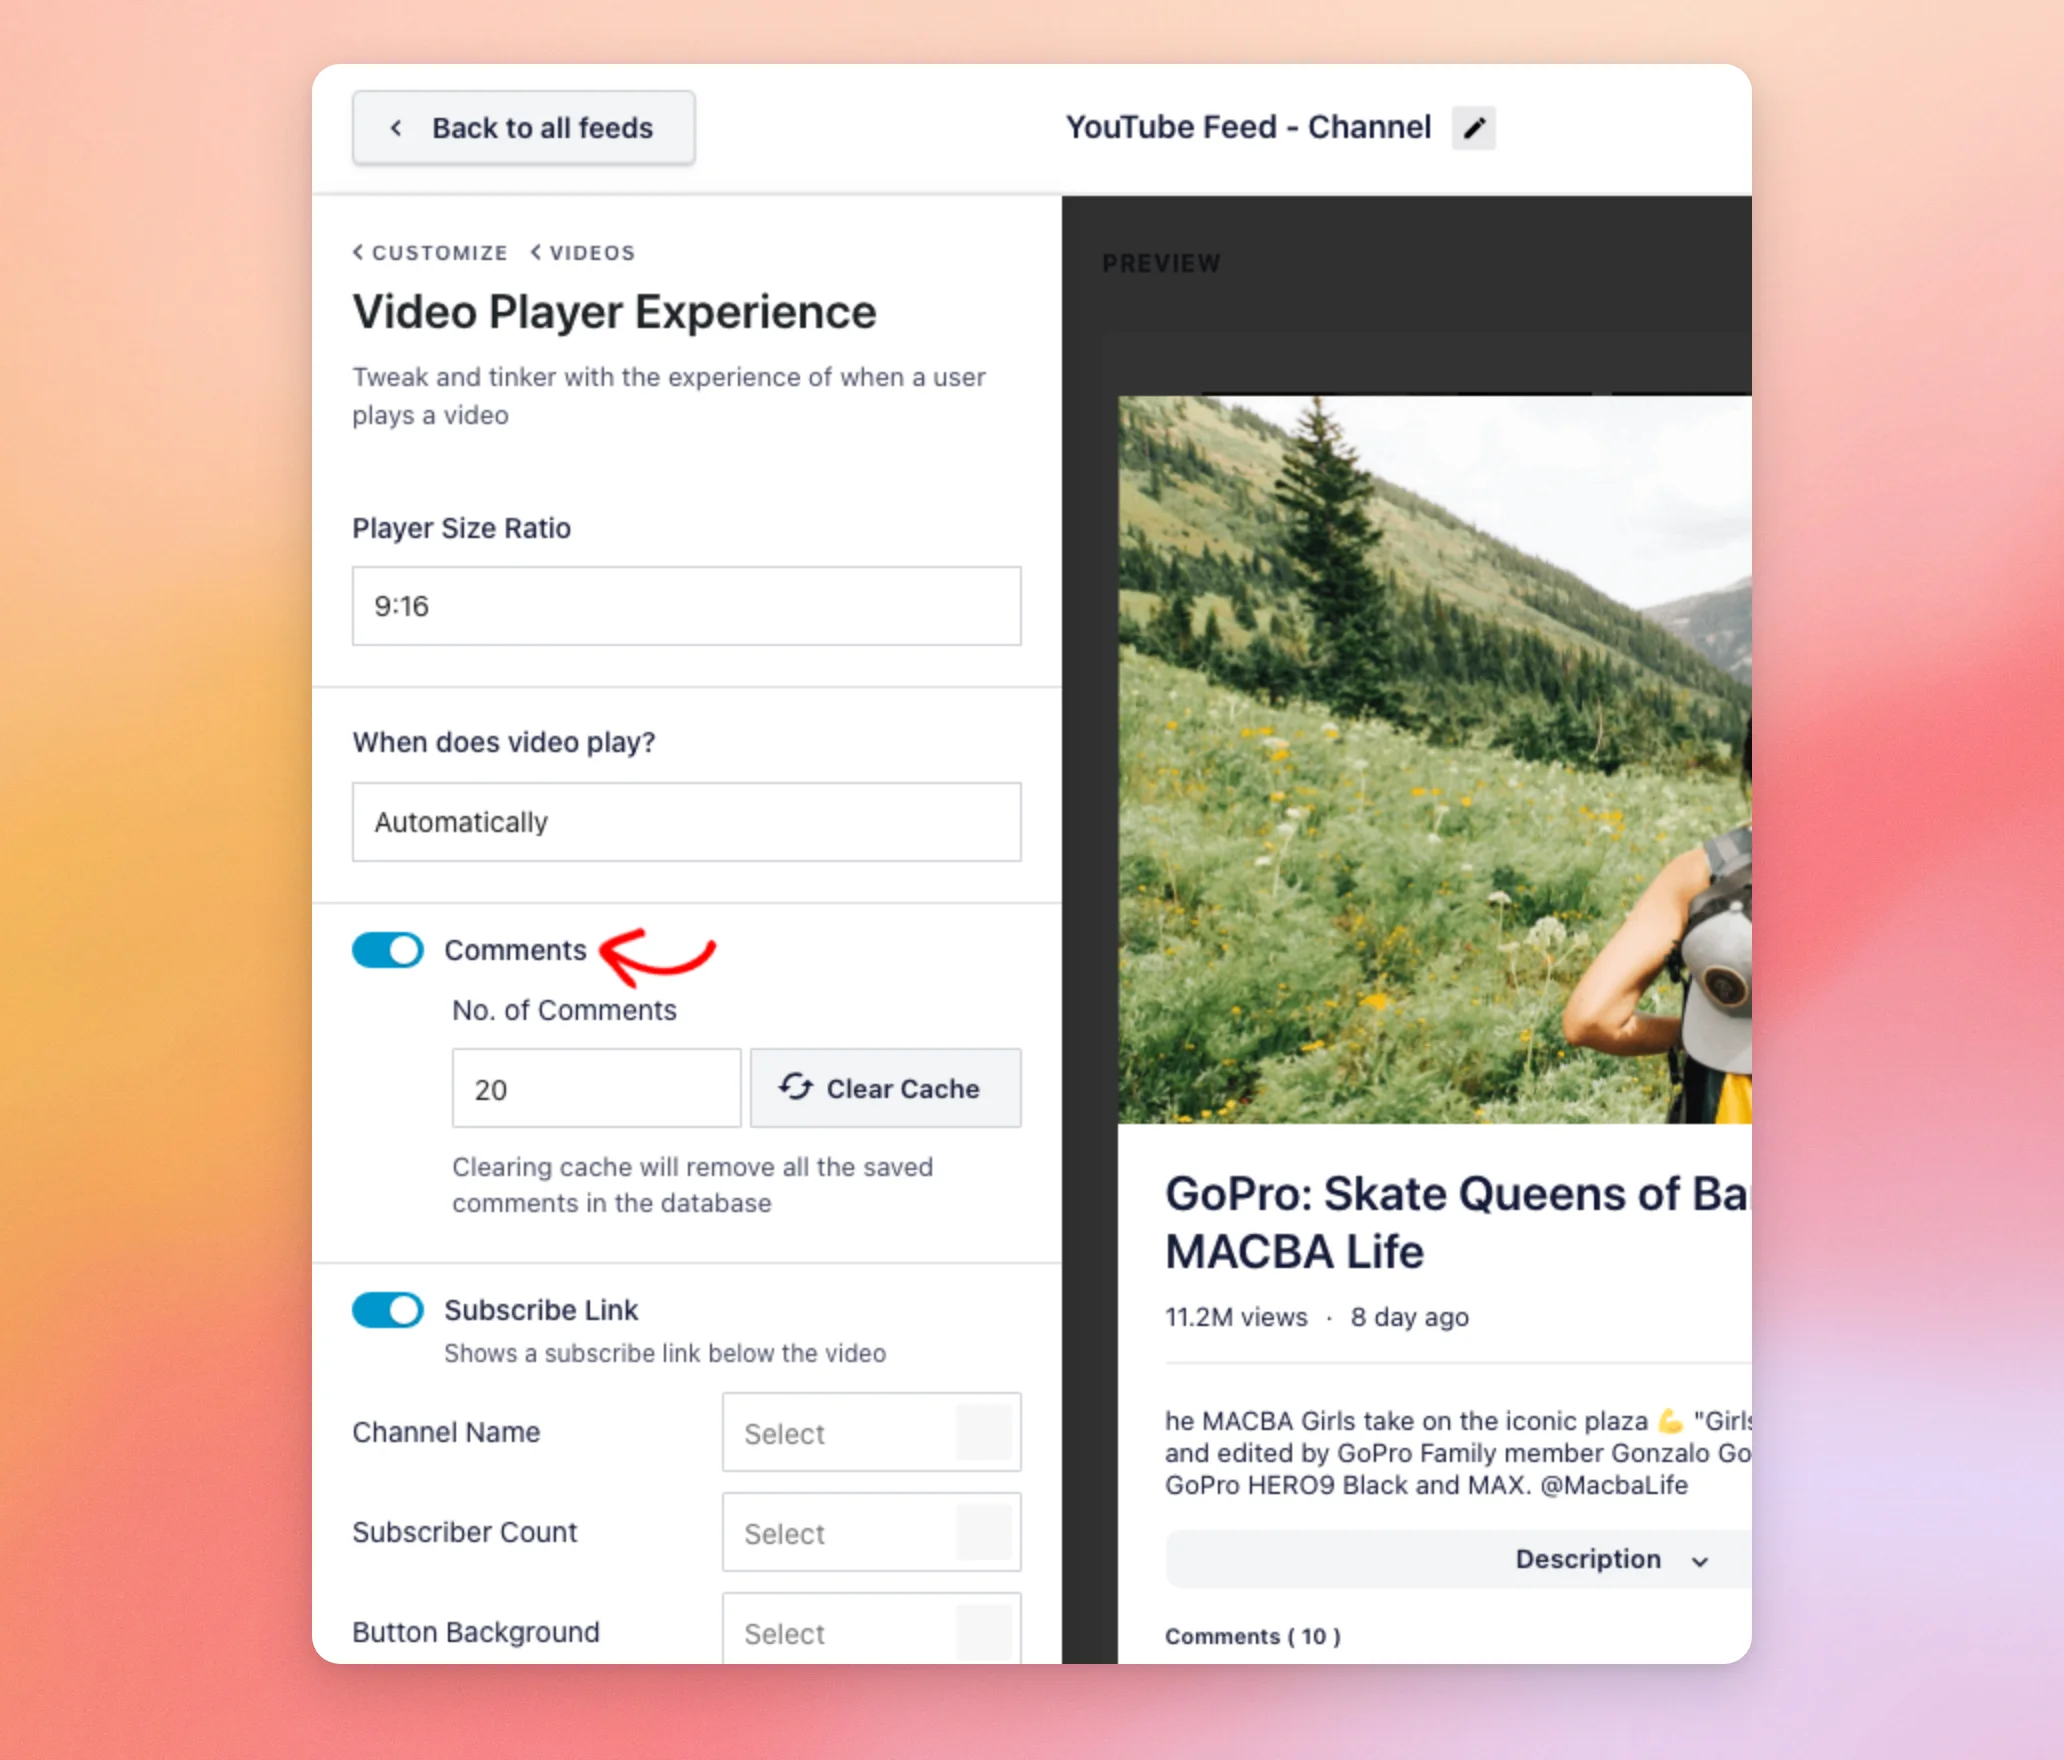
Video Player Experience controls what happens when a visitor plays a video. It includes the player size ratio, when the video plays, Comments and a Subscribe Link.
To show comments with the video, switch on Comments. Switch it off to hide them. Next, set how many to show in No. of Comments. To remove the saved comments from your database, use Clear Cache.
To show a link to subscribe below the video, switch on Subscribe Link. Switch it off to hide it. Then set colors for the Channel Name, Subscriber Count, Button Background, and Button Text.
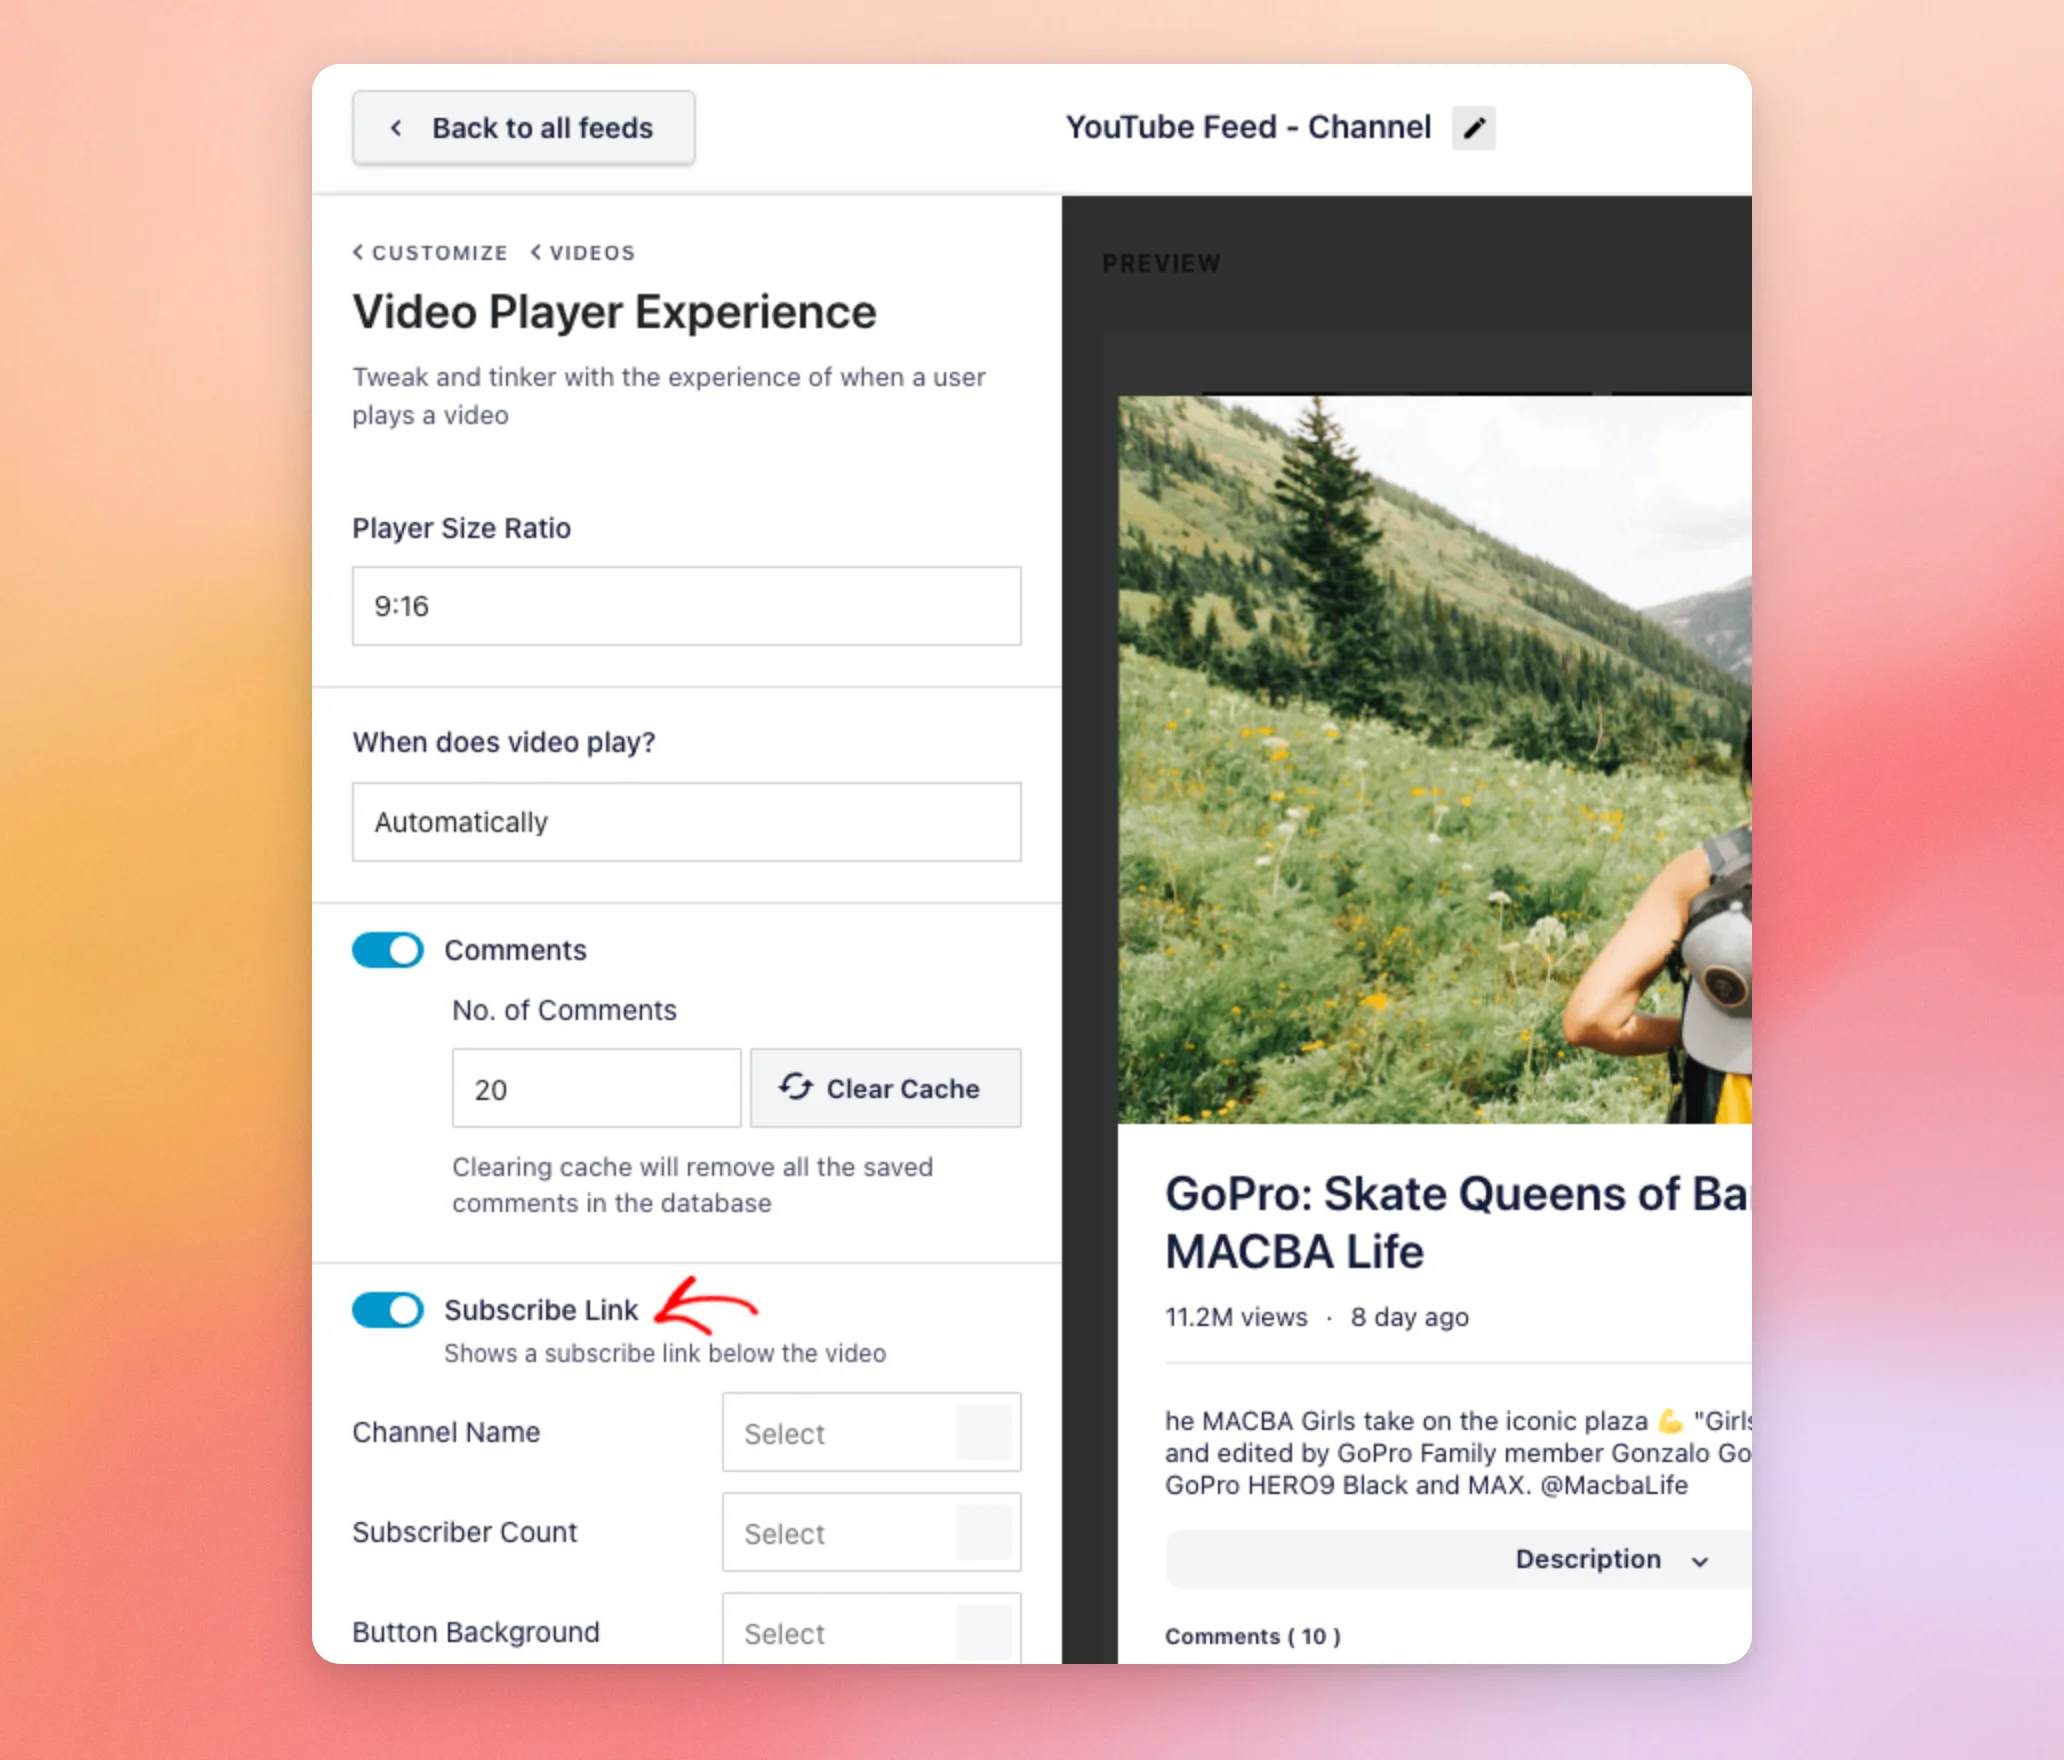
Comments and the Subscribe Link need a paid license. The Call to Action options are also in this panel. To set them up, see our guide to pause and end-of-video actions.
Load More Button
The Load More button lets visitors load the next set of videos. To change it, click Load More Button.
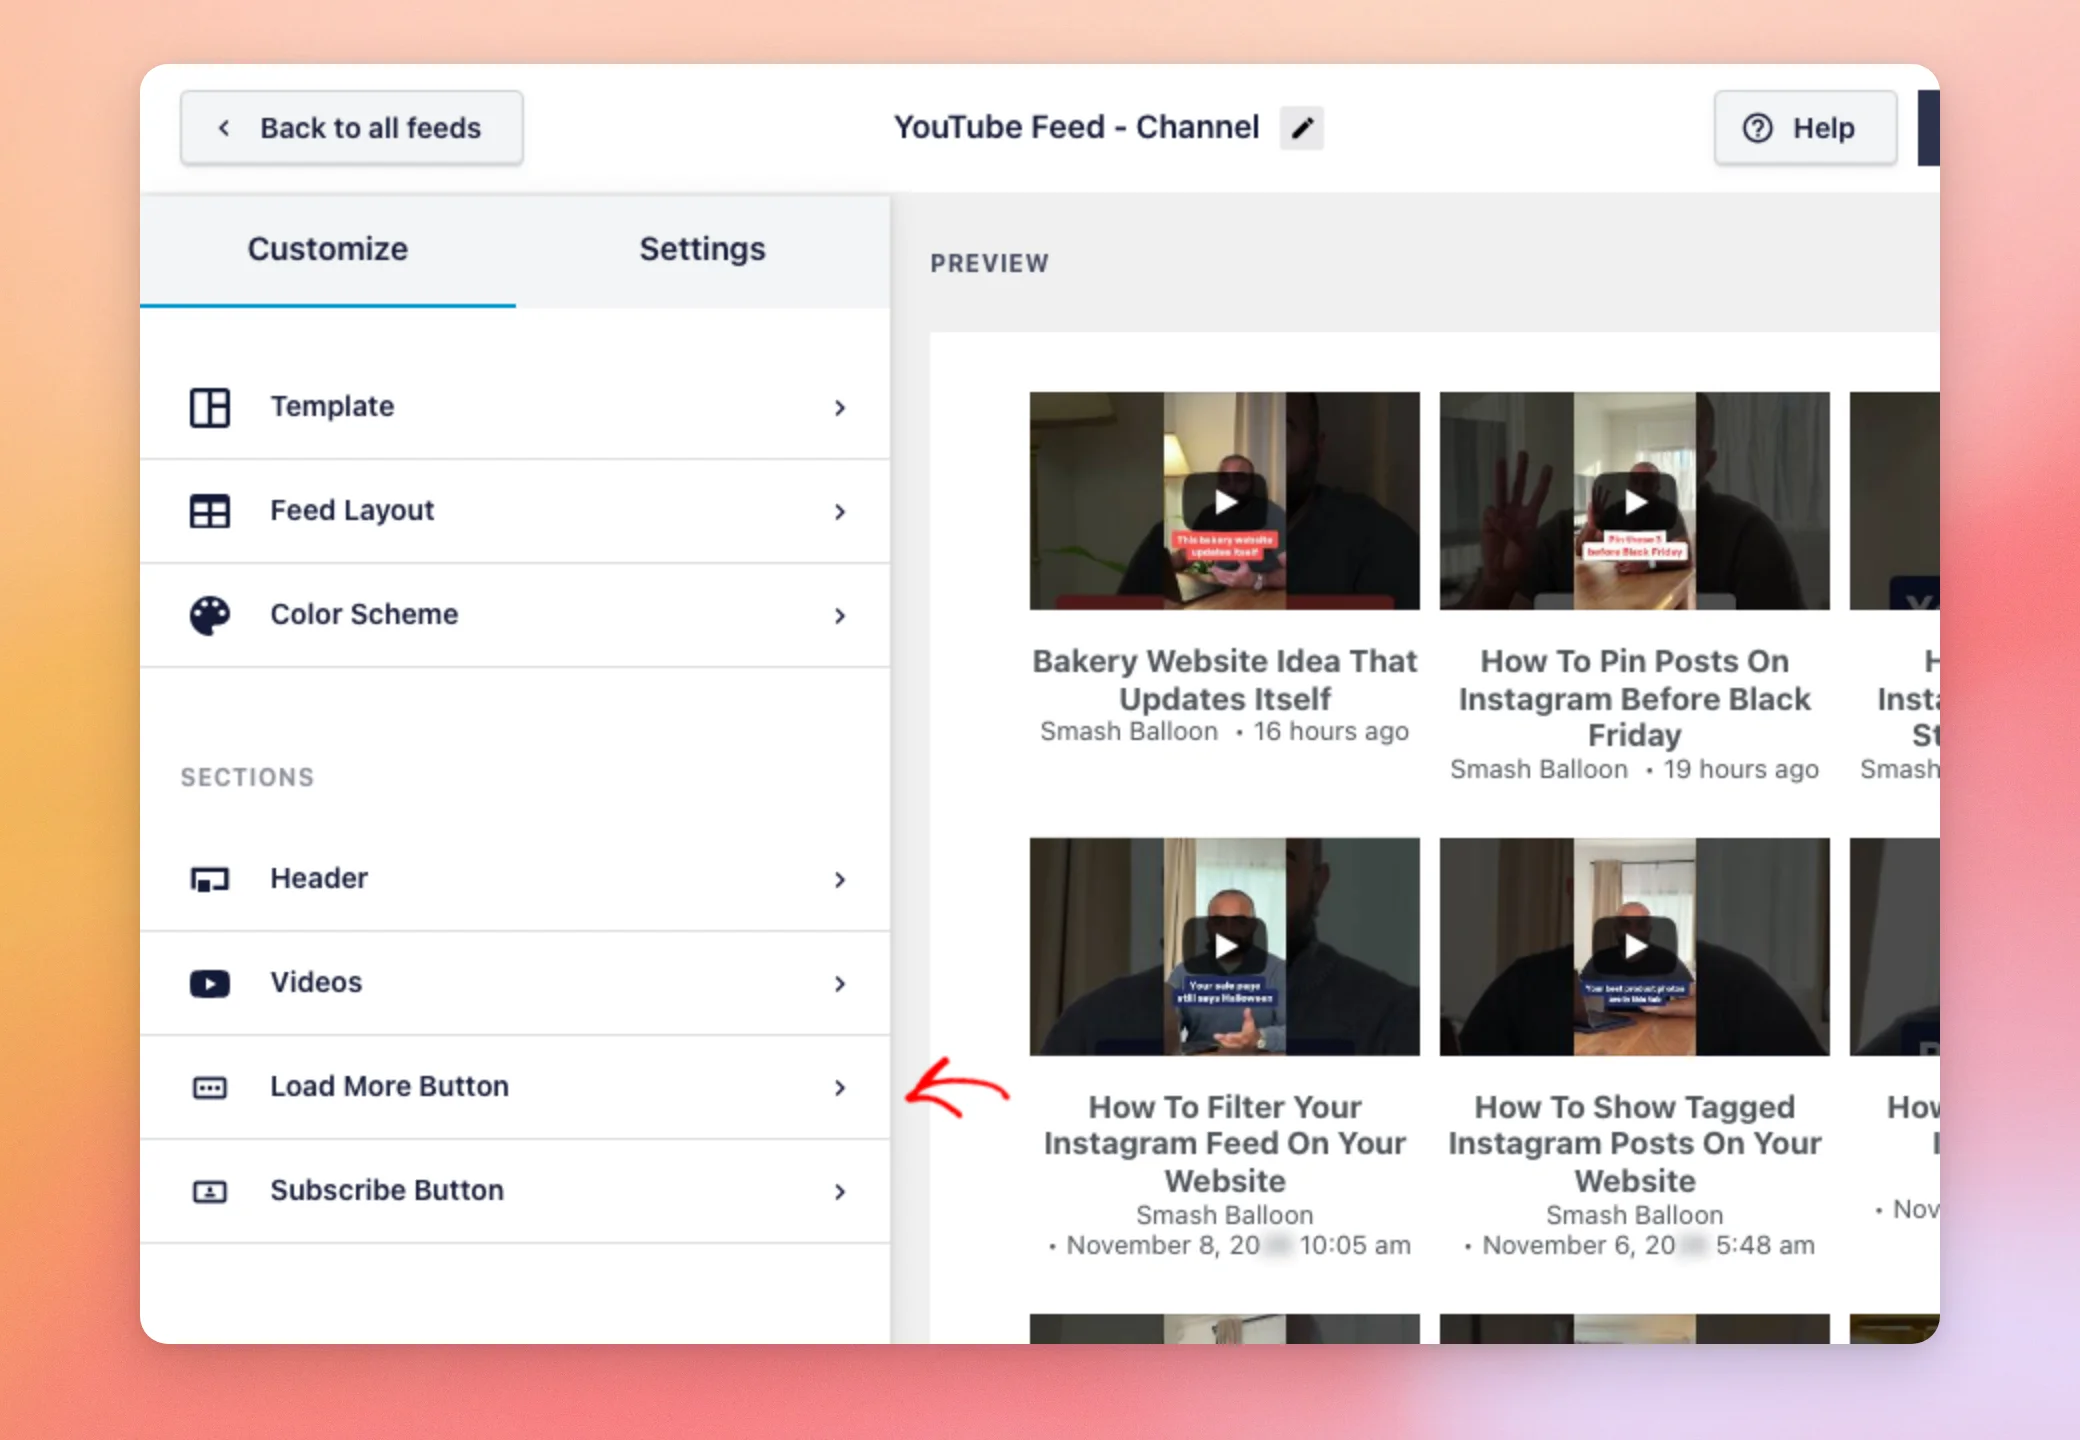
Then use Enable to show or hide it.
Next, change its Text and set the Background, Hover State and Text colors.
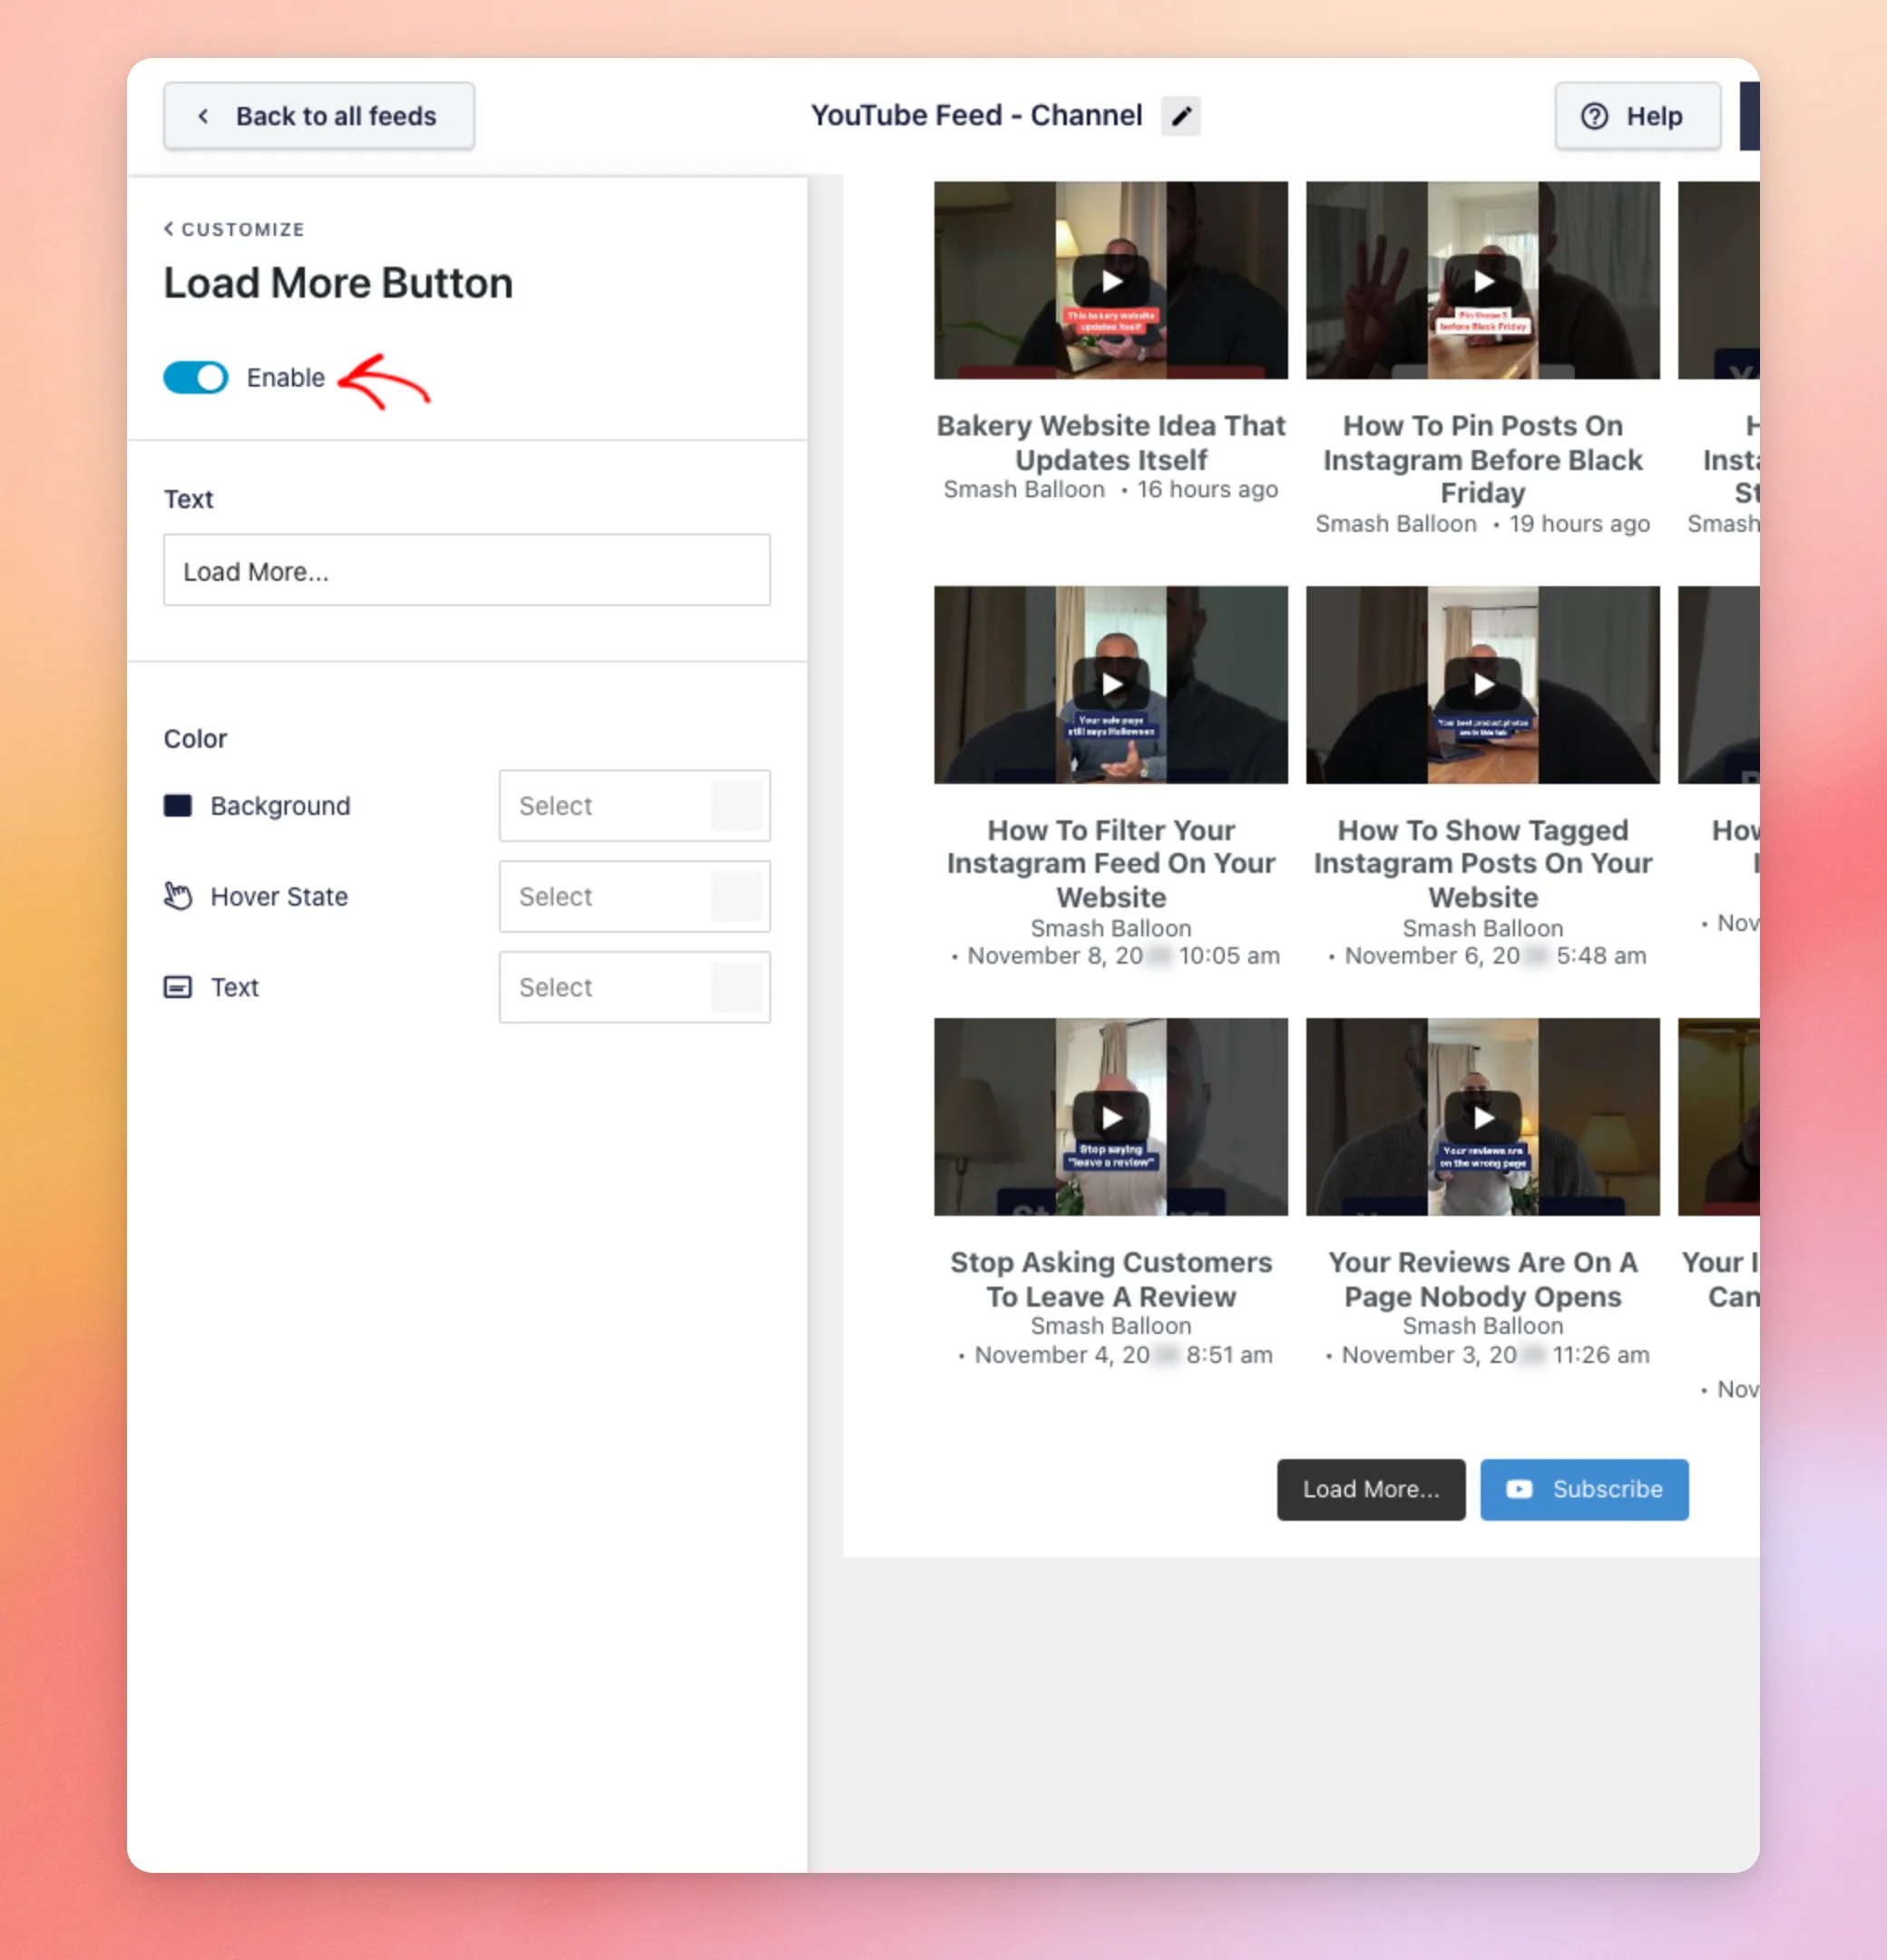
The Subscribe button is set up in much the same way.
Subscribe Button
The Subscribe button sends visitors to your YouTube channel. To change it, click Subscribe Button.
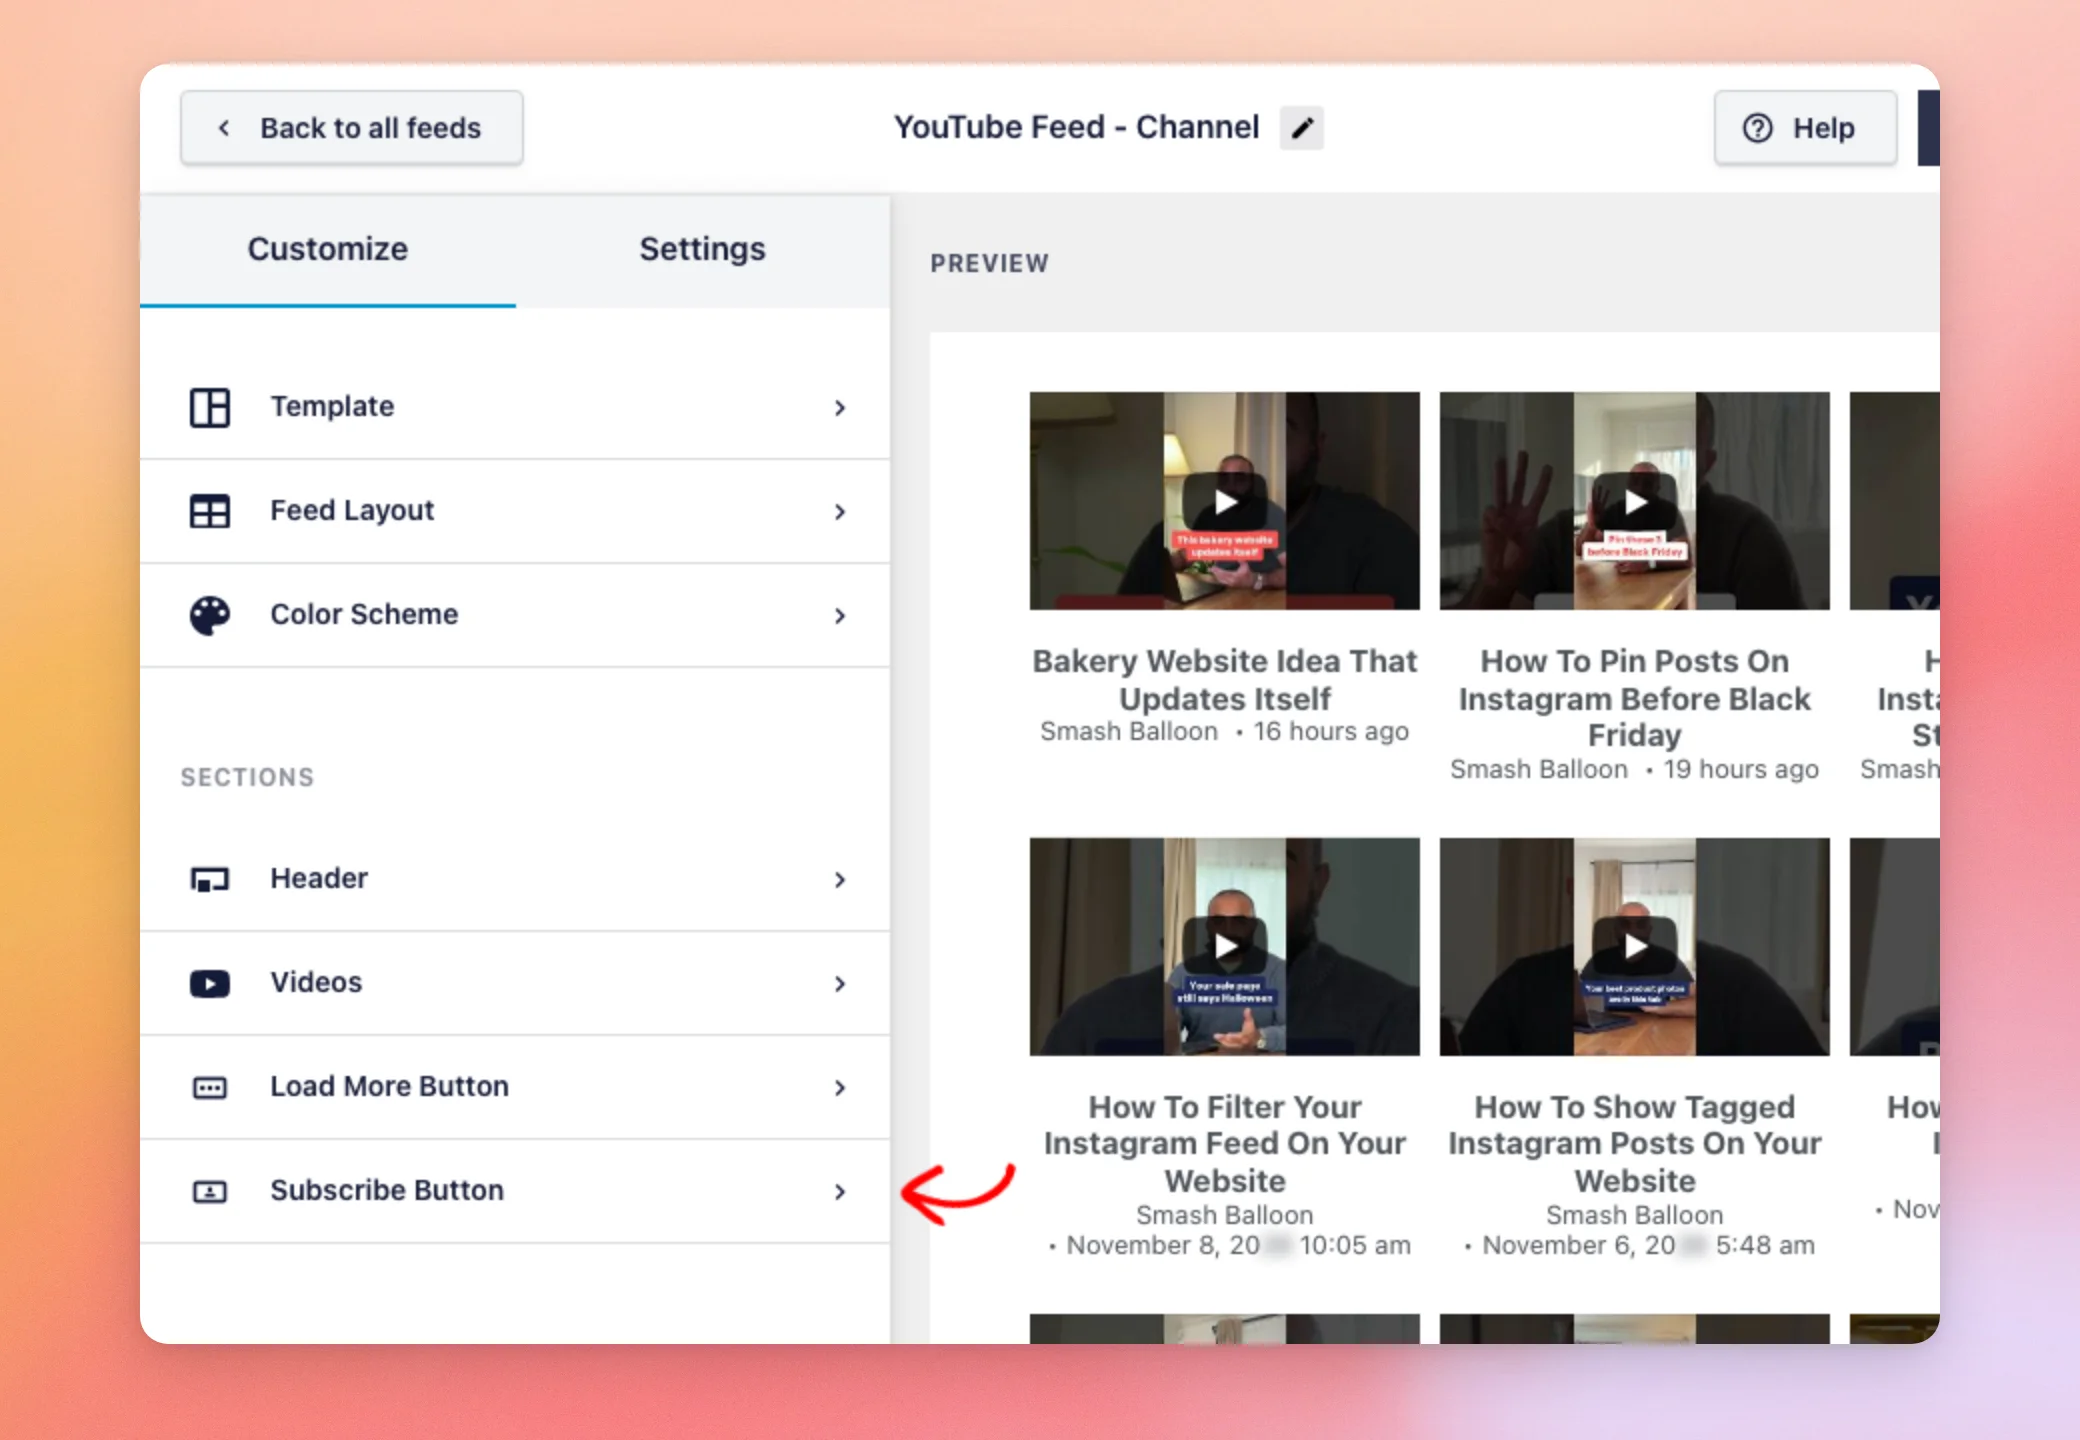
Then use Enable to show or hide it.
Next, change its Text and set the Background, Hover State and Text colors in the same way.
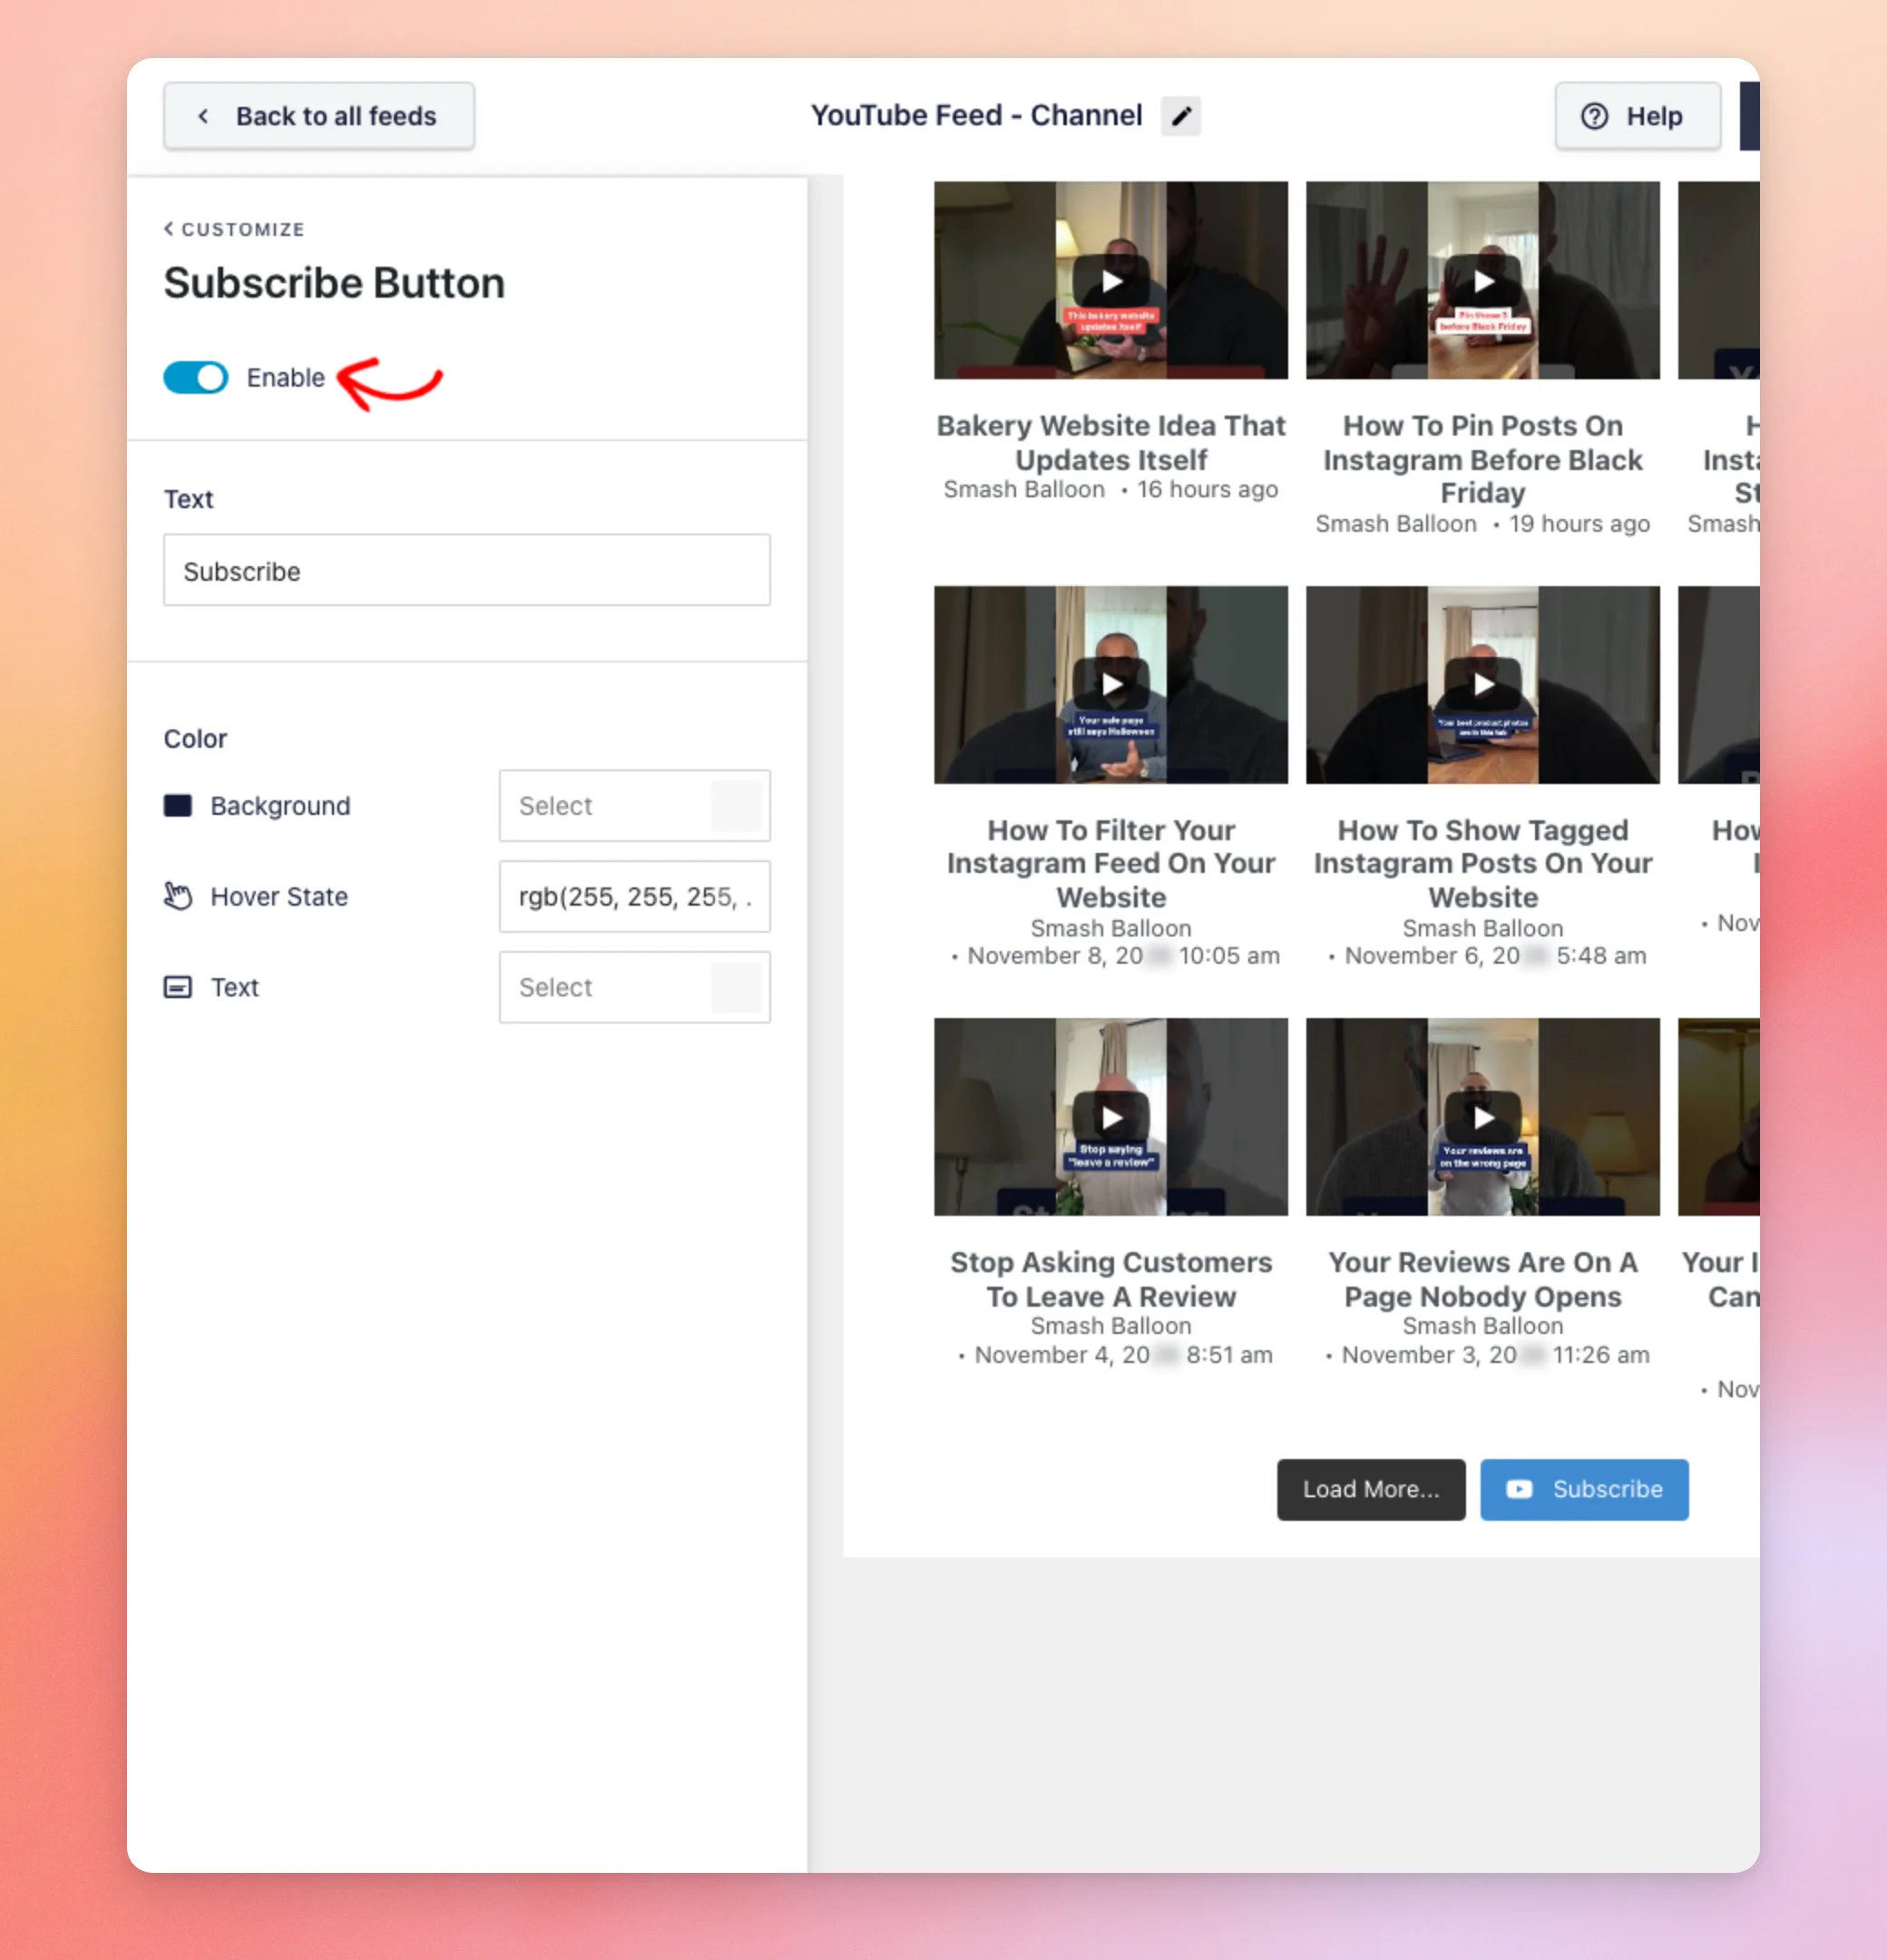
Once the buttons look right, save your changes.
Saving Your Changes
Your changes appear in the preview but are not kept until you save them. When you are happy with how the feed looks, click Save in the top right.
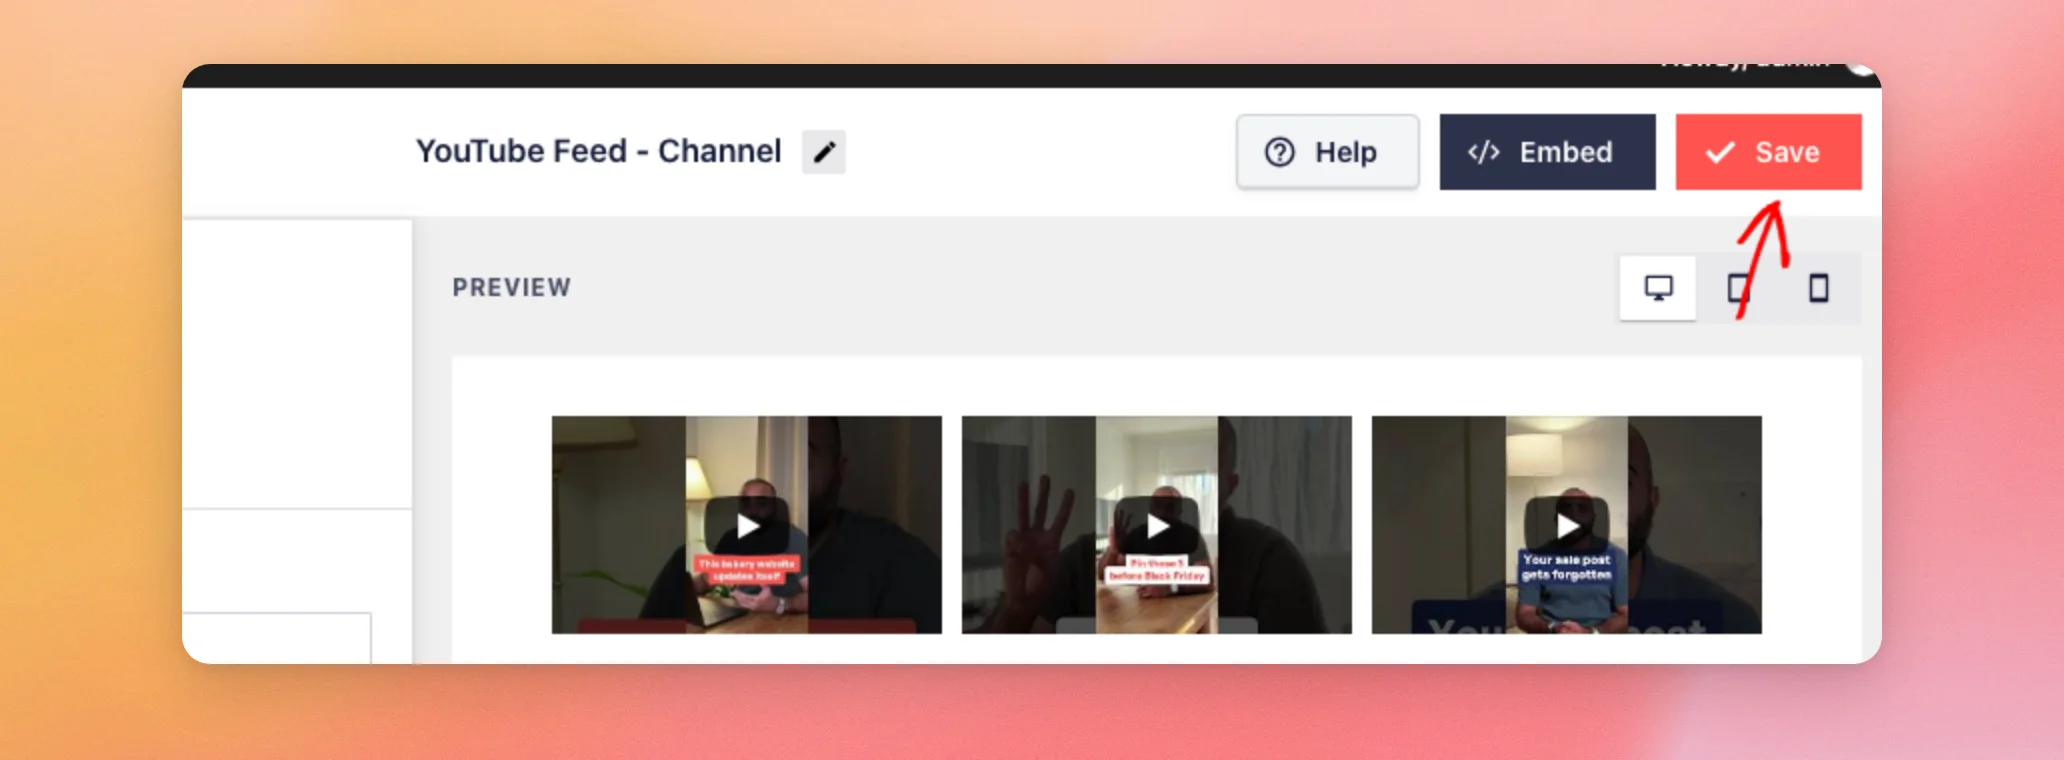
That’s it! You can now style your feed’s header, videos, and buttons from the Customize tab. To place your feed on a page, see our guide to adding feeds to your site.
Frequently Asked Questions
Below, we’ve answered some of the most common questions about customizing a YouTube feed.
Do my changes show on my site right away?
No. Your changes show only in the editor’s preview until you click Save. If you leave the editor without saving, the feed goes back to its last saved settings.
Why can’t I change an element or option?
Some options need a paid license, such as most video elements, Comments, and the Subscribe Link. Views Actions and Likes and Comments Summary also need an API key. See our Free and paid features guide for details.