Using moderation mode (version 6.0 and above)
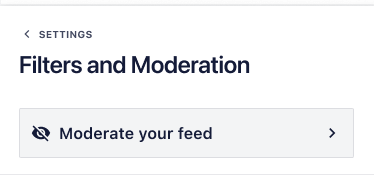
To use a visual interface for hiding posts on the front-end of your site, log in as an admin and Navigate to Instagram feed > All feeds > Feed Settings (pencil icon) > Settings tab > Filters and Moderation > Click the Moderate your feed button.
For more information please visit our Guide to Moderation Mode.
Using moderation mode (below version 6.0, above version 2.4)
To use a visual interface for hiding posts on the front-end of your site, log in as an admin and enable moderation mode on the “Customize” tab or by adding this to the shortcode
[instagram-feed moderationmode=true]
You can now click the orange “Moderation Mode” button that is added to the top of the feed.
Manually (version 1.2 and above)
The Instagram Feed Pro plugin version 1.2 and above has a built in feature to allow you to hide specific photos in your feed by their ID. You can do this by following these steps:
1) Find the ID of the photo you want to hide by clicking on the photo to launch the pop-up lightbox. If you’re logged into WordPress as an admin user then you should see a link labeled Hide photo (admin). Clicking this will reveal the ID of the photo, as shown below.
2) You can then enter the IDs of the photos you want to hide into the Hide Photos section on the plugin’s Customize page, as shown below.
Note: If you’re using the free version of the plugin or have version 1.1 of the Pro version then you’d need to find the ID of the photos you want to hide from the HTML source code of your page and then enter them into the plugin’s Custom CSS section, like so:
#sbi_898212053294455194_12986477{ display: none; }
How to Create an Easy Way to Gather Post IDS
If you would like to gather post ids without ever allowing unapproved images to display to the public, you can use the method described in this section. It would involve creating a “dummy” feed that only you could see to pick out the posts you would want to show on the public feed. Follow these steps:
1)Create a new page in WordPress with and set the visibility to “private” so only you can view this page when logged in. Add the following short code to that page:
[instagram-feed type=hashtag hashtag="#sun" cols=3 class=id-gathering-feed]
2)Go to the Settings page for the plugin and on the “Customize” tab add the following javascript to the “Custom Javascript” section:
$('.id-gathering-feed .sbi_item').each(function(){
$self = jQuery(this);
var dataID = $self.find('.sbi_link_area').attr('data-id');
$self.append("<p>'"+dataID+"'</p>");
});
$('.public-feed .sbi_item').each(function(){
var whitelist = [
'sbi_1102420064681664695_1483446863',
'sbi_1026823673954256036_13460080'
],
$self = $(this);
$self.hide();
jQuery.each( whitelist, function( index, id ) {
if( $self.attr('id').indexOf(id) > -1 ) $self.show();
});
});
The first snippet adds the individual image id underneath each image in the feed for you to collect easily.
The second snippet creates the white list of image ids like before. You would need to change the ids being stored in the “whitelist” variable to the ids of the posts you want to show.
3) Add this short code wherever you want to display the public feed that displays the photos you chose:
[instagram-feed type=hashtag hashtag="#sun" class=public-feed]
4) View the “private” page you made earlier to copy and paste the ids you would like to use in the public feed into the “whitelist” variable in the custom javascript area from step 2.