

Installing the plugin
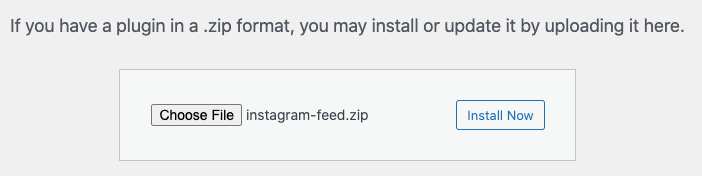
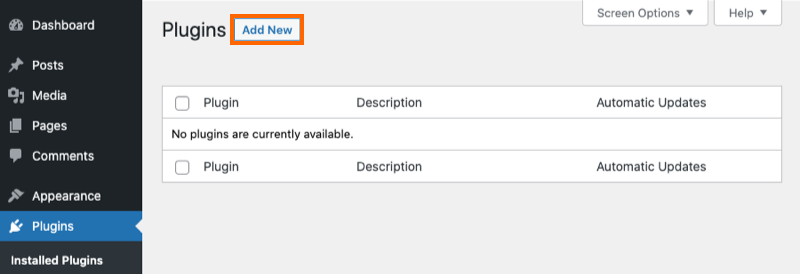
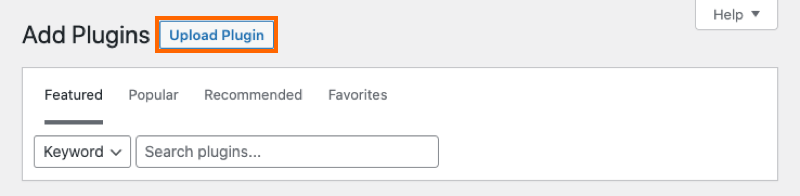
1) To upload the plugin click Add New at the top of your WordPress Plugins page.


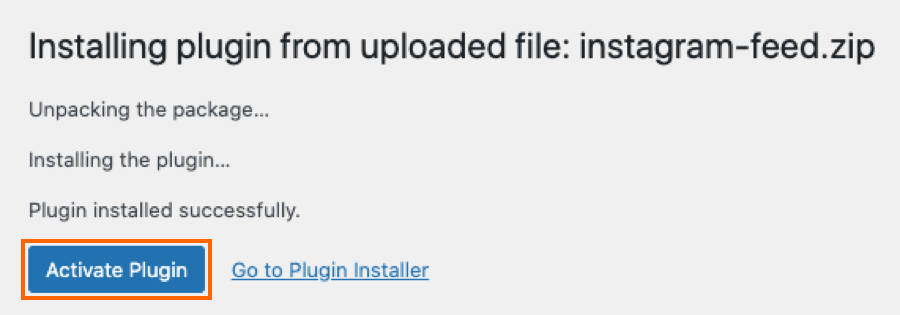
4) Activate the plugin.
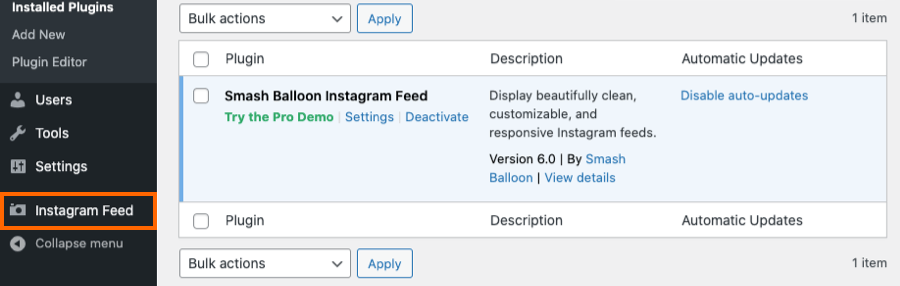
5) You’ll now see the Instagram Feed menu appear in your WordPress menu.
Creating your first Feed
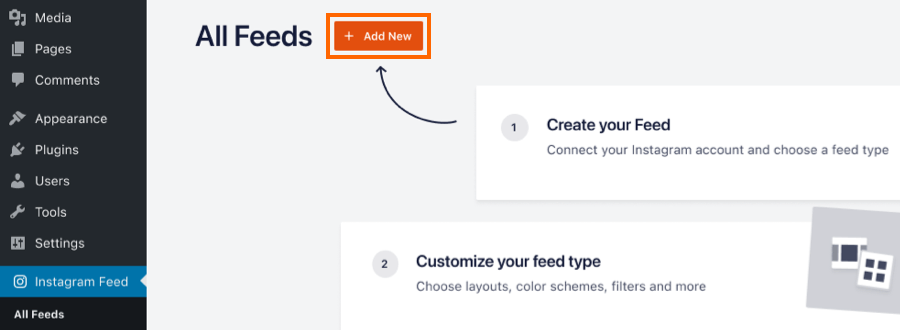
1) Click on All Feeds and then click on the button labeled Add new.
Note: If you are connecting an account on behalf of someone else.
Due to recent changes in Meta’s API, it is no longer possible to manually generate an Access Token. If you don’t have access to the Instagram profile you’d like to connect, you can request the admin to handle the connection for you. Alternatively, if it’s an Instagram Business Profile, you can ask the owner to add you to their Facebook Business Suite, which will allow you to connect the Instagram profile on their behalf.
2) Click on the User Timeline option, then click Next

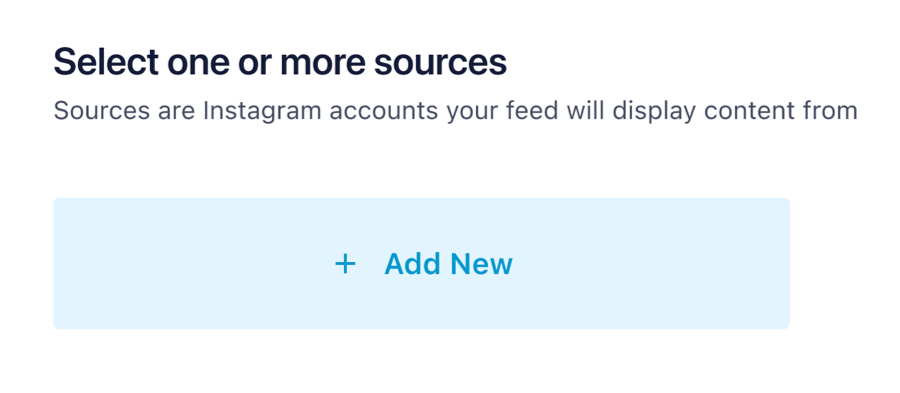
3) Click on the button labeled Add Source

4) Select the Add New option
5) Select the Type of account, then click the Connect button
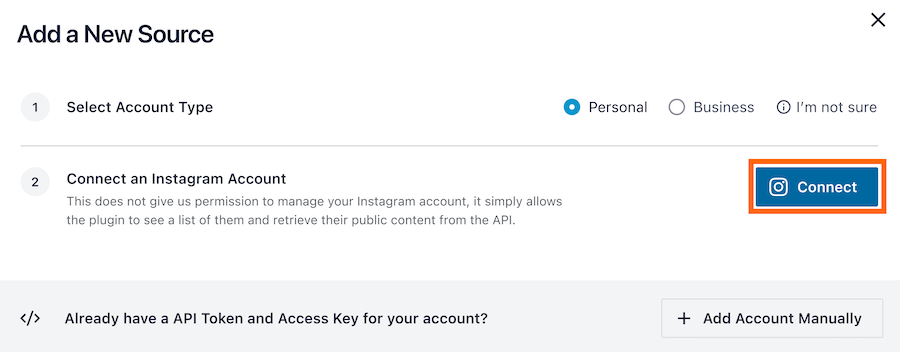
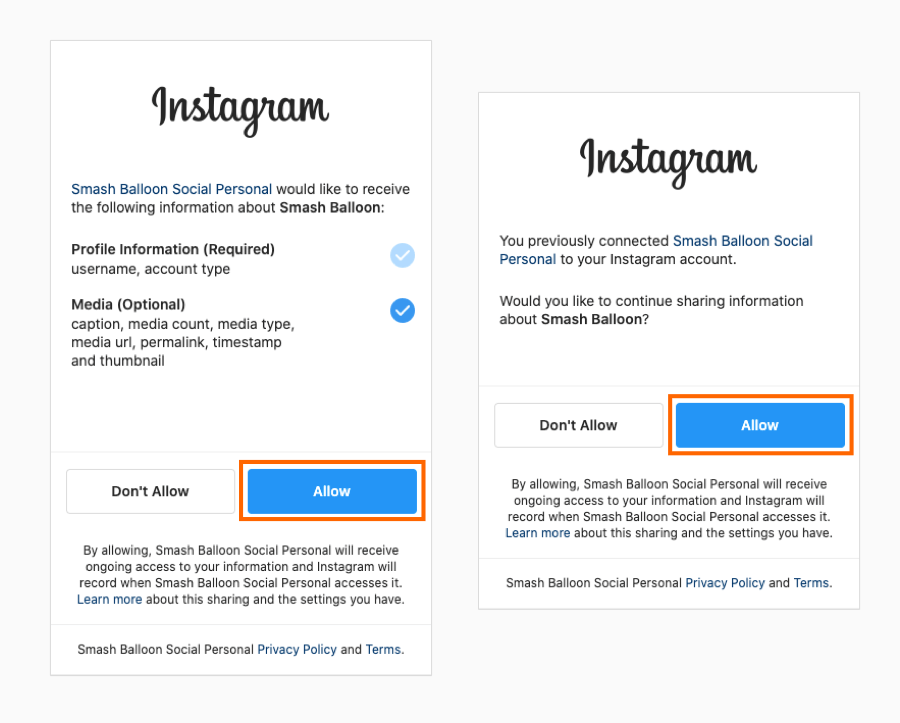
6) Depending on the type of account you selected you’ll be redirected to Instagram (Personal profile) or Facebook (Business profile). If you are not logged in then will be prompted to do so. Once logged in, follow the prompts by clicking the Allow/Continue button.
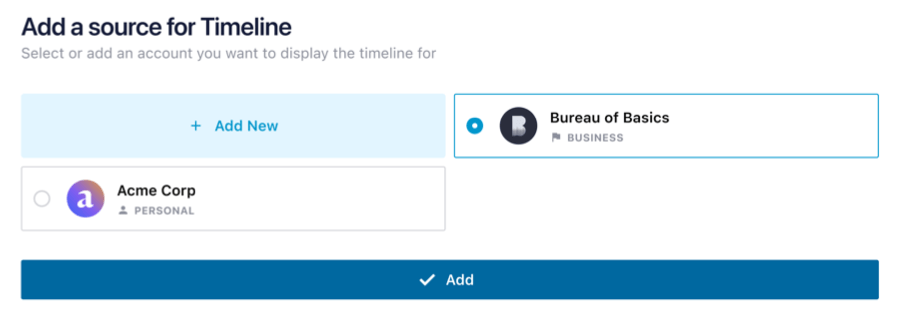
7) The list of Facebook pages will be displayed. Select a page and click the Add button.
8) Add a name to your feed and customize it using the options on this screen, then click Save

Adding the feed to your site
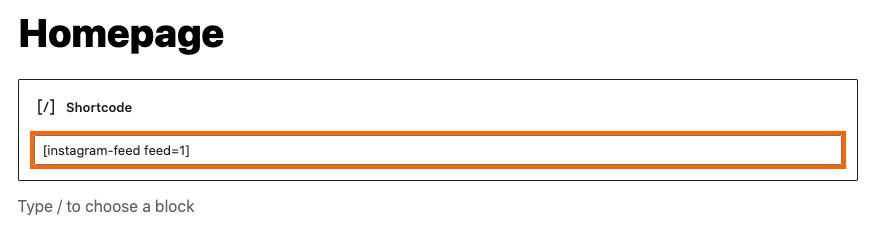
1) Once you’re ready to embed your feed, click the Embed button and copy the shortcode.

2) To display your feed simply add the shortcode you created to any page, post, or widget, like so:

You can also check this video from our YouTube channel to get more details on how to configure the plugin.

