Social Wall
  Feed Analytics
1) Once you’ve purchased the Social Wall plugin, click on the “Downloads” tab to download the plugin. Your download link, license key, and purchase information are also emailed to you at the address you provided during checkout.

2) Once you’ve downloaded the .zip file, there’s no need to open it. You’ll be uploading and installing this .zip file directly to WordPress.
Please note, if you’re using Safari:
The .zip file will be automatically extracted after downloading it. You can disable this feature by navigating to Safari > Preferences > General > Deselect the box with the text “Open safe files after downloading“. After that, the plugin will now download as a .zip file and can be uploaded directly to WordPress.
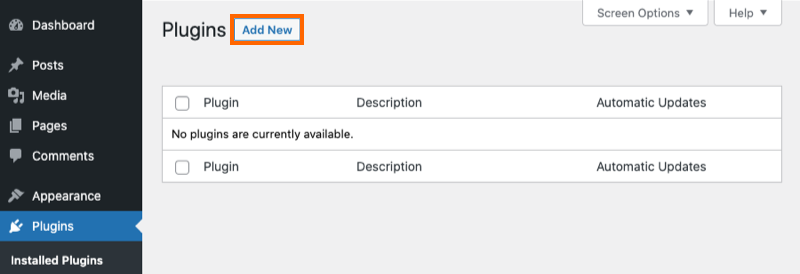
3) To upload the Pro version of the plugin, click Add New at the top of your WordPress Plugins page.
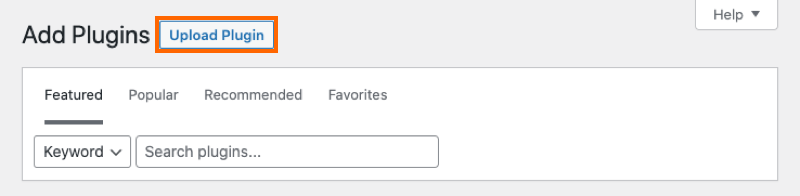
4) Click Upload Plugin at the top.
5) Browse the .ZIP file which you downloaded when you purchased the plugin and click Install Now

6) Activate the plugin.

7) You’ll now see the Social Wall plugin appear in your WordPress menu. Click on it and enter your license key.
8) Paste your license key into the field and click the Activate button (It may take a few clicks before it shows Active). Then click the Save Changes button.

To set up a new Social Wall Feed, please follow this other guide here.