Note: We no longer offer a Standalone version of this plugin. All plugins are now only available as a WordPress plugin.
1) Once you’ve purchased the Instagram Feed Standalone Version you’ll be presented with the purchase confirmation screen which displays your license key and a link to download the plugin. This information is also emailed to you at the address which you provided during checkout. Take note of your license key and click on the download link to download a zip file of the plugin.
2) Once you’ve downloaded and unzipped the plugin zip file, you’ll see the following file structure:

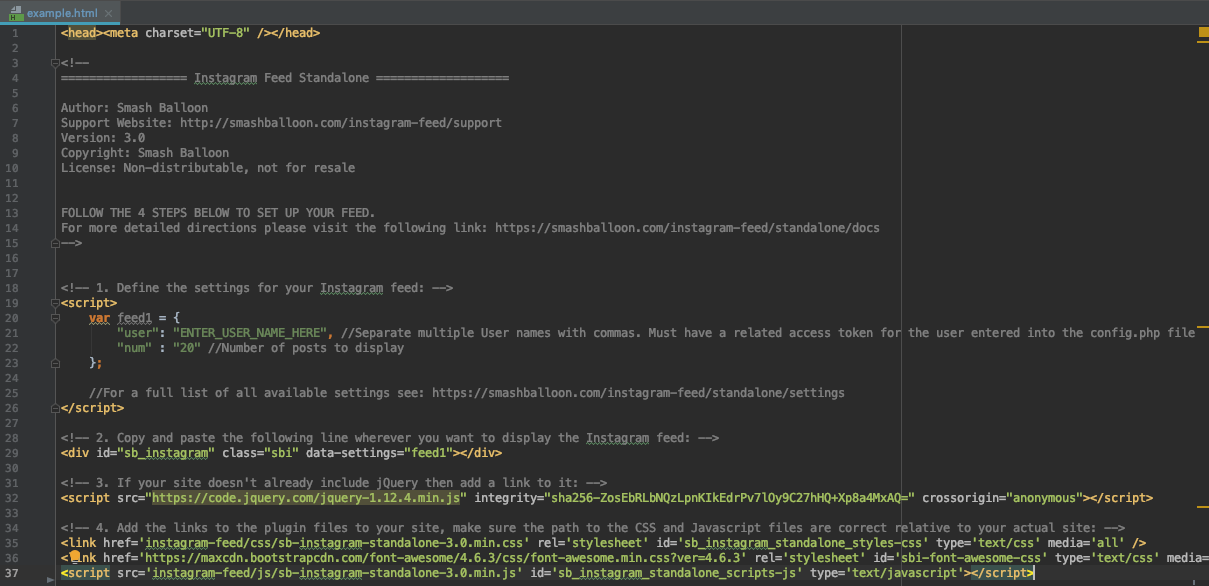
The main files are example.html – which contains an example of how to integrate the feed into your website, multiple.html – which contains an example of how to show more than one feed on the same page, and config.php where you can enter Access Tokens for the Instagram accounts you are using in your feeds.
3) To configure your individual feed settings, first open the config.php file and the example.html file.
Here is what you’ll see the following after opening config.php in a text editor:

Here is what you’ll see the following after opening example.html in a text editor:

4) Enter your Access Token in the config.php file where directed, as shown below.
Use this tool to get an Access Token: Standalone Access Token Tool

Enter the matching User Name in the example.html file where directed, as shown below.

Note: The “user” setting entered in your example.html configuration area must match the first part of an Access Token entered in the config.php file in order to display posts from that account.
5) Copy and paste the entire contents of the example.html file (you can exclude comments) into your web page, page editor, widget/module, or anywhere else on your site or CMS that accepts HTML code.

6) Upload the “instagram-feed” folder and the connect.php file that comes with the plugin source files to your web server using an FTP client. You will also need to upload your customized config.php file in the same directory.
IMPORTANT:
Change the file paths in the code that includes the files in your page to reflect the location of the files on your site:
If the config.php and connect.php files are not in the same directory as your instagram-feed folder. You will need to manually set the path to the connect.php file in the example.html file.

7) View the page in your browser to see the feed being displayed. Below is an example of how the default demo page looks using the puma user name:
8) You can customize the plugin by adding customization options to the feed options object. A full list of available customization options is available on the Instagram Feed Standalone Settings page.


